
Appendix A
Using Eclipse for Android Development
Although Google supports the development of Android applications using IDEs such as IntelliJ, or basic editors like Emacs, Google’s recommendation is to use the Eclipse IDE together with the Android Development Tools (ADT) plug-in. Doing so makes developing Android applications much easier and more productive. This appendix describes some of the neat features available in Eclipse that can greatly improve your development work.
WARNING If you have not downloaded Eclipse yet, please start with Chapter 1, where you will learn how to obtain Eclipse and configure it to work with the Android SDK. This appendix assumes that you have already set up your Eclipse environment for Android development.
Eclipse is a highly extensible multi-language software development environment that supports application development of all sorts. Using Eclipse, you can write and test your applications using a wide variety of languages, such as Java, C, C++, PHP, Ruby, and more. Because of its extensibility, new users of Eclipse often feel overwhelmed by the IDE. Hence, the following sections aim to make you more at home with Eclipse when you develop your Android applications.
Workspaces
Eclipse adopts the concept of a workspace. A workspace is a folder that you have chosen to store all your projects.
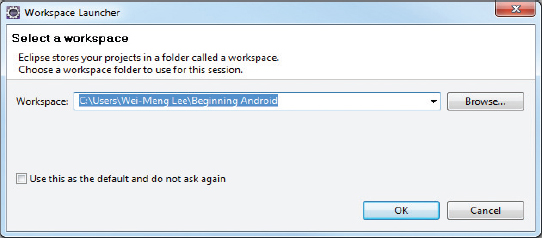
When you first start Eclipse, you are prompted to select a workspace (see Figure A-1).
When Eclipse has finished loading the projects located in your workspace, several panes are displayed in the IDE (see Figure A-2).

The following sections highlight some of the more important panes that you need to know about when developing Android applications.
Package Explorer
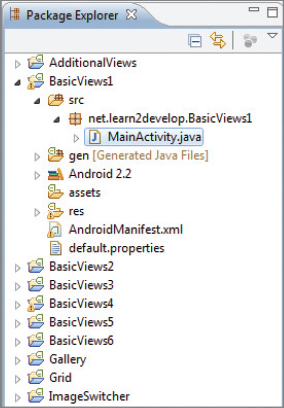
The Package Explorer, shown in Figure A-3, lists all the projects currently in your workspace. To edit a particular item in your project, you can double-click on it and the file will be displayed in the respective editor.
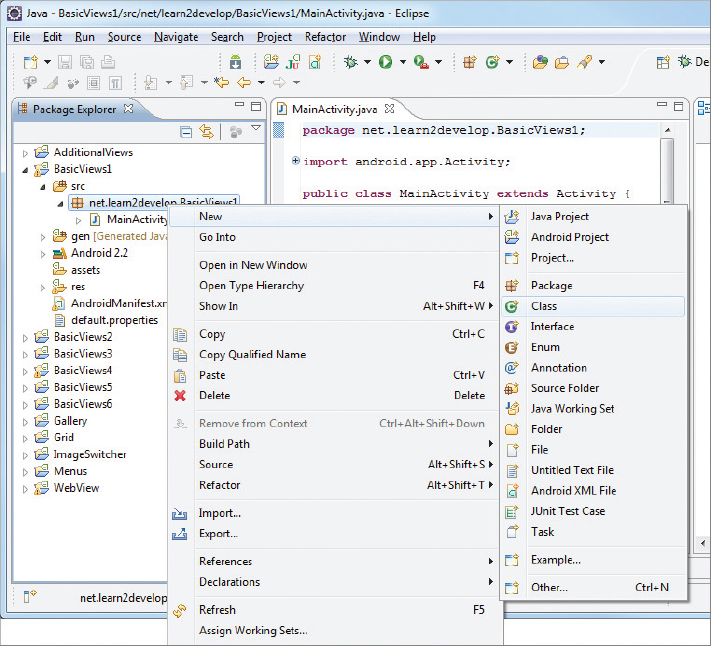
You can also right-click on each item displayed in the Package Explorer to display context-sensitive menu(s) related to the selected item. For example, if you wish to add a new .java file to the project, you can right-click on the package name in the Package Explorer and then select New ⇒ Class (see Figure A-4).
Using Projects from Other Workspaces
There may be times when you have several workspaces created to store different projects. If you need to access the project in another workspace, there are generally two ways to go about doing so. First, you can switch to the desired workspace by selecting File ⇒ Switch Workspace (see Figure A-5). Specify the new workspace to work on and then restart Eclipse.

The second method is to import the project from another workspace into the current one. To do so, select File ⇒ Import. . . and then select General ⇒ Existing Projects into Workspace (see Figure A-6). Click Next.

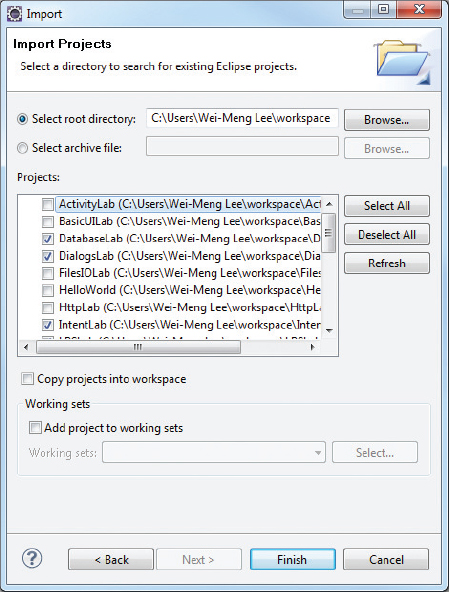
In the Select root directory textbox, enter the path of the workspace containing the project(s) you want to import and tick the project(s) you want to import (see Figure A-7). To import the selected project(s), click Finish.
Note that even when you import a project from another workspace into the current workspace, the physical location of the imported project remains unchanged. That is, it will still be located in its original directory. To add a copy of the project to the current workspace, check the “Copy projects into workspace” option.
Using Editors within Eclipse
Depending on the type of items you have double-clicked in the Package Explorer, Eclipse will open the appropriate editor for you to edit the file. For example, if you double-click on a .java file, the text editor for editing the source file will be opened (see Figure A-8).

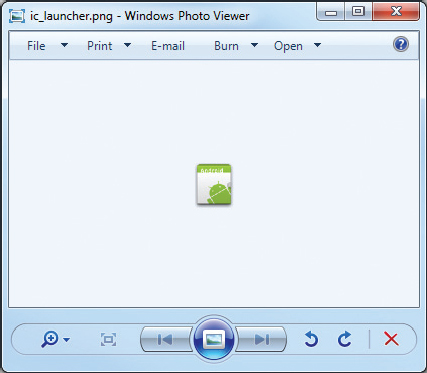
If you double-click on the ic_launcher.png file in the res/drawable-mdpi folder, the Windows Photo Viewer application will be invoked to display the image (see Figure A-9).
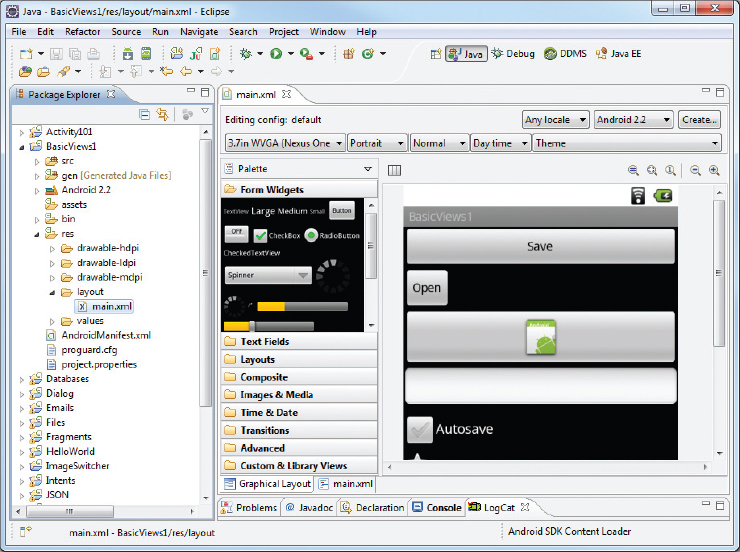
If you double-click on the main.xml file in the res/layout folder, Eclipse will display the UI editor, where you can graphically view and build the layout of your UI (see Figure A-10).
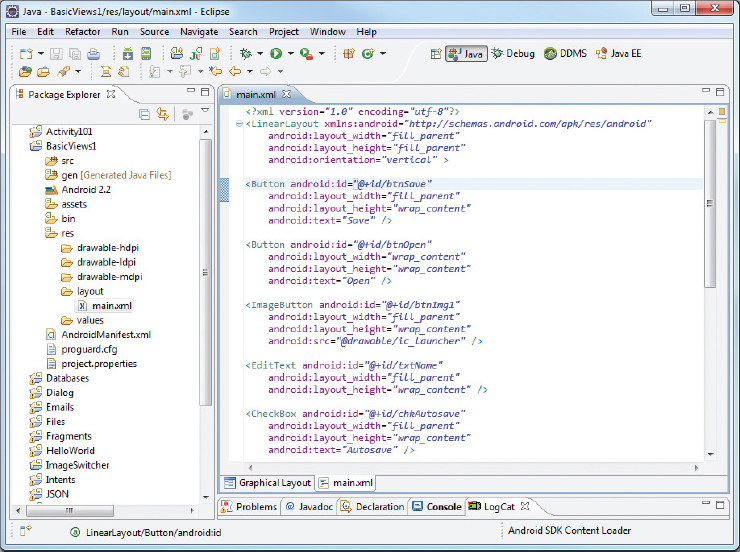
To edit the UI manually using XML, you can switch to XML view by clicking on the main.xml tab located at the bottom of the editor (see Figure A-11).
Understanding Eclipse Perspectives
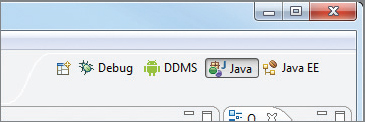
In Eclipse, a perspective is a visual container for a set of views and editors. When you edit your Android/Java project in Eclipse, you are in the Java perspective (see Figure A-12).
The Java EE perspective is used for developing enterprise Java applications, and it includes other modules that are relevant to it.
You can switch to other perspectives by clicking the perspective name. If the perspective name is not shown, you can click the Open Perspective button and add a new perspective (see Figure A-13).
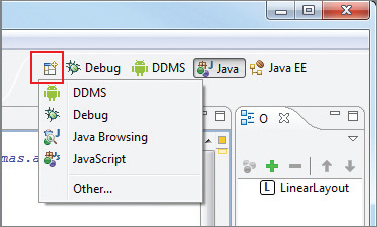
The DDMS perspective contains tools for communicating with Android emulators and devices. This is covered in more detail in Appendix B. The Debug perspective contains panes used for debugging your Android applications. You will learn more about that later in this appendix.
Automatically Importing Packages
The various classes in the Android library are organized into packages. As such, when you use a particular class from a package, you need to import the appropriate packages, like this:
import android.app.Activity;
import android.os.Bundle;
Because the number of classes in the Android Library is very large, remembering the correct namespace for each class is not an easy task. Fortunately, Eclipse can help you find the correct namespace, which enables you to import it with just a click.
Figure A-14 shows that I have declared an object of type Button. Because I did not import the correct package for the Button class, Eclipse signals an error beneath the statement. When you move the mouse over the Button class, Eclipse displays a list of suggested fixes. In this case, I need to import the android.widget.Button package. Clicking the “Import ‘Button’ (android.widget)” link will add the import statement to the top of the file.

Alternatively, you can use the following key combination: Ctrl+Shift+o. This key combination will cause Eclipse to automatically import all the namespaces required by your class.
Using the Code Completion Feature
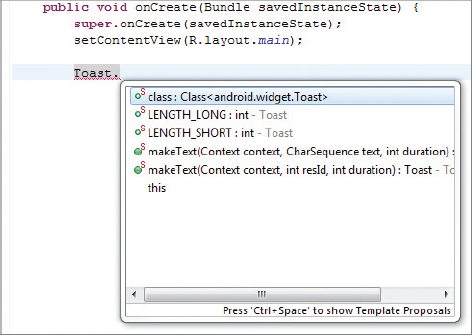
Another very useful feature of Eclipse is its support for code completion. Code completion displays a context-sensitive list of relevant classes, objects, methods, and property names as you type in the code editor. For example, Figure A-15 shows code-completion in action. As I type the word “fin,” I can activate the code-completion feature by pressing Ctrl+space. This brings up a list of names that begin with “fin.”

To select the required name, simply double-click on it or use your cursor to highlight it and then press the Enter key.
Code completion also works when you type a period (.) after an object/class name. Figure A-16 shows an example.
Refactoring
Refactoring is a very useful feature that most modern IDEs support. Eclipse supports a whole slew of refactoring features that make application development efficient.
In Eclipse, when you position the cursor at a particular object/variable, the editor will highlight all occurrences of the selected object in the current source (see Figure A-17).

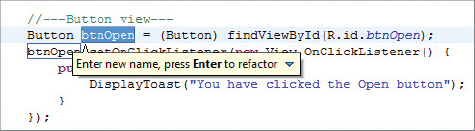
This feature is very helpful for identifying where a particular object is used in your code. To change the name of an object, simply right-click on it and select Refactor ⇒ Rename. . . (see Figure A-18).

After entering a new name for the object, all occurrences of the object will be changed automatically (see Figure A-19). Note that in order for refactoring to work correctly, your code must not have any syntax errors and must be able to be compiled correctly by the compiler.
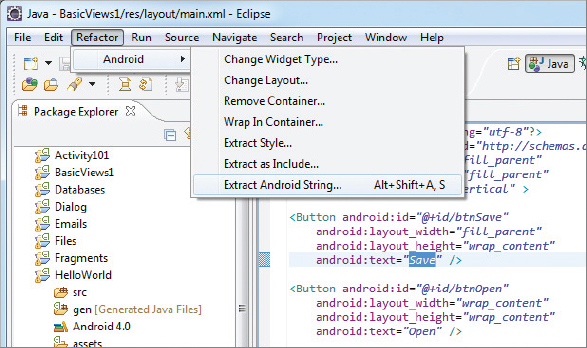
Another area where refactoring is very useful is for extracting string constants from your UI files. As I mentioned earlier in Chapter 1, all the string constants that you use in your user interface should preferably be stored in the strings.xml file so that it is easy to perform localization later. However, it is very common during development to take the shortcut of entering the string constant directly. For example, you may set the android:text attribute of a Button view using a string constant:
<Button android:id="@+id/btnSave"
    android:layout_width="fill_parent"
    android:layout_height="wrap_content"
    android:text="Save" />
Using the refactoring feature in Eclipse, you could select the string constant and then select the Refactor ⇒ Android ⇒ Extract Android String. . . (see Figure A-20).
You are then prompted to specify a name for this string constant (see Figure A-21). Click OK when you are done.
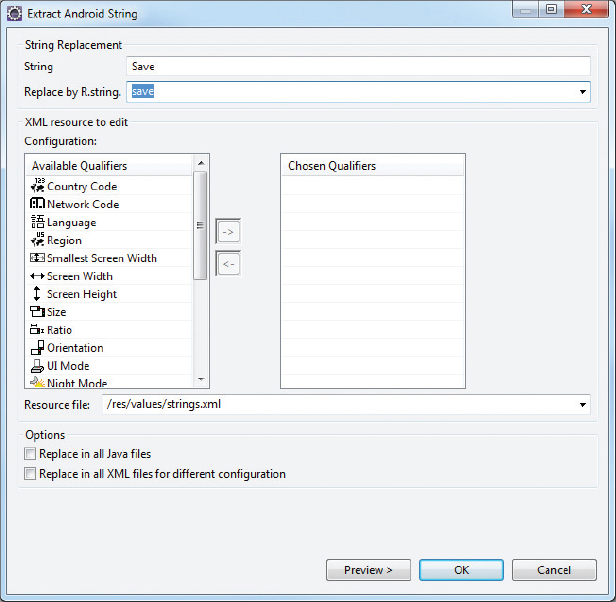
After doing so, the value of the android:text attribute is now replaced with @string/save:
<Button android:id="@+id/btnSave"
    android:layout_width="fill_parent"
    android:layout_height="wrap_content"
    android:text="@string/save" />
If you examine the strings.xml file, it will now contain a new entry named save:
<?xml version="1.0" encoding="utf-8"?>
<resources>
    <string name="hello">Hello World, BasicViews1Activity!</string>
    <string name="app_name">BasicViews1</string>
    <string name="save">Save</string>

</resources>
A detailed discussion of refactoring is beyond the scope of this book. For more information on refactoring in Eclipse, refer to www.ibm.com/developerworks/library/os-ecref/.
Eclipse supports debugging your application on both Android emulators as well as real Android devices. When you press F11 in Eclipse, Eclipse first determines whether an Android emulator instance is already running or a real device is connected. If at least one emulator (or device) is running, Eclipse will deploy the application onto the running emulator or the connected device. If no emulator is running and no device is connected, Eclipse automatically launches an instance of the Android emulator and deploys the application onto it.
If you have more than one emulator or device connected, Eclipse will prompt you to select the target emulator/device on which to deploy the application (see Figure A-22). Select the target device you want to use and click OK. Devices that do not have the minimum OS version required by your application will be marked with an X.

If you want to launch a new emulator instance to test the application, select Window ⇒ Android SDK and AVD Manager to launch the AVD Manager.
Setting Breakpoints
Setting breakpoints is a good way to temporarily pause the execution of the application and then examine the content of variables and objects.
To set a breakpoint, double-click on the leftmost column in the code editor. Figure A-23 shows a breakpoint set on a particular statement.
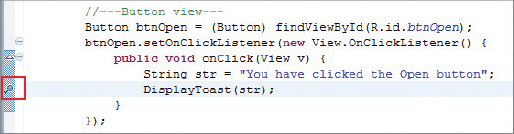
When the application is running and the first breakpoint is reached, Eclipse will display a Confirm Perspective Switch dialog. Basically, it wants to switch to the Debug perspective. To prevent this window from appearing again, check the “Remember my decision” checkbox at the bottom and click Yes. Eclipse will highlight the breakpoint (see Figure A-24).
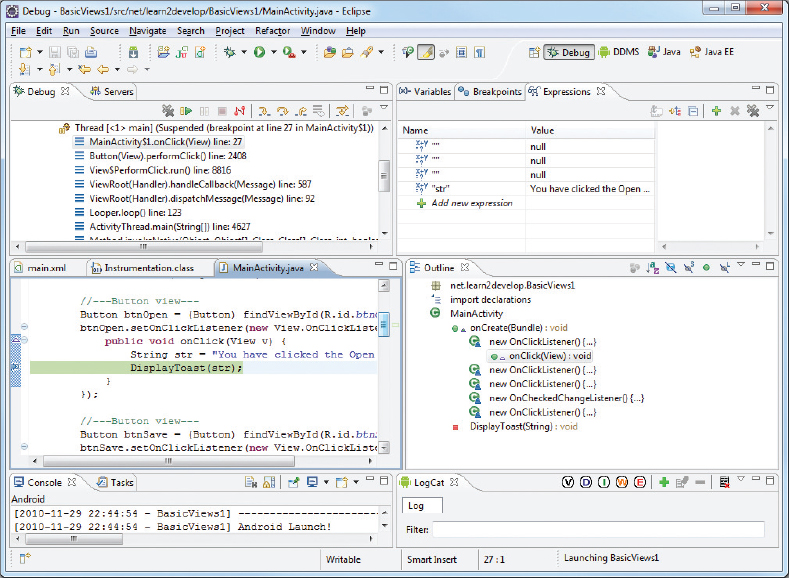
At this point, you can right-click on any selected object/variable and view its content using the various options (e.g., Watch, Inspect, Display) shown in Figure A-25.

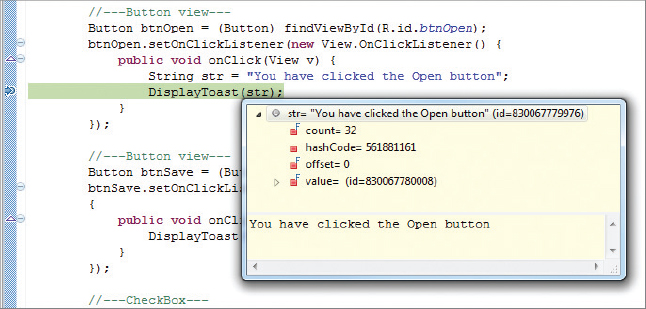
Figure A-26 shows the Inspect option displaying the content of the str variable.
You have several options at this point to continue the execution:
- Step Into — Press F5 to step into the next method call/statement.
- Step Over — Press F6 to step over the next method call without entering it.
- Step Return — Press F7 to return from a method that has been stepped into.
- Resume Execution — Press F8 to resume the execution.
Dealing with Exceptions
As you develop in Android, you will encounter numerous run-time exceptions that prevent your program from continuing. Examples of run-time exceptions include the following:
- Null reference exception (accessing an object that is null)
- Failure to specify the permissions required by your application
- Arithmetic operation exceptions
Figure A-27 shows the current state of an application when an exception occurred. In this example, I am trying to send an SMS message from my application and it crashes when the message is about to be sent.
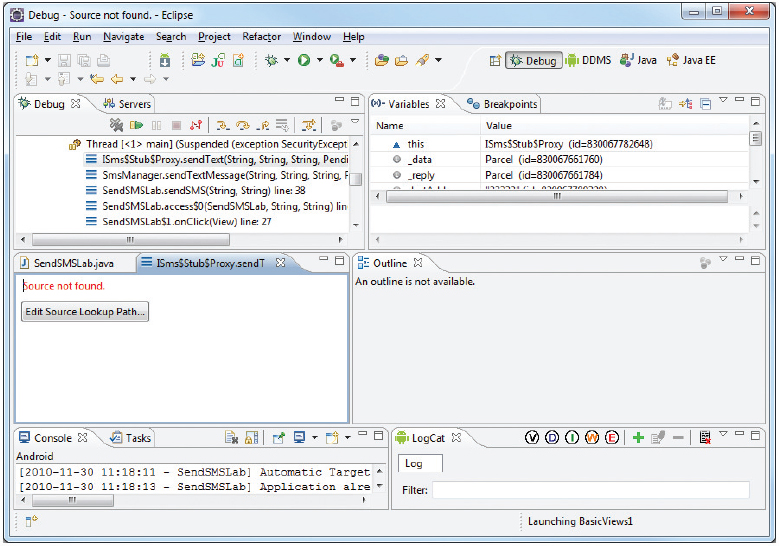
The various windows do not really identify the cause of the exception. To find out more, press F6 in Eclipse so that it can step over the current statement. The Variables window, shown in Figure A-28, indicates the cause of the exception. In this case, the SEND_SMS permission is missing.
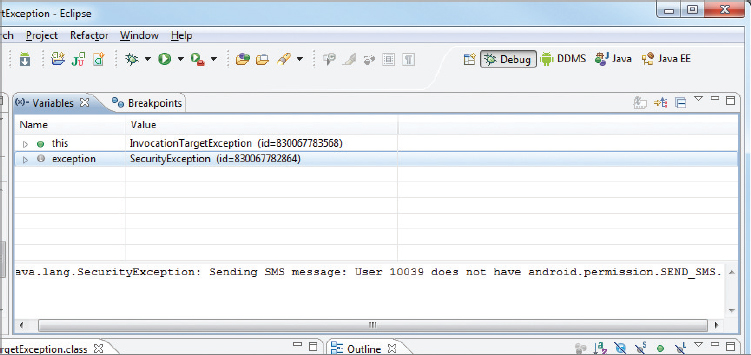
To remedy this, all you need to do is add the following permission statement in the AndroidManifest.xml file:
<uses-permission android:name="android.permission.SEND_SMS"/>