Azure Resource Manager (ARM) templates are the preferred mechanism for provisioning resources and configuring them on Azure.
ARM templates help to implement a relatively new paradigm known as Infrastructure as Code (IaC). ARM templates convert the infrastructure and its configuration into code, which has numerous advantages. IaC brings a high level of consistency and predictability to deployments across environments. It also ensures that environments can be tested before going to production, and, finally, it gives a high level of confidence in the deployment process, maintenance, and governance.
The following topics will be covered in this chapter:
- ARM templates
- Deploying resource groups with ARM templates
- Deploying resources across subscriptions and resource groups
- Deploying cross-subscription and resource group deployments using linked templates
- Creating ARM templates for PaaS, data, and IaaS solutions
ARM templates
A prominent advantage of IaC is that it can be version controlled. It can also be reused across environments, which provides a high degree of consistency and predictability in deployments, and ensures that the impact and result of deploying an ARM template is the same no matter the number of times the template is deployed. This feature is known as idempotency.
ARM templates debuted with the introduction of the ARM specification and have been getting richer in features and growing in maturity since then. It's important to understand that there's generally a feature gap of a few weeks to a couple of months between the actual resource configuration and the availability of the configuration in ARM templates.
Each resource has its own configuration. This configuration can be affected in a multitude of ways, including using Azure PowerShell, the Azure CLI, Azure SDKs, REST APIs, and ARM templates.
Each of these techniques has its own development and release life cycle, which is different from the actual resource development. Let's try to understand this with the help of an example.
The Azure Databricks resource has its own cadence and development life cycle. The consumers of this resource have their own development life cycle, in turn, which is different from the actual resource development. If Databricks gets its first release on December 31, the Azure PowerShell cmdlets for it might not be available on the same date and might even be released on January 31 of the next year; similarly, the availability of these features in the REST API and ARM templates might be around January 15.
ARM templates are JSON-based documents that, when executed, invoke a REST API on the Azure management plane and submit the entire document to it. The REST API has its own development life cycle, and the JSON schema for the resource has its own life cycle too.
This means the development of a feature within a resource needs to happen in at least three different components before they can be consumed from ARM templates. These include:
- The resource itself
- The REST API for the resource
- The ARM template resource schema
Each resource in the ARM template has the apiVersion property. This property helps to decide the REST API version that should be used to provision and deploy the resource. Figure 15.1 shows the flow of requests from the ARM template to resource APIs that are responsible for the creation, updating, and deletion of resources:

Figure 15.1: Request flow
A resource configuration, such as a storage account in an ARM template, looks as follows:
{ "type": "Microsoft.Storage/storageAccounts", "apiVersion": "2019-04-01", "name": "[variables('storage2')]", "location": "[resourceGroup().location]", "kind": "Storage", "sku": { "name": "Standard_LRS" }}
In the preceding code, the availability of this schema for defining sku is based on the development of the ARM template schema. The availability of the REST API and its version number is determined by apiVersion, which happens to be 2019-04-01. The actual resource is determined by the type property, which has the following two parts:
- Resource-provider namespace: Resources in Azure are hosted within namespaces and related resources are hosted within the same namespace.
- Resource type: Resources are referenced using their type name.
In this case, the resource is identified by its provider name and type, which happens to be Microsoft.Storage/storageaccounts.
Previously, ARM templates expected resource groups to be available prior to deployment. They were also limited to deploying to a single resource group within a single subscription.
This meant that, until recently, an ARM template could deploy all resources within a single resource group. Azure ARM templates now have added functionality for deploying resources to multiple resource groups within the same subscription or multiple subscriptions simultaneously. It's now possible to create resource groups as part of ARM templates, which means it's now possible to deploy resources in multiple regions into different resource groups.
Why would we need to create resource groups from within ARM templates, and why would we need to have cross-subscription and resource group deployments simultaneously?
To appreciate the value of creating a resource group and cross-subscription deployments, we need to understand how deployments were carried out prior to these features being available.
To deploy an ARM template, a resource group is a prerequisite. Resource groups should be created prior to the deployment of a template. Developers use PowerShell, the Azure CLI, or the REST API to create resource groups and then initiate the deployment of ARM templates. This means that any end-to-end deployment consists of multiple steps. The first step is to provision the resource group and the next step is the deployment of the ARM template to this newly created resource group. These steps could be executed using a single PowerShell script or individual steps from the PowerShell command line. The PowerShell script should be complete with regard to code related to exception handling, taking care of edge cases, and ensuring that there are no bugs in it before it can be said to be enterprise-ready. It is important to note that resource groups can be deleted from Azure, and the next time the script runs, they might be expected to be available. It would fail because it might assume that the resource group exists. In short, the deployment of the ARM template to a resource group should be an atomic step rather than multiple steps.
Compare this with the ability to create resource groups and their constituent resources together within the same ARM templates. Whenever you deploy the template, it ensures that the resource groups are created if they don't yet exist and continues to deploy resources to them after creation.
Let's also look at how these new features can help to remove some of the technical constraints related to disaster recovery sites.
Prior to these features, if you had to deploy a solution that was designed with disaster recovery in mind, there were two separate deployments: one deployment for the primary region and another deployment for the secondary region. For example, if you were deploying an ASP.NET MVC application using App Service, you would create an app service and configure it for the primary region, and then you would conduct another deployment with the same template to another region using a different parameters file. When deploying another set of resources in another region, as mentioned before, the parameters used with the template should be different to reflect the differences between the two environments. The parameters would include changes such as a SQL connection string, domain and IP addresses, and other configuration items unique to an environment.
With the availability of cross-subscription and resource group deployment, it's possible to create the disaster recovery site at the same time as the primary site. This eliminates two deployments and ensures that the same configuration can be used on multiple sites.
Deploying resource groups with ARM templates
In this section, an ARM template will be authored and deployed, which will create a couple of resource groups within the same subscription.
To use PowerShell to deploy templates that contain resource groups and cross-subscription resources, the latest version of PowerShell should be used. At the time of writing, Azure module version 3.3.0 is being used:

Figure 15.2: Verifying the latest Azure module version
If the latest Azure module is not installed, it can be installed using the following command:
install-module -Name az -Force
It's time to create an ARM template that will create multiple resource groups within the same subscription. The code for the ARM template is as follows:
{ "$schema": "https://schema.management.azure.com/schemas/2015-01-01/deploymentTemplate.json#", "contentVersion": "1.0.0.0", "parameters": { "resourceGroupInfo": { "type": "array" }, "multiLocation": { "type": "array" } }, "resources": [ { "type": "Microsoft.Resources/resourceGroups", "location": "[parameters('multiLocation')[copyIndex()]]", "name": "[parameters('resourceGroupInfo')[copyIndex()]]", "apiVersion": "2019-10-01", "copy": { "name": "allResourceGroups", "count": "[length(parameters('resourceGroupInfo'))]" }, "properties": {} } ], "outputs": {}}
The first section of the code is about parameters that the ARM templates expect. These are mandatory parameters, and anybody deploying these templates should provide values for them. Array values must be provided for both the parameters.
The second major section is the resources JSON array, which can contain multiple resources. In this example, we are creating resource groups, so it is declared within the resources section. Resource groups are getting provisioned in a loop because of the use of the copy element. The copy element ensures that the resource is run a specified number of times and creates a new resource in every iteration. If we send two values for the resourceGroupInfo array parameter, the length of the array would be two, and the copy element will ensure that the resourceGroup resource is executed twice.
All resource names within a template should be unique for a resource type. The copyIndex function is used to assign the current iteration number to the overall name of the resource and make it unique. Also, we want the resource groups to be created in different regions using distinct region names sent as parameters. The assignment of a name and location for each resource group is done using the copyIndex function.
The code for the parameters file is shown next. This code is pretty straightforward and provides array values to the two parameters expected by the previous template. The values in this file should be changed for all parameters according to your environment:
{ "$schema": "https://schema.management.azure.com/schemas/2015-01-01/deploymentParameters.json#", "contentVersion": "1.0.0.0", "parameters": { "resourceGroupInfo": { "value": [ "firstResourceGroup", "SeocndResourceGroup" ] }, "multiLocation": { "value": [ "West Europe", "East US" ] } }}
Deploying ARM templates
To deploy this template using PowerShell, log in to Azure with valid credentials using the following command:
Login-AzAccount
The valid credentials could be a user account or a service principal. Then, use a newly released New-AzDeployment cmdlet to deploy the template. The deployment script is available in the multipleResourceGroups.ps1 file:
New-AzDeployment -Location "West Europe" -TemplateFile "c:users itessource eposCrossSubscriptionCrossSubscriptionmultipleResourceGroups.json" -TemplateParameterFile "c:users itessource eposCrossSubscriptionCrossSubscriptionmultipleResourceGroups.parameters.json" -Verbose
It's important to understand that the New-AzResourceGroupDeployment cmdlet can't be used here because the scope of the New-AzResourceGroupDeployment cmdlet is a resource group and it expects a resource group to be available as a prerequisite. For deploying resources at the subscription level, Azure had released a new cmdlet that can work above the resource group scope. The new cmdlet, new-AzDeployment, works at the subscription level. It is also possible to have a deployment at the management group level. Management groups are at a higher level than subscriptions using the New-AzManagementGroupDeployment cmdlet.
Deployment of templates using Azure CLI
The same template can also be deployed using the Azure CLI. Here are the steps to deploy it using the Azure CLI:
- Use the latest version of the Azure CLI to create resource groups using the ARM template. At the time of writing, version 2.0.75 was used for deployment, as shown here:
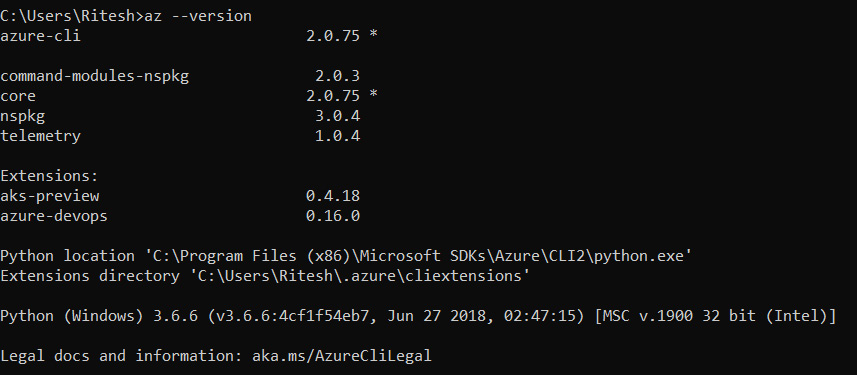
Figure 15.3: Checking the version of the Azure CLI
- Log in to Azure using the following command and select the right subscription for use:
az login
- If the login has access to multiple subscriptions, select the appropriate subscription using the following command:
az account set –subscription xxxxxxxx-xxxx-xxxx-xxxx-xxxxxxxxxxxx
- Execute the deployment using the following command. The deployment script is available in the multipleResourceGroupsCLI.txt file:
C:UsersRitesh>az deployment create—location westus—template-file "C:users itessource eposCrossSubscriptionCrossSubscriptionazuredeploy.json—parameters @"C:users itessource eposCrossSubscriptionCrossSubscriptionazuredeploy.parameters.json"—verbose
Once the command is executed, the resources defined within the ARM template should be reflected on the Azure portal.
Deploying resources across subscriptions and resource groups
In the last section, resource groups were created as part of ARM templates. Another feature in Azure is the provision of resources into multiple subscriptions simultaneously from a single deployment using a single ARM template. In this section, we will provide a new storage account to two different subscriptions and resource groups. The person deploying the ARM template would select one of the subscriptions as the base subscription, using which they would initiate the deployment and provision the storage account into the current and another subscription. The prerequisite for deploying this template is that the person doing the deployment should have access to at least two subscriptions and that they have contributor rights on these subscriptions. The code listing is shown here and is available in the CrossSubscriptionStorageAccount.json file within the accompanying code:
{ "$schema": "https://schema.management.azure.com/schemas/2015-01-01/deploymentTemplate.json#", "contentVersion": "1.0.0.0", "parameters": { "storagePrefix1": { "type": "string", "defaultValue": "st01" ... "type": "string", "defaultValue": "rg01" }, "remoteSub": { "type": "string", "defaultValue": "xxxxxxxx-xxxx-xxxx-xxxx-xxxxxxxxxxxx" } ... } } ], "outputs": {} } } } ], "outputs": {}}
It is important to note that the names of the resource group used within the code should already be available in the respective subscriptions. The code will throw an error if the resource groups are not available. Moreover, the names of the resource group should precisely match those in the ARM template.
The code for deploying this template is shown next. In this case, we use New-AzResourceGroupDeployment, because the scope of the deployment is a resource group. The deployment script is available in the CrossSubscriptionStorageAccount.ps1 file within the code bundle:
New-AzResourceGroupDeployment -TemplateFile "<< path to your CrossSubscriptionStorageAccount.json file >>" -ResourceGroupName "<<provide your base subscription resource group name>>" -storagePrefix1 <<provide prefix for first storage account>> -storagePrefix2 <<provide prefix for first storage account>> -verbose
Once the command is executed, the resources defined within the ARM template should be reflected in the Azure portal.
Another example of cross-subscription and resource group deployments
In this section, we create two storage accounts in two different subscriptions, resource groups, and regions from one ARM template and a single deployment. We will use the nested templates approach along with the copy element to provide different names and locations to these resource groups in different subscriptions.
However, before we can execute the next set of ARM templates, an Azure Key Vault instance should be provisioned as a prerequisite and a secret should be added to it. This is because the names of the storage accounts are retrieved from Azure Key Vault and passed as parameters to ARM templates to provision the storage account.
To provision Azure Key Vault using Azure PowerShell, the next set of commands can be executed. The code for the following commands is available in the CreateKeyVaultandSetSecret.ps1 file:
New-AzResourceGroup -Location <<replace with location of your key vault>> -Name <<replace with name of your resource group for key vault>> -verbose New-AzureRmKeyVault -Name <<replace with name of your key vault>> -ResourceGroupName <<replace with name of your resource group for key vault>> -Location <<replace with location of your key vault>> -EnabledForDeployment -EnabledForTemplateDeployment -EnabledForDiskEncryption -EnableSoftDelete -EnablePurgeProtection -Sku Standard -Verbose
You should note that the ResourceID value should be noted from the result of the New-AzKeyVault cmdlet. This value will need to be replaced in the parameters file. See Figure 15.4 for details:

Figure 15.4: Creating a Key Vault instance
Execute the following command to add a new secret to the newly created Azure Key Vault instance:
Set-AzKeyVaultSecret -VaultName <<replace with name of your key vault>> -Name <<replace with name of yoursecret>> -SecretValue $(ConvertTo-SecureString -String <<replace with value of your secret>> -AsPlainText -Force ) -Verbose
The code listing is available in the CrossSubscriptionNestedStorageAccount.json file within the code bundle:
{ "$schema": "https://schema.management.azure.com/schemas/2015-01-01/deploymentTemplate.json#", "contentVersion": "1.0.0.0", "parameters": { "hostingPlanNames": { "type": "array", "minLength": 1 }, ... "type": "Microsoft.Resources/deployments", "name": "deployment01", "apiVersion": "2019-10-01", "subscriptionId": "[parameters('subscriptions')[copyIndex()]]", "resourceGroup": "[parameters('resourceGroups')[copyIndex()]]", "copy": { "count": "[length(parameters('hostingPlanNames'))]", "name": "mywebsites", "mode": "Parallel" }, ... "kind": "Storage", "properties": { } } ]...
Here's the code for the parameters file. It is available in the CrossSubscriptionNestedStorageAccount.parameters.json file:
{ "$schema": "https://schema.management.azure.com/schemas/2015-01-01/deploymentParameters.json#", "contentVersion": "1.0.0.0", "parameters": { "hostingPlanNames": { ... "storageKey": { "reference": { "keyVault": { "id": "<<replace it with the value of Key vault ResourceId noted before>>" }, "secretName": "<<replace with the name of the secret available in Key vault>>" } } }}
Here's the PowerShell code for deploying the previous template. The deployment script is available in the CrossSubscriptionNestedStorageAccount.ps1 file:
New-AzResourceGroupDeployment -TemplateFile "c:users itessource eposCrossSubscriptionCrossSubscriptionCrossSubscriptionNestedStorageAccount.json" -ResourceGroupName rg01 -TemplateParameterFile "c:users itessource eposCrossSubscriptionCrossSubscriptionCrossSubscriptionNestedStorageAccount.parameters.json" -Verbose
Once the command gets executed, the resources defined within the ARM template should be reflected in the Azure portal.
Deploying cross-subscription and resource group deployments using linked templates
The previous example used nested templates to deploy to multiple subscriptions and resource groups. In the next example, we will deploy multiple App Service plans in separate subscriptions and resource groups using linked templates. The linked templates are stored in Azure Blob storage, which is protected using policies. This means that only the holder of the storage account key or a valid shared access signature can access this template. The access key is stored in Azure Key Vault and is accessed from the parameters file using references under the storageKey element. You should upload the website.json file to a container in Azure Blob storage. The website.json file is a linked template responsible for provisioning an App Service plan and an app service. The file is protected using the Private (no anonymous access) policy, as shown in Figure 15.5. A privacy policy ensures that anonymous access is not allowed. For this instance, we have created a container named armtemplates and set it with a private policy:

Figure 15.5: Setting a private policy for the container
This file can only be accessed using the Shared Access Signature (SAS) keys. The SAS keys can be generated from the Azure portal for a storage account using the Shared access signature item in the left menu shown in Figure 15.6. You should click on the Generate SAS and connection string button to generate the SAS token. It is to be noted that an SAS token is displayed once and not stored within Azure. So, copy it and store it somewhere so that it can be uploaded to Azure Key Vault. Figure 15.6 shows the generation of the SAS token:

Figure 15.6: Generating an SAS token in the Azure portal
We will use the same Key Vault instance that was created in the previous section. We just have to ensure that there are two secrets available within the Key Vault instance. The first secret is StorageName and the other one is StorageKey. The commands to create these secrets in the Key Vault instance are as follows:
Set-AzKeyVaultSecret -VaultName "testkeyvaultbook" -Name "storageName" -SecretValue $(ConvertTo-SecureString -String "uniquename" -AsPlainText -Force ) -Verbose Set-AzKeyVaultSecret -VaultName "testkeyvaultbook" -Name "storageKey" -SecretValue $(ConvertTo-SecureString -String "?sv=2020-03-28&ss=bfqt&srt=sco&sp=rwdlacup&se=2020-03-30T21:51:03Z&st=2020-03-30T14:51:03Z&spr=https&sig=gTynGhj20er6pDl7Ab%2Bpc29WO3%2BJhvi%2BfF%2F6rHYWp4g%3D" -AsPlainText -Force ) -Verbose
You are advised to change the names of the Key Vault instance and the secret key value based on your storage account.
After ensuring that the Key Vault instance has the necessary secrets, the ARM template file code can be used to deploy the nested templates across subscriptions and resource groups.
The ARM template code is available in the CrossSubscriptionLinkedStorageAccount.json file and is also shown here. You are advised to change the value of the templateUrl variable within this file. It should be updated with a valid Azure Blob storage file location:
{ "$schema": "https://schema.management.azure.com/schemas/2015-01-01/deploymentTemplate.json#", "contentVersion": "1.0.0.0", "parameters": { "hostingPlanNames": { "type": "array", "minLength": 1 ... "type": "Microsoft.Resources/deployments", "name": "fsdfsdf", "apiVersion": "2019-10-01", "subscriptionId": "[parameters('subscriptions')[copyIndex()]]", "resourceGroup": "[parameters('resourceGroups')[copyIndex()]]", "copy": { "count": "[length(parameters('hostingPlanNames'))]", "name": "mywebsites", "mode": "Parallel" ... ]}
The code for the parameters file is shown next. You are advised to change the values of the parameters, including the resourceid of the Key Vault instance and the secret name. The names of app services should be unique, or the template will fail to deploy. The code for the parameters file is available in the CrossSubscriptionLinkedStorageAccount.parameters.json code file:
{ "$schema": "https://schema.management.azure.com/schemas/2015-01-01/deploymentParameters.json#", "contentVersion": "1.0.0.0", "parameters": { "hostingPlanNames": { "value": [ "firstappservice", "secondappservice" ] ... "storageKey": { "reference": { "keyVault": { "id": "/subscriptions/xxxxxxxx-xxxx-xxxx-xxxx-xxxxxxxxxxxx/resourceGroups/keyvaluedemo/providers/Microsoft.KeyVault/vaults/forsqlvault1" }, "secretName": "storageKey" } } }}
Here's the command to deploy the template. The deployment script is available in the CrossSubscriptionLinkedStorageAccount.ps1 file:
New-AzureRmResourceGroupDeployment -TemplateFile "c:users itessource eposCrossSubscriptionCrossSubscriptionCrossSubscriptionLinkedStorageAccount.json" -ResourceGroupName <<replace with the base subscription resource group name >> -TemplateParameterFile "c:users itessource eposCrossSubscriptionCrossSubscriptionCrossSubscriptionLinkedStorageAccount.parameters.json" -Verbose
Once the command gets executed, the resources defined within the ARM template should be reflected in the Azure portal.
Now that you know how to provision resources across resource groups and subscriptions, we will look at some of the solutions that can be created using ARM templates.
Virtual machine solutions using ARM templates
Infrastructure as a service (IaaS) resources and solutions can be deployed and configured using ARM templates. The major resources related to IaaS are virtual machine resources.
Creating a virtual machine resource is dependent on multiple other resources in Azure. Some of the resources that are needed to create a virtual machine include:
- A storage account or a managed disk for hosting the operating system and data disk
- A virtual network along with subnets
- A network interface card
There are other resources that are optional, including:
- Azure Load Balancer
- Network security groups
- Public IP address
- Route tables and more
This section will deal with the process of creating virtual machines using ARM templates. As mentioned before in this section, we need to create a few resources, upon which the virtual machine resource will depend, prior to creating the virtual machine resource itself.
It is important to note that it is not always necessary to create the dependent resources. They should be created only if they do not exist already. If they already are available within the Azure subscription, the virtual machine resource can be provisioned by referencing those dependent resources.
The template is dependent on a few parameters that should be supplied to it at the time of executing the template. These variables relate to the location of the resources and some of their configuration values. These values are taken from parameters because they might change from one deployment to another, so using parameters helps keep the template generic.
The first step is to create a storage account, as shown in the following code:
{
"type": "Microsoft.Storage/storageAccounts", "name": "[variables('storageAccountName')]", "apiVersion": "2019-04-01", "location": "[parameters('location')]", "sku": { "name": "Standard_LRS" }, "kind": "Storage", "properties": {} },
After creating a storage account, a virtual network should be defined within the ARM template. It is important to note that there is no dependency between a storage account and a virtual network. They can be created in parallel. The virtual network resource has a subnet as its sub-resource. These are both configured with their IP ranges; the subnet typically has a smaller range than the virtual network IP range:
{
"apiVersion": "2019-09-01",
"type": "Microsoft.Network/virtualNetworks",
"name": "[variables('virtualNetworkName')]",
"location": "[parameters('location')]",
"properties": {
"addressSpace": {
"addressPrefixes": [
"[variables('addressPrefix')]"
]
},
"subnets": [
{
"name": "[variables('subnetName')]",
"properties": {
"addressPrefix": "[variables('subnetPrefix')]"
}
}
]
}
},
If the virtual machine needs to be accessed over the public internet, a public IP address can also be created, as shown in the following code. Again, it is a completely independent resource and can be created in parallel with the storage account and virtual network:
{
"apiVersion": "2019-11-01",
"type": "Microsoft.Network/publicIPAddresses",
"name": "[variables('publicIPAddressName')]",
"location": "[parameters('location')]",
"properties": {
"publicIPAllocationMethod": "Dynamic",
"dnsSettings": {
"domainNameLabel": "[parameters('dnsLabelPrefix')]"
}
}
},
After creating the virtual network, storage account, and public IP address, a network interface can be created. A network interface is dependent on a virtual network and subnet resource. It can optionally also be associated with a public IP address as well. This is shown in the following code:
{
"apiVersion": "2019-11-01",
"type": "Microsoft.Network/networkInterfaces",
"name": "[variables('nicName')]",
"location": "[parameters('location')]",
"dependsOn": [
"[resourceId('Microsoft.Network/publicIPAddresses/', variables('publicIPAddressName'))]",
"[resourceId('Microsoft.Network/virtualNetworks/', variables('virtualNetworkName'))]"
],
"properties": {
"ipConfigurations": [
{
"name": "ipconfig1",
"properties": {
"privateIPAllocationMethod": "Dynamic",
"publicIPAddress": {
"id": "[resourceId('Microsoft.Network/publicIPAddresses',variables('publicIPAddressName'))]"
},
"subnet": {
"id": "[variables('subnetRef')]"
}
}
}
]
}
},
It is important to note that both the public IP address and the subnet are referred to by their unique Azure identifiers.
After the creation of the network interface, we have all the resources that are needed to create a virtual machine. The next code block shows how to create a virtual machine using an ARM template. It has a dependency on the network card and storage account. This indirectly creates dependencies on the virtual network, subnet, and the public IP address.
For the virtual machine, we configure the mandatory resource configuration, lincluding type, apiVersion, location, and name, along with any dependencies, as shown in the following code:
{
"apiVersion": "2019-07-01",
"type": "Microsoft.Compute/virtualMachines",
"name": "[variables('vmName')]",
"location": "[resourceGroup().location]",
"tags": {
"displayName": "VirtualMachine"
},
"dependsOn": [
"[concat('Microsoft.Storage/storageAccounts/', variables('storageAccountName'))]",
"[concat('Microsoft.Network/networkInterfaces/', variables('nicName'))]"
],
"properties": {
"hardwareProfile": { "vmSize": "[variables('vmSize')]" },
"availabilitySet": {
"id": "[resourceId('Microsoft.Compute/availabilitySets', parameters('adAvailabilitySetName'))]"
},
"osProfile": {
"computerName": "[variables('vmName')]",
"adminUsername": "[parameters('adminUsername')]",
"adminPassword": "[parameters('adminPassword')]"
},
"storageProfile": {
"imageReference": {
"publisher": "[variables('imagePublisher')]",
"offer": "[variables('imageOffer')]",
"sku": "[parameters('windowsOSVersion')]",
"version": "latest"
},
"osDisk": { "createOption": "FromImage" },
"copy": [
{
"name": "dataDisks",
"count": 3,
"input": {
"lun": "[copyIndex('dataDisks')]",
"createOption": "Empty",
"diskSizeGB": "1023",
"name": "[concat(variables('vmName'), '-datadisk', copyIndex('dataDisks'))]"
}
}
]
},
"networkProfile": {
"networkInterfaces": [
{
"id": "[resourceId('Microsoft.Network/networkInterfaces', variables('nicName'))]"
}
]
}
}
}
In the preceding code, the virtual machine is configured with:
- A hardware profile—the size of the virtual machine.
- An OS profile—the name and credentials for logging in to the virtual machine.
- A storage profile—the storage account on which to store the Virtual Hard Disk (VHD) file for the virtual machine, including data disks.
- A network profile—the reference to the network interface card.
The next section will show an example of using ARM templates to provision a Platform as a Service solution.
PaaS solutions using ARM templates
Platform as a service (PaaS) resources and solutions can be deployed using ARM templates. One of the main resources related to PaaS is Azure Web Apps, and in this section, we will focus on creating web apps on Azure using ARM templates.
The template expects a few parameters to be supplied while executing it. The parameters needed are the SKU for the App Service plan, the Azure region hosting the resources, and the SKU capacity of the App Service plan.
There are a couple of variables declared within the template to make it generic and maintainable. The first one, hostingPlanName, is for the App Service plan name, and the next one, webSiteName, is for the app service itself.
There are at minimum two resources that should be declared and provisioned for a working web app in Azure. They are the following:
- The Azure App Service plan
- Azure App Service
The first step in creating a web app on Azure is defining the configuration for an Azure App Service plan. The following code defines a new App Service plan. It is important to note that the resource type is Microsoft.Web/serverfarms. Most of the configuration values of the plan, such as location, name, and capacity, come as parameters to the ARM template:
{
"apiVersion": "2019-08-01",
"name": "[variables('hostingPlanName')]",
"type": "Microsoft.Web/serverfarms",
"location": "[parameters('location')]",
"tags": {
"displayName": "HostingPlan"
},
"sku": {
"name": "[parameters('skuName')]",
"capacity": "[parameters('skuCapacity')]"
},
"properties": {
"name": "[variables('hostingPlanName')]"
}
},
The next resource that should be provisioned after a plan is the app service itself. It is important that a dependency between both these resources is created such that a plan is already created before the app service itself is created:
{
"apiVersion": "2019-08-01",
"name": "[variables('webSiteName')]",
"type": "Microsoft.Web/sites",
"location": "[parameters('location')]",
"dependsOn": [
"[variables('hostingPlanName')]"
],
"properties": {
"name": "[variables('webSiteName')]",
"serverFarmId": "[resourceId('Microsoft.Web/serverfarms', variables('hostingPlanName'))]"
},
"resources": [
{
"apiVersion": "2019-08-01",
"type": "config",
"name": "connectionstrings",
"dependsOn": [
"[variables('webSiteName')]"
],
"properties": {
"DefaultConnection": {
"value": "[concat( 'sql connection string here')]",
"type": "SQLAzure"
}
}
}
]
}
In the preceding code, a resource of type Microsoft.Web/sites is defined and it has a dependency on the plan. It is also using the App Service plan and is associated with it using serverFarmId. It further declares a connection string that can be used for connecting to SQL Server.
This section showed an example of creating a PaaS solution on Azure using an ARM template. Similarly, other PaaS solutions, including Azure Function apps, Kubernetes Service, and Service Fabric, among many others, can be created using ARM templates.
Data-related solutions using ARM templates
There are many resources in Azure related to data management and storage. Some of the important data-related resources include Azure SQL, Azure Cosmos DB, Azure Data Lake Storage, Data Lake Analytics, Azure Synapsis, Databricks, and Data Factory.
All of these resources can be provisioned and configured using an ARM template. In this section, we will create an ARM template to provision a Data Factory resource responsible for migrating data from Azure Blob storage to Azure SQL Database using stored procedures.
You will find the parameters file along with the template. These values might change from one deployment to another; we'll keep the template generic so that you can customize and use it easily with other deployments as well.
The entire code for this section can be found at https://github.com/Azure/azure-quickstart-templates/blob/master/101-data-factory-blob-to-sql-copy-stored-proc.
The first step is to declare the configuration for the data factory in the ARM template, as shown in the following code:
"name": "[variables('dataFactoryName')]",
"apiVersion": "2018-06-01",
"type": "Microsoft.DataFactory/datafactories",
"location": "[parameters('location')]",
Each data factory has multiple linked services. These linked services act as connectors to get data into the data factory, or the data factory can send data to them. The following code listing creates a linked service for the Azure storage account from which the blobs will be read into the data factory, and another linked service for Azure SQL Database:
{
"type": "linkedservices",
"name": "[variables('storageLinkedServiceName')]",
"apiVersion": "2018-06-01",
"dependsOn": [
"[variables('dataFactoryName')]"
],
"properties": {
"type": "AzureStorage",
"description": "Azure Storage Linked Service",
"typeProperties": {
"connectionString":
"[concat('DefaultEndpointsProtocol=https; AccountName=',parameters('storageAccountName'),'; AccountKey=',parameters('storageAccountKey'))]"
}
}
},
{
"type": "linkedservices",
"name": "[variables('sqlLinkedServiceName')]",
"apiVersion": "2018-06-01",
"dependsOn": [
"[variables('dataFactoryName')]"
],
"properties": {
"type": "AzureSqlDatabase",
"description": "Azure SQL linked service",
"typeProperties": {
"connectionString": "[concat('Data Source=tcp:', parameters('sqlServerName'), '.database.windows.net,1433;Initial Catalog=', parameters('sqlDatabaseName'), ';Integrated Security=False;User ID=', parameters('sqlUserId'), ';Password=', parameters('sqlPassword'), ';Connect Timeout=30;Encrypt=True')]"
}
}
},
After linked services, it's time to define the datasets for Azure Data Factory. Datasets help in identifying the data that should be read and placed in the data factory. They could also represent the temporary data that needs to be stored by the Data Factory during the transformation, or even the destination location where the data will be written. The next code block creates three datasets—one for each of the aspects of datasets that were just mentioned.
The read dataset is shown in the following code block:
{
"type": "datasets",
"name": "[variables('storageDataset')]",
"dependsOn": [
"[variables('dataFactoryName')]",
"[variables('storageLinkedServiceName')]"
],
"apiVersion": "2018-06-01",
"properties": {
"type": "AzureBlob",
"linkedServiceName": "[variables('storageLinkedServiceName')]",
"typeProperties": {
"folderPath": "[concat(parameters('sourceBlobContainer'), '/')]",
"fileName": "[parameters('sourceBlobName')]",
"format": {
"type": "TextFormat"
}
},
"availability": {
"frequency": "Hour",
"interval": 1
},
"external": true
}
},
The intermediate dataset is shown in the following lines of code:
{
"type": "datasets",
"name": "[variables('intermediateDataset')]",
"dependsOn": [
"[variables('dataFactoryName')]",
"[variables('sqlLinkedServiceName')]"
],
"apiVersion": "2018-06-01",
"properties": {
"type": "AzureSqlTable",
"linkedServiceName": "[variables('sqlLinkedServiceName')]",
"typeProperties": {
"tableName": "[variables('intermediateDataset')]"
},
"availability": {
"frequency": "Hour",
"interval": 1
}
}
},
Finally, the dataset used for the destination is shown here:
{
"type": "datasets",
"name": "[variables('sqlDataset')]",
"dependsOn": [
"[variables('dataFactoryName')]",
"[variables('sqlLinkedServiceName')]"
],
"apiVersion": "2018-06-01",
"properties": {
"type": "AzureSqlTable",
"linkedServiceName": "[variables('sqlLinkedServiceName')]",
"typeProperties": {
"tableName": "[parameters('sqlTargetTable')]"
},
"availability": {
"frequency": "Hour",
"interval": 1
}
}
},
Finally, we need a pipeline in Data Factory that can bring together all the datasets and linked services, and help in creating extract-transform-load data solutions. A pipeline consists of multiple activities, each fulfilling a particular task. All these activities can be defined within the ARM template, as you'll see now. The first activity copies the blobs in the storage account to an intermediate SQL Server, as shown in the following code:
{
"type": "dataPipelines",
"name": "[variables('pipelineName')]",
"dependsOn": [
"[variables('dataFactoryName')]",
"[variables('storageLinkedServiceName')]",
"[variables('sqlLinkedServiceName')]",
"[variables('storageDataset')]",
"[variables('sqlDataset')]"
],
"apiVersion": "2018-06-01",
"properties": {
"description": "Copies data from Azure Blob to Sql DB while invoking stored procedure",
"activities": [
{
"name": "BlobtoSqlTableCopyActivity",
"type": "Copy",
"typeProperties": {
"source": {
"type": "BlobSource"
},
"sink": {
"type": "SqlSink",
"writeBatchSize": 0,
"writeBatchTimeout": "00:00:00"
}
},
"inputs": [
{
"name": "[variables('storageDataset')]"
}
],
"outputs": [
{
"name": "[variables('intermediateDataset')]"
}
]
},
{
"name": "SqlTabletoSqlDbSprocActivity",
"type": "SqlServerStoredProcedure",
"inputs": [
{
"name": "[variables('intermediateDataset')]"
}
],
"outputs": [
{
"name": "[variables('sqlDataset')]"
}
],
"typeProperties": {
"storedProcedureName": "[parameters('sqlWriterStoredProcedureName')]"
},
"scheduler": {
"frequency": "Hour",
"interval": 1
},
"policy": {
"timeout": "02:00:00",
"concurrency": 1,
"executionPriorityOrder": "NewestFirst",
"retry": 3
}
}
],
"start": "2020-10-01T00:00:00Z",
"end": "2020-10-02T00:00:00Z"
}
}
]
}
The last activity copies data from the intermediate dataset to the final destination dataset.
There are also start and end times during which the pipeline should be running.
This section focused on creating an ARM template for a data-related solution. In the next section, we will deal with ARM templates for creating datacenters on Azure with Active Directory and DNS.
Creating an IaaS solution on Azure with Active Directory and DNS
Creating an IaaS solution on Azure means creating multiple virtual machines, promoting a virtual machine to be a domain controller, and making other virtual machines join the domain controller as domain-joined nodes. It also means installing a DNS server for name resolution and, optionally, a jump server for accessing these virtual machines securely.
The template creates an Active Directory forest on the virtual machines. It creates multiple virtual machines based on the parameters supplied.
The template creates:
- A couple of availability sets
- A virtual network
- Network security groups to define the allowed and disallowed ports and IP addresses
The template then does the following:
- Provisions one or two domains. The root domain is created by default; the child domain is optional
- Provisions two domain controllers per domain
- Executes the desired state configuration scripts to promote a virtual machine to be a domain controller
We can create multiple virtual machines using the approach discussed in the Virtual machine solutions using ARM templates section. However, these virtual machines should be part of an availability set if they need to be highly available. It is to be noted that availability sets provide 99.95% availability for applications deployed on these virtual machines, while Availability Zones provide 99.99% availability.
An availability set can be configured as shown in the following code:
{
"name": "[variables('adAvailabilitySetNameRoot')]",
"type": "Microsoft.Compute/availabilitySets",
"apiVersion": "2019-07-01",
"location": "[parameters('location')]",
"sku": {
"name": "Aligned"
},
"properties": {
"PlatformUpdateDomainCount": 3,
"PlatformFaultDomainCount": 2
}
},
Once the availability set is created, an additional profile should be added to the virtual machine configuration to associate the virtual machine with the availability set, as shown in the following code:
"availabilitySet" : {
"id": "[resourceId('Microsoft.Compute/availabilitySets', parameters('adAvailabilitySetName'))]"
}
You should note that availability sets are mandatory in order to use load balancers with virtual machines.
Another change needed in the virtual network configuration is adding DNS information, as shown in the following code:
{
"name": "[parameters('virtualNetworkName')]",
"type": "Microsoft.Network/virtualNetworks",
"location": "[parameters('location')]",
"apiVersion": "2019-09-01",
"properties": {
"addressSpace": {
"addressPrefixes": [
"[parameters('virtualNetworkAddressRange')]"
]
},
"dhcpOptions": {
"dnsServers": "[parameters('DNSServerAddress')]"
},
"subnets": [
{
"name": "[parameters('subnetName')]",
"properties": {
"addressPrefix": "[parameters('subnetRange')]"
}
}
]
}
},
Finally, to convert a virtual machine into Active Directory, a PowerShell script or desired state configuration (DSC) script should be executed on the virtual machine. Even for joining other virtual machines to the domain, another set of scripts should be executed on those virtual machines.
Scripts can be executed on the virtual machine using the CustomScriptExtension resource, as shown in the following code:
{
"type": "Microsoft.Compute/virtualMachines/extensions",
"name": "[concat(parameters('adNextDCVMName'),'/PrepareNextDC')]",
"apiVersion": "2018-06-01",
"location": "[parameters('location')]",
"properties": {
"publisher": "Microsoft.Powershell",
"type": "DSC",
"typeHandlerVersion": "2.21",
"autoUpgradeMinorVersion": true,
"settings": {
"modulesURL": "[parameters('adNextDCConfigurationModulesURL')]",
"configurationFunction": "[parameters('adNextDCConfigurationFunction')]",
"properties": {
"domainName": "[parameters('domainName')]",
"DNSServer": "[parameters('DNSServer')]",
"DNSForwarder": "[parameters('DNSServer')]",
"adminCreds": {
"userName": "[parameters('adminUserName')]",
"password": "privateSettingsRef:adminPassword"
}
}
},
"protectedSettings": {
"items": {
"adminPassword": "[parameters('adminPassword')]"
}
}
}
},
In this section, we created a datacenter on Azure using the IaaS paradigm. We created multiple virtual machines and converted one of them into domain controller, installed DNS, and assigned a domain to it. Now, other virtual machines on the network can be joined to this domain and they can form a complete datacenter on Azure.
Please refer to https://github.com/Azure/azure-quickstart-templates/tree/master/301-create-ad-forest-with-subdomain for the complete code listing for creating a datacenter on Azure.
Summary
The option to deploy resources using a single deployment to multiple subscriptions, resource groups, and regions provides enhanced abilities to deploy, reduce bugs in deployment, and access advanced benefits, such as creating disaster recovery sites and achieving high availability.
In this chapter, you saw how to create a few different kinds of solution using ARM templates. This included creating an infrastructure-based solution comprising virtual machines; a platform-based solution using Azure App Service; a data-related solution using the Data Factory resource (including its configuration); and a datacenter on Azure with virtual machines, Active Directory, and DNS installed on top of the virtual machine.
In the next chapter, we will focus on creating modular ARM templates, an essential skill for architects who really want to take their ARM templates to the next level. The chapter will also show you various ways to design ARM templates and create reusable and modular ARM templates.