Lesson Files | Soundtrack Pro book files > 03-04_Projects&Media > 3-1 Start, 3-5 Final |
Time | This lesson takes approximately 1 hour to complete. |
Goals | Explore video clip details |
Create a customized video layout | |
Store files in the Bin tab for easy access | |
Add markers to the Timeline | |
Work with a playback region | |
Add sound effects | |
Change a track’s name and icon |
Audio is often one the least appreciated crafts in filmmaking. If you have any doubt as to the importance of audio, try muting your television as you watch a commercial, television show, or movie. Not only would you miss out on the basic dialog, but sound design adds an extra level of reality, texture, emotion, and credibility to a scene.
In this lesson, you’ll take the skills you’ve learned so far and apply them to the sound design of a suspense scene. First you’ll watch the scene and determine a strategy for the sound. Then you’ll add markers in the Timeline for specific sounds effects. Once the markers are in place, you’ll work with sound effects to add reality, illusion of space, and mood to the scene. Along the way you’ll also organize tracks, change track names and icons, and learn some new features and shortcuts.
Once you get the fundamental sound design in place, you’ll be ready to move on to the next lesson where you’ll add additional sound effects, music, and Timeline editing techniques to finish the soundtrack.
You will begin this lesson by opening the 3-1 Start project file located in the 03-04_Projects&Media folder and playing the finished project. If you have any other Soundtrack Pro projects open, you should close them at this time. If you just finished Lesson 2, “Creating and Arranging a Multitrack Project,” Soundtrack Pro should already be open.
Quit all open applications, except for Soundtrack Pro.
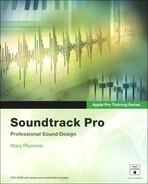
Open the Soundtrack Pro project 3-1 Start.
The project opens with a video clip already in the Timeline, and one audio clip on the top track. The 03-04 Final Audio unmixed audio clip is an exported audio file of the project that you’ll complete in Lesson 4, “Building Suspense with Editing Techniques.”
Play the project to see the scene with unmixed audio.
Note
This audio clip is unmixed because the final project tracks have not been through the mixing process where the track volume levels are adjusted and effects are applied. You’ll learn more about mixing in Lesson 8, “Creating a Basic Mix.”
Now that you know what you’re aiming for in designing the sound for this scene, it’s time to let it go. That’s right. You’re going to delete the audio clip from the project.
Select the 03-04 Final Audio unmixed track (top audio track) in the Timeline, then press Shift-Cmd-T to delete the entire track.
The track and its audio clip should no longer exist in the Timeline.
Press Shift-Cmd-S to open the Save As window.
Change the name of the project to Suspense Scene, making sure that the Collect Audio and Collect Video checkboxes are unselected, and then save it into the My Soundtrack Pro Projects folder on your desktop.
Note
It is important to save files uncollected while you build your project. Only save collected if you plan to archive or move the project to another computer. You’ll learn more about archiving files and media management in Lesson 10, “Exporting, Managing Media, and Preferences.”
You’ll work on this Suspense Scene project for the duration of Lessons 3 and 4. If you don’t complete an exercise, there are catch-up versions of the project that you can open at any time. You’ll be prompted to save as you go along or open a catch-up version to continue with the lessons. Also, even though you deleted the 03-04 Final Audio unmixed clip from the Timeline, it is still in the Bin tab if you’d like to hear it as a reference.
Importing a video clip into a Soundtrack Pro multitrack project is as simple as locating the file in the Media and Effects manager and dragging it to either the Video tab or the video track in the Timeline. You’ve already done that in Lessons 1 and 2.
There are several major differences between the computer-animated ClapBoard video clip you worked on in the previous lessons and the clip you’ll be using now. This clip is significantly longer and involves live action, so the need to create an audible reality is much greater. Second, it was shot and edited in PAL rather than the NTSC video standard used for ClapBoard. Finally, this clip was exported into Soundtrack Pro from Final Cut Pro.
Soundtrack Pro will automatically change the project’s video settings (Frame Rate and Frame Size) to match the imported video clip, but it’s important to remember that you can only import a single clip. It can be long—up to four hours in length—but a Soundtrack Pro multitrack project can only include one video clip.
And it must be in a standard QuickTime-compatible file format supported by Soundtrack Pro, such as .mov, NTSC, PAL, and HD. You can even import MPEG-2 (m2v) files if you have installed the QuickTime MPEG-2 playback component.
How do you determine the frame rate or frame size of a video clip in Soundtrack Pro? All of these answers and more are in the details, which we will learn about next.
Note
NTSC (North America) is the broadcast standard, with 29.97 frames per second (fps) and a frame size of 720 × 486 for standard definition (SD) or 720 × 480 for digital video (DV). Europe and some parts of Asia use PAL, with 25 fps and a frame size of 720 × 576. Apple’s Final Cut Studio applications support both NTSC and PAL clips in the QuickTime format.
The Utility window’s Details tab gives you easy access to information about the project’s video and audio clips.
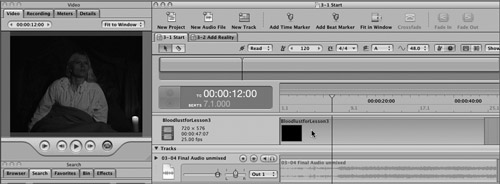
Select the BloodlustforLesson3 clip in the video track of the Timeline.
The video clip turns blue once it has been selected.
Press Cmd-I (for information) or click the Details tab on the Utility window to view the details for the selected clip.

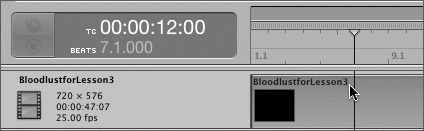
The Details tab displays the frame rate and frame size, as well as the duration of the clip (47 seconds). You can also see some of the details on the left edge of the video clip on the video track’s header.
Press Cmd-1 or click the Video tab to bring it forward in the Utility window.
The standard-sized Utility window is fine for previewing your video, but it’s a bit small if you need to see intricate details within the frame. Fortunately you can resize it by dragging the Resize handle in the bottom-right corner of the window to create a much larger view.
Drag the diagonal lines of the Resize handle down and to the right to make the Utility window larger.

Let go of the mouse button when the Utility window is as big as you want it to be. You can even resize it while the clip is playing.
Press the spacebar, Shift-Return, or click the Play button to play the project.
While the project is playing, resize the Utility window again and then pause playback.
Press F1 to reset the interface to the Standard layout.
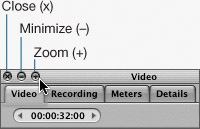
Another useful window feature, the Zoom button (+), will automatically change the Utility window’s scale to fit the screen. It is the third button from the left in the top-left corner of the Utility window.
Click the Zoom button (+).
The Utility window will fill your computer screen.
Click the Zoom button again or press F1 to return to the Standard layout.
You’ve already learned that you can rearrange the order of tabs in any window by dragging them to a different position. You can also drag a tab away from its default window so that it becomes a separate window. This feature allows you to customize the interface and view more than one tab from a window at a time. In this exercise, you’ll remove and resize the Video tab. Then you’ll learn how to save that window layout to use again later.
Drag the Video tab down and to the right to pull it away from the other tabs in the Utility window.
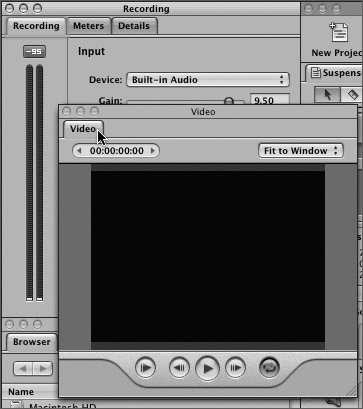
The Video tab becomes a separate window. You can move the new Video window just as you move any window in the interface, by dragging the title bar at the top of the window.
Move the Video window so that it is positioned over the Media and Effects manager. The top of the Video window should be even with the top of the Video track header in the Timeline.
Drag the Resize handle in the bottom-right corner of the Video window until the window covers most of the Track headers in the Timeline.
Make sure that you do not cover the actual Timeline tracks or the Time display at the top of the Timeline.
Play some of the video to see how it looks in the larger Video window.
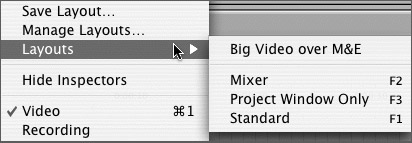
Like other Apple Pro Applications, Soundtrack allows you to customize the different window layouts. You’re already familiar with the Standard (F1) and Mixer (F2) layouts from Lesson 1, “Working with the Interface.” There is also a third preset layout, Project Window Only (F3), which hides the other windows and fits the Project window to the screen. For this exercise, you’ll save your current layout so that you can access it anytime that you’re using Soundtrack Pro on your computer.
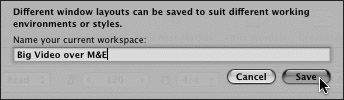
Choose Window > Save Layout to open the Save layout dialog.

Type Big Video over M&E in the dialog and click Save.
Now that you’ve saved the layout, you can access it under the Windows menu just as you would the other default layouts.
Press F1 to switch back to Standard layout.
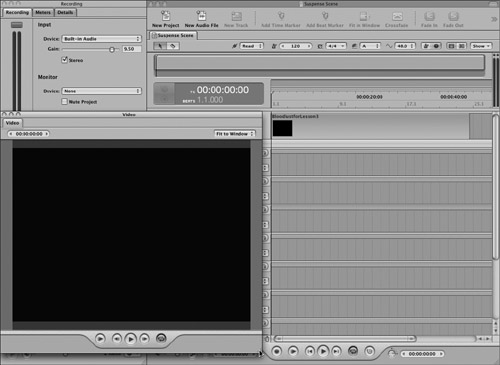
Choose Widow > Layouts > Big Video over M&E to change the window to your newly saved layout.
Since the Project window and the Video window overlap, the active window will move to the front of the interface. Simply click the Video window to move it in front.
Voila! You can now create and save different layouts as needed.
Tip
If you’re working with two computer monitors, you can play a project’s video externally using Digital Cinema Desktop. By connecting an Apple Cinema Display to your computer, you can play the video full-screen on one monitor and use the other monitor for editing. Soundtrack Pro also supports playback through an external video output device as long as you configure the Soundtrack Pro Video Out Preferences.
Now that you have resized the Video window, this is a good time to master your video playback skills. You can control playback by clicking the Video transport controls or by using keyboard shortcuts. In this exercise, you’ll refresh what you already know and add a few new shortcuts and buttons to your growing Soundtrack Pro skill set. Let’s start with the transport control buttons, then move on to the keyboard shortcuts.

Play from Beginning: Starts playback from the beginning of the video.
Previous Frame: Moves the video back one frame earlier in timecode.
Play/Pause: Plays or pauses the video from the current playhead position.
Next Frame: Moves the video forward one frame later in timecode.
Cycle: Plays the video as a continuous loop so that it repeats from the beginning each time the playhead reaches the end of the video.
Click the Play from Beginning button to start playing the video.
Click the Play/Pause button to pause playback and view the current timecode in the Time display.
Click the Previous Frame button to move the playhead one frame earlier.
The timecode in the Time display changes by one frame.
Click the Next Frame button several times to move the playhead forward one frame at a time.
You can also scrub through the video one frame at a time with the Previous Frame or Next Frame buttons.
Click and hold the Previous Frame button to play the video in reverse one frame at a time. Release the button to stop on a specific frame.
Next, you’ll repeat the exercise with keyboard shortcuts.
Press Shift-Return to start playing the video from the beginning.
Press the spacebar to pause playback.
Press Cmd–left arrow key to move the playhead one frame earlier.
Press Cmd–right key arrow several times to move the playhead forward one frame at a time.
Press and hold Cmd–left arrow key to scrub through the video one frame at a time. Release the keys to stop at a specific frame.
Time to practice your video playback skills. The more you work with the different buttons and keyboard shortcuts, the more efficient you’ll become. Use the shortcuts or Video transport controls to find the specific frames listed below. Each of these frames are important visual cues for designing the sound for this scene.
Play from the beginning and pause just before the woman sits up in her bed (00:00:05:11).
Find the frame just before the latches on the door drop and the door swings open (00:00:07:16).
Find the first frame where you see the Vampire (00:00:12:18).
And now for the moment you’ve all been waiting for—planning the sound design for your scene. Think of it like planning a party. First you come up with a theme, then you plan the decorations, food, and drinks. With sound design, first you come up with a theme or feel for the scene, then you plan sound effects and musical parts accordingly.
There are many layers to the art of sound design. Generally you start with the big picture, then work your way down to the details.
What’s a soundscape? It’s the audible landscape of your scene that includes everything you would expect to hear in the contextual reality of the scene’s location and time period. The overall soundscape includes ambient noise such as an air conditioner, street traffic, or the walla (that’s sound designer jargon for murmur) of people talking in the distance, and sound effects such as a clock ticking, door slamming, or glass breaking as it falls to the floor. Let’s start by taking inventory of your current “reality”-based soundscape, then apply the same technique to the scene.
Close your eyes for a minute and listen to all of the sounds around you.
What did you hear? Sometimes what you didn’t hear is as important as what you did. For example, if a scene takes place in a bank near a busy street, you’d expect to hear computers, canned music, people, and cars. However, if the scene involves people locked in a soundproof bank vault, the lack of sound adds to the suspense.
Now, take a mental inventory of things in the room that might need sound effects, such as a computer printer, phone, pencil sharpener, alarm, door, or window. All of these elements are potentially part of the soundscape as well.
As a sound designer, you may also use sound effects to establish elements in the scene that aren’t visible by the camera.
Imagine things that aren’t visible, but might be in the room and could still be established audibly. These would be things like cell phones, pagers, a knock on the door, a dog barking outside, sirens passing, furniture being moved upstairs....
Tip
Using sound effects to establish sounds off camera is a great way to save money in the shooting budget as well. Hearing a car accident and then showing the aftermath is much cheaper to film than showing the actual accident. Also, working with animals and children can be expensive, but you can always hear a dog bark or a baby cry and perceive that they are there, even without seeing them.
Now turn your attention to the suspense scene in your project.
Watch the video clip and take a mental inventory of noises that you should hear, such as a door opening or footsteps.
Watch the video clip again and imagine story elements that you could establish with sound, such as crickets to show that it is nighttime or a barking dog to show that an intruder is lurking outside.
Once you have decided on the overall theme or soundscape for the scene, it’s a good idea to organize the sounds by audio priority. In other words, it’s time for more planning. The sound elements of a scene can be organized into several categories, including reality, ambience, establishing, and mood. There are many different terms that can be used to describe sound effects and how they are used, but they still boil down to these general categories.
In the next series of exercises, you’ll search for sound effects appropriate for this scene and place them in the Bin tab for easy access when you’re ready to build the soundtrack. Choosing sound files and placing them in the Bin tab is like shopping for groceries before you cook a big meal. First you gather the ingredients, and then you start cooking. Otherwise, you’re constantly running back and forth to the store. Or in Soundtrack Pro, you’re constantly going back and forth to the Search tab to hunt for more files.
Press F1 to return to the Standard layout.
Click the Search tab to make it active.
Drag the Bin tab to the right edge of the Media and Effects Manager.
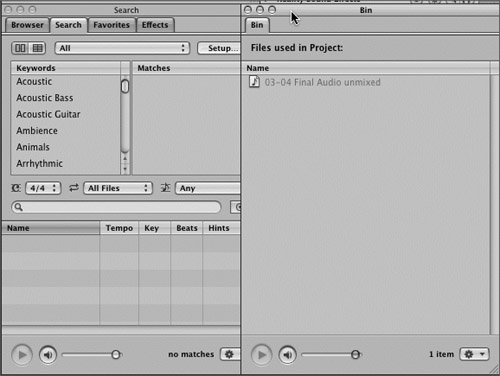
Click the Timeline to make it active.
The Timeline covers most of the Bin window.
Click the left edge of the Bin window that is visible over the Media and Effects tab.

Nice customized layout. Why not take a moment and save it in case you decide to presort files to the Bin tab in a future project?
Choose Windows > Save Layout, and name the layout Separate Bin.
Click the Bin window if it is not already active and in front of the Timeline window.
Your Separate Bin layout is ready for files. Let’s start with the reality sound effects needed for the scene.
Reality sound effects—a door opening, a glass breaking, a gun shooting—are used to make an action look realistic onscreen. However, in sound design, bigger is usually better and reel does not mean real. The sounds you choose for the scene must meet the expectations of the viewer rather than mimicking the sounds that would occur in the real world. For example, gunshots in the movies are loud and startling: Each shot explodes and resonates larger-thanlife. People are so conditioned to movie gunshots that they would not believe the real, unaltered sound of gunshots if you chose to use that in your video instead. You’ll often see witnesses on the news describing a shooting as “popping firecrackers” because they didn’t recognize the sound of real gunshots.
The scene you are working on in this lesson needs at least two reality sound effects—a sound for the doorknob turning and a sound for the door opening. But the door can’t just open silently—that would be real world, not reel world. In a suspenseful, dark, vampire-at-the-door scene, the viewer expects the door to squeak when it opens. Give in to audio clichés: Doors in scary places always squeak, horror films always have full moons and wolves howling in the distance, tires on getaway cars always squeal, and dogs always bark at bad people, to name a few. Sure, you could make it a well-oiled, perfectly maintained silent door if you like, but you’d be compromising the illusion of “reality” in the make-believe world of the scene.
Now that we’ve established the need for a squeaky door in your project, let’s go find its voice.
Click the Column View button on the Search tab, if it is not already set to Column view, and choose Sound Effects from the Keywords pop-up menu, if that’s not the current category.

Click the Work/Home Keyword in the left column, then type door squeak in the search text field to narrow the search.
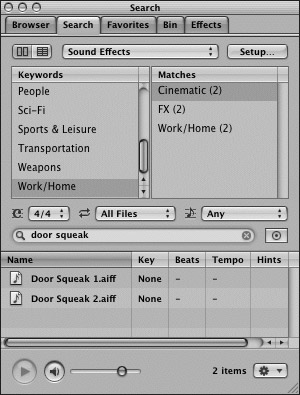
Preview each of the Door Squeak sound effects. Which sounds more eerie?
My vote is for Door Squeak 2.
Drag Door Squeak 2 from the Search results list to the Bin window and release it.

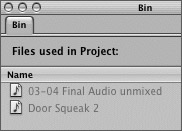
The filename will appear gray until you add the file to the Timeline. For now, the bin will be your audio shopping cart, containing just the files you might use in the multitrack project. You can always remove unused files from the bin once you’ve finished the soundtrack.
Click the Reset button (x) in the Search text field, and type knob to search for door knob sound effects.
Tip
When using the Search text field to narrow your search, it’s a good idea to try a specific descriptor such as “knob” rather than something general like “door.” Searching for “door” could result in dozens of files, including automobile doors, sliding doors, and slamming doors.
Soundtrack Pro includes three different Door Knob sound effects. Since you’re just shopping around, why not take them all! You can decide which to use later.
Drag each Door Knob sound effect one at a time from the Search results list to the Bin window.

Reset the Search text field and save your project.
Your hunt for reality sound effects was a success. Now it’s on to the next category—ambience.
Ambience brings a room or location to life and can include anything from the beeping horns and rumbling motors of traffic on a busy street to the low rumble of a waterfall and chirping birds of a secluded forest. Ambient sound adds another layer of reality to a scene and fills the void of silence between dialog and action. It may be subtle, but if it’s missing, the illusion of reality is broken and the scene comes across like a play performed on a make-believe set. True, many narrative scenes are filmed on a make-believe set, but it’s your job as sound designer to color the scene with acoustic wallpaper.
The illusion of reality in this scene is that it is nighttime in a rural area, most likely somewhere near Transylvania. No problem, just add crickets and you have instant rural nighttime. If the scene is in the city, then you can exchange the crickets for light traffic with the occasional street cleaner and sirens.
Click the Ambience Keyword to focus the search to ambient sound effects.
Soundtrack Pro includes over 100 ambient effects.

Scroll down through the list to find the Country Day, Country Night, and Crickets files, and preview each effect.
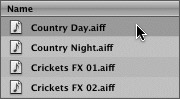
The first two both evoke that feeling of country, so what’s the difference between day and night? Crickets! There’s also a lovely babbling brook and birds chirping throughout the Country Day file. At night, the birds are replaced by an Owl hoot, and the babbling brook has been muted to make room for crickets. Do natural water sources cease to make noise at night in the real world? Of course not, but this isn’t real. You have to set audio priorities. Crickets trump just about any other nighttime sound.
For this exercise, the Country Night ambience is a little too busy and might distract from the rest of the scene. Let’s just go with straight crickets.
Drag the Crickets FX 01 and Crickets FX 02 files to the Bin window, and reset the Search text field to prepare for the next search.
Next, you’ll find an establishing sound effect.
Establishing sounds can be used to set the tone for a location or era, such as dinosaurs roaring during the Jurassic period or horse-drawn wagons and saloon music in Dodge City circa the early 1900s. Establishing sounds can also be used as part of the storytelling process to establish something that is not present in front of the camera but is still important to the character or story. In fact, it’s quite easy to audibly establish rumbling thunder, exploding bombs, and crying babies without ever seeing them.
Your goal in this exercise is to find an establishing sound that will communicate that someone or something might be outside the character’s bedroom window. When the scene opens, the woman is already awake. She doesn’t seem alarmed, just awake. Why? Did she hear something? Perhaps a barking dog. Barking dogs don’t always mean danger—maybe the dog wants to go inside, maybe a cat is walking along the fence, or maybe there’s a vampire sneaking around the corner. The audience needs you to establish why the character is awake.
Click the Animals Keyword on the Search tab, and type dog in the Search text field.
There are lots of barking dog sounds to choose from, including small dogs, large dogs, and medium dogs. All are fine for different situations, but for this exercise you’ll focus on the medium dogs.
Preview all three of the Dog Bark Medium files.
Listen for one that sounds like the dog is outside and is a combined bark and growl sound. Dog Bark Medium 1 will work perfectly.
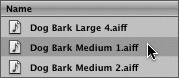
Drag it to the Bin window.
Reset the Search text field and save your progress.
The final sound effect category that you’ll be working with in this lesson is Mood. Sound effects and music can also be added to enhance the mood of a scene. Is the scene eerie, funny, happy, lonely, action-packed, or painfully boring? Sound can be a powerful tool for enhancing the overall mood of a scene. If the suspense scene that you’re working on included funny cartoon sound effects, children laughing outside, birds chirping, and a happy ukulele tune, it would have an entirely different mood.
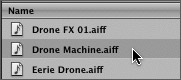
For this exercise, you’ll be locating the sound effect for the vampire himself. Not the sound of him speaking, just the theme music that appears whenever he’s around. A low sci-fi–type drone would add an ominous presence to the vampire scene.
What other sound effects might help set the mood? How about wolves howling in the distance? That would help establish the story line and enhance the eerie mood at the same time. So go to the Animals Keyword on the search tab. Find both of the Wolves Howling files and add them to the Bin window. The project could also use some wind ambience to go with the billowing fog outside. Find the Wind 2 sound effect and add it to the bin as well.
Once you’re finished adding files to the bin, change the interface to the Standard window layout and save your progress. Now that you’ve completed your initial sound effects search, you can mark where to place them in the Timeline.
All of the Apple Pro Applications include markers that can be used to mark specific frames or points in time. In Soundtrack Pro, markers are very useful tools for making notes in the Timeline, as well as for marking specific points for music changes, sound effects, or dialog cues. You can mark a frame or beat, depending on the time format that you are using as a reference.
Soundtrack has four different types of markers that come in a unique color to make it easy to distinguish from the others. Time markers (green) mark a specific timecode frame and use timecode as a reference. Beat markers (purple) mark a specific beat and use the time in beats as a reference. Scoring makers (orange) are embedded in a video clip in Final Cut Pro and reference the video clip’s timecode. You will work more with scoring markers in Lesson 5, “Designing Sound in the Waveform Editor.” Finally, End of Song (red) markers can be added to the Timeline to mark the end of the project.
During the next series of exercises, you’ll work with the Time, Beat, and End of Song markers to further organize your sound design ideas in the Timeline.
To add a marker, all you have to do is move the playhead to the desired position and use one of the following methods:
Choose Mark > Add Time Marker, Add Beat Marker, or Set End of Song.
Press Option-B (for Beat marker) or -M (for Time marker).
Click the Add Time Marker or Add Beat Marker button in the Toolbar.
Note
The toolbar buttons for adding markers will also make the Project window active. The Mark menu and keyboard shortcut methods for adding markers will only work if the Project window is active.
Let’s use all three methods to set some markers that you’ll need later on. This is also a good time to practice your Timeline navigation skills.
Click the Time-based format button, if the project is not already in that format.
Choose Window > Big Video over M&E to change the layout.
Play from the beginning and pause just before the woman sits up in her bed (00:00:05:11).
Click the Add Time Marker button on the toolbar.


A green time marker appears in the Timeline at the playhead position.
Find the frame just before the latches on the door drop and the door swings open (00:00:07:16). Click the Add Time Marker button on the toolbar to add the marker at the playhead position.
The remaining markers don’t require the larger Video tab, so you can return to the Standard layout for the remaining markers.
Press F1 to change the window layout.
Find the first frame where you see the vampire (00:00:12:18) and press M to set a time marker.
Next, you’ll mark the location for the music to start, so you’ll use a beat marker.
Click the Beats-based format button to change the project’s time format.
Move the playhead to the 3rd beat of the 8th measure (8.3.000), and click the Add Beat Marker button or press Option-B.

A purple beat marker appears at the playhead position. Since that is the only beat marker you’ll be setting in this lesson, it’s a good idea to change the project’s time format back to time-based.
Once you’ve added a marker, you can open the Marker Edit dialog and name the marker or move its position on the Timeline. You can also move a marker by dragging it to a different point in time. In this exercise, you’ll name the markers that you’ve added to the project so far.
Double-click the head of the purple beat marker.
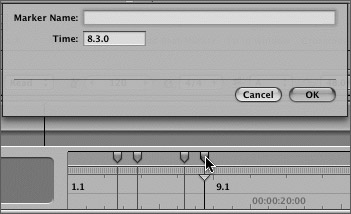
A dialog box opens with information about the marker. Notice that the Time field has the beats-based position of the marker (8.3.0).
Type start music in the Marker Name field and click OK.
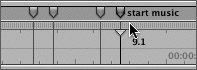
The marker’s name appears above the Time ruler.
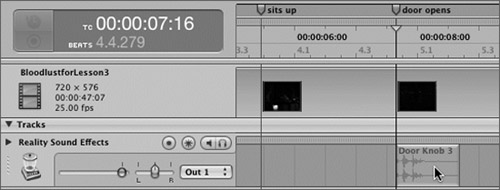
Double-click the head of the first time marker (green) in the Timeline and name it sits up.
Name the second time marker door opens and the third marker vampire presence.

Move the playhead to 50;00 in the Timeline.
This is where you’ll mark the end of the scene.
Choose Mark > Set End of Song.
A red end of song marker appears in the Timeline.
It’s your turn to add and edit the last marker in this exercise. Move to frame 16;15, set a time marker, and name the marker breathe.
Now that you have set all six markers, you can easily move between them in the Timeline.
To move between markers, press Shift-M to move forward in the Timeline to the next marker and Option-M to move back to the previous marker. You can also go to the Mark menu and choose Go to Next Marker or Go to Previous Marker.
Press Return to move the playhead to the beginning.
Press Shift-M to move the playhead to the first marker in the Timeline.
Press Shift-M four times to move the playhead to the last time marker (breathe) in the Timeline.
Press Option-M to move the playhead back to the previous marker.
Moving between markers with Shift-M or Option-M does not include the red end of song marker.
Press the End key or click the Go to End button on the transport controls at the bottom of the Project window.

The playhead moves to the red end of song marker.
Now that the first stages of planning the sound design are over, it’s time to start building the tracks. That doesn’t actually require heavy equipment or tools; it’s just an expression for adding multiple audio files to a track or tracks. As the files accumulate in the Timeline, the sound builds to create the overall piece. Let’s start with the first priority—the reality sound effects. You can use the markers that you’ve already set to snap the sound effects into position in the Timeline.
Click the Bin tab on the Media and Effects Manager.
All of the audio files that you’ve preselected should be in the list including: two crickets, three door knobs, one door squeak, a drone machine, wind, and two wolves howling. Sounds like the audible ingredients for a suspenseful vampire scene.
Press Return to set the playhead at the beginning of the Timeline.
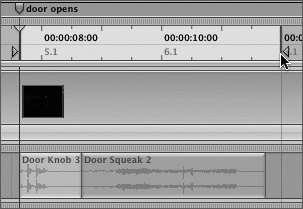
Press Shift-M twice to move to the door opens marker. Zoom in as needed for a better view of the markers in the Timeline.
Check the snapping button to be sure that snapping is turned on.

Listen to the door knob sound effects to see which one fits the clip.
Door Knob 3 sounds like the heavy latches on the pair of doors that open in the video clip.
Drag the Door Knob 3 file from the Bin tab to the Reality Sound Effects track (top track), and snap it to the door opens marker.
Snapping can also include markers, so you’re able to snap to the desired frame without a gridline in that position.
Play the clip in the Timeline to see how it works with the video.
Sounds real doesn’t it? Now all you need to do is add a little squeak for an extra dose of reality.
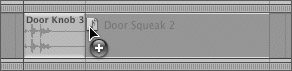
Drag the Door Squeak 2 file from the Bin tab and snap it to the right edge of the Door Knob 3 clip.
Play the clips in the Timeline.
Amazing! The combination of two simple sound effects can add life and “reality” to a scene. Before you move on to the other effects, this is a good time to learn how to create a playback region.
Sometimes you want to play just part of the Timeline. In this case, you want to play only the reality sound effects on the top track. Creating a playback region is an easy way to isolate a particular portion of the Timeline. Playback regions are created by clicking and dragging the bottom half of the Time ruler. Your goal in this exercise is to create a playback region that isolates the two sound effects clips in the Timeline.
Click the bottom half of the Time ruler at the door opens marker and drag it to the right just beyond the end of the Door Squeak 2 clip in the Timeline.
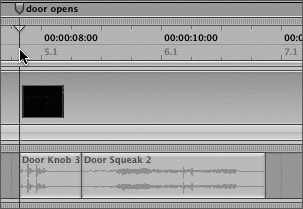
The Time ruler is marked with a lighter section with blue In and Out points. This is the playback region.
Press the spacebar to start the playback loop.
Notice that when the playhead reaches the end of the playback region, it repeats the section seamlessly.
Press the spacebar again to stop the playback.
Press the Home key to go to the beginning of the playback region, or press the End key to move to the end of the playback region.
Note
If the playhead is already within the playback region, the Home and End keys move it to the beginning or end. If the playhead is outside of the playback region, the Home and End keys move it to the beginning or end of the project in the Timeline. Return also takes the playhead to the beginning of the playback region, while Shift-Return always starts playback from the beginning of the Timeline.
You can resize a playback region by dragging its In or Out points.
Click the playback region Out point and drag it to the right to the vampire presence marker.
It’s even easier to remove a playback region.
Click the bottom half of the Time ruler outside of the playback region.
The region disappears.
Press Shift-Z and then save.
The next time you want to focus the playback in the Timeline to one isolated section, you can simply create a playback region.
It’s your turn to add the remaining sound effects to their designated tracks and markers. Don’t worry about the length of the clips and volume levels of the tracks—you’ll edit them in Lesson 4. Follow the bullet points below for instructions, and don’t forget to save once you’ve completed the exercise.
Listen to both Crickets sound effects in the Bin tab. The second one is more subtle and less distraction, so add Crickets FX 02 to the beginning of the second track in the Timeline.
Add the Wind 2 clip to the third track from the top, and align it to the door opens marker (07;18).
Add the Dog Bark Medium 1 clip to the beginning of the Establishing track.
Listen to both of the Wolves Howling sound effects in the Bin tab. The first one sounds like scared wolves, which may work well at the end of the piece. The second one sounds more like wolves announcing their presence, or perhaps the presence of their kin, the vamipire. Add Wolves Howling 2 to the upper Mood track and start it around 2;16 in the Timeline. (The wolves howling clip is about half the length of the barking dogs clip, so it should start after the dogs barking and end before the dog barking clip ends.)
Add the Drone Machine clip to the lower Mood track so that it begins at the vampire presence marker.
Play the project to hear the preliminary sound design.

Did you notice how easy it was to build the project? That’s because you had a plan, gathered the effects you wanted to work with, and set markers in the Timeline for easy alignment. Nice work.
Each track header includes an icon that represents the Keyword category of the track’s contents. The icon and track name match the first clip placed in an untitled track. If the tracks were prenamed before adding clips, as they were in this project, the tracks maintain the names they were originally given.
You can change a track’s name to better represent the contents of that track. For example, you may have several different reality sound effects in one track. Rather than keep the name of the first clip, you could call the entire track Vampire SFX or Suspenseful Ambience.
To change a track name, all you have to do is click in the Track Name field on the track header and type a new name.

Soundtrack offers many track icons to choose from, and it’s easy to change them. Why? To better represent the contents of the track so you’ll be able to distinguish it from the other tracks. Notice that most of the lower Illusion/Soundscape tracks have icons that represent the Keyword category of the contents; however, the Wind 2 clip has an icon that looks like an audio file. Since the track contains the ambient sound of wind, let’s also change the icon to match.
Click the track icon on the lower Illusion/Soundscape track.
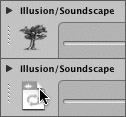
A window with all of the different icons appears onscreen. You can choose from any of the icons in the menu. There aren’t any wind or weather icons, so you’ll need to try something else.
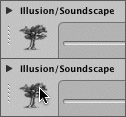
Select the icon that looks like a tree, since wind is an outdoor ambient sound.

Press Cmd-S to save your project.
Congratulations! You completed the lesson and the preliminary sound design for this project. In the next lesson, you’ll add additional effects and learn some editing techniques to fine-tune the arrangement in the Timeline and finish the soundtrack.
Answers
Shift-Cmd-S | opens the Save As window |
Markers | |
M | sets a time marker |
Option-B | sets a beat marker |
Shift-M | moves to the next marker |
Option-M | moves to the previous marker |
Playback Region | |
Return or Home | moves the playhead to the playback region In point |
End | moves the playhead to the playback region Out point |
Utility Window | |
Cmd-I | shows the Details tab |
Cmd-1 | shows the Video tab |
F1 | displays Standard layout |
F2 | displays Mixer layout |
F3 | displays Project Window Only layout |