Birds
Once you learn the basics, you can apply them to many different varieties of birds. We will paint two types of birds, European robins and a mountain bluebird.

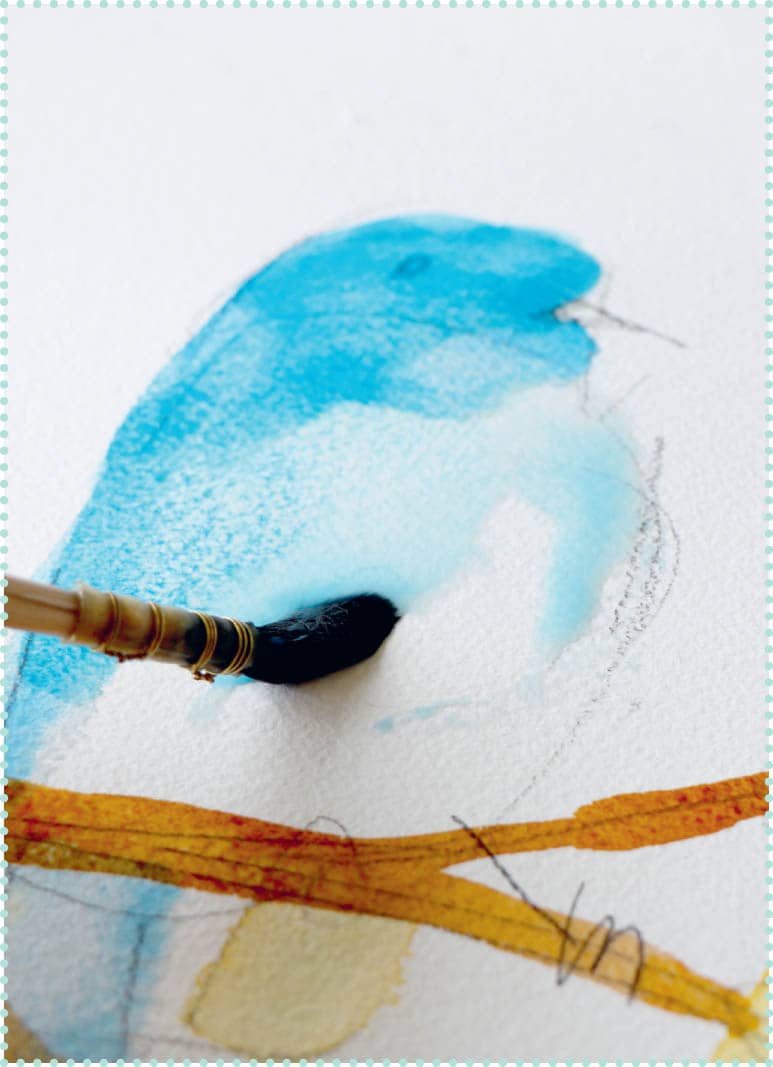
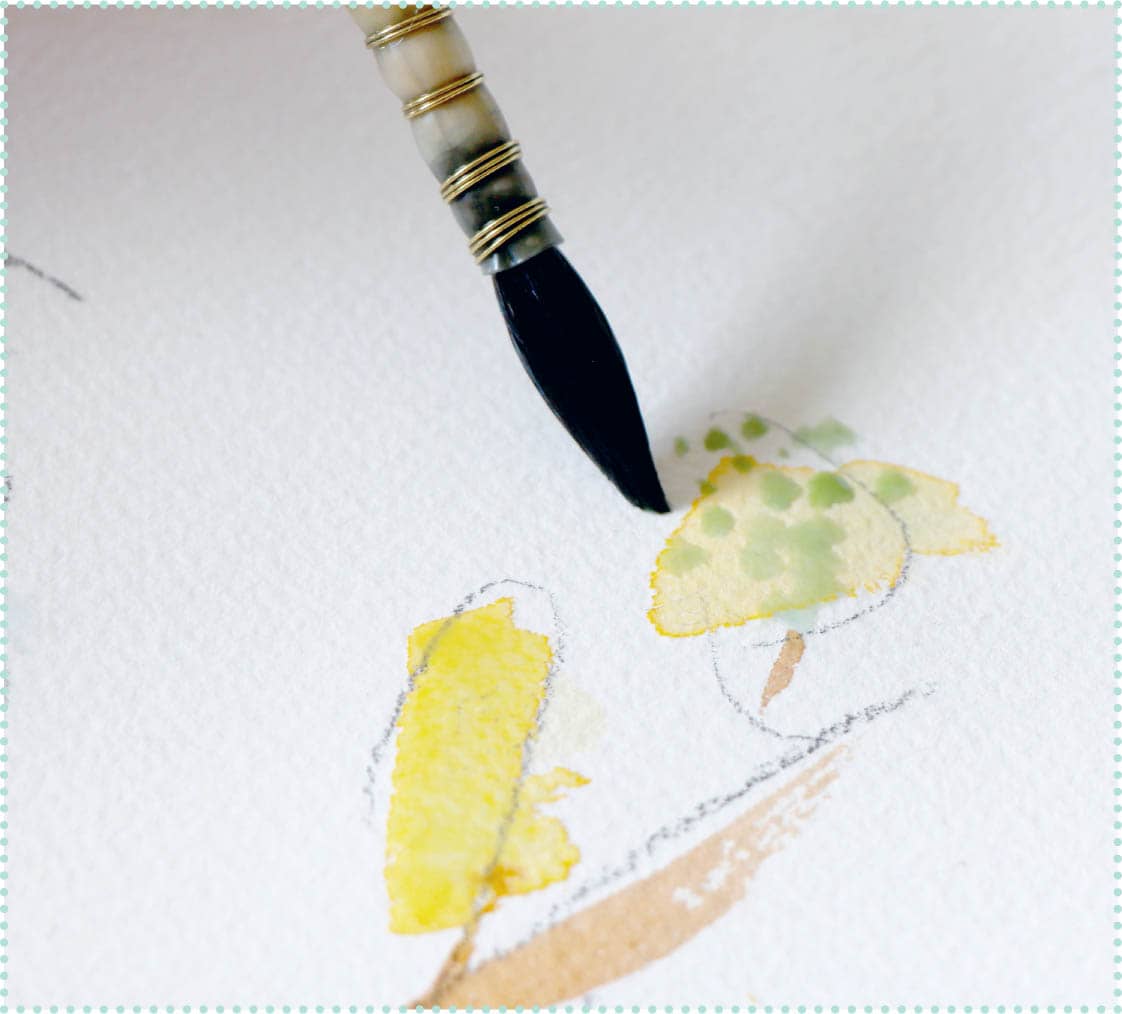
Draw the bird, branch, and willow buds. Pick up some blue paint for the head, wings, and back of the bird. Mix yellow and white to make a pale yellow for the willow buds. Add a touch of blue, if desired, to make more of a yellow-green. Now that the blue on the bird has had a chance to dry for a few minutes, add a watered-down version of the blue paint to create a lighter blue belly on the bird. Use the tip of a round brush to make yellow-green dots on the buds. Start with the yellow buds that are dry. Some may not be dry yet. It’s okay if the dots run a bit into the wet paint. Finish the belly with watered down blue or gray paint, so it completely touches the now-dry branch. Add the black eyes, beak, and feet. Use the tip of a round brush to add more white-yellow dots to the willow buds. Some can extend beyond the yellow bud to create the willow catkins.MOUNTAIN BLUEBIRD
STEP 1:

STEP 2:
STEP 3:
STEP 4:

STEP 5:


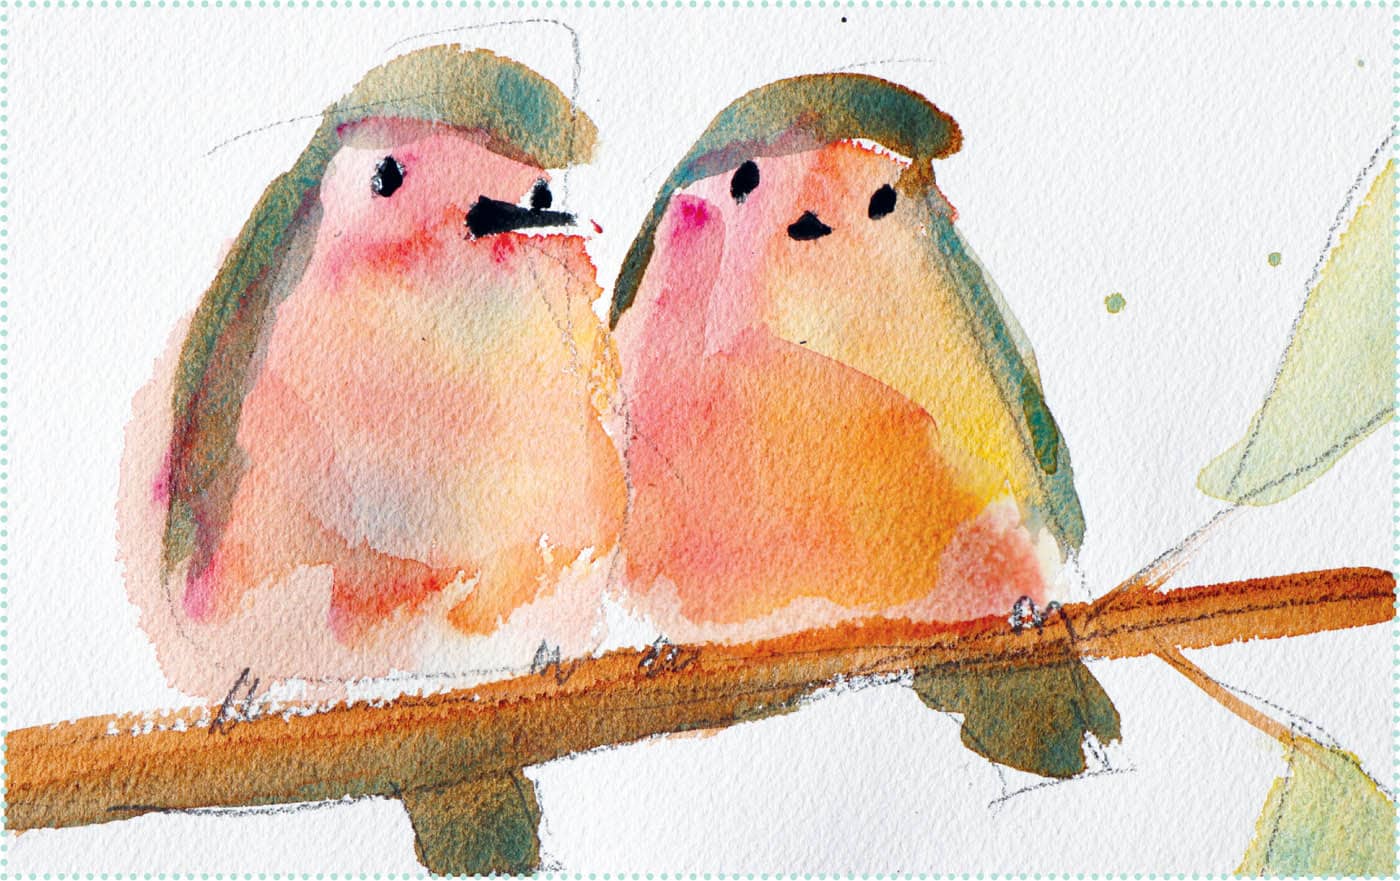
Start by sketching the basic shape of your birds. Don’t fuss with feathers and small details. Make sure to draw the eyes, beaks, and feet of the birds. Add some leaves to the branch, if you like. Try to balance the composition by placing the birds slightly off-center and adding leaves to the branch on the other side of the birds. Mix yellow and rose with a touch of burnt sienna. Lay down the red-orange paint mixture on the bodies of the birds. The red-orange color should extend to the face area of the head. Mix a brown for the tree branch. You can use just the transparent earth orange or burnt sienna, or you can mix a bit of burnt sienna into the transparent earth orange for a more reddish brown. Mix blue and yellow, and add a touch of rose or burnt sienna to tone down the green. Paint the leaves. It’s okay if a few drops of paint splatter onto your paper. It creates an effect and tells the story that this is a watercolor painting. Mix a warm gray for the body of the birds, using cerulean blue, burnt sienna, and touch of yellow. Add more blue if it looks too brown. Add some black to the gray mixture for the darker tail area. Paint heads and wings on the birds. The wings are just suggested. If you want to try another bird later that has markings on its wings, let the base color dry completely before adding more color for the markings. Use titanium white mixed with gray (or just a watered-down gray) for the bottom of the bird bellies. If you have the time, add a shaded area with darker brown paint to the bottom of the branch and a more orange-red color to the middle of the bird bellies. Use a small round brush to pick up some black lake paint for the eyes, beaks, and feet. Wait for the black paint to dry. Use your brush to add more shading and details to the leaves and birds, as desired. To add highlights to the birds’ eyes, use either a white watercolor in a very thick concentration or white gouache. But if you want to be a purist, use the transparent white or better yet, leave a tiny white spot in the black of the eye to be the highlight on the eye. For a finishing touch, mix more pink into the orange paint and add another wash of pink-orange to the center of the birds.EUROPEAN ROBINS
STEP 1:

STEP 2:

STEP 3:

STEP 4:

STEP 5:


STEP 6:
STEP 7:

STEP 8:

STEP 9:

