
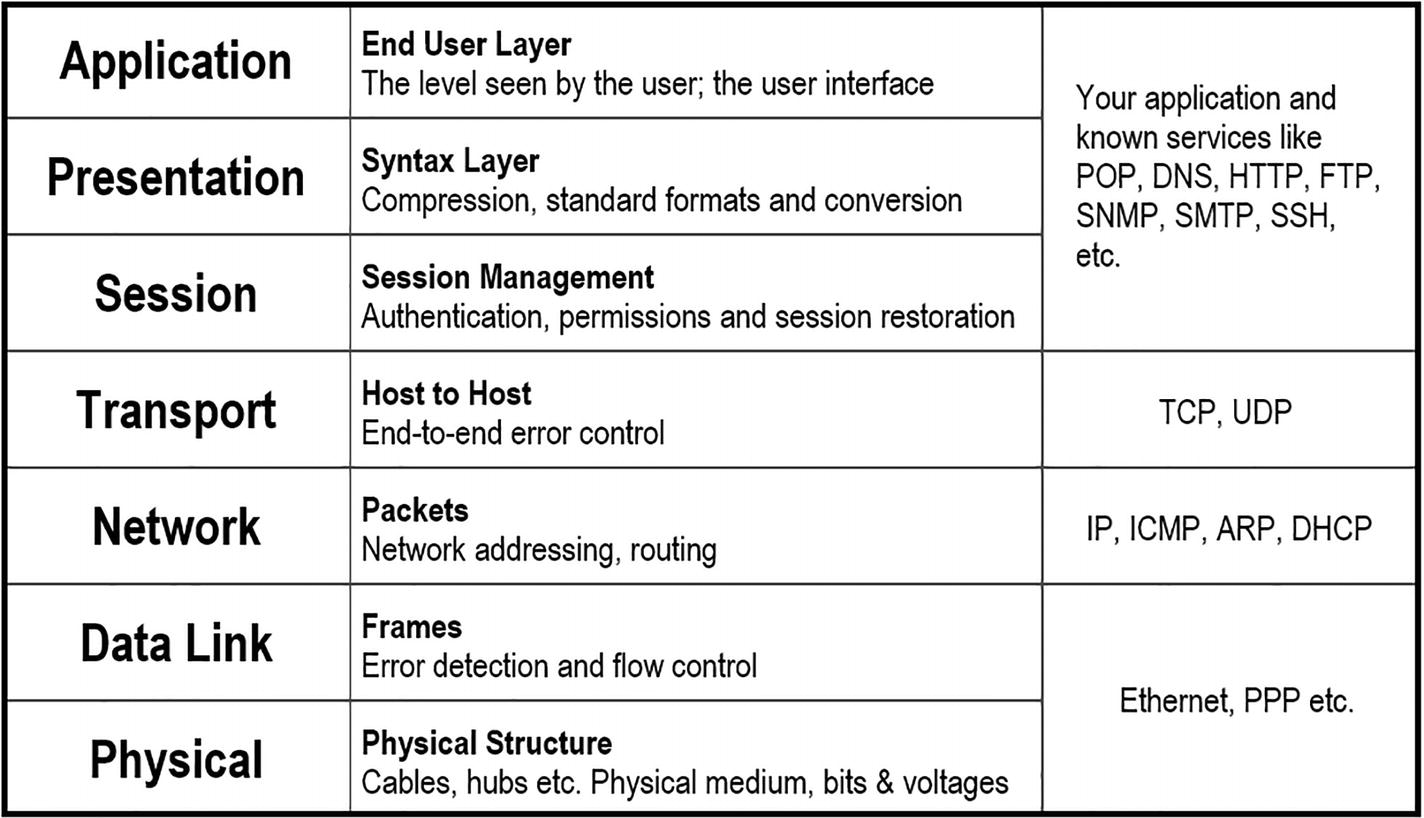
The OSI seven-layer network model
Your game might utilize some form of web service to get data for your game, such as leaderboards, friend’s lists, etc.
The UnityWebRequest class can be used to connect to a web server and perform web requests. It is possible to write your own code to do this using Sockets or TcpClient, but because this class exists and provides a lot of the functionality that you need already, it’s best to use it instead. Among other features, it can be used to get data from web pages using what is known as RESTful APIs.
What Is a RESTful API?
In its simplest form, a RESTful API is a way for clients to request data using a web URL (Uniform Resource Locator) and the request can be given a response in a known format from the server. The client can use HTTP verbs like GET, PUT, and DELETE to perform actions on the data. This matches up with typical CRUD (Create, Read, Update and Delete) operations like getting leaderboard data, saving or replacing player state, and deleting a save slot, for example. This means that the client does not have to be written in the same language as the server. Because the requests use URLs and standard HTTP messages, there is no need to open additional ports. The developer just needs to be able to request a web page to read or write information.
REST is short for REpresentational State Transfer . API is short for Application Programming Interface . As long as the client and the server agree on the messages – the format of the requests and their responses – and how those requests are made using HTTP, both the client and the server will understand the messages passed between them.
REST is a concept; it does not define the API. APIs are different for each service.

A RESTful request and response showing a GET request for a leaderboard and the JSON response that’s returned
RESTful Requests
An endpoint
A method
Headers
The data, also known as the body
The Endpoint
A Method
You need to look at the service’s API documentation to see the paths that it offers. For example, there is extensive documentation for the Steam API at https://developer.valvesoftware.com/wiki/Steam_Web_API. You could think of paths as being synonymous with functions and methods in a normal program.
The Headers
The headers provide extra information to the client and server. Headers can be used for a number of reasons, including authentication and providing additional metadata to the receiving device.
The Data
HTTP Verbs and Their Uses
HTTP Verb | Use |
|---|---|
POST | Create something new on the server, such as when a player logs in for the first time. |
PUT | Create or update. This could be used when saving player state to the server. |
PATCH | Update a small amount of information. For example, when the player updates their password. |
DELETE | Remove something from the game. For example, when a player deletes their account. |
RESTful Responses
The format of the response varies from service to service but it is typically formatted as a JSON string. This string can be easily converted into a class using a JSON parser like the one provided by Unity’s JsonUtility class.
Responses can also contain additional HTTP headers. These are the same HTTP headers as for the client/server requests. See https://developer.mozilla.org/en-US/docs/Web/HTTP/Headers for more information.
Authentication and Restrictions
You should be respectful of the limits placed by the API provider. They usually limit you to a few hundred calls per minute. More calls than that and you could find yourself banned from the service after repeat offenses.
The major difference is who owns the authority to use the website. With OAuth, the user must validate themselves to a provider like Google, Facebook, Twitter, or OpenID using a username and password. The result is that they receive a token to use with the remote server. The token is unique to the user.
In the case of the client application owning the authorization, the API key becomes the token. The token is unique to the application.
Always keep tokens and passwords safe! Do not let your token fall into the wrong hands!
In the weather application detailed later in this chapter, you will be using the simpler API token method for OpenWeatherMap rather than OAuth.
The UnityWebRequest Class
Reading and writing data to a remote website is made possible through the UnityWebRequest class . You do not create a UnityWebRequest class directly. Instead you use the Get() method and pass in the URL of the RESTful API endpoint.
The UnityWebRequest class is typically used in a co-routine because of its asynchronous nature. A request is made and at some point in the future that request is given a response.
A normal function in Unity must execute completely before anything else can complete. If there is a function that takes a long time, this will affect the performance of your game. To combat this, Unity created co-routines. These are functions that yield control back to Unity when they need to wait longer than a frame to complete. When the function is called again, it picks up where it left off. See https://docs.unity3d.com/Manual/Coroutines.html for more details.
Errors are handled by checking the isNetworkError and isHttpError properties once the request operation has completed. The text of the error is contained in the error property of the request instance.
The response is located in the text property of the web request’s downloadHandler. This is just C# code and no further processing is required. The response will usually be in the JSON format, so creating classes from it is a simple matter of using JsonUtility.FromJson<T>().
Fetching Text
Fetch the Google Home Page from the Web Using UnityWebRequest
The Start() method is a co-routine that will not stall out the game while the web request is waiting for a response. The SendWebRequest() method returns an enumerator that exits when either an error occurs or when the data has been received.
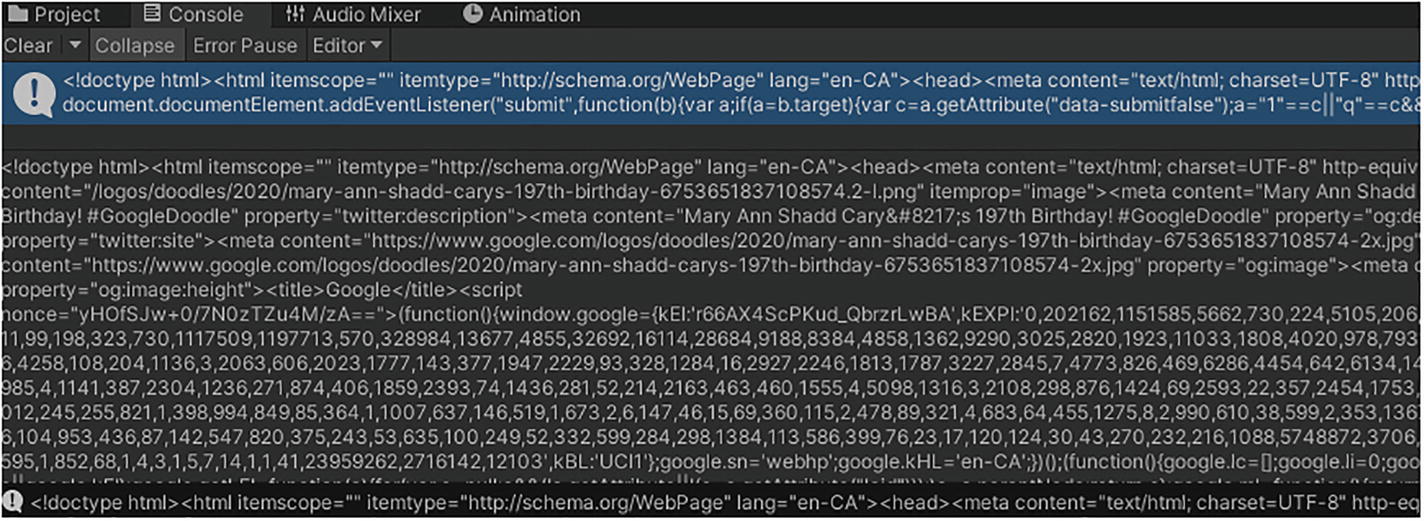
The output from the FetchGoogle script showing the contents of the Google home page’s HTML
A request is required for each resource. If you were building a web server, you would have to make several requests for the HTML page, each image, each stylesheet, and each JavaScript file needed to display the page completely.
Fetching Images
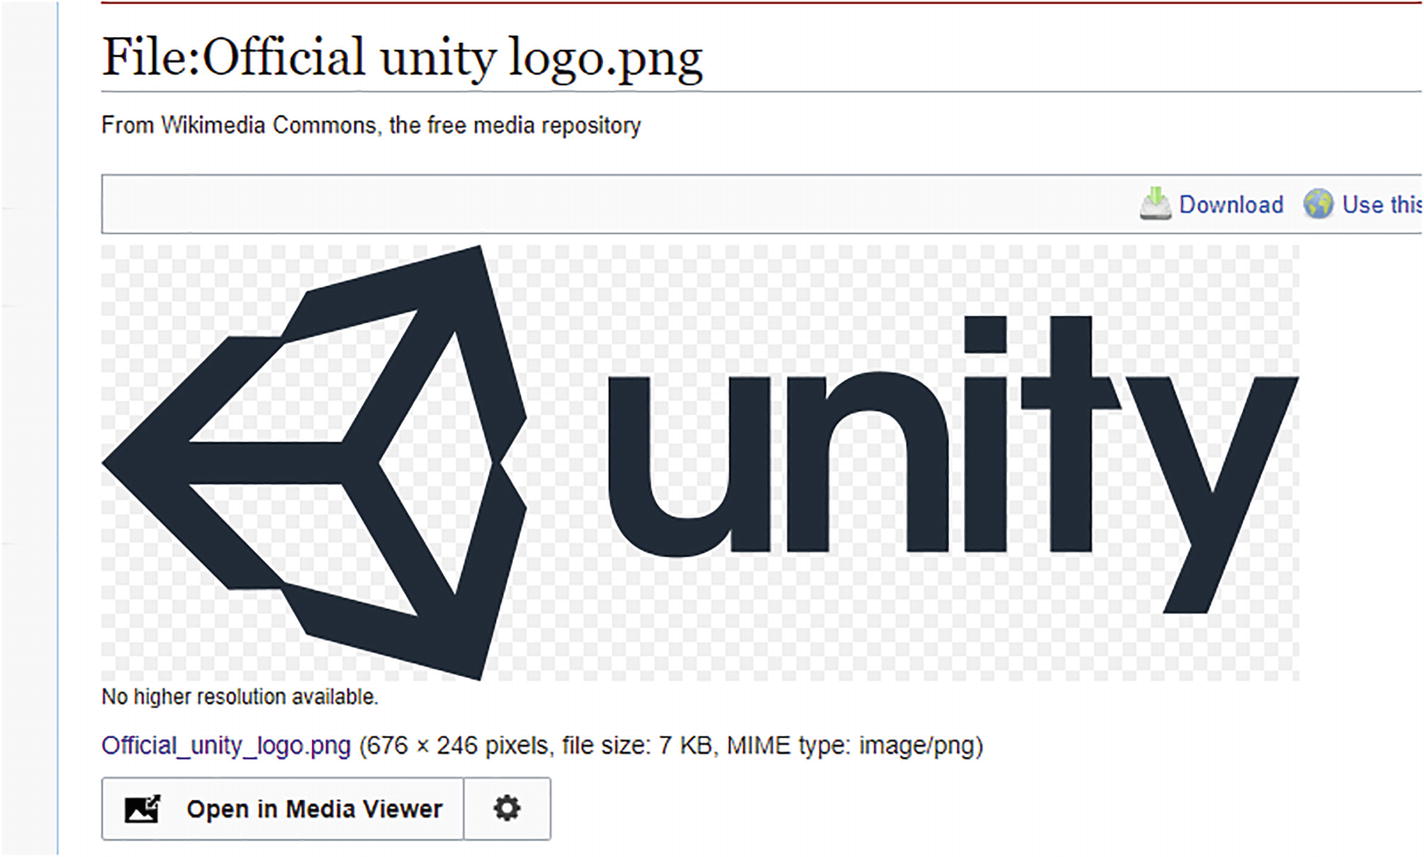
The Unity logo as shown on the Wikimedia Commons website
Creating the Project
- 1.
Create a new 2D project from Unity Hub named Fetch Example.
- 2.
Add an empty GameObject to the scene called Logo.
- 3.
Add a SpriteRenderer component to the Logo GameObject.
- 4.
Create a new folder in Assets called Scripts.
- 5.
Inside the Scripts folder, create a C# script called FetchLogo.
- 6.
Attach the FetchLogo script to Logo using the Add Component button or by dragging the script onto Logo.

The list of components added to the game object
Fetching the Image
The UnityWebRequest class is part of a group of classes that are used to download data from remote websites. To download an image, use the UnityWebRequestTexture class.
Fetching an Image from a Website Using UnityWebRequestTexture
Instead of using the Get() method, as you did for the text, the GetTexture() method is used. This returns an instance of UnityWebRequestTexture, but, the actual return is an object of type UnityWebRequest. You must do some casting to get the objects back to the type that you need in order to get the texture.
The download handler that is returned from a UnityWebRequest is a standard DownloadHandler instance. However, after casting the UnityWebRequestTexture’s downloadHandler property to the DownloadHandlerTexture class, we can access the downloadHandler’s texture property.
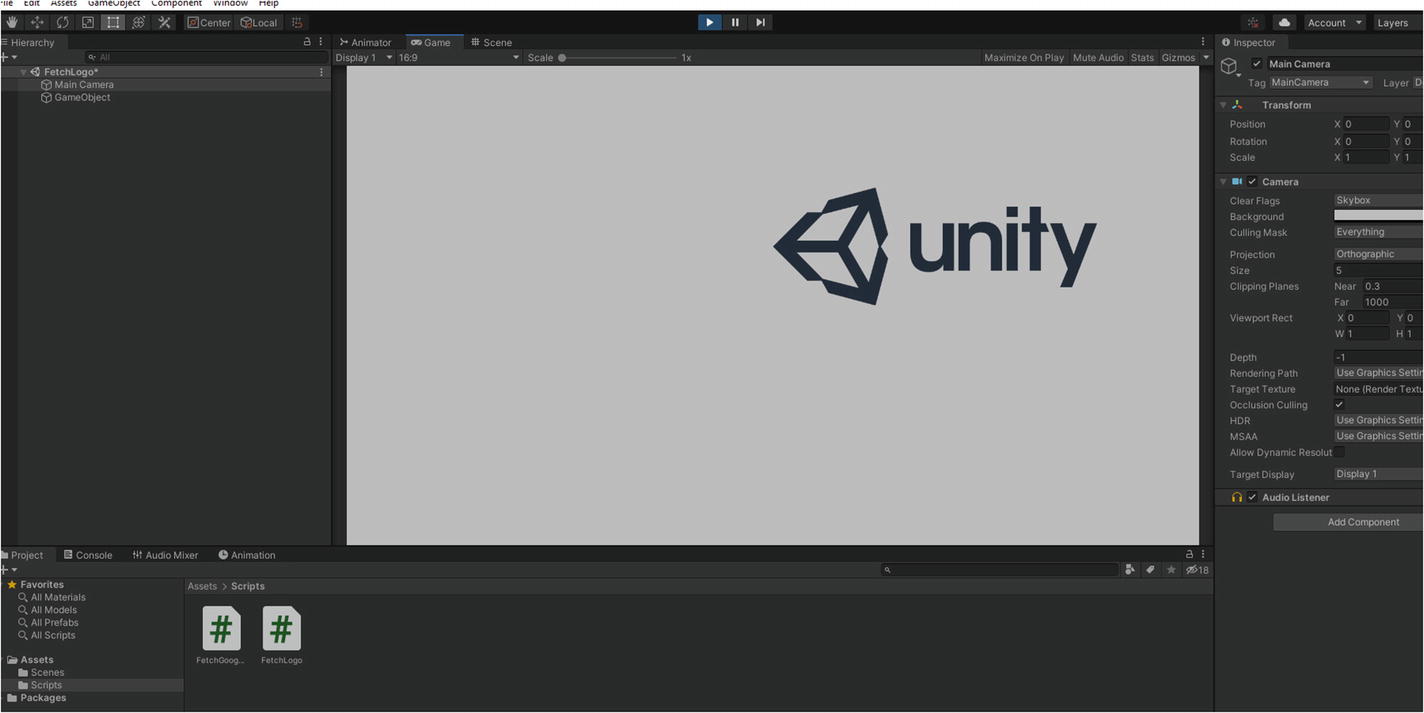
The Unity logo is displayed in the game after downloading it from the remote site
Fetching Other Types
Audio – UnityWebRequestMultimedia/DownloadHandlerAudioClip
Asset Bundle – UnityWebRequestAssetBundle/DownloadHandlerAssetBundle
Text – UnityWebRequest/DownloadHandler
Textures – UnityWebRequestTexture/DownloadHandlerTexture
Asset bundles can group assets together. Typical uses include texture packs and downloadable content (DLC).
The Weather Application
In this chapter, you are going to build a functioning application that uses data provided by a remote site. Access to the data is through a RESTful API and requires a token.
The OpenWeather home page
Registering and Getting an API Key
Before you start, you need to obtain an API key. This key will be used in all your queries. To obtain a key, you must first get an account with the site. To do that, locate the Sign In menu option along the top of the page and click the Create an Account link. This will take you to the sign-up page, as shown in Figure 3-8.
Once completed, you will get a confirmation message sent to the email account that you provided. Do not forget to verify your email address!
It can take upwards of two hours to get a confirmation back while OpenWeather creates a valid key.

The OpenWeather sign-up page
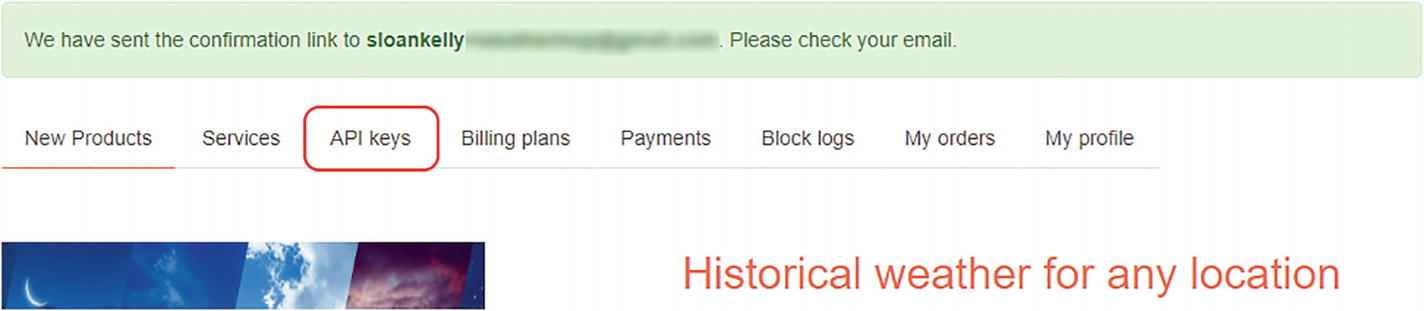
The API Keys link shown in a box

The default API key has been renamed Unity Net Book
Each new application requires a different API key.
The User Interface

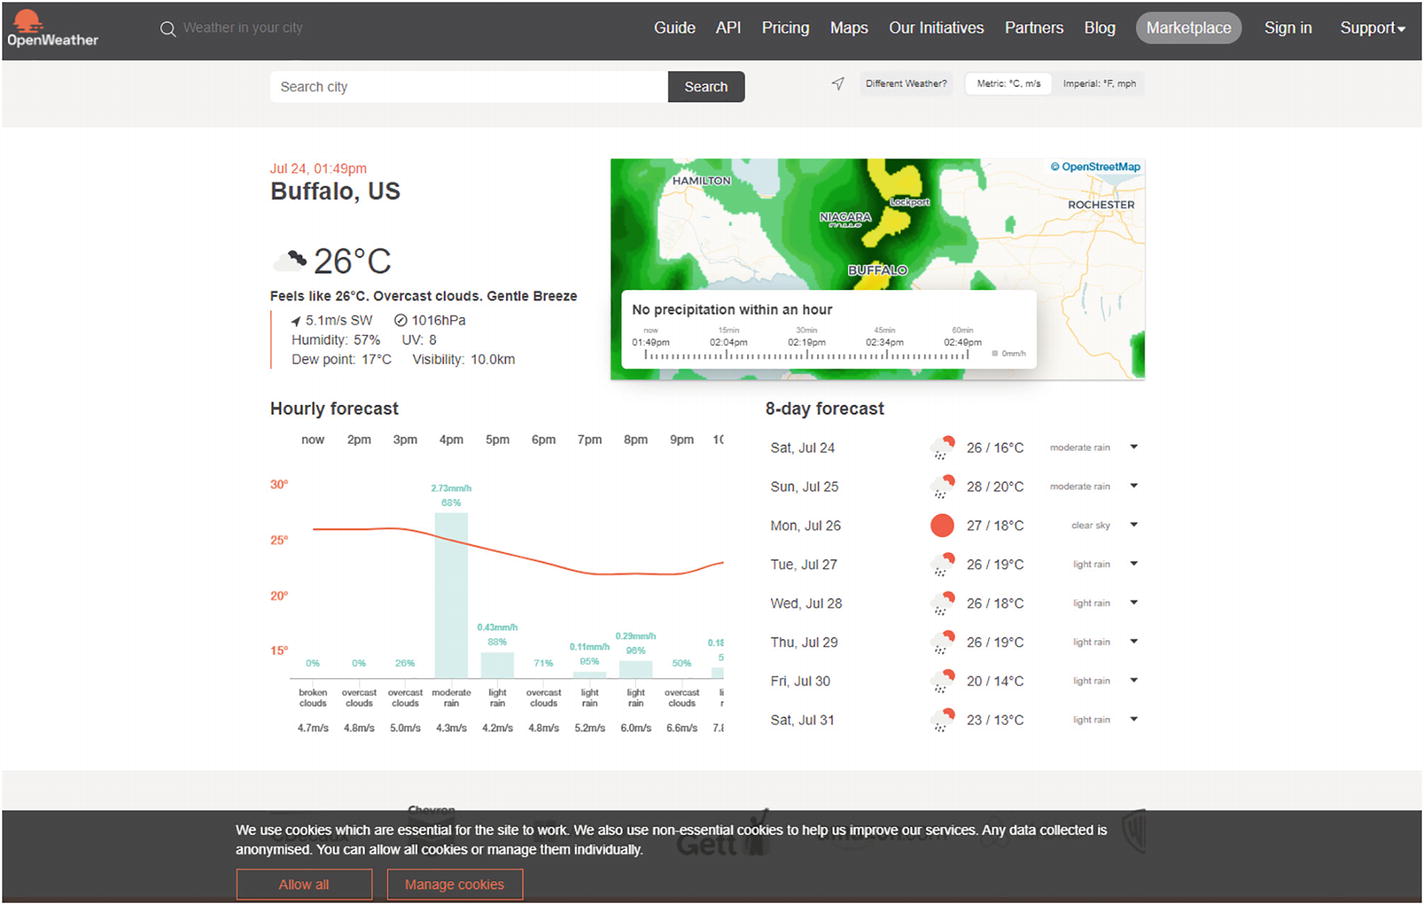
The application showing the five day forecast for New York City
The resources for this project can be obtained by clicking the Download Source Code button located at www.apress.com/9781484273579. This includes the images for the weather icons, the prefabs for each day, and the fonts.
Creating the Project
- 1.
Create a new blank 2D project in Unity Hub named weather-app.
- 2.
Import the weather-application.unitypackage from the resources folder on the GitHub repo to get the prefabs, images, fonts, and starting scene.
Importing the weather-application.unitypackage

The Import Unity Package window showing the contents of the weather-package.unitypackage
The OpenWeather Daily Forecast Endpoint
The endpoint takes in three parameters that will be passed to the method using an HTTP query string, which you need to provide in order to obtain the data.
A query string is set of key-value pairs that appear after the question mark (?) character in a web address. The key and the value are separated by an equals sign (=). Query strings are not secure because they are part of the web address and are sent in plain text.
q – The city and country code of the location.
cnt – The number of days to return. You will set this to 5 in your example.
appid – The API key for the application.
Fetching the Data
With the barebones project imported via the package, you need to create additional scripts that will:
Provide classes to decode the JSON message received from the API call
Use a common function to make the call to the API
Send out the request when the user clicks the Fetch button
FetchResults
OpenWeatherMapAPI
ResponseContainer
ResponseItem
ResponseTemperature
WeatherItem

The project hierarchy for the weather application
Serialization Classes
The serialization classes in Scripts/Serialization will just be plain classes with public fields that will be populated with data.
Unity’s JsonUtility can only serialize/deserialize public fields. Do not use properties for your serialization classes!

Example showing the shape of the data returned from the API endpoint for daily forecasting using the OpenWeather API
The date (dt), sunrise, and sunset fields are 10 digits long. These values are the number of seconds since midnight on 1/1/1970. You’ll learn how to create a function to convert them to something human readable later in the UnixTimeToDateTime() function .
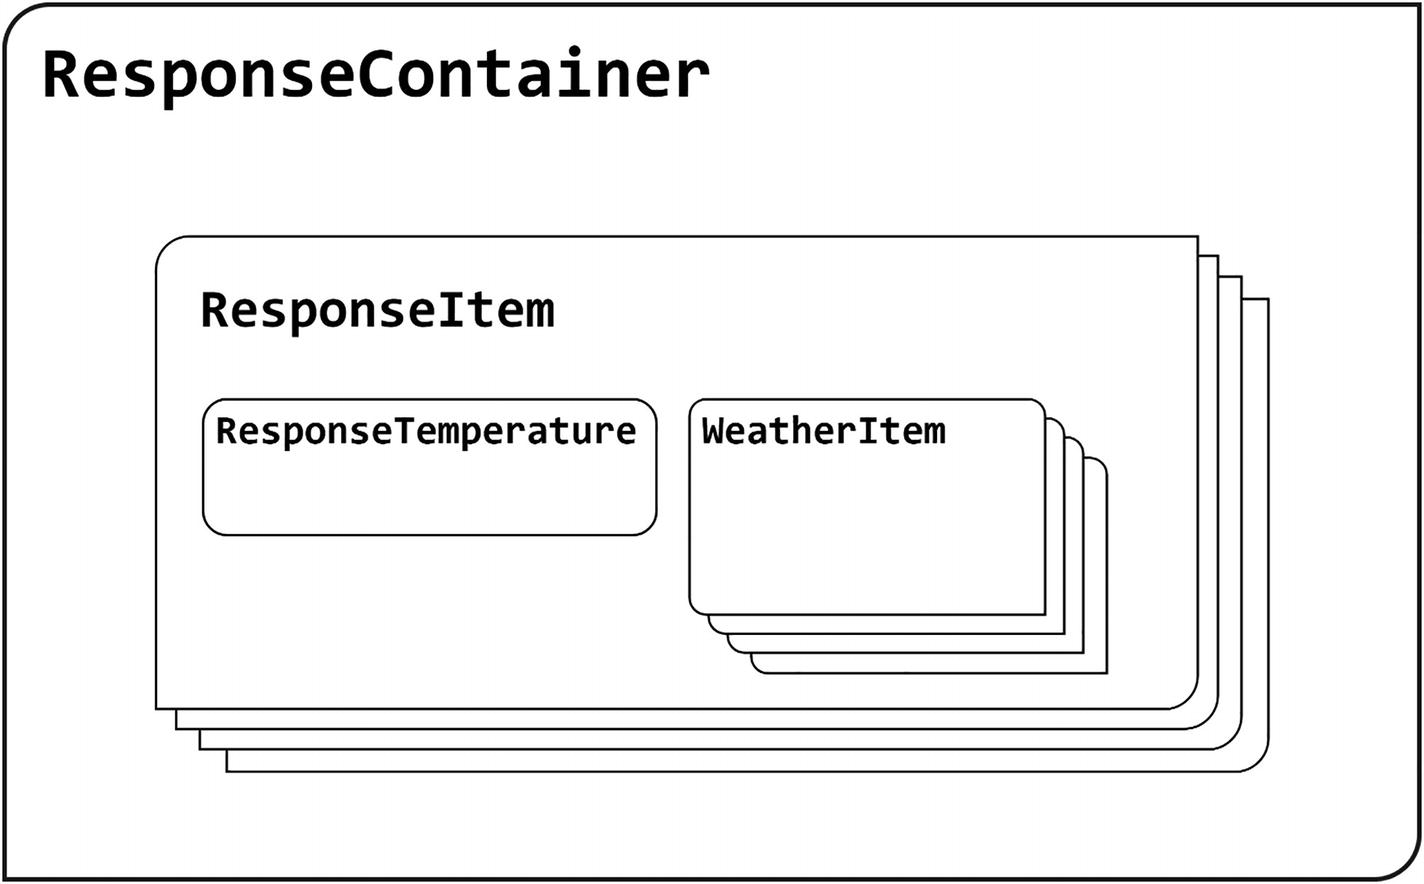
The parent-child relationships of the response message from OpenWeather’s API call
The ResponseContainer is the message received from the server. Each ResponseItem is a day of the week.
The WeatherItem Script
This class contains the icon used to visually represent the weather as well as a description of the weather itself. Paired with the WeatherItem class is the ResponseTemperature class, shown in Listing 3-4. It contains, unsurprisingly, the temperature for the parts of the day. The temperatures returned from the API are in Kelvin. You will write a function called ToHumanTemperature() that will convert the temperature from Kelvin to Celsius or Fahrenheit.
Zero Kelvin is approximately -273 Celsius or -460 Fahrenheit!
The ResponseTemperature Script
The ResponseItem Script
The dt, sunrise, and sunset fields are not in the DateTime format. This is because the OpenWeatherMap API returns times in what is called UNIX Epoch time. This is the number of seconds since midnight on 1/1/1970.
The ResponseContainer Script
Now that the serializable classes have been defined, you can take a look at creating a MonoBehaviour that queries the OpenWeather endpoint for a particular location and returns the result to the caller.
Calling the API
As in the previous examples, you will use the UnityWebRequest class to fetch the data from the remote server. JsonUtility.FromJson<T>() is used to create the ResponseContainer from the JSON response.
The OpenWeatherMapAPI MonoBehaviour Script
Notice that the endpoint is stored as a constant called ApiBaseUrl and the string.Format() method is used to place the query and the API key in the query. Also of note is the UrlEncode() method, which is used to encode the query string.
This MonoBehaviour is used by the final script that you write, which acts as a controller for the whole application. If you were writing an application that uses a lot of API calls, it would be rather inefficient to rewrite this over and over again. At the end of this chapter, you’ll take a look at making this more generic.
The Controller: Final Wiring
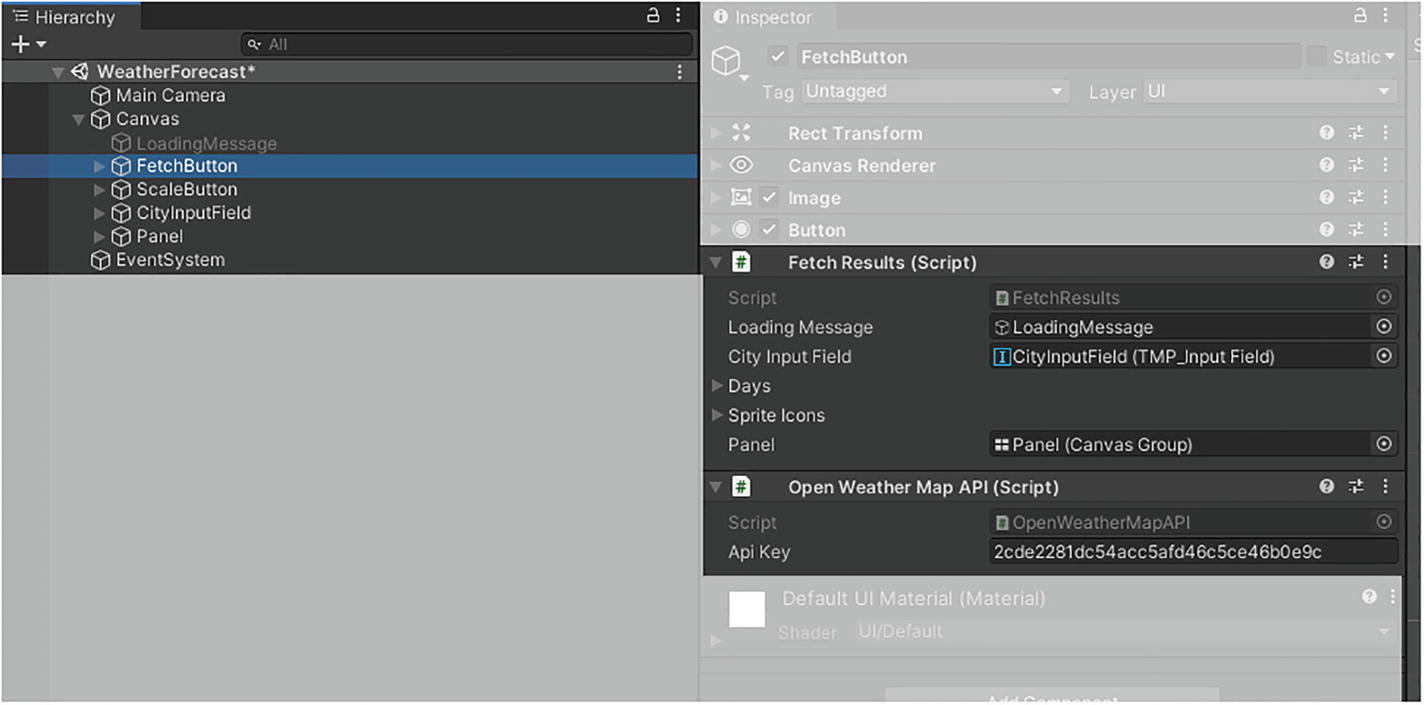
The FetchButton GameObject with the two script components: FetchResults and OpenWeatherMapAPI
The FetchResults MonoBehaviour script
The final thing to do is to enter the API token on the OpenWeatherMapAPI script in the Unity Editor. At this point, you can test the application—everything is complete!
Running the Weather Application
The code is typed exactly as written
You have a network connection
You have entered the API token correctly
Your token is valid
Remember that it can take up to two hours for the token to be validated by the OpenWeather service. Check your email!
Generic RESTful API Client
As I mentioned earlier, you may find yourself doing multiple calls to various endpoints to build your client. If this is the case, it is better to abstract the remote call out of the class and into a helper class.
endPoint – The endpoint of the API method
onSuccess – An action to be called when the data has been successfully received by the client
onError – An action to be called when the data could not be retrieved by the client
The RestfulHelper Class
The Refactored OpenWeatherMapAPI Class Utilizing the RestfulHelper Static Class
The Modified FetchData() Method in the FetchResults Class
The bold code line is the one that performs the API call to get the forecast data. The FillDays() method will be called automatically once the remote call has completed successfully.
Summary
Your game can act as a client to a remote service that exposes various methods using a RESTful interface. This will allow you to perform read and write operations on remote data. These are performed by requesting a particular URL or endpoint.
There are two methods of authentication: one is per user, the other is per application. OAuth requires users to sign in to a service like Google, Twitter, etc. and obtain a token. The alternative is that the application provides the token. The token is then passed via each call to the remote server to validate the request. Out of date or invalid tokens will get rejected.
Results from the remote service are usually returned in a JSON format. Classes can be easily created using the JSON function built into Unity.
If you are making multiple calls to different endpoints, it is a good idea to create a generic function to perform the remote calls.
The weather application uses a high-level client server architecture. It’s now time to switch gears and look at the lower-level socket programming that is provided as part of the .NET framework, as this will allow you to create your own protocols.