
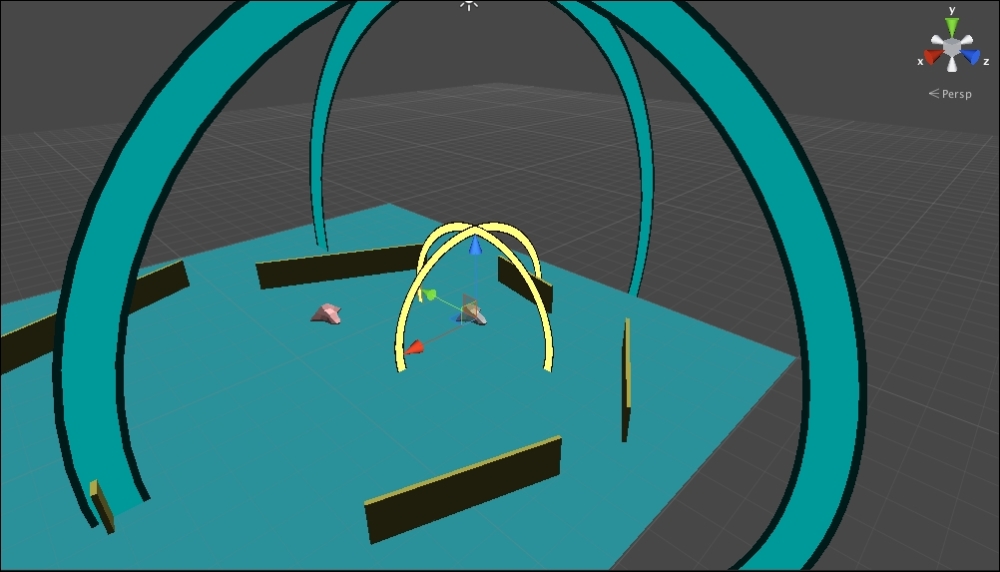
In the first demo, we will build an enemy ship that senses for the player, and if it sees the player, it starts moving toward it and then attacks it. A simple version of this would be to have the enemy wander with a visual sensor to detect the player, and if it sees the player, the enemy will move toward it and attack it. This would work but it really wouldn't be any different from the demo from Chapter 7, Adaptation, where the ship had to search for and collect gold. To make it a little different, we'll use a two-sensor approach. We will have one larger sensor on the enemy that detects the player, and if the enemy senses the player aspect, it will start chasing the player. Then, there is a second smaller sensor that attacks the player, that is, if it senses the player, then the enemy stops chasing and it instead attacks. This gives the effect of chasing the player but when the enemy gets closer, it stops and starts attacking, instead of just chasing and attacking at the same time.
To begin setting these up, go to the Perception tab on the enemy AI rig (the little eye icon tab) and add a visual sensor called ChaseSensor. This should be pretty large and cover most of the scene. Then, add a second visual sensor and call it AttackSensor. Make this one about a third the size of ChaseSensor. The setup should look something like the following screenshot:
The preceding screenshot shows our enemy setup with two sensors: one will be used to chase and the smaller one will be used to attack.
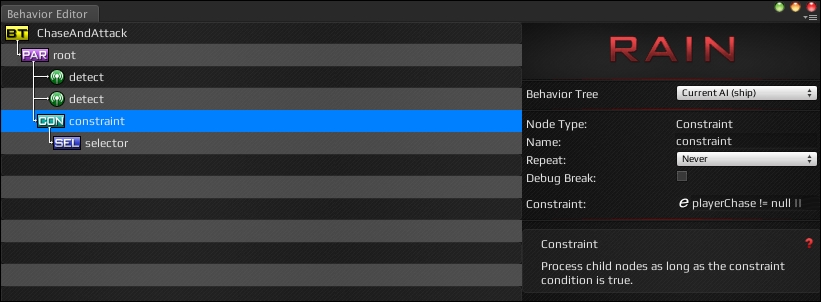
Now we have our sensor, we can work on the behavior tree for the enemy. Select the Mind tab of the enemy AI rig and open the behavior editor. Create a new behavior tree called ChaseAndAttack. The enemy will detect and chase or attack the player at the same time, so right-click on the root node and change its type to Parallel. Then, add two detect nodes, one for the chase sensor and one for the attack sensor. For the chase detect node, set Sensor to "ChaseSensor", Aspect to "player", and the form variable to playerChase (remember to watch out for the quotes). For the attack sensor, set Sensor to "AttackSensor", Aspect also to "player", and the form variable to playerAttack. Then, add a constraint node, which will go off if either of the sensors has found something, so set its constraint to playerChase != null || playerAttack != null. Then, add a selector node under the constraint node that will handle the attack and chase logic. The multiple visual sensors behavior tree should look like the following screenshot:
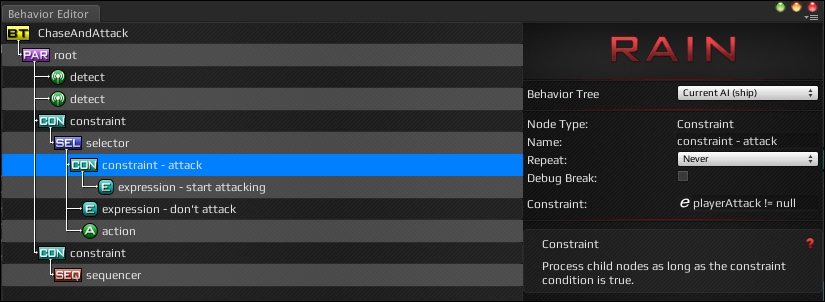
Remember the selector node will continue to run its children until one succeeds, so first we will check for attack. If playerAttack has a value (that is, it is not null), we will set isAttacking to true, and if not, set it to false. Add a constraint node under the selector that checks for attacks and set its constraint to playerAttack != null. As the playerAttack variable is not null, add an expression node to start attacking with an expression value of isAttacking, which is equal to true.
Then, if playerAttack is null, we want the attack to stop, so add another expression with isAttacking, which is equal to false. The attack setup on our enemy behavior tree should look like the following screenshot:
If you run the demo now, when the player gets sensed by AttackSensor, the enemy will start attacking and stop when the player is out of range.
Finally, we need to have the enemy chase the player if it is not attacking, so add a custom node called Chase to the bottom of the selector. Create a Chase script for it and set the Chase code to the following:

This code first finds the player GameObject and then just moves to the player's position. This is unlike the code in the demos in Chapter 7, Adaptation, where we did a check to stop moving if the character gets very close to the moving target. When the character gets close to the target, it will stop moving and start attacking, so we don't need checks. If you run the demo now, the enemy will chase the player and start attacking:

The preceding screenshot shows how an enemy attacking the player will look at the end.