This chapter looks at how to implement React Router on React applications in order to build single-page applications. It starts by building simple nesting routing structures and then goes on to create parameters via URL parameters in the routes. This chapter will enable you to design missing pages by displaying an appropriate page not found message to the user. You will be equipped with techniques that will enable you to introduce navigation into your application. By the end of this chapter, you will have a solid foundation of using basic React Router.
Introduction
When you are building a single-page application in any language or framework, it is typically not just one giant static page. It usually has links to help you navigate to the other components or sections of the application. A major part of the success of any such application goes to the design of the page-level manipulation, where there are different section links that enable you to navigate around the application with a sense of purpose. React remains no different in this regard. In fact, React has the ability to create a similar number of different URLs or paths that can be used to navigate around your app and to each of the individual components in a way that feels organic and intuitive to the user.
The goal of any single-page app is that the user should feel as though they are navigating through just a regular site but with far more interactivity. React Router goes a long way toward establishing that feeling by building a system for integrating different URLs seamlessly into your app but keeping the user within the confines of your React application.
This chapter includes a few hands-on approaches to explore the functionalities of React Router. Let's get started.
Understanding Browser Routing
Modern web browsers have History and Location APIs that provide access, through the browser, to the different parts of the browser's history, location, and state. By using this functionality, you will be able to effectively handle routing. For example, the History API in modern browsers exposes the web browser's current session state and allows you to manipulate that state, either by moving forward using forward(), moving backward using back(), or moving to a specific point in the history using go().
The Location APIs allow JavaScript code to inspect the current location and path through the window.location.href and window.location.path properties and pull different types of information from it, allowing developers to figure out the navigation paths on a website and handle them accordingly.
React Router is a library for React that handles navigation and URLs and translates them into displaying the appropriate component for the URL.
React Router watches for state changes in the browser (via History), gets information about where the user currently is and where they're going (via Location), and uses the combination of the two, along with the JavaScript events, to build a set of routes and components to handle those routes. Let's go through the following exercise to build a basic React router using the Location API.
Exercise 9.01: Building a Basic Router using the Location API
In this exercise, we will create a simplified router using the Location API. This will help us to understand a little more about how the React Router works, since being able to understand the underlying code concepts will help us to learn how to use libraries better:
- Start by creating a new React app:
$ npx create-react-app router
- Go to the src/App.js file, delete logo.svg and App.css, and then clear out the contents of App.js.
We will need to access a few properties via the Location API, specifically through window.location. Inside App.js, create a new React functional component called App, and display two key properties: window.location.href and window.location.pathname. Add the window.location.href and window.location.pathname properties as follows:
import React from 'react';
const App = () => (
<div className="Router">
<h1>Example Router</h1>
<hr />
<p>href: {window.location.href}</p>
<p>path: {window.location.pathname}</p>
</div>
);
export default App;
This component is just a standard functional component that will only display the two properties that we listed. The window.location.href property will display the full URL including the protocol and the domain name, while the window.location.pathname property will contain only the pathname variable. Between window.location.href and window.location.pathname, the former property will not be of much help; instead, we only care about the pathname variable.
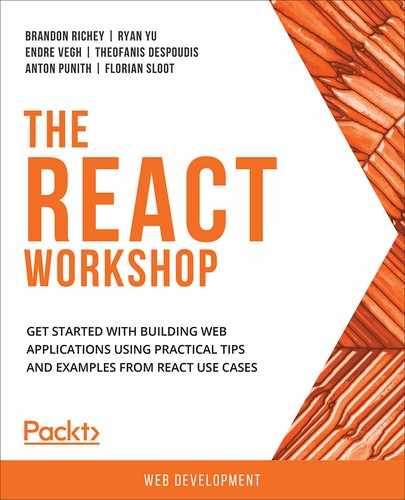
- Try typing multiple URLs into your browser, such as http://localhost:3000/about or http://localhost:3000/foo. You should see /about or /foo show up in your component:

Figure 9.1: Basic router app
As you can see from Figure 9.1, the path variable contains what we really need: that is, information about the domain and port that will tell us what route or component the user is trying to navigate to.
From here, we can start implementing our basic router, which should just be a function that returns a valid component. To do this, we are going to split the path property when a forward slash is encountered.
Note
The catch here is that the split operation will return both sides of the string, whether there is a value present or not.
/about will split at the forward slash, /, returning two values: a blank string and about. We also want our paths to be case-insensitive. We can do this by changing the pathnames to lowercase.
- Using the preceding guidance, create a RouteTo utility function that will split the path at the forward slash:
const RouteTo = path => {
const paths = path
.split('/')
.map(p => p.toLowerCase())
.slice(1);
switch (paths[0]) {
default:
return <div className="Default">Default Route</div>;
}
};
Note
The p argument in the map method is an ES6 arrow syntax for defining a function, while p is a temporary variable that gets declared within the scope of this function.
Inside the RouteTo utility function, we have created an array, called paths, that essentially contains two values: an empty string and about (in lowercase). We obtained these values after splitting path at the forward slash, /. We also have a default case where we have defined a route in case there are no paths to display.
- Now we need to hook up the browser's Location API to our component, which We will do by placing a call to RouteTo() (that is, the function that we just wrote) in our render() function.
- Call the RouteTo() method and hook the window.location.pathname property to it:
const App = () => (
<div className="Router">
<h1>Example Router</h1>
<hr />
<p>href: {window.location.href}</p>
<p>path: {window.location.pathname}</p>
<hr />
{RouteTo(window.location.pathname)}
</div>
);
- Refresh the page. We should expect to see Default Route show up at the bottom of the page because we haven't created an about page yet:
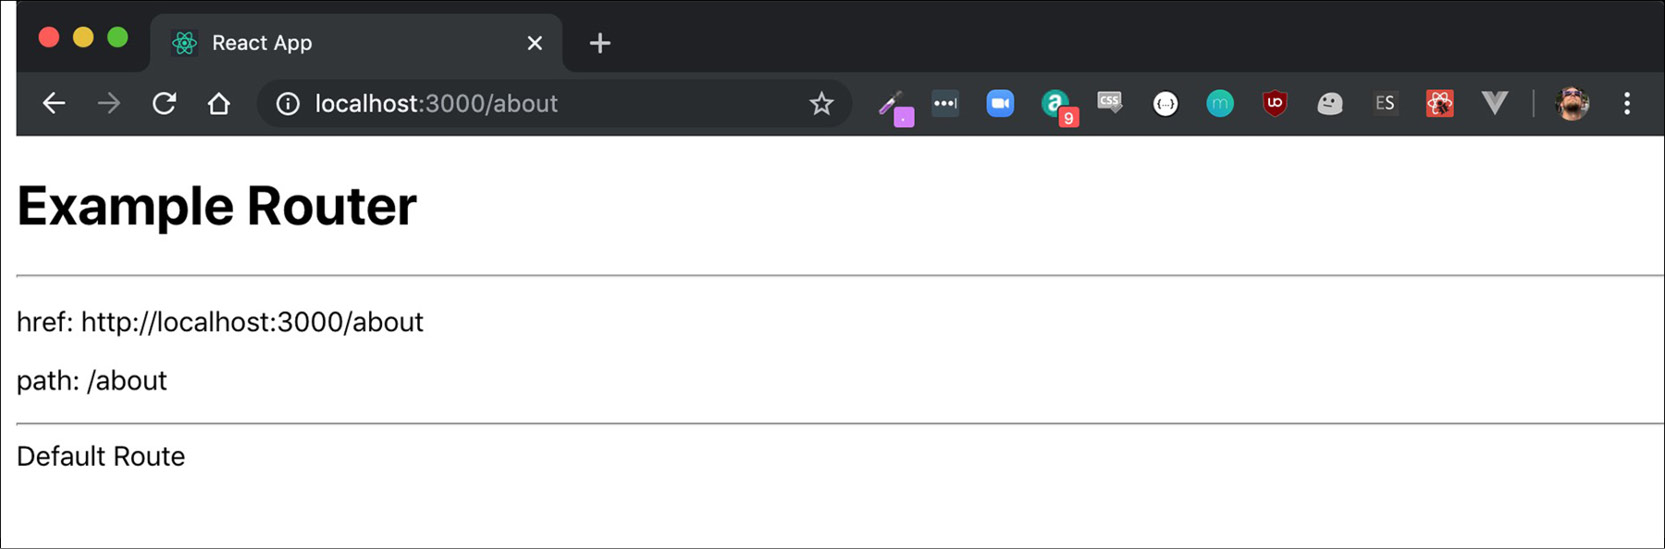
Figure 9.2: Showing Default Route
Now, let's implement a simple route. We will start off by adding one for /about, which will take us to an about page. The easiest way to do it is by adding a new functional About component.
- Add an About functional component to our existing app:
const About = () => (
<div className="About">
<h1>About Page</h1>
<hr />
<p>Information about your app or who you are would go here.</p>
</div>
);
- Next, add an entry to the RouteTo function by adding another entry to our switch statement:
const RouteTo = path => {
const paths = path
.split('/')
.map(p => p.toLowerCase())
.slice(1);
switch (paths[0]) {
case 'about':
return <About />;
default:
return <div className="Default">Default Route</div>;
}
};
Note
The p argument inside the map method is an ES6 arrow syntax for defining a function, where p is a temporary variable that gets declared within the scope of this function.
As you can see from the preceding code, a switch statement has been introduced, where the paths array has been passed as an argument. While looping through paths, when about is encountered, the <About/> component gets displayed.
- Now, visit /about in your browser, where you will see the About route. If you visit another URL, you will instead see the Default route as shown below:

Figure 9.3: App showing the about page
Now that we understand the very basics of how React Router works behind the scenes, let's move on to using React Router. The importance of doing this yourself the first time is to understand what is going on under the hood. Once you demystify complicated concepts, you can learn them much faster.
Basics of React Router
We have now looked at what we can accomplish through the browser's own built-in Location APIs. Imagine a library that is far more fully featured and built to accommodate the explicit purpose of making single-page applications way easier to navigate via browser mechanisms that the user is likely very comfortable with. The React Router library provides the functionalities that you require to make an application more interactive and intuitive. The library has gone through a few different revisions over the years, but the core of how to use it has remained similar across all iterations.
React Router provides several different built-in mechanisms for routing to components, handling default and error routes, and even more in-depth functionality such as dealing with authentication.
When we talk about React Router, a discussion of a few key components that will be imported and used while building the React Router project is necessary. So, let's get started:
- The first thing we need to import is BrowserRouter, which we will alias in our import statement as just Router. This is the top-level component inside which we need to wrap our routable code.
- Next, we will import Switch. You can think of the Switch component functioning in the same way as the switch statement used in the first exercise. This includes all the route decisions that need to be made while building an application.
- Finally, we will import Route. Think of Route as each of the case statements in the switch block from the first exercise. Each Route indicates a path to trap and render a particular component or bit of JSX code.
Note
The order of the Route components in our application is important. The program will start matching the routes will match from top to the bottom and will return the first route that is applicable. This means that if you have the default route (that is, the one without a pathname variable specified for it) above the about route, then you will never be able to reach the about route. Therefore, we have to be careful while setting the order of these components.
The best way to learn React Router, however, is to start building with it. So, let's jump right into our next exercise and start building a simple route-based app.
Exercise 9.02: Implementing a Switch Router
In this exercise, we will create a new app that mirrors the functionality we implemented in the previous exercise.
We will start by building our App component as a functional component and include the Homepage component first, and then, eventually, we will add the About component. We are going to use the order of Router -> Switch -> Route in order to switch between these components. Perform the following steps to achieve this:
- Start off by creating a new React app, and call it router-example:
$ npx create-react-app router-example
- Add React Router through the react-router-dom package using Yarn:
$ yarn add react-router-dom
- Delete logo.svg and App.css, and then clear out the contents of App.js.
- Add the About component from the previous exercise to this project. You can declare it inside of src/App.js for now:
import React from 'react';
const About = () => (
<div className="About">
<h1>About Page</h1>
<hr />
<p>Information about your app or who you are would go here.</p>
</div>
);
export default About;
- Build a quick Homepage component to represent our default route:
const Homepage = () => (
<div className="Homepage">
<h1>Homepage</h1>
<hr />
<p>This is our homepage.</p>
</div>
);
- First, add our import statements for React Router. We specifically need a few different import statements to account for how React Router works, as mentioned earlier:
import { BrowserRouter as Router, Switch, Route } from 'react-router-dom';
- Inside the App component, use the Switch router in order to switch between the Homepage and About components:
const App = () => (
<Router>
<Switch>
<Route>
<Homepage />
</Route>
</Switch>
</Router>
);
export default App;
This should give us the following application to start, regardless of what URL we add:

Figure 9.4: Homepage
- Add an /about route that displays the About component we created earlier:
const App = () => (
<Router>
<Switch>
<Route path="/about">
<About />
</Route>
<Route>
<Homepage />
</Route>
</Switch>
</Router>
);
Here, we specify the path attribute for the route that sends the user to the About component and append the /about string in the URL Going to http://localhost:3000/about in our browser now will send us to the About component instead of the home page:
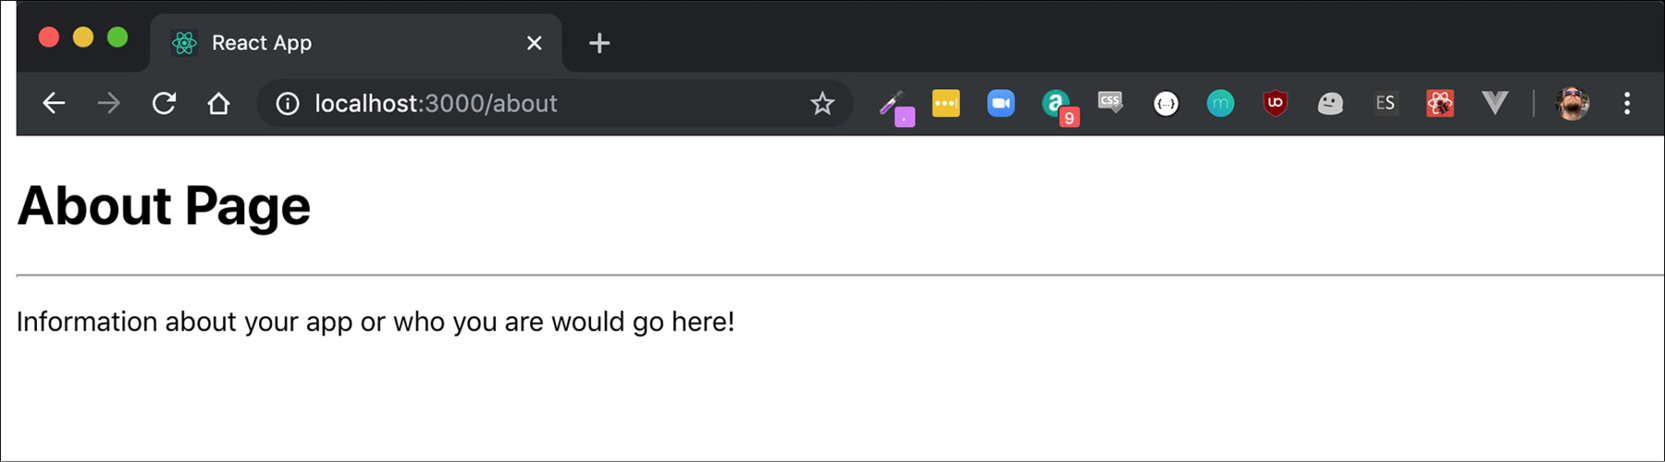
Figure 9.5: About Page
As you can see, the About page gets displayed when requested. You can see how easily we can use the Switch router in order to switch between the components.
Note
Routes are case-insensitive by default; so, if you went to http://localhost:3000/ABouT, it would still work and appropriately route you to the About component.
Adding Params to Your Routes
Frequently, while working with routes, we might encounter a problem where we need to customize what is displayed on a page based on a little bit of information being passed into the page or path. A good example of this is with something like search pages, where you might have a URL such as https://search.com?q=search_term, where q is the URL parameter and search_term is the value of that parameter.
Now, if we want to customize the display result based on the search_term value, you will need to do a little more legwork than just the simple routing example we used before. First of all, you will need to include a new import statement from react-router-dom called useLocation. useLocation allows you to parse out more details about the current location in the browser and convert the data into variables. Using this, we can pull the query parameters out via the useLocation utility, specifically from the search property on useLocation. We can then build a new URLSearchParams object and use that to pull the specific parameter we want. For example, if we wanted to pull the q URL parameter out, we could do so via the following snippet:
import { useLocation } from 'react-router-dom';
const Search = () => {
const query = new URLSearchParams(useLocation().search);
const term = query.get('q');
return (<div className="Search"></div>);
};
Note
In the preceding example, the call to useLocation().search function happens from inside a React functional component, Search.
Let's now put this into practice by building a quick and small Search component using the preceding snippet of code.
Exercise 9.03: Adding Params to Routes
In this exercise, we will create a Search component that will be designed to display a search results page. We will create a results list and design a search query. We will then append this query as a parameter to the URL. We will then match this with the items in the results list. In the case of a match with an item from the results list, we will display the matched items on the page. To do this, let's go through the following steps:
- Start off by creating a new React app, and call it search:
$ npx create-react-app search
- Add React Router through the react-router-dom package via Yarn:
$ yarn add react-router-dom
- Delete logo.svg and App.css, and then clear out the contents of App.js.
- Add our standard React Router import statements at the top:
import {
BrowserRouter as Router,
Switch,
Route,
useLocation
} from 'react-router-dom';
- Add a quick Homepage component to represent our default route:
const Homepage = () => (
<div className="Homepage">
<h1>Homepage</h1>
<hr />
<p>This is our homepage.</p>
</div>
);
- Next, let's set up our main App component with all of the React Router code. We don't have a Search component yet, but We will be adding that next, so we're going to add the code for that now:
const App = () => (
<Router>
<Switch>
<Route path="/search">
<Search />
</Route>
<Route>
<Homepage />
</Route>
</Switch>
</Router>
);
- Now, let's start building the Search component. We will start with a quick shell for a Search component and then flesh out the meat of it:
const Search = props => {
const term = '';
return (
<div className="Search">
<h1>Search Page</h1>
<hr />
Found results for {term}:
<ul>
<li>No results.</li>
</ul>
</div>
);
};
- Add a list of items that we can search across at the top of our project:
const Items = [
'Lorem Ipsum',
'Ipsum Dipsum',
'Foo Bar',
'A little black cat',
'A lazy fox',
'A jumping dog'
];
- Next, add a search function that will perform the search across that list of items. This should take in term as the only argument, and if no search term is passed in, the entire list is returned. From there, we will change each list item to lowercase as we traverse through it and filter it down to only the items where the search term appears:
const doSearch = term => {
if (!term) {
return Items;
}
return Items.filter(
item => item.toLowerCase().indexOf(term.toLowerCase()) !== -1
);
};
- Finally, we will flesh out the Search functionality using the code snippet we provided before this exercise, and map over each of the returned items from the search code in an enclosed <li> tag:
const Search = props => {
const query = new URLSearchParams(useLocation().search);
const term = query.get('q');
const returned = doSearch(term);
return (
<div className="Search">
<h1>Search Page</h1>
<hr />
Found results for {term}:
<ul>
{returned.map(t => (
<li key={t}>{t}</li>
))}
</ul>
</div>
);
};
- Now, if we search for something such as ipsum, we should expect to see only the appropriate search terms returned to us:

Figure 9.6: Search Page displayed
As you can see, when we add a parameter in the search query, q=ipsum, that matches an item from the results list created in Step 8 of the preceding exercise, the page displays the items containing the word ipsum. (Note that the casing of the word is ignored.)
Let's move on to the next section, in which We will design components for instances where we might encounter a resource not found error when a user visits our site.
Adding Page Not Found for Routes
Sometimes, you will want to be able to display something meaningful to the user when they attempt to visit an incorrect URL for your site, instead of just showing the 404 error. This could be something funny, on-brand, or something memorable. However, in order to do something like this, you need to be able to catch those missed pages and display a NotFound component. One of the first things you will need to change is the previous default route that we had set up, which did not specify a pathname.
Try setting up your routes like this:
<Router>
<Switch>
<Route path="/search">
<Search />
</Route>
<Route>
<Homepage />
</Route>
</Switch>
</Router>
Here, you can see that there is no room for anything to fall through when someone enters a bad route when a component is not found. It is often better to be more explicit while working with routes:
<Router>
<Switch>
<Route exact path="/">
<Homepage />
</Route>
<Route path="/search">
<Search />
</Route>
</Switch>
</Router>
Notice that, in the preceding example, the path for the Homepage component is now listed above the Search component and has a few new properties attached to it. Specifically, we have added the following properties:
- exact, which has a default value of true when specified this way.
- path, which points to /. This means it will ONLY match when the path is ONLY / with no variation. This prevents scenarios where it would catch everything else. Now we can add a 404-display component.
We can create an explicit catch-all route by using path= to allow it to catch any other routes entered. Let's put this to the test in the next exercise.
Exercise 9.04: Adding a NotFound Route
In this exercise, we will create a NotFound route in case a component does not have defined routes. This will allow us to display a custom 404 component. Let's go through the following steps:
- Start off by creating a new React app called notfound:
$ npx create-react-app notfound
- Add React Router from the react-router-dom package via Yarn:
$ yarn add react-router-dom
- Delete logo.svg and App.css, and then clear out the contents of App.js.
- Add our standard React Router import statements at the top:
import { BrowserRouter as Router, Switch, Route } from 'react-router-dom';
- Add a quick Homepage component (this is from our previous exercise) to represent our default route:
const Homepage = () => (
<div className="Homepage">
<h1>Homepage</h1>
<hr />
<p>This is our homepage.</p>
</div>
);
- Additionally, add the About component, also from a previous exercise, since we should have a few different components to attempt to route to in order to make this more meaningful:
const About = () => (
<div className="About">
<h1>About Page</h1>
<hr />
<p>Information about your app or who you are would go here.</p>
</div>
);
- Now set up the routes. We will start off with our Homepage route (remember the exact path=/ props) and the About route:
const App = () => (
<Router>
<Switch>
<Route exact path="/">
<Homepage />
</Route>
<Route path="/about">
<About />
</Route>
</Switch>
</Router>
);
- Finally, let's add our NotFound route by adding a new route with a path of * at the bottom of our Switch route:
const App = () => (
<Router>
<Switch>
<Route exact path="/">
<Homepage />
</Route>
<Route path="/about">
<About />
</Route>
<Route path="*">
<h1>404 - Component Not Found</h1>
<a href="/">Return Home</a>
</Route>
</Switch>
</Router>
);
- Reload the page and try to create a URL with a string that will not match any values from the preceding list (also remember to test the two matched routes), and you should see the 404 page show up instead of the Homepage component:

Figure 9.7: The NotFound component
The NotFound component has displayed successfully. Now, let's move on to the Nesting Routes section.
Nesting Routes
Occasionally, you will need to create routes that have the same parent URLs but different sub URLs. For example, you might visit an online store, which might have a full URL like this:
https://somesite.com/store
When you click on an item in a store, they might be listed like this:
https://somesite.com/store/item/12345
Here, the 12345 value at the end of the URL indicates the ID of the item you are looking at on that online store. The site will want you to still see the information that is pertinent to you in the context of the store, so it will keep the parent route as store, and the child route as the specific item (the /item/12345 bit in the URL). This is an example of a nested route.
In React Router, dealing with nesting routes is a little bit more complicated than simple routes. The easiest way to handle it, even though it is slightly more verbose, is to place new Router -> Switch -> Route trees inside of your React components. Working with our previous exercise, if we wanted to add a nested Contact route to our About route, we would change our About component from a simple example to one that embeds the React Router components into the component itself.
The first thing you need to do is to wrap your About component in a Router component. Next, add a Switch statement inside of the component, followed by routes for each of the levels of nesting you want to include. We will also want to explore how we can use React Router's built-in Link component. The Link component acts like standard anchor tags in HTML, but it also helps you to preload necessary data for the component you are navigating to. It also does a better job of intercepting the navigation request in the browser so that only the component is refreshed instead of the entire page.
We also need to use something from React Router called useRouteMatch(). useRouteMatch() will return to us specifically two pieces of information that we need: the current path and the current full URL. We will need both to construct our nested paths and the links of the current path to avoid a situation where we change the about top-level path to something else and then have to go in and find every single nested route and fix those too.
Let's explore this further in our next exercise.
Exercise 9.05: Nested Routes and the Link Component
In this exercise, while building up more complicated navigation in your React apps, it is important to provide a means of navigation to move among the components in a simple way. We can use the Link component to provide React Router-specific navigation. You can copy the same project from the previous exercise, though, the steps to start a new project will be included here just in case. Let's get started:
- Start off by creating a new React app and call it nested:
$ npx create-react-app nested
- Add React Router from the react-router-dom package via Yarn:
$ yarn add react-router-dom
- Delete logo.svg and App.css, and then clear out the contents of App.js.
- Add our standard React Router import statements at the top, with the additional inclusion of Link and useRouteMatch, which we will use to construct our nested paths (we will talk about this a lot more in a later step):
import { BrowserRouter as Router, Switch, Route, Link, useRouteMatch } from 'react-router-dom';
- Add the Homepage component, the About component, and the App component with routing for each. The code for all three is included here:
App.js
15 <div className="About">
16 <h1>About Page</h1>
17 <hr />
18 <p>Information about your app or who you are would go here.</p>
…
55 const Homepage = () => (
56 <div className="Homepage">
57 <h1>Homepage</h1>
58 <hr />
59 <p>This is our homepage.</p>
60 </div>
61 );
The complete code can be found here: https://packt.live/2LqH4sp
- Next, we are going to add a persistent navigation component called Navbar, which will contain our Link components. Link is just a wrapper around an anchor tag and involves React Router functionality. This allows for different routes to be navigated to within the context of your app, instead of via the browser. Each Link component we use will just have a property called to on it that tells us where the Link component needs to be pointed to:
const Navbar = () => (
<div className="Navbar">
<Link to="/">Home</Link>
<Link to="/about">About</Link>
</div>
);
- Now, add that Navbar to our App component. It specifically needs to be inside of a router, or it will not work, so you need to place it above the Switch statement to make it persistent across each of the pages:
const App = () => (
<div className="App">
<Router>
<Navbar />
<Switch>
<Route exact path="/">
<Homepage />
</Route>
<Route path="/about">
<About />
</Route>
<Route path="*">
<h1>404 - Component Not Found</h1>
</Route>
</Switch>
</Router>
</div>
);
Our app should now resemble the following screenshot:

Figure 9.8: The About Page component
- Let's start building our nested components now. We will add two new components: Bio and Contact. The Bio component will include a short biography about yourself and the Contact component will include the best way for someone to reach you:
const Bio = () => (
<div className="Bio">
<h2>Bio</h2>
<hr />
<p>I'm a pretty cool person.</p>
</div>
);
const Contact = () => (
<div className="Contact">
<h2>Contact Me</h2>
<hr />
<p>Send me an email at [email protected].</p>
</div>
);
- Now we are going to set up nested routing in our About component. The general design for this is that we want our /aboutpath to have two nested paths: /about/bio and /about/contact. These should display the About component and then additionally one of the nested routes if we visit one. To build a nested route, we just place a Router -> Switch -> Route hierarchy into our component. We will start off by wrapping our About component inside of a Router tag:
const About = () => {
return (
<Router>
<div className="About">
<h1>About Page</h1>
<hr />
<p>Information about your app or who you are would go here.</p>
</div>
</Router>
);
};
- We need to take advantage of the useRouteMatch import that we declared earlier. We will add this line to the top of our About component:
const { path, url } = useRouteMatch();
- Now we can start building our custom routes. We will add a new Switch statement with an <hr> tag preceding it. Everything under the <hr> tag will represent the content of our nested routes. We will want to use the path variable we created before to construct our paths. Place this code under the <p> tag in your About component:
<hr />
<Switch>
<Route path={`${path}/contact`}>
<Contact />
</Route>
<Route path={`${path}/bio`}>
<Bio />
</Route>
</Switch>
- Next, let's create some sub-navigation for the About component to allow the user to easily move between each of those nested routes. This time, we will use the url variable we created from useRouteMatch, and we will place it above the Switch statement but below the content of the About component:
<hr />
<Link to={`${url}`}>About Home</Link>
<Link to={`${url}/contact`}>Contact</Link>
<Link to={`${url}/bio`}>Bio</Link>
This should give us a full About component with the following code:
const About = () => {
const { path, url } = useRouteMatch();
return (
<Router>
<div className="About">
<h1>About Page</h1>
<hr />
<p>Information about your app or who you are would go here.</p>
<hr />
<Link to={`${url}`}>About Home</Link>
<Link to={`${url}/contact`}>Contact</Link>
<Link to={`${url}/bio`}>Bio</Link>
<hr />
<Switch>
<Route path={`${path}/contact`}>
<Contact />
</Route>
<Route path={`${path}/bio`}>
<Bio />
</Route>
</Switch>
</div>
</Router>
);
};
And a resulting component that should resemble the following screenshot:
Figure 9.9: The About Page component
As you can see, the About and Bio components have been displayed successfully. We are now going to put everything we have learned so far together and perform the following activity.
Activity 9.01: Creating an E-Commerce Application
The goal of this activity is to construct a simple e-commerce application where we will implement several links or routes that could be used to navigate to different sections. We will apply nested 404/component not found routes and URL queries.
In this MyStore we will have a few items displayed. The store app should contain a header and the list of items that are up for sale. You can either delegate the display of each item to another component or write them into the Store component. The Store component has a couple of requirements:
- If no item id is specified, display all of the items using the minimized item display.
- If an item id is specified and the item exists, display the larger version of that item. You will need to research and use a parameterized URL for this.
- If an item id is specified and the item does not exist, display an item NotFound message.
- If a bad nested route is specified, display an item NotFound message.
The following steps will help you to complete the activity:
- Create a new React application using the npx command.
- Inside App.js, include the necessary import statements: Router, Switch, Route, Link, and useRouteMatch.
- Create a basic functional component, MyStore, and add to it the inventory items, Shoes, Backpack, and TravelMug.
- Build a Store functional component and then, using useRouteMatch, build routes for each inventory item.
- Create a HomePage component and a navigation bar inside each component.
- Create nested routes for the Store component.
- Create a NotFound component in case the item was not found in the store.
- Create a functional Item component to show the details for each item.
The output should be as follows:

Figure 9.10: The MyStore app
You have successfully completed the activity.
React Router is a very powerful tool to have in your React toolbox. With it, you can create incredibly seamless and snappy web applications that will feel like they are practically native applications. Notice that every time you navigate around using the navigation bar created via Link components, the entire browser doesn't redraw the page for each different navigation element; instead, only the parts of the tree that need to be re-rendered will be re-rendered and the rest will remain the same.
This gives the user the feeling of navigation that feels natural, which is one of the best things you can give to your app. The more seamless everything feels, the more likely the user will be happy using it and recommend it to others as well. Putting this together with the techniques you have learned over the course of this chapter will give you the ability to construct some truly fantastic experiences on the web. In the next chapter, we will look into React Router in more detail.
Note
The solution to this activity can be found on page 672.
Summary
Over the course of this chapter, we explored the basics of React Router and the various Router implementation strategies that you can take when you are just getting started. It is important to have a better means of natural navigation via a browser; this allows for a clean separation of components into their logical use cases and allows the user to use their back button in the browser. It is a better, cleaner separation for users and for developers, and now we have a great working knowledge not just of the library itself, but also a little insight into how it works behind the scenes as well.
In later chapters, we will explore React Router in greater detail, showcasing some of the more advanced functionality. We will be able to take our implementations with React Router from basic applications to the next level and build upon the foundations that we have established in this chapter.