
Are you ready for your journey into the … fourth dimension!? (Cue spooky theramin music.)
Animation is all about time—stopping time, starting time, and bending time to produce the effect you want: movement. You don’t actually have to learn much new JavaScript in order to create web page animation—just two little functions. One and a half, really. What are they? You’ll have to read on to find out!
But first, let’s take a look at exactly what animation is, and how we can best go about producing it on a computer screen.
If, like me, you’re a connoisseur of Saturday morning cartoons, you’ll probably be familiar with the basic principles of animation. As illustrated in Figure 5.1, what we see on the TV screen isn’t actually Astroboy jetting around, but a series of images played rapidly, with minute changes between each one, producing the illusion that Astroboy can move.
Standard TV displays between 25 and 30 pictures (or frames) per second, but we don’t perceive each picture individually—we see them as one continuous, moving image. Animation differs from live TV only in the way it is produced. The actual display techniques are identical—a series of rapidly displayed images that fools our brains into seeing continuous movement.

Adding animation to your interfaces is no different from animating something for TV, although it may seem somewhat less artistic. If you want a drop-down menu to actually drop down, you start it closed, end it open, and include a whole bunch of intermediate steps that make it look like it moved.
The faster you want to move it, the fewer steps you put in between the starting and finishing frames. As it is, a drop-down menu without animation is akin to teleportation—the menu moves directly from point A to point B, without any steps in between. If you add just one step, it’s not quite teleportation, but it’s still faster than you can blink. Add ten steps and the menu begins to look like it’s moving smoothly. Add 50 and it’s probably behaving a bit too much like a tortoise. It’s really up to you to find the optimal intervals that give you that nice, pleasing feeling of the menu opening.
The most intuitive way of thinking about animations is as slices of time. We’re capturing and displaying discrete moments in time so that they look like one continuous experience. But, given the way we handle animation in JavaScript, it’s probably more accurate to think of ourselves as inserting the pauses—putting gaps between the slices, as is illustrated in Figure 5.2.

Figure 5.2. An animation running at 25 frames per second, in which the gap between each “slice” of time is 40 milliseconds
In normal program flow a browser will execute JavaScript as quickly as it can, pumping instructions to the CPU whenever they can be processed. This means that your entire, 5,000-line program could execute faster than you can take a breath. That’s great if you’re performing long calculations, but it’s useless if you’re creating animation. Watching Snow White and the Seven Dwarfs in 7.3 seconds might be efficient, but it doesn’t do much for the storyline.
To create smooth, believable animation we need to be able to control when each frame is displayed. In traditional animation, the frame rate (that is, the number of images displayed per second) is fixed. Decisions about how you slice the intervals, where you slice them, and what you slice, are all up to you, but they’re displayed at the same, measured pace all the time.
In JavaScript, you can create the same slices and control the same
aspects, but you’re also given control of the pauses—how long it takes for one image to be displayed after
another. You can vary the pauses however you like, slowing time down,
speeding it up, or stopping it entirely (though most of the time you’ll
want to keep it steady). We control time in JavaScript using
setTimeout.
Instead of allowing your program to execute each statement as
quickly as it can, setTimeout tells your program to wait awhile—to take a breather. The
function takes two arguments: the statement you want it to run next, and
the time that the program should wait before executing that statement (in
milliseconds).
In order to stop the statement inside the
setTimeout call from being evaluated immediately, we
must make it into a string. So if we wanted to display an alert after one
second, the setTimeout call would look like
this:
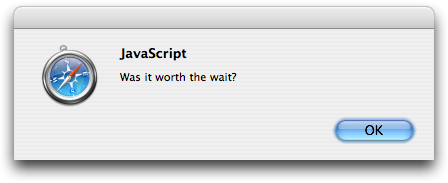
setTimeout("alert('Was it worth the wait?')", 1000);
From the moment this statement is executed, our program will wait 1000 milliseconds (one second) before it executes the code inside the string, and produces the popup shown in Figure 5.3.
Technically speaking, what happens when
setTimeout is called is that the browser adds the
statement to a “to-do list” of sorts, while the rest of your program
continues to run without pausing. Once it finishes what it’s currently
doing (for instance, executing an event listener), the browser consults
its to-do list and executes any tasks it finds scheduled there.
Usually, when you call a function from inside another function, the execution of the outer function halts until the inner function has finished executing. So a function like the one shown here actually executes as depicted in Figure 5.4:
function fabric()
{
  …
  alert("Stop that man!");
  …
}
But what happens if you have a setTimeout call
in the middle of your code?
function fabric()
{
  …
  setTimeout("alert('Was it worth the wait?'),", 1000);
  …
}
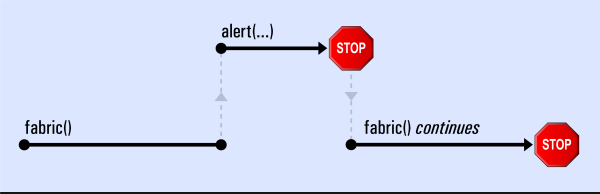
In this case, the execution of the statement passed to
setTimeout is deferred, while the rest of
fabric executes immediately. The scheduled task waits
until the specified time has elapsed, and the browser
has finished what it’s doing, before executing. Figure 5.5 illustrates this
concept.

Strictly speaking, the delay that you specify when calling
setTimeout will be the minimum
amount of time that must elapse before the scheduled task will occur. If
the browser is still tied up doing other things when that time arrives,
your task will be put off until all others have been completed, as
Figure 5.6 indicates.[26]

Statements passed to setTimeout are run in
global scope. We talked about scope in Chapter 2, so if you’d like to refresh your memory,
flick back to that chapter. The effect that scope has here is that the
code run by setTimeout will not have access to any
variables that are local to the function from which
setTimeout was called.
Take a look at this example:
function periscope()
{
  var message = "Prepare to surface!";

  setTimeout("alert(message);", 2000);
}
Here, the variable message is local to
periscope, but the code passed to the
setTimeout will be run with global scope, entirely
separately from periscope. Therefore, it won’t have
access to message when it runs, and we’ll receive the
error shown in Figure 5.7.

Figure 5.7. The error that occurs when we try to use a locally scoped
variable as part of setTimeout code
There are three ways around this problem.
The first is to make message a global
variable. This isn’t that great an idea, because it’s not good
practice to have variables floating around, cluttering up the global
namespace, and causing possible clashes with other scripts. But if we
were to go down this path, we could just leave the
var keyword off our variable declaration:
function periscope()
{
  message = "Prepare to surface!";

  setTimeout("alert(message)", 2000);
}
message would be a global variable that’s
accessible from any function, including the code passed to
setTimeout.
The second option is available when the variable we’re using is a string.
In this case, we can encode the value of the variable directly into the
setTimeout code simply by concatenating the
variable into the string:
function periscope()
{
  message = "Prepare to surface!";

  setTimeout("alert('" + message + "')", 2000);
}
Since we want the string to be interpreted as a string—not a
variable name—we have to include single quote marks inside the
setTimeout code string, and in between those marks,
insert the value of the variable. Though the above code is equivalent to
the code below, we have the advantage of being able to use dynamically
assigned text with the variable:
setTimeout("alert('Prepare to surface!')", 2000);
Warning: Troublesome Quotes
Of course, if the variable’s string value happens to contain one or more single quotes, this approach will fall to pieces unless you go to the trouble of escaping each of the single quotes with a backslash. And while that is certainly possible, the code involved isn’t much fun.
The final option, and the one that’s used more regularly in complex scripts, is to use a closure. A closure is a tricky JavaScript concept that allows any function that’s defined inside another function to access the outer function’s local variables, regardless of when it’s run. Put another way, functions have access to the context in which they’re defined, even if that context is a function that’s no longer executing. So, even though the outer function may have finished executing minutes ago, functions that were declared while it was executing will still be able to access its local variables.
How does this help us given the fact that
setTimeout takes a string as its first argument?
Well, it can also take a function:
function periscope()
{
  var message = "Prepare to surface!";

  var theFunction = function()
  {
    alert(message);
  };

  setTimeout(theFunction, 2000);
}
Or, more briefly:
function periscope()
{
  var message = "Prepare to surface!";

  setTimeout(function(){alert(message);}, 2000);
}
When you pass a function to setTimeout,
setTimeout doesn’t execute it then and there; it
executes the function after the specified delay. Since that function was
declared within periscope, the function creates a
closure, giving it access to periscope’s local
variables (in this case, message).
Even though periscope will have finished
executing when the inner function is run in two seconds’ time,
message will still be available, and the call to
alert will bring up the right message.
The concept of closures is difficult to get your head around, so for the moment, you can be satisfied if you’ve just got a general feel for them.
When setTimeout is executed, it creates a
timer that “counts down” to the moment when the specified code should be
executed. The setTimeout function returns the ID of
this timer so that you can access it later in your script. So far, we’ve
been calling setTimeout without bothering about its
return value, but if you ever want to intervene in a timer’s countdown,
you have to pay attention to this value.
To stop a timer before its countdown has finished, we need to
capture the timer’s ID inside a variable and pass it to a function
called clearTimeout. clearTimeout will
immediately cancel the countdown of the associated timer, and the
scheduled task will never occur:
var timer = setTimeout("alert('This will never appear')", 3000);
clearTimeout(timer);
The alert in the code above will never be displayed, because we
stop the setTimeout call immediately using
clearTimeout.
Let’s consider something that’s a little more useful. Suppose we create a page that displays two buttons:
We can add some behavior to those buttons with a short program:
var ClearTimer =
{
  init: function()
  {
    var start = document.getElementById("start");
    Core.addEventListener(start, "click", ClearTimer.clickStart);

    var stop = document.getElementById("stop");
    Core.addEventListener(stop, "click", ClearTimer.clickStop);
  },
  clickStart: function()
  {
    ClearTimer.timer = setTimeout("alert('Launched')", 2000);
  },
  clickStop: function()
  {
    if (ClearTimer.timer)
    {
      clearTimeout(ClearTimer.timer);
    }

    alert("Aborted");
  }
};

Core.start(ClearTimer);
This program begins by running
ClearTimer.init via
Core.start, which initializes the page by adding a
click event listener to each of the buttons. When
the button is clicked,
ClearTimer.clickStart will be called, and when
the button is clicked, ClearTimer.clickStop
will be called.
ClearTimer.clickStart uses
setTimeout to schedule an alert, but we store the
ID to that scheduled alert inside the variable
ClearTimer.timer. Whenever
ClearTimer.clickStop is pressed we pass
ClearTimer.timer to
clearTimeout, and the timer will be stopped.
So, once you click you will have two seconds to click ; otherwise, the alert dialog will appear, displaying the message “Launched.” This simple example provides a good illustration of what’s involved in controlling timers via user interaction; we’ll look at how it can be used in a more complex interface later in this chapter.
There’s another timing function that’s very similar to
setTimeout, but which allows you to schedule a
repeating piece of code. This function is called
setInterval.
setInterval takes exactly the same arguments
as setTimeout, and when it’s executed, it waits in
exactly the same way. But the fun doesn’t stop once the scheduled code
has finished executing—setInterval schedules the
code again, and again, and again, and again, until you tell it to stop.
If you tell it to wait 1,000 milliseconds,
setInterval will schedule the code to run once
every 1,000 milliseconds.
Each interval is scheduled as a separate task, so if a particular occurrence of the scheduled code takes longer to run than the interval time, the next occurrence will execute immediately after it finishes, as the browser scrambles to catch up.
At the start of this chapter I mentioned that there were really
one and a half functions that could be used to control time in
JavaScript. That’s because setInterval isn’t used very often.
As setInterval relentlessly schedules tasks
at the specified interval no matter how long those tasks actually take,
long-running tasks can generate an undesirable backlog that causes
fast-running tasks to run instantly, with no pause between them. In an
animation, this can be disastrous, as the pause between each frame is
crucial to generating that illusion of motion.
When it comes to animation, it’s usually best to rely on chained
setTimeout calls, including at the end of your
scheduled code a setTimeout call to that same piece
of code. This approach ensures that you only have one task scheduled at
any one time, and that the crucial pauses between frames are maintained
throughout the animation. You’ll see examples of this technique in each
of the animation programs we write in this chapter.
It’s probably easiest to get a feel for working with
setTimeout if we start simply—using it to put in a
short delay on an action. I’ll demonstrate this by modifying the Rich
Tooltips script from Chapter 4, so that the tooltips
behave more like regular tooltips and appear after the user has hovered
the mouse over the element for a moment. We won’t need to change much of
the program—just the two event listeners that handle the
mouseover/focus and
mouseout/blur
events.
Let’s think about how the delay should work. We want the tooltip to
pop up about 500 milliseconds after the mouseover
or focus event occurs. In our original script, the
event listener showTipListener immediately made a call to
Tooltips.showTip. But in the delayed script, we
want to move that call into a setTimeout:
showTipListener: function(event)
{
  var link = this;
  this._timer = setTimeout(function()
      {
        Tooltips.showTip(link);
      }, 500);
  Core.preventDefault(event);
},
In order to pass showTip a reference to the link in question, we need to store that
reference in a local variable called link. We can then
make use of a closure by passing setTimeout a newly
created function. That new function will have access to
showTipListener’s local variables, and when it’s
run, it will be able to pass the link to
showTip.
The other point to note about this setTimeout
call is that we assign the ID it returns to a custom property of the
anchor element, called _timer. We store this value so
that if a user mouses off the anchor before the tooltip has appeared, we
can stop the showTip call from going ahead. To
cancel the method call, we update hideTipListener with a clearTimeout call:
hideTipListener: function(event)
{
  clearTimeout(this._timer);
  Tooltips.hideTip(this);
}
The ID of the setTimeout call is passed to
clearTimeout every time that
hideTipListener is executed, and this will
prevent premature “tooltipification.”
And that’s it: our Rich Tooltips script has now been modified into a moderately less annoying Rich Delayed Tooltips script.
To demonstrate how to create a multi-stepped animation sequence in JavaScript we’re going to do something novel, though you probably wouldn’t implement it on a real web page. We’re going to re-create a film reel in HTML.
First of all, we need a strip of film—or a graphic that looks almost like a real piece of film. As you can see in Figure 5.8, our reel contains a series of progressively changing images that are joined together in one long strip.

If you had a real reel, you’d pass it through a projector, and the
frames would be projected individually onto the screen, one after the
other. For this virtual film reel, our projector will be an empty
div:
The div will be styled to the exact dimensions of a frame
(150x150px), so that we can show exactly one frame inside it:
If we use the strip of robots as a background image, we can change
the background-position CSS property to move the image around and
display different parts of the strip:
#robot {
  width: 150px;
  height: 150px;
background-image:
url(../images/robot_strip.gif);
background-repeat: no-repeat;
background-position: 0 0;
}
Getting the idea now? You can think of the div as a little window inside which we’re moving
the strip around, as Figure 5.9
illustrates.

So, we know how to make any one frame appear inside the div window, but the page is still static—there’s
no animation. That’s what that ol’ JavaScript magic is for!
In order to create a fluid animation, we’re going to need to change
the background-position at a regular interval, flicking through the frames so that
they look like one fluid, moving image. With all the talk of
setTimeout in this chapter, you could probably take a guess that the
function is the key to it all. And you’d be wrong. Sorry,
right:
var Robot =
{
  init: function()
  {
    Robot.div = document.getElementById("robot");(1)
    Robot.frameHeight = 150;
    Robot.frames = 10;
    Robot.offsetY = 0;(2)

    Robot.animate();(3)
  },
  animate: function()(4)
  {
    Robot.offsetY -= Robot.frameHeight;(5)

    if (Robot.offsetY <= -Robot.frameHeight * Robot.frames)(6)
    {
      Robot.offsetY = 0;
    }

    Robot.div.style.backgroundPosition =
        "0 " + Robot.offsetY + "px";(7)

    setTimeout(Robot.animate, 75);(8)
  }
};

Core.start(Robot);
The Robot object contains two methods.
Robot.init is included mainly to declare some
variables and kick-start the animation. I include the variables here,
rather than in Robot.animate, because Robot.animate will be
called a lot, and it’s more efficient to declare the variables just once
than to have them declared for each frame of our animation.
Here are the highlights of this script:
Once the program has made a few passes through
Robot.animate, you have yourself an animation.
Since there’s nothing in our code to stop the repeated calls to that
method, the animation will keep going forever. If you wanted to, you could
provide start and stop buttons as we did previously in this chapter to
allow users to stop and restart the animation. Alternatively, you could
limit the number of cycles that the animation goes through by including a
counter variable that’s incremented each time
Robot.offsetY returns to
0.
The JavaScript techniques we used to animate our digital film reel
can be applied whenever you want to make a series of progressive changes
to the display over time. All you have to do is replace
background-position with the attribute you want to
modify: color, width, height, position, opacity—anything you can think
of.
In our next example, we’re going to look at moving an HTML
element along a linear path. So, instead of changing the
background-position of the target element, we change its actual
position.
In cases where you want to move an element, you usually know where it is now (that is, its starting location), and where you want it to be (its end location), as Figure 5.10 shows.
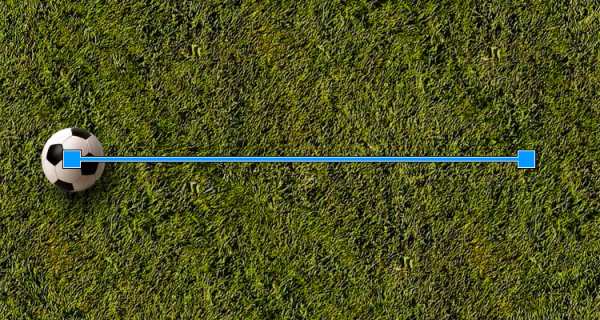
Figure 5.10. Visualizing a path from the object’s starting location to the point where you want it to end up
Once you’ve defined the two end points of the path, it’s the job of the animation program to figure out all the steps that must occur to let the animated element move smoothly from point A to point B, as shown in Figure 5.11.

Given that the movement is going to be automated by an animation function, all we really have to identify at the moment is:
-
the element we want to move
-
where we want to move it to
-
how long we want it to take to reach its destination
We’ll use the soccer ball and grassy background as the basis for a working example. The HTML for this document is fairly simple:
There are a number of ways we could position the soccer ball, but for this example I’ve chosen to use absolute positioning:
#soccerBall {
  background-image: url(soccer_ball.png);
  background-repeat: no-repeat;
  height: 125px;
  left: 0;
  margin-top: 25px;
  position: absolute;
  top: 75px;
  width: 125px;
}
Note: Positioning and Animation
If you’re going to animate an element’s movement, the element will need to be
positioned relatively or absolutely; otherwise, changing its
left and top properties won’t
have any effect.
The JavaScript we used to animate our previous film reel example
makes a fairly good template for any animation, so we’ll use its structure
to help us define the movement we need in this new animation. Inside
init, we declare some of the variables we’ll need, then start the
actual animation:
var SoccerBall =
{
  init: function()
  {
    SoccerBall.frameRate = 25;(1)
    SoccerBall.duration = 2;
    SoccerBall.div = document.getElementById("soccerBall");(2)
    SoccerBall.targetX = 600;(3)
    SoccerBall.originX = parseInt(
        Core.getComputedStyle(SoccerBall.div, "left"), 10);(4)
    SoccerBall.increment =
        (SoccerBall.targetX - SoccerBall.originX) /
        (SoccerBall.duration * SoccerBall.frameRate);(5)
    SoccerBall.x = SoccerBall.originX;(6)

    SoccerBall.animate();(7)
  },
  …
};
|
The first two variables control the speed of the animation.
| |
|
| |
|
| |
|
In order to support an arbitrary starting position for the
soccer ball, |
The computed style of an element is its style information
after all CSS rules and inline styles have been
applied to it. So, if an element’s left position has
been specified inside an external style sheet, obtaining the element’s
computed style will let you access that property value.
Unfortunately, there are differences between the way that Internet
Explorer implements computed style and the way that other browsers
implement it. Internet Explorer exposes a currentStyle
property on every element. This property has exactly the same
properties as style, so you could ascertain an
element’s computed left position using
element.currentStyle.left. Other browsers require you
to retrieve a computed style object using the method
document.defaultView.getComputedStyle. This
method takes two arguments—the first is the element you require the styles
for; the second must always be null—then returns a
style object that has the same structure as Internet Explorer’s
currentStyle property.
To get around these browser differences, we’ll create a new Core library function that will allow us to get a particular computed style property from an element:
Core.getComputedStyle = function(element, styleProperty)
{
  var computedStyle = null;

  if (typeof element.currentStyle != "undefined")
  {
    computedStyle = element.currentStyle;
  }
  else
  {
    computedStyle =
        document.defaultView.getComputedStyle(element, null);
  }

  return computedStyle[styleProperty];
};
Core.getComputedStyle does a little object detection to check which
way we should retrieve the computed style, then passes back the value for
the appropriate property. Using this method, we can get the correct
starting point for SoccerBall.originX without
requiring a hard-coded value in our script.
Let’s return to our init method above:
Here’s the code for this method:
animate: function()
{
  SoccerBall.x += SoccerBall.increment;

  if ((SoccerBall.targetX > SoccerBall.originX &&
      SoccerBall.x > SoccerBall.targetX) ||
      (SoccerBall.targetX <= SoccerBall.originX &&
      SoccerBall.x <= SoccerBall.targetX))
  {
    SoccerBall.x = SoccerBall.targetX;
  }
  else
  {
    setTimeout(SoccerBall.animate, 1000 / SoccerBall.frameRate)
  }

  SoccerBall.div.style.left = Math.round(SoccerBall.x) + "px";
}
The similarities between this animate
method and Robot.animate, which we saw in the previous example, are
striking. The process for both is basically:
-
Calculate the new position.
-
Check whether the new position exceeds the limit.
-
Apply the new position to the element.
-
Repeat the process with a delay.
In this case, we’re calculating a new position by adding to the current position one “slice” of the total distance to be traveled:
Then, we check whether that new position goes beyond the end point of the animation:
if ((SoccerBall.targetX > SoccerBall.originX &&
    SoccerBall.x >= SoccerBall.targetX) ||
    (SoccerBall.targetX < SoccerBall.originX &&
    SoccerBall.x <= SoccerBall.targetX))
That condition looks a little daunting, but we can break it down into smaller chunks. There are actually two possible states represented here, separated by an OR operator.
The first of these states (SoccerBall.targetX >
SoccerBall.originX && SoccerBall.x >=
SoccerBall.targetX) checks whether
SoccerBall.targetX is greater than
SoccerBall.originX. If it is, we know that the soccer
ball is moving to the right. If that’s the case, the soccer ball will be
beyond the end point if SoccerBall.x is greater than
SoccerBall.targetX.
In the second state (SoccerBall.targetX <
SoccerBall.originX && SoccerBall.x <=
SoccerBall.targetX), if SoccerBall.targetX is
less than SoccerBall.originX,
the soccer ball will be moving to the left, and it
will be beyond the end point if SoccerBall.x is
less than SoccerBall.targetX. By
including these two separate states inside the condition, we allow the
soccer ball to move in any direction without having to modify the
code.
If the newly calculated position for the soccer ball exceeds the end point, we automatically set the new position to be the end point:
if ((SoccerBall.targetX > SoccerBall.originX &&
    SoccerBall.x >= SoccerBall.targetX) ||
    (SoccerBall.targetX < SoccerBall.originX &&
    SoccerBall.x <= SoccerBall.targetX))
{
  SoccerBall.x = SoccerBall.targetX;
}
Otherwise, the soccer ball needs to keep moving, so we schedule another animation frame:
Notice that the delay for the setTimeout
is specified as 1000 milliseconds (one second) divided by the
specified frame rate. This calculation transforms the frame rate into the
millisecond format that’s required for the delay.
The last thing we need to do for each frame is apply the newly
calculated position to the style.left
property of the soccer ball. This step causes the browser to display
the update:
That statement converts SoccerBall.x to an
integer using Math.round, which rounds any number up or down to the
nearest integer. We need to do this because
SoccerBall.x might be a floating point number, and
CSS pixel values can’t be decimals.
The last two statements (the setTimeout and the
style change) would normally be written in the
reverse of the order shown here, but the setTimeout
is placed inside the else statement for code efficiency. If
we were to place it after the style assignment,
setTimeout would require an additional conditional
check. By doing it this way, we can avoid adversely affecting the
performance of our script.
Once we assemble both the init and
animate functions inside the one object, which we
initialize using Core.start, we have our finished program. We’re all set to roll that
soccer ball over a lush, green field:
var SoccerBall =
{
init: function()
{
SoccerBall.frameRate = 25;
SoccerBall.duration = 2;
SoccerBall.div = document.getElementById("soccerBall");
SoccerBall.targetX = 600;
SoccerBall.originX = parseInt(
Core.getComputedStyle(SoccerBall.div, "left"), 10);
SoccerBall.increment =
(SoccerBall.targetX - SoccerBall.originX) /
(SoccerBall.duration * SoccerBall.frameRate);
SoccerBall.x = SoccerBall.originX;
SoccerBall.animate();
},
animate: function()
{
SoccerBall.x += SoccerBall.increment;
if ((SoccerBall.targetX > SoccerBall.originX &&
SoccerBall.x >= SoccerBall.targetX) ||
(SoccerBall.targetX < SoccerBall.originX &&
SoccerBall.x <= SoccerBall.targetX))
{
SoccerBall.x = SoccerBall.targetX;
}
else
{
  setTimeout(SoccerBall.animate, 1000 / SoccerBall.frameRate)
}
SoccerBall.div.style.left = Math.round(SoccerBall.x) + "px";
}
};
Core.start(SoccerBall);
The example above only animated the soccer ball horizontally, but it’s quite easy to modify our program to deal with vertical movement as well:
var SoccerBall =
{
  init: function()
  {
    SoccerBall.frameRate = 25;
    SoccerBall.duration = 2;
    SoccerBall.div = document.getElementById("soccerBall");
    SoccerBall.targetX = 600;
    SoccerBall.targetY = 150;
    SoccerBall.originX = parseInt(
        Core.getComputedStyle(SoccerBall.div, "left"), 10);
    SoccerBall.originY = parseInt(
        Core.getComputedStyle(SoccerBall.div, "top"), 10);
    SoccerBall.incrementX =
        (SoccerBall.targetX - SoccerBall.originX) /
        (SoccerBall.duration * SoccerBall.frameRate);
    SoccerBall.incrementY =
        (SoccerBall.targetY - SoccerBall.originY) /
        (SoccerBall.duration * SoccerBall.frameRate);
    SoccerBall.x = SoccerBall.originX;
    SoccerBall.y = SoccerBall.originY;

    SoccerBall.animate();
  },
  animate: function()
  {
    SoccerBall.x += SoccerBall.incrementX;
    SoccerBall.y += SoccerBall.incrementY;

    if ((SoccerBall.targetX > SoccerBall.originX &&
        SoccerBall.x >= SoccerBall.targetX) ||
        (SoccerBall.targetX < SoccerBall.originX &&
        SoccerBall.x <= SoccerBall.targetX))
    {
      SoccerBall.x = SoccerBall.targetX;
      SoccerBall.y = SoccerBall.targetY;
    }
    else
    {
      setTimeout(SoccerBall.animate, 1000 / SoccerBall.frameRate)
    }

    SoccerBall.div.style.left = Math.round(SoccerBall.x) + "px";
    SoccerBall.div.style.top = Math.round(SoccerBall.y) + "px";
  }
};

Core.start(SoccerBall);
For every instance in which we performed a calculation with the
x coordinate, we add an equivalent statement for
the y coordinate. So,
SoccerBall.init ends up with a vertical
end-point in SoccerBall.targetY, a vertical origin
in SoccerBall.originY, and a vertical position
tracker in SoccerBall.y. These variables are used
by SoccerBall.animate to increment the vertical
position and write it to the style.top
property.
The only other change we need to make is a small tweak to the starting position of the ball:
Once that’s done, we’ve got a ball that moves in both dimensions, as Figure 5.12 illustrates.

The animation that we’ve created so far treats the movement of the soccer ball homogeneously—each frame moves the ball by the same amount, and the ball stops without any deceleration. But this isn’t how objects move in the real world: they speed up, they slow down, they bounce. It’s possible for us to mimic this type of behavior by using different algorithms to calculate the movement of our soccer ball.
If we wanted to get our soccer ball to slow to a halt, there are just a few minor tweaks we’d have to make to our program:
var SoccerBall =
{
  init: function()
  {
    SoccerBall.frameRate = 25;
    SoccerBall.deceleration = 10;
    SoccerBall.div = document.getElementById("soccerBall");
    SoccerBall.targetX = 600;
    SoccerBall.targetY = 150;
    SoccerBall.originX = parseInt(
        Core.getComputedStyle(SoccerBall.div, "left"), 10);
    SoccerBall.originY = parseInt(
        Core.getComputedStyle(SoccerBall.div, "top"), 10);
    SoccerBall.x = SoccerBall.originX;
    SoccerBall.y = SoccerBall.originY;

    SoccerBall.animate();
  },

  animate: function()
  {
    SoccerBall.x += (SoccerBall.targetX - SoccerBall.x) /
        SoccerBall.deceleration;
    SoccerBall.y += (SoccerBall.targetY - SoccerBall.y) /
        SoccerBall.deceleration;

    if ((SoccerBall.targetX > SoccerBall.originX &&
        Math.round(SoccerBall.x) >= SoccerBall.targetX) ||
        (SoccerBall.targetX < SoccerBall.originX &&
        Math.round(SoccerBall.x) <= SoccerBall.targetX))
    {
      SoccerBall.x = SoccerBall.targetX;
      SoccerBall.y = SoccerBall.targetY;
    }
    else
    {
      setTimeout(SoccerBall.animate, 1000 / SoccerBall.frameRate)
    }

    SoccerBall.div.style.left = Math.round(SoccerBall.x) + "px";
    SoccerBall.div.style.top = Math.round(SoccerBall.y) + "px";
  }
};

Core.start(SoccerBall);
In this code, we’ve replaced
SoccerBall.duration with
SoccerBall.deceleration—a deceleration factor
that’s applied to our new position calculation inside
animate. This time, instead of dividing the
total distance into neat little increments, the position calculator
takes the distance remaining to the end-point, and
divides it by the deceleration factor. In this way, the steps start out
being big, but as the ball moves closer to its goal, the steps become
smaller and smaller. The ball travels a smaller distance between frames,
creating the sense that it’s slowing down, or decelerating.
One pitfall that you need to watch out for when you’re using an
equation like this is that, if left to its own devices,
SoccerBall.x will never reach the end point. The
animation function will continually divide the remaining distance into
smaller and smaller steps, producing an infinite loop. To counteract this (and stop the animation from going
forever), we round SoccerBall.x to the nearest
integer, using Math.round, before checking whether it has reached the
end point. As soon as SoccerBall.x is within 0.5
pixels of the end point—which is close enough for the ball to reach its
goal when its position is expressed in pixels—the rounding will cause
the animation to end.
Using this deceleration algorithm, the movement of the ball looks more like that depicted in Figure 5.13.

If you want the ball to move more slowly—gliding more smoothly to
its final position—increase the deceleration factor. If you want
the ball to reach its destination more quickly—coming to a more sudden
stop—decrease the deceleration factor. Setting the factor to
1 causes the ball to jump directly to its
destination.
If you wanted to accelerate the soccer ball—make it start off slow and get faster—then you’d have to reverse the algorithm we used for deceleration:
var SoccerBall =
{
  init: function()
  {

    SoccerBall.frameRate = 25;
    SoccerBall.acceleration = 2;
    SoccerBall.threshold = 0.5;
    SoccerBall.div = document.getElementById("soccerBall");
    SoccerBall.targetX = 600;
    SoccerBall.targetY = 150;
    SoccerBall.originX = parseInt(
        Core.getComputedStyle(SoccerBall.div, "left"));
    SoccerBall.originY = parseInt(
        Core.getComputedStyle(SoccerBall.div, "top"));

    if (SoccerBall.targetX < SoccerBall.originX)
    {
      SoccerBall.x = SoccerBall.originX - SoccerBall.threshold;
    }
    else
    {
      SoccerBall.x = SoccerBall.originX + SoccerBall.threshold;
    }

    SoccerBall.distanceY = SoccerBall.targetY - SoccerBall.originY;

    SoccerBall.animate();
  },

  animate: function()
  {
    SoccerBall.x += (SoccerBall.x - SoccerBall.originX) /
        SoccerBall.acceleration;
    var movementRatio = (SoccerBall.x - SoccerBall.originX) /
        (SoccerBall.targetX - SoccerBall.originX);
    var y = SoccerBall.originY + SoccerBall.distanceY *
        movementRatio;

    if ((SoccerBall.targetX > SoccerBall.originX &&
        SoccerBall.x >= SoccerBall.targetX) ||
        (SoccerBall.targetX < SoccerBall.originX &&
        SoccerBall.x <= SoccerBall.targetX))
    {
      SoccerBall.x = SoccerBall.targetX;
      y = SoccerBall.targetY;
    }
    else
    {
      setTimeout(SoccerBall.animate, 1000 / SoccerBall.frameRate)
    }

    SoccerBall.div.style.left = Math.round(SoccerBall.x) + "px";
    SoccerBall.div.style.top = Math.round(y) + "px";
  }
};

Core.start(SoccerBall);
Here, the SoccerBall.deceleration variable
has been replaced by SoccerBall.acceleration, and
the value has been lowered to give us a quicker start. The algorithm
that calculates the increments now uses the distance to the start
point to determine them, so as the ball gets further from the start
point the increments get bigger, making the ball move faster.
As this algorithm uses SoccerBall.x –
SoccerBall.originX as the basis for its calculations, we need
SoccerBall.x to initially be offset slightly from
SoccerBall.originX, otherwise the ball would
never move. SoccerBall.x must be offset in the
direction of the destination point, so during initialization we check
the direction in which the destination lies from the origin, and add
or subtract a small value—SoccerBall.threshold—as
appropriate. For a more accurate model, you could reduce
SoccerBall.threshold below
0.5, but you won’t see much difference.
The other difference between this algorithm and the decelerating one is the way in which the vertical positions are calculated. Since we use a fixed value for acceleration, if it was calculated separately, the acceleration in either dimension would be the same—the y position would increase in speed at the same rate as the x position. If your y destination coordinate is closer than your x destination coordinate, the soccer ball would reach its final y position faster than it reached its final x position, producing some strange (non-linear) movement.
In order to prevent this eventuality, we calculate the
y position of the soccer ball based on the value
of its x position. After the new
x position has been calculated, the ratio between
the distance traveled and the total distance is calculated and placed
in the variable movementRatio. This figure is multiplied by the total
vertical distance between the origin and the target, and gives us an
accurate y position for the soccer ball,
producing movement in a straight line.
As the y position is calculated in terms of the
x position, we no longer need
SoccerBall.y, so this property has been removed
from the object. Instead, we just calculate a normal
y variable inside the
animate function. As a quick reference for the
vertical distance, SoccerBall.distanceY is
calculated upon initialization.
You can give countless different types of movements to an object. Deceleration and acceleration are just two of the more simple options; there’s also bouncing, circular movements, elastic movements—the list goes on. If you’d like to learn the mathematics behind other types of object movement, I highly recommend visiting Robert Penner’s site. He created the movement calculations for the Flash environment, so I’m pretty sure he knows his stuff.
Well, you learned to make an accordion control in Chapter 4, and I’m sure you were clicking around it, collapsing and expanding the different sections, but thinking, “This isn’t quite there; it needs some more … snap!” Well, it’s now time to make it snap, move, and jiggle. Because we’re going to add some animation to that accordion. After all, what’s an accordion without moving parts, and a little monkey in a fez?
This upgrade will take a little more effort than the modifications we made to our Rich Tooltips script, but the effect is well worth it—we’ll wind up with an animated accordion that gives the user a much better sense of what’s going on, and looks very, very slick.
Before we dive into the updated code, let’s take a look at how we’re going to animate the accordion. To produce the effect of the content items collapsing and expanding, we have to modify the height of an element that contains all of that content. In this case, the list items in the menu are the most likely candidates.
Normally, if no height is specified for a block-level element, it will expand to show all of the content that it contains. But if you do specify a height for a block-level element, it will always appear at that specified height, and any content that doesn’t fit inside the container will spill out, or overflow, as shown in Figure 5.14.

Now, we don’t want the content to overflow when we’re animating
our accordion; we want the parent element to hide any content that would
ordinarily overflow. The way to do this is to adjust the CSS on the
parent container, and specify the property overflow:
hidden. When this is done, and a height (or a width) is
specified, any overflowing content will be hidden from view, as
illustrated in Figure 5.15.

Figure 5.15. Specifying overflow: hidden on the
block-level element causing content that doesn’t fit inside it to be
hidden
Once we’ve made sure that the overflowing content is being hidden correctly, we can start to animate the container. To do this, we’ll gradually change its height to make it look like it’s expanding or collapsing.
Now that you’ve got the general idea of how we’re going to animate our accordion, our first stop is the initialization method:
init: function()
{
Accordion.frameRate = 25;
Accordion.duration = 0.5;
var accordions = Core.getElementsByClass("accordion");
for (var i = 0; i < accordions.length; i++)
{
var folds = accordions[i].childNodes;
for (var j = 0; j < folds.length; j++)
{
if (folds[j].nodeType == 1)
{
var accordionContent = document.createElement("div");(1)
accordionContent.className = "accordionContent";
for (var k = 0; k < folds[j].childNodes.length; k++)(2)
{
if (folds[j].childNodes[k].nodeName.toLowerCase() !=
"h2")(3)
{
accordionContent.appendChild(folds[j].childNodes[k]);(4)
k--;(5)
}
}
folds[j].appendChild(accordionContent);(6)
folds[j]._accordionContent = accordionContent;(7)
Accordion.collapse(folds[j]);
var foldLinks = folds[j].getElementsByTagName("a");
var foldTitleLink = foldLinks[0];
Core.addEventListener(foldTitleLink, "click",
Accordion.clickListener);
for (var k = 1; k < foldLinks.length; k++)
{
Core.addEventListener(foldLinks[k], "focus",
Accordion.focusListener);
}
}
}
if (location.hash.length > 1)
{
var activeFold =
document.getElementById(location.hash.substring(1));
if (activeFold && activeFold.parentNode == accordions[i])
{
Accordion.expand(activeFold);
}
}
}
}
In this code, we’ve added two familiar animation constants, as well as a whole new block of code that modifies the HTML of the menu. Why?
One point you should note about using the overflow:
hidden CSS property is that it can produce some weird visual
effects in Internet Explorer 6. Given the way we’ve set up the accordion
headings, if we applied overflow: hidden to those list
items, they’d look completely warped in IE. To circumvent this pitfall,
we separate the heading (the part that the user clicks on) from the rest
of the content in a given fold of the accordion by putting that content
inside its own div element. It’s also
a lot easier to deal with the animation if we can collapse the container
to zero height, rather than having to worry about leaving enough height
for the heading.
But that’s no reason to go in and modify your HTML by hand! We can easily make these changes with JavaScript, as the code above shows:
Another advantage of adding the accordionContent div is that it simplifies the CSS. For example, the CSS code
that hides the contents of collapsed folds can be distilled down to
this:
.accordionContent {
overflow: hidden;
…
}
li.collapsed .accordionContent {
position: absolute;
left: -9999px;
}
/* Fixes Safari bug that prevents expanded content from displaying.
See http://betech.virginia.edu/bugs/safari-stickyposition.html */
li.collapsed .accordionContent p {
position: relative;
}
Thanks to this code, overflow: hidden will always be
specified on elements with the class accordionContent, enabling us
to animate them properly.
In the original script, our expand
function changed some classes to make the selected accordion item
pop open, but in animating the accordion, we need
to use expand to do a little setup
first:
expand: function(fold)
{
  var content = fold._accordionContent;(1)

  Accordion.collapseAll(fold.parentNode);
  if (!Core.hasClass(fold, "expanded"))(2)
  {
    content.style.height = "0";(3)
    content._height = 0;(4)
    Core.removeClass(fold, "collapsed");
    Core.addClass(fold, "expanded");
    content._increment = content.scrollHeight /
        (Accordion.frameRate * Accordion.duration);(5)
    Accordion.expandAnimate(content);(6)
  }
},
Let’s take a look at that animation method:
expandAnimate: function(content)
{
  var newHeight = content._height + content._increment;(1)

  if (newHeight > content.scrollHeight)(2)
  {
    newHeight = content.scrollHeight;(3)
  }
  else
  {
    content._timer = setTimeout(function()(4)
        {
          Accordion.expandAnimate(content);
        }, 1000 / Accordion.frameRate);
  }

  content._height = newHeight;(5)
  content.style.height = Math.round(newHeight) + "px";
  content.scrollTop = 0;(6)
},
With those two methods, you can see how animation works—the event
listener is fired only once, and sets up the initial values for the
animation. Then the iterative function is called via
setTimeout to produce the visual changes needed to
get to the final state.
Collapsing an item works in much the same fashion:
collapse: function(fold)
{
  var content = fold._accordionContent;
  content._height = parseInt(content.style.height, 10);
  content._increment = content._height /
      (Accordion.frameRate * Accordion.duration);

  if (Core.hasClass(fold, "expanded"))
  {
    clearTimeout(fold._accordionContent._timer);
    Accordion.collapseAnimate(fold._accordionContent);
  }
  else
  {
    Core.addClass(fold, "collapsed");
  }
},
For the collapse method, we have to move
the class changes into the animation method because we need the item to
remain expanded until the animation has finished (otherwise it will
disappear immediately, before the animation has had a chance to take
place). To kick off the animation, we check whether the current item has
the class expanded, and if it does,
we send the browser off to execute collapseAnimate, but not before we cancel any expansion
animation that’s currently taking place. If we didn’t cancel the
expansion first, the collapsing animation might coincide with an
expansion animation that was already in progress, in which case we’d end
up with a stuck accordion (never a pretty sight—or sound).
If an element doesn’t have the expanded class on it when a collapse is
initiated, we simply add the collapsed class and forego the animation.
This takes care of the circumstance in which the page first loads and we
need to hide all the menu items.
collapseAnimate is a lot like
expandAnimate, but in reverse:
collapseAnimate: function(content)
{
  var newHeight = content._height - content._increment;(1)

  if (newHeight < 0)
  {
    newHeight = 0;
    Core.removeClass(content.parentNode, "expanded");(2)
    Core.addClass(content.parentNode, "collapsed");
  }
  else
  {
    content._timer = setTimeout(function()
        {
          Accordion.collapseAnimate(content);
        }, 1000 / Accordion.frameRate);
  }

  content._height = newHeight;
  content.style.height = Math.round(newHeight) + "px";
}
|
We’re aiming to get the | |
|
The |
With animation occurring in both directions, we now have a fully functioning animated accordion. Of course, you’ll get the best view of its effect if you check out the demo in the example files, but Figure 5.16 shows what happens when you click to open a new accordion item.

Quite a few of the main JavaScript libraries don’t tackle animation; instead, they focus on core tasks like DOM manipulation and styling. However, around these have sprung up a number of little libraries devoted to animation tasks, and they do the job quite well.
The animation libraries are a lot more generalized than the scripts we’ve written here, so it’s possible to use them to apply a range of effects to almost any element, depending on how adventurous you’re feeling.
script.aculo.us is probably the most well-known effects library available. It’s actually an add-on to Prototype, which it uses for its DOM access and architecture capabilities, so if you want to run script.aculo.us, you’ll also need to include Prototype.
script.aculo.us comes with a host of effects that have become popular in the so-called Web 2.0 age: fading, highlighting, shrinking, and many other transitions. It has also more recently included larger pieces of functionality such as drag-and-drop and slider widgets. Here, we’ll focus on the effects.
All of the effects in script.aculo.us are available through the
Effect object, which will be available in your programs if you include
the scriptaculous.js file on your page.
Let’s imagine that we have a paragraph of text that we want to highlight:
<p id="introduction"> Industrial Light & Magic (ILM) is a motion picture visual effects company, founded in May 1975 by George Lucas and owned by Lucasfilm Ltd. Lucas created the company when he discovered that the special effects department at Twentieth Century Fox was shut down after he was given the green light for his production of Star Wars. </p>
We can do so by passing the ID string to
Effect.Highlight:
new Effect.Highlight("introduction");
As soon as you make this call, the effect will be applied to the element, as shown in Figure 5.17.

Effect.Highlight also allows you to pass
it a DOM node reference, so you could apply the effect to the paragraph
like this:
new Effect.Highlight(document.getElementsByTagName("p")[0]);
Most of the effects in script.aculo.us have optional parameters that allow you to customize various aspects of the effect. These parameters are specified as properties inside an object literal, which itself is passed as an argument to the effect.
For instance, by default,
Effect.Highlight fades the background from
yellow to white, but it’s possible to specify the start color and the
end color, so we could make a particularly lurid fade from red to blue
like this:
new Effect.Highlight("introduction",
    {startcolor: "#FF0000", endcolor: "#0000FF"});
These optional parameters will differ from effect to effect, so you’ll have to read through the script.aculo.us documentation if you wish to customize a particular effect.
Most of the effects have a duration parameter, which lets you specify how quickly you want the effect to occur. This parameter is specified in seconds, so if you wanted a two-second, lurid red-blue fade, you’d include all these parameters:
new Effect.Highlight("introduction",
    {startcolor: "#FF0000", endcolor: "#0000FF",
    duration: 2});
script.aculo.us also has a nice little event model that allows you to trigger functions while effects are happening, or after they have finished. These events are again specified as parameters in the object literal, and take a function name as a value. That function will be called when the event is fired:
function effectFinished()
{
  alert("The introduction has been effected");
}

new Effect.Highlight("introduction",
    {afterFinish: effectFinished});
That code pops up an alert dialog once the fade has finished, to tell us it’s done.
script.aculo.us is certainly a powerful and flexible effects library. Its popularity has largely been fueled by its ease of integration and execution. In case these benefits weren’t already apparent, I’ll leave you with this nugget: using script.aculo.us, we could have animated our soccer ball with just one line of code:
new Effect.MoveBy("soccerBall", 150, 600);
HTML was designed to be a static medium, but using JavaScript, we can bring it to life.
There’s no doubt that animation can add a lot of polish to an interface—it doesn’t have to be mere eye candy! Animation provides real benefits in guiding users around and providing them with visual cues as to functionality and state. I’m sure quite a few useful ideas have sprung into your mind while you’ve been reading. This chapter has given you a taste of what you can do with time-based processing, but there’s so much more to explore once you’ve learned the basics.
Next up, we’ll delve deeper into a subject that’s central to the development of web applications: forms.
[26] If you specify a delay of zero milliseconds when you call
setTimeout, the browser will execute the task as
soon as it’s finished what it’s currently doing.