
Working with the Gimp
The Red Hat Linux 6 CD in the back of this book contains a terrific graphics tool called the Gimp. The Gimp— Gnu Image Manipulation Program—is a full-featured application along the lines of Adobe Photoshop. You can use to it create images, retouch photos, and much more.
Written by Peter Mattis and Spencer Kimball, the Gimp is as powerful as any comparable program available on any platform. Like Photoshop, it is a visual artist's delight. You can find some of the images that artists have created using it—as well as downloads and useful information—at the Gimp's Web site, http://www.gimp.org
When you set out to explore the Gimp on your own, you'll realize that it has many more features than could ever be covered in Red Hat Linux 6: Visual QuickPro Guide. (Indeed, the Gimp deserves a book of its own!) These features include:
A complete set of painting tools, including Brush, Pencil, Airbrush, and Clone tools
Tile-based memory management so image size is limited only by available disk space
Anti-aliasing support for the highest quality rendering
Implementation of full alpha channel support
Layers and channels
The ability to write scripts that can be invoked in the Gimp, and the ability to call Gimp objects and methods from external scripts (called Script-Fu)
Multiple levels of Undo and Redo (limited only by available disk space)
The ability to have a virtually unlimited number of images open at one time
An extremely powerful gradient editor and Blend tool
The ability to load and save animations in a convenient frame-as-layer format
Transformation tools, including Rotate, Scale, Shear, and Flip tools
Many supported file formats, including .gif, .jpg, .png, .xpm, .tiff, .tga, .mpeg, .ps, .pdf, .pcx, and .bmp
The ability to load, display, convert, and save using many file formats
Selection tools, including Rectangle, Ellipse, Free, Fuzzy, Bezier, and Intelligent Selection tools
Numerous filter effects
Many plug-ins, which enable easy addition of new file formats and new effect filters
Support for custom brushes and patterns
I'll show you how to use a few of the Gimp's features here, to give you a taste of how the Gimp works.
Was the Gimp installed? Starting the GimpWhether the Gimp was installed depends on the selections you made during installation of Red Hat Linux 6 from this book's CD. In addition, a menu item for the Gimp may—or may not—have been added to the Graphics menu-out of your Gnome main menu.
|
To start the Gimp:
-
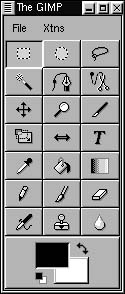
With the Gnome desktop running, select the Gimp from the Graphics menu fly-out on the Gnome main menu. The Gimp toolbox will open (Figure 7.33).
Figure 7.33. The Gimp's functionality can be accessed from its toolbox, which is what opens when you first start the Gimp, or by right-clicking an open image and using the fly-out menus.
Tip
If there is no menu item for the Gimp on the Graphics menu, see the previous sidebar "Was the Gimp Installed? Starting the Gimp" for instructions.
Tip
Most of the Gimp's functionality can be accessed by right-clicking and using fly-out menus with an image open in the Gimp.
Acquiring an image
Before you can really start working with the Gimp, you need an image to work on. There are many ways to obtain an image. You can start a new, empty file and use the Gimp's tools to add distinctiveness, or you can open an existing graphic file.
Figure 7.34. You can use the Screen Shot dialog box to capture an image of a specific window or your entire desktop.

An interesting possibility is to start with a screen capture, or portion of your computer desktop.
To grab a screen capture:
1. | Make sure that the image you want to capture is open on your desktop; for example, in a Web browser. |
2. | Choose Screen Tool from the Xtns menu in the Gimp toolbox. (Xtns is short for Extensions.) The Screen Shot dialog box will open (Figure 7.34). |
3. | Make sure that Grab a Single Window is selected. |
4. | Click OK. The Screen Shot dialog box will disappear from view, and a cross-hair cursor will appear. |
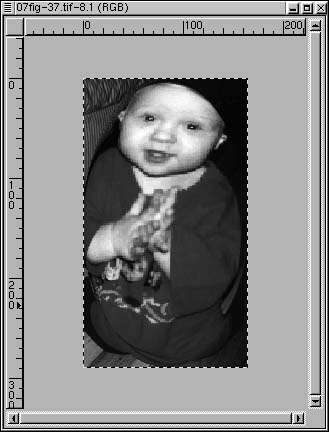
5. | Click with the cross-hair cursor in the window you want to capture. Your selection will open, ready for editing, in a Gimp window (Figure 7.35). Figure 7.35. The window grabbed by the Screen Shot utility appears, ready for editing, in a Gimp window.
|

Tip
If you want to capture menus or rearrange the appearance of things before the capture takes effect, set the Screen Shot dialog box to Grab the Whole Screen with a Time Delay. Once the entire screen has been grabbed, you can crop to select the portion you want (see the next section).
To crop an image:
1. | With an image open in a Gimp window, right-click anywhere in the image. The Gimp menu will open. |
2. | Select Crop from the Tools menu fly-out (Figure 7.36). Figure 7.36. To crop an image in a Gimp window, select Crop from the Tools menu fly-out.
A cross-hair cursor will appear on the image. |
3. | Drag the cross-hair cursor to form the box that you want to crop out of the image. The perimeter of the area that you are selecting will be indicated with black box handles. |
4. | Release the mouse. The Crop Information dialog box will appear (Figure 7.37). Figure 7.37. The area you are selecting to crop is indicated with perimeter handles; once you release the mouse, the Crop Information dialog box appears.
|
5. | Click Crop. The old (larger) image is replaced with the new, cropped image. |


To apply a filter to an image:
1. | With an image open in a Gimp window, right-click anywhere in the image. The Gimp menu will open. |
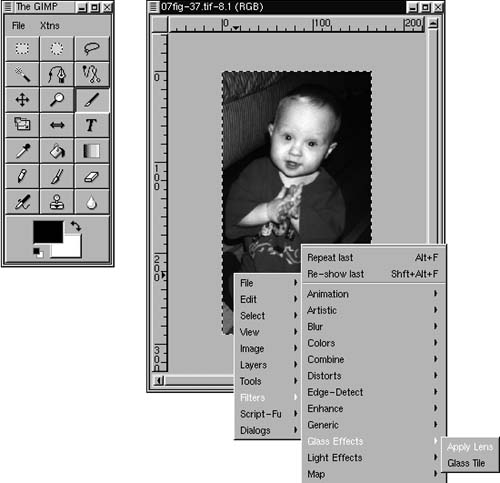
2. | Select Filters. The Filters fly-out menu will appear (Figure 7.38). Figure 7.38. The filter you select will be applied to the image in the Gimp window.
|
3. | Choose the filter effect you want The filter you selected will be applied to the image. Figure 7.39 shows the Glass Lens filter effect. Figure 7.39. You can choose from many filter effects, including the Glass Lens, which is shown.
|
Tip
To undo a filter effect (or other effect), hold down the Control key and type z, or select Undo from the Edit fly-out menu.
To use Script-Fu to create a sphere:
1. | Select the Script-Fu fly-out menu from the Gimp Xtns menu. |
2. | Select Sphere from the Misc fly-out menu. The Sphere Script-Fu Arguments dialog box will open (Figure 7.40). Figure 7.40. The Script-Fu Arguments dialog box is used to provide input parameters for a script.
|
3. | Enter the sphere's radius (in pixels), enter the lighting (in degrees), and select background and foreground color by clicking the appropriate buttons. |
4. | Click OK. A sphere that matches the specifications you entered will open in a Gimp window (Figure 7.41). Figure 7.41. A sphere will open in a Gimp window that is based on your entries.
|

