Chapter 10. Graphics
The web is much more visual than textual; that is obvious. Images appear in the form of logos, buttons, photographs, charts, advertisements, and icons. Many of these images are static and never change, built with tools such as Photoshop. But many are dynamically created—from advertisements for Amazon’s referral program that include your name to graphs of stock performance.
PHP supports graphics creation with the built-in GD extension library. In this chapter, we’ll show you how to generate images dynamically within PHP.
Embedding an Image in a Page
A common misconception is that there is a mixture of text and graphics flowing across a single HTTP request. After all, when you view a page, you see a single page containing such a mixture. It is important to understand that a standard web page containing text and graphics is created through a series of HTTP requests from the web browser; each request is answered by a response from the web server. Each response can contain one and only one type of data, and each image requires a separate HTTP request and web server response. Thus, if you see a page that contains some text and two images, you know that it has taken three HTTP requests and corresponding responses to construct this page.
Take this HTML page, for example:
<html>
 <head>
 <title>Example Page</title>
 </head>

 <body>
 This page contains two images.
 <img src="image1.png" alt="Image 1" />
 <img src="image2.png" alt="Image 2" />
 </body>
</html>
The series of requests sent by the web browser for this page looks something like this:
GET /page.html HTTP/1.0
GET /image1.png HTTP/1.0
GET /image2.png HTTP/1.0
The web server sends back a response to each of these requests. The Content-Type headers in these responses look like this:
Content-Type: text/html
Content-Type: image/png
Content-Type: image/png
To embed a PHP-generated image in an HTML page, pretend that the PHP script that generates the image is actually the image. Thus, if we have image1.php and image2.php scripts that create images, we can modify the previous HTML to look like this (the image names are PHP extensions now):
<html>
 <head>
 <title>Example Page</title>
 </head>

 <body>
 This page contains two images.
 <img src="image1.php" alt="Image 1" />
 <img src="image2.php" alt="Image 2" />
 </body>
</html>
Instead of referring to real images on your web server, the <img> tags now refer to the PHP scripts that generate and return image data.
Furthermore, you can pass variables to these scripts, so instead of having separate scripts to generate each image, you could write your <img> tags like this:
<img src="image.php?num=1" alt="Image 1" />
<img src="image.php?num=2" alt="Image 2" />
Then, inside the called PHP file image.php, you can access the request parameter $_GET['num'] to generate the appropriate image.
Basic Graphics Concepts
An image is a rectangle of pixels of various colors. Colors are identified by their position in the palette, an array of colors. Each entry in the palette has three separate color values—one each for red, green, and blue. Each value ranges from 0 (color not present) to 255 (color at full intensity). This is known as its RGB value. There are also hexadecimal, or “hex” values—alphanumeric representations of colors that are commonly used in HTML. Some image tools, such as ColorPic (http://www.iconico.com/colorpic/), will convert RGB values to hex for you.
Image files are rarely a straightforward dump of the pixels and the palette. Instead, various file formats (GIF, JPEG, PNG, etc.) have been created that attempt to compress the data somewhat to make smaller files.
Different file formats handle image transparency, which controls whether and how the background shows through the image, in different ways. Some, such as PNG, support an alpha channel, an extra value for every pixel reflecting the transparency at that point. Others, such as GIF, simply designate one entry in the palette as indicating transparency. Still others, like JPEG, don’t support transparency at all.
Rough and jagged edges, an effect known as aliasing, can make for unappealing images. Antialiasing involves moving or recoloring pixels at the edge of a shape to transition more gradually between the shape and its background. Some functions that draw on an image implement antialiasing.
With 256 possible values for each of red, green, and blue, there are 16,777,216 possible colors for each pixel. Some file formats limit the number of colors you can have in a palette (e.g., GIF supports no more than 256 colors); others let you have as many colors as you need. The latter are known as true color formats, because 24-bit color (8 bits each for red, green, and blue) gives more hues than the human eye can distinguish.
Creating and Drawing Images
For now, let’s start with the simplest possible GD example. Example 10-1 is a script that generates a black-filled square. The code works with any version of GD that supports the PNG image format.
Example 10-1. A black square on a white background (black.php)
<?php
$image = imagecreate(200, 200);

$white = imagecolorallocate($image, 0xFF, 0xFF, 0xFF);
$black = imagecolorallocate($image, 0x00, 0x00, 0x00);
imagefilledrectangle($image, 50, 50, 150, 150, $black);

header("Content-Type: image/png");
imagepng($image);
Example 10-1 illustrates the basic steps in generating any image: creating the image, allocating colors, drawing the image, and then saving or sending the image. Figure 10-1 shows the output of Example 10-1.

Figure 10-1. A black square on a white background
To see the result, simply point your browser at the black.php page. To embed this image in a web page, use:
<img src="black.php" />
The Structure of a Graphics Program
Most dynamic image-generation programs follow the same basic steps outlined in Example 10-1.
You can create a 256-color image with the imagecreate() function, which returns an image handle:
$image = imagecreate(width, height);
All colors used in an image must be allocated with the imagecolorallocate() function. The first color allocated becomes the background color for the image1:
$color = imagecolorallocate(image, red, green, blue);
The arguments are the numeric RGB (red, green, blue) components of the color. In Example 10-1, we wrote the color values in hexadecimal to bring the function call closer to the HTML color representation #FFFFFF and #000000.
There are many drawing primitives in GD. Example 10-1 uses imagefilledrectangle(), in which you specify the dimensions of the rectangle by passing the coordinates of the top-left and bottom-right corners:
imagefilledrectangle(image, tlx, tly, brx, bry, color);
The next step is to send a Content-Type header to the browser with the appropriate content type for the kind of image being created. Once that is done, we call the appropriate output function. The imagejpeg(), imagegif(), imagepng(), and imagewbmp() functions create GIF, JPEG, PNG, and WBMP files from the image, respectively:
imagegif(image [, filename ]);
imagejpeg(image [, filename [, quality ]]);
imagepng(image [, filename ]);
imagewbmp(image [, filename ]);
If no filename is given, the image is output to the browser; otherwise, it creates (or overwrites) the image to the given file path. The quality argument for JPEGs is a value from 0 (worst-looking) to 100 (best-looking). The lower the quality, the smaller the JPEG file. The default setting is 75.
In Example 10-1, we set the HTTP header immediately before calling the output-generating function imagepng(). If you set the Content-Type at the very start of the script, any errors that are generated are treated as image data and the browser displays a broken image icon. Table 10-1 lists the image formats and their Content-Type values.
| Format | Content-Type |
|---|---|
| GIF | image/gif |
| JPEG | image/jpeg |
| PNG | image/png |
| WBMP | image/vnd.wap.wbmp |
Changing the Output Format
As you may have deduced, generating an image stream of a different type requires only two changes to the script: send a different Content-Type and use a different image-generating function. Example 10-2 shows Example 10-1 modified to generate a JPEG instead of a PNG image.
Example 10-2. JPEG version of the black square
<?php
$image = imagecreate(200, 200);
$white = imagecolorallocate($image, 0xFF, 0xFF, 0xFF);
$black = imagecolorallocate($image, 0x00, 0x00, 0x00);

imagefilledrectangle($image, 50, 50, 150, 150, $black);

header("Content-Type: image/jpeg");
imagejpeg($image);
Testing for Supported Image Formats
If you are writing code that must be portable across systems that may support different image formats, use the imagetypes() function to check which image types are supported. This function returns a bit field; you can use the bitwise AND operator (&) to check if a given bit is set. The constants IMG_GIF, IMG_JPG, IMG_PNG, and IMG_WBMP correspond to the bits for those image formats.
Example 10-3 generates PNG files if PNG is supported, JPEG files if PNG is not supported, and GIF files if neither PNG nor JPEG is supported.
Example 10-3. Checking for image format support
<?php
$image = imagecreate(200, 200);
$white = imagecolorallocate($image, 0xFF, 0xFF, 0xFF);
$black = imagecolorallocate($image, 0x00, 0x00, 0x00);

imagefilledrectangle($image, 50, 50, 150, 150, $black);

if (imagetypes() & IMG_PNG) {
 header("Content-Type: image/png");
 imagepng($image);
}
else if (imagetypes() & IMG_JPG) {
 header("Content-Type: image/jpeg");
 imagejpeg($image);
}
else if (imagetypes() & IMG_GIF) {
 header("Content-Type: image/gif");
 imagegif($image);
}
Reading an Existing File
If you want to start with an existing image and then modify it, use imagecreatefromgif(), imagecreatefromjpeg(), or imagecreatefrompng():
$image = imagecreatefromgif(filename);
$image = imagecreatefromjpeg(filename);
$image = imagecreatefrompng(filename);
Basic Drawing Functions
GD has functions for drawing basic points, lines, arcs, rectangles, and polygons. This section describes the base functions supported by GD 2.x.
The most basic function is imagesetpixel(), which sets the color of a specified pixel:
imagesetpixel(image, x, y, color);
There are two functions for drawing lines, imageline() and imagedashedline():
imageline(image, start_x, start_ y, end_x, end_ y, color);
imagedashedline(image, start_x, start_ y, end_x, end_ y, color);
There are two functions for drawing rectangles, one that simply draws the outline and one that fills the rectangle with the specified color:
imagerectangle(image, tlx, tly, brx, bry, color);
imagefilledrectangle(image, tlx, tly, brx, bry, color);
Specify the location and size of the rectangle by passing the coordinates of the top-left and bottom-right corners.
You can draw arbitrary polygons with the imagepolygon() and imagefilledpolygon() functions:
imagepolygon(image, points, number, color);
imagefilledpolygon(image, points, number, color);
Both functions take an array of points. This array has two integers (the x and y coordinates) for each vertex on the polygon. The number argument is the number of vertices in the array (typically count($points)/2).
The imagearc() function draws an arc (a portion of an ellipse):
imagearc(image, center_x, center_ y, width, height, start, end, color);
The ellipse is defined by its center, width, and height (height and width are the same for a circle). The start and end points of the arc are given as degrees counting counterclockwise from 3 o’clock. Draw the full ellipse with a start of 0 and an end of 360.
There are two ways to fill in already-drawn shapes. The imagefill() function performs a flood fill, changing the color of the pixels starting at the given location. Any change in pixel color marks the limits of the fill. The imagefilltoborder() function lets you pass the particular color of the limits of the fill:
imagefill(image, x, y, color);
imagefilltoborder(image, x, y, border_color, color);
Another thing that you may want to do with your images is rotate them. This could be helpful if you are trying to create a web-style brochure, for example. The imagerotate() function allows you to rotate an image by an arbitrary angle:
imagerotate(image, angle, background_color);
The code in Example 10-4 shows the black box image from before, rotated by 45 degrees. The background_color option, used to specify the color of the uncovered area after the image is rotated, has been set to 1 to show the contrast of the black and white colors. Figure 10-2 shows the result of this code.
Example 10-4. Image rotation example
<?php
$image = imagecreate(200, 200);
$white = imagecolorallocate($image, 0xFF, 0xFF, 0xFF);
$black = imagecolorallocate($image, 0x00, 0x00, 0x00);
imagefilledrectangle($image, 50, 50, 150, 150, $black);

$rotated = imagerotate($image, 45, 1);

header("Content-Type: image/png");
imagepng($rotated);

Figure 10-2. Black box image rotated 45 degrees
Images with Text
Often it is necessary to add text to images. GD has built-in fonts for this purpose. Example 10-5 adds some text to our black square image.
Example 10-5. Adding text to an image
<?php
$image = imagecreate(200, 200);
$white = imagecolorallocate($image, 0xFF, 0xFF, 0xFF);
$black = imagecolorallocate($image, 0x00, 0x00, 0x00);

imagefilledrectangle($image, 50, 50, 150, 150, $black);
imagestring($image, 5, 50, 160, "A Black Box", $black);

header("Content-Type: image/png");
imagepng($image);
Figure 10-3 shows the output of Example 10-5.

Figure 10-3. The black box image with added text
The imagestring() function adds text to an image. Specify the top-left point of the text, as well as the color and the font (by GD font identifier) to use:
imagestring(image, font_id, x, y, text, color);
Fonts
GD identifies fonts by an ID. Five fonts are built in, and you can load additional fonts through the imageloadfont() function. The five built-in fonts are shown in Figure 10-4.

Figure 10-4. Native GD fonts
Here is the code used to show you these fonts:
<?php
$image = imagecreate(200, 200);
$white = imagecolorallocate($image, 0xFF, 0xFF, 0xFF);
$black = imagecolorallocate($image, 0x00, 0x00, 0x00);

imagestring($image, 1, 10, 10, "Font 1: ABCDEfghij", $black);
imagestring($image, 2, 10, 30, "Font 2: ABCDEfghij", $black);
imagestring($image, 3, 10, 50, "Font 3: ABCDEfghij", $black);
imagestring($image, 4, 10, 70, "Font 4: ABCDEfghij", $black);
imagestring($image, 5, 10, 90, "Font 5: ABCDEfghij", $black);

header("Content-Type: image/png");
imagepng($image);
You can create your own bitmap fonts and load them into GD using the imageloadfont() function. However, these fonts are binary and architecture-dependent, making them nonportable from machine to machine. Using TrueType fonts with the TrueType functions in GD provides much more flexibility.
TrueType Fonts
TrueType is an outline font standard; it provides more precise control over the rendering of the characters. To add text in a TrueType font to an image, use imagettftext():
imagettftext(image, size, angle, x, y, color, font, text);
The size is measured in pixels. The angle is in degrees from 3 o’clock (0 gives horizontal text, 90 gives vertical text going up the image, etc.). The x and y coordinates specify the lower-left corner of the baseline for the text. The text may include UTF-82 sequences of the form ê to print high-bit ASCII characters.
The font parameter is the location of the TrueType font to use for rendering the string. If the font does not begin with a leading / character, the .ttf extension is added and the font is looked up in /usr/share/fonts/truetype.
By default, text in a TrueType font is antialiased. This makes most fonts much easier to read, although very slightly blurred. Antialiasing can make very small text harder to read, though—small characters have fewer pixels, so the adjustments of antialiasing are more significant.
You can turn off antialiasing by using a negative color index (e.g., −4 means to use color index 4 without antialiasing the text).
Example 10-6 uses a TrueType font to add text to an image, searching for the font in the same location as the script, but still having to provide the full path to the location of the font file (included in the book’s code examples).
Example 10-6. Using a TrueType font
<?php
$image = imagecreate(350, 70);
$white = imagecolorallocate($image, 0xFF, 0xFF, 0xFF);
$black = imagecolorallocate($image, 0x00, 0x00, 0x00);


$fontname = "c:/wamp64/www/bookcode/chapter_10/IndieFlower.ttf";

imagettftext($image, 20, 0, 10, 40, $black, $fontname, "The Quick Brown Fox");

header("Content-Type: image/png");
imagepng($image);
Figure 10-5 shows the output of Example 10-6.

Figure 10-5. Indie Flower TrueType font
Example 10-7 uses imagettftext() to add vertical text to an image.
Example 10-7. Displaying vertical TrueType text
<?php
$image = imagecreate(70, 350);
$white = imagecolorallocate($image, 255, 255, 255);
$black = imagecolorallocate($image, 0, 0, 0);

$fontname = "c:/wamp64/www/bookcode/chapter_10/IndieFlower.ttf";

imagettftext($image, 20, 270, 28, 10, $black, $fontname, "The Quick Brown Fox");

header("Content-Type: image/png");
imagepng($image);
Figure 10-6 shows the output of Example 10-7.

Figure 10-6. Vertical TrueType text
Dynamically Generated Buttons
Creating images for buttons on the fly is one popular use for generating images (this topic was introduced in Chapter 1). Typically, this involves compositing text over a preexisting background image, as shown in Example 10-8.
Example 10-8. Creating a dynamic button
<?php
$font = "c:/wamp64/www/bookcode/chapter_10/IndieFlower.ttf" ;
$size = isset($_GET['size']) ? $_GET['size'] : 12;
$text = isset($_GET['text']) ? $_GET['text'] : 'some text';

$image = imagecreatefrompng("button.png");
$black = imagecolorallocate($image, 0, 0, 0);

if ($text) {
 // calculate position of text
 $tsize = imagettfbbox($size, 0, $font, $text);
 $dx = abs($tsize[2] - $tsize[0]);
 $dy = abs($tsize[5] - $tsize[3]);
 $x = (imagesx($image) - $dx ) / 2;
 $y = (imagesy($image) - $dy ) / 2 + $dy;

 // draw text
 imagettftext($image, $size, 0, $x, $y, $black, $font, $text);
}

header("Content-Type: image/png");
imagepng($image);
In this case, the blank button (button.png) is overwritten with the default text, as shown in Figure 10-7.
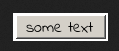
Figure 10-7. Dynamic button with default text
The script in Example 10-8 can be called from a page like this:
<img src="button.php?text=PHP+Button" />
This HTML generates the button shown in Figure 10-8.

Figure 10-8. Button with generated text label
The + character in the URL is the encoded form of a space. Spaces are illegal in URLs and must be encoded. Use PHP’s urlencode() function to encode your button strings. For example:
<img src="button.php?text=<?= urlencode("PHP Button"); ?>" />
Caching the Dynamically Generated Buttons
It is somewhat slower to generate an image than to send a static image. For buttons that will always look the same when called with the same text argument, you can implement a simple cache mechanism.
Example 10-9 generates the button only when no cache file for that button is found. The $path variable holds a directory, writable by the web server user, where buttons can be cached; make sure it can be reached from where you run this code. The filesize() function returns the size of a file, and readfile() sends the contents of a file to the browser. Because this script uses the text form parameter as the filename, it is very insecure. (Chapter 14, which covers security issues, explains why and how to fix it.)
Example 10-9. Caching dynamic buttons
<?php

$font = "c:/wamp64/www/bookcode/chapter_10/IndieFlower.ttf";
$size = isset($_GET['size']) ? $_GET['size'] : 12;
$text = isset($_GET['text']) ? $_GET['text'] : 'some text';

$path = "/tmp/buttons"; // button cache directory

// send cached version

if ($bytes = @filesize("{$path}/button.png")) {
 header("Content-Type: image/png");
 header("Content-Length: {$bytes}");
 readfile("{$path}/button.png");

 exit;
}

// otherwise, we have to build it, cache it, and return it
$image = imagecreatefrompng("button.png");
$black = imagecolorallocate($image, 0, 0, 0);

if ($text) {
 // calculate position of text
 $tsize = imagettfbbox($size, 0, $font, $text);
 $dx = abs($tsize[2] - $tsize[0]);
 $dy = abs($tsize[5] - $tsize[3]);
 $x = (imagesx($image) - $dx ) / 2;
 $y = (imagesy($image) - $dy ) / 2 + $dy;

 // draw text
 imagettftext($image, $size, 0, $x, $y, $black, $font, $text);

 // save image to file
 imagepng($image, "{$path}/{$text}.png");
}

header("Content-Type: image/png");
imagepng($image);
A Faster Cache
Example 10-9 is still not as quick as it could be. Using Apache directives, you can bypass the PHP script entirely and load the cached image directly once it is created.
First, create a buttons directory somewhere under your web server’s DocumentRoot and make sure that your web server user has permissions to write to this directory. For example, if the DocumentRoot directory is /var/www/html, create /var/www/html/buttons.
Second, edit your Apache httpd.conf file and add the following block:
<Location /buttons/>
 ErrorDocument 404 /button.php
</Location>
This tells Apache that requests for nonexistent files in the buttons directory should be sent to your button.php script.
Third, save Example 10-10 as button.php. This script creates new buttons, saving them to the cache and sending them to the browser. There are several differences from Example 10-9, though. We don’t have form parameters in $_GET, because Apache handles error pages as redirections. Instead, we have to pull apart values in $_SERVER to find out which button we’re generating. While we’re at it, we delete the '..' in the filename to fix the security hole from Example 10-9.
Once button.php is installed, when a request comes in for something like http://your.site/buttons/php.png, the web server checks whether the buttons/php.png file exists. If it does not, the request is redirected to the button.php script, which creates the image (with the text “php”) and saves it to buttons/php.png. Any subsequent requests for this file are served up directly without a line of PHP being run.
Example 10-10. More efficient caching of dynamic buttons
<?php
// bring in redirected URL parameters, if any
parse_str($_SERVER['REDIRECT_QUERY_STRING']);

$cacheDir = "/buttons/";
$url = $_SERVER['REDIRECT_URL'];

// pick out the extension
$extension = substr($url, strrpos($url, '.'));

// remove directory and extension from $url string
$file = substr($url, strlen($cacheDir), -strlen($extension));

// security - don't allow '..' in filename
$file = str_replace('..', '', $file);

// text to display in button
$text = urldecode($file);

$font = "c:/wamp64/www/bookcode/chapter_10/IndieFlower.ttf" ;


// build it, cache it, and return it
$image = imagecreatefrompng("button.png");
$black = imagecolorallocate($image, 0, 0, 0);

if ($text) {
 // calculate position of text
 $tsize = imagettfbbox($size, 0, $font, $text);
 $dx = abs($tsize[2] - $tsize[0]);
 $dy = abs($tsize[5] - $tsize[3]);
 $x = (imagesx($image) - $dx ) / 2;
 $y = (imagesy($image) - $dy ) / 2 + $dy;

 // draw text
 imagettftext($image, $size, 0, $x, $y, $black, $font, $text);

 // save image to file
 imagepng($image, "{$_SERVER['DOCUMENT_ROOT']}{$cacheDir}{$file}.png");
}

header("Content-Type: image/png");
imagepng($image);
One significant drawback to the mechanism in Example 10-10 is that the button text cannot contain any characters that are illegal in a filename. Nonetheless, this is the most efficient way to cache dynamically generated images. If you change the look of your buttons and you need to regenerate the cached images, simply delete all the images in your buttons directory, and they will be re-created as they are requested.
You can also take this a step further and get your button.php script to support multiple image types. Simply check $extension and call the appropriate imagepng(), imagejpeg(), or imagegif() function at the end of the script. You can also parse the filename and add modifiers such as color, size, and font, or pass them right in the URL. Because of the parse_str() call in the example, a URL such as http://your.site/buttons/php.png?size=16 displays “php” in a font size of 16.
Scaling Images
There are two ways to change the size of an image. The imagecopyresized() function is fast but crude, and may produce jagged edges in your new images. The imagecopyresampled() function is slower, but uses pixel interpolation to generate smooth edges and give clarity to the resized image. Both functions take the same arguments:
imagecopyresized(dest, src, dx, dy, sx, sy, dw, dh, sw, sh);
imagecopyresampled(dest, src, dx, dy, sx, sy, dw, dh, sw, sh);
The dest and src parameters are image handles. The point (dx, dy) is the point in the destination image where the region will be copied. The point (sx, sy) is the upper-left corner of the source image. The sw, sh, dw, and dh parameters give the width and height of the copy regions in the source and destination.
Example 10-11 takes the php.jpg image shown in Figure 10-9 and smoothly scales it down to one-quarter of its size, yielding the image in Figure 10-10.
Example 10-11. Resizing with imagecopyresampled()
<?php
$source = imagecreatefromjpeg("php_logo_big.jpg");

$width = imagesx($source);
$height = imagesy($source);
$x = $width / 2;
$y = $height / 2;

$destination = imagecreatetruecolor($x, $y);
imagecopyresampled($destination, $source, 0, 0, 0, 0, $x, $y, $width, $height);

header("Content-Type: image/png");
imagepng($destination);

Figure 10-9. Original php.jpg image

Figure 10-10. Resulting 1/4-sized image
Dividing the height and the width by 4 instead of 2 produces the output shown in Figure 10-11.

Figure 10-11. Resulting 1/16-sized image
Color Handling
The GD library supports both 8-bit palette (256 color) images and true color images with alpha channel transparency.
To create an 8-bit palette image, use the imagecreate() function. The image’s background is subsequently filled with the first color you allocate using imagecolorallocate():
$width = 128;
$height = 256;

$image = imagecreate($width, $height);
$white = imagecolorallocate($image, 0xFF, 0xFF, 0xFF);
To create a true color image with a 7-bit alpha channel, use the imagecreatetruecolor() function:
$image = imagecreatetruecolor(width, height);
Use imagecolorallocatealpha() to create a color index that includes transparency:
$color = imagecolorallocatealpha(image, red, green, blue, alpha);
The alpha value is between 0 (opaque) and 127 (transparent).
While most people are used to an 8-bit (0–255) alpha channel, it is actually quite handy that GD’s is 7-bit (0–127). Each pixel is represented by a 32-bit signed integer, with the four 8-bit bytes arranged like this:
High Byte Low Byte
{Alpha Channel} {Red} {Green} {Blue}
For a signed integer, the leftmost bit, or the highest bit, is used to indicate whether the value is negative, thus leaving only 31 bits of actual information. PHP’s default integer value is a signed long into which we can store a single GD palette entry. Whether that integer is positive or negative tells us whether antialiasing is enabled for that palette entry.
Unlike with palette images, with true color images the first color you allocate does not automatically become your background color. Instead, the image is initially filled with fully transparent pixels. Call imagefilledrectangle() to fill the image with any background color you want.
Example 10-12 creates a true color image and draws a semitransparent orange ellipse on a white background.
Example 10-12. A simple orange ellipse on a white background
<?php
$image = imagecreatetruecolor(150, 150);
$white = imagecolorallocate($image, 255, 255, 255);

imagealphablending($image, false);
imagefilledrectangle($image, 0, 0, 150, 150, $white);

$red = imagecolorallocatealpha($image, 255, 50, 0, 50);
imagefilledellipse($image, 75, 75, 80, 63, $red);

header("Content-Type: image/png");
imagepng($image);
Figure 10-12 shows the output of Example 10-12.

Figure 10-12. An orange ellipse on a white background
You can use the imagetruecolortopalette() function to convert a true color image to one with a color index (also known as a paletted image).
Using the Alpha Channel
In Example 10-12, we turned off alpha blending before drawing our background and our ellipse. Alpha blending is a toggle that determines whether the alpha channel, if present, should be applied when the image is drawn. If alpha blending is off, the old pixel is replaced with the new pixel. If an alpha channel exists for the new pixel, it is maintained, but all pixel information for the original pixel being overwritten is lost.
Example 10-13 illustrates alpha blending by drawing a gray rectangle with a 50 percent alpha channel over an orange ellipse.
Example 10-13. A gray rectangle with a 50% alpha channel overlaid
<?php
$image = imagecreatetruecolor(150, 150);
imagealphablending($image, false);

$white = imagecolorallocate($image, 255, 255, 255);
imagefilledrectangle($image, 0, 0, 150, 150, $white);

$red = imagecolorallocatealpha($image, 255, 50, 0, 63);
imagefilledellipse($image, 75, 75, 80, 50, $red);

imagealphablending($image, false);

$gray = imagecolorallocatealpha($image, 70, 70, 70, 63);
imagefilledrectangle($image, 60, 60, 120, 120, $gray);

header("Content-Type: image/png");
imagepng($image);
Figure 10-13 shows the output of Example 10-13 (alpha blending is still turned off).

Figure 10-13. A gray rectangle over the orange ellipse
If we change Example 10-13 to enable alpha blending just before the call to imagefilledrectangle(), we get the image shown in Figure 10-14.

Figure 10-14. Image with alpha blending enabled
Identifying Colors
To check the color index for a specific pixel in an image, use imagecolorat():
$color = imagecolorat(image, x, y);
For images with an 8-bit color palette, the function returns a color index that you then pass to imagecolorsforindex() to get the actual RGB values:
$values = imagecolorsforindex(image, index);
The array returned by imagecolorsforindex() has the keys 'red', 'green', and 'blue'. If you call imagecolorsforindex() on a color from a true color image, the returned array also has a value for the key 'alpha'. The values for these keys correspond to the 0–255 color values and the 0–127 alpha value used when calling imagecolorallocate() and imagecolorallocatealpha().
True Color Indexes
The color index returned by imagecolorallocatealpha() is really a 32-bit signed long, with the first three bytes holding the red, green, and blue values, respectively. The next bit indicates whether antialiasing is enabled for this color, and the remaining seven bits hold the transparency value.
For example:
$green = imagecolorallocatealpha($image, 0, 0, 255, 127);
This code sets $green to 2130771712, which in hex is 0x7F00FF00 and in binary is 01111111000000001111111100000000.
This is equivalent to the following imagecolorresolvealpha() call:
$green = (127 << 24) | (0 << 16) | (255 << 8) | 0;
You can also drop the two 0 entries in this example and just make it:
$green = (127 << 24) | (255 << 8);
To deconstruct this value, you can use something like this:
$a = ($col & 0x7F000000) >> 24;
$r = ($col & 0x00FF0000) >> 16;
$g = ($col & 0x0000FF00) >> 8;
$b = ($col & 0x000000FF);
Direct manipulation of color values like this is rarely necessary. One application is to generate a color-testing image that shows the pure shades of red, green, and blue. For example:
$image = imagecreatetruecolor(256, 60);

for ($x = 0; $x < 256; $x++) {
 imageline($image, $x, 0, $x, 19, $x);
 imageline($image, 255 - $x, 20, 255 - $x, 39, $x << 8);
 imageline($image, $x, 40, $x, 59, $x<<16);
}

header("Content-Type: image/png");
imagepng($image);
Figure 10-15 shows the output of the color-testing program.

Figure 10-15. The color test
Obviously it will be much more colorful than what we can show you here in black and white print, so try this example for yourself. In this particular example, it is much easier to simply calculate the pixel color than to call imagecolorallocatealpha() for every color.
Text Representation of an Image
An interesting use of the imagecolorat() function is to loop through each pixel in an image and do something with that color data. Example 10-14 prints # for each pixel in the image php-tiny.jpg in that pixel’s color.
Example 10-14. Converting an image to text
<html><body bgcolor="#000000">

<tt><?php
$image = imagecreatefromjpeg("php_logo_tiny.jpg");

$dx = imagesx($image);
$dy = imagesy($image);

for ($y = 0; $y < $dy; $y++) {
 for ($x = 0; $x < $dx; $x++) {
 $colorIndex = imagecolorat($image, $x, $y);
 $rgb = imagecolorsforindex($image, $colorIndex);

 printf('<font color=#%02x%02x%02x>#</font>',
 $rgb['red'], $rgb['green'], $rgb['blue']);
 }

 echo "<br>
";
} ?></tt>

</body></html>
The result is an ASCII representation of the image, as shown in Figure 10-16.

Figure 10-16. ASCII representation of an image
What’s Next
There are many different ways to manipulate images on the fly with PHP. This certainly dispels the myth that PHP is useful only for generating web HTML content. If you have the time and desire to explore what’s possible in more depth, feel free to experiment with the code samples here. In the next chapter we’ll be looking at another myth-buster in generating dynamic PDF documents. Stay tuned!
1 This is true only for images with a color palette. True color images created using ImageCreateTrueColor() do not obey this rule.
2 UTF-8 is an 8-bit Unicode (http://www.unicode.org) encoding scheme.