One of the first gear mistakes I made when starting to shoot video with an HDSLR camera was not using a fluid tripod head. It’s fine to use a regular photographic tripod head if you are shooting locked down and not planning on moving the camera while filming. But smooth panning and tilting demand a specialty head on a tripod with a bowl mount. The bowl helps you easily level the head no matter what position the legs are in—think of fitting a ball into a socket joint.
Tripod heads used in feature film production can cost thousands of dollars and are made to support heavy and unwieldy movie cameras. They are generally overkill for HDSLR filmmaking and often can throw the balance off with too much resistance.
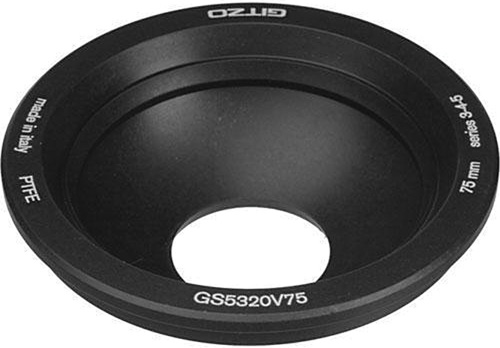
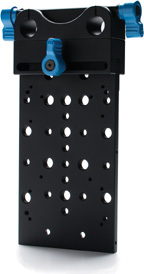
Tripod bowl mount
At the 2009 Cinegear show, I asked the Bogen Manfrotto booth rep which tripod head was best when using an HDSLR camera on a Redrock Micro support rig with a couple of accessories attached. He recommended the 503HDV fluid head because it can effectively hold 17.6 pounds and offers a nice fluid action when panning or tilting. With a street price of around $350, it is a good entry point for HDSLR filmmakers, and it was the first fluid head I added to my kit.
Recently, Manfrotto launched the 504HD designed specifically for HDSLR and HD camcorder filmmaking. In addition to being smooth and ergonomic, this fluid head has some cool features like the easy link connectors that provide a 3/8-inch female socket to screw in accessory arms for LCD monitors or other accessories directly to the tripod head. The design is smart and the ergonomic controls are easy to use. At $400 street, the 504HD is a great choice for HDSLR filmmaking and a versatile all around tripod head.
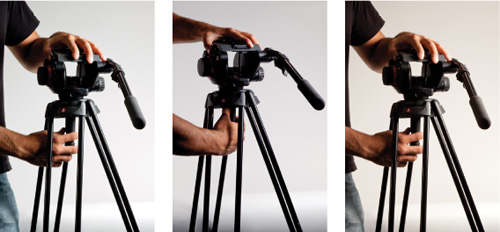
Head mounted on bowl being leveled

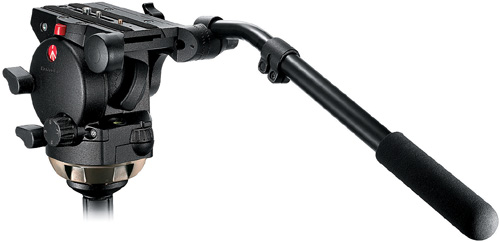
Fluid head
Some other choices for HDSLR filmmaking are the $650 Libec RH25, the $850 Cartoni F100, and the more pricey Sachtler FSB-6, coming in at $1,200.
Tripods come in a wide range of materials and weights, and the one you choose depends on what and where you are shooting and how you plan on arriving at the location. For video, you want the heaviest tripod you can find so that it can create a rock-solid platform that’s not easily swayed by wind or traffic vibrations. But when you are backpacking gear to a remote location, you’re probably willing to sacrifice some stability for weight.
Tripod selection is a personal choice. I recommend getting a fairly lightweight one that you can easily take with you without breaking your back. Remember, the camera kit you are shooting with is comprised of a lightweight DSLR that doesn’t require a 100-pound tripod like those used in motion picture productions. Besides, you can always add weight by hanging a sandbag from the center rod when you are in a studio or on location with support trucks and want a heavier base.
Tripods for photographic purposes usually have click stops that allow you to click the legs into several positions without having to use a spreader like oncinema and video tripods. This adds convenience to photo tripods and removes unnecessary complexity that isn’t required for lightweight, inexpensive cameras. It is highly unlikely that the weight of a DSLR camera and lens would need the robustness of cinema style tripods, especially with all the modern materials available today.
Look at kits from manufacturers with tripod and head combos. These kits are well-thought-out and can save you a lot of money over buying the parts separately. The Manfrotto 504HD with matching 546GBK Video Tripod and carrying case goes for around $800 on Amazon.com.
Beanbags or sandbags also offer great support for small cameras, especially when shooting low on the ground or when improvising a dolly move in a wheelchair. Several companies offer bags designed specifically to support video cameras, or you can DIY. One retail option is the Cinesaddle from Cinekinetic. The Cinesaddle costs around $350 and comes in several sizes with options like hidden storage compartments. The Camera Cradle from ikan is a more affordable option, coming in at a much more reasonable $100.
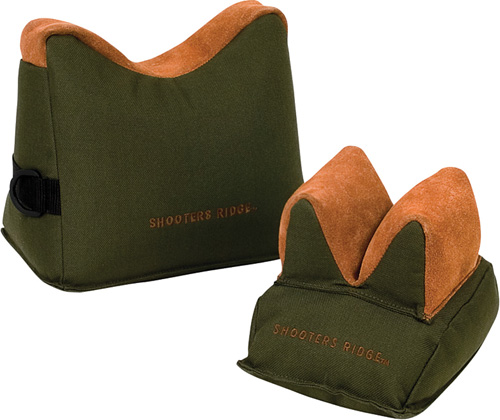
Shooters Ridge Bench SteadyBags
In between DIY and a specialty beanbag, you might consider a rifle support rest (steadying guns and cameras have a lot in common). For around $49, you can get small sandbags with a V cutout meant for the front or rear end of a rifle when shooting from a prone position. These support a DSLR nicely.
As we discussed previously, the ergonomics of a DSLR camera are not optimal for shooting motion. Think of it like the difference between shooting a pistol and a rifle. A pistol is optimized for quick access, shooting short bursts in close proximity. Kind of like a DSLR camera. When you need a steady shot, the form factor changes to a more elongated design with supportive points of contact to aid in limiting motion as you fire the weapon. Now, instead of a short barreled pistol that sits in your hands, you have a rifle with a long barrel, a shoulder stock with cheek rest, an optical scope, extra hand holds, and so on that allow you to aim and steady the rifle using multiple contact points minimizing movement.
So the first job of a support system is to stabilize the camera in order to minimize movement, which is just as important when shooting motion as it is in target practice. No matter how steady you think your hands are, footage shot holding a DSLR without support will be shaky and look amateurish. It won’t even look as good as hand-held video from a camcorder because even handycam systems are designed from the ground up to offer a stable platform while shooting motion.
A good HDSLR support system will add points of contact and offer ways to balance the rig itself as well as the weight of the camera, lens, and accessories. You don’t have to reinvent the wheel when trying to support your DSLR for motion. Motion picture cameras use standardized rail systems to accommodate the rigors of filmmaking with large unwieldy cameras that have a multitude of attachments.
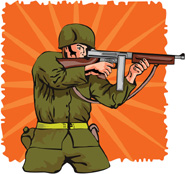
A rifle being held steady
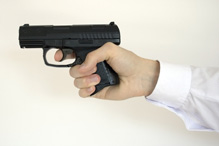
A pistol in a one-handed firing position
Redrock Micro was the first manufacturer to take this concept, shrink it down, and adapt it to the specific needs of HDSLR cameras. This system is comprised of a base plate that attaches to the camera with slots for rails that offer placement flexibility and the ability to add brackets and adapters for a multitude of peripherals and attachments.

Redrock Micro rig
For shooting hand-held, my favorite configuration is the shoulder rig. A shoulder support rig changes the ergonomics of a DSLR camera into a form factor that closely resembles electronic news gathering (ENG) video cameras like the ones reporters and documentary shooters carry around on their shoulders. Shoulder mounts offer great multi-point contact support and, if balanced correctly, can be comfortable when shooting for extended periods. Your instincts might lead you astray when it comes to balancing video and adding counterweights. The first time I used a Redrock shoulder rig, I removed one of the two counter weights that hung over the back of my shoulder. I did this for temporary comfort and so that I could move quicker, but I didn’t realize how important weight is when shooting video. The weights balance the load so you’re not constantly fighting to level your rig. Their heaviness also dampens movement, which allows for smooth tilts and pans.
One of the things that makes the Redrock Micro DSLR Field Cinema V2 rig my favorite is the microBalance Plus vertical plate that allows the replacement of the counter balance weights with batteries, sound recorders, or other accessories hung in a vertical orientation. A good configuration is to use an Anton Bauer battery and Zoom H4N as your counterweights instead of adding them to the front of your rig or on your belt.
I’m not the only one who likes these rigs. A little birdie told me that after the Fox television show House M.D. used HDSLRs to film their 2010 season finale, they stocked up on Redrock Micro DSLR Field Cinema Deluxe rigs for the next season. This support setup is becoming very popular in Hollywood circles. With a tripod quick release plate on the bottom, a tricked out shoulder rig is a joy to shoot with and one of the most useful support configurations for an indie filmmaker. You can go from hand-held configuration to tripod without making any changes to the rig. The shoulder mount is my favorite type of support rig.
HDSLR support systems are like erector sets for filmmaking, only limited by your imagination and budget. These systems offer better ergonomics and support and the ability to add accessories to the camera platform.
The microBalance Plus vertical plate

The next important accessory is a follow focus wheel to aid in a smooth manual focus pull, even during a take. A follow focus wheel like the microFollowFocus from Redrock Micro uses gears matched to cinema lenses or to adapter rings on still lenses. The gearing aids in smoothing out focus while keeping your fingers off the barrel of the lens where vibration is more likely to occur. Adding a whip keeps your hands even farther away from the lens and allows focusing from off angles and in hard-to-reach places.
When you start adding all these accessories to your camera, you might want to consider adding a handle like the microHandle to your rig to make it easier to pick up and put down. It aids in shooting from a low angle and for holding the camera off to one side. A nice lightweight configuration for this kind of shooting would be a microShoeClamp with a microHandle (both from Redrock Micro). This setup attaches to the camera’s hotshoe, which is screwed directly into the solid magnesium bodies of most HDSLRs to give you a nice top handle and a mount for other accessories like an LCD monitor.
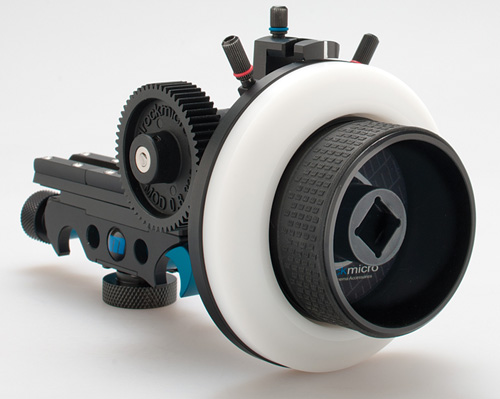
MicroFollowFocus
There are many options available for HDSLR support gear, and it’s a good idea to try before you buy. Then base your purchases on your needs, budget, and skill level.
If you’re not planning on using attachments other than a focus wheel and viewfinder loupe, a good minimalist option is the Run & Gun kit from iDC Photo Video’s Bruce Dorn. This kit isn’t a geared follow focus system and doesn’t use any rails. Instead, it consists of a base plate that holds a frame for attaching a Hoodman HoodLoupe or Zacuto Z-Finder, and a friction wheel next to the lens barrel for focusing. It’s a really nice streamlined design at an affordable price for shooters wanting a simple, low-profile gear package. This is the kind of rig you can shoot with when you’re stealing locations and don’t want to draw attention to the fact that you are filming a movie.

Improvising a top handle rig with Ultralight clamping arms and accessories

The Run & Gun Kit from iDC Photo Video’s Bruce Dorn
This isn’t really a rig per se, but it’s a cool configuration from Redrock Micro for shooting the POV (point of view) from a pistol or rifle. It’s called the GunCam, and it’s a great way to spice up an action short.

Redrock Micro GunCam

BHS GunCam being used
This rig allows you to place the camera out in front of the pistol or rifle looking right down the barrel and at the face of the person wielding the weapon. It distributes the weight along the bottom of the forearm of the person holding the rig. I wouldn’t want to wear it in actual combat, but it is pretty easy for the duration of an action scene.
A bit of camera movement goes a long way toward adding high production value to your shot. It doesn’t always take a crane or a large dolly and grip crew to pull off. Earlier, you read about using a beanbag to cushion and support the camera. Those work pretty good when slid along rails and banisters to emulate a dolly move.
Another really inexpensive camera movement technique uses gear you probably already have and a little practice. You just shorten your front tripod leg, and starting from a reclined or tilted back position, use the two back legs to pivot the camera forward holding onto the fluid head handle to keep the camera level (picture the arc of a pole vaulter). This technique works surprisingly well once you get the hang of it. You can watch an instructional video on YouTube at http://www.youtube.com/watch?v=LqPX0gH2id0.
Sliders and gliders are small, square or flat track pieces that use friction or ball bearings to slide or glide the camera the length of the unit. You can usually add cranks and motors to aid in precision movement. There are many brands and DIY kits on the market, starting at around a couple of hundred dollars to over $3,000. Some of them are very precise once you get the hang of it, but they are limited to fairly short lengths because they are rigid. That’s not always a problem since even a small move can make a big difference.
Shane Hurlbut, ASC, wrote a blog article about his first experience using the $3,000 CineSlider. From Hurlbut Visuals:
“When I started the five-week Marine’s commercial two months ago, I knew we would be in wide open spaces as well as tight quarters on the Amphibious Assault Destroyer. The project required gear that was versatile, so I turned to Kessler Crane’s CineSlider. NAB was where I first saw this baby in action. It was smooth, lightweight and quiet but beefy enough to take an Arri III.”
“The first place we used it was on the Assault Destroyer in the middle of the Atlantic. I was positioned up on the Crow’s nest of the ship and did a very subtle move from left to right as a C-22 Osprey lifted off and banked right. I had the railings in the foreground and I looked down the whole flight deck to what would have been a beautiful lock off shot, yet this small three-foot move gave it a big screen, cinematic feel.”
See http://www.hurlbutvisuals.com/blog/2010/09/17/when-a-small-move-makes-all-the-difference-kessler-cranes-cineslider/ for the full story.

John Early using CineSlider


Over the shoulder of the 5D with a 19mm R Series Leica moving from left to right to capture the Osprey take off
Skateboard or pocket dollies use skate type wheels angled to roll on lengths of traditional speed rail, conduit, PVC pipe, or other industrial materials. One of my favorites is the Dana Dolly (http://www.danadolly.com/). This $500 kit fits into a 1520 pelican or storm case and includes the dolly with special skate wheels, bowl adapters for fluid tripod heads, and track ends for speed rails. This mechanism is very fluid, and you can run it on speed rail or other pipe materials in lengths as long as you can find or transport. You can of course DIY a skate dolly using numerous video instructions on the Internet. However, you won’t be able to match the precision engineering and real-world testing that Mike Hall brings to the process, and it hardly seems worth the effort since the Dana Dolly is only $500.
“The Dana Dolly is made of 6061 Aluminum Hard Anodized Black to cut down on reflectivity. The bottom of the plate is milled out to cut down on overall weight, while not compromising strength. The triangle trucks are welded aluminum, hard anodized black. The wheels are custom made soft, then turned down to be round within 1/1000 of an inch (thinner than a human hair) to eliminate the “bounce” that normal skateboard wheels give. The turning process also helps keep down the squeak that some dollies experience. We have our bearings specially made to complement the wheels. The dolly wheels are designed soft to give a very smooth, squeak-free move with any size camera, and can be used for today’s SLRs.”
