
Though there’s no pressing need right now, it seems inevitable that Daisy’s Gone will need to support other languages on its website. Given the (partially) Italian blood that flows through the founding members, it seems like Italian language support is a good place to start. Porteremo Daisy per le persone buone d’Italia!
ASP.NET MVC and ASP.NET WebForms both offer localization support by way of resource (.resx) files. Orchard instead takes a different approach that is a better match for its modular architecture. This approach is to use PO files, which are simple text files with a well-defined format. PO files are commonly used by other web frameworks, including many other CMS platforms.
Within an Orchard site, there are three areas you might need to
localize. If your content creators are not native English speakers, you’ll
want to take advantage of the admin and module translation files that have
been created by the Orchard community. If you have developed a module that
you’ll share in the Orchard Gallery, you might want to contribute
translation files of your own. You’ll also likely want to enable the
Localization module to allow the
content that you create to be localized.
Whether you’re looking to localize for Italian, Polish, or some other language, you’ll first want to visit http://orchardproject.net/Localize/ for a listing of available translation files. For each listed locale, you’ll be able to download a ZIP file containing .po files with translations for the most common themes, modules, and admin utilities (including the command-line interface).
Browse to the Italian listing at http://orchardproject.net/Localize/IT-it. Click “Download the PO files” to get the ZIP file. After downloading, the easiest way to install a new translation is to open the ZIP file, and copy-and-paste the four directories (App_Data, Core, Modules, and Themes) into the root of your website (Orchard.Web). Windows Explorer will prompt you to merge the directories, which you should do.
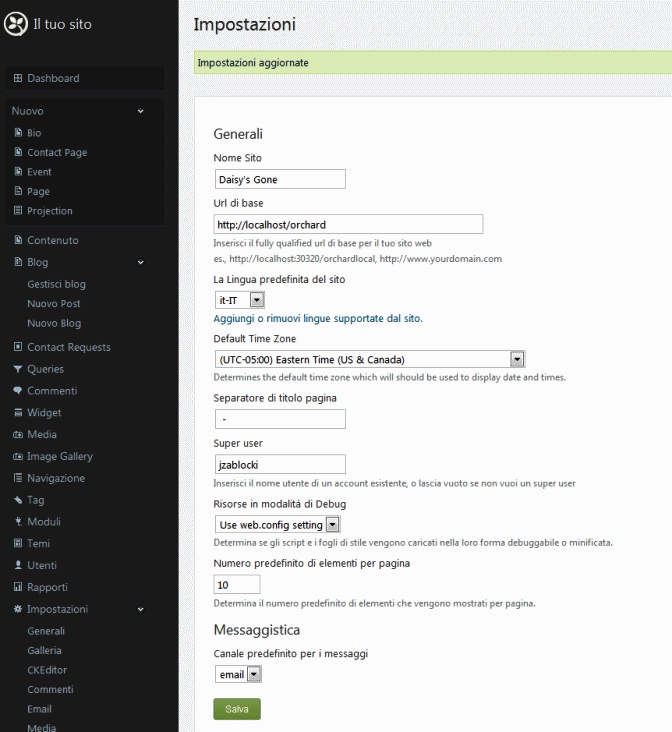
After merging, in the dashboard, select Settings→General. Under the “Default Site Culture” section, click “Add or remove supported cultures for this site.” Select the “IT-it” culture that you just downloaded and click “Add.” Return to Settings→General and select the new site culture. Click “Save” and you’ll see that the dashboard no longer displays English text—even the confirmation message has changed (Figure 7-1).
There’s also a Translation
Manager module that you could install from the Orchard
Gallery. This module allows you to install translation bundles from the
Orchard command-line interface.
All you need is the path to the downloaded ZIP file:
orchard> install translation C:UsersJohnDownloadspl-PL.zipWe won’t dig too deeply into creating our own PO files, but we’ll take a quick look at how the pieces come together. For more information on PO file options, Bing “PO Translation Files.” There’s even an open source PO file editor named Poedit available at https://github.com/vslavik/poedit.
To see how our Italian language translation works, let’s examine the
simple case of the “Save” button that appears on the General Settings
page. Recall that we just clicked this button when changing our culture to
Italian. In Visual Studio, locate the Orchard.Core project and navigate to the
Views directory under the Settings directory. In the Admin directory, open the file Index.cshtml, where you’ll find a button
defined as follows:
<button class="primaryAction" type="submit">@T("Save")</button>You might have seen the T method
in some templates along the way. This is the primary localization method
for Razor templates in Orchard. It’s defined in the WebViewPage class that we explored in Chapter 4. That method will locate culture specific
translations for your view files by using the translation files you
install (or create).
Note
T is actually implemented as a
property of type Localizer in
WebViewPage. Localizer is delegate, which allows the property to use
method call syntax in the templates.
In the Orchard.Core project,
navigate to the App_Data directory.
You might need to show hidden files. Expand the Localization directory to find the IT-it directory, which contains the translation
file orchard.core.po. Open this file
and search for “~/Core/Settings/Views/Admin/Index.cshtml.” You’ll find a
few results. The one you want has an id-string (second line) of
“Save.”
In the snippet below, you can see values for the original text, and its translation, as well as the context (template) of this text. The most important values are the last two, which together are sufficient to translate the text of our button. Of course, providing context allows us to avoid collisions in our translations. If you change “Salva” to another value, and refresh the “Settings” page while the Italian culture is selected, you’d see your button text appear:
#: ~/Core/Settings/Views/Admin/Index.cshtml
#| msgid "Save"
msgctxt "~/Core/Settings/Views/Admin/Index.cshtml"
msgid "Save"
msgstr "Salva"
Finally, we probably want to translate the content on the pages that
we’ve created so far. Before we continue, be sure to set your site back to
English (unless you’re feeling adventurous). Select Modules→Features (or Moduli→Funzionalitá, if you kept
Italian) and enable the Localization
module. After it’s enabled, you can select Content→Content Items, where you’ll now see “+ New
Translation” links under each page that we’ve created (the home, gallery,
and about pages).
To add translations to our Bio
and Event content types, we’ll simply
need to add the Localization content
part to the definition of these types. Click Content→Content Types and click “Edit” in the row for
each type. Under “Parts,” click “Add parts,” check “Localization,” and
click “Save.” Now when you click “Content,” you should see the “+ New
Translation” link under each of our content items (Figure 7-2).

To translate the homepage, return to Content→Content Items and click “+ New Translation” under the home page listing. You’ll see that there’s now a “Content Localization” section on our page editor. Select “it-IT” from the list. Copy the content from your “Body” section and get a translation from http://www.bing.com/translate or your favorite translator service. Paste the translated text back into the “Body” element and click “Publish Now.”
Browsing to the home page, you’ll see there’s now a “Translations:
it-IT” link on the page above the Content zone (Figure 7-3). Click that link to see the Italian
language translation of our home page. Note that our translated content is
actually a unique content item. Therefore, when we create translations for
content items, we are possibly duplicating our content maintenance efforts
(for items that aren’t translatable). Another repercussion of creating a
new item is that our home page alternate template won’t apply to our
translation (Figure 7-4).


As we’ve seen, Orchard has a great deal of flexibility for dealing
with localization. However, not all aspects of localization have been
fully baked. For example, if we created localized versions of our Bio items, our query for the “Bios” projection
page would list the translations as well. Keep these limitations in mind
as you plan your localization strategy. You might find yourself needing to
code for a solution.