
Chapter 6
Azure Functions
Overview
Azure Functions is a serverless compute service that provides on-demand access to infrastructures to run and scale applications dynamically. It eliminates the need to deploy, maintain, and manage servers in Azure, enabling organizations to focus on deploying and managing their application code.
You can use Azure Functions for trigger-based apps to:
Build web APIs for trigger-based actions.
Process bulk data streams.
Manage message queues.
Process IoT streams.
The back-end infrastructure resources are updated and managed completely by Microsoft. This frees up your organization to focus on your application code and the associated triggers. Developers can build and deploy code and allow Azure Functions to handle the rest.
The compute-on-demand provided by Azure Functions helps in two ways:
You can use Azure Functions to deploy the required business or system logic in available blocks of code or to build custom code for deployment. You can then define event triggers to initiate the function app.
Azure Functions provides additional resources as needed to the function app for the duration of demand. As soon as demand falls, the extra resources are removed automatically.
Azure Functions hosting options
A hosting plan defines the set of resources available to host function apps. There are features available for the function app for scaling, resource limits, networking integrations, and security changes based on the hosting plan. There are three types of hosting plans available for both Windows and Linux virtual machines:
Consumption plan
Premium plan
Dedicated (App Service) plan
Consumption plan
The Consumption plan is a pay-as-you-go plan that supports automatic scaling based on event-driven triggers. Each host in the Consumption plan has 1 CPU and 1.5 GB of memory. Based on the number of events triggering the function, more hosts will be made available for consumption. Then, when the number of events diminishes, the hosts will be automatically scaled back down to reduce associated charges.
Currently, the Consumption plan grants 1 million requests for free use, after which billing begins. However, this could change, so it is important to refer to the up-to-date documentation on the Microsoft site during planning.
The Consumption plan has numerous limitations, which relate to the maximum runtime, resource availability, and storage size supported by apps hosted in the plan. Take these into consideration when identifying the right plan to host your app.
Premium plan
The Premium plan provides automatic scaling capabilities, which can help function apps scale, and supports a much higher processing volume than the Consumption plan. In addition, some worker instances are constantly kept online, ensuring they are always warm and available when needed. And when required, even buffer worker instances are brought online and warmed up to ensure quick scaling.
The key benefits of the Premium plan are as follows:
Pre-warmed worker instances, ensuring continuous availability
More powerful hosts that support up to four CPUs and 14 GB of memory
More predictable pricing compared to the Consumption plan
Much longer runtimes than the Consumption plan
Connectivity to virtual networks in Azure and interconnected on-premises resources
The ability to define inbound network traffic IP restrictions
Dedicated plan
The Dedicated plan runs functions within an App Service plan. It is ideal for long-running functions that cannot be executed with the timeouts that apply on the Premium plan.
The key benefits of the Dedicated plan are as follows:
You can employ existing underutilized App Service Environment (ASE) instances for maximum efficiency.
Custom OS images are required to run function app code.
You can use both manual and automatic scaling.
Durable Functions
Azure Functions was primarily designed to process large, rapid bursts of events in a stateless manner. However, over time, as the role of Azure Functions has expanded, there was a need to support stateful functions for scenarios such as execution retries based on checkpoints rather than completely re-executing all tasks. Durable Functions extends the capabilities of Azure Functions to support such scenarios. It enables you to define stateful workflows by keeping track of the state, checkpoints, and restarts, so you can easily implement the required business logic. At present, Durable Functions supports code written in C#, JavaScript, Python, F#, and PowerShell, but support for more languages could be added over time.
Triggers
Every function requires a trigger, which causes the function to initiate. Each function is invoked based on how that trigger is defined. Each function must have only one trigger. There are different types of triggers. A few of these are detailed here:
HTTP trigger Initiates a function with an HTTP request. This type of trigger helps build serverless APIs and respond to webhooks.
Timer trigger Invokes a function based on a set schedule.
Queue trigger Invokes a function when a message is added to an Azure storage queue.
Service bus trigger Invokes a function to respond to messages from a Service Bus queue.
Blob storage trigger Invokes a function when a change takes place in a blob storage, such as the addition or modification of a blob.
Event Hub trigger Invokes a function based on specific events in an Event Hub stream.
Consider a scenario in which an online retail store receives orders on a web page. These orders must be processed and entered into the back-end database—in this example, Cosmos DB. A function app set up with a service bus trigger can pick up the order information from a service bus queue, process it, and send the output to the Cosmos DB database back end. (See Figure 6-1.)
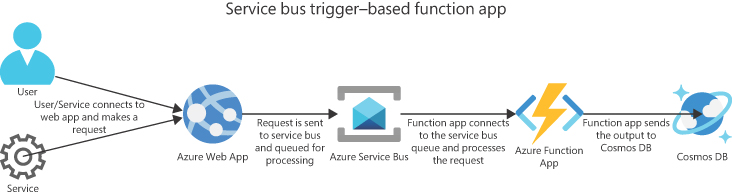
FIGURE 6-1 Service bus trigger–based function app.
Now consider another scenario that requires data from a PDF file to be read and stored in a back-end SQL database. In this scenario, a function app set up with an Azure storage queue trigger can read the PDF file from the blob storage and push the file to Cognitive Services, which can then write the output to the SQL DB. (See Figure 6-2.)

FIGURE 6-2 Queue trigger–based function app.
Bindings
A binding is a method of connecting a resource to a function for data input or data output, to be captured in parameters. For example, you can use the content of an Event Hub queue message as an input parameter to a function, and you can use the output return value of a function to create a queue message. Note that bindings are optional, and that every function can have one or more bindings (input and/or output).
Azure Functions walkthrough
The following section steps you through the process of creating a function app using the Azure Portal. Specifically, you will create an HTTP trigger–based app using the default code available in Azure.
Using the Azure Portal
To create a function app using the Azure Portal, follows these steps:
Log in to the Azure Portal and type function in the search bar.
Under Services, click Function App. (See Figure 6-3.)
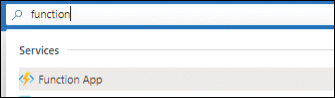
FIGURE 6-3 Search for the Function App service.
In the function app service page, click the Create Function App button to start the Create Function App wizard. (See Figure 6-4.)

FIGURE 6-4 Creating a function app.
In the Basics tab of the Create Function App wizard, enter the following information (see Figure 6-5) and click Next:
Subscription Select the subscription that will host the function app.
Resource Group Select an existing resource group or create a new one for the function app.
Function App Name Enter the name for the function app.
Publish You can publish the function app using code or a Docker container. In this case, choose Code.
Runtime Stack Select the application runtime stack—in this case, .NET.
Version Select version 3.1.
Region Select the Azure region where you want to host the function app.

FIGURE 6-5 The Basic tab for the Create Function App wizard.
In the Hosting tab, open the Storage Account drop-down list and choose an existing storage account for the function app. Alternatively, click the Create New link to create a new storage account specifically for this function app (recommended).
Next to Operating System, click either the Linux option button or the Windows option button—in this case, the Windows option button. (See Figure 6-6.)

FIGURE 6-6 Setting up the storage account and OS.
Still in the Hosting tab, under Plan, open the Plan Type drop-down list and choose Consumption (Serverless) (see Figure 6-7). Then click Next.

FIGURE 6-7 Selecting the hosting plan type for the function app.
In the Monitoring tab, you have the option to enable Application Insights. For now, click the No option button next to Application Insights (see Figure 6-8) and click Next.
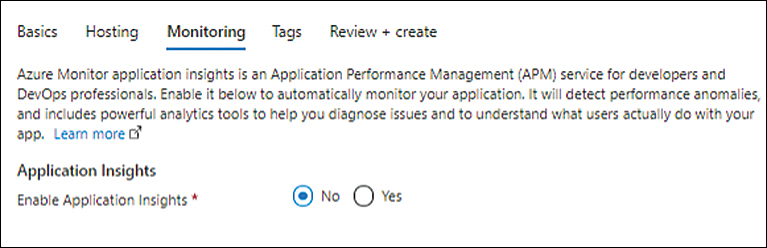
FIGURE 6-8 Leaving Application Insights disabled for now.
In the Tags tab, enter any tags you want to apply to the function app, and click Next.
On the Review + Create tab, review your settings and click Create to create the function app.
After the function app is created, click the Go to Resource button.
On the function app’s page (see Figure 6-9), click Functions in the left pane. Then click the Create button to start the Create Function wizard.

FIGURE 6-9 Creating the function.
In the Create Function wizard, open the Development Environment drop-down list and choose Develop in Portal.
Under Select a Template, choose a template for the function app’s trigger—in this case, HTTP Trigger. (See Figure 6-10.)

FIGURE 6-10 Selecting the trigger.
Under Template Details, in the New Function box, type a name for the new function.
Open the Authorization Level drop-down list and choose Anonymous. (See Figure 6-11.) Then click Create.

FIGURE 6-11 Setting the function name and authorization level.
After the function is created, click Code + Test in the left pane of the trigger’s page.
The function code appears. As you can see, it is a simple HTTP function that will show an output based on the variable passed to it.
Optionally, customize the message shown, if required. (See Figure 6-12.) Then click the Test/Run button to test the function.

FIGURE 6-12 Customizing the default function code.
In the Input tab, in the Body section, enter the value for the name parameter. (See Figure 6-13.) Then click Run.
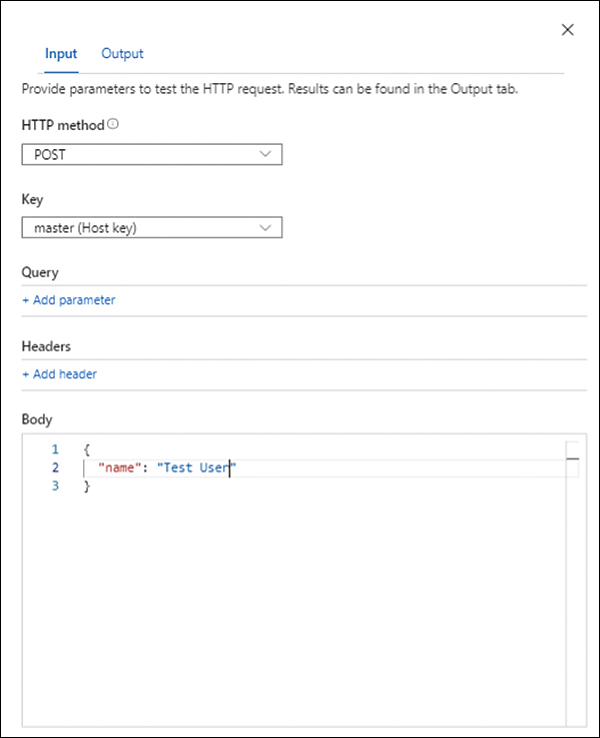
FIGURE 6-13 Setting up the name parameter in input.
The Output tab shows the expected output of the function. (See Figure 6-14.) Assuming the output is as you expected, you can test it using a web browser.

FIGURE 6-14 Output of the function.
Click the Get Function URL button. (See Figure 6-15.)

FIGURE 6-15 Getting the function URL.
Click the Copy to Clipboard button to copy the URL, as shown in Figure 6-16.
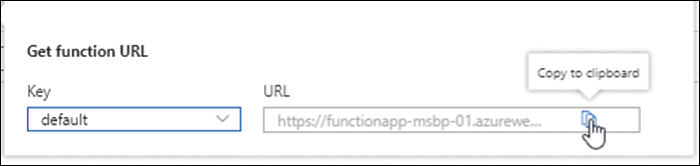
FIGURE 6-16 Copying the URL.
Open your web browser and paste the URL into the address bar. Then, at the end of the URL, type ?name=, set the expected parameter, and press Enter. (See Figure 6-17.)

FIGURE 6-17 Pasting the URL into your web browser.
Confirm that the output is correct output in the web browser. (See Figure 6-18.)

FIGURE 6-18 Confirming the output.
Deploy function apps
You can use various technologies to deploy function apps in different ways. The following sections explain this in more detail. Once you have a better understanding of the available options, you can decide on the right tool and deployment strategy.
Deployment methods
There are multiple methods available in Azure Functions for code deployment. These are as follows:
External package URL If the function app is hosted in a remote package—for example, a ZIP file—you can set up an external package URL to point to the location of the file. At the time of execution, the file will be downloaded and the app will run in Run from Package mode.
ZIP deploy ZIP deploy is another way to push a ZIP file containing the function app. All files for the function app must be part of the ZIP file.
Linux Docker container You can deploy a function app in Linux Docker container using the Azure Function App on Container Deploy task.
Web Deploy (MSDeploy) The Web Deploy method packages and deploys Windows-based function applications. Although this is supported for use with Windows apps, the recommended method is ZIP Deploy.
Source control You can set up continuous deployment using cloud-based repositories such as GitHub, Azure Repos, or Bitbucket for function app deployments. This is the preferred method of deployment for projects that require integration of multiple sources and frequent contributions for the team to be merged for deployments.
Local Git You can set up a local Git repository hosted on a client PC as a source to push code to Azure for the deployment of a function app.
Cloud sync You can use the cloud sync deployment method if the application content is stored in cloud repositories such as Dropbox and OneDrive.
FTP With one-time or irregular deployment requirements, you can use FTP to directly upload files to Azure Functions for app deployment.
Portal editing Azure provides a portal-based editor that you can use to build and edit code for the function app.
To deploy the code, follow these steps:
Open the function app’s page.
Click Deployment Center in the left pane.
In the right pane, open the Source drop-down list and choose the deployment source method. (See Figure 6-19.)

FIGURE 6-19 Selecting the deployment source method.
Deployment technologies
There are different technologies and tools available to deploy code to Azure Functions.
The following table provides a list of these along with ideal use cases for each. The deployment technology used is generally correlated to the deployment method to be used for the function app. The deployment method in turn is connected to two factors:
The requirements of the application or the development team.
The development cycle stage being deployed for.
This means that the deployment method and deployment tools used during development might differ from the ones used for production. The product code lifecycle management processes employed during development and production would primarily influence this.
The deployment tools and methods currently available, along with some suggestions on use cases, are as follows:
Tools-based deployment There are three tools that you can use to publish function apps:
Visual Studio
Visual Studio Code
Azure Functions Core Tools
It is best to use these during the initial development stages of a project or for ad-hoc deployments instead of as a deployment and management strategy for production builds.
Source control–based deployment App Services allows you to integrate function app deployment using Deployment Center or Kudu to different sources that support continuous deployment of code. These are the primary tools that you can leverage to establish DevOps in your environment when using functions with App Services.
External pipelines Azure supports Azure Pipelines and GitHub actions to establish DevOps pipelines that you can use for code validation, testing, and deployment. This is the recommended approach for production deployments at a minimum, if not for all development deployments, too.
Deployment slots
When a deployment is committed, any existing ongoing executions are permitted to complete or time out before new code is loaded to begin processing new requests. To avoid such scenarios, or to gain better control on the deployment of any code, it is advisable to use deployment slots. Deployment slots help provision different versions of code for different purposes—for example, production, staging, dev, and test.
Using deployment slots provides multiple benefits:
Separation of environments You can separate production code from staging, dev, and test code to make sure no accidental commits are performed in production.
Warm start Deploying code to a slot enables the app to come online and warm up before the slot is swapped to make the code live.
Easy rollbacks You can easily revert any unanticipated issues after deployment of new code by swapping the slots back to their earlier configuration.
To create a deployment slot, follow these steps:
Open the function app’s page.
Click Deployment Slots in the left pane.
In the right pane, click the Add Slot button and follow the prompts in the Add Slot wizard. (See Figure 6-20.)

FIGURE 6-20 Setting up deployment slots.
Event-driven scaling
Azure Functions supports event-driven scaling in the Consumption and Premium plans. When a scaling event takes place, additional host instances are made available to run the function app, thereby increasing the available CPU and memory resources.
There are some differences in the way scaling occurs under each plan. For example, in the Consumption plan, each function app within a plan scales independently, whereas in the Premium plan, all apps share the underlying host resources; therefore, any app being scaled will result in all apps being scaled to the same level. Also, when scaling in, with the Consumption plan, the number of hosts could eventually be scaled down to zero if no functions were running for an extended period. In contrast, with the Premium plan, the user can specify a minimum number of hosts.
Numerous factors can impact scaling behavior. For example:
Scale controller The scale controller monitors and manages scaling in a function app. The scale controller checks the rate of event generation and determines the scaling action to take—scaling in to reduce the number of available resources or scaling out to increase it. Based on the trigger used for the function app, the scale controller adjusts its unit of measurement. For example, for an Azure queue storage trigger, scaling is based on the queue length and the age of the oldest message.
Cold start This refers to scenarios in which the number of active instances is scaled down to zero. This occurs if the function app has been idle for a period of time. When the next request comes in, the required instances are brought online and scaled up if necessary. This results in some latency when the request is processed. Depending on the number of dependencies required by the function app, the cold start time can be extended. Cold starts apply when using the Consumption plan. If you need to maintain a minimum number of hosts online and provide faster scaling, you should use the Premium or Dedicated plan.
Scaling factors Scaling behavior depends on numerous factors, including the following:
Allocation of new instances HTTP and non-HTTP triggers have a different rate for allocation of new instances. For HTTP triggers, this can be as low as once per second, whereas for non-HTTP triggers, it can be much slower—one every 30 seconds. This can affect app performance.
Max instance support With the Consumption plan, every function app can scale to a maximum of 200 instances. With the Premium plan, this limit is lowered to 100 instances, but with a higher number of resources available per instance.
Scaling management
Function apps can depend on other services or components for data input and data output. In such cases, the scaling of a function app can be affected by throughput limits on these services or components—for example, throughput limits on a connected database or storage service. In such scenarios, you need to do one of the following (see Figure 6-21):
Scale the limits on those services in parallel.
Cap function app instances to scale to limits that are compatible with available capacities on the associated services or components.

FIGURE 6-21 Setting scale-out limits.
Best practices
You can optimize function apps in to improve the reliability, security, and performance of the app. The following sections contain the most widely used best practices that you can incorporate into your environment based on your application design and requirements.
Reliability best practices
Nowadays, function apps are used to run critical functionality for organizations. So, it’s critical to ensure that your apps are running with a high level of reliability to avoid a breakdown in business processes. Following are some recommended practices to incorporate in your function app to improve its reliability:
Avoid long-running functions Each hosting plan (Consumption, Premium, and Dedicated) supports different app-timeout durations. Long-running functions can reach these limits quite easily and cause timeout issues. You should monitor such functions to identify areas that can be broken down into smaller function sets to speed up execution and response times. This will improve the function app’s reliability.
Use cross-function communication Cross-function communication is important in scenarios in which the state information of one function is used as an input or trigger for another function. You can address this in a few different ways:
Durable Functions Durable Functions provide capabilities to build and manage stateful apps and communication between multiple functions.
Storage queues Storage queues provide a cheap alternative to Durable Functions and can be used in scenarios in which building Durable Functions is not possible. There is a limit of 64 KB on messages stored in a storage queue.
Service bus queues Service bus queues provide an alternative to storage queues in cases in which a higher limit than 64 KB is required. Service bus queues support messages up to 1 MB in size.
Service bus topics Service bus topics are useful in scenarios in which message filtering is required before queue processing.
Event Hubs You can use Event Hubs in scenarios in which you need to support high volumes of communications.
Use stateless functions Any state data should be associated with the application or event data. This will generally help make the app more scalable and reliable.
Write idempotent functions Idempotence is a property that allows any function to be run multiple times without affecting the final result beyond the first iteration. This can help in triggering a function at different times of day based on resource availability or in retriggering a function due to timeouts or failure.
Use defensive programming principles Defensive programming implies that functions are designed to take exception and failure scenarios into account such that retriggering the function will continue the operation from the point of failure. Even downstream services associated with the function will require consideration in the design phase to ensure that every aspect of the function can easily recover in the event of a failure or timeout.
Organizing functions
You can set up multiple functions as part of a single- or multiple-function app. Depending on the pricing plan, the apps will scale together or independently and share underlying resources. This will in turn influence performance and security.
Here are some organizational factors that can affect the performance and scaling of a function app:
In the Premium and Dedicated plans, every function shares the same underlying resources. The more functions in a function app, the more this resource sharing can affect performance due to excessive usage or a fault in a single function in the app.
Having multiple functions within a function app can cause the app to start up slowly. This is especially impactful in cold-start scenarios you might encounter when using the Consumption plan. If this poses a problem for your organization, you might need to upgrade to the Premium or Dedicated plan, both of which offer always-on functionality.
A function that stores large amounts of data in memory can have a detrimental impact on all functions within the app. In such scenarios, consider hosting such functions in their own app.
Functions that have much higher memory requirements can create a memory crunch for other functions in the same app when running on the Premium or Dedicated plan. In such scenarios, it may be better to host these functions in their own hosting plan. This makes it easier to scale them independently without affecting other functions.
In the Consumption plan, all apps are scaled independently. If your environment will be using the Consumption plan, it is recommended to host each app within its own plan, as this will reduce the dependency between the apps without affecting scaling, performance, or cost.
Organizational factors that relate to configuration and deployment include the following:
All functions in a function app share the same host.json file, which manages the advanced behavior of the function triggers and Azure Function runtime. If any function requires its own independent host.json file due to conflicting configuration or custom configuration requirements, it might be best to host it in an independent function app.
In scenarios in which different functions use different deployment methods or different deployment slots, it might be better to host them in different function apps.
Organizing functions based on permission requirements requires you to take into account the functions’ authorization and authentication requirements for when choosing a hosting plan. For example, suppose every function in a function app shares the same application settings. These settings would include connection strings and stored credentials. In scenarios where security is of paramount importance and access is to be limited to the maximum possible extent, it would be best to host only those functions that require the same level of access permissions in the same function app to avoid giving unwanted access to other functions.
Performance and scalability
Many factors influence how instances of a function app perform and scale. Following are a few factors to consider to optimize the performance and scalability of a function app:
Create connections to external resources You can reuse connections to external resources to avoid creating duplicate connections and consuming additional resources. There are connection limits on each function app instance; reusing client connections can help you avoid hitting this limit and prevent a scale-out event.
Enable Application Insights Enabling Application Insights can help you monitor a function app’s performance metrics, such as runtime executions, resource usage, and so on. This helps you better understand app behavior and plan for changes either in your hosting strategy or your code. Figure 6-22 and Figure 6-23 show the settings to enable Application Insights.

FIGURE 6-22 Enabling Application Insights.

FIGURE 6-23 Setting up Application Insights.
Separate function apps for production and dev/test In the Premium and Dedicated plans, underlying resources are shared by all functions in the function app. In such scenarios, it might be best to host production functions separately from dev/test functions in different function apps. This can help you prevent a code bug in dev/test causing performance degradation or an outage in production.
Host shared components in common storage If functions share any components, such as class files, it may be advisable to host the shared assembly in a shared storage location. This helps ensure that any assembly changes are deployed consistently across all functions in the app.
Don’t use verbose logging in production code Ensure that verbose logging is turned off in production code, as it can have a negative impact on application performance. You should enable verbose logging only in scenarios in which debugging is required, and only for the period during which you need to collect logs.
Use multiple worker processes One of the best ways to improve function performance is to configure them to invoke multiple worker processes per host to increase parallel processing. By default, this is set to a single worker process, and can be scaled up to 10 worker processes per host. As additional hosts are added to the app during scaling, more worker processes are used to distribute the load and improve performance.
Batch messages if possible Batching messages can help improve app performance, as multiple messages can be received in a single batch for processing. This can result in better execution performance as the host is in a warm state for multiple messages. Certain triggers such as Event Hub triggers support this capability, and if possible, should be used. You can define the maximum batch size to control the maximum number of messages received in each batch if you observe performance issues over time.
Set up concurrency if required You can set up concurrency to define the maximum concurrent requests that a function app can handle. You can define this using the host.json file. All functions in a function app will then share the concurrency limit. This can help ensure that apps accept only a certain threshold of requests to maximize app performance. In scenarios in which you know the acceptable load limits for functions in a function app, you can use this to optimize performance.
Storage best practices
Storage is a critical element in function app design. Here are a few best practices related to storage accounts used in function apps that can help improve their performance and security:
Set up shared storage accounts Every function app must be associated with a storage account when it is created. If a function generates lots of storage transactions, it can result in performance degradation for other functions sharing the same storage account. If there are functions in an app that can generate high storage transactions, it is best to use a dedicated storage account for that function app. In addition, if there is a function that writes lots of data to storage, it may be advisable to separate those write operations to another storage account instead of sharing the storage account used by the function app. This will maximize the performance of the function app.
Choose a storage location in the same region It is best to locate the storage account and function app in the same Azure region. This reduces latency and improves app performance. This is the default behavior when you use the Azure Portal; indeed, you cannot select another storage account. In certain scenarios, though, it might be necessary to use a storage account in another region due to compliance or security reasons. In such cases, you can use PowerShell or CLI to deploy the function app and specify the storage in another region during the creation process.
Encrypt storage data All data in the storage account used by the function app is encrypted at rest by default using platform-managed keys. This meets most security requirements. However, if your organization requires the use of its own encryption keys, you configure the storage account accordingly.
Use file shares for Linux apps Linux function apps support the use of Azure file shares for existing machine learning models or application data. You should use this functionality when possible instead of duplicating data for use by Linux function apps. Windows function apps currently do not support this functionality; however, this could change in the future.
Security best practices
Following are recommended best practices to improve the security posture of your function app. Make use of these based on your application design and setup:
Integrate Azure Security Center Azure Security Center performs free assessments of potential security vulnerabilities in the function app configuration. It is recommended that you use this feature to address potential loopholes in the function app security configuration.
Log and monitor functions You can monitor functions for security and performance in multiple ways, including the following:
Application Insights Integrate functions with Application Insights to collect application logs, monitor performance and errors to detect anomalies, better understand app usage metrics, and diagnose problems.
Azure Monitor Integrate functions with Azure Monitor to centrally log all events taking place on the functions in the app. This can help correlate performance or system issues with ongoing issues with other integrated services or system components.
Azure Log Analytics Integrate functions with Azure Log Analytics by streaming all platform logs and metrics to a Log Analytics workspace. This enables you to conduct historical performance analysis and plan for future growth.
Azure Sentinel You can use Azure Sentinel to monitor security events to prevent or plug security vulnerabilities in the function app. Azure Sentinel can read logs streamed to a Log Analytics workspace and provide a detailed analysis.
Allow only HTTPS connections By default, function endpoints support both HTTP and HTTPS connections. However, it is best to allow HTTPS connections only to ensure that all communication is encrypted by default. Redirecting all HTTP connections to HTTPS can help mitigate the risk of unencrypted communications. (See Figure 6-24.)

FIGURE 6-24 Allowing only HTTPS connections.
Use TLS 1.2 or above Microsoft is deprecating TLS 1.0 and 1.1 across all its platforms. It is therefore recommended that you set any new deployments to use TLS 1.2 by default and to migrate any existing deployments using TLS 1.0 or 1.1 to TLS 1.2 or newer as soon as possible. (See Figure 6-25.)

FIGURE 6-25 Setting the Minimum TLS version.
Limit the use of access keys You can use access keys to prevent anonymous users from accessing HTTP endpoints. Although allowing anonymous users might be acceptable during development or testing, it is not recommended in production deployments. It is better to use identity and access solutions such as Azure AD or other third-party solutions to ensure that application access is not defined in API keys shared publicly via the app access URLs.
Implement app-level authentication and authorization You can integrate various identity-management solutions, such as Azure Active Directory (AAD) with function apps for client authentication. This makes it easier to identify each individual user accessing the app and customize access policies based on the profile information.
Implement API-level authentication and authorization for management purposes Azure provides the Azure API Management (APIM) service to integrate and securely manage all function app APIs. This helps ensure that API access is controlled, monitored, and managed per your organization’s security requirements.
Limit user-management permissions to function apps You can set up users with management permissions for function apps using built-in Azure roles, such as Contributor, Owner, and Reader. You should limit management permissions based on user roles and limit the users who have more access than required for their daily activities. If a user requires Owner-level control for a specific set of activities, provide the access for the period of the activity and limit it thereafter.
Use Azure Key Vault Avoid storing secrets in function app code and application settings. Instead, use Azure Key Vault to store secrets, and integrate the function app with Azure Key Vault to access the required secrets at runtime and when required. This makes it easy for multiple function apps using the same connection strings and secrets to access them from the shared Key Vault without having to manage the application settings across each function app individually.
Use managed identities You can set up managed identities in Azure Active Directory (AAD) to create platform-managed IDs, which can be used to provision service level access. For example, a managed identity used in a function app can be given access to Azure Key Vault or to Azure queue or Azure storage. Because managed identities are managed by Azure, there is no requirement for key rotation on a regular basis, as the platform takes care of this. Use managed identities whenever possible instead of secrets to improve the function app’s security posture.
Restrict CORS access to specific domains Cross-origin resource sharing (CORS) allows web apps from different domains to make requests to the HTTP trigger endpoints in a function app. Azure provides built-in support for managing CORS headers in HTTP requests. You can allow required domains access to the endpoint to prevent cross-site scripting attacks. It is recommended that you avoid the use of wildcards to prevent exposure of access to all sites and opening the function app to such attacks.
Perform data validation Perform data validation for any data input to or output from a function app. This helps ensure that no injection attack can be used to provide unvalidated data to the function app or modify data from a function app before it is passed to a downstream service.
Disable FTP or enforce FTPS FTP is an unencrypted protocol and not recommended for use in most scenarios. By default, an FTP endpoint is enabled for deployment for every function app and is accessible using deployment credentials. It is recommended to avoid using FTP for deployments and to disable the protocol completely. If FTP must be used, you can enable FTPS to secure the communication channel (see Figure 6-26).

FIGURE 6-26 Setting up FTPS only.
Use access restrictions Azure provides an access restrictions feature to define allow/deny access lists to control network access to function apps. You can prioritize rules to address different types of access scenarios. By default, no rules are defined, which permits traffic from any address. If traffic to the function app is to be restricted from known sources, use this feature to secure network access.
Use a Private Endpoint for secure internal access You can integrate function apps with a private virtual network in Azure and any other interconnected networks using an Azure Private Endpoint. This opens secure private access to the functions from resources running in the Azure virtual network and on-premises networks connected over ExpressRoute or Site-to-Site VPN.
Deploy your function app in isolation For environments in which security is of utmost concern, you can deploy function apps using the Dedicated plan in an Azure ASE. This provides the function apps with a dedicated hosting environment that you can set up to control all incoming requests.
Use a gateway service You can use Azure Application Gateway or Azure Front Door with a web application firewall (WAF) to monitor and prevent attacks on a function app. Currently, function apps running in an Azure ASE on a Dedicated plan or function apps using Private Endpoints support such an integration. For environments in either scenario, consider the use of these services to secure the function app.