
In this section:
Working Collaboratively with Word 2010
Using the Word 2010 Web App
Co-Authoring a Document
Contacting Co-Authors
Reviewing Shared File Information
Working with Revision Marks
Comparing Changes in a Document
Combining Reviews
Viewing Documents Side by Side
Finalizing Your Document
In today’s rapidly growing worldwide marketplace, being able to share and work collaboratively on documents is more important than ever. Microsoft Word 2010 includes a big new co-authoring feature that enables you to actually work on your document alongside other authors. After you’ve saved the file to Microsoft SharePoint Workspace or Windows Live SkyDrive, you can open, edit, and save the file while seeing what others are doing in the file at the same time.
Word also includes a number of features that help you keep track of all the edits being made so that you can easily finalize the document after all the hard work is done. Using Track Changes, you can see the changes made by each reviewer, and then you can choose whether to accept or reject the changes that were made. When you’ve reviewed all the reviews and accepted or rejected the changes, you can then merge all the disparate pieces into one final document. When you’re ready to finalize your document, Word provides tools to help you make sure protections are in place and you’re sharing just what you intend to share.
With Word 2010, you can be more flexible and collaborative than ever. New tools enable you to work literally anywhere you have Internet access, share your files easily with friends and colleagues, and even co-author your files live with others while you’re all working in the document at the same time.

The Word 2010 Web App gives you the same familiar Word interface—complete with the ribbon and all your favorite tools—available in your Web browser. First, you save your file to Windows Live SkyDrive (a free service that is part of Windows Live) or Microsoft SharePoint Workspace 2010 (which is part of Microsoft Office 2010 Professional Plus), and then you can open, edit, share, and save your file normally in your favorite Web browser.

Microsoft SharePoint Workspace 2010 is a collaboration tool that is part of Microsoft Office 2010 Professional Plus. This server-based tool enables colleagues to create document libraries, chat online, co-author documents, download files from the server, and much more.

Windows Live SkyDrive (www.skydrive.live.com) is a free file storage and sharing service that is part of Microsoft’s Windows Live services. This type of online file management service is often referred to as cloud computing and is quickly becoming an energy-efficient, convenient way for individual users and businesses to back up and manage files while accessing them from any point they have Web or smartphone access. All you need to create a Windows Live SkyDrive account is a Windows Live ID, and Word 2010 walks you through the process the first time you attempt to save a file to Windows Live SkyDrive.

The Microsoft Office 2010 Upload Center is a tool that is available as part of Office 2010, designed to manage your file transfers when you need to synchronize files with a server. In most cases, the Upload Center handles transfers transparently, but you can display the Upload Center to check recent transfers, scheduled transfers, and more.
Word 2010 makes it easy for you to continue your work anywhere you have Web access by using the Word 2010 Web App. Now you can save your file to Windows Live SkyDrive and open it in a Web browser and continue working on it—adding content and formatting content; revising and updating your text and images, diagrams, and charts. You can also use the Word 2010 Web App with Microsoft SharePoint Workspace 2010, which is available with Microsoft Office 2010 Professional Plus.
Open the document you want to save online.
Click File and click Save & Send.
Click Save To Web.
Click one of the folders shown.
Or
Click New to sign in and create a new online folder.
Click Save As.


Tip
You can also open a document in Word 2010, which opens the file on your computer and then synchronizes your changes with the version on the server when you save the file.
If you are working with someone else preparing a document—perhaps a newsletter for a neighborhood association or a brochure for a nonprofit group—you need to be able to add your content and make changes, and then review what the other person has done as well. Now in Word 2010 you can both work in the file at the same time if you like. As each person edits the file, the section being edited is locked so the other person can’t change that section. Both you and your co-author can see the changes being made in real time and contact each other online using the presence features available through Office Communicator.
Log in to your Windows Live SkyDrive account.
Click the file you want to share.
Click Share and click Edit Permissions. In the next window, click My Documents and then click the link in the Shared With field.
Click Edit Permissions again.
Type your co-author’s e-mail address and press Enter.
Choose the level of permission you want your co-author to have.
Click Save.


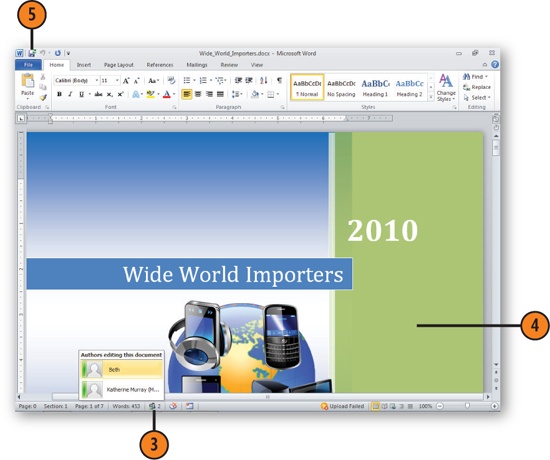
When you are working simultaneously in a file with a co-author, you can contact your co-author by e-mail, instant message, or phone to ask questions about the file, discuss possibilities, or just generally talk through your plans for the edits.


When you are working with a shared file, you can use the File tab to display information about file status, co-authors, and version information. Begin by clicking File to display Backstage view. The Info tab provides file properties as well as information related to the sharing of the file.


When you are working in a document that you plan to share with others, you can turn on Track Changes so that you can easily see where others make changes in the file. When Track Changes is turned on, Word marks all additions, deletions, moves, and formatting changes. When you’re reviewing the edited document, you can accept or reject any change or comment, view the changes made by individual reviewers, and even view the document as it was before any of the changes were made. You can also view the document as it would look if you accepted all the changes.
Open the document to be reviewed.
On the Review tab, click Track Changes in the Tracking group if it isn’t already selected.
Click Final Showing Markup in the Tracking group to see your changes.
Edit the content as usual. You can see the changes in the text.
To insert a comment, select the text you want to comment on and click New Comment.
Type your comment in the balloon that appears.
Choose Final view, review the document for any errors, and then save and close it.

Tip
In Draft view, all the changes are marked in the document, and any descriptions and comments are displayed in the Reviewing pane on the left side or at the bottom of the window. When you’re working in Page Layout view, click the Review tab and click Show Markup in the Tracking group to display the list. Point to Balloons to display the options that control how content changes appear in the document.
Open a document that has been reviewed and edited. If it’s marked as Read-Only, save it using a different name.
On the Review tab, click Track Changes in the Tracking group, if it’s selected, to turn it off.
Switch to Final Showing Markup view if it isn’t already selected.
Click Final: Show Markup, and specify the types of changes you want to be displayed. If you don’t want to see the markup from every reviewer, specify which reviewers’ changes you do want to see.
Click Next to locate a change. Click Accept to include the change or click Reject to delete the change. Continue choosing Accept or Reject to review and incorporate changes. To accept all the changes, click the down arrow on the Accept tool and choose Accept All Changes In Document from the drop-down menu. To reject all changes, click the down arrow on the Reject tool and choose Reject All Changes In Document.
When you’ve finished, switch to Final: Show Markup view, review the document for any errors, and then save and close it.

See Also
Comparing Changes in a Document on the next page for information about comparing two versions of the same document and marking the changes.
Tip
To highlight text without adding a comment, click the Highlight tool on the Home tab and drag the mouse pointer over the content you want to highlight.
See Also
Combining Reviews for information about combining separate files that contain marked changes by different reviewers.
If you have two versions of the same document, and changes have been made but not marked in one of them, how do you know what changes were made? Using Word’s Compare feature, you can compare the original with the revised document and have Word mark all the changes.
On the Review tab, click Compare in the Compare group and, in the gallery that appears, choose Compare to display the Compare Documents dialog box.
Specify the original document by clicking either the down arrow to see a list of recently used documents or the Browse button to locate and select the document.
Specify the revised document.
If you want to change the name assigned to a reviewer’s changes—to Reviewer 1, for example—enter the new name.
If the More button is displayed, click it to show the options for the comparison. (When the More button has been clicked, it’s replaced by the Less button.) Clear the check boxes for any items you don’t want to be marked and select the check boxes for the items you do want to be marked.
Specify how and where you want the changes to be shown.
Click OK.


Click the Reviewing Pane tool to show or hide the Reviewing pane. Click the down arrow at the right of the Reviewing Pane tool to change the location of the Reviewing pane.
Scroll through the main document, noting the changes. As you scroll, the source documents are simultaneously scrolled so that the same parts of the documents are shown in all windows.
Save the main document with the marked changes.
Review the main document, using the same methods you normally use when you’re reviewing any document that contains marked changes.

When co-authoring isn’t an option, you may need to send a document out for review. This means you’re likely to get back several separately reviewed and/or edited copies of the document. How do you combine all those separate changes into one document? If others used Word’s Track Changes feature, you can combine all their changes and comments by merging the separate documents into a single document so that you can easily create a final version.
Click Compare in the Compare group of the Review tab and click Combine.
Specify the document that contains the first set of reviews you want to use.
Select the document with the second set of reviews.
Click the More button if you want to modify which changes are displayed and in which document. (When the More button has been clicked, it’s replaced by the Less button.) Select the check boxes for the items you want to be marked as changed.
Specify whether you want each character or each word change to be noted and specify where you want the changes to be shown.
Click OK and then save the merged document.

Tip
When you combine two documents, you can include the formatting changes from only one of the documents. It’s a good idea, therefore, to clear the Formatting check box if you want to keep the formatting changes marked in the original document; otherwise, you can end up with only the formatting changes made in the revised document.
When you want to look at two documents simultaneously to compare their content, Word will place the documents in adjacent windows. If the documents are similar enough, you can have Word scroll through both of them at the same time or you can scroll through the documents one at a time.
Open the two documents you want to view and compare.
On the View tab, in one document, click the View Side By Side tool in the Windows group.
If a dialog box appears and asks you which document you want to view, select the document you want, and click OK.
If you don’t want the documents to scroll together, on the View tab, click the Window tool to expand the window section (if it’s collapsed), and click Synchronous Scrolling to turn off the scrolling. Click Synchronous Scrolling again to resume the coordinated scrolling.
Scroll through the documents. When you’ve finished, click the Window tool again, and click the View Side By Side button to turn off that view.

Tip
If you want to see two different parts of the same document, click the Windows Split bar at the top of the vertical scrollbar downward in the document. This splits the screen so that you can scroll to just the area of the document you’d like to see.
If you’ve ever released what you thought was the final version of a document, only to find that there were still changes marked on it or that it contained information you didn’t want others to see, you know that you don’t want to do that again! And if you’ve ever released a document whose wording made you cringe because someone had edited it without your permission, you don’t want that to happen again, either. Fortunately, Word provides tools to help you ensure that your document is really ready to share before you share it.
Click File, and in the Info tab, click Check For Issues.
Click Inspect Document.
Clear the check boxes for the items you want to keep in the document and select the check boxes for the items you don’t want to appear in the document.
Click Inspect.
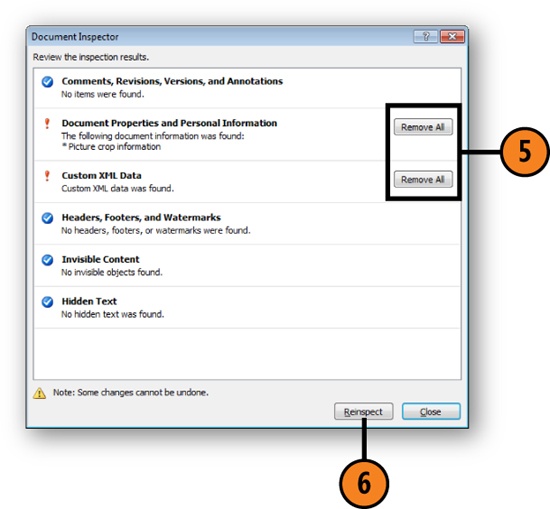
In the Document Inspector dialog box, click the Remove All button for each type of item you want to remove.
Click Reinspect if you want to recheck the document. Close the dialog box when you’re finished.
Close and distribute the document.


See Also
Password Protecting a File for information about using additional security settings to prevent changes to your document.