
3. Browser Handling in HTML5
Even though the HTML5 and accompanying specifications are not complete and the details are somewhat in flux, you can use many of the features right away. HTML5 is a developing language and incorporates a growing JavaScript API. Browser manufacturers are working hard to keep up with the growth of the new specifications. With these moving targets of new functionality and browser versions, we as developers can often run into browser support issues.
In this chapter, you will learn how to handle the differences between browsers and how you can plug the gaps using available tricks, tips, and scripts.
Beginner Recipe: Dealing with Internet Explorer
If you have been trying the code in the previous chapters in Internet Explorer (IE) 7, 8, or even 6 (we really hope you are not being forced to support IE6), then you may have noticed a slight problem—the pages you created in the recipes might not look as expected. That is because the code we have provided so far works natively only in the following major browsers: Firefox, Chrome, Safari, Opera, and Internet Explorer 9 (IE9). That is not to say that IE7 and IE8 do not support HTML5 entirely; there are various HTML5 APIs that do work in those browsers, such as drag and drop and ContentEditable.
Using JavaScript to Make HTML5 Compatible
IE6, 7, and 8, by default, do not recognize the new HTML5 elements, such as article or section, and therefore will not style these tags. If you do not do anything, the page will probably not look like you would hope. To have IE recognize the elements, you can programmatically create them through JavaScript as part of the DOM and then style them accordingly, as in this example:
<script>
document.createElement('article'),
document.createElement('section'),
//and so on
</script>
Of course, doing that for every single new HTML5 element would be a little tedious, and chances are that you would miss something. Luckily, you can use something called HTML5Shiv (http://code.google.com/p/html5shiv), written by Remy Sharp, which includes all the new elements and another bit of JavaScript called IE Print Protector (http://iecss.com/print-protector), which helps IE display HTML5 elements correctly. The “shiv” is designed to allow versions prior to IE9 to recognize the HTML5 elements and allow them to be styled using CSS.
Even though the script has conditional code within, so it runs only in IE, you might as well wrap it in a conditional comment of your own so only IE 8 and older download and run the code. This script must go in the head tag and before style sheet calls, as shown in Listing 3.1. It is up to you if you prefer to serve the html5shiv file locally or link directly to the http://googlecode.com-hosted file. Having the file locally will prevent both “resource not found” from any remote access issues and breakages due to future modifications to the JavaScript file.
Listing 3.1 Using the HTML5 Shiv
<!DOCTYPE html>
<html lang="en">
<head>
<meta charset="utf-8">
<!--[if lt IE 9]>
<script src="http://html5shiv.googlecode.com/svn/trunk/html5.js"></script>
<![endif]-->
<!-- put CSS after the shiv -->
</head>
Making CSS Compatible
Now that you can make IE support new HTML5 elements, you need to make it play nice with CSS. Most modern browsers know how to handle the new elements by default and without any styling; however, to make sure IE plays nice, you need to set your new elements to display: block, as shown in Listing 3.2.
Listing 3.2 Setting Up New Elements in CSS
article, aside, details, figcaption, figure, footer, header, hgroup, nav, section
{
display: block;
}
If you use a CSS reset, you could include the code in Listing 3.2, or there are various CSS resets currently available that include the HTML5 fixes:
• http://meyerweb.com/eric/thoughts/2011/01/03/reset-revisited
• Modernizr (which we will cover later in this chapter)
• http://html5doctor.com/html-5-reset-stylesheet
Boilerplates
Whether you are a newcomer or a veteran in the web development industry, you will have gathered various bits of best practices and code snippets that you reuse on almost every project. Depending how much time you have dedicated to organizing these components, you may already have your own boilerplate, which is a series of folders and files that allow you to start your project quickly. A couple of popular boilerplates are being advocated in the web community at the moment: http://html5boilerplate.com and http://html5reset.org. In addition, these boilerplates have already been extended to generate templates for your specific website or application through sites such as http://initializr.com, which uses the HTML5 Boilerplate.
These sites, HTML5 Boilerplate in particular, come with a wealth of documentation, instructions, and tips and tricks for your web project, which include markup, scripts, CSS, and optimization techniques.
The point of the boilerplates is not to just take it and start using it, but to understand what is in there and to add to or take things away that you either do not need or maybe disagree with, which is fine. The boilerplates are simply a place for you to start and gain the benefit of the work of many minds to provide HTML5 cross-browser support and performance structure. You may even end up with your own custom boilerplate based on the features you decide are important.
Tip
The HTML5 Boilerplate has a long list of features and benefits to leverage at the start of your project. Included in the boilerplate are browser compatibility models, older browser support options for HTML5, handling of mobile device design, and even an optimization build script. We recommend you check out the full feature set at http://html5boilerplate.com. And if you need an even more finished template to start with, check out http://initializr.com, which uses the HTML5 Boilerplate to create templates for you.
Beginner Recipe: Testing for HTML5 Features
Earlier you learned how to make browsers recognize the new HTML5 elements and how to use CSS to get them to display properly. But not all browsers support all the new HTML5 features such as canvas or geolocation. Although you still sometimes have to do some “browser sniffing” to get a browser to behave a certain way, this is not a recommended approach, and with the scope of HTML5 and the speed at which browsers are developing, you can instead use feature detection methods. Feature detection requires JavaScript, so you need to make sure your markup is good enough so it “degrades gracefully” and that users with older browsers and JavaScript turned off can still use the site.
In general, the features of HTML5 such as canvas and geolocation, which are part of the HTML5 elements and JavaScript APIs, can be determined to exist or not exist by checking for their presence with JavaScript. In Listing 3.3, you perform a simple check on the browser to determine whether the Geolocation API is available in the browser.
Listing 3.3 Testing for Geolocation HTML5 Support
<!DOCTYPE html>
<html>
<head>
<meta charset="UTF-8" />
<title>3 Geolocation Check</title><script>
if (navigator.geolocation) {
alert('Geolocation is supported.'),
} else {
alert('Geolocation is not supported.'),
}
</script>
</head>
<body>
</body>
</html>
With JavaScript APIs, it is quite easy to check for the presence of the API, and we will show this throughout the book. However, if you are trying to check for the availability of an HTML5 element such as the canvas element, the process is a little bit more involved. The recognized approach for checking for an element is to create the element and then attempt to retrieve a default method or attribute of the element. If the value returned is null or undefined, then the element is not supported by the browser. Listing 3.4 shows an example of how to do this with the canvas element.
Listing 3.4 Checking for canvas Support
<!DOCTYPE html>
<html>
<head>
<meta charset="UTF-8" />
<title>3 Canvas Check</title>
<script>
if (document.createElement('canvas').getContext) {
alert('Canvas is supported.'),
} else {
alert('Canvas is not supported.'),
}
</script>
</head>
<body>
</body>
</html>
You first created a new element of type canvas and immediately after checked to see whether the element provides a getContext method. You will see the canvas methods later in the book, but it is enough to know at this point that the getContext method is an essential and default method of any canvas object. So, if the getContext method does not exist on this element, then the element itself does not exist and canvas is not supported by this browser.
Intermediate Recipe: Leveraging jQuery to Replace a Calendar
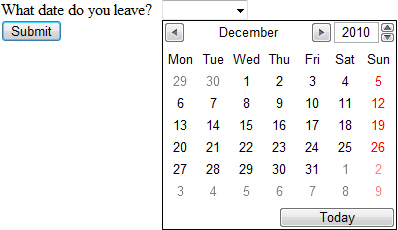
In Chapter 5, you will learn about all the new form features available in HTML5, but right now we will briefly introduce one of those new features, the date input type. The date input type displays a calendar widget to the user, as shown in Figure 3.1. Currently this works only in the Opera browser, and although it degrades nicely in other browsers by just showing a normal input element that the user can type a date into, here you want a calendar widget to appear in all browsers.
Figure 3.1 The <input type"date" /> element displayed in Opera 10.63
Here is the HTML code you need to get the input working in Opera:
<form>
<label for="date">What date do you leave?</label>
<input required type="date" id="date" name="date" />
<input type="submit" value="Submit" />
</form>
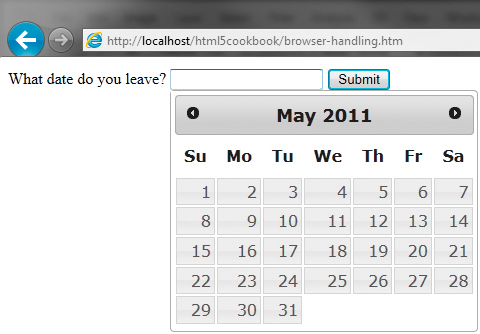
With JavaScript, you will create an element in the DOM, add the date type attribute to it, and then test whether the browser supports it. If the browser does support it, then you celebrate by doing nothing. But if the browser does not support it, then you provide a calendar widget. Figure 3.2 shows a calendar in Internet Explorer. Listing 3.5 shows the code for creating this. In this example, we have used jQuery to provide the calendar functionality, so we have linked directly to the necessary jQuery files for ease.
Figure 3.2 Internet Explorer with the fallback jQuery calendar
Listing 3.5 Using jQuery Calendar as a Fallback
<!DOCTYPE html>
<html lang="en">
<head>
<meta charset="utf-8">
<title>Detect the date input type</title>
<script src="http://ajax.googleapis.com/ajax/libs/jquery/1.4.4/jquery.min.js"></script>
<script src="http://ajax.googleapis.com/ajax/libs/jqueryui/1.8.7/jqueryui.min.js"></script>
<link rel="stylesheet" href="http://ajax.googleapis.com/ajax/libs/jqueryui/1.8.7/themes/base/jqueryui.css" media="screen" /><script>
$(function(){
function inputSupport() {
var input = document.createElement("input");
input.setAttribute("type", "date");
var val = (input.type !== "text");
delete input;
return val;
}
if (!inputSupport() || ($.browser.webkit)) {
//alert("the date input type is not supported");
$('input[type=date]').datepicker({
dateFormat: 'yy-mm-dd' // this format is the same format as in the HTML5 Specification
});
}
});
</script>
</head>
<body>
<form>
<label for="date">What date do you leave?</label> <input required type="date" id="date" name="date" />
<input type="submit" value="Submit" />
</form>
</body>
</html>
The eagle-eyed among you will have noticed the following bit of JavaScript: ($.browser.webkit). We have included this in Listing 3.5 because, frustratingly, WebKit browsers do detect <input type="date">, but at the moment, they do not do anything with it. The same thing happens with the input types email, number, tel, and url. So, that little bit of JavaScript makes sure the jQuery calendar widget works in Safari and Chrome. We hope soon these WebKit-based browsers will do something awesome with these input types by default so we can do away with the browser detection code.
The JavaScript code in Listing 3.5 deals only with detecting date type support. If you have other types to detect, you may want to tweak the previous code so you can test several input types. For example, see Listing 3.6.
Listing 3.6 Detecting Different Input Types
$(function(){
function inputSupport(inputType) {
var input = document.createElement("input");
input.setAttribute("type", inputType);
var val = (input.type !== "text");
delete input;
return val;
}
if (!inputSupport("date")) {
alert("the date input type is not supported");
//do something else instead
}
if (!inputSupport("email")) {
alert("the email input type is not supported");
//do something else instead
}
});
If you have a small site, maybe with just a few new HTML5 elements that you want to make available in all browsers, then the previous approach may be suitable because it is a fairly quick fix. However, if you perform a lot of functional support detection, it is likely to become tedious, so you might consider using a JavaScript library such as Modernizr.
Intermediate Recipe: Using Modernizr to Detect Features
Modernizr is a JavaScript library (found at http://modernizr.com) that detects what HTML5 and CSS3 features the browser supports and makes it simple for developers to test and code for the browsers that do not support some of the new technologies. In the previous examples, we used standard JavaScript to test for features, but with Modernizr it is incredibly easy.
Although Modernizr does the detection part for you, it does not, however, fill in the gaps and add the missing functionality for you. Regardless, it is an incredibly powerful bit of script that developers should be aware of and have ready in their arsenal. Now on version 2, the Modernizr library focuses on CSS3 detection, HTML5 tag support, and JavaScript API support. For each of these areas, the Modernizr library has particular properties that can be accessed after initialization and used to dynamically change the source and thus support multiple experiences and browsers. Some of the property flags include the following:
• Geolocation API
• localStorage
• sessionStorage
• Drag and Drop
• History Management
• applicationCache
• Web Sockets
• Web Workers
• Web SQL Database
• Input Types
• Input Attributes
The Modernizr library, or in its terms micro-library, is simple to use and has been integrated into major and minor sites around the world. Until all browsers support all features uniformly of HTML5, CSS3, and the JavaScript APIs, there will be a need for tools such as Modernizr.
So, how do you use it? To generate your file, you have to select the features you want to test for. Selecting only a few features is useful because it keeps the file size down and it makes you think more specifically about the features your website will have. So first, you generate a file from the site and, as shown in Listing 3.7, include the link in the head tag and add a class of no-js to the html tag.
Listing 3.7 Setting Up with Modernizr
<!DOCTYPE html>
<html class="no-js" lang="en">
<head>
<meta charset="utf-8">
<title>Let's go Modernizr</title>
<script src="modernizr.js"></script>
</head>
<body>
</body>
</html>
The Modernizr script will run automatically when included and will replace the no-js class attribute added to the html element. The script will dynamically attach CSS classes of what functionality the browser supports and also what functionality the browser does not support. The following code shows the html tag after the Modernizr script has run and replaced the class attribute in Chrome version 8. As you can see, the Chrome 8 browser supports many CSS3 and HTML5 goodies but does not support, for example, WebGL, so it adds a class of no-webgl.
<html lang="en" class=" js flexbox canvas canvastext no-webgl no-touch geolocation
postmessage websqldatabase no-indexeddb hashchange history draganddrop
websockets rgba hsla multiplebgs backgroundsize borderimage borderradius
boxshadow textshadow opacity cssanimations csscolumns cssgradients
cssreflections csstransforms no-csstransforms3d csstransitions fontface
video audio localstorage sessionstorage webworkers applicationcache svg
inlinesvg smil svgclippaths">
Listing 3.8 shows a simple use of how Modernizr exposes different feature support in the CSS tags by checking for Session Storage API support. If session storage is available, then the .sessionstorage class style will be used, and if session storage is not supported, then the .no-sessionstorage class style will be used.
Listing 3.8 CSS Options with Modernizr
<!DOCTYPE html>
<html class="no-js" lang="en">
<head>
<meta charset="UTF-8" />
<title>3 Modernizr CSS</title>
<style>
div.storageNo, div.storageYes { display: none }
.no-sessionstorage div.storageNo { display: block }
.sessionstorage div.storageYes { display: block }
</style>
<script src="modernizr.js" type="text/javascript"></script>
</head>
<body>
<div class="storageNo">SessionStorage is not supported.</div>
<div class="storageYes">SessionStorage is supported.</div>
</body>
</html>
So, in the previous example, the corresponding div will be displayed based on the support. But you could use this for any of the JavaScript API usage. A listing of all the properties exposed on the Modernizr object is available on the http://modernizr.com website in the documentation section.
Although this is useful for CSS development, Modernizr has a wealth of JavaScript properties that can be used for feature detection. In Listing 3.9, you programmatically alert the user whether session storage is available depending on a property of the Modernizr object.
Listing 3.9 Feature Detection with Modernizr and JavaScript
<!DOCTYPE html>
<html class="no-js">
<head>
<meta charset="UTF-8" />
<title>3 Modernizr JS</title>
<script src="modernizr.js" type="text/javascript"></script>
<script>
if (Modernizr.sessionstorage) {
alert('SessionStorage is supported.'),
} else {
alert('SessionStorage is not supported.'),
}
</script>
</head>
<body>
</body>
</html>
You can also use Modernizr in conjunction with jQuery and other libraries. Listing 3.5 uses a JavaScript solution to provide a calendar widget to browsers that do not support the HTML5 date input type. In Listing 3.10, we have re-created this example using Modernizr as our detection tool.
Listing 3.10 jQuery Calendar Fallback with Modernizr
<!DOCTYPE html>
<html class="no-js" lang="en">
<head>
<meta charset="utf-8">
<title>Let's go Modernizr</title>
<script src="modernizr2.js"></script>
<script src="http://ajax.googleapis.com/ajax/libs/jquery/1.4.4/jquery.min.js"></script>
<script src="http://ajax.googleapis.com/ajax/libs/jqueryui/1.8.7/jqueryui.min.js"></script>
<link rel="stylesheet" href="http://ajax.googleapis.com/ajax/libs/jqueryui/1.8.7/themes/base/jquery-ui.css" media="screen" />
<script>
$(function(){
//check to see browser does not support input type
if (!Modernizr.inputtypes.date){
$('input[type=date]').datepicker({
dateFormat: 'yy-mm-dd' // same format as in the HTML5 specification
});
}
});
</script>
</head>
<body>
<form>
<label for="date">What date do you leave?</label>
<input required type="date" id="date" name="date" />
<input type="submit" value="Submit" />
</form>
</body>
</html>
You do not typically have to use the opening bit of the JavaScript $(function(){}) as we did in Listing 3.10, but in this example we are using a jQuery calendar so it is needed. And that is all there is to it. It is really easy, and there are dozens of options in the Modernizr documentation at http://modernizr.com/docs, including the flexibility to extend the library with new tests.
Polyfilling
Being able to detect what HTML5 features are supported, either with your own code or using Modernizr, is only half the battle. Ultimately the goal is to be able to support the HTML5 functionality in the various browsers and versions of browsers that your users use to visit the web applications and sites you create. To allow for browsers that do not support a specific HTML5 functionality, you would need to use a third-party library that includes code for the various browsers to have the same functionality. The code or library of code that allows the feature to be supported on browsers is called a polyfill or polyfiller. An example of a polyfiller could be a library that provides canvas support for Internet Explorer since Internet Explorer does not support the canvas element directly but has its own drawing functionality such as Silverlight. You want to be able to develop with the new APIs and still offer the same experience to browsers that do not support them natively. We have seen examples of using a JavaScript library such as jQuery to plug some of the gaps, but there is no one library that will fix everything.
It is not just the older browsers that have holes in HTML5 features; new browsers do not universally cover HTML5 yet either. So, either with your own detection code or by using Modernizr, you will need to load an appropriate polyfill library to provide the same level of support for HTML5 features across multiple browsers. In fact, Modernizr provides a utility for loading scripts directly through its Modernizr.load method, which is based on a test for a specific feature, and the results can dynamically load a polyfill, which you provide as shown here:
Modernizr.load({
test: Modernizr.canvas,
yep: 'myCanvas.js',
nope: 'myCanvasPolyfiller.js'
});
Tip
The Modernizer.load method is actually an aliased command to an included third-party JavaScript library titled yepnope.js, which you can find at http://yepnopejs.com. The library is dedicated to being a fast conditional resource loader with a small footprint. The library can be used separately or via the Modernizr load alias method. The yepnope JavaScript library is beneficial for conditionally loading either CSS or JavaScript through the testing of various types of data objects from strings to arrays.
There is a wide array of polyfills already developed for multiple components in various browsers; you can find a broad list at http://github.com/Modernizr/Modernizr/wiki/HTML5-Cross-browser-Polyfills. This useful list is maintained by Paul Irish, lead developer of Modernizr, and has fallbacks for all kinds of things, including canvas, video, geolocation, forms, and much more.
Note
Having various polyfills, shims, and libraries available to support HTML5 features that may not currently be supported in one or more browsers is a powerful way to provide a uniform experience across multiple browsers for users. However, there can be a negative performance impact if you have to load multiple polyfills. The negative load time versus the functionality and support gained will need to be balanced in your development.
Useful HTML5 Verification Sites
We have been through various techniques and scripts to find out how to handle different browser behaviors, so here is a quick list of sites that will tell you which browsers support which features. As browsers update or if you are not sure about a particular feature, you can try visiting one of these sites:
• http://findmebyIP.com: Provides details on the browser in which you launch the page for CSS3, HTML5, Forms 2.0, CSS3 Selector Tests, script support, and IP details. In fact, it employs Modernizr to provide much of the information.
• http://caniuse.com: Provides tables of compatibility with various browsers for HTML5, JS API, and CSS3 and can be filtered as needed.
• http://html5test.com: Tests a set of various HTML5 features and scores your browser on what is supported. This can compare one browser to other browsers.
• http://html5readiness.com: Visualization of the state of various browsers in relation to HTML5 features.
Summary
In this chapter, you learned about some of the methods for dealing with old versions of browsers and deficiencies in versions of browsers in regard to HTML5. The case with HTML5 is that there is a wide range of support for the various CSS, HTML, and JavaScript additions that make up HTML5, but it is still maturing. You also learned about CSS resets and boilerplates, which contain modern up-to-date tools, tips, and techniques for web development.
You learned about the use of Modernizr, a powerful bit of script for feature detecting that enables you to offer fallbacks for browsers that do not yet support some of the new HTML5 features. We will not be showing how to employ Modernizr in the book since you may or may not choose to use it in your own site and because we are trying to show the base methods of performing functions. However, we recommend and fully expect that using Modernizr or one of the other tools mentioned in this chapter will provide you benefit in your HTML5 coding.