
Store Other Information in 1Password
In the previous chapter, I talked about using 1Password with a web browser—storing and filling in usernames, passwords, contact data, credit card numbers, and so on. That combination of features may be 1Password’s main focus, but the app can do many other powerful things too. In this chapter, I talk about the types of information 1Password can work with that have nothing to do with web browsing.
Standalone Passwords
Passwords are needed for many reasons other than logging in to websites. I talk about several other categories, such as wireless routers, reward programs, and memberships, later in this chapter—see Other Data Types. But sometimes you need to create a password and nothing more—no username, URL, or other fields. Just a password. For example, you may need:
Passcodes for smartphones or tablets
Passwords for full-disk encryption, disk images, and other encrypted files
PINs for alarms and keyless entry systems
In these and other cases where you need to store a password (perhaps with other data) in 1Password and can’t find an appropriate category, you can create a password item.
Since you generally won’t be looking at a webpage when you need to create or save standalone passwords, automatic login saving won’t help. Instead, in the 1Password app, choose + New Item > Password or, in the Mac app, File > New Item > Password, and fill in the form (using the built-in password generator when you get to the password field). Be sure to give the item a descriptive title that will help you find it later. Then click Save.
When it comes time to retrieve your password later, you can go to the 1Password app or 1Password in Your Browser and click the password to copy it. Or, after finding the item in Quick Access, you can press ⌘/Ctrl-Shift-C to copy it, and then paste it where it’s needed.
One-Time Passwords
Increasingly, online services offer an optional security feature called two-step verification (or words to that effect), in which you need both your regular credentials and a time-based one-time password (TOTP)—typically a numeric code that changes every 30 seconds—to log in. Dropbox, Facebook, Google, Microsoft, Slack, and Twitter are among the many companies that use this approach.
Sometimes this one-time password is sent to your mobile phone via SMS, which is insecure and prone to hacking. But most frequently, the way to generate it is to use an authenticator app that you set up in advance for each of your accounts. Google Authenticator and Authy are perhaps the two best-known examples of authenticator apps, but 1Password can generate these one-time passwords for you too, eliminating the need for a separate app. As a bonus, 1Password automatically fills in the one-time password when it’s needed, saving you an extra round trip to the app.
Set Up a One-Time Password Generator
To set up a one-time password generator:
In your web browser, log in to the site in question, navigate to the security settings, and find the procedure for turning on two-step verification. Usually you start by clicking a link and then work through a sequence of additional steps. When you get to the step that displays a QR code and a secret key on the screen, leave it there.
Open 1Password (that is, 1Password in Your Browser or the 1Password app) and select your existing login item for the site or service in question.
Add the one-time password generator to 1Password:
In 1Password in Your Browser: With the site’s login selected, choose “More options”
 > Scan QR Code.
In the 1Password app: If you have “Check for two-factor authentication” enabled in 1Password > Settings > Privacy, any login for which TOTP is supported but not enabled displays a “Two-Factor authentication available” banner at the top. Click the disclosure triangle if necessary to display the full message and then click Scan QR Code.
If you don’t have that feature enabled, you can still add a TOTP manually: Click Edit, then click “+ add more” > One-Time Password. Next, click the QR
 icon followed by Save. Finally, click the one-time password field to copy it to your clipboard.
1Password invisibly “scans” the QR code on your screen and sets up the TOTP for that login.
Click the current TOTP in 1Password to copy it to your clipboard. (In some cases, 1Password copies it automatically, but since it’s not consistent, you can save some hassle by copying it yourself.)
Paste the current TOTP into the field provided on the site, and follow any additional onscreen instructions.
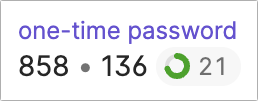
After this setup process, the login item in 1Password displays your current one-time password, along with a circular progress indicator showing when it expires (Figure 22). Although normally 1Password fills it in automatically as needed (see the next topic), you can also consult this code and fill it in manually or copy and paste it.
Use a One-Time Password
In most cases, after you use 1Password to fill a password on a webpage for which you’ve set up a TOTP, the code is filled in automatically after your username and password. I have seen situations in which, for whatever reason, the TOTP is not filled in automatically; if that happens, use the inline 1Password ![]() menu in the TOTP field to choose your login for the site, and 1Password should then fill in your TOTP.
menu in the TOTP field to choose your login for the site, and 1Password should then fill in your TOTP.
Security Questions
When you encounter a site that asks you to configure security questions (usually for password recovery, should that ever become necessary), you should always make up fake answers and store those fake answers in 1Password so you don’t forget them. (That way, you don’t have to worry that someone who figures out your mother’s maiden name or the name of your first pet can use that information to access your account.) 1Password makes this process easy:
In the 1Password app, select the login for which you want to add security questions and click Edit.
Click “+ add more” > Security Questions. A list of security questions pops up.
Choose one of the predefined security questions or type your own (if you’re creating your own question or if the one supplied by the site is not on 1Password’s list).
Click in the answer field below the question, then choose Create a New Answer from the pop-up menu. 1Password’s suggested fake answer is prefilled (Figure 23). If you like it, click Use; if you want a different answer, click the refresh
 icon or use the slider to adjust the number of words. Click Save when you’re done.
Figure 23: 1Password can create fake answers to security questions automatically.
Repeat these steps if needed for additional questions.
When you get to a page that asks one of these questions, open the login item, click the answer to copy it, and paste it into the appropriate field.
Software Licenses
Many apps require a license key or serial number, and 1Password makes a great storage place for all those licenses (Figure 24). Even though they may not be as secret as your passwords, they’re likely just as valuable to you—and keeping them in 1Password makes them easier to find than rummaging through filing cabinets and email receipts when you need one of your licenses.
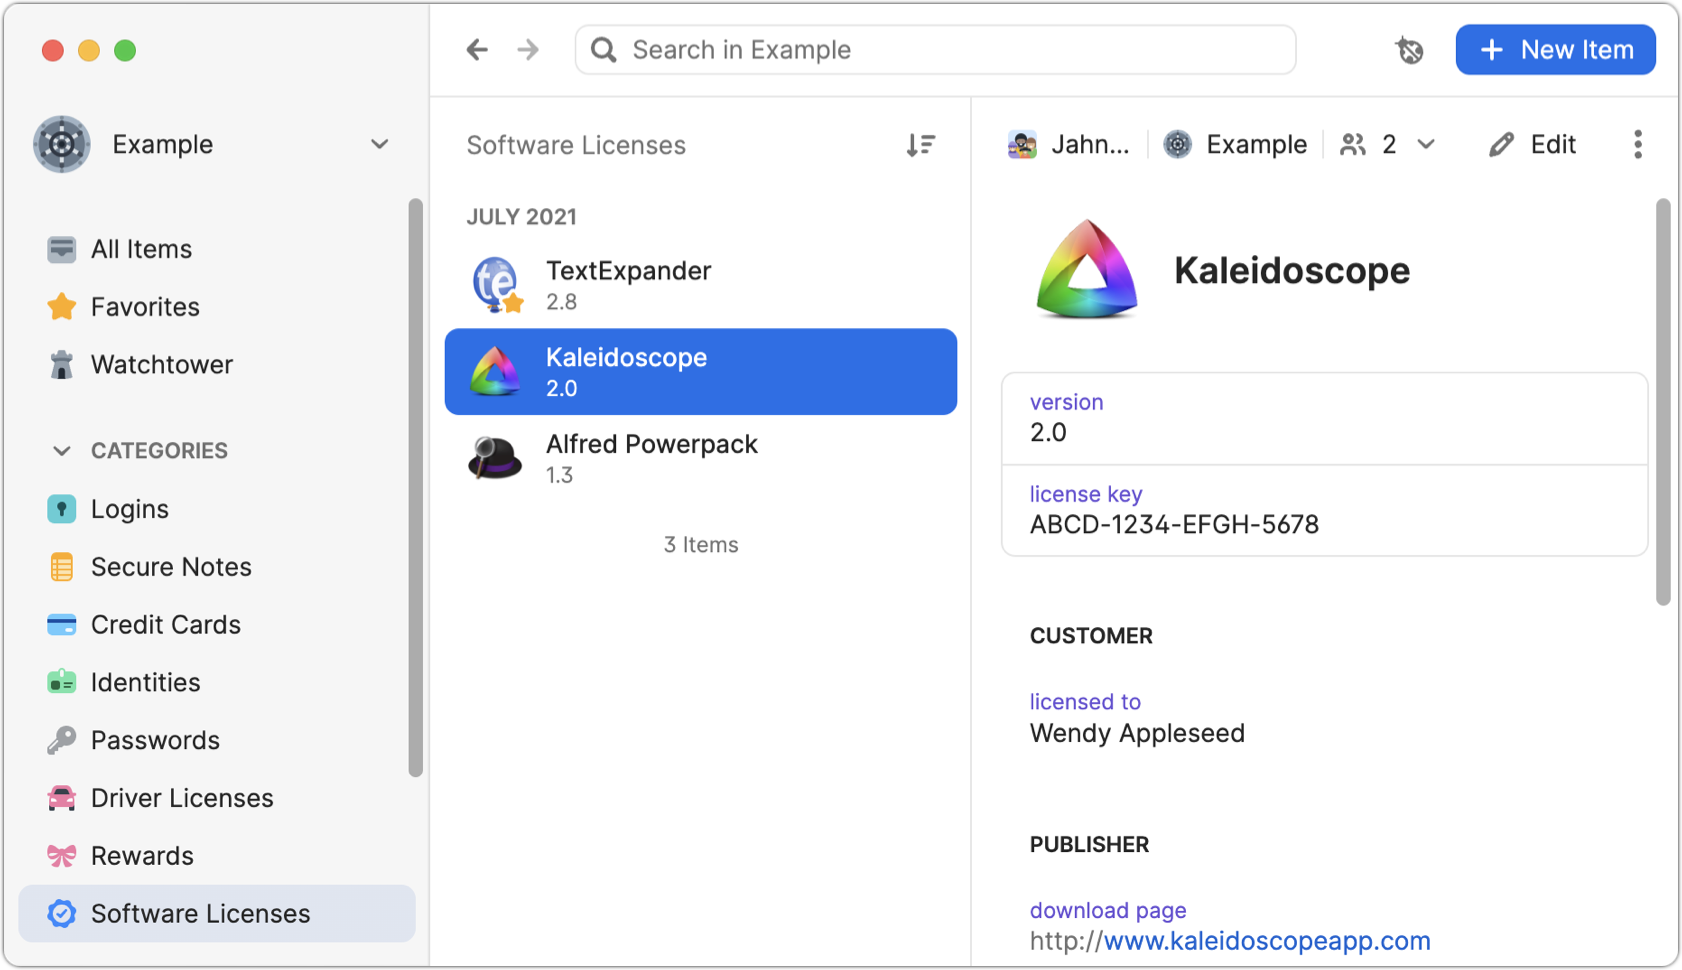
To add a software license, choose + New Item > Software License or, in the Mac app, File > New Item > Software License, and fill in as much or as little of the form as you like—but at the very least, fill in the app’s name, version number, and license key. Then click Save.
1Password can store and display an application’s icon, which makes it easier to find applications in a long list. The process varies by platform. For instructions, flip ahead to Add Custom Icons.
Secure Notes
Secure notes are designed to hold plain text (optionally styled using Markdown; see this support article for details)—anything you can type or paste and want to keep safely encrypted and synced with your other devices. Secure notes are good for freeform information such as lists, the outline for your new blockbuster novel, notes from discussions with your doctor or attorney, diary entries, or anything else that doesn’t fit in another category and consists entirely of text. You can also use them for password-like strings such as locker/padlock/safe combinations, PGP/GPG keys, and similar fixed codes created elsewhere (as opposed to passwords you would generate in 1Password).
To create a secure note, choose + New Item > Secure Note or, in the Mac app, File > New Item > Secure Note.
Documents and Attachments
1Password can store existing documents (such as graphics, text files, spreadsheets, or pretty much anything else) along with your logins, secure notes, and other data. Any document you add to 1Password will be securely encrypted and synced along with everything else in your account. Documents can be stored either as independent items (which can then, optionally, be linked to one or more other 1Password items) or as attachments to existing items.
For example, if you took a screenshot of a recovery key when you encrypted a storage device, you can add that image to 1Password as a standalone item. If it doesn’t have an associated username or password, the graphic by itself is all you need. However, if you took a photo of the back of a credit card (to have an extra record of the CVV code as well as the bank’s phone numbers), that photo would logically be attached to the credit card item in 1Password, rather than existing as a separate item. (You can mix and match these approaches as needed.)
Standalone Documents
The easiest way to add a standalone document to 1Password is to open the 1Password app and drag a file into it. In the New Item window that appears, you can optionally enter a different name for the file, add a note, apply tags, and so on. Click Save to save the item.
Alternatively, you can choose + New Item > Document or, in the Mac app, File > New Item > Document. Then either drag a file to the area labeled “Drag a file here to upload” or click + Add File, navigate to the file, and click Open.
If you later want to link another 1Password item to the document, select the item in question and click Edit. Click “+ add more” > “Link to a related item,” search for the document you want to link, and select it.
Attachments
You can also add a file as an attachment to an existing 1Password item; if you do so, it appears only within that item and not in 1Password’s Documents category.
To add a file as an attachment, select an item in the 1Password app and click Edit. Click “+ add more” > Attach a File, navigate to the file, and click Open. Click Save when you’re done.
SSH Keys
Developers, system administrators, and others who spend a lot of time connecting to remote servers via SSH (and related protocols, such as SFTP) are likely familiar with SSH keys—long strings of characters used to encrypt connections without the use of a username and password. If all that made your eyes glaze over, chances are you have no need for SSH keys and you can skip right ahead to the next topic!
If you do work with SSH keys, however, you know that creating these keys and configuring them for authentication is a hassle (usually involving a series of command-line operations in a Terminal app). Having set up one app or device to authenticate with a particular server using SSH, you then have to repeat most of the steps for each additional app or device, which is not fun.
1Password 8 makes every part of this process simpler. If you’re setting up SSH for a new site or service, 1Password can generate the key for you. If you already have SSH set up, 1Password can import your existing key and connect it to apps you already use (such as Terminal, GitHub Desktop, Transmit, or Sequel Pro in macOS, and comparable apps in Windows and Linux; this page has an extensive compatibility list). Thereafter, whenever you connect to a server in one of those apps that uses an SSH key, 1Password prompts you to authenticate (with a fingerprint or face recognition, if your device supports it; otherwise, with your 1Password master password) and logs you in. And, of course, 1Password can sync these keys across devices and platforms for you, so that you need not repeat the setup on each device.
Before you can use this feature, you must enable “Use the SSH agent” in 1Password > Settings > Developer; see Developer Settings for more on this setting.
Because the use of SSH keys in 1Password is rather involved, yet probably not interesting to the bulk of this book’s audience, I don’t want to spend many pages here describing it. Instead, I refer you to 1Password’s 1Password for SSH & Git site for detailed information, and in particular the Manage SSH keys page.
Other Data Types
Beyond the core data types I’ve discussed already (logins, identities, credit cards, standalone passwords, software licenses, secure notes, documents, and SSH keys), you can store numerous other kinds of structured information in 1Password. There are built-in categories (which are really nothing more than templates with a collection of relevant fields) for the following additional items—those with an asterisk (*) contain a Password or PIN field that uses the built-in password generator:
API Credential
Bank Account
Crypto Wallet*
Database*
Driver License
Email Account*
Medical Record
Membership*
Outdoor License
Passport
Reward Program*
Server*
Social Security Number
Wireless Router*
To add any of these data types, choose the type from the + New Item menu or, in the Mac app, the File > New Item menu.
I won’t go into these in detail because they’re largely self-explanatory. However, I would like to mention a few tips:
Currently, there’s no way to create a new category. These are the only options, so if you have a type of data that doesn’t quite fit, choose whichever category is most similar—or use a secure note.
Similarly, it’s not possible to change an item’s category after the fact. That’s because categories aren’t merely labels but templates that include particular fields. (There’s one exception: standalone passwords can be converted to full login items, as I explain later in Use Previously Generated Passwords.)
With a few exceptions, categories don’t appear in 1Password’s sidebar until you have added at least one item in that category.
For official documents such as driver’s licenses, insurance cards, and passports, you may find it useful to include a photo or scanned image of the front and back of the document as a linked document or an attachment (refer back to Documents and Attachments).