In this recipe, we will demonstrate how to self-host an ASP.NET web API. A web API gives us the flexibility to host our web API in our process, also called self-hosting.
In order to use this recipe you should have Visual Studio 2012 and ASP.NET MVC 4 installed (the latter includes the ASP.NET Web API).
Next we are going to self-host our web API.
- Create a new console application project and name it
WebAPISelfHosted. - Open the NuGet package manager, which you can launch from the Tools menu, select Library Package Manager, and click on Manage NuGet Packages for Solution.
- Select the online packages, and look for Microsoft ASP.NET Web API Self Host and click on Install as shown in the following screenshot:

- We will add a class named
Booksmodel.cswith the following code:public class BookModel { public int Id { get; set; } public String Title { get; set; } public String Description { get; set; } public bool IsOnSale { get; set; } public int BookRating { get; set; } public double BookPrice { get; set; } } - Next we will add a controller. Right-click on our project, select New item from Add and type
controllerthere. The ASP.NET Web API Controller Class option will appear. Select it, name itBooksController, and press the Add button, as shown in the following screenshot: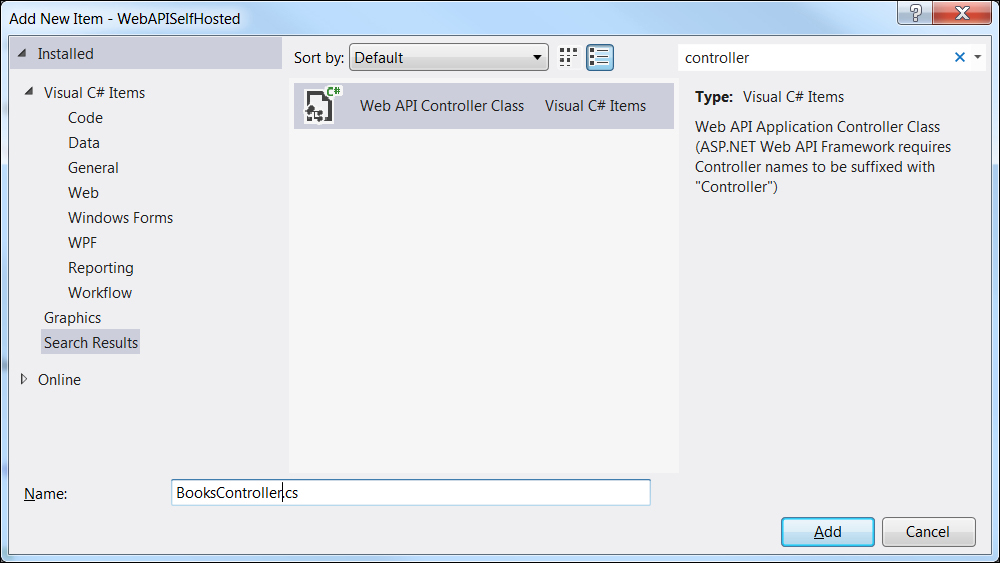
- We will insert exactly the same code in
BooksControlleras in our first controller, as follows:public class BooksController : ApiController { BookModel[] Books = null; public BooksController() { Books = GenerateBooks(); } public IEnumerable<BookModel> Get() { return Books; } public BookModel Get(int id) { var book = (from b in Books where b.Id == id select b).FirstOrDefault(); return book; } private BookModel[] GenerateBooks() { BookModel[] Books = new BookModel[] { new BookModel(){ Id=1, Title = ".NET 4.5 First Look", Description = "A book to quickly and practically get into .NET 4.5" }, new BookModel(){ Id=2, Title = "The lost book of Agatha Christie", Description = "A book everybody wants to read..." } }; return Books; } } - We will open the
Programs.csfile and add the following code:static void Main(string[] args) { HttpSelfHostConfiguration cfg = new HttpSelfHostConfiguration("http://localhost:8030"); cfg.Routes.MapHttpRoute( "API Default", "api/{controller}/{id}", new { id = RouteParameter.Optional } ); using (HttpSelfHostServer server = new HttpSelfHostServer(cfg)) { server.OpenAsync().Wait(); Console.WriteLine("Press Enter to finalize the service (or close the console application)."); Console.ReadLine(); } - We might get a reference problem when handling the routes; if this happens, add a reference in the project to
System.Web.Routing.dlland toSystem.Web.dll. - Add a
usingclause such as the following in theProgram.csfile:Using System.Web.Http.Routing;
- Now save the solution, close Visual Studio 2012, and open it again as administrator.
- Open the solution again and execute it by pressing F5.
- We should see the console application being executed and waiting for us to finalize.
- Launch a browser, Firefox for example, and type the URI that we wrote, together with the web API syntax, to get all the books:
http:// http://localhost:8030/api/Booksand press Enter. - We should see the following result:

In this recipe, we created a console application, to which we added, through NuGet, the Microsoft ASP.NET Web API Self Host package.
Following this, we added the BooksModel.cs class that we used on our first recipe and the same BooksController.cs class, changing the namespaces to match our current project.
We saw how to solve a possible reference problem and went into the main part of the project. In the Program.cs file we added the needed references and created a new HttpSelfHostConfiguration class with the URL that our application will service.
We mapped the route to our web API and created a server with the newly defined configuration. There we wait for an Enter to be hit to continue the flow and finish the application.
Additionally, we explored the web API with a browser and checked that it works as expected.
Note that in order to run this application, you will need to open Visual Studio 2012 as an administrator, since serving a specific HTTP domain on the machine requires administrator privileges. Another alternative option for this would be to reserve the URL with Netsh.exe, but this service does not run permanently on this machine and/or URL, so the Run as admin option is preferable.