
The HTML editor provides improved support for some of the server controls that used to have dialogues and wizards for their configuration and setup. Usually we had to do this from the design view or move our mouse to the properties to launch these configuration wizards.
With ASP.NET 4.5, we have them at our fingertips in our source code view.
In this recipe we are going to see how to activate and use the Smart Tasks in the HTML editor.
- Open our previous ASP.NET application or create a new one.
- Open the
Site.Masterpage. - Locate the
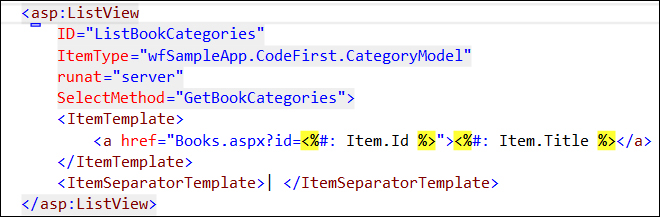
<asp:ListView>server control that we added (or add a new one). - Place our text input cursor in the code, over the tag; click on it so that it is selected.
- We should see an underline glyph at the beginning of the element and it should appear highlighted, showing that it has been selected, as shown in the following screenshot:
- When we click over the glyph or put the mouse over the
<asp:tag, we will see that the smart task glyph expands into an arrow. - We can click on this arrow to expand the Smart Tasks panel or we can press Ctrl + . to directly expand it, as shown in the following screenshot.

- From there, we can select the data source selection, create a new one, and launch its wizard, as shown in the next screenshot:

..................Content has been hidden....................
You can't read the all page of ebook, please click here login for view all page.