
12
Building an API
In the previous chapter, you built a system for student registration and enrollment on courses. You created views to display course contents and learned how to use Django's cache framework.
In this chapter, you will create a RESTful API for your e-learning platform. An API allows you to build a common core that can be used on multiple platforms like websites, mobile applications, plugins, and so on. For example, you can create an API to be consumed by a mobile application for your e-learning platform. If you provide an API to third parties, they will be able to consume information and operate with your application programmatically. An API allows developers to automate actions on your platform and integrate your service with other applications or online services. You will build a fully featured API for your e-learning platform.
In this chapter, you will:
- Install Django REST framework
- Create serializers for your models
- Build a RESTful API
- Create nested serializers
- Build custom API views
- Handle API authentication
- Add permissions to API views
- Create a custom permission
- Implement viewsets and routers
- Use the Requests library to consume the API
Let's start with the setup of your API.
Building a RESTful API
When building an API, there are several ways you can structure its endpoints and actions, but following REST principles is encouraged. The REST architecture comes from Representational State Transfer. RESTful APIs are resource-based; your models represent resources and HTTP methods such as GET, POST, PUT, or DELETE are used to retrieve, create, update, or delete objects. HTTP response codes are also used in this context. Different HTTP response codes are returned to indicate the result of the HTTP request, for example, 2XX response codes for success, 4XX for errors, and so on.
The most common formats to exchange data in RESTful APIs are JSON and XML. You will build a RESTful API with JSON serialization for your project. Your API will provide the following functionality:
- Retrieve subjects
- Retrieve available courses
- Retrieve course contents
- Enroll on a course
You can build an API from scratch with Django by creating custom views. However, there are several third-party modules that simplify creating an API for your project; the most popular among them is Django REST framework.
Installing Django REST framework
Django REST framework allows you to easily build RESTful APIs for your project. You can find all the information about REST framework at https://www.django-rest-framework.org/.
Open the shell and install the framework with the following command:
pip install djangorestframework==3.11.0
Edit the settings.py file of the educa project and add rest_framework to the INSTALLED_APPS setting to activate the application, as follows:
INSTALLED_APPS = [
    # ...
    'rest_framework',
]
Then, add the following code to the settings.py file:
REST_FRAMEWORK = {
    'DEFAULT_PERMISSION_CLASSES': [
      'rest_framework.permissions.DjangoModelPermissionsOrAnonReadOnly'
    ]
}
You can provide a specific configuration for your API using the REST_FRAMEWORK setting. REST framework offers a wide range of settings to configure default behaviors. The DEFAULT_PERMISSION_CLASSES setting specifies the default permissions to read, create, update, or delete objects. You set DjangoModelPermissionsOrAnonReadOnly as the only default permission class. This class relies on Django's permissions system to allow users to create, update, or delete objects, while providing read-only access for anonymous users. You will learn more about permissions later in the Adding permissions to views section.
For a complete list of available settings for REST framework, you can visit https://www.django-rest-framework.org/api-guide/settings/.
Defining serializers
After setting up REST framework, you need to specify how your data will be serialized. Output data has to be serialized in a specific format, and input data will be deserialized for processing. The framework provides the following classes to build serializers for single objects:
Serializer: Provides serialization for normal Python class instancesModelSerializer: Provides serialization for model instancesHyperlinkedModelSerializer: The same asModelSerializer, but it represents object relationships with links rather than primary keys
Let's build your first serializer. Create the following file structure inside the courses application directory:
api/
    __init__.py
    serializers.py
You will build all the API functionality inside the api directory to keep everything well organized. Edit the serializers.py file and add the following code:
from rest_framework import serializers
from ..models import Subject
class SubjectSerializer(serializers.ModelSerializer):
    class Meta:
        model = Subject
        fields = ['id', 'title', 'slug']
This is the serializer for the Subject model. Serializers are defined in a similar fashion to Django's Form and ModelForm classes. The Meta class allows you to specify the model to serialize and the fields to be included for serialization. All model fields will be included if you don't set a fields attribute.
Let's try your serializer. Open the command line and start the Django shell with the following command:
python manage.py shell
Run the following code:
>>> from courses.models import Subject
>>> from courses.api.serializers import SubjectSerializer
>>> subject = Subject.objects.latest('id')
>>> serializer = SubjectSerializer(subject)
>>> serializer.data
{'id': 4, 'title': 'Programming', 'slug': 'programming'}
In this example, you get a Subject object, create an instance of SubjectSerializer, and access the serialized data. You can see that the model data is translated into Python native data types.
Understanding parsers and renderers
The serialized data has to be rendered in a specific format before you return it in an HTTP response. Likewise, when you get an HTTP request, you have to parse the incoming data and deserialize it before you can operate with it. REST framework includes renderers and parsers to handle that.
Let's see how to parse incoming data. Execute the following code in the Python shell:
>>> from io import BytesIO
>>> from rest_framework.parsers import JSONParser
>>> data = b'{"id":4,"title":"Programming","slug":"programming"}'
>>> JSONParser().parse(BytesIO(data))
{'id': 4, 'title': 'Programming', 'slug': 'programming'}
Given a JSON string input, you can use the JSONParser class provided by REST framework to convert it to a Python object.
REST framework also includes Renderer classes that allow you to format API responses. The framework determines which renderer to use through content negotiation by inspecting the request's Accept header to determine the expected content type for the response. Optionally, the renderer is determined by the format suffix of the URL. For example, the URL http://127.0.0.1:8000/api/data.json might be an endpoint that triggers the JSONRenderer in order to return a JSON response.
Go back to the shell and execute the following code to render the serializer object from the previous serializer example:
>>> from rest_framework.renderers import JSONRenderer
>>> JSONRenderer().render(serializer.data)
You will see the following output:
b'{"id":4,"title":"Programming","slug":"programming"}'
You use the JSONRenderer to render the serialized data into JSON. By default, REST framework uses two different renderers: JSONRenderer and BrowsableAPIRenderer. The latter provides a web interface to easily browse your API. You can change the default renderer classes with the DEFAULT_RENDERER_CLASSES option of the REST_FRAMEWORK setting.
You can find more information about renderers and parsers at https://www.django-rest-framework.org/api-guide/renderers/ and https://www.django-rest-framework.org/api-guide/parsers/, respectively.
Building list and detail views
REST framework comes with a set of generic views and mixins that you can use to build your API views. They provide the functionality to retrieve, create, update, or delete model objects. You can see all the generic mixins and views provided by REST framework at https://www.django-rest-framework.org/api-guide/generic-views/.
Let's create list and detail views to retrieve Subject objects. Create a new file inside the courses/api/ directory and name it views.py. Add the following code to it:
from rest_framework import generics
from ..models import Subject
from .serializers import SubjectSerializer
class SubjectListView(generics.ListAPIView):
    queryset = Subject.objects.all()
    serializer_class = SubjectSerializer
class SubjectDetailView(generics.RetrieveAPIView):
    queryset = Subject.objects.all()
    serializer_class = SubjectSerializer
In this code, you are using the generic ListAPIView and RetrieveAPIView views of REST framework. You include a pk URL parameter for the detail view to retrieve the object for the given primary key. Both views have the following attributes:
queryset: The baseQuerySetto use to retrieve objectsserializer_class: The class to serialize objects
Let's add URL patterns for your views. Create a new file inside the courses/api/ directory, name it urls.py, and make it look as follows:
from django.urls import path
from . import views
app_name = 'courses'
urlpatterns = [
    path('subjects/',
         views.SubjectListView.as_view(),
         name='subject_list'),
    path('subjects/<pk>/',
         views.SubjectDetailView.as_view(),
         name='subject_detail'),
]
Edit the main urls.py file of the educa project and include the API patterns, as follows:
urlpatterns = [
    # ...
    path('api/', include('courses.api.urls', namespace='api')),
]
You use the api namespace for your API URLs. Ensure that your server is running with the command python manage.py runserver. Open the shell and retrieve the URL http://127.0.0.1:8000/api/subjects/ with curl, as follows:
curl http://127.0.0.1:8000/api/subjects/
You will get a response similar to the following one:
[
    {
        "id":1,
        "title":"Mathematics",
        "slug":"mathematics"
    },
    {
        "id":2,
        "title":"Music",
        "slug":"music"
    },
    {
        "id":3,
        "title":"Physics",
        "slug":"physics"
    },
    {
        "id":4,
        "title":"Programming",
        "slug":"programming"
    }
]
To obtain a more readable, well-indented JSON response, you can use curl with the json_pp utility, as follows:
curl http://127.0.0.1:8000/api/subjects/ | json_pp
The HTTP response contains a list of Subject objects in JSON format. If your operating system doesn't come with curl installed, you can download it from https://curl.haxx.se/dlwiz/. Instead of curl, you can also use any other tool to send custom HTTP requests, including a browser extension such as Postman, which you can get at https://www.getpostman.com/.
Open http://127.0.0.1:8000/api/subjects/ in your browser. You will see REST framework's browsable API, as follows:

Figure 12.1: The subject list page in the REST framework browsable API
This HTML interface is provided by the BrowsableAPIRenderer renderer. It displays the result headers and content, and it allows you to perform requests. You can also access the API detail view for a Subject object by including its ID in the URL.
Open http://127.0.0.1:8000/api/subjects/1/ in your browser. You will see a single Subject object rendered in JSON format.
Creating nested serializers
You are going to create a serializer for the Course model. Edit the api/serializers.py file of the courses application and add the following code to it:
from ..models import Course
class CourseSerializer(serializers.ModelSerializer):
    class Meta:
        model = Course
        fields = ['id', 'subject', 'title', 'slug', 'overview',
                  'created', 'owner', 'modules']
Let's take a look at how a Course object is serialized. Open the shell, run python manage.py shell, and run the following code:
>>> from rest_framework.renderers import JSONRenderer
>>> from courses.models import Course
>>> from courses.api.serializers import CourseSerializer
>>> course = Course.objects.latest('id')
>>> serializer = CourseSerializer(course)
>>> JSONRenderer().render(serializer.data)
You will get a JSON object with the fields that you included in CourseSerializer. You can see that the related objects of the modules manager are serialized as a list of primary keys, as follows:
"modules": [6, 7, 9, 10]
You want to include more information about each module, so you need to serialize Module objects and nest them. Modify the previous code of the api/serializers.py file of the courses application to make it look as follows:
from rest_framework import serializers
from ..models import Course, Module
class ModuleSerializer(serializers.ModelSerializer):
    class Meta:
        model = Module
        fields = ['order', 'title', 'description']
class CourseSerializer(serializers.ModelSerializer):
    modules = ModuleSerializer(many=True, read_only=True)
    class Meta:
        model = Course
        fields = ['id', 'subject', 'title', 'slug', 'overview',
                  'created', 'owner', 'modules']
You define ModuleSerializer to provide serialization for the Module model. Then, you add a modules attribute to CourseSerializer to nest the ModuleSerializer serializer. You set many=True to indicate that you are serializing multiple objects. The read_only parameter indicates that this field is read-only and should not be included in any input to create or update objects.
Open the shell and create an instance of CourseSerializer again. Render the serializer's data attribute with JSONRenderer. This time, the listed modules are being serialized with the nested ModuleSerializer serializer, as follows:
"modules": [
    {
        "order": 0,
        "title": "Introduction to overview",
        "description": "A brief overview about the Web Framework."
    },
    {
        "order": 1,
        "title": "Configuring Django",
        "description": "How to install Django."
    },
    ...
]
You can read more about serializers at https://www.django-rest-framework.org/api-guide/serializers/.
Building custom API views
REST framework provides an APIView class that builds API functionality on top of Django's View class. The APIView class differs from View by using REST framework's custom Request and Response objects, and handling APIException exceptions to return the appropriate HTTP responses. It also has a built-in authentication and authorization system to manage access to views.
You are going to create a view for users to enroll on courses. Edit the api/views.py file of the courses application and add the following code to it:
from django.shortcuts import get_object_or_404
from rest_framework.views import APIView
from rest_framework.response import Response
from ..models import Course
class CourseEnrollView(APIView):
    def post(self, request, pk, format=None):
        course = get_object_or_404(Course, pk=pk)
        course.students.add(request.user)
        return Response({'enrolled': True})
The CourseEnrollView view handles user enrollment on courses. The preceding code is as follows:
- You create a custom view that subclasses
APIView. - You define a
post()method forPOSTactions. No other HTTP method will be allowed for this view. - You expect a
pkURL parameter containing the ID of a course. You retrieve the course by the givenpkparameter and raise a404exception if it's not found. - You add the current user to the
studentsmany-to-many relationship of theCourseobject and return a successful response.
Edit the api/urls.py file and add the following URL pattern for the CourseEnrollView view:
path('courses/<pk>/enroll/',
     views.CourseEnrollView.as_view(),
     name='course_enroll'),
Theoretically, you could now perform a POST request to enroll the current user on a course. However, you need to be able to identify the user and prevent unauthenticated users from accessing this view. Let's see how API authentication and permissions work.
Handling authentication
REST framework provides authentication classes to identify the user performing the request. If authentication is successful, the framework sets the authenticated User object in request.user. If no user is authenticated, an instance of Django's AnonymousUser is set instead.
REST framework provides the following authentication backends:
BasicAuthentication: This is HTTP basic authentication. The user and password are sent by the client in theAuthorizationHTTP header encoded with Base64. You can learn more about it at https://en.wikipedia.org/wiki/Basic_access_authentication.TokenAuthentication: This is token-based authentication. ATokenmodel is used to store user tokens. Users include the token in theAuthorizationHTTP header for authentication.SessionAuthentication: This uses Django's session backend for authentication. This backend is useful for performing authenticated AJAX requests to the API from your website's frontend.RemoteUserAuthentication: This allows you to delegate authentication to your web server, which sets aREMOTE_USERenvironment variable.
You can build a custom authentication backend by subclassing the BaseAuthentication class provided by REST framework and overriding the authenticate() method.
You can set authentication on a per-view basis, or set it globally with the DEFAULT_AUTHENTICATION_CLASSES setting.
Authentication only identifies the user performing the request. It won't allow or deny access to views. You have to use permissions to restrict access to views.
You can find all the information about authentication at https://www.django-rest-framework.org/api-guide/authentication/.
Let's add BasicAuthentication to your view. Edit the api/views.py file of the courses application and add an authentication_classes attribute to CourseEnrollView, as follows:
from rest_framework.authentication import BasicAuthentication
class CourseEnrollView(APIView):
    authentication_classes = (BasicAuthentication,)
    # ...
Users will be identified by the credentials set in the Authorization header of the HTTP request.
Adding permissions to views
REST framework includes a permission system to restrict access to views. Some of the built-in permissions of REST framework are:
AllowAny: Unrestricted access, regardless of whether a user is authenticated or not.IsAuthenticated: Allows access to authenticated users only.IsAuthenticatedOrReadOnly: Complete access to authenticated users. Anonymous users are only allowed to execute read methods such asGET,HEAD, orOPTIONS.DjangoModelPermissions: Permissions tied todjango.contrib.auth. The view requires aquerysetattribute. Only authenticated users with model permissions assigned are granted permission.DjangoObjectPermissions: Django permissions on a per-object basis.
If users are denied permission, they will usually get one of the following HTTP error codes:
HTTP 401: UnauthorizedHTTP 403: Permission denied
You can read more information about permissions at https://www.django-rest-framework.org/api-guide/permissions/.
Edit the api/views.py file of the courses application and add a permission_classes attribute to CourseEnrollView, as follows:
from rest_framework.authentication import BasicAuthentication
from rest_framework.permissions import IsAuthenticated
class CourseEnrollView(APIView):
    authentication_classes = (BasicAuthentication,)
    permission_classes = (IsAuthenticated,)
    # ...
You include the IsAuthenticated permission. This will prevent anonymous users from accessing the view. Now, you can perform a POST request to your new API method.
Make sure the development server is running. Open the shell and run the following command:
curl -i -X POST http://127.0.0.1:8000/api/courses/1/enroll/
You will get the following response:
HTTP/1.1 401 Unauthorized
...
{"detail": "Authentication credentials were not provided."}
You got a 401 HTTP code as expected, since you are not authenticated. Let's use basic authentication with one of your users. Run the following command, replacing student:password with the credentials of an existing user:
curl -i -X POST -u student:password http://127.0.0.1:8000/api/courses/1/enroll/
You will get the following response:
HTTP/1.1 200 OK
...
{"enrolled": true}
You can access the administration site and check that the user is now enrolled on the course.
Creating viewsets and routers
ViewSets allow you to define the interactions of your API and let REST framework build the URLs dynamically with a Router object. By using viewsets, you can avoid repeating logic for multiple views. Viewsets include actions for the following standard operations:
- Create operation:
create() - Retrieve operation:
list()andretrieve() - Update operation:
update()andpartial_update() - Delete operation:
destroy()
Let's create a viewset for the Course model. Edit the api/views.py file and add the following code to it:
from rest_framework import viewsets
from .serializers import CourseSerializer
class CourseViewSet(viewsets.ReadOnlyModelViewSet):
    queryset = Course.objects.all()
    serializer_class = CourseSerializer
You subclass ReadOnlyModelViewSet, which provides the read-only actions list() and retrieve() to both list objects, or retrieves a single object.
Edit the api/urls.py file and create a router for your viewset, as follows:
from django.urls import path, include
from rest_framework import routers
from . import views
router = routers.DefaultRouter()
router.register('courses', views.CourseViewSet)
urlpatterns = [
    # ...
    path('', include(router.urls)),
]
You create a DefaultRouter object and register your viewset with the courses prefix. The router takes charge of generating URLs automatically for your viewset.
Open http://127.0.0.1:8000/api/ in your browser. You will see that the router lists all viewsets in its base URL, as shown in the following screenshot:
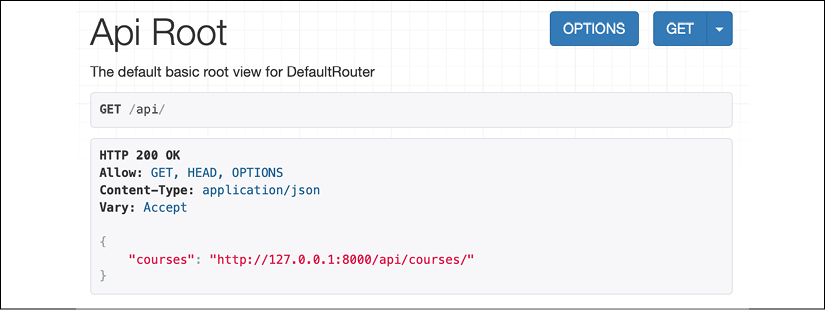
Figure 12.2: The API root page of the REST framework browsable API
You can access http://127.0.0.1:8000/api/courses/ to retrieve the list of courses.
You can learn more about viewsets at https://www.django-rest-framework.org/api-guide/viewsets/. You can also find more information about routers at https://www.django-rest-framework.org/api-guide/routers/.
Adding additional actions to viewsets
You can add extra actions to viewsets. Let's change your previous CourseEnrollView view into a custom viewset action. Edit the api/views.py file and modify the CourseViewSet class to look as follows:
from rest_framework.decorators import action
class CourseViewSet(viewsets.ReadOnlyModelViewSet):
    queryset = Course.objects.all()
    serializer_class = CourseSerializer
    @action(detail=True,
            methods=['post'],
            authentication_classes=[BasicAuthentication],
            permission_classes=[IsAuthenticated])
    def enroll(self, request, *args, **kwargs):
        course = self.get_object()
        course.students.add(request.user)
        return Response({'enrolled': True})
In the preceding code, you add a custom enroll() method that represents an additional action for this viewset. The preceding code is as follows:
- You use the
actiondecorator of the framework with the parameterdetail=Trueto specify that this is an action to be performed on a single object. - The decorator allows you to add custom attributes for the action. You specify that only the
post()method is allowed for this view and set the authentication and permission classes. - You use
self.get_object()to retrieve theCourseobject. - You add the current user to the
studentsmany-to-many relationship and return a custom success response.
Edit the api/urls.py file and remove the following URL, since you don't need it anymore:
path('courses/<pk>/enroll/',
     views.CourseEnrollView.as_view(),
     name='course_enroll'),
Then, edit the api/views.py file and remove the CourseEnrollView class.
The URL to enroll on courses is now automatically generated by the router. The URL remains the same, since it's built dynamically using your action name enroll.
Creating custom permissions
You want students to be able to access the contents of the courses they are enrolled on. Only students enrolled on a course should be able to access its contents. The best way to do this is with a custom permission class. Django provides a BasePermission class that allows you to define the following methods:
has_permission(): View-level permission checkhas_object_permission(): Instance-level permission check
These methods should return True to grant access, or False otherwise.
Create a new file inside the courses/api/ directory and name it permissions.py. Add the following code to it:
from rest_framework.permissions import BasePermission
class IsEnrolled(BasePermission):
    def has_object_permission(self, request, view, obj):
        return obj.students.filter(id=request.user.id).exists()
You subclass the BasePermission class and override the has_object_permission(). You check that the user performing the request is present in the students relationship of the Course object. You are going to use the IsEnrolled permission next.
Serializing course contents
You need to serialize course contents. The Content model includes a generic foreign key that allows you to associate objects of different content models. Yet, you added a common render() method for all content models in the previous chapter. You can use this method to provide rendered contents to your API.
Edit the api/serializers.py file of the courses application and add the following code to it:
from ..models import Content
class ItemRelatedField(serializers.RelatedField):
    def to_representation(self, value):
        return value.render()
class ContentSerializer(serializers.ModelSerializer):
    item = ItemRelatedField(read_only=True)
    class Meta:
        model = Content
        fields = ['order', 'item']
In this code, you define a custom field by subclassing the RelatedField serializer field provided by REST framework and overriding the to_representation() method. You define the ContentSerializer serializer for the Content model and use the custom field for the item generic foreign key.
You need an alternative serializer for the Module model that includes its contents, and an extended Course serializer as well. Edit the api/serializers.py file and add the following code to it:
class ModuleWithContentsSerializer(serializers.ModelSerializer):
    contents = ContentSerializer(many=True)
    class Meta:
        model = Module
        fields = ['order', 'title', 'description', 'contents']
class CourseWithContentsSerializer(serializers.ModelSerializer):
    modules = ModuleWithContentsSerializer(many=True)
    class Meta:
        model = Course
        fields = ['id', 'subject', 'title', 'slug',
                  'overview', 'created', 'owner', 'modules']
Let's create a view that mimics the behavior of the retrieve() action, but includes the course contents. Edit the api/views.py file and add the following method to the CourseViewSet class:
from .permissions import IsEnrolled
from .serializers import CourseWithContentsSerializer
class CourseViewSet(viewsets.ReadOnlyModelViewSet):
    # ...
    @action(detail=True,
            methods=['get'],
            serializer_class=CourseWithContentsSerializer,
            authentication_classes=[BasicAuthentication],
            permission_classes=[IsAuthenticated, IsEnrolled])
    def contents(self, request, *args, **kwargs):
        return self.retrieve(request, *args, **kwargs)
The description of this method is as follows:
- You use the
actiondecorator with the parameterdetail=Trueto specify an action that is performed on a single object. - You specify that only the
GETmethod is allowed for this action. - You use the new
CourseWithContentsSerializerserializer class that includes rendered course contents. - You use both
IsAuthenticatedand your customIsEnrolledpermissions. By doing so, you make sure that only users enrolled on the course are able to access its contents. - You use the existing
retrieve()action to return theCourseobject.
Open http://127.0.0.1:8000/api/courses/1/contents/ in your browser. If you access the view with the right credentials, you will see that each module of the course includes the rendered HTML for course contents, as follows:
{
    "order": 0,
    "title": "Introduction to Django",
    "description": "Brief introduction to the Django Web Framework.",
    "contents": [
        {
            "order": 0,
            "item": "<p>Meet Django. Django is a high-level
            Python Web framework
            ...</p>"
        },
        {
            "order": 1,
            "item": "
<iframe width="480" height="360"
            src="http://www.youtube.com/embed/bgV39DlmZ2U?
            wmode=opaque"
            frameborder="0" allowfullscreen></iframe>
"
        }
    ]
}
You have built a simple API that allows other services to access the course application programmatically. REST framework also allows you to handle creating and editing objects with the ModelViewSet viewset. We have covered the main aspects of Django REST framework, but you will find further information about its features in its extensive documentation at https://www.django-rest-framework.org/.
Consuming the RESTful API
Now that you have implemented an API, you can consume it in a programmatic manner from other applications. You can interact with the API using JavaScript in the frontend of your application, in a similar fashion to the AJAX functionalities you built in Chapter 5, Sharing Content on Your Website. You can also consume the API from applications built with Python or any other programming languages.
You are going to create a simple Python application that uses the RESTful API to retrieve all available courses and then enrolls a student on all of them. You will learn how to authenticate against the API using HTTP basic authentication, and perform GET and POST requests.
You will use the Python Requests library to consume the API. Requests is the most popular HTTP library for Python. It abstracts the complexity of dealing with HTTP requests and provides a very simple interface to consume HTTP services. You can find the documentation for the Requests library at https://requests.readthedocs.io/en/master/.
Open the shell and install the Requests library with the following command:
pip install requests==2.23
Create a new directory next to the educa project directory and name it api_examples. Create a new file inside the api_examples/ directory and name it enroll_all.py. The file structure should now look like this:
api_examples/
    enroll_all.py
educa/
    ...
Edit the enroll_all.py file and add the following code to it:
import requests
base_url = 'http://127.0.0.1:8000/api/'
# retrieve all courses
r = requests.get(f'{base_url}courses/')
courses = r.json()

available_courses = ', '.join([course['title'] for course in courses])
print(f'Available courses: {available_courses}')
In this code, you perform the following actions:
- You import the Requests library and define the base URL for the API.
- You use
requests.get()to retrieve data from the API by sending aGETrequest to the URLhttp://127.0.0.1:8000/api/courses/. This API endpoint is publicly accessible, so it does not require any authentication. - You use the
json()method of the response object to decode the JSON data returned by the API. - You print the title attribute of each course.
Start the development server from the educa project directory with the following command:
python manage.py runserver
In another shell, run the following command from the api_examples/ directory:
python enroll_all.py
You will see output with a list of all course titles, like this:
Available courses: Introduction to Django, Python for beginners, Algebra basics
This is your first automated call to your API.
Edit the enroll_all.py file and change it to make it look like this:
import requests
username = ''
password = ''
base_url = 'http://127.0.0.1:8000/api/'
# retrieve all courses
r = requests.get(f'{base_url}courses/')
courses = r.json()
available_courses = ', '.join([course['title'] for course in courses])
print(f'Available courses: {available_courses}')
for course in courses:
  course_id = course['id']
  course_title = course['title']
  r = requests.post(f'{base_url}courses/{course_id}/enroll/',
                                  auth=(username, password))
  if r.status_code == 200:
    # successful request
    print(f'Successfully enrolled in {course_title}')
Replace the values for the username and password variables with the credentials of an existing user.
With the new code, you perform the following actions:
- You define the username and password of the student you want to enroll on courses.
- You iterate over the available courses retrieved from the API.
- You store the course ID attribute in the
course_idvariable and the title attribute in thecourse_titlevariable. - You use
requests.post()to send aPOSTrequest to the URLhttp://127.0.0.1:8000/api/courses/[id]/enroll/for each course. This URL corresponds to theCourseEnrollViewAPI view, which allows you to enroll a user on a course. You build the URL for each course using thecourse_idvariable. TheCourseEnrollViewview requires authentication. It uses theIsAuthenticatedpermission and theBasicAuthenticationauthentication class. The Requests library supports HTTP basic authentication out of the box. You use theauthparameter to pass a tuple with the username and password to authenticate the user using HTTP basic authentication. - If the status code of the response is
200 OK, you print a message to indicate that the user has been successfully enrolled on the course.
You can use different kinds of authentication with Requests. You can find more information on authentication with Requests at https://requests.readthedocs.io/en/master/user/authentication/.
Run the following command from the api_examples/ directory:
python enroll_all.py
You will now see output like this:
Available courses: Introduction to Django, Python for beginners, Algebra basics
Successfully enrolled in Introduction to Django
Successfully enrolled in Python for beginners
Successfully enrolled in Algebra basics
Great! You have successfully enrolled the user on all available courses using the API. You will see a Successfully enrolled message for each course in the platform. As you can see, it's very easy to consume the API from any other application. You can effortlessly build other functionalities based on the API and let others integrate your API into their applications.
Summary
In this chapter, you learned how to use Django REST framework to build a RESTful API for your project. You created serializers and views for models, and you built custom API views. You also added authentication to your API and you restricted access to API views using permissions. Next, you discovered how to create custom permissions, and you implemented viewsets and routers. Finally, you used the Requests library to consume the API from an external Python script.
The next chapter will teach you how to build a chat server using Django Channels. You will implement asynchronous communication using WebSockets and you will use Redis to set up a channel layer.