
This chapter will introduce you to the techniques of fetching data on initial rendering and fixing issues when a component falls into an infinite loop. You will be able to create class-based and functional component custom hooks and refactor the code further for simplicity and reusability. This chapter will give you a complete overview of how to fetch data on initial rendering and fix the common issue you will face with the infinite loop.
Introduction
In the previous chapter, we learned how to fetch data from servers using async/await and catch errors with the try/catch pattern. Also, we have further practiced how to use the async/await methods inside loops.
Now, let's consider a scenario. If you visit any of the popular social media sites, such as Instagram or Twitter, you get photos and content upon initial rendering of the web page and user interaction, such as clicking on a button or submitting a form, isn't necessary. In such a business use case, it is very common for an app to display content on initial rendering without any user interaction. In this chapter, we will look at the best way to fetch data upon initial rendering of a class-based component and how to achieve the same with a functional component.
Furthermore, for such scenarios, while fetching data from the server, we may encounter an issue with the component falling into an infinite loop due to re-rendering of the component. An example of this could be the state of the component getting updated without any safeguard after fetching data. We will learn how we can solve these issues in both class-based and functional components. We will discuss the custom hook and how we can further refactor the code so that we can reuse the hook to fetch data in such cases. Creating such types of hooks will help us avoid writing repetitive code and make the code reusable in such a way that other developers can easily understand our code.
Let's start with how to fetch data upon initial rendering in the correct manner so that you can avoid the infinite loop.
Fetching Data upon Initial Rendering
You may want to display data upon initial rendering of a component; for example, when you visit YouTube, you will see some trending videos on the initial page load. Now, if we want to design a page or a component of this kind, we could use the life cycle methods that we discussed in Chapter 4, React Lifecycle Methods. We need to decide which life cycle method to use to fetch data and store it in a state.
According to the life cycle diagram (https://packt.live/2zCiT7P), the component goes through a life cycle in the following order.
The constructor()-> render()->componentDidMount. componentDidMount() method is used for mounting steps and is the best life cycle method for fetching and manipulating data received from the server. After fetching data in the method, we update the state of the component with the data fetched within the componentDidMount() method in order to populate the data in the content.
From the life cycle methods' diagram (https://packt.live/2zCiT7P), it is evident that when the componentDidMount() life cycle method is running, the render() method has already been run once, which means if we fetch data in the componentDidMount() method, the data won't be loaded before the initial rendering. We can avoid assigning any undefined state in such a case, which is a best practice in any case.
While fetching data from a server, we are going to use axios with async/await, as we discussed in the previous chapter. Before we start fetching data in the componentDidMount() method, we need to import React and axios:
import React, { Component } from 'react';
import axios from 'axios';
We are going to create a class-based component and, in the constructor (), we will define an items variable that will contain the data fetched from a server. We will initialize the items state with an empty array and then export the App component. It should look like this:
class App extends Component {
constructor(props) {
super(props);
this.state = {
items: []
};
}
}
export default App;
Once the data is received from the server, we can store it in the state with setState():
class App extends Component {
constructor(props) {
super(props);
this.state = {
items: []
};
}
async componentDidMount() {
const res = await axios.get(
'https://mydomain.com/api'
);
this.setState({
items: res.data.items
});
}
}
export default App;
As we can see from the code, we can fetch data using the componentDidMount() method on initial rendering of the component. We have used async/await by adding the async keyword in front of the componentDidMount() method and the await keyword in front of the axios method. The async function, which contains the await expression, provides us with a simpler means of using promises synchronously.
To re-render the data received from the server, we could manipulate the state of the items array inside the render() method. If the data is a list of items, we could use the map() method to loop the array and display the items as shown in the following code:
class App extends Component {
constructor(props) {
super(props);
this.state = {
items: []
};
}
async componentDidMount() {
const res = await axios.get(
'https://mydomain.com/api'
);
this.setState({
items: res.data.items
});
}
render() {
return(
<ul>
{
this.state.items.map((item, index) => (
<li key={index}>{item.title}</li>
))
}
</ul>
);
}
}
export default App;
Note
The preceding code is just an example with no valid API endpoint, so there will be no output.
One thing to note here is that the render() method will be called twice in the code example. When the preceding code is loaded, the render() method will be called first, followed by componentDidMount(). When the state is updated in componentDidMount(), it will call the render() method again and this will result in the render() method being called twice. However, as the extra rendering happens before the browser gets updated, users will not notice the intermediate state.
Note
To initially assign values to the state, please DO NOT do it in the componentDidMount() method, because updating the state in the componentDidMount() method will call render() twice and it may cause performance issues in the component. The best place to initially set the values of state variables is inside constructor().
With this knowledge, let's take a look at the following exercise.
Exercise 16.01: Fetching Popular Google Fonts on Initial Rendering
In this exercise, we will display the top ten Google fonts upon initial rendering of a website. Each font should contain a link to the font's page on Google Fonts. You can access the Developer API at https://packt.live/2T0MLS0, and the key to access this at https://packt.live/2X9hf5N. To get the API key, click the Get a key button and follow the steps instructed.
At the end of this exercise, we will display 10 popular Google fonts and each list will have a link to each font's site on the Google Fonts website:

Figure 16.1: The outcome of the 10 most popular Google fonts
- Start by creating a new React app:
$ npx create-react-app font
- Remove all the files present in the src folder and create App.css. Then, add the CSS styles as follows:
.container {
margin: 50px auto;
width: 250px;
}
.card__item {
border: 1px solid #ccc;
color: #111;
display: block;
font-size: 20px;
margin: 10px 0;
padding: 20px;
text-decoration: none;
transition: background-color 0.3s ease-in-out;
}
.card__item:hover {
background-color: #eee;
}
- In the src folder, create index.js. Import React, ReactDOM, and App. Also, render the <App> component in the DOM:
import React from 'react';
import ReactDOM from 'react-dom';
import App from './App';
ReactDOM.render(<App />, document.querySelector('#root'));
- In the src folder, create another file called App.js and import the React and CSS files we created earlier. Also, add boilerplate code and import the FontList component, which we will create in the next step:
import React from 'react';
import FontList from './FontList';
import './App.css';
const App = () => {
return (
<div className="container">
<FontList />
</div>
);
};
export default App;
- We are going to use axios, so install axios by typing the following command in the root directory in your terminal:
yarn add axios
- Create another file, called FontList.js, and create a class-based component called FontList. Add boilerplate code too:
import React, { Component } from 'react';
import axios from 'axios';
class FontList extends Component {
render() {
return (
<div className="card">
FontList component
</div>
);
}
}
export default FontList;
- Add the API key that we have prepared:
import React, { Component } from 'react';
import axios from 'axios';
const API_KEY = '12345';
class FontList extends Component {
render() {
return (
<div className="card">
FontList component
</div>
);
}
}
export default FontList;
- To fetch the data on initial rendering, use the componentDidMount() life cycle method. As we are going to use async/await, let's add the async keyword in front of componentDidMount() and add the method right above render():
async componentDidMount() {
// 1. Fetch data with axios
// 2. Update state
}
- Fetch data using axios. Add the await keyword in front of axios, and then add the endpoint. The endpoint for the popular Google fonts should start with https://www.googleapis.com/webfonts/v1/webfonts and add two parameters:
- key=${API_KEY}
- sort=popularity
async componentDidMount() {
// 1. Fetch data with axios
const res = await axios.get(`https://www.googleapis.com/webfonts/v1/webfonts?key=${API_KEY}&so rt=popularity`);
// 2. Update state
}
- Check the response using console.log:
console.log(res)
You should get results along the lines of the following screenshot. The data we want is in data > items as an array. Hence, we can get the only data we want from res.data.items:

Figure 16.2: The data received from the Google Fonts API
- Before storing the data in a state, initialize the state in constructor():
constructor(props) {
super(props);
this.state = {
fonts: []
};
}
- Update the state with res.data.items. As we only want to display the 10 most popular Google fonts, we will use the slice() method to fetch the first 10 items from the res.data.items array:
async componentDidMount() {
// 1. Fetch data with axios
const res = await axios.get(`https://www.googleapis.com/webfonts/v1/webfonts?key=${API_KEY}
&sort=popularity`);
// 2. Update state
this.setState({
fonts: res.data.items.slice(0, 10)
});
}
To display the data inside the render() method, we will loop the fonts state using the map() method. We are going to receive two values, each font and index. We are going to get the family name from font and we are going to use index as a key.
- Call the map method with two parameters, font and index:
render() {
return (
<div className="card">
{this.state.fonts.map((font, index) => (
Also, to build the URL to link to the font page on the Google Fonts site, we will start with https://fonts.google.com/specimen/, followed by the font family name, but we need to replace the space with +.
- Replace the space, ' ', with +:
render() {
return (
<div className="card">
{this.state.fonts.map((font, index) => (
<a
href={`https://fonts.google.com/specimen/${font.family.replace(
' ',
'+'
)}`}
className="card__item"
key={index}
>
{font.family}
</a>
))}
</div>
);
}
Once you have followed these steps, you should get the 10 most popular Google fonts, as indicated in the following screenshot. Also check whether the link takes you to its corresponding Google Fonts page:

Figure 16.3: The outcome of the 10 most popular Google fonts
We have seen how we can retrieve the 10 most popular Google fonts and display them while the component loads for the first time. Now, let's understand how to fetch data while a component gets updated.
Fetching Data on Update
We now have a good idea of which life cycle method we need to use while fetching data upon initial rendering. In this section, we are going to learn which life cycle method we need to use while fetching data while a component gets updated.
Suppose a child component is fetching data from the server with the values sent from the parent component. Now, if we update the state of the parent component and use the componentDidMount() method in the child component to fetch data from the server simultaneously, we won't be able to do so even if the child components are re-rendered. This is because the componentDidMount() method is only called once in the life cycle of any component (discussed in Chapter 4, React Lifecycle Methods in React).
The following diagram shows an example of a parent and child component:

Figure 16.4: Updating the state from the parent component
The parent component has a state value of 134 and we send this value, 134, to the child component. We are using 134 as part of the API endpoint. Let's say that we want to fetch data using a different value this time, 987. We update the state in the parent component, which will re-render the child component. We expect that we will receive the new value, 987, in the child component and reconstruct the API endpoint, which allows us to fetch another set of data. However, this fetching of the data will ideally never happen as the componentDidMount() method is called only once during the life cycle of a component, and therefore will not be called again when the updating occurs.
In this case, the best place to fetch data is in the componentDidUpdate() method. Hence, updating the state in the parent component will re-render the child component and the componentDidUpdate() method in the child component will be invoked. Let's look at the following code in order to understand how we will implement the method:
async componentDidUpdate() {
const res = await axios.get(
'https://mydomain.com/api'
);
this.setState({
items: res.data.items
});
}
As the componentDidUpdate() method cannot be used for the initial render, if we still wanted to fetch data upon initial rendering, we also need to keep fetching data in the componentDidMount() method:
async componentDidMount() {
const res = await axios.get(
'https://mydomain.com/api'
);
this.setState({
items: res.data.items
});
}
async componentDidUpdate() {
const res = await axios.get(
'https://mydomain.com/api'
);
this.setState({
items: res.data.items
});
}
As the code for fetching the data inside componentDidMount() and componentDidUpdate() is the same, we can create a new function called getData() and reuse the code.
Note
DO NOT attempt to run this code yet as it will cause an infinite loop.
async getData() {
const res = await axios.get(
'https://mydomain.com/api'
);
this.setState({
items: res.data.items
});
}
componentDidMount() {
this.getData();
}
componentDidUpdate() {
this.getData();
}
In the next section, we will discuss the infinite loop problem that we will encounter when a component updates.
Infinite Loop
We now have a good idea of which method to use between componentDidMount() and componentDidUpdate() while fetching data. However, it is very important to note that updating the state inside the componentDidUpdate() method will cause an infinite loop. Let's take a look at the following diagram:

As we can see from the preceding diagram, when the state in the component gets updated, the componentDidUpdate method will be called again and, therefore, the component will be rendered again. Now, when you update the state in the componentDidUpdate() method, it will infinitely re-render the component.
To avoid this situation, we need a safeguard. The componentDidUpdate() method returns three values, prevProps, prevState, and snapshot (discussed in Chapter 4, React Lifecycle Methods in React). We can use the prevProps value and create a safeguard. We can compare the previous prop value in a child component with the current prop sent from the parent component and, if they are not the same, we can update the state. When we update the state, the component will be re-rendered and this time, since the current prop becomes the previous prop, and their values are the same, we can skip updating the state, which prevents the infinite loop. The following code shows how we compare the previous prop value with the current prop value in the componentDidUpdate() method:
componentDidUpdate(prevProps) {
if (prevProps.sort !== this.props.sort) {
this.getData();
}
}
Therefore, the problem of a component falling into an infinite loop can be avoided with this simple trick. Let's see the implementation in more detail in the following exercise.
Exercise 16.02: Fetching Trending Google Fonts
Continuing from Exercise 16.01, Fetching Popular Google Fonts on Initial Rendering, we are going to add two buttons above the font list, one to get the popular Google fonts, and the other for the trending fonts. We are going to add a state to the App component and, when clicking on the button, we will update the state to either popularity or trending. The state will be sent to the FontList component as a prop and used as a sort parameter when fetching data. At the end of this initial rendering with componentDidMount:
- In App.css, add the button styles:
.card__button:first-of-type {
margin: 10px;
}
- First, update the App component to the class-based component and add an initial sort state as popularity. Then, send the sort state as a prop to the FontList component:
import React, { Component } from 'react';
import FontList from './FontList';
import './App.css';
class App extends Component {
constructor(props) {
super(props);
this.state = {
sort: 'popularity'
};
}
render() {
return (
<div className="container">
<FontList sort={this.state.sort} />
</div>
);
}
}
export default App;
- Add two buttons—one for popularity and the other for trending. Each button will have a class name of card__button and also an onClick event, which will call a new function called handleClick when each sort value is sent:
render() {
return (
<div className="container">
<div>
<button
className="card__button"
onClick={() => {
this.handleClick('popularity');
}}
>
Popularity
</button>
<button
className="card__button"
onClick={() => {
this.handleClick('trending');
}}
>
Trending
</button>
</div>
<FontList sort={this.state.sort} />
</div>
);
}
- Create the handleClick function and update the sort state with the value received from each button:
handleClick = sort => {
this.setState({ sort });
};
- From Exercise 16.01, Fetching Popular Google Fonts on Initial Rendering, add componentDidUpdate() and add the same code from the componentDidMount() method. However, make sure to have a safeguard with prevProps. Also, update the sort parameter value to the sort value received as the prop from the App component:
class FontList extends Component {
constructor(props) {
super(props);
this.state = {
fonts: []
};
}
async componentDidMount() {
// 1. Fetch data with axios
const res = await axios.get(`https://www.googleapis.com/webfonts/v1/webfonts?key=${API_KEY}&so rt=${this.props.sort}`);
// 2. Update state
this.setState({
fonts: res.data.items.slice(0, 10)
});
}
async componentDidUpdate(prevProps) {
if (prevProps.sort !== this.props.sort) {
const res = await axios.get(
`https://www.googleapis.com/webfonts/v1/webfonts?key=${API_KEY}&sort=${th is.props.sort}`);
this.setState({
fonts: res.data.items.slice(0, 10)
});
}
}
- Update the render function as we did for the previous exercise:
render() {
return (
<div className="card">
{this.state.fonts.map((font, index) => (
<a
href={`https://fonts.google.com/specimen/${font.family.replace(
' ',
'+'
)}`}
className="card__item"
key={index}
>
{font.family}
</a>
))}
</div>
);
}
}
export default FontList;
- Refactor both the componentDidMount() and componentDidUpdate() methods so that we can reuse the duplicate code:
async getFonts() {
// 1. Fetch data with axios
const res = await axios.get(`https://www.googleapis.com/webfonts/v1/webfonts?key=${API_KEY}&so rt=${this.props.sort}`
);
// 2. Update state
this.setState({
fonts: res.data.items.slice(0, 10)
});
}
componentDidMount() {
this.getFonts();
}
componentDidUpdate(prevProps) {
if (prevProps.sort !== this.props.sort) {
this.getFonts();
}
}
- Click on the buttons and we should see that the list of fonts gets updated between trending and popularity:

Figure 16.6: The output of sorting buttons
Hitherto, we've seen how to fetch data for class components using the life cycle methods. Now, we're going to learn how to fetch data for functional components. Since, by now, we already have a good understanding of React Hooks, let's dive right into using React Hooks to fetch data.
React Hooks to Fetch Data
We have learned about the life cycle methods we need to use for fetching data and how to fix the infinite loop when updating the state in the componentDidUpdate() method.
In early 2019, React 16.8 was released with a stable release of React Hooks. As we discussed in the Chapter 15, Promise API and async/await.
React Hooks allows us to use state and other features in the function components without writing a class. In this section, we are going to learn how to use React Hooks to refactor what we have done in the previous sections, such as fetching data or updating the state by clicking on either the Popularity or Trending buttons.
In the class-based components, we have used the componentDidMount() method to initially fetch data, and the componentDidUpdate() method to re-fetch data upon re-rendering. To avoid the infinite loop, we used prevProps to compare whether the previous prop is the same as the current prop.
With useEffect, we can do both initial requests and follow-up requests in the same place. To recap useEffect, we can send a second argument to useEffect and, if the second argument has changed (meaning it has different values than the previous rendering), the function in useEffect will be called, whereas if the second argument is the same, the function inside useEffect won't be called:

Figure 16.7: Setting the second argument
From the diagram, when we send the same value as the second argument to useEffect and currentPropValue, the function inside useEffect won't be called. However, when we send a different value, updatedPropValue, the function inside the useEffect will be called and we can execute the code in the function on the follow-up rendering.
Now, let's see how we can fetch data using the useEffect hook.
To fetch data in useEffect(), add the axios call inside useEffect, followed by updating the state using useState():
useEffect(async () => {
const res = await axios.get(
'https://mydomain.com/api'
);
setRes(res);
}, [propValue]);
However, if you run the preceding code, you will receive an error message because we are not allowed to use useEffect if we are passing an async function, or if the function returns a promise:

Figure 16.8: An error message
To fix this error message and call the async function, we need to create a second function and call it inside useEffect:
useEffect(() => {
const getRes = async () => {
const res = await axios.get(
'https://mydomain.com/api'
);
setRes(res);
}
getRes();
}, [propValue]);
In this way, we can fetch data for the follow-up rendering as well as the initial rendering and avoid the infinite loop because receiving a different propValue will not execute the code inside the useEffect method and will safeguard the infinite re-rendering.
Exercise 16.03: Refactoring the FontList Component
In this exercise, we are going to refactor the FontList class-based component we completed in Exercise 16.02 to the function component using React Hooks. During this exercise, you will learn how to use useState to handle the state and useEffect to fetch data in the functional component. By the end of this exercise, you should be able to know how to properly use useEffect to fetch data by avoiding the infinite loop issue.
Let's look at the completed FontList class component:
FontList.js
1 import React, { useState, useEffect } from 'react';
2 import axios from 'axios';
3
4 const API_KEY = '12345';
5
6 const FontList = props => {
7 const [fonts, setFonts] = useState([]);
8
9 useEffect(() => {
10 const getFonts = async () => {
11 // 1. Fetch data with axios
12 const res = await axios.get(
13 `https://www.googleapis.com/webfonts/v1/webfonts?key=${API_KEY}&sort=${prop s.sort}`
14 );
15
16 // 2. Update state
The complete code can be found here: https://packt.live/3dGTDvR
- First, we are going to change the class to function and remove Component from the import statement:
import React from 'react';
import axios from 'axios';
const API_KEY = '12345';
const FontList = props => {
…
- Remove the constructor. We will initialize the fonts state using the useState hook. To use the useState hook, we need to import it:
import React, { useState } from 'react';
import axios from 'axios';
const API_KEY = '12345';
const FontList = props => {
const [fonts, setFonts] = useState([]);
…
- Remove the render() method and return the JSX code directly:
import React, { useState } from 'react';
import axios from 'axios';
const API_KEY = '12345';
const FontList = props => {
const [fonts, setFonts] = useState([]);
return (
<div className="card">
{fonts.map((font, index) => (
<a
href={`https://fonts.google.com/specimen/${font.family.replace(
' ',
'+'
)}`}
className="card__item"
key={index}
>
{font.family}
</a>
))}
</div>
);
}
export default FontList;
- Between useState() and return(), add useEffect() to fetch data and add props.sort as the second argument. The value of props.sort will be either popularity or trending, and this value will be updated by the parent component, App. So, unless the App component changes, the function inside useEffect will only be called once:
useEffect(() => {
}, [props.sort]);
- Let's add getFonts() inside useEffect() and call it:
useEffect(() => {
const getFonts = async () => {
// 1. Fetch data with axios
const res = await axios.get(
`https://www.googleapis.com/webfonts/v1/webfonts?key=${API_KEY}&sort=${pro ps.sort}`
);
// 2. Update state
setFonts(res.data.items.slice(0, 10));
};
getFonts();
}, [props.sort]);
Once you have completed the refactoring, you should still see the two buttons with Popularity and Trending and the font lists received upon initial rendering:
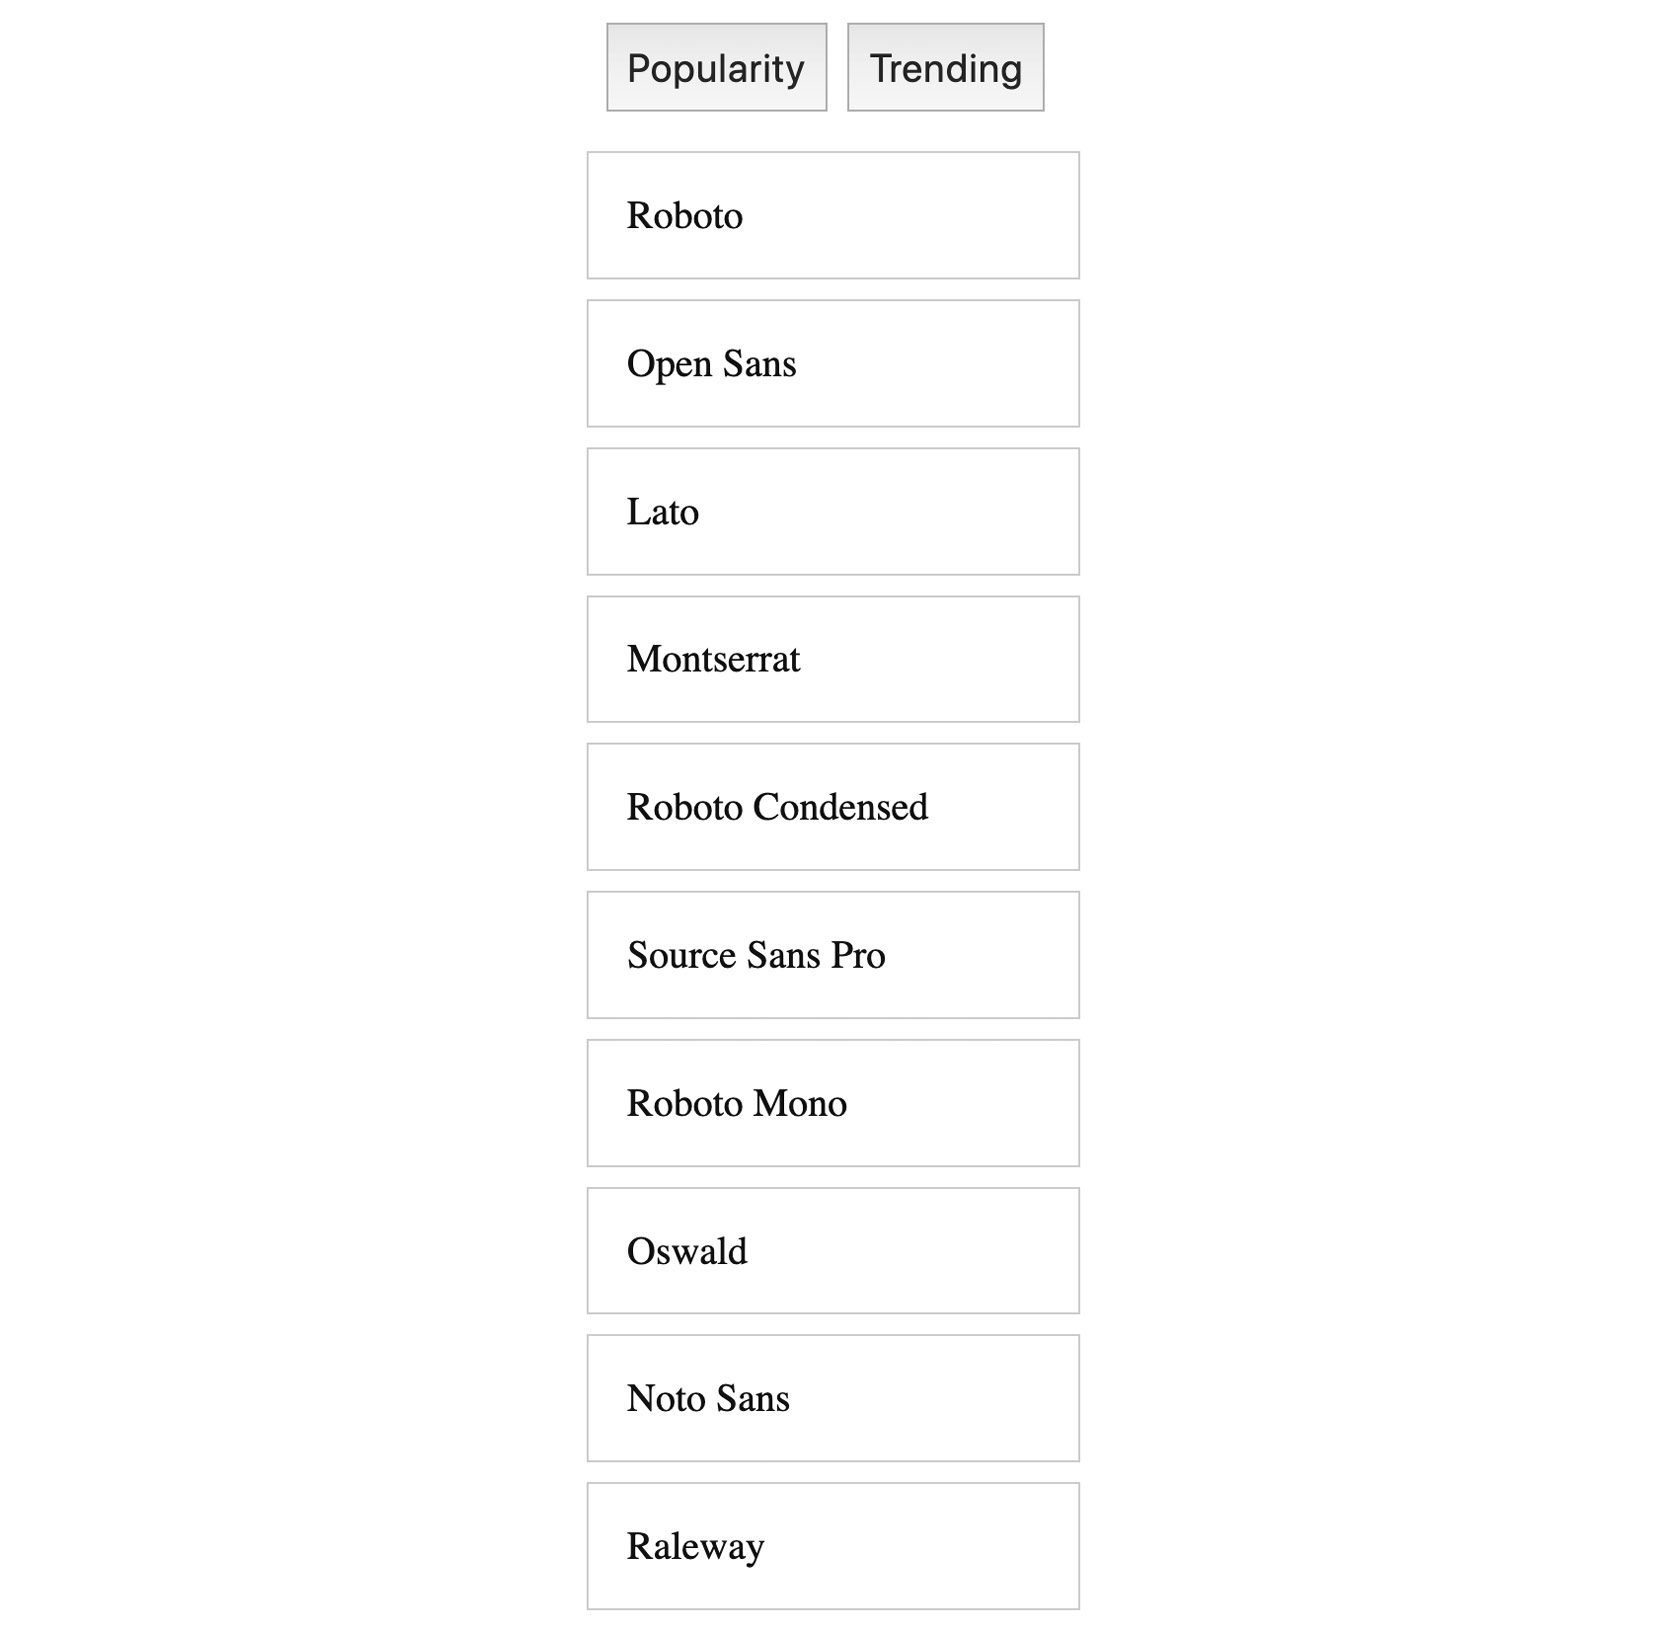
Figure 16.9: Output from refactoring
We now have a good understanding of how we can fetch data using the useEffect hook on the follow-up rendering and can then avoid the infinite loop issue. For now, the hooks work really well, making our code simpler and easier to understand. However, with the custom hook, we can make our code more reusable so that it can be shared with many other components. This will help make our code much easier to work on.
More Refactoring with Custom Hook
In the previous sections, we learned how to use hooks to fetch data in a function component. We also discussed how to avoid the infinite loop by specifying the second argument in useEffect.
In this section, we will learn how to further refactor the previous code by using a custom hook. While developing React applications, it is always a good idea to reuse code in one place and share it across different components.
As we discussed in the previous chapter, and also specified in the React documentation (https://packt.live/3cwLUjN), Building your own hooks lets you extract component logic into reusable functions, which means hooks allow us to easily share and reuse code.
Let's recap how to create the custom hook. To create a custom hook, we first create a new file. The filename convention is to start with use, followed by the hook name—for example, useResponse.js.
Inside the hook file, we need to import necessary hooks, such as useState or useEffect, and create a function, such as useResponse. To fetch data in the custom hooks, we do almost the same as in the previous section, but we will return the response we fetched this time. And, finally, we need to export the hook so that other components can use it:
import { useState, useEffect } from 'react';
import axios from 'axios';
const useResponse = (propValue) => {
const [res, setRes] = useState([]);
useEffect(() => {
const getRes = async () => {
const res = await axios.get(
‹https://mydomain.com/api›
);
setRes(res);
}
getRes();
}, [propValue]);
return res;
};
export default useResponse;
For other components to use this hook in order to retrieve the data from the server, we import the hook first, and then call the hook and assign it to a variable:
import useResponse from './useResponse';
const response = useResponse(propValue);
Exercise 16.04: Refactoring a FontList Component with a Custom Hook
In this exercise, we are going to create a custom hook called useFonts and move the useEffect part to the useFonts hook. By doing so, we can reuse the useFonts custom hook in other components and improve code readability. At the end of this exercise, you will learn how to create a custom hook and use it in any other component.
Let's recap what we did in Exercise 16.03, Refactoring the FontList Component
FontList.js
1 import React, { useState, useEffect } from 'react';
2 import axios from 'axios';
3 const API_KEY = '12345';
4 const FontList = props => {
5 const [fonts, setFonts] = useState([]);
6 useEffect(() => {
7 const getFonts = async () => {
8 // 1. Fetch data with axios
9 const res = await axios.get(
10 `https://www.googleapis.com/webfonts/v1/webfonts?key=${API_KEY}&sort=${prop s.sort}`
);
16 // 2. Update state
The complete code can be found here: https://packt.live/3dGTDvR
- First, create a new file called useFonts.js in the same directory as FontList.js.
- Import useState and useEffect.
As we are only going to create a function and return a value and will not be making use of React objects such as React.createElement or React.Component, we do not need to import React from 'react'. As we are going to use axios, we need to import axios:
import { useState, useEffect } from 'react';
import axios from 'axios';
- Create a function called useFonts, and then move API_KEY and useEffect to useFonts. Then, export useFonts:
import { useState, useEffect } from 'react';
import axios from 'axios';
const API_KEY = '12345';
const useFonts = () => {
useEffect(() => {
const getFonts = async () => {
// 1. Fetch data with axios
const res = await axios.get(
`https://www.googleapis.com/webfonts/v1/webfonts?key=${API_KEY}&sort=${p rops.sort}`
);
// 2. Update state
setFonts(res.data.items.slice(0, 10));
};
getFonts();
}, [props.sort]);
}
export default useFonts;
We will receive props.sort as sort.
- Add sort as a function parameter and replace props.sort with sort. Define useState to store the fetched data in the state:
const useFonts = sort => {
const [fonts, setFonts] = useState([]);
useEffect(() => {
const getFonts = async () => {
// 1. Fetch data with axios
const res = await axios.get(
`https://www.googleapis.com/webfonts/v1/webfonts?key=${API_KEY}&sort=${so rt}`
);
// 2. Update state
setFonts(res.data.items.slice(0, 10));
};
getFonts();
}, [sort]);
}
...
- Return the fonts state:
import { useState, useEffect } from 'react';
import axios from 'axios';
const API_KEY = '12345';
const useFonts = sort => {
const [fonts, setFonts] = useState([]);
useEffect(() => {
const getFonts = async () => {
// 1. Fetch data with axios
const res = await axios.get(
`https://www.googleapis.com/webfonts/v1/webfonts?key=${API_KEY}&sort=${s ort}`
);
// 2. Update state
setFonts(res.data.items.slice(0, 10));
};
getFonts();
}, [sort]);
return fonts;
};
export default useFonts;
- In FontList.js, we no longer need to import useState, useEffect, and axios. Instead, import useFonts. Finally, assign the font data from useFonts to a variable called fonts:
import React from 'react';
import useFonts from './useFonts';
const FontList = props => {
const fonts = useFonts(props.sort);
return (
<div className="card">
{fonts.map((font, index) => (
<a
href={`ttps://fonts.google.com/specimen/${font.family.replace(
' ',
'+'
)}`}
className="card__item"
key={index}
>
{font.family}
</a>
))}
</div>
);
};
export default FontList;
With the custom hook, we should see output as in the following screenshot, with two buttons and a font list upon initial rendering. When you click on the button, the list of fonts should get updated, either by popularity or trending:
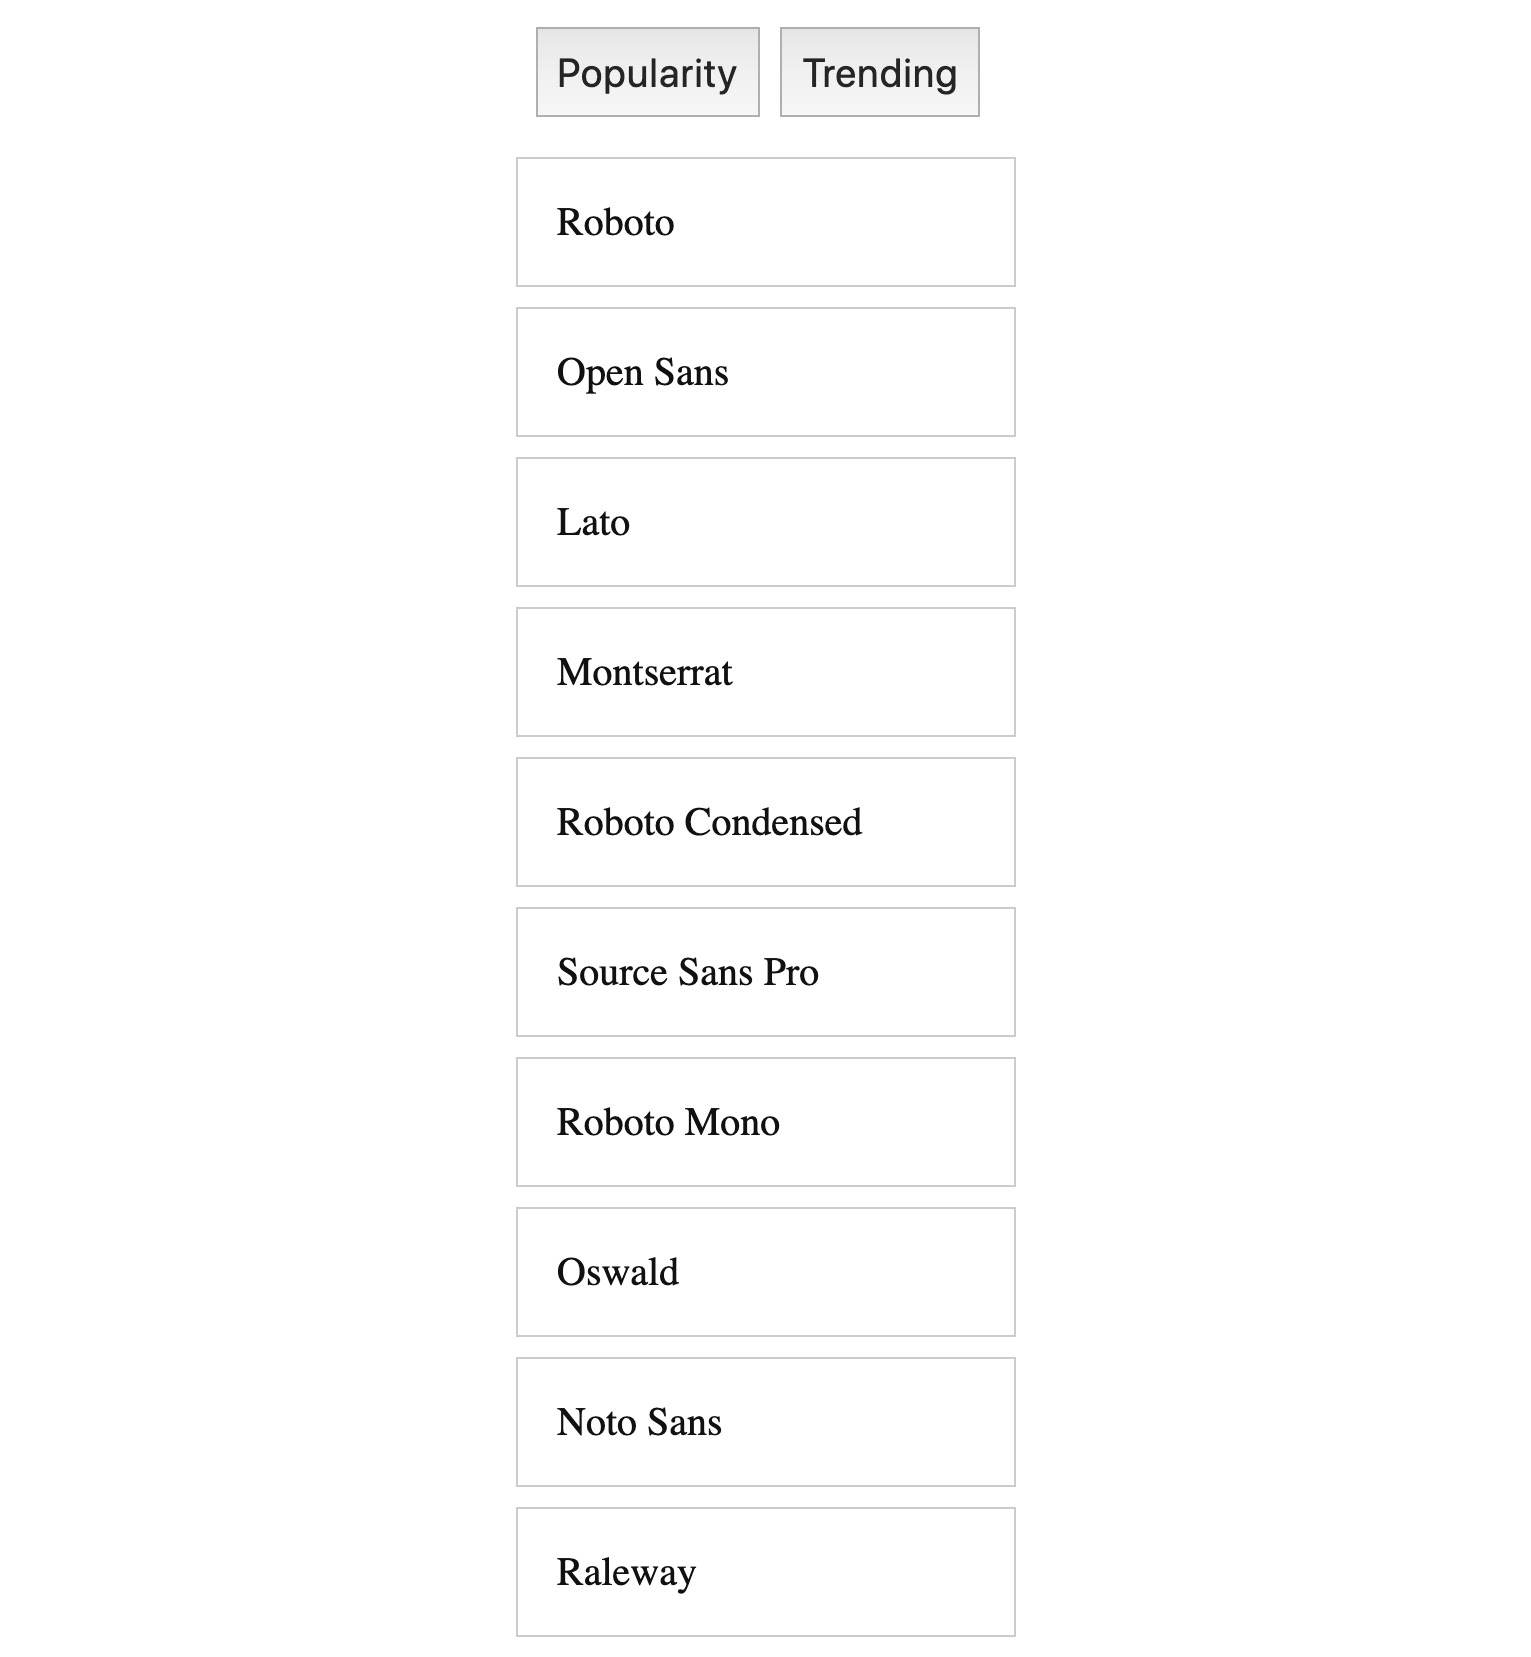
Figure 16.10: Output with a custom hook
We have learned how to fetch data both in the initial and follow-up renders in class-based components. We also discussed how to use hooks to achieve the same results in function components. Furthermore, we learned how to refactor using the custom hook so that we can make the code more reusable by utilizing other components.
Activity 16.01: Creating an App Using Potter API
The aim of this activity is to create an app displaying characters from the Harry Potter API. The list of characters can be re-fetched by clicking on one of four buttons that represent each house (Gryffindor, Slytherin, Hufflepuff, and Ravenclaw). Initially, the app will display the name of the characters, but upon clicking on the name, it will further fetch the details of the characters, such as the role and the house. To fetch the data, we are going to use the Harry Potter API (https://www.potterapi.com/), which provides the list of houses and characters in the Harry Potter franchise.
The complete app should look like this:

Figure 16.11: Outcome of the activity
To use the Potter API, we need to sign up and get the API key first. To sign up, go to the sign-up page (https://www.potterapi.com/login/). Once signed up, you will be taken to the page where you can get the API key.
Once you are registered, head to the documentation page (https://www.potterapi.com/#introduction), where you can get all the necessary details of the Harry Potter API. For this activity, you need to take a closer look at the house routes and character routes. If you need to get the data for an individual character, add characterId to the character route's endpoint. To fetch the data, use async/await with axios. As we will fetch the data using the same base endpoint (https://www.potterapi.com/v1/), please make use of the custom hook so that we can share the hook to fetch data from different endpoints.The recommended file structure is as follows:
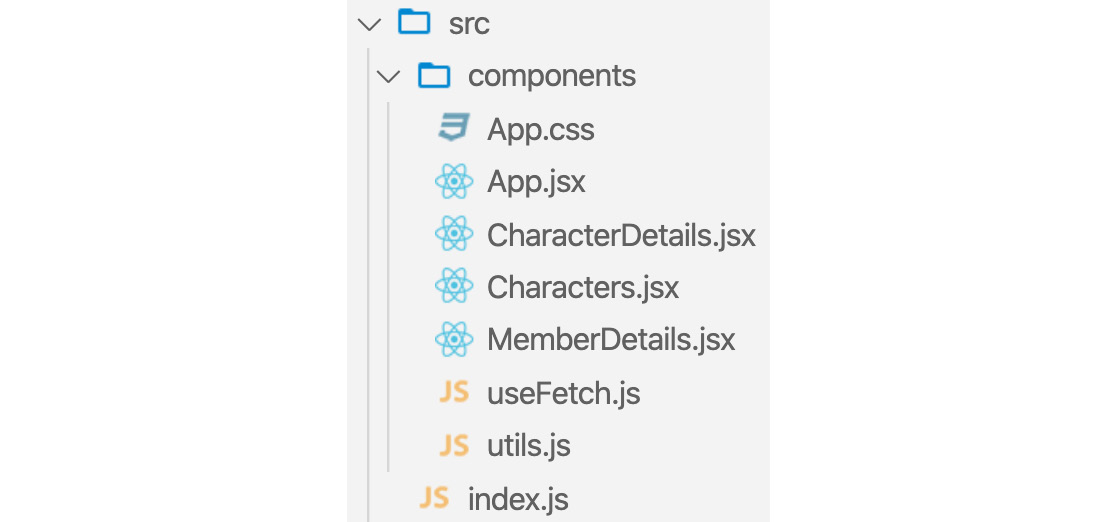
Figure 16.12: The file structure of the activity
For the styles, please use the following code, App.css:
App.css
1 .container {
2 margin: 100px auto;
3 width: 600px;
4 }
5
6 .house {
7 display: flex;
8 flex-wrap: wrap;
9 justify-content: center;
10 }
11
12 .house__button {
13 border: 0;
14 border-radius: 4px;
15 box-shadow: 1px 2px 9px #ccc;
The complete code can be found at: https://packt.live/2Z58gF4
The following steps will help you to complete the activity:
- Start a new React application
- Import the styles using the App.css file provided above.
- Add four buttons, one labeled for each house (Gryffindor, Slytherin, Hufflepuff and Ravenclaw).
- Use the Potter API endpoint to fetch the data pertaining to the houses.
- Fetch data using async/await in the useEffect hook.
- Save the data in a variable (let's call this houses) defining the state.
- Display the buttons with the four house names. Each button should have a key and a name.
- Apply the color names with the color value. Check whether the color is scarlet or bronze. Create a utility file called utils.js and put the colorconverter function inside it.
- Create a custom hook called useFetch to fetch the data from the Potter API. Create a separate file called useFetch.js to put the code of the custom hook inside it.
- Display the data fetched from the API.
Note
The solution of this activity can be found on page 738.
Summary
This chapter talked about how to fetch data on initial rendering and how to avoid the infinite loop when updating the state after fetching data. Throughout this chapter, we have used the Google Font API to fetch data on initial rendering with the class-based and functional component. We have also covered how to use custom hooks to share the common fetching functionality with components.
Firstly, we learned that the componentDidMount() life cycle method is the best place to fetch data upon initial rendering. Also, we learned how to use async/await with componentDidMount() and how to display the data using the map() method in the render() method.
Secondly, we used componentDidUpdate() when fetching data on updating components. We also established that updating state inside componentDidUpdate() will cause the infinite loop. To avoid this, we compared the previous prop with the current prop and updated the state only when those two prop values were different.
Thirdly, we learned how to use React hooks (such as useState and useEffect) to fetch data on initial rendering in the function components. Furthermore, we also learned how to use async/await with axios in useEffect and how to avoid the infinite loop when using this hook.
Lastly, we learned how to further refactor fetching data using a custom hook. Using the custom hook allows other engineers to easily reuse the custom hook by sharing the custom hook with components such as fetching data from servers.
Throughout the previous and current chapter, we learned all about fetching data from servers, and you should now have a great understanding of how to fetch data in React. Knowing this will help you build more advanced React applications, which could be used to communicate with the outside world. In the next chapter, we are going to learn how to use refs (references) in React.