
Appendix 1: A Brief Review of OOP Principles in C#
The landscape of programming languages contains hundreds of choices. If you’re reading this book, you have probably come across C# at some point along your journey. For some, C# is the only language they’ve ever learned. For others, it’s the third or fourth. Maybe you develop in C# every day and have for many years, or maybe you’ve just picked it up, and it’s now your new best friend.
I realize that readers will be coming to this book with different levels of experience, different backgrounds, and different career objectives. I used to have a very popular video series published on LinkedIn Learning that was designed to teach C# to beginners. To be honest, this has always been my favorite audience. Teaching software development to newbies is like teaching magic in a jaded world sadly short of vision. I get to see Aha! moments nearly every week with my students at Southern Methodist University, where I teach at the Full Stack Code boot camp.
One of the things that excited me about the prospect of writing this book is this book helps you take the next step. Either you’ve just learned how to code or maybe you’ve been using the same magic tricks for many years with success, but you realize there’s still more to learn. Patterns are a great next step. Learning patterns makes you better at almost everything else in programming.
The problem here is that I don’t know where you are in your journey. If you’re a student of mine from SMU, you’ve learned JavaScript really well and you want to take the next step. C# is radically different from JavaScript. Jumping into this book from only knowing JavaScript would be hard, but not impossible. If you’re self-taught, you’ve probably focused on what I call “survival skills.” They include basic OOP plus how to work with a database and probably web technologies. If you’re in a university, and you’re learning how to code, your textbooks are likely not very illuminating. I know. I’ve taught at colleges and universities for 25 years. Usually, I write my own material because of the dearth of good books out there.
No matter where you are right now, or where you came from, this chapter is here to orient you. Originally, I had intended this to be the second chapter of this book. My editor wisely suggested we get into working with patterns as quickly as possible. She suggested an appendix, which we’ve mentioned throughout the book. You’ll either get a good review or a crash course in C#.
In this appendix, you can expect to learn the following:
- A quick background on C# and how the language can be defined along a number of lines of taxonomy. That sounds fancy, but you’ll see it’s fairly basic.
- The syntax mechanics of C# with enough length and detail to get you through this book. Since this book mainly deals with plain old C# objects (POCOs) and a few common types from .NET Framework such as Lists, this section is possible.
- How to set up the projects in the book using three common IDEs in Windows. There are two project types we use: command-line projects and libraries.
- How to clone the sample code projects covered in the book.
Let’s get started!
Technical requirements
This appendix is largely an overview of basic topics rather than a collection of projects. With that said, at the end of the appendix, you are guided in the use of the three most popular C# IDEs on the market today. You’ll have a choice to make. Regardless of which IDE you choose, you’ll need a computer running the Windows operating system. I’m using Windows 10. The projects used in this book probably work fine on a Mac or in Linux, but I didn’t test them there, so your mileage might vary.
To follow the IDE tutorials at the end of this chapter, you’ll need the following:
- One of these IDEs:
- Visual Studio
- Visual Studio Code (VS Code)
- JetBrains Rider
- .NET Core 6 SDK
You can find the completed project files for this chapter on GitHub at https://github.com/Kpackt/Real-World-Implementation-of-C-Design-Patterns/tree/main/appendix-1.
A quick background of C#
Let me just say it out loud right off the bat: C# is a knock-off of Java. If you know Java, but not C#, you’re going to have a very easy time. Now, pretend I didn’t lead with that and allow me to slip on my corduroy sport coat. The one with the patches on the elbows. I have a tobacco pipe in the front pocket of the jacket sticking up so that you can see it. Naturally, in this day and age, nobody would dream of putting tobacco or anything else into it. That’d be wrong. But I need to look as much like a college professor as possible, so I can go all historical on you for a bit.
The C# language is Microsoft’s flagship language product for corporate and game programming. It was designed by Anders Hjlsberg in the year 2000 AD. Some of my students claim I am ancient, so I figured I’d clarify by stating that it is, in fact, AD and not BC. The language was submitted and approved as a standardized language via the European Computer Manufacturers Association (ECMA). You might know this is as the same body that standardized JavaScript, which is really called ECMAScript. Many languages are standardized. This simply means that there is an open specification available for the language and that it is possible for others to create a competing implementation of a language based on the specification. C# is Microsoft’s implementation. There is an open source competitor called Mono that used to be popular in several arenas, including cross-platform mobile and game development.
When Microsoft introduced C#, it also released .NET Framework and Visual Studio. .NET Framework is a massive set of libraries that provides a language support infrastructure for C# along with other Microsoft languages. Each language supported can compile its code into an intermediate format. The intermediate form at, called Microsoft Intermediate Language (MSIL), can then execute using the .NET runtime. This makes the overall language architecture very similar to Java, which compiles to an intermediate form called bytecode, which is then executed on a Java Virtual Machine (JVM).
The stated design goals for the language include the following:
- A simple, general-purpose, object-oriented language
- Support for a strong, statically typed variable system
- Automatic bounds checking on array types and the detection of uninitialized variables
- Automated garbage collection
- Source code portability; code should be executable in a variety of environments without changing the code significantly and without recompiling
Let’s expand on these ideas.
C# is a general-purpose language
Pretty much everyone has heard of an invention created by Richard Clyburn in 1842. I present you with an adjustable wrench in Figure A.1:

Figure A1.1: An adjustable wrench. You can use this for almost any wrenching job. If you’re in a jam, you can also use it to open bottles and drive nails. It’s a general-purpose tool just like the C# language, which can be used to make almost any kind of software
We call them crescent wrenches in the US, while many other countries refer to them as spanners. This wrench is a general-purpose wrench. It can be used for a variety of tasks befitting a wrench from the loosening and tightening of metal fasteners on your IKEA furniture to installing a new engine in your ‘57 Chevy, to installing a new garbage disposal for your kitchen sink.
Now consider the wrench in Figure A1.2:

Figure A1.2: This is a basin wrench. It’s only good for one thing: tightening down fastening nuts on faucet hardware under a sink. It is a special-purpose tool just like SQL is a special-purpose language. Both can only be used for one purpose
You might have never encountered one of these before. This odd-looking contraption is called a basin wrench. It has only one job. It is used to tighten the faucet coupling when installing a new kitchen or bathroom sink. The wrench head pivots across 180 degrees, so you can maneuver it around all the pipes. The long handle helps you deal with the sink bowl that protrudes downward, blocking your access were you to attempt this with a general-purpose wrench.
Likewise, there exist a few special-purpose languages, the most popular being Structured Query Language (SQL). SQL is only used to query relational databases. You can’t make a video game or an operating system with it.
On the other hand, C# is a general-purpose language. It can be used to make just about anything from line-of-business software to AAA video games. And yes, someone did once try to make an operating system with C# called SharpOS, showing us that it is possible to write an operating system with C#.
The biggest reason to choose C# as your main language of choice is the flexibility. Coupled with .NET Framework, you have thousands of building blocks. You can use them to build whatever software you might need.
C# is purely and fully object-oriented
There are two major paradigms that you’ll see in programming languages: OOP and functional programming languages. Perhaps a third paradigm occurs when it is possible to mix the two within a single language. Let’s cover the differences:
|
OOP |
Functional programming |
|
Code is organized into classes as the primary building block of your program. |
Code is organized into distinct functions, which use their arguments in place of properties. |
|
Methods often have side effects. They can change the state of the object from within the method. |
Pure functions never have side effects. |
|
In OOP, we have support for mutable and immutable objects. |
Function programming never supports mutable variables. If you want to change something, you have to create a new variable. |
|
Data is stored in properties within the object and is prioritized from a design perspective above methods that often serve only to mutate the state of the object. |
The design goals are focused on functions. They take immutable inputs and produce an output. |
Figure A1.3: The difference between OOP and functional programming.
Some languages, such as C# and Java, are strictly object-oriented. Languages such as Haskell and F# are strictly functional, while languages such as JavaScript, Python, and PHP can support either or both paradigms. The original Gang of Four (GoF) software design patterns, which are the focus of this book, were built around OOP using a language called SmallTalk. Naturally, we’ll keep our focus strictly on OOP.
C# uses a static, strong type system
There are three schools of thought with respect to type systems. First, let me tell you what I mean by a type system. Programming languages share a common purpose: they all take some sort of input and turn it into some sort of output. The input and output for the program are called data. There are three basic types of data as far as your computer is concerned.
Strings are alphanumeric data – think letters and numbers. If you can type it on your keyboard, it is alphanumeric.
The second type of data is numbers. I think you know what this means. While numbers can be alphanumeric strings, you can’t use strings to do math. This distinction is at the heart of a strong type system, so remember this for just a moment.
The third basic type of data is booleans. Booleans are binary, meaning they can have a value of either true or false. Sometimes, the value is expressed as 0 (false) and 1 (true), or 0 (false) and not 0 (true).
The three basic types are called primitive data types. In a strong type system, you have to tell your program what kind of data you will be using when you declare a variable or create a function.
Beyond primitive types, C# supports the ability to create your own types as objects. Like primitives, these types are strong. They are also static. A static type system means that when you say you are going to use a variable to hold a string, you can never change the variable to any other type. It is static, meaning it can never change its type.
While C# and many other languages use a strong and static type of system, other languages do not. JavaScript took the opposite approach. JavaScript uses a weak and dynamic type of system. In such a system, it is perfectly fine and normal to create a variable and assign a value of any type. Let’s say we create a variable called foo and set it equal to “this is a string.”
The very next line can assign a value of 9 to the variable of foo. The fact that you didn’t have to declare a type with the variable indicates a weak type system. The fact you can change the type any time you’d like indicates a dynamic type system. JavaScript is incredibly powerful and flexible, but it also feels very foreign for developers who learn a strong static system leading to the idea that JavaScript is a “toy language” and not for serious work. This is, of course, wholly false.
The third type of system that you’ll encounter is called duck typing. Likely the most famous system using duck typing is Python. In Python, you see the middle ground between strong static typing in C# and the weak dynamic system in JavaScript.
In Python, you don’t declare a type with your variables. However, the Python interpreter observes how the variable is used, and it infers a strong type. This kind of system is called duck typing because the designers who created this type of system claimed “If it walks like a duck and quacks like a duck, it’s a duck.”
Later versions of C# support also duck typing, so we’ll see some examples later.
C# has automatic bounds checking and detection for uninitialized variables
C# was created to correct deficiencies in other languages. You hear that for pretty much every new language created in the last 20 years. Some group hates the way something works in C or Java, so they make a new language. Usually, they are an amalgamation of the so-called good parts of other languages. If you don’t believe me, read up on Apple’s Swift language, the Rust language, or the Golang languages created by Google. C# isn’t any different.
Studies have shown that the lack of bounds checking and uninitialized variables are both major sources of software bugs. Really, then, the objective here is to create a language that makes it harder for developers to make mistakes. In the next few features, we’ll discuss embodying this goal.
Bounds checking refers to arrays. An array is a special type that allows you to store multiple values in a single variable. Since C# is strongly typed, array elements must all be of the same type. You can have an array of strings, an array of numbers, or an array of objects. Furthermore, in C# when you define an array, you must tell your program how many elements you will put into the array. Once you set it, the size is fixed and you can’t change it without jumping through some proverbial hoops.
Uninitialized variables are not just representative of sloppy work – in some programming languages they can be dangerous. The C programming language comes to mind here. C went through some drastic changes over the last 10 years, but back when I was your age, the mantra of C was “With great power comes great responsibility.” I think that’s also Spiderman’s mantra. Maybe Peter Parker should have been a coder instead of a photographer.
In C, as in most languages, a variable is just a pointer to an address in memory. Computer memory is a lot like an apartment complex. In fact, older versions of C# and Visual Basic called their memory models “apartment threading.” Apartments are containers for you and your stuff. Some apartments are small and economical (unless you live in New York City, in which case they are simply small). Others are larger and more expensive. Regardless of their size, shape, and decor, their function is to hold you and your stuff.
Each apartment in an apartment complex has an apartment address number. So, you can effectively say I want to put my stuff in apartment 122. If you get a raise at work, and you decide to upgrade, you can move your stuff into apartment 300, which is larger. The address tells us where your stuff is located, and the manager of your apartment building knows how big each apartment is and how much it costs.
Computer memory works the same way. There are registers of addresses (such as the apartment complex) that can be told to store stuff of varying sizes. We can extend our analogy to say the apartment manager is the computer running your program. It knows where the containers are since it keeps a list of each apartment’s address and how much space each apartment occupies.
The addresses are not simple numbers such as 122 or 300. They are a bit more complicated and are not easy to work with. So, instead of dealing with addresses, we can give our apartments, or containers, a straightforward human-sounding name that describes how your variable is being used in your program.
When you create a container, such as an apartment, of a defined size (small and cheap versus big and expensive), it has an address. But instead of using that, you use whatever name you think is easy to use and remember.
Now imagine an apartment that was built as part of the building, but it is full of construction debris and trash left over from when it was built. Nobody has ever rented the apartment, so nobody has ever cleaned up the mess. This is an uninitialized variable. If someone wanted to rent the apartment and move in on the same day, that is, access the address, they would find it’s full of trash. When a running program with a strong static type system encounters trash that it doesn’t expect, the program crashes. If you have ever encountered a blue screen of death (BSOD) in Windows, you know what this looks like. Uninitialized variables will have whatever junk was left over from the last time that memory address was used. Back in the day, a major headache of working with C was manually allocating and deallocating memory. If you did it wrong, things crashed in the least graceful way possible. What the C developers really need is some way to handle garbage collection.
C# supports automated garbage collection
The nightmare scenario we just covered shows the need for language improvements. C# is meant to be simple and useful. In C, back when C# was conceived, we were manually allocating memory addresses. This meant executing a statement that defined your allocation using a hexadecimal value. Most humans are doing well working in base 10. Our old environments had us mentally converting decimal (base 10) numbers into base 8 (octal) and base 16 (hexadecimal) to do our memory allocations. Then, we used that memory, and when we were done, we needed to remember to deallocate the memory. In our apartment metaphor, this would entail moving out of the apartment and giving it thorough cleaning in the process. The apartment should be move-in ready when we deallocate.
What if we had a language that handled allocation and deallocation automatically? We do. C# has a garbage collection system that handles everything for you. You create a variable, and the details are taken care of by the .NET runtime. When your variable goes out of scope, it gets marked for cleanup and, ultimately, the garbage collection process in the runtime deallocates and cleans up the memory for you. As you can imagine, the manual allocation and deallocation of memory in a system that had no safety net was also a major source of bugs.
C# code is highly portable
The C# language specification aims at having portable code. In the earliest versions of C# and .NET, we weren’t very portable. Windows was all we had. You couldn’t run C# code on a Mac, Linux, or a phone. Gaming consoles were also out.
The open source community created Mono, an open source version of C# designed to run on Linux operating systems, but it has always been several years behind Microsoft’s implementation in C#. Eventually, Mono became a very popular way for C# developers to leverage their language skills to create mobile applications for the Android and iPhone platforms using Mono alongside a framework called Xamarin.
A game development engine called Unity 3D also leveraged Mono and brought a AAA quality game engine to the mass market. Up until then, game engines such as Unreal were strictly in-house. The only way to develop a quality game was to work at a company that could afford the very expensive SDKs. Unity 3D busted the game development industry wide open, and they used C#/Mono to do it.
As time moved on, Microsoft made each iteration of the language more portable. We saw a big shift when Microsoft announced its Azure cloud platform. They wisely understood most IT professionals were never going to use a system that limited them to Microsoft products. Linux owns the majority share of web servers. When cloud computing started to reach critical mass in terms of popularity, we saw a huge proliferation of open source compatibility introduced into Microsoft’s landscapes including .NET Core, which allows us to compile and run C#, or any .NET language, to run on nearly any type of hardware environment making your code truly portable. The portability comes from the .NET runtime. Let me explain what that means.
There are a few different ways any given programming language is able to execute code. First, there is code that can be compiled into native machine code. For this, you need a language such as C, C,++, or Rust. Programs that can be compiled this way run on “the bare metal,” making them very fast in terms of execution, but the languages required for this are typically more demanding to use. C and C++ require you to keep tabs on your memory utilization, which is the primary source of bugs written in these tools. Rust aims to eliminate memory errors with very strict compile time restrictions. Using these languages can be frustrating, and your time to market is usually slower, especially when adopting these languages for the first time. There’s a trade-off between developer productivity and the performance of the software when it runs for the users.
The second camp is languages that use interpreters. Usually, these languages are scripting languages such as Python, PERL, and Lua. These languages are built around developer productivity and, typically, sacrifice execution speed and efficiency.
The third group is sort of in-between. All .NET languages, in a similar fashion to Java, compile to an intermediary binary format. Java calls this byte code. C# and other .NET languages call it Common Intermediate Language (CIL). These binary formats execute faster and more efficiently than an interpreted language, but they do require a runtime to execute the intermediate form.
It is important to remember how the published version of code in any given language might perform. On the whole, compiled C# code is generally slower than the “bare metal” compiled languages, but not by much.
Language mechanics in C#
We’ve mentioned already that C# is strictly an object-oriented programming (OOP) language. OOP languages support a set of abstract features, which you need to understand before we can continue. Firstly, OOP languages organize code differently than procedural languages. In OOP, we model elements from the real-world using code. The real-world elements are described using properties, methods, and events.
For example, if I were modeling a circle, I might give it a set of properties as seen in Figure A1.3:

Figure A1.4: A circle, like anything else, can be represented by describing it as a set of properties
Using these properties, I can describe any circle I might want to draw on the screen in my program.
Effectively, properties are variables that belong to the circle. They contain the data that describes the circle. When describing a variable that belongs to an object, you refer to these as properties, member variables, or members.
Additionally, objects describe the actions they might perform. When we talk about functions in the context of OOP, we call them methods. We could say our circle object has a method called draw() that draws the circle to the screen given the properties that describe it. We could also add a method to resize the circle. Methods are the same thing as functions, so we can pass in arguments. Our resize method will need to know the new radius of the circle. It might be called this way: resize(100). This would change the radius of the circle from 200 to 100.
Objects also commonly have a specialized set of methods designed to respond to events. Events can be described as things that happen while your program is running. Common examples might include the user clicking on the circle, hovering a cursor over the circle, right-clicking on the circle with your mouse, long-tapping the circle on a touch screen, or the passage of time. Maybe you want the circle to disappear after 10 seconds.
It isn’t necessary for an object to have all of these pieces. Some objects only represent data using properties. Some are just used for constants and methods, such as the Math class in C#. However, most of the time, there is a mixture.
In addition to objects being organized with properties and methods, there are a few other buzzwords to learn:
- Encapsulation
- Composition
- Inheritance
- Polymorphism
- Open recursion
All of this sounds horribly complicated, but don’t worry, that’s what I’m here for. We’ll touch on all of these concepts within this chapter.
OOP first surfaced in the 1980s with the Ada programming language. Ada was named for programming pioneer August a Ada King, Countess of Lovelace. You’ve probably heard of her as Ada Lovelace. The language that bears her name was created under contract for the US Department of Defense (DoD) and was designed to replace over 450 disparate programming languages that were in use at the DoD at the time. As you can imagine, it had some big shoes to fill. The Ada language is to programming what the Tucker automobile was to the American automotive industry. The 1948 Tucker automobile was the first to offer standard seat belts, a water-cooled aluminum engine, disk brakes, fuel injection, and an independent suspension. These are all standard features of modern cars, and we’d be hard-pressed to consider buying a car today without them. However, they didn’t exist on cars designed and built in the 1940s, or certainly not all on one car.
The original Ada language supported object orientation, design by contract, strong typing, an explicit syntax for concurrency, tasks, message passing, encapsulation using private and protected classes, and code safety enforced by a compiler. Sound familiar? Many modern languages, including C#, include these features out of the box owing largely to the virtues embodied in Ada.
OOP became popular because it allows you to organize your software in a way that makes sense and is easy to comprehend. Developers who learn OOP first have trouble switching away from it. Having worked with both kinds of thinking for many years, I believe OOP is the best way to create large-scale software projects because it forces you to think a certain way. The main tenets of OOP, some of which are covered in SOLID principles, are like a built-in way to make your software maintainable, testable, and extensible in the safest way possible. I believe it is important to use an object-oriented language when you initially learn patterns. The original work on patterns was based on Java, which is remarkably similar to C#. Many of the ideas presented in this book won’t work or must be shoehorned into working with non-object-oriented, multi-paradigm, or dynamic languages. For example, JavaScript ES5 is considered object-oriented, but objects are dynamic. By this, I mean you can change the structure of any object, including those internally supported by the language at any time while your code is running. You can even alter all instances of an object owing to JavaScript’s use of prototype inheritance. JavaScript is weakly typed, and the list of types it supports is limited. Classes and encapsulation simply don’t exist in ES5. It is difficult to study patterns in a language such as this because patterns require a foundational set of restrictive rules, which don’t fully exist in many other languages.
By choosing to work with C#, you align yourself with all the key tenets of developing software with well-known, battle-tested patterns.
Variables in C#
I consider the simplest definition of a variable to be as follows:
A variable is a named container that holds data in computer memory.
When you learn a programming language, you need to know whether the language is strongly or weakly typed.
In a strongly typed language, also referred to as a statically typed language, you must define your variables’ data type. You have to tell your program what kind of data you are storing in any given variable.
In a weakly typed language, you don’t need to declare a type because, effectively, there is only one type: everything is an object.
Here is a great way to think of it. Data can have a shape, as can a container. Containers also have a definite size. You cannot fit one pound of sugar into a container designed to hold no more than a quarter of a pound. However, you can fit that same pound of sugar into a 5-gallon bucket with room to spare.
C# is statically typed with support for implicit typing, also known as duck typing. In a strongly typed language such as C#, you would see something like this:
int myNumber = 5;
Here, we’re creating a variable called myNumber, of type int, and setting it to an initial value of 5.
Implicit typing allows us to make a small change:
var myNumber = 5;
Instead of the type declaration appearing before the name, you use a one-size-fits-all keyword, var. The compiler will see these statements as identical. The compiler can figure out what type your variable is supposed to be based on its initial assignment. Here, we see an initial assignment of 5, so the compiler will assume you meant this to be an integer (int). If that’s not what you wanted, you can give the compiler a hint. Let’s say we really wanted myNumber to be the decimal type. Since there is no mathematical difference between 5 and 5.0, the compiler gets it wrong and, eventually, you get red wavy lines in your code indicating you have a problem. How can you specify the type and still use the var keyword syntax? Behold:
var myNumber = 5d;
We add a d as a suffix to the number. Just like that, the compiler now knows you want this to be a decimal. But I’m getting ahead of myself.
Signed numeric types delineated by memory size usage
C# supports signed and unsigned numeric types. Numbers in programming languages are handled in memory using a mathematical operation on binary numbers called two’s complement as seen in Figure A1.4:

Figure A1.5: Integer representation on computers happens using a mathematical concept called two’s-complement. One year, I went to the office Halloween party as an integer. I had this figure printed on a t-shirt. The best costumes are the ones you have to explain
If you’re a math geek, check out the Wikipedia page for this topic provided in the further reading section.
For the rest of us, this concept can be explained simply. Any variable that’s meant to store a number will have a minimum and maximum size for the number. For example, a common 32-bit integer (int32) has a range of -2,147,483,648 at the minimum end and a maximum value of 2,147,483,647. We had to chop one off the maximum to account for zero. The size ranges are dictated by two’s complement given the amount of memory space used. The range I just showed you represents the capacity for a signed type, meaning it supports numbers less than zero. If you don’t care about negative values, C# allows you to use unsigned types that extend the range from 0 to 4,294,967,295.
C# allows you to control memory usage by selecting from a myriad of signed and unsigned ranges. In other words, signed numeric types are delineated by memory size usage. I think this is a point that most developers forget or ignore since most of us, when we need an integer, just use int. I used an analogy earlier:
You cannot fit one pound of sugar into a container designed to hold no more than a quarter of a pound. You can, however, fit that same pound of sugar into a 5-gallon bucket with room to spare.
There is a lot of wasted space in the 5-gallon bucket. You can control the waste by selecting a type that has a range that is compatible with how it’s used. Think about how many times have you either seen or done this:
int myAge = 54;
That’s a huge waste of space. First, a person’s age can’t be a negative number. It makes sense to change this to the following:
uint myAge = 54;
Here, we’re using the unsigned version of the 32-bit integer. See if you can pick a more appropriate type from the following table:
|
Type |
Description |
Minimum |
Maximum |
Bits |
|
bool |
Boolean |
False (0) |
True (1) |
1 |
|
byte |
Unsigned byte |
0 |
255 |
8 |
|
sbyte |
Signed byte |
-128 |
127 |
8 |
|
short |
Signed short integer |
-32,768 |
32,767 |
16 |
|
ushort |
Unsigned short integer |
0 |
65,535 |
16 |
|
int |
Signed integer |
-2,147,483,648 |
2,147,483,647 |
32 |
|
uint |
Unsigned integer |
0 |
4,294,967,295 |
32 |
|
long |
Signed long integer |
-9e18 |
9e18 |
64 |
|
ulong |
Unsigned long integer |
0 |
1.8e19 |
64 |
Figure A1.6: A list of C# integer types with ranges and how much memory each consumes.
As you can see, as we move down the chart, we use more and more memory. A bit is the smallest thing a computer can work with. A 64-bit integer can only be understood using the term ±9 kajillion or 18 kajillion depending on whether it’s signed.
Why would we use a 32-bit unsigned integer with a maximum value of 8 billion for a person’s age? Either we don’t know about numeric type delineations or we’re simply lazy, which is one of those debilitating forces we talked about in Chapter 1. We’ve just broken a window that leads us into a big ball of mud. We should be using an unsigned byte that has a minimum value of 0 and a maximum value of 255. Most normal humans, aside from Elvis, who is living on a secret island in Hawaii, and Chuck Norris, who is obviously immortal, don’t live past 100 years. When you consider the earth is about 4.5 billion years old, you begin to see the folly of this common practice. If you do this, you’re in good company. Microsoft does it too throughout its C# documentation. I am tempted to quip writers make bad coders, but I’d be shooting myself in the foot if I did. I won’t fault you if you don’t immediately change all your production code from int to byte so long as you now realize you’re wasting a lot of memory.
Figure A1.7 shows us all the valid integer types. There are similar names and ranges for floating-point numbers and text types. All of these types are considered primitives. Primitives are what you think they are based on the name. In many C-based languages, these are usually simple structures. C# doesn’t treat them that way. C# and, by extension, .NET Framework treat them as objects. The keywords in Table 1 are primitive aliases to the real objects from .NET Framework. The objects have different names from the list of keywords presented in Figure A1.6. The example you’ve most likely encountered is the int keyword mapping to the Int32 class.
The real list turns out to be something like the list in Figure A1.7:
|
Alias/primitive keyword |
.NET type |
|
bool |
System.Boolean |
|
byte |
System.Byte |
|
sbyte |
System.Sbyte |
|
short |
System.Int16 |
|
ushort |
System.Uint16 |
|
int |
System.Int32 |
|
uint |
System.Uint32 |
|
long |
System.Int64 |
|
ulong |
System.UInt64 |
Figure A1.7: The full list of C# integer ranges with the alias in the first column and the real implementation class in the second column.
C# allows for aliases, and often the alias points to the same class name expressed with an uppercase letter. All the primitive types are in the .NET System object. Almost every project you create in Visual Studio has a using System statement at the top. This is why you can see strings being created in several different ways.
A string defined using all lowercase characters works because of the alias:
var string foo = "bar";
A string defined with a capitalized String keyword works because of the using System statement that is likely at the top of your project:
var String bar = "baz";
Of course, you can also write the following:
var System.String fooBarBaz = "foo bar baz";
Honestly, I’ve never seen anybody do this. Years ago, when I taught introductory programming courses in C# at a nearby college, the difference between String and string was a widely asked question, especially coming from students who had previously studied Java. Java lacked these kinds of aliases.
Separate character and string classes with different quotation marks used for each
This point is short, but worth mentioning if you are coming from another language, or if you switch languages frequently. C# has separate class types for strings and characters. The string type is System.String. It’s an alias that is used far more frequently, which is just string. The character type, which is a single character string, is created using the System.Char class or just char. The quotation marks used in the assignment of values matter, too. Many languages, such as JavaScript and Python, allow you to use single and double quotes interchangeably. In C#, strings are denoted with double quotes, while characters are assigned using single quotes. They are not interchangeable.
Collections
JavaScript has Arrays (a.k.a. what I’m hoping I get at work for writing a book). Python has Lists. Java has ArrayLists. C# has a broad set of Collections. C# has arrays such as JavaScript, but they are more limited. You have to set the number of items you are putting into the array in advance, and once set, that number can’t be easily changed. A more useful form of array in C# is the .NET List class.
List classes are like arrays, except you can add and remove items any time you need to. They are a lot more flexible. Lists are strongly typed, like everything else in C#. This means all the items in the List have to be the same type. C# has a system for this called Generics. I won’t get into the details of generics here, as it would take more time and room than we have. Just know that generics are denoted in C# with angle brackets (<>). In the book, you’ll see references to List<>. This indicates a generic list, and once again, that just means you can put anything into the list as long as everything you put into it is of the same type. If you wanted to create a list of strings, it might look like this:
var myStrings = new List<string>();
myStrings.add("foo");
myStrings.add("bar");
To use these generic collections, you have to add a statement at the top of your class file like this:
using System.Collections.Generic;
Generic collections are some of the most versatile and widely used classes in .NET Framework. You will definitely encounter them early and often.
Classes
So far, my assumptions regarding your exposure to OOP have presupposed you know what a class is and its purpose. Just in case that’s an invalid assumption, let’s clear it up now. A class can be thought of as a blueprint for a house. The blueprint describes everything you need to know to build the house. You can use the blueprint to make as many houses as you need, and as you build them, you can change the individual properties on each house. It isn’t necessary that they all be the same size or color, or that they all have a certain number of windows. You can alter any of these properties when you build the house.
In most OOP languages, the class is the main form for defining how objects are constructed. There are even special methods called constructors, which run when an object is instantiated, which is to say when you create an instance of an object using the new keyword.
Here is the example of the Person class I used earlier. This time, I added all the parts so that I can show them to you:
using System;
namespace MyProject;
class Person
{
  public string Name { get; set; }
  public byte Age { get; set; }
  public Person()
  {
    Name = string.Empty;
    Age = 0;
  }
  public Person(string name){
  {
    Name = name;
    Age = 0;
  }
  public Person(string name, int age)
  {
    Name = name;
    Age = age;
  }
  public override string ToString()
  {
    return "Person: " + Name + " " + Age;
  }
}- Using statements to define dependencies
- The namespace
- The class name
- Constructors
- Properties
- Methods
Let’s go over each part.
Using statements
The using keyword has a double meaning in C#. When you see it at the top of a class, it refers to the class’ dependencies. This is common in most languages. In Java and Python, the word is import. In JavaScript, it’s either require or import depending on which convention you use. In C#, the keyword is using. The statement signals to the compiler that some of the classes we’re going to reference in this class exist in other parts of our project, or even outside our project, which is the case when we use third-party libraries.
For example, in order to use the Console.WriteLine method, which prints text to the console, first, we must declare that we will be using the System namespace. We do this with the following statement:
using System;
The Console object is in the System namespace. The using statement tells the compiler we’ll be using classes from that namespace. That last statement makes for a natural segue into the next topic.
Namespaces
Namespaces are a way of organizing your code in C#. If you’re coming from Java, you’ve used packages. In Python, they’re called modules. In JavaScript, you export objects you want to expose in modular code. In C#, a namespace appears at the top of your class files. Usually, it corresponds to the name of your project. If you create folders inside your project to break up your code, usually, the namespace mirrors the folder structure.
In the preceding sample code, we have a namespace called MyProject, which would be the name of the C# project. If I made a folder called helpers to hold some helper objects, the namespace in those folders would be MyProject.helpers.
Namespaces are not an absolute requirement. Most IDEs put them in automatically, so you’ll usually see them. Five years ago, when I last worked with the Unity 3D game engine, the IDE didn’t put namespaces in the class code automatically. It’s possible to work without namespaces, but it’s rare. Visual Studio and Rider add the namespace automatically when you create the class. In VS Code, everything is manual, so you might have to add it yourself.
The class name
The line that names the class is not difficult to spot:
class Person
You just use the keyword class followed by the name of the class. By convention, class names use the Pascal case convention, which means each word in the class name is represented by a capital letter. If we wanted to create a class to represent a floor manager at a retail outlet, we would call it FloorManager.
Classes, like properties and methods, can use access modifiers to define how they can be accessed. We’ll talk more about this later.
Constructors and instantiation
A constructor is a special method designed to run when you instantiate the class. Semantically, a class is not an object. A class is a blueprint used to create objects. Simply put, class is your code. When your code runs, it creates instances of objects through a process called instantiation: Create an instance = instantiation. See? It’s a fancy word every software developer needs to understand. Instantiation happens when you put the new keyword in front of a constructor method. This is why there is always a parenthesis at the end of your new statement. The constructor returns the instance of the object set up per any code in the constructor. If you don’t supply a constructor, the .NET compiler adds an empty one when you compile.
There are defining rules that govern the constructors. First, the constructor’s method name must match the name of the class. Second, you can’t define a return type since it is fixed to returning an instance of the class it is constructing.
C# allows you to have multiple overloaded constructors. This means you can have more than one constructor as long as the type and number of arguments are different. Our code example from earlier features three constructors:
public Person()
  {
    Name = string.Empty;
    Age = 0;
  }
  public Person(string name){
  {
    Name = name;
    Age = 0;
  }
  public Person(string name, int age)
  {
    Name = name;
    Age = age;
  }
Note the following:
- All of the constructors are named Person because that is the name of the class. They must match the name of the class or they aren’t valid constructors.
- There is no return type specified. The return type would be between the public keyword and the name of the constructor method.
- Even though all three functions have the same name because they have different numbers of arguments, it’s legal. The first constructor has zero arguments, the second has one, and the third has two. This is called method overloading and is a form of polymorphism.
Constructors are a very useful way to establish the initial state of your object the instant the object is created. I often say that the number one job of a software developer is to make sure no object within your program is capable of entering an invalid state.
In the preceding example, the constructor is syntactic overkill. C# will initialize the age property to 0 automatically. I initialize strings to empty strings because I don’t like the ambiguity of dealing with null values. Sometimes, your language of choice, in this case, C#, will try to handle things such as initialization for you. Relying on automatic language features will lead to mental laziness, one of the destructive forces I talk about in Chapter 1 that leads to chaotic, unmaintainable code. If you don’t believe me, go to YouTube and find videos on JavaScript’s automatic semicolon insertion “feature.” You need to remember that your code is a set of instructions to be executed by one of the dumbest things on planet earth. Computers take everything literally, and if your instructions contain any ambiguity, bad comedy always ensues. Granted, some people call that job security, and everybody needs good war stories to tell. It’s like that one time someone on the team pasted an incomplete SQL update statement into SSMS pointed to a production database and updated all the customer records to one account. A system with a million users a day was down for 7 hours. To be clear, no, it wasn’t me. If it were, I would never speak of it. I’m making a point. That painful experience happened because someone was too lazy to do their job the right way. Personally, I’d rather do things right and keep my weekends free. When I write code, I am always explicit and intentional. It keeps me out of trouble. Always pay attention to your object’s state and write your code to guard against invalid states. Your constructors are the first line of defense. The second line of defense is encapsulation, which we’ll talk about shortly.
Properties
Objects consist of state variables and functions capable of doing work on those state variables. This is a fancy way of saying an object is like a marriage between two common programming concepts: variables and functions. Classes are designed to represent real-world objects. Any object in the real world is defined by its descriptive properties. What color is it? Is it bigger than a breadbox? Physical objects are further defined by what they can do. A car can go, a dog can bark, and so on.
For now, let’s focus on the objects’ descriptors. It’s easy to call them properties. A basketball has properties such as its circumference, its orange color, its black lines, and how much air it is holding. These are properties of the basketball. In C# classes, properties look like this:
public string Name { get; set; }The word public is an access modifier. We described this earlier in the appendix.
Every property has a name. This property’s name is Name, and it is defined as a string. The part that says { get; set; } makes it an auto-implemented property, which is an easy form of encapsulation that I’ll explain later.
You access a property on an instantiated object using dot notation. For example, to set the Name property on a Person object, you instantiate and then set it like this:
var somebody = new Person();
somebody.Name = "Bruce";
Access modifiers define the availability of properties, methods, and even classes in C#.
Methods
Methods are functions attached to objects. Since C# is strictly object-oriented, we should probably always refer to them as methods rather than functions, but the words are effectively synonymous. Even the strongest adherent to OOP will occasionally slip and say function. With that out of the way, there are a few things to remember with respect to methods in C#. First, they follow the same rules as variables in that they are strongly typed. They need any arguments passed in to be typed as well as the return value to be typed. Like variables, the method names need to be unique within scope.
C# uses C-like method signatures common to all C-based languages. A method signature consists of the parts of the method that define it as unique:
- The name of the function
- The number and types of arguments
- The type of the return value
In the preceding example, we have this method:
public override string ToString()
{
  return "Person: " + Name + " " + Age;
}
In this method signature, we can see this method is public. It can be accessed by any class in our program. We can see that its name is ToString and that it takes no arguments. Furthermore, we can see this method is expected to return a string.
This one has an extra keyword stuck between the access modifier and the return type. It says override. The ToString() method is on every object in C# because that method is in the Object base class. It is always inherited from the base class in every object you make. The base class implementation isn’t very useful. It is very common to override the function with something more useful. That is what’s happening in the preceding example. We’ve changed the implementation in the base class by overriding the implementation with our own. We do this in plenty of places within the projects covered in this book.
Encapsulation
This concept entails one of the most important aspects of OOP: the maintenance of the object’s state.
Earlier, in Figure A1.3, I presented a circle with a set of properties with values that describe the circle you’re seeing. As your program runs, it’s likely those properties will change in response to events within that program. If you take a snapshot of that circle at any point in time during your program’s execution, you can talk about its current state. It’s currently sporting a radius of 200 pixels, with a line color of black, and fill color of dark gray. Let’s create some code to represent our circle in the simplest way possible, without any encapsulation, so we can see it added later:
public class Circle
{
  ushort centerX;
  ushort centerY;
  ushort radius;
  byte lineWidth;
  string lineColor;
  string fillColor;
}
In this listing, we create a Circle class, and within it, we define the fields based on our earlier discussion. Note that I did not say properties. Properties and fields are different in C#. Fields are simply member variables. These fields are wide open. Effectively, any other class can directly modify the fields at any time. Why is this bad? Remember, it’s all about guarding the state. It really doesn’t make sense to have a negative radius, which is why I used an unsigned short. Likewise, graphics coordinate systems on a computer are usually strictly positive, with 0,0 located in the upper-left corner of the screen. To that end, I used unsigned shorts here because we don’t need values beneath zero, and the upper value seems reasonable. So far, I’ve done everything right, except I haven’t guarded the state beyond limiting invalid values based on types.
Let’s imagine that you’re working on a program such as Adobe Illustrator or the open source program Inkscape. These programs deal with vector graphics, and they most definitely need a structure to handle a circle. Both programs are pretty big in terms of lines of code and the number of classes. I realize neither program is written in C#, but if they were, imagine all the different objects each program would have flying around at any given moment. If any one of them has the ability to, at any time, modify the properties of our circle object, finding and debugging odd behavior changes in the circle becomes nigh impossible. Usually, lack of encapsulation is caused by the cardinal sin of sloth, a lack of imagination, or both.
Our program could change any of these properties at any time. Encapsulation aims to prevent you from entering your object into an invalid state. For example, what if I try to specify a negative number for the radius? That doesn’t really make sense.
To protect our object from entering an invalid state, we can hide the properties behind access modifiers. Access modifiers are keywords that define “who or what” is allowed to make changes to an object’s state. In an ideal program, the object should always solely be in charge of its own state. A different object in the program shouldn’t be directly manipulating the radius. Aside from access problems, there’s nothing policing the type of data being passed in, other than our strongly typed variable system. To improve things, let’s start with the radius. Earlier, I mentioned that I thought ushort was an appropriate type because being unsigned, it doesn’t support negative values. Further, I think the next lowest unsigned type, byte, which tops out at 256, is too small. I can easily see needing the ability to make a circle larger than 256 pixels in diameter. But 65K is probably too big. Let’s say I want to limit the maximum radius to 1,000 pixels. This is probably smart because, in a large graphical composition, we might have thousands of circles and we should be thinking about our memory consumption. We can hide the radius field behind a special function that checks to see whether the radius you are setting is valid, in this case, a number between 0 and 1,000.
There are two steps at play here. First, you have to hide the radius with an access modifier. The most common access modifiers are listed as follows:
- Public: Anything can access the property or method.
- Private: Only this object can access the property or method.
- Protected: Only this object and its descendants can access the property or method. More on this after we talk about inheritance.
You’ll find these available in most object-oriented languages. C# has a few additional access modifiers:
- Internal: Anything within the same assembly can access the property or method.
- Protected internal: The property or method can only be accessed by code within the assembly wherein it was declared or from a subclass of the class where it was created.
- Private protected: The property or method can be accessed by subclasses that are declared within the same assembly.
You can visualize this using the following table:
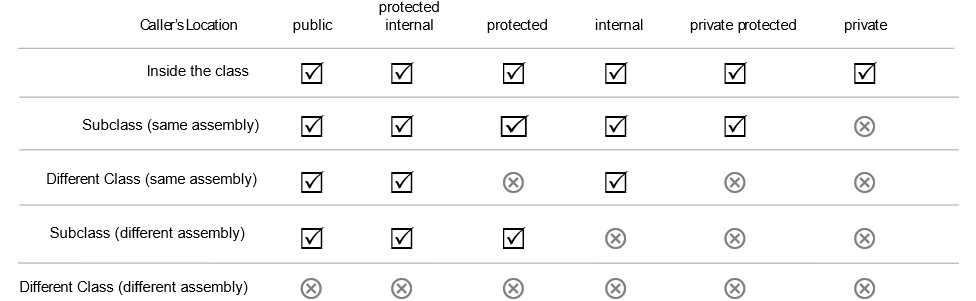
Figure A1.8: Relative access levels by the caller’s location.
Let’s go back to improving the Circle class. The first improvement we’ll make is adding a private access modifier to the radius field. I’ll also move radius to the top just so that it is easier to see for this discussion:
public class Circle
{
  private ushort radius;
  ushort centerX;
  ushort centerY;
  byte lineWidth;
  string lineColor;
  string fillColor;
}
The private access modifier tells us that only methods in “this particular object” are allowed to change the radius. That’s perfect, except now the radius field is totally hidden. There isn’t any way to set it from the outside, and we’ll, of course, need to do that at some point. Let’s change the access modifier to something more permissive:
public class Circle
{
  private ushort radius;
  ushort centerX;
  ushort centerY;
  byte lineWidth;
  string lineColor;
  string fillColor;
}
OK. Now we’re back to where we started. The public access modifier means that anything can alter the radius. That’s not good! Dagnabbit!
We need private back, but we need it to be a little better. We need accessor methods to allow us to get and set the field’s value from outside this object, but in a manner we control. When I do this, I use a common convention of renaming the field so that it starts with an underscore. This is done so that we can easily remember it’s a private backing field:
private ushort _radius;
Next, let’s add an accessor method that allows us to get the radius. The get method is commonly called a getter. We don’t need any restrictions on this one:
 public ushort getRadius()
 {
  return _radius;
 }
Next, let’s deal with the real problem at hand, which is controlling how the radius is set. Another accessor method can be used:
 public void setRadius(int newRadius)
 {
  if(newRadius >= 0 && newRadius <= 1000)
  {
    _radius = newRadius;
  }
  else
  {
    throw new Exception("The radius must be between 0
    and 1000.");
  }
 }
}
Now we have a set method, commonly called a setter, that can set the value. Note that its access modifier is public, which we just learned means anything can access it. This setter method contains code that checks to see whether the new radius conforms to the required range. If it does, it goes ahead and changes the radius to the new value. The object is now in command of its own state. You can’t just randomly set the value to an invalid number. You have to ask the object to change its radius value, and it doesn’t automatically say OK – it checks to make sure you didn’t pass something that doesn’t make sense.
Additionally, accessor methods can be used to define a read-only property. By simply neglecting to create a public setter method, you limit the ability to set the value of the private field to other methods within this class.
C# auto-implemented properties
If you’re a C# veteran, you’re no doubt yelling at this book right now. Don’t do that. First, it makes you look crazy unless you have your earbuds in, then at least people around you will think you’re just yelling at your mother-in-law. Second, this book is very sensitive. You might hurt its feelings. I get it. The earlier example is definitely not how we usually make accessor methods in C# – at least not these days. Back when I was your age, gas was 35 cents per gallon, and that’s exactly how we did it. I like showing it to you that way because I think just throwing int foo { get; set; } at someone without explaining how it works is kind of mean, which is to say that’s how the average C# book might cover it. As we all know, mean is the average. Was that a math pun? Yes, I think it was.
Modern C# has a different syntax for defining properties predicated on the idea that most properties are really fields. But if you leave them as fields, your OOP professor will give you a B because you didn’t encapsulate them. We can’t have that. I could climb back up on my soapbox and decry their existence, but I have a page count I need to stay under, so let’s just see how they work and you can decide whether they are a good idea or not.
If you want to say your class is fully encapsulated, but you don’t need any logic to control state, your code winds up with a lot of boilerplate code like this:
public class Student {
  private string _firstName;
  private string _lastName;
  private int _age;
  public string getFirstName(){
    return _firstName;
  }
  public void setFirstName(string firstName){
    _firstName = firstName;
  }
  public string getlastName(){
    return _lastName;
  }
  public void setLastName(string lastName){
    _lastName = lastName;
  }
  public int getAge(){
    return _age;
  }
  public void setAge(int age){
    if(age > -1 && age < 970){
      _age = age;
    } else {
      throw new Exception("Age must be between 0 and
      970 years");
    }
  }
}
That’s a lot of code that doesn’t do anything. It only exists in the service of calling the class members encapsulated. In this case, there might not be a need to control the first and last name fields. I can’t think of any restrictions you might put on the kind of data, aside from it being a required field within a user interface. Let’s say the boilerplate is legitimate but we want to be modern and use auto-implemented properties. Your code can be reduced to this:
public class Student {
  public string FirstName {get; set;}
  public string LastName {get; set;}
Auto-implemented properties allow you to use this shortened syntax if you don’t have logic to put in the getter and setter methods.
Accessor logic with backing variables
The real power of encapsulation happens when you use the accessor methods to control the state of your object. Your biggest job as a developer is making sure your object is incapable of entering into an invalid state. For example, take Age. A negative number in the age property doesn’t make sense. Neither does a billion years. The oldest human lifespan ever recorded that I know of was Methuselah, in the Old Testament, who live to be about 970 years old. Since there is no accessor logic, I can make the age 100 years or 1,000,000,000 years. If I want the controlling logic to limit the input values, I need to create something like this:
private int _age;
Here, we create a private backing variable called _age. We need this to hold the value since the property is now under the control of accessor logic. It is common to name private variables beginning with an underscore.
Next, we add the logic. We don’t really need anything special on the getter:
  public int Age {
    get => _age;
The setter is where the magic happens:
    set {
      if(value > -1 && value < 970){
        _age = value;
      } else {
        throw new Exception("Age must be between 0 and
        970 years");
      }
    }
  }
}
Then, we make the property with the auto-implemented method syntax, but this time, there’s more to it. Essentially, the syntax for the getter is a fat-arrow function that returns the _age backing variable. The setter is straightforward except for the value variable. Where does that come from? It’s magic. It’s part of the language for use in this scenario. It holds the value of whatever was passed into the setter.
Inheritance
C# is a statically compiled language that supports a classical inheritance model. By statically compiled, I mean the structure of your objects can’t change unless you stop your running program, alter the source code for the class, recompile, and rerun. You can contrast C#’s static nature with a language designed to be dynamic: JavaScript.
JavaScript breaks from a great many conventions, not the least of which is that it uses prototypes for inheritance instead of classes. For that matter, it doesn’t support encapsulation. It is based heavily on the idea of Lambda functions, which was also novel when JavaScript was invented. JavaScript uses lexical scope instead of the more conventional block scope we find in C#. In short, JavaScript is really weird when compared with C# if C# is the only language you know.
Now that we’ve established there’s more than one way to do inheritance, let’s switch back over to how it works in C#.
Let’s suppose you are writing software to track the faculty and student body at a school, or university. You need to model a student class – maybe something like this:
public class Student
{
    public string FirstName { get; set; }
    public string LastName { get; set; }
    public string EmailAddress { get; set; }
    public float GradePointAverage { get; set; }
    public List<Course> Courses { get; set; }
    public void Study()
    {
        Console.WriteLine("I am studying");
    }
    public void TakeTest()
    {
        Console.WriteLine("I am taking a test!");
    }

    public void DoHomework()
    {
        Console.WriteLine("I am doing homework.");
    }

    public void AskParentsForMoney()
    {
        Console.WriteLine("Hey Dad, do you have a
        minute?");
    }
}
Additionally, you need to model a professor class – maybe something like this:
public class Professor
{
    public string FirstName { get; set; }
    public string LastName { get; set; }
    public string EmailAddress { get; set; }
    public bool HasTenure {get; set;
    public List<Course> Courses { get; set; }

    public void GradeTest()
    {
        Console.WriteLine("I am grading a test.");
    }

    public void TeachClass()
    {
        Console.WriteLine("I am teaching a class.");
    }
    public void BegForResearchFunding()
    {
        Console.WriteLine("Hey National Science Foundation,
        do you have a minute?");
    }
}
We have a problem here. There are a lot of properties that are redundant since they are used in both classes. OOAD would have us redesign these two classes by abstracting the common properties into a superclass. This leaves only those elements that are unique to the Student and Professor classes. The obvious targets for hoisting to the superclass are the following common properties:
- FirstName
- LastName
- Courses
Less obvious targets for hoisting include the AskParentsForMoney() method in the student class and the BegForResearchFunding() method in the professor class. They effectively do the same thing. The only difference is who is being asked to part with cash.
Let’s make a superclass:
public abstract class Person
{
    public string FirstName { get; set; }
    public string LastName { get; set; }
    public string EmailAddress { get; set; }
    public List<Course> Courses { get; set; }
    public void BegForMoney(string who)
    {
        Console.WriteLine("Hey " + who + ", do you have a
        minute?");
    }
}
I’ve dubbed the superclass Person. It has the common elements between the student and the professor. Now, let’s make the Student class inherit from the Person class. To signal inheritance, I’ll add a colon followed by the superclass on the first line:
public class Student : Person
{
Now I’ll only keep the properties that aren’t defined in the superclass. There is just one:
public float GradePointAverage { get; set; }The same goes for methods. I only need those that are not in the superclass:
    public void Study()
    {
        Console.WriteLine("I am studying");
    }
    public void TakeTest()
    {
        Console.WriteLine("I am taking a test!");
    }

    public void DoHomework()
    {
        Console.WriteLine("I am doing homework.");
    }

}
I can do the same thing with the Professor class:
public class Professor : Person
{
    public bool HasTenure { get; set; }

    public void GradeTest()
    {
        Console.WriteLine("I am grading a test.");
    }

    public void TeachClass()
    {
        Console.WriteLine("I am teaching a class.");
    }
}
Now, the class only contains the properties and methods unique to the Professor class. The common properties and methods are in the Person superclass.
The key to understanding inheritance is to vocalize the relationship between Person, Student, and Professor. We can say a Student IS A Person (debatable in their freshman and sophomore years), and we can say a Professor IS A Person (debatable after they get tenure). This vocalization both defines and illustrates the relationship between the superclass, sometimes called the parent class, and its descendants, called subclasses or children.
This leads us to a question: would it ever make sense to instantiate the Person class? The answer is no. Person is designed to be a parent class. It isn’t intended to be used directly. Classes that are not meant to be instantiated are called abstract classes. I’ve already put that in the class – I just didn’t call it out. The first line of the Person class was this:
public abstract class Person
The abstract keyword will prevent direct instantiation.
Just remember that inheritance is a vital part of your OOP toolbox. Inheritance is like eggs. It’s part of a balanced breakfast, but a really good breakfast has some fiber in it too. Let’s get some metaphorical fiber in our code by learning about interfaces. Interfaces do nothing to lessen your risk of heart disease like a good bowl of low-sugar oatmeal does. Using them might lower your stress levels later when you discover how flexible your code will be once you incorporate them, which is just as good. If you eat low-sugar oatmeal and use interfaces in your code, maybe you’ll give Elvis a run for his money in terms of lifespan.
Interfaces
An interface defines all or part of the structure a class must take by defining the public method signatures and properties that must be present in the class. This is a powerful tool that allows you to create a specification for an object’s behavior. The power of interfaces is multiplied by the fact that you are not limited to implementing a single interface versus using subclassing where you are only allowed a single parent.
Interfaces serve to loosely define behavior or type. Here’s a shout-out to all the Unity 3D developers in the crowd: imagine creating a video game where the player battles zombies and ancient creatures conjured by the imagination of H.P. Lovecraft – oh, and cats because cats are scary. Each monster could have its own class. You could create an interface to define behaviors such as fighting, running, eating humans, and more. Such a video game might look like Figure A1.9:

Figure A1.9: A terrible video game design that masterfully uses interfaces to map behaviors to characters in the game.
With these interfaces, you could define behaviors on objects that don’t necessarily fit together in an inheritance chain and wind up with game code that is very easy to extend.
The key benefit to interfaces versus inheritance is flexibility. In Chapter 2, we learn about SOLID principles and we learn about techniques for avoiding tightly coupling your classes together. If you define a property on a class with a type of Monster, then only Monster or a subclass of Monster will work. Your class is tightly coupled to Monster. If you define it by an interface, such as IEatHumans, you can pass any object that implements the interface as long as all you need are the methods defined by that interface.
Defining interfaces
Practically speaking, if next week the game director decides to add a new monster to the game, we don’t have to reshuffle our object hierarchy if the new monster doesn’t happen to fit the structure we’ve created. We just make a new class and use the interfaces to define its structure. Let’s code out what we have in Figure A1.9 in C#, so we can see what this looks like in code instead of just a diagram. There are three interfaces used by the four characters:
- IRun
- IFight
- IEatHumans
Let’s start with the IRun interface. Making interfaces is pretty easy. All you need to do is specify the basics of the method signature – specifically, the return type, the name of the method, and the names and types of the arguments:
public interface IRun
{
    void Jog();
    void Sprint();
}
That was easy. What we’ve done here is to specify that any class implementing this interface must have two methods, both of which have a void return type. One must be called Jog(), which takes no arguments, and the other must be called Sprint(), which also takes no arguments. If you’re using a good IDE, any class you create that implements an interface will mark your code with red squiggles until you meet all the requirements of the interfaces. Let’s do IFight next:
public interface IFight
{
    void Attack();
}
IFight says any class that implements this interface must have a method called Attack(), which returns void and takes no arguments:
public interface IEatHumans
{
    void Chomp();
}
IEatHumans requires the implementing class to have a method called Chomp(), which takes no arguments and returns void. Interfaces are easy. Let’s look at how they’re used.
Implementing interfaces
First, let’s make a class for HelplessVictim. The class implements the IRun interface. The syntax is the same as it is for inheritance. We use a colon to indicate the interface implementation, which would be the same if we were inheriting from a superclass:
public class HelplessVictim : IRun
{
    public void Jog()
    {
        throw new NotImplementedException();
    }
    public void Sprint()
    {
        throw new NotImplementedException();
    }
}
To satisfy the interface, we must implement two methods, Jog() and Sprint(), exactly as specified in the interface. That’s nice. What if we need to implement more than one interface? It’s not possible for a class to have two parent classes. C# mercifully doesn’t support multiple inheritance, which is the leading cause of clinical insanity among C++ programmers. However, classes can implement as many interfaces as you’d like. Let’s make the AncientTerror class, which implements three interfaces – IRun, IFight, and IEatHumans:
public class AncientTerror : IRun, IFight, IEatHumans
{
    public void Chomp()
    {
        throw new NotImplementedException();
    }
    public void Attack()
    {
        throw new NotImplementedException();
    }
    public void Jog()
    {
        throw new NotImplementedException();
    }
    public void Sprint()
    {
        throw new NotImplementedException();
    }
}
IRun requires the same Jog() and Sprint() methods to be implemented. Note that it isn’t necessary to have the exact same implementation for the different classes. The instance methods simply have to conform to the interface. IFight requires the addition of a method called Attack(), which returns void and takes no arguments. IEatHumans requires us to add a Chomp() method per the interface.
I’ll save the scariest monsters, the zombie and the house cat, as an exercise in the questions section at the end. Challenge yourself and see whether you can come up with the basic implementation for these remaining two classes!
IDEs for C# development
Whenever I work in a new or unfamiliar language, the first thing I want to know about is the tools used to work in that language. Good tools make learning and working with the language much easier. Microsoft realized this, and when they released the C# language and the accompanying .NET runtime, they also released Visual Studio – an IDE written specifically for use with C# and another very popular programming language called Visual Basic.
Visual Basic was Visual Studio’s predecessor. During the 1990s, Visual Basic was the most widely used development language product from Microsoft. The company also sold an IDE geared for C++ development called Visual C++, and briefly and ineffectively dabbled in Java with Visual J++. Of these toolkits, Visual Basic was by far the most important. At the time, Visual C++ was used by “serious” developers. Microsoft Windows is written in C and C++, so naturally, the tooling in Visual C++ was first and foremost designed to support that effort. Corporate software really became possible and mainstream with the BASIC language. In fact, the BASIC language formed the cornerstone of Microsoft itself. Bill Gates bought the rights for a BASIC compiler, and along with the Microsoft Disk Operating System (MS-DOS), he formed what would become one of the largest software companies in the world.
Visual Basic was designed by Alan Cooper. Cooper was a visionary. The Visual Basic UI was the first WYSIWYG design platform for computer software. Before the World Wide Web, we built software that ran solely on the desktop, and Visual Basic was the innovation that drove the industry.
But that’s enough history. Today, there are three important IDEs I want to tell you about. Chances are you’ve used one of them already. These tools include the following:
- Visual Studio
- VS Code
- Rider
There are other IDEs out there, but these three are the most popular, complete, and frankly, important. If you use a Mac, it is worth mentioning that Visual Studio for Mac is not a port of Visual Studio. Earlier, I mentioned the open source version of C# called Mono. The team that developed Mono created an IDE called Monodevelop. It looks a lot like Apple’s X-Code IDE, and it was designed to allow Linux developers to write C# programs. Monodevelop was open source and was ultimately forked to become Xamarin Studio. Xamarin Studio is an IDE geared toward mobile development. Microsoft bought out Xamarin several years ago. A separate fork of the technology became Visual Studio for Mac. I mention it because it looks nothing like the IDEs we’ll be covering, so if you’re on a Mac, my screenshots won’t help much.
To learn patterns, you only need a fraction of the functionality these IDEs provide. In this section, I wanted to walk you through creating the two project types found in this book: the command-line project and the library project.
Command-line programs are the simplest programs you can make that will actually run. They have no user interface and are run from, you guessed it, the command line. Libraries are code projects used to house objects meant to be shared between projects. In Chapter 3, I create a shared library that is used across many other chapters because they share a lot of the same code, as typing the same classes over and over would get very tedious.
Let’s take a look at these IDEs starting with Visual Studio.
Visual Studio
Visual Studio needs no further introduction. You can get a copy at https://www.visualstudio.com. The IDE comes in three editions:
- Visual Studio Community
- Visual Studio Professional
- Visual Studio Enterprise
The first two are effectively identical except for how they are licensed. The Community Edition is free assuming you meet the licensing requirements. These things tend to change over time, so I’m not going to try to quote those requirements here. Review the Visual Studio website to see whether you qualify for a free license.
Visual Studio Professional is the paid version of the same tool. If you work for a company with a certain number of developers, or that makes a certain amount of revenue, you need to buy a subscription.
Visual Studio Enterprise is a more expensive version of the paid editions and ships with a myriad of extra features not present in the Professional Edition.
Any of these editions will be fine for use with this book. I’ll be demonstrating the Community Edition, which, again, is indistinguishable from the Professional Edition.
Creating a command-line project
Having downloaded, installed, registered, and launched the IDE, you are greeted with a screen that looks something like Figure A1.10:

Figure A1.10: The opening screen for Visual Studio 2022.
Click on the Create a new project button in the lower-right corner of the window. Doing this presents you with Figure A1.11:
Figure A1.11: Create a new project in Visual Studio using this dialog.
You’re looking for the Console App project in C#. If you did a full install of Visual Studio, beware that the tool might show you Visual Basic projects as well as C#. Make sure you pick the C# version of the project template. Note that the icons on the templates denote the language they use, as shown in Figure A1.12:

Figure A1.12: Watch the icons on the project templates; it is easy to accidentally generate a new project in the wrong language.
If you don’t see the Console App project template, you can search for it using the search dialog at the top, as shown in Figure A.13:

Figure A1.13: You can search for the console app template if you don’t see it listed.
Click on the Console App template, and click on Next in the lower-right corner of the dialog. This takes you to a dialog titled Configure your new project, as shown in Figure A1.14:

Figure A1.14: Configuring your new project by giving it a name and location
This dialog allows you to name your project and specify its location on your hard drives. You can also choose to name your solution differently than your project. A solution is a collection of projects bound into one set of files. This allows you to work on multiple related projects in a convenient way. Maybe you have a web application and a related command-line program that belong together. A solution allows you to store the related projects together. If you are storing related projects together, you might not want to name the solution the same as the project. For the exercises in this book, it doesn’t matter.
We’re going to name the project BicycleConsoleApp. We’re going to name the solution BicycleSolution. Use a location on your computer that is convenient. The checkbox at the bottom specifies a folder structure. You can just leave it unchecked. Your project configuration should resemble Figure A1.15. Click on the Next button in the lower-right corner of the dialog:

Figure A1.15: The Additional information dialog lets you set the framework for the project.
The Additional information dialog allows you to pick the .NET Framework type that you’ll use for development. The default at the time of this writing is .NET 6.0 (Long-term support). Just accept the defaults as they are and click on the Create button. This will complete project creation, and you’ll see the full IDE, as shown in Figure A1.16:
Figure A1.16: The new project is created and ready in Visual Studio.
Your project is ready! You can start developing your code.
Adding a new class
Once your project has been created, you’ll be needing to add new classes. To add a class, right-click on the BicycleConsoleApp project, and you’ll find a context menu. Find the Add option and hover over it. A second menu expands. Find Class... at the bottom of the menu and click on it. You can see the menu layout in Figure A1.17:

Figure A1.17: The menu item for adding a class accessed from Solution Explorer in Visual Studio.
The next step is to specify what you wish to add using the dialog in Figure A1.18. In this case, we’re adding a class. Note there is also an option for adding an interface. You’ll need both, but right now, let’s focus on adding a class:
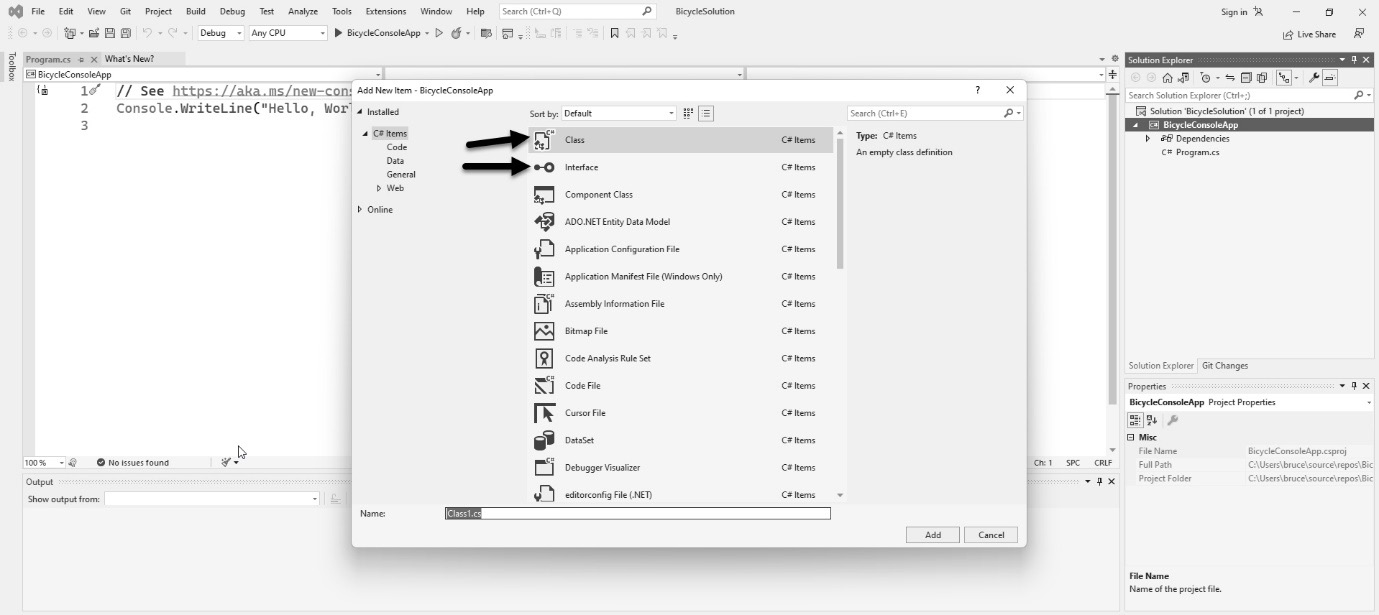
Figure A1.18: The Add New Item dialog in Visual Studio can be used to add anything, including classes and interfaces.
Click on Class, then give the file a name that matches the name of the class you want to create. Usually, I honor the age-old Java convention of having one class per file. Click on the Add button, and the class will be created and added to your project.
To add an interface, follow the same procedure, but select Interface instead of Class. By convention, C# interfaces always start with the letter I (as in “Interface”), so name your file the same as what you plan to name your interface.
Adding a library project to the solution
When you created the command-line app project, Visual Studio also created a solution. Solutions are containers for projects. Even if you only have one project, it will be inside a solution. You can add more projects to the solution. This is a handy way of keeping related projects together.
Library projects are used to house reusable code designed to be accessible between projects. In Chapters 3–5 of this book, I use a library for common classes like those that model the basic parts of the bicycle classes we’re building in those chapters. In the real world, you generally put your business logic in a library. When you do this, you can leverage that logic in a web application, a mobile application, and a desktop application without repeating your code in three places.
Creating a library project is easy. Right-click on the solution in the solution explorer. Locate the Add option, hover over it, and click on New Project. A new project dialog appears, as shown in Figure A1.19:
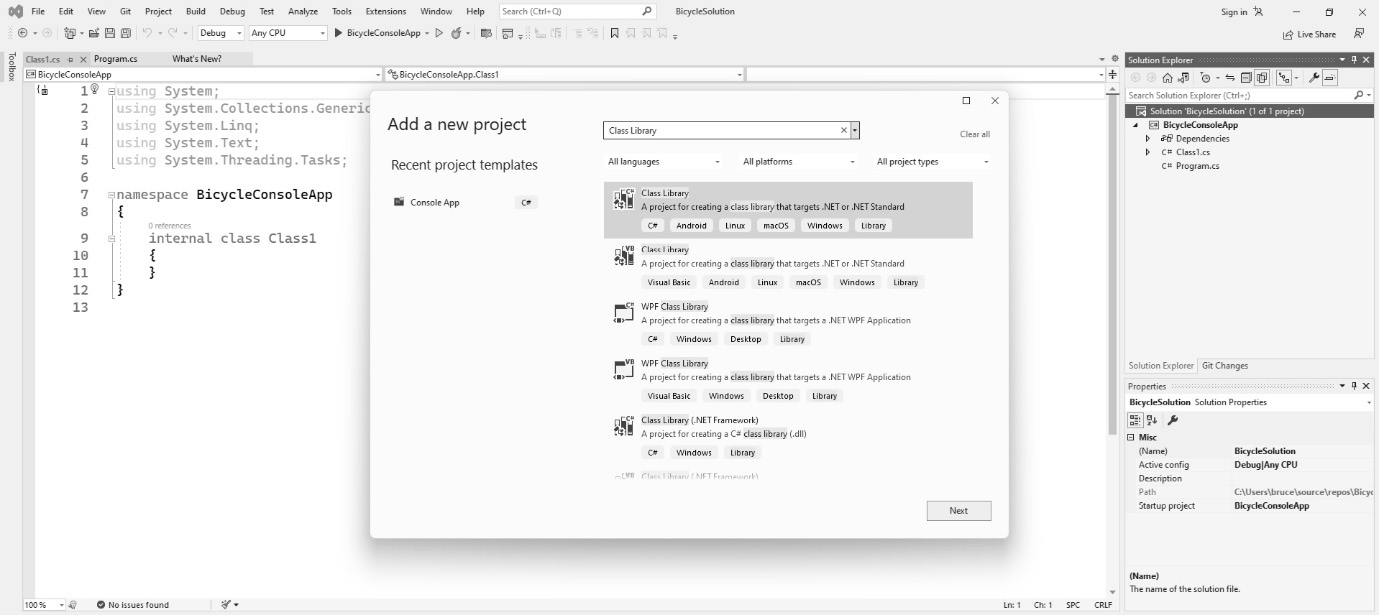
Figure A1.19: The context menu in Visual Studio used to add a new project to the solution.
Locate the Class Library project template. If you don’t see it, type the term Library into the search box at the top of the dialog. Make sure the class library template is using the C# language and not some other language such as Visual Basic or F#. Click on the Class Library project option, and click on the button labeled Next near the bottom-right corner of the dialog. You’re taken to another dialog asking for your project name and its location. Let’s call the project BicycleLibrary. The location should be defaulting to the location of the solution and, by extension, the console app project we just made. Click on the Next button.
The next dialog allows you to select the .NET runtime for your project. Generally, you want these to match. We picked .NET 6.0 for the console app, so we should pick the same thing here. Click on the Create button, and Visual Studio will generate the project’s files for you.
Linking the library project to the console project
Before you can use the library, you must create a reference to it in the BicycleConsoleApp project. To create the reference, right-click on the Dependencies option in the console app, and then click on Add Project Reference. This reveals a dialog, as shown in Figure A1.20:

Figure A1.20: The menu used to add project dependencies to a project in Visual Studio.
The Projects option is at the top of the dialog and is probably already selected. You should see the name of your library project in the list. Click on the checkbox next to the library project you just made, and then click on OK.
Your library is now available within your console app project.
Referencing the library
When you created the library project, Visual Studio created a file called Class1.cs. Let’s add a method to that class and then see how to reference it in the console app.
Open the Class1.cs file in the class library project. Add this code:
namespace BicycleLib;
public class Class1
{
  public string SayHello()
    {
        return "Hello from the Bicycle Library!";
    }
}
Save the file.
Now, open the Program.cs file in the console app project. You should see a “Hello World” program. Replace the starter code with this:
using System;
using BicycleLibrary;
var test = new Class1();
Console.WriteLine(test.SayHello());
Notice that as you type the code (type it, don’t copy and paste – copy and paste teaches you nothing!), you’ll find that IntelliSense is giving you hints on the method you added in the library. Effectively, you are using the code in the library as if it were part of the console app project!
There’s just one thing left to do: build the project.
Building and running the console project
C# applications are compiled. If you’re used to an interpreted language such as JavaScript or Python, you might not be familiar with this step. The C# compiler, code-named Roslyn, has been interacting with you this whole time. The compiler checks your code in Visual Studio as you write it. It flags mistakes and underlines things you should fix. Additionally, it gives you the IntelliSense for your code completion. A distinct difference from what you’re seeing in Visual Studio is that this tool uses the compiler and a feature of the .NET called introspection. This means Roslyn can literally see the classes and code within your project. This makes your Intellisense hints extremely accurate. If you’ve seen code completion in other editors such as Sublime Text or VS Code, the hints you are getting are not nearly as accurate. Those are coming from, at best, depending on which editor we’re talking about, an index of the code you have in place so far. When you type foo, where foo is any given object, an augmented text editor will probably give you every possible option that could come after that dot. Really good editors might use probability or AI to narrow the field. Visual Studio only shows you viable options based on introspection. The latest versions of Visual Studio are starting to include AI features. When AI is combined with IntelliSense, the results are frightening. You can expect Visual Studio to write entire blocks of code for you, not just boilerplate; the actual methods in your code.
Better code hints and early warnings about code mistakes are among the benefits of working with compiled languages. The compiler doesn’t allow the most common types of mistakes, so you find and fix them early because you must. The product of a compiled language is also generally faster in terms of execution speed.
Building in Visual Studio is very simple, and there are a few ways to do it. The most straightforward is to run your program. To do this, just click on the green arrow in the toolbar. Figure A1.21 shows the location of the Run button. Unfortunately, Figure A1.21 isn’t in color. The book editor’s bosses muttered something about budgets and money not growing on trees. I haven’t met the boss of bosses at Packt, but I suspect they used to hang out with my father (God rest his soul) A LOT. The good news is you really can’t miss it in the IDE:
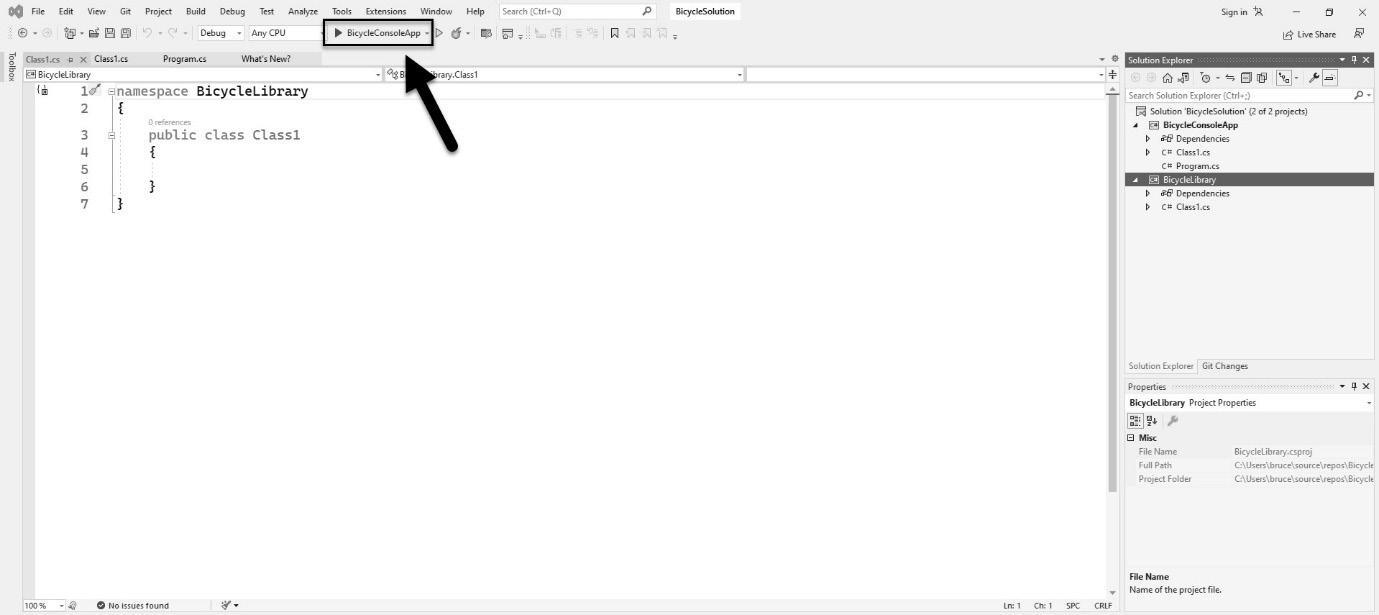
Figure A1.21: Locate the green triangle in the IDE; this is the Run button.
When you click on the Run button, your program builds, and it is then executed with an attached debugger. You’ll see your running program, as shown in Figure A1.22:
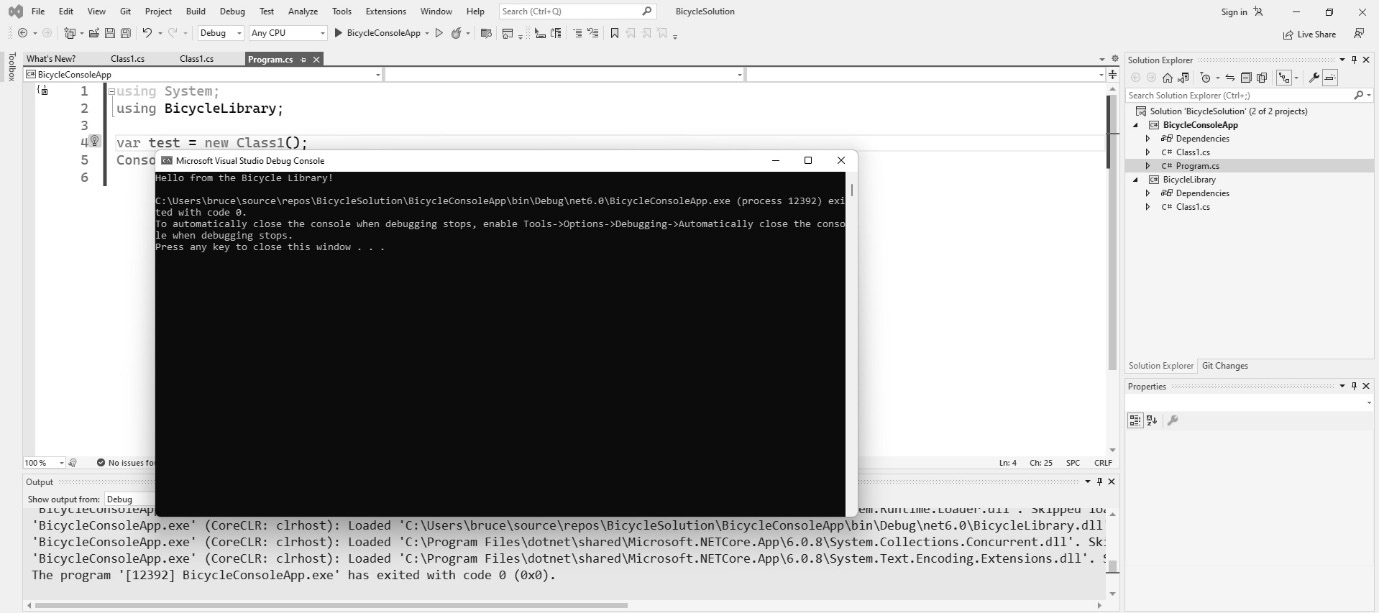
Figure A1.22: The program runs in a window.
To stop the program, press your computer’s Any key in the running console app window:

Figure A1.23: Press the Any key to exit Visual Studio’s program run; if your computer doesn’t have an Any key like mine, you can use the spacebar.
The Any key is common on older keyboards. It does limit your ability to write code using the letter H. Since I live in Texas, I just use J instead. It’s a small price to pay for being able to quickly exit from your running programs.
If your computer doesn’t have an Any key, just press the spacebar. Note that the pause message isn’t part of your program, and it won’t be there if you publish your application. This is Visual Studio pausing the application. Console apps tend to run and exit in under a second. If something goes wrong, the program will finish, display an error, then kill the window before you have a chance to see anything. So, Visual Studio does you a solid and freezes the window before the program exits so that you can inspect it. Your program should have run without any errors.
This concludes our brief tour of Visual Studio. If you’re interested in a video walk-through that coaches you through setting up a Visual Studio development environment in Windows, you’ll find links for this at https://csharppatterns.dev.
VS Code
VS Code bears a similar name to Visual Studio but is an entirely different beast. Rather than being a full-fledged IDE, VS Code is really an augmented text editor rather than a true IDE. We just covered Microsoft’s Gold Standard for editing tools. Why should I even talk about VS Code? The answer: VS Code currently has over 50% of the market share, making it the most popular tool used by most developers every day. There are some good reasons for this:
- VS Code takes a fraction of the space as Visual Studio, which all-in requires nearly 45 GB of space. You can reduce the footprint of Visual Studio, but VS Code is still going to boast a smaller footprint.
- VS Code launches very quickly. Visual Studio doesn’t. You can use VS Code to quickly look at a repository you pulled off GitHub or some folder a colleague shared with you. Launching Visual Studio is a commitment. If you’re on a less powerful computer, you can likely catch up on your emails, take a quick peek at social media, get some coffee, and call your mother before you get the IDE’s opening screen. By the way, call your mother! She misses you.
- VS Code works with nearly any programming language. Naturally, it works well with Microsoft-supported languages and other popular languages such as Golang or Rust. Also, you’ll find extensions that allow you to use it with oddball languages. The original GoF book used the SmallTalk programming language, which is offered by two extension vendors. You can find Ada, Haskell, and many more. Visual Studio is mainly used for mainstream work in Microsoft language products.
- VS Code has a consistent user experience across all operating systems. Visual Studio is a Windows-only program. It won’t run in Linux. Visual Studio Mac is a completely different program and looks nothing like the Windows version. This consistency makes the tool a popular choice for schools, universities, and code boot camps like the one I teach at Southern Methodist University.
VS Code has a lot going for it. Like Visual Studio, VS Code can also be downloaded at https://www.visualstudio.com.
If VS Code is going to be your editor of choice, you’re going to need to install the .NET Core SDK to give you the tools and compilers to work with C#.
Installing .NET Core
You need the .NET Core SDK if you are going to work with VS Code. You can download it from https://dotnet.microsoft.com/en-us/download. Naturally, that web address might change after this book is published, in which case you’ll have to be resourceful. Installing it is straightforward.
With VS Code and .NET Core SDK installed, you’re ready to get started. If you read the steps for setting up a project in Visual Studio, the steps for VS Code are very different.
Creating a new solution
Visual Studio creates a project and a solution in one step. This is VS Code. Each step is performed separately, and it is all done from the command line. Technically speaking, VS Code isn’t really involved. You use the dotnet command-line tool that was installed when you installed the .NET Core SDK. You can do all of this in Windows Terminal.
Since Windows Terminal comes with Windows 11, there is nothing further to install. If you’ve never used it, click on Start, and then search for Terminal, as shown in Figure A1.24. Launch the app. If you’re still using Windows 10, search for PowerShell instead of Terminal:

Figure A1.24: Most of the project setup work with VS Code happens in the Terminal window.
With Terminal (or PowerShell) open, type this command:
dotnet new sln -o BicycleSolution
Here, -o is for output. This tells the command to create a folder for the solution. In addition to creating the folder, the command generates a set of files in the BicycleSolution folder. Let’s take a look. Type this:
cd BicyleSolution
Then, type in this:
dir
The dir (directory) command will list all the files in the current working directory. You should see something like Figure A1.25:

Figure A1.25: The result of our new solution command.
We have a solution, but there’s nothing in it. We need some projects to make the solution useful.
Creating a command-line project
Next, we’ll add a console application to the current solution folder. First, cd into the BicycleSolution folder. Going forward, the commands I’m giving you are based on the assumption that your present working directory is the BicycleSolution folder.
To add the console app to the solution, type this command into the Terminal window:
dotnet new console -o BicycleConsoleApp
This creates a new console app. Again, -o is for output. This tells the command what to call the project. The dotnet command generates the boilerplate files for the console app project, as shown in Figure A1.27:

Figure A1.27: Our command generated your file structure for the command-line project.
Once you have the app created, you need to add it to your solution using this command:
dotnet sln add BicycleConsoleApp/BicycleConsoleApp.csproj
The result of the command can be seen in Figure A1.28:

Figure A1.28: The console app was successfully added to the solution.
There won’t be a visible change to the folder structure. The command alters the BicycleSolution.sln file to include the BicycleConsoleApp project. Your command-line project is ready to use.
Creating a library project
Library projects are used to house reusable code designed to be accessible between projects. In Chapters 3–5 of this book, I use a library for common classes like those that model the basic parts of the bicycle classes we’re building in those chapters. In the real world, you generally put your business logic in a library. When you do this, you can leverage that logic in a web application, a mobile application, and a desktop application without repeating your code in three places.
To create a library project in your solution folder, type the following command into your Terminal window:
dotnet new classlib -o BicycleLibrary
As before, the command creates a new project within the current solution. The -o switch tells the command what to name the output, which, in this case, is the name of the library project. Having created the library project, you need to add the project to your solution using this command:
dotnet sln add BicycleLibrary/BicycleLibrary.csproj
Use the dir command to confirm that your folder structure looks like mine in Figure A1.29:
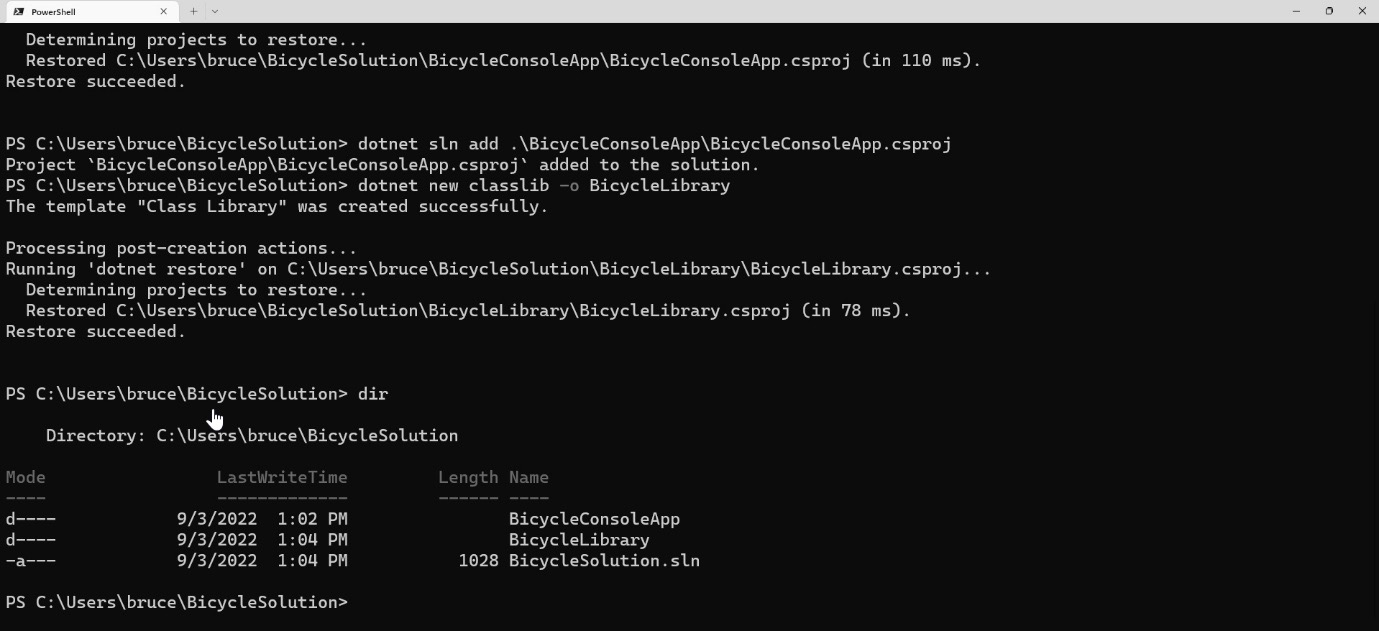
Figure A1.29: The project structure after creating the solution, the console app, and the library project.
Now that you have the library project, you need to set up a reference between the console app and the library project.
Linking the library to the console project
To link the console project to the library project, type in this command:
dotnet add BicycleConsoleApp/BicycleConsoleApp.csproj reference BicycleLibrary/BicycleLibrary.csproj
The library is linked to the console app project. We’ve spent a lot of time in the Terminal window. It’s time to start working in VS Code.
Launching VS Code and adding the C# extension
Adding a class or an interface is easy in VS Code. You can launch VS Code from the Terminal window we’ve been using by typing in the following:
code .
You read it correctly: type in code, add a space and a period, and then press Enter. This command launches VS Code with the solution folder loaded. You’ll be greeted by your usual security warning, as shown in Figure A1.30:
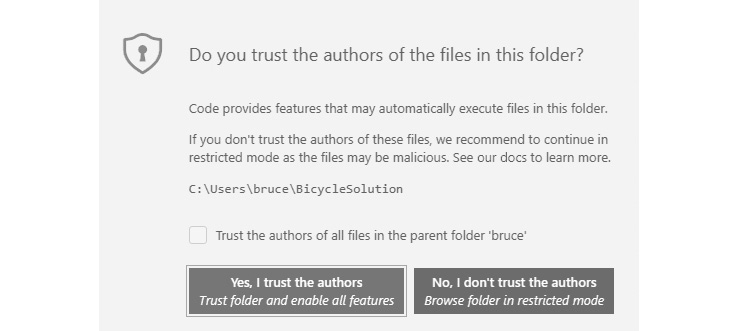
Figure A1.30: Do you trust the files you just made?
Assuming you trust your own work, click on Yes. If you don’t, briefly close this book and ponder deeply on this. Consider whether it’s better to live in a beautiful boring secure world where no harm will ever come to you; a world filled with beautiful flowers whose aroma reminds you of only the best moments of your life. Or would you rather live in a world filled with high adventure and the possibility of total ruin? Pirate ships are safe hiding in port. But they are not meant to stay there! This is your moment! Go for it! Click on the Yes, I trust the authors button! I promise that if you do, you’ll turn a corner in your life. Grow a spine already and click on the button! Side note: my attorney wants me to remind you the author is not responsible for malware, computer damage, damage to your reputation, or pirate attacks resulting from clicking on this button.
With your personal issues resolved, if you had them, let’s continue.
I have mentioned that VS Code isn’t considered a full-fledged IDE. It is meant as a general-purpose coding tool and doesn’t assume anything about how you will use it. As such, VS Code doesn’t come with C# support baked in. Naturally, Microsoft has a plugin to help you with C#. You’ll probably be prompted to install the plugin as soon as the project opens. In case you aren’t, you can install it by following the steps shown in Figure A1.30:
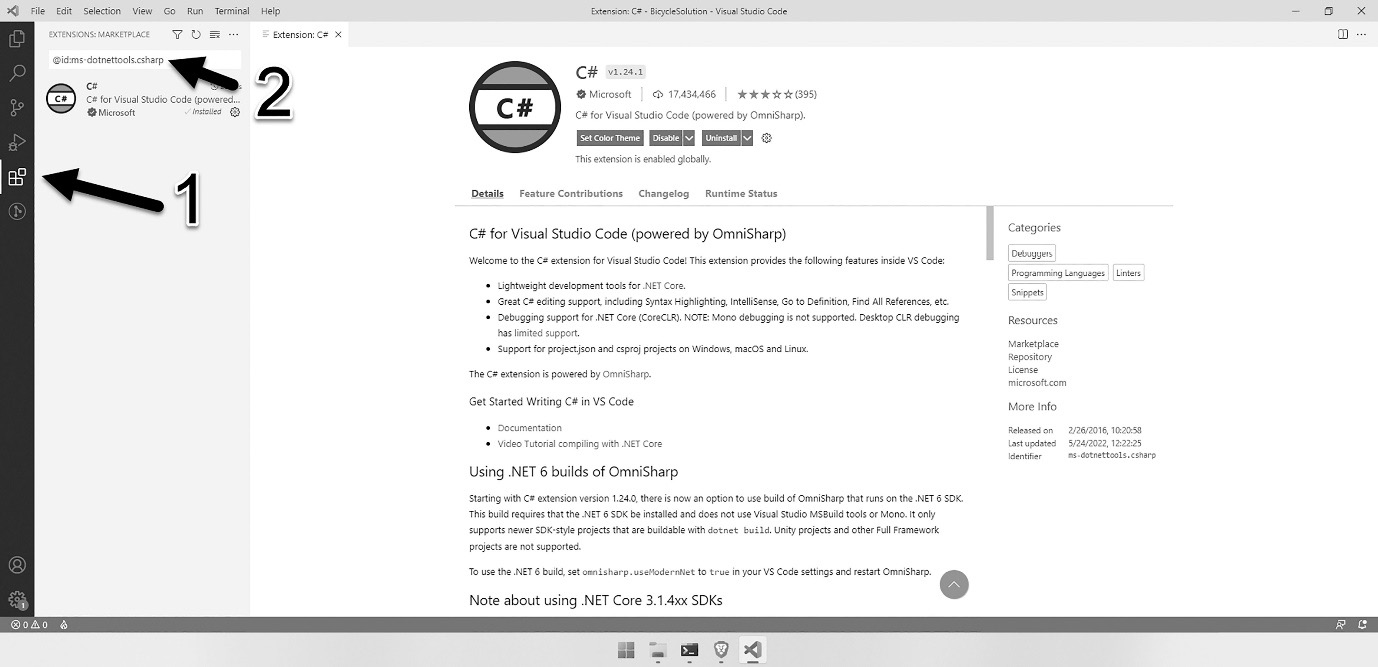
Figure A1.30: Microsoft makes a free extension for VS Code that makes working with C# more enjoyable.
First, click on the Extensions button in the menu on the left-hand side of the interface (1). Then, search for this extension in the search bar (2):
@id:ms-dotnettools.csharp
This will narrow the list to a single extension. Click on it, and then click on the install button. VS Code is now fully aware of the C# language and the structure of your project.
Adding a class or interface
Right-click on the BicycleConsoleApp folder in the explorer view and click on New File, as shown in Figure A1.31:

Figure A1.31: Right-click on the explorer area, and click on New File to create a new file.
Once you click on New File, just type in the name of the file you want to create. Be sure to include the .cs extension. For example, I’m calling my file Class1.cs. If you’re creating an interface, it is standard practice to begin the filename with a capital I (as in “Interface”).
Adding code to the BicycleLibrary project
Let’s add a method to the BicycleLibrary project so that we can verify it is linked and working correctly.
Find the Class1.cs file in the BicycleLibrary project. This file was generated for you when you created the project. Click on the file, and it will open in the editor. Add the following code:
namespace BicycleLibrary;
public class Class1
{
  public string SayHello()
    {
        return "Hello from the Bicycle Library!";
    }
}
Be sure to save the file! Compare your project with mine, as shown in Figure A1.32:

Figure S1.32: The library code has been added to Class1.cs in the BicycleLibrary project.
Next, let’s switch to the Program.cs file in the BicycleConsoleApp project. Replace the line dotnet generated with the following:
using System;
using BicycleLibrary;
var test = new Class1();
Console.WriteLine(test.SayHello());
As you type, IntelliSense will show you the library method we added to the BicycleLibrary project as if it was within the BicycleConsoleApp project. Check your work against Figure A1.33:
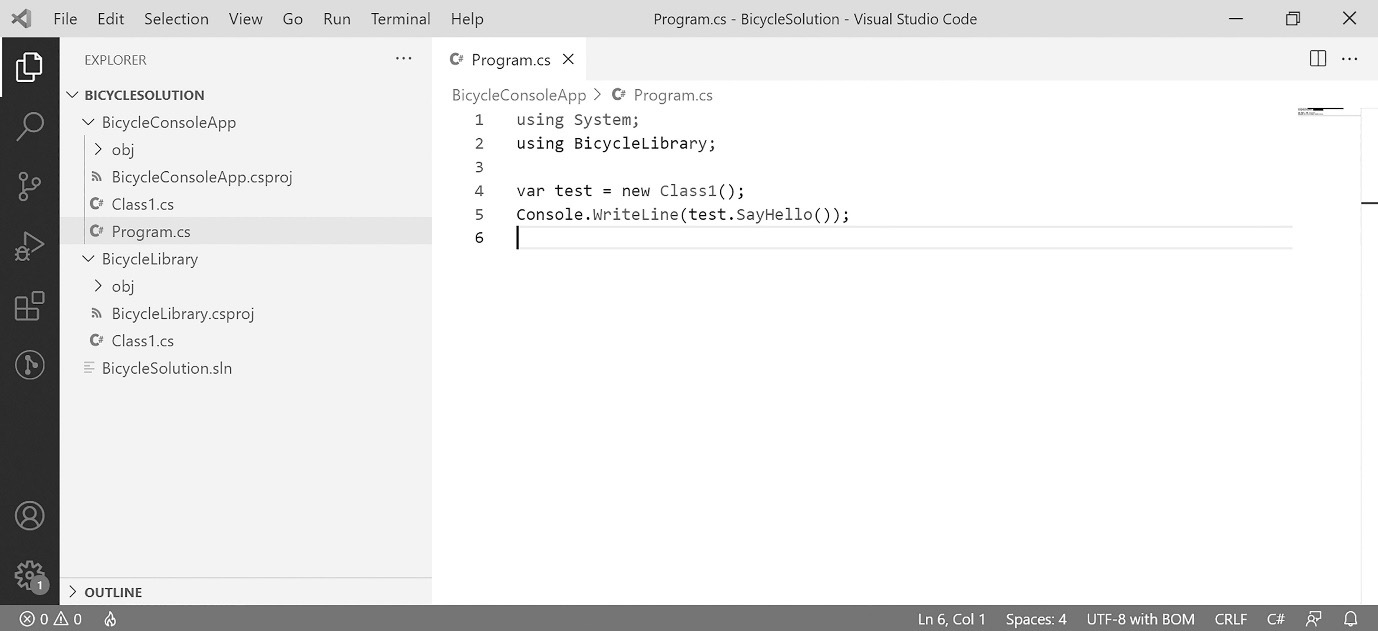
Figure A1.33: The updated Program.cs file with our test code.
Our mission has been accomplished! There is just one thing left to do: build the project.
Building and running the console project
We could switch back to our Terminal window, but VS Code has an integrated Terminal window. Using it is more convenient than constantly switching windows.
To activate it, use the keyboard shortcut Ctrl + ` (control + backtick). Additionally, you can click on View and then Terminal from the main menu, as shown in Figure A1.34:

Figure A1.34: You can open the integrated Terminal window in VS Code using this menu item, or Ctrl + ` as a keyboard shortcut.
Running the project will build the project and then execute the BicycleConsoleApp project’s executable file, which consists of the code in the Program.cs file. To run the program in the Terminal window, enter this command:
dotnet run –-project .BicycleConsoleAppBicycleConsoleApp.csproj
You’ll see the program being built, and the command-line project will run. You should see the “Hello from the Bicycle Library!” message in the Terminal window just like you see it in Figure A1.35:
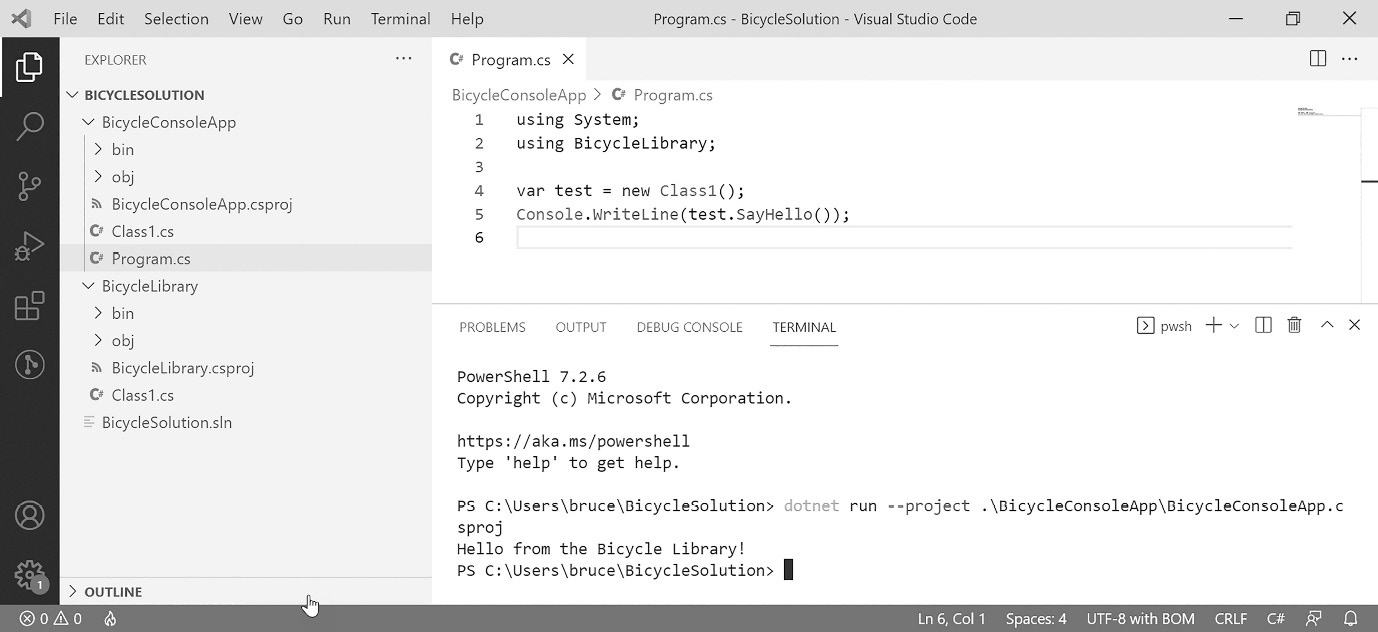
Figure A1.35: This is the result of our test run.
This concludes our brief tour of VS Code. If you’re interested in a video walk-through that coaches you through setting up a VS Code development environment in Windows, you’ll find links for this at https://csharppatterns.dev.
Rider
JetBrains Rider is the most recent addition to the world of C# IDEs. JetBrains is known for making amazing IDEs for Java (IntelliJ Idea), Python (Pycharm), PHP (PHPStorm), and JavaScript (WebStorm) among others. They also built Google’s IDE for Android Development, Android Studio. In addition to IDEs, the company has a very popular add-in product for Visual Studio called Resharper. The tools in Resharper give you many similar features you’ll find in Visual Studio Enterprise at a fraction of the cost.
I used Rider to create this book, mainly because of the code formatting and refactoring tools available in the program. Also, I use several of their other IDEs regularly, and I have my keyboard shortcuts configured to be common in every language IDE I use. This is purely a personal preference. I knew I could produce this book more quickly with Rider.
Rider is not a free product. There is a lower-cost version available for solo developers, and the same product is sold at a higher rate for use in companies. Check out https://www.jetbrains.com/rider for more information if you’re interested in using this tool.
Since I used Rider to create the book, I think it would be strange if I didn’t at least show you around. Let’s do this exercise one more time using Rider.
Creating a command-line project
When you launch Rider, you are greeted with the Welcome screen dialog. Click on the New Project button in the upper-right portion of the dialog box, as shown in Figure A1.36:

Figure A1.36: The welcoming screen in Rider with the New Project button highlighted.
Clicking on the button gives you another dialog, as shown in Figure A1.37:

Figure A1.37: Project creation in Rider.
With Rider, everything is on one screen. Find the Console Application template in the list on the left-hand side and click on it. Set the solution name to BicycleSolution and ProjectName to BicycleConsoleApp. Click on the Create button and your project will be generated. The full IDE will appear, and you’ll find your project hierarchy in the explorer panel on the left-hand side of the IDE window.
Adding a class or interface
Adding a class is the same as it is in the other two IDEs we’ve talked about so far. Right-click on the BicycleSolution project. A context menu appears, as shown in Figure A1.38:
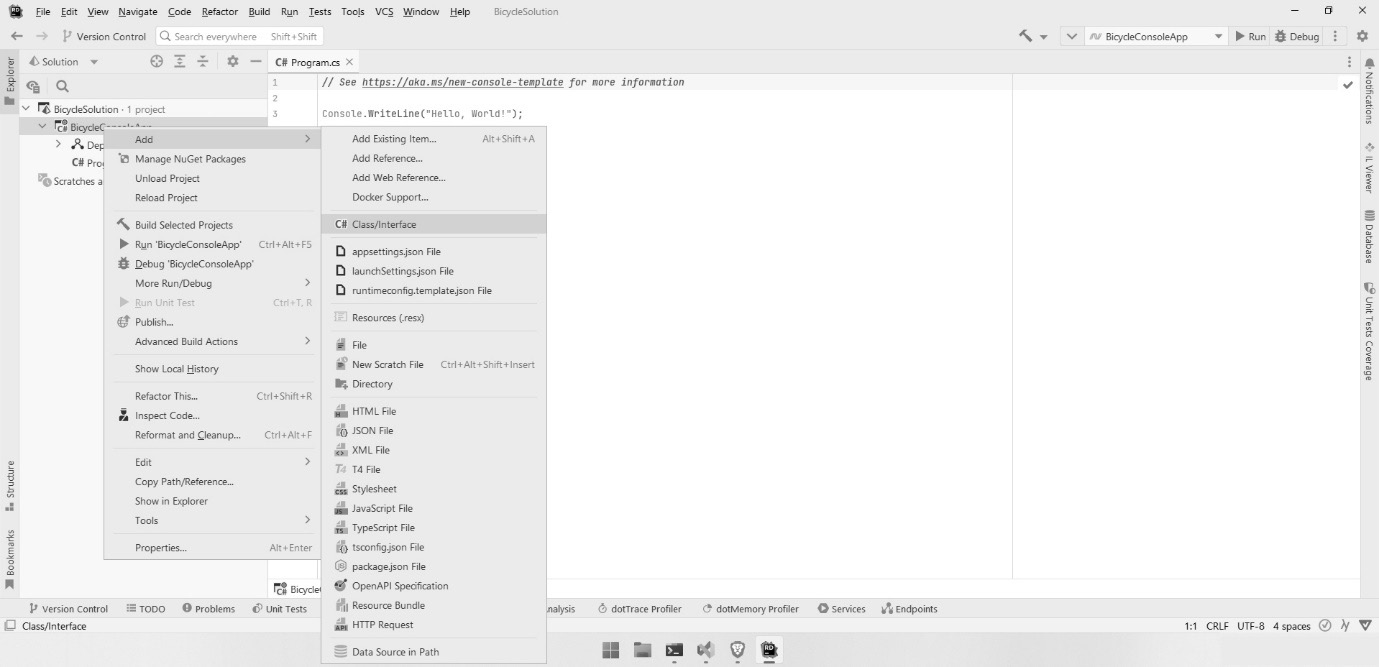
Figure A1.38: The ability to add a class or interface to your project can be found in the context menu when you right-click on the project.
Hover over the Add menu item, and then find Class/Interface in the sub-menu. Click on it. You will see a small dialog asking you to name the class or interface. There are a few more possibilities evident in the list, but this book is only concerned with classes and interfaces. Choose the Class option and name your class whatever you would like. As soon as you press Enter, you’ll see the class file added to your project.
When you need an interface, follow the same procedure, but instead of Class, select Interface. Don’t forget that in C#, the name convention for interfaces stipulates naming the interface starting with the letter I (as in “Interface”).
Next, we’ll look at adding a library project to our solution so that we can maximize code reuse between projects.
Creating a library project
Library projects are used to house reusable code designed to be accessible between projects. In Chapters 3–5 of this book, I use a library for common classes like those that model the basic parts of the bicycle classes we’re building in those chapters. In the real world, you generally put your business logic in a library. When you do this, you can leverage that logic in a web application, a mobile application, and a desktop application without repeating your code in three places.
Right-click on the BicycleSolution in the explorer menu. Hover over the Add option and select New Project.... You can see this in Figure A1.39:

Figure A1.39: Adding a project to the solution in Rider is done by right-clicking on the solution, then hovering over Add, and then clicking on New Project.
You get the same project dialog we started with. Locate the Class Library template and click on it. Then, fill in the name for the project as BicycleLibrary. Your project should match mine, as shown in Figure A1.40:
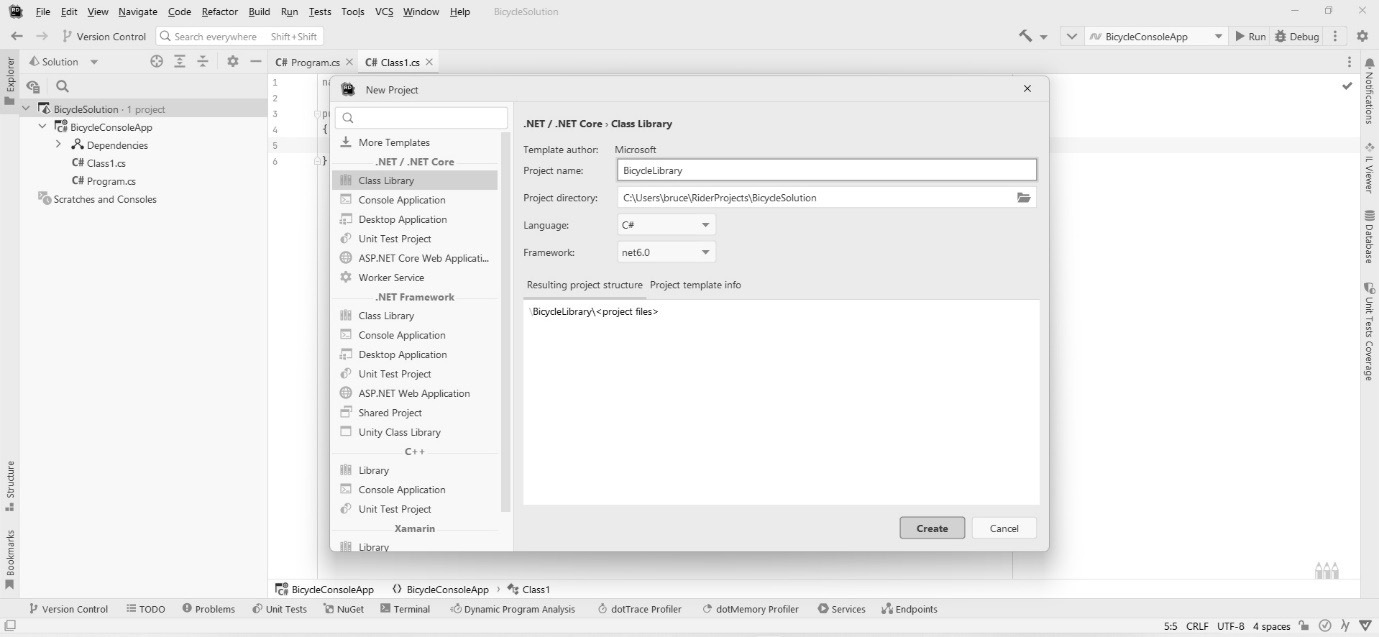
Figure A1.40: Set up your new library project as shown.
Click on the Create button, and you’ll find a new project added to the solution. Your explorer pane should look something like Figure A1.41:

Figure A1.41: The explorer pane shows both projects in our solution.
Before we can use the library in our console app project, we need to link the two projects with a reference.
Linking the library project to the console project
In the explorer pane, locate the BicycleConsoleApp project and right-click on the Dependencies item in the project hierarchy. A context menu appears, as shown in Figure A1.42:

Figure A1.42: The context menu is displayed when you right-click on the Dependencies item in the explorer pane.
Click on Add Reference. A dialog appears like the one in Figure A1.43:

Figure A1.43: The Add Reference dialog in Rider.
You should see the library project listed. Check the box next to the library, and then click on Add. You can now reference the library project from your console app project. Let’s try it out.
Testing the linked library
Open the Class1.cs file in the BicycleLibrary project. Add this code:
namespace BicycleLibrary;
public class Class1
{
  public string SayHello()
    {
        return "Hello from the Bicycle Library!";
    }
}
That’s the third time I’ve typed in the same code. Thank goodness the English language doesn’t require authors to be DRY.
Next, open the Program1.cs file in the BicycleConsoleApp project. Change the code in that file to this:
using System;
using BicycleLibrary;
var test = new Class1();
Console.WriteLine(test.SayHello());
As you type the code, you should see the code hints showing you that you have access to the library. Once the code has been entered, we’re ready to run a test.
Building and running the console project
As with Visual Studio, you’re looking for a big green arrow that indicates the Run button in the toolbar. You can see this button highlighted, alas, not in color, in Figure A1.44.
When you click on the Run button, your project builds and runs with an attached debugger just as it does in Visual Studio. Unlike Visual Studio, your program runs within Rider’s integrated Terminal just like it did in VS Code. You can see the result of my run in Figure A1.44:

Figure A1.44: The completed run of our test program in Rider; the Terminal window has been pointed out.
This concludes our brief tour of Rider. If you’re interested in a video walk-through that coaches you through setting up a Rider development environment in Windows, you’ll find links at https://csharppatterns.dev.
Summary
This appendix was meant to be a short summary of working with C#. I almost didn’t include it in the book. There are many other places you can get training and orientation for the language. I felt, though, having taught C# for decades that I might be able to more concisely, yet thoroughly, get you up to speed if you’re coming from a different language, have limited experience with C#, or if it’s been a while and you’re a little rusty.
Along the way, we learned the following:
- C# is a standardized general-purpose, strictly OOP language.
- C# uses a strong, static type system.
- C# is designed with features designed to limit the most common problems found in C and C++ development such as bounds checking, effortless memory allocation, and automated garbage collection.
- C# supports many different kinds of numeric types, including signed and unsigned variants.
- How to make auto-implemented properties and methods and work with encapsulation.
- How to use the basic building blocks of OOP in C#, including inheritance and working with interfaces.
At the end of all that we were treated to a basic tutorial on the three most popular IDE choices for C#: Visual Studio, VS Code, and Rider. I called this appendix concise. I wouldn’t call it short, but consider the size of most C# books that only orient you in Visual Studio, and I think you’ll agree this is a bargain. If you have found yourself wanting more, head over to https://csharppatterns.dev where I have links to additional resources.
Further reading
- C# Object-Oriented Programming for Beginners in C# and .NET by Praveenkumar Bouna.
- Visual Studio Code for C# Developers by Praveenkumar Bouna.
- Hands-On Visual Studio 2022 by Hector Uriel Perez Rojas and Miguel Angel Teheran Garcia.
- https://csharppatterns.dev has links to additional resources.