11
OpenShift Multi-Cluster GitOps and Management
In the first chapter of this book, we discussed the main challenges most organizations face in scaling their Kubernetes infrastructure in a multi- or hybrid-cloud world. New challenges arise when you deploy multiple clusters on different providers, such as the following:
- Inconsistent security policies: Clusters with different configurations regarding access rules and user profiles, allowed/blocked network flows, certificates, and other security aspects make an organization more vulnerable to data breaches and other security events.
- High operational effort to manage all clusters: Managing configurations, components, compliance, and policies for several clusters is overwhelming.
- Deploying and managing applications: The deployment process becomes much more complicated when you need to do it over several clusters. Monitoring and managing them are also really complex and require a lot of human effort.
In this chapter, we will introduce a great tool to help you address these challenges and alleviate the amount of work you and/or your team may need to deal with when managing several clusters: Red Hat Advanced Cluster Management (ACM).
Therefore, you will find the following topics covered in this chapter:
- What is Red Hat ACM?
- Red Hat ACM installation
- Managing clusters using Red Hat ACM
- Managing applications using Red Hat ACM
- Governance using Red Hat ACM
- Multi-cluster observability with Red Hat ACM
Note
The source code used in this chapter is available at https://github.com/PacktPublishing/OpenShift-Multi-Cluster-Management-Handbook/tree/main/chapter11.
What is Red Hat ACM?
Red Hat ACM is a complete solution for Kubernetes multi-cluster management from a single pane that includes some other great features, making complex and time-consuming tasks a lot easier. Red Hat ACM provides a few main features, listed here:
- Kubernetes multi-cluster management: Create, update, and delete Kubernetes clusters on-premises and in the cloud.
- Multi-cluster observability: ACM can also provide observability for all clusters from a single point of view, enabling administrators to read, aggregate, and receive alerts on the clusters.
- Governance using policies: Through Red Hat ACM, you can audit and enforce policies to apply anything you want in the clusters, from security to infrastructure and application-related stuff. This includes roles and access control, operators that must be installed, and security compliance rules.
- Application management: Deploy applications from Git repositories or Helm into multiple clusters simultaneously and also view them from a single pane.
One of the great aspects of ACM is its multi-cluster architecture – it is designed to manage several clusters from a single standpoint, as you can see in the following figure.

Figure 11.1 – ACM hub and managed clusters
To do so, it uses the concept of hub and managed clusters, as follows:
- Hub cluster: An OpenShift cluster that runs the central controller of ACM, which contains the web console, APIs, and other components that make up the product’s features. In this chapter, we will use the term hub cluster several times to refer to the OpenShift cluster that hosts ACM. OpenShift is the only supported option for the hub cluster.
- Managed cluster: A cluster that is managed by ACM. ACM can manage OpenShift as well as other Kubernetes-based distributions. Check the Further reading section at the end of this chapter to find a complete list of Kubernetes distributions supported by ACM (Supportability Matrix).
We will dig into all these features in the following sections of this chapter.
Red Hat ACM installation
In this section, we will guide you through the installation and configuration of ACM.
Important Note
It is important to consider that ACM uses the compute, memory, and storage resources of the hub cluster, thus it is recommended to have a dedicated cluster to be the hub for ACM, avoiding concurrent workloads and resource usage. This is recommended but not required; you can run ACM in any OpenShift cluster with enough capacity.
The installation process is simple, similar to what we followed in the last chapters with OpenShift Pipelines and GitOps, as you can see in this section.
Prerequisites
Installation
Follow this process to install Red Hat Advanced Cluster Management:
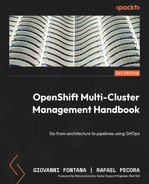
- Access the OpenShift web console using a cluster-admin user.
- Navigate to the Operators | OperatorHub menu item.
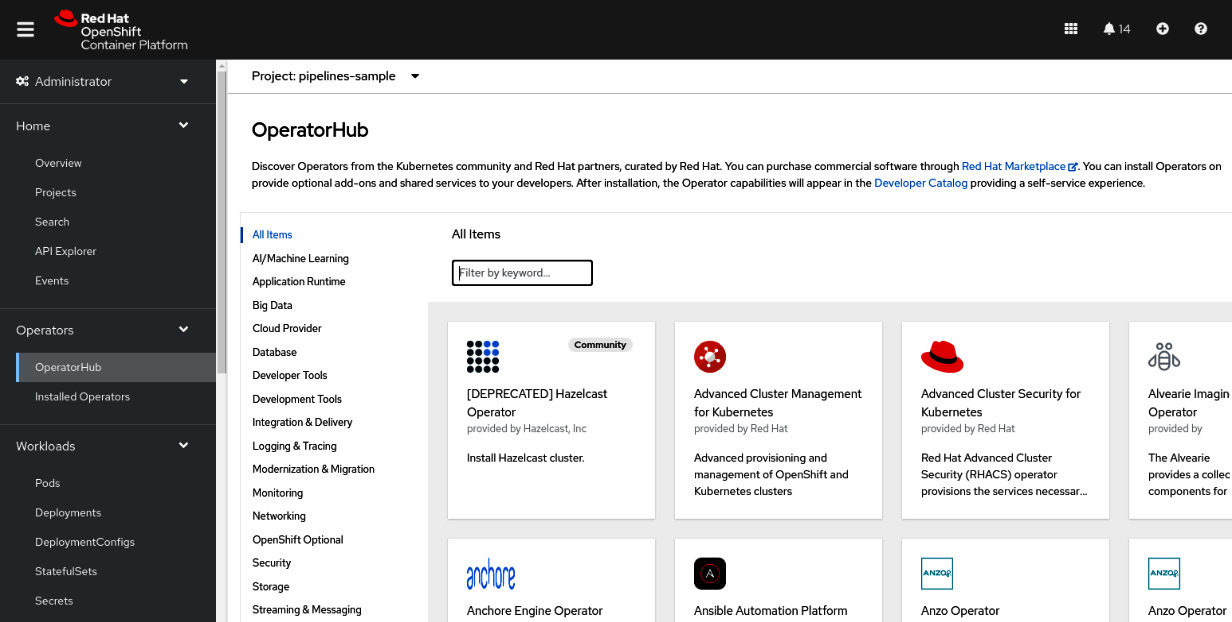
Figure 11.2 – OperatorHub
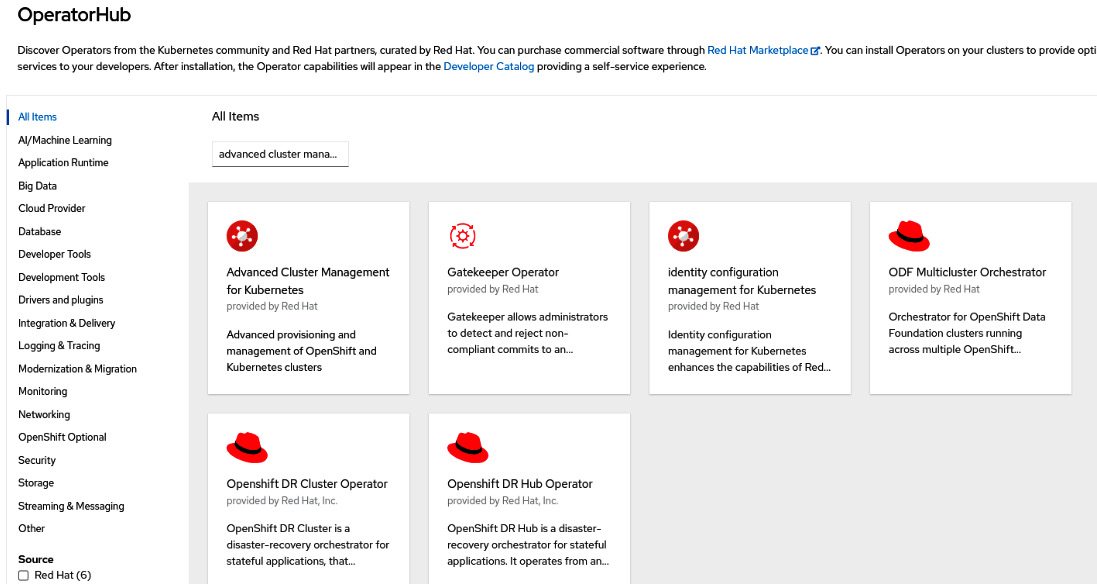
Figure 11.3 – Advanced Cluster Management for Kubernetes on OperatorHub
- Click on the Advanced Cluster Management for Kubernetes tile and then on the Install button to see the Install Operator screen.

Figure 11.4 – Installing Advanced Cluster Management for Kubernetes
- Don’t change the default namespace (open-cluster-management).
- Select Automatic or Manual for Update approval. If you select Automatic, upgrades will be performed automatically by Operator Lifecycle Manager (OLM) as soon as they are released by Red Hat, while with Manual, you need to approve it before being applied.
- Select the correct update channel. The stable channel is recommended as it contains the latest stable and supported version of the operator.
- Click the Install button.

Figure 11.5 – Installing the operator
- Wait up to 5 minutes until you see the following message:
Figure 11.6 – Operator installed
Now that we have the operator installed, we can go ahead and deploy a new MultiClusterHub instance:
- Click on the Create MultiClusterHub button.
- Usually, no changes are needed; leave the default values and click on the Create button. Check out the link in the Further reading section of this chapter for product documentation for more information if you need to configure some advanced settings.

Figure 11.7 – Create MultiClusterHub
- You will see the status Phase:Installing during the installation process.

Figure 11.8 – Installing MultiClusterHub

Figure 11.9 – MultiClusterHub running
- Click on the combo box at the top left of the screen and then click on Advanced Cluster Management.

Figure 11.10 – Advanced Cluster Management option
- You should see the ACM login screen. Use the same admin credentials you use to log in to OpenShift.

Figure 11.11 – Red Hat ACM login
You have now Red Hat ACM installed and ready to be used.
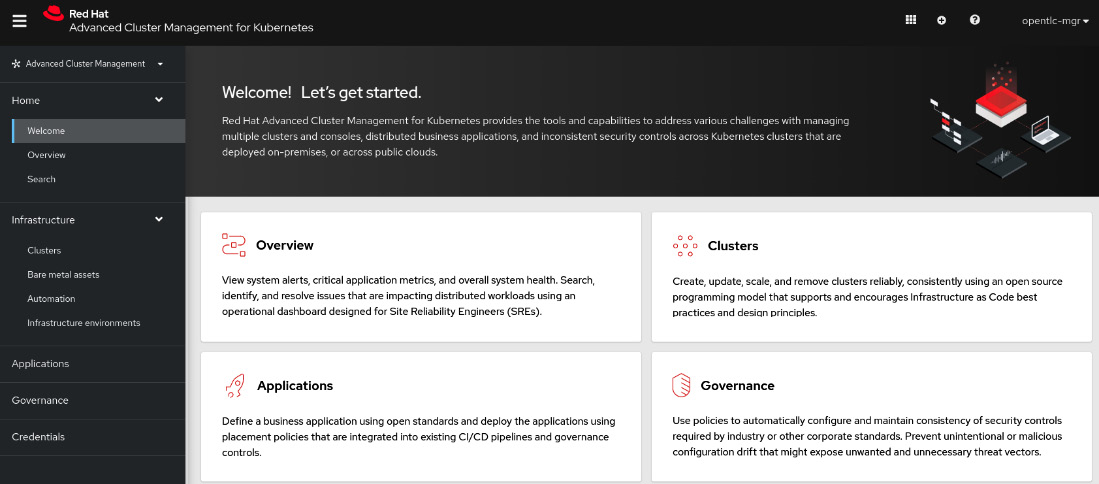
Figure 11.12 – Red Hat ACM initial page
Continue to the next section to learn more about the ACM cluster management feature.
Managing clusters using Red Hat ACM
As we mentioned previously, one of the features ACM provides is cluster management. The following is a list of some of the operations you can perform with ACM:
- Cluster provisioning
- Import of existing clusters
- Destroying a cluster
- Upgrading a cluster
- Scaling cluster nodes in or out
Check the Further reading section of this chapter to see a link to a complete list of supported operations.
We will not cover how to do all the operations you can perform with ACM in this book, but we will guide you through the process of provisioning a new OpenShift cluster on AWS using ACM, to give you an idea of how easy it is to use the tool.
Cluster provisioning
Currently, in version 2.5, ACM can deploy clusters on AWS, Azure, Google Cloud, VMware vSphere, bare metal, Red Hat OpenStack, and Red Hat Virtualization. To do so, you need to first input the provider credentials to be used by ACM during the provisioning process. The following steps show how to add AWS credentials that will be used with our sample:
- Access the Credentials menu and click on the Add credential button.
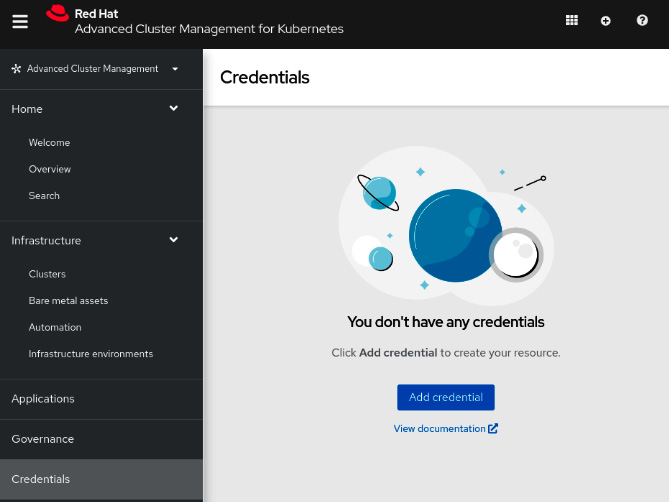
Figure 11.13 – Adding provider credentials
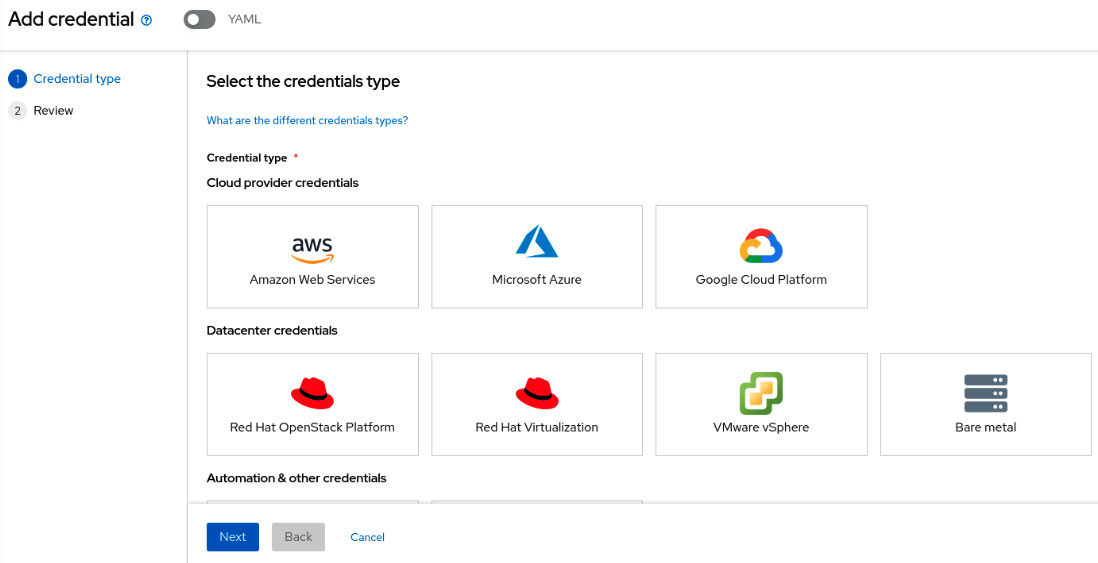
Figure 11.14 – Selecting the credential type
- On the next page, input a name and select a namespace where the credentials will be stored and the base DNS domain that will be used to deploy clusters. Click on the Next button.

Figure 11.15 – Basic credentials information
Recommended Practice
The provider credentials are stored in secrets in the namespace provided. As such, it is highly recommended you create a specific namespace for that and keep the access for it restricted.
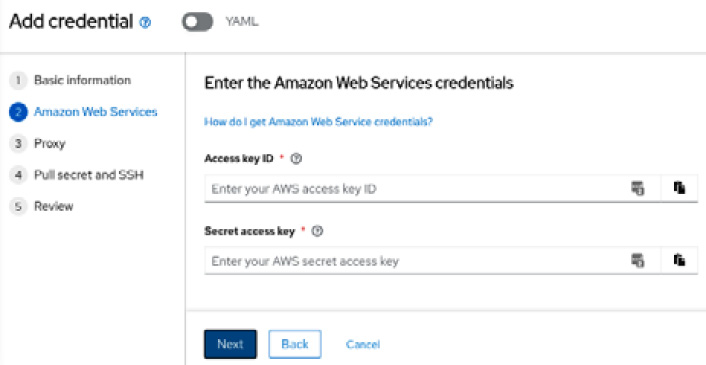
Figure 11.16 – AWS access and secret keys
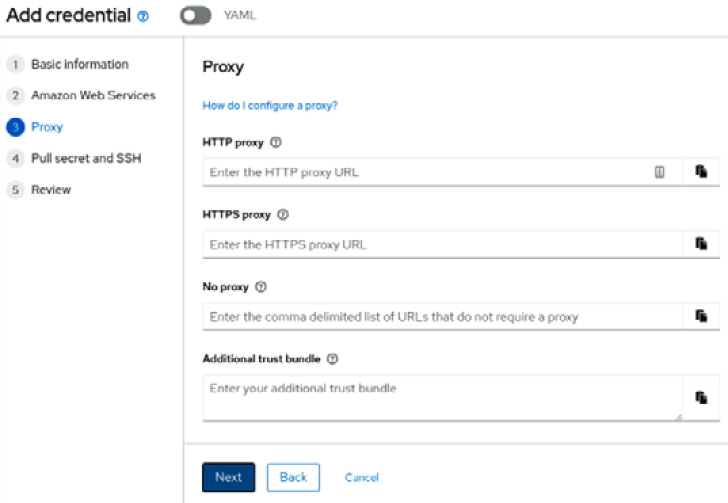
Figure 11.17 – Proxy configuration
- Log in to the console.redhat.com portal using your Red Hat credentials and go to the OpenShift | Downloads menu option. Scroll down in the Tokens section and click on the Copy button next to Pull Secret.

Figure 11.18 – Getting a pull secret
- Go back to ACM and paste the pull secret in the required field. Use an existing or create a new SSH key and paste it into the SSH private key and SSH public key fields.
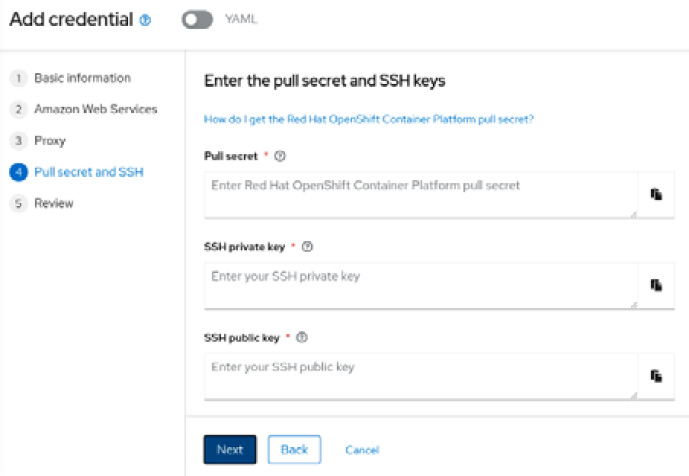
Figure 11.19 – Inputting the pull secret and SSH keys
Note
You can use the following command in a Linux workstation to generate a new SSH key if needed:
ssh-keygen -t ed25519 -N '' -f new-ssh-key
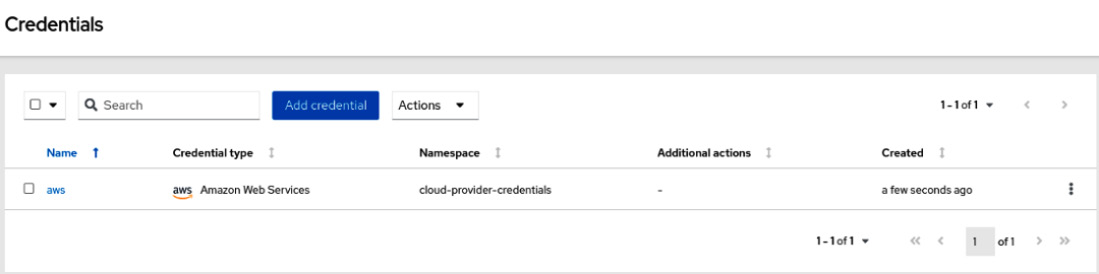
Figure 11.20 – Credential added
Now, let’s go ahead and deploy a new cluster using this credential. Follow this process to deploy the cluster using ACM:
- Access the Infrastructure | Clusters menu and click on the Create cluster button.

Figure 11.21 – Creating a cluster

Figure 11.22 – Selecting the installation type

Figure 11.23 – Filling out the cluster details
- Input the AWS region and the machine number and size.

Figure 11.24 – Node pools

Figure 11.25 – Network configurations
- Input the proxy configurations, if needed.

Figure 11.26 – Proxy configuration
- You can also use Ansible to run playbooks and automate infrastructure requirements you may have as part of your deployment process. We will not dig into the Ansible integration in this book, but you can find good references to it in the Further reading of this chapter.

Figure 11.27 – Ansible automation hooks
- Review the information provided and click on the Create button if everything is correct.
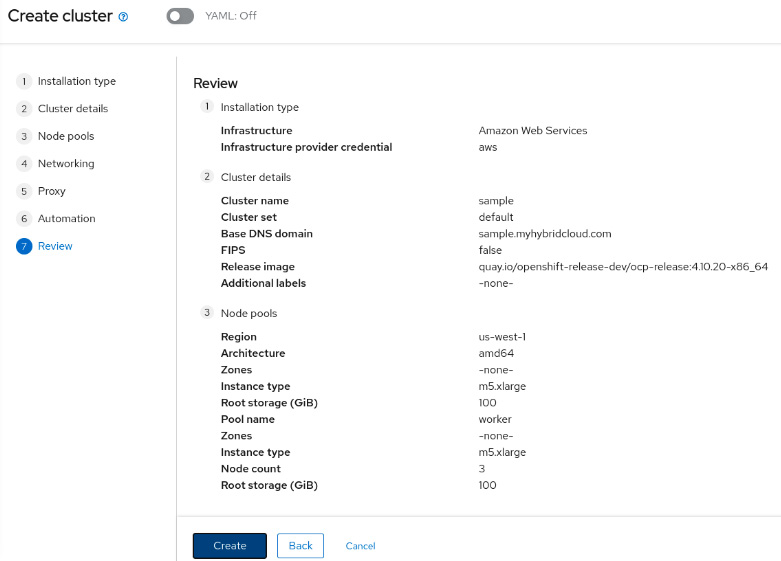
Figure 11.28 – Reviewing a cluster
- You will be redirected to the overview page, where you can inspect the installation process. The deployment process usually takes between 30 and 60 minutes depending on the provider and region.

Figure 11.29 – Cluster overview
- It is recommended that you add labels in your clusters according to some organizational structure to be used later with PlacementRules. We are going to add the env=dev label in this cluster and use it in the next section when we deploy an application into a remote cluster using ACM. To do so, click on the pencil icon next to the Labels section.

Figure 11.30 – Adding new labels
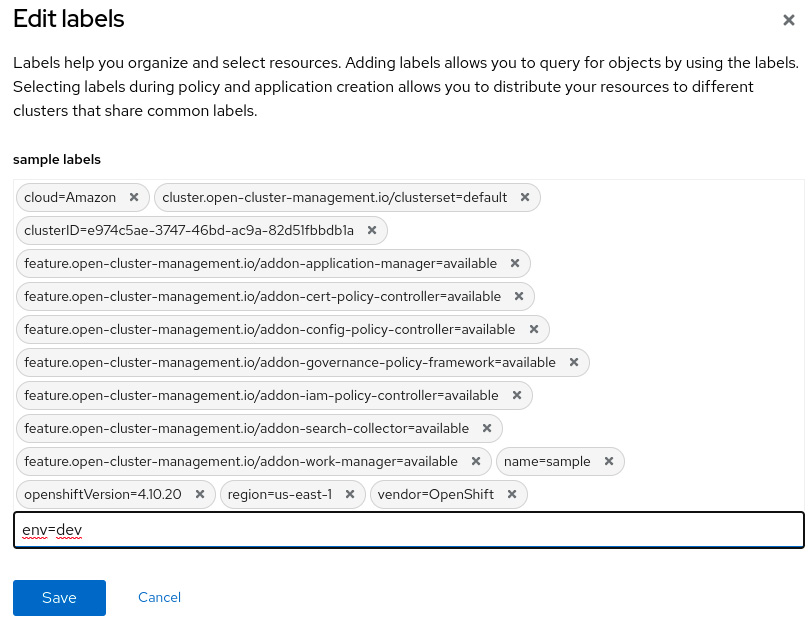
Figure 11.31 – Adding a label in a cluster
As you can see, the OpenShift cluster deployment process is straightforward! In the next section, you will see how ACM can also help you to deploy an application into multiple clusters using its embedded deployment mechanism or also using it integrated with OpenShift GitOps (Argo CD).
Managing applications using Red Hat ACM
One of the greatest benefits of ACM is providing a single and simple way to view applications that are deployed among different clusters. You can also deploy an application into multiple clusters using two different approaches:
- Using the embedded Application Subscription deployment model
- Using OpenShift GitOps (Argo CD) and ApplicationSets
We will walk through the process of each approach in this section.
Application Subscription model
This model is embedded in ACM and doesn’t depend on anything other than ACM itself. In the Application Subscription model, you will define an Application object that subscribes (Subscription) to one or more Kubernetes resources (Channel) that contain the manifests that describe how the application is deployed. The application will be deployed in the clusters defined in the placement rules.
The following is a diagram that explains how this model works:
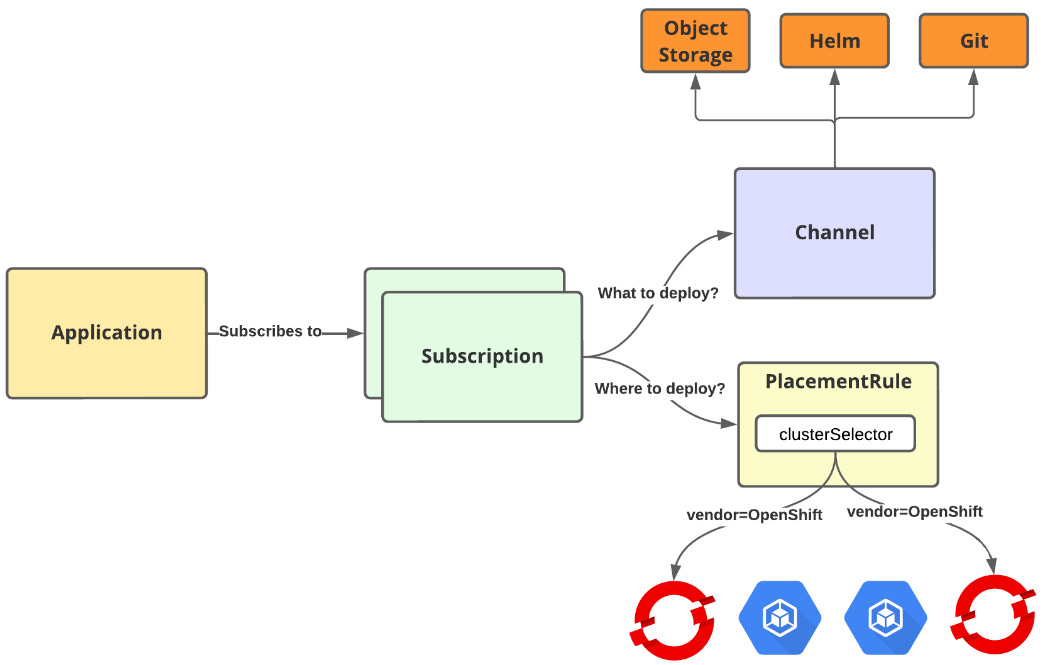
Figure 11.32 – ACM Application Subscription model
Let’s get back to the sample application we used in the previous chapter and create the ACM objects to check what the application deployment model looks like.
Channels (what to deploy)
Define the source repositories used to deploy an application. It can be a Git repository, Helm release, or object storage repository. We are going to use the following YAML manifest to point out to our Git repository:
apiVersion: apps.open-cluster-management.io/v1
kind: Channel
metadata:
  name: cloud-api-github
  namespace: clouds-api-dev
spec:
  pathname: https://github.com/PacktPublishing/OpenShift-Multi-Cluster-Management-Handbook.git #[1]
  type: Git
#[1] highlights the URL to the Git repository that contains the application deployment manifests.
After the Channel object, we need to create the PlacementRule object, which will be used with the application deployment.
Placement rules (where to deploy)
Placement rules define the target clusters where the application will be deployed. They are also used with policies. Remember that we added the env=dev label to the cluster we provisioned earlier. We are going to use it now to define our PlacementRule object:
apiVersion: apps.open-cluster-management.io/v1
kind: PlacementRule
metadata:
  name: cloud-api-placement
  namespace: clouds-api-dev
  labels:
    app: cloud-api
spec:
  clusterSelector:
    matchLabels:
      env: dev #[1]
#[1] highlights the cluster selector based on labels. It will instruct ACM to deploy the application in all clusters that have the env=dev label.
We are now ready to create the Subscription object.
Subscriptions
Subscriptions are used to subscribe clusters to a source repository and also define where the application will be deployed. They work like a glue between the deployment manifests (Channel) and the target clusters (PlacementRule). The following shows what our Subscription object looks like:
apiVersion: apps.open-cluster-management.io/v1
kind: Subscription
metadata:
  name: cloud-api-subscription
  namespace: clouds-api-dev
  annotations:
    apps.open-cluster-management.io/git-path: sample-go-app/clouds-api/k8s/ #[1]
  labels:
    app: cloud-api #[2]
spec:
  channel: clouds-api-dev/cloud-api-github #[3]
  placement:
    placementRef: #[4]
      name: cloud-api-placement
      kind: PlacementRule
In the preceding code, we have highlighted some parts with numbers. Let’s take a look:
- #[1]: Path for deployment manifests on Git.
- #[2]: Subscription labels. Used later with the Application object.
- #[3]: Channel that contains the Git repository, Helm, or object storage.
- #[4]: PlacementRule, which describes where the application will be deployed.
Finally, we can now create the ACM Application object.
Applications
Applications are objects used to describe a group of ACM resources that are needed to deploy an application. The following is the Application object of our sample:
apiVersion: app.k8s.io/v1beta1
kind: Application
metadata:
  name: cloud-api
  namespace: clouds-api-dev
spec:
  componentKinds:
    - group: apps.open-cluster-management.io
      kind: Subscription
  descriptor: {}
  selector:
    matchExpressions: #[1]
      - key: app
        operator: In
        values:
          - cloud-api
#[1] highlights subscriptions used by this application. In this case, subscriptions that have the app=cloud-api label will be used.
Now that we understand the objects involved in application deployment, let’s create them on ACM.
Deploying the application
Deploying the objects is as simple as running an oc apply command from the hub cluster. Run the following commands from the hub cluster to deploy the application:
$ git clone https://github.com/PacktPublishing/OpenShift-Multi-Cluster-Management-Handbook.git
$ cd OpenShift-Multi-Cluster-Management-Handbook/
$ oc apply -k chapter11/acm-model
namespace/clouds-api-dev created
application.app.k8s.io/cloud-api created
channel.apps.open-cluster-management.io/cloud-api-github created
placementrule.apps.open-cluster-management.io/cloud-api-placement created
subscription.apps.open-cluster-management.io/cloud-api-subscription created
You can check the application status by running the following command:
$ oc get application -n clouds-api-dev
NAME        TYPE   VERSION   OWNER   READY   AGE
cloud-api                                    5m48s
You can alternatively deploy the application using the ACM web console. To do so, perform the following process:
- Access the Applications | Create application | Subscription menu option.
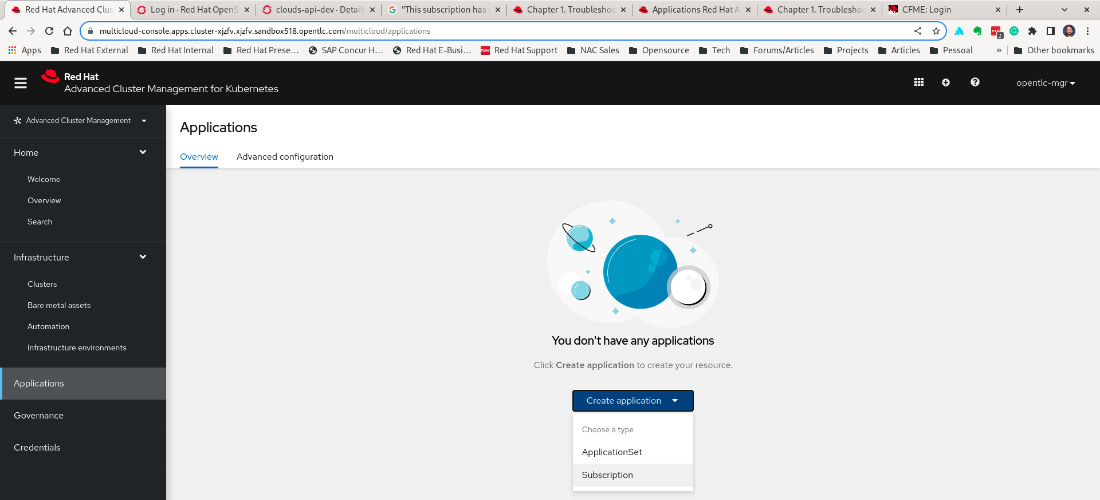
Figure 11.33 – Deploying an application using ACM
- Fill out the form with the application data, including Name and Namespace, choose the Git repository, and then click on the Create button.
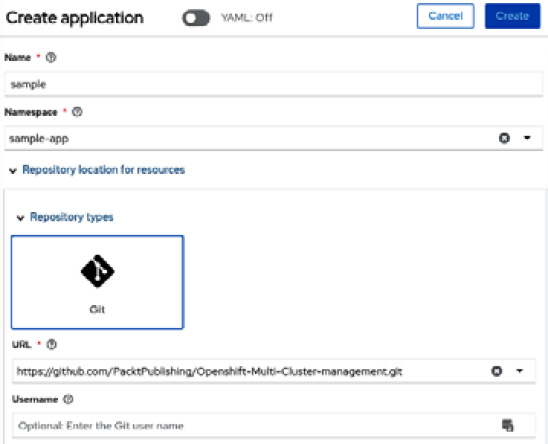
Figure 11.34 – Filling out the application data

Figure 11.35 – Placement configuration details

Figure 11.36 – Application topology
Now that you know how to deploy an application using the embedded ACM subscription, let’s see how we would do the same using OpenShift GitOps (Argo CD).
OpenShift GitOps (Argo CD) and ApplicationSets
As already mentioned, you can alternatively deploy applications using ACM integrated with OpenShift GitOps (Argo CD) through an object called an ApplicationSet. In the Configuring Argo CD for multi-cluster section of Chapter 10, OpenShift GitOps – Argo CD, we saw how to use the argocd command-line option to add managed clusters to Argo CD. You don’t need to do that when you use ACM, as ACM manages the external clusters and can add them to Argo CD for you. Instead, with ACM you will need to define the following objects in the hub cluster, in order to instruct ACM to configure Argo CD and add the managed clusters for you:
- ManagedClusterSet: Group of clusters that share some common configurations, such as user access control and multi-cluster networking.
- ManagedClusterSetBinding: Binds ManagedClusterSet to a namespace. In this particular case, we need to bind ManagedClusterSet to the openshift-gitops namespace.
- Placement: Resource that defines predicates to select ManagedCluster from ManagedClusterSets to bind to GitOpsCluster.
- GitOpsCluster: Register to OpenShift GitOps a group of managed clusters.
We have sample YAML for all the previously listed objects in the chapter11/argocd folder of our GitHub repository. Go ahead and use the following commands to apply those objects in your hub cluster:
$ git clone https://github.com/PacktPublishing/OpenShift-Multi-Cluster-Management-Handbook.git
$ cd OpenShift-Multi-Cluster-Management-Handbook/
$ oc apply -k chapter11/argocd
gitopscluster.apps.open-cluster-management.io/argo-acm-clusters created
managedclusterset.cluster.open-cluster-management.io/all-clusters created
managedclustersetbinding.cluster.open-cluster-management.io/all-clusters created
placement.cluster.open-cluster-management.io/all-clusters created
Now, access your ACM and go to Clusters | Cluster sets (tab) | all-clusters | Managed clusters (tab), and then click on the Manage resource assignments button. On this page, select all your clusters and click on the Review button and then Save.

Figure 11.37 – Adding clusters to a cluster set
Finally, we can go ahead and create an ApplicationSet that uses a Placement object to deploy the application in all clusters that have the env=dev label:
$ oc apply -f chapter11/argocd/applicationset.yaml
applicationset.argoproj.io/cloud-api created
placement.cluster.open-cluster-management.io/cloud-api-placement created
After a couple of minutes, you should see the application deployed from the application Overview/Topology view.

Figure 11.38 – ApplicationSet topology
The Topology view allows you to see your application deployed into multiple clusters from a single pane. This feature is really helpful for applications that are deployed over several clusters, as you can easily see how the application is behaving in all the clusters from a single and simple view.
This concludes our overview of the application life cycle management feature of Red Hat ACM. In this section, you have seen how ACM can help you deploy applications into multiple managed clusters by using either the Application Subscription model or OpenShift GitOps (Argo CD). Next, you are going to see how to use policies on ACM to keep your clusters compliant according to your organization’s business and security needs.
Governance using Red Hat ACM
We have been discussing the challenges that large enterprises face in keeping different environments consistent a lot in this book. The ACM governance feature can play a crucial role in your strategy to maintain secure and consistent environments, no matter where they are running. The ACM governance feature allows you to define policies for a set of clusters and inform or enforce when clusters become non-compliant.
To define policies in ACM, you need to create three objects:
- Policy: Define the policy and remediation action that will be performed (inform or enforce).
- PlacementBinding: Bind a policy into a PlacementRule.
- PlacementRule: Rules that define which clusters the policy will be applied to.
You can see an example of a policy to check etcd encryption in all managed clusters on our GitHub. The following diagram shows what the interaction between the ACM policy objects looks like:

Figure 11.39 – ACM policy model
Run the following command to create the policy:
$ git clone https://github.com/PacktPublishing/OpenShift-Multi-Cluster-Management-Handbook.git
$ cd OpenShift-Multi-Cluster-Management-Handbook/
$ oc apply -k chapter11/governance
namespace/acm-policies-sample created
placementrule.apps.open-cluster-management.io/placement-policy-etcdencryption created
placementbinding.policy.open-cluster-management.io/binding-policy-etcdencryption created
policy.policy.open-cluster-management.io/policy-etcdencryption created
Now, access the Governance feature on the ACM web console to check the policy we just put in place.

Figure 11.40 – ACM governance console
Click on Policies and access policy-etcdencryption to see the details.

Figure 11.41 – ACM governance – violation details
In the Further reading section of this chapter, you will find a link to a repository that contains several reusable policies that you can use as is or as samples to create your own policies.
As you have seen, the ACM governance feature is simple to understand and use. Now think about the policies that you would like to have monitored or enforced in your clusters and start deploying your own policies!
Multi-cluster observability with Red Hat ACM
Multicluster observability is an ACM feature that is intended to be a central hub for metrics, alerting, and monitoring systems for all clusters, whether hub clusters or managed clusters.
As this tool handles a large amount of data, it is recommended to provide fast disks as its storage backend. Red Hat has tested and fully supports the solution if adopted in conjunction with Red Hat OpenShift Data Foundation.
Although Red Hat recommends doing so, the prerequisite is a storage solution that provides object/S3-type storage, such as those commonly found in most cloud providers (such as Amazon S3).
Prerequisites
Since observability is a feature of an ACM operator, there aren’t many prerequisites. The following are the requirements:
- Enable the observability feature on a connected Red Hat OpenShift cluster.
- Configure an object store from a storage provider. Some of the supported object storage types are as follows:
- Red Hat Container Storage
- AWS S3
- Red Hat Ceph (S3-compatible API)
- Google Cloud Storage
- Azure Storage
- Red Hat on IBM Cloud
Important Note
It is important to configure encryption when you have sensitive data persisted. The Thanos documentation has a definition of supported object stores. Check the link in the Further reading section at the end of this chapter.
Enabling the observability service
Since observability runs on top of ACM, its creation depends on a Custom Resource (CR) that will trigger the creation of the Multicluster Observability instance.
The following diagram demonstrates a high-level architecture of the objects involved in the observability solution. It serves as a reference for which objects are created when enabling the observability service:

Figure 11.42 – Creating MultiClusterHub
Follow these instructions to enable multicluster observability:
- For this example, we used an OpenShift hub cluster deployed on top of Microsoft Azure, so you must to set some variables in a terminal that will help you configure Azure dynamic storage to be used as the storage solution:
$ LOCATION=eastus #[1]
$ RESOURCEGROUP=aro-rg #[2]
$ CLUSTER=MyHubCluster #[3]
$ STORAGEBLOB=observsto #[4]
$ az storage account create --name $STORAGEBLOB --resource-group $RESOURCEGROUP --location $LOCATION --sku Standard_ZRS --kind StorageV2 #[5]
$ az ad signed-in-user show --query objectID –o tsv | az role assignment create --role "Storage Blob Data Contributor" --assignee @- --scope "subscriptions/11111111-2222-a1a1-d3d3-12mn12mn12mn/resourceGroups/$RESOURCEGROUP/providers/Microsoft.Storage/storageAccountes/$STORAGEBLOB" #[6]
$ az storage container create --account-name $STORAGEBLOB --name container-observ --auth-mode login #[7]
"created": true
$ az storage account show-connection-string –name $STORAGEBLOB
"connectionString": "DefaultEndpointsProtocol=https;EndpointSuffix=conre.windows.net;AccountName=observsto;AccountKey=sfsfoefoosdfojevntoaa/dsafojosjfsodfsafdsaf==" #[8]
Let’s take a look at what the highlighted numbers mean:
- #[1]: Hub cluster zone for Microsoft Azure
- #[2]: Resource group name for Microsoft Azure
- #[3]: Cluster name for the hub cluster
- #[4]: Storage account name
- #[5]: Command to create the storage on Microsoft Azure
- #[6]: Attribute storage role for OpenShift to handle storage operations for observability
- #[7]: This command creates a container inside the storage blob account, that will be used to store the data for ACM observability
- #[8]: Azure CLI instruction to get the connection string for storage
- Create a namespace in the hub cluster for observability. We will create the namespace in the terminal; otherwise, you can also create it in the OpenShift web console UI:
$ oc create namespace open-cluster-management-observability
- Now, it is time to create a secret with the connection string we got in the previous step (instruction #[8]). The complete YAML files are available in our GitHub repository for your reference and use:
$DOCKER_CONFIG_JSON='oc extract secret/pull-secret –n openshift-config --to=.' #[1]
.dockerconfigjson
$ oc create secret generic multiclusterhub-operator-pull-secret –n open-cluster-management-observability --from-literal=.dockerconfigjson="DOCKER_CONFIG_JSON" --type= kubernetes.io/dockerconfigjson #[2]
(.. omitted ..)
thanos.yaml: |
type: AZURE
config:
storage_account: observsto #[3]
storage_account_key: sfsfoefoosdfojevntoaa/dsafojosjfsodfsafdsaf== #[3]
container: container-observ #[3]
endpoint: blob.core.windows.net
max_retries: 0
(.. omitted ..)
Let’s take a look at what the highlighted numbers mean:
- #[1]: Environment variable for current Docker pull secret.
- #[2]: Inject the dockerconfigjson file into the secret for multiclusterhub.
- #[3]: Data from previous commands
Configuration file available at https://github.com/PacktPublishing/OpenShift-Multi-Cluster-Management-Handbook/blob/main/chapter11/acm-observability/thanos-object-storage.yaml.
- Now you have the required storage to be used with observability, so it’s time to create a MulticlusterObservability object. Go back to the Advanced Cluster Management for Kubernetes operator, which we installed at the beginning of this chapter, access the MultiClusterObservability tab, and click on the Create MultiClusterObservability button.
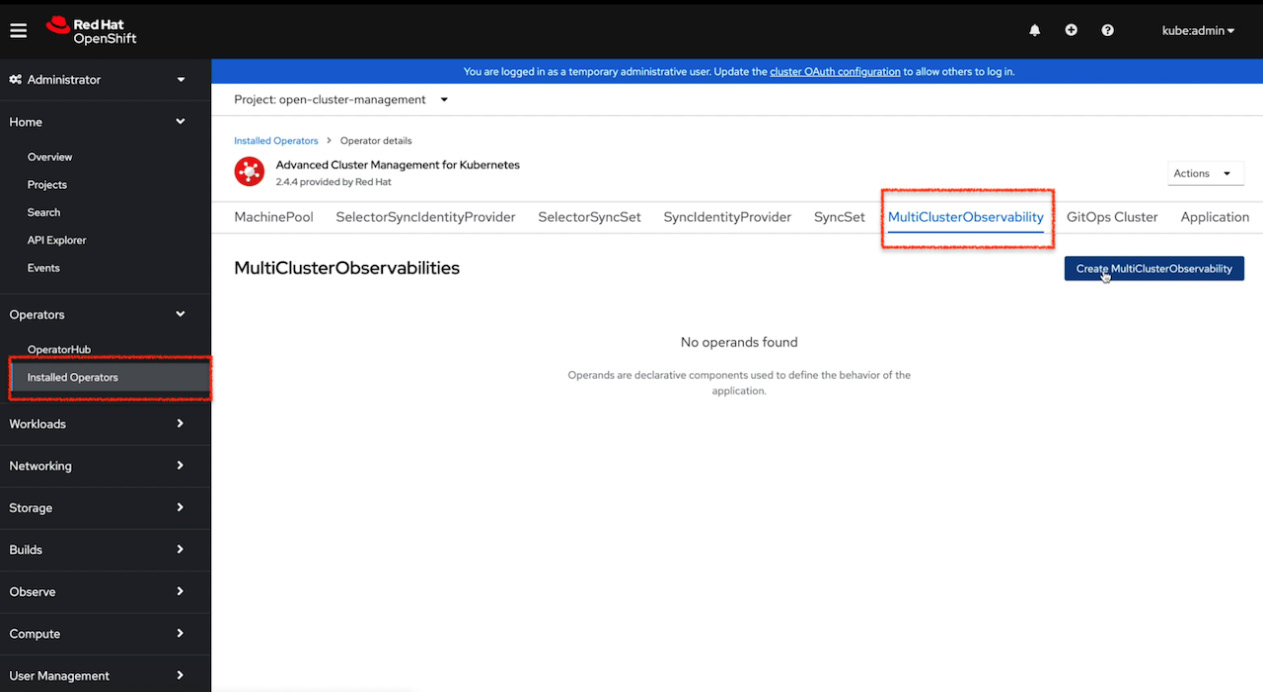
Figure 11.43 – MultiClusterObservability creation
- Keep the CR as default and then click on Create.

Figure 11.44 – MultiClusterObservability
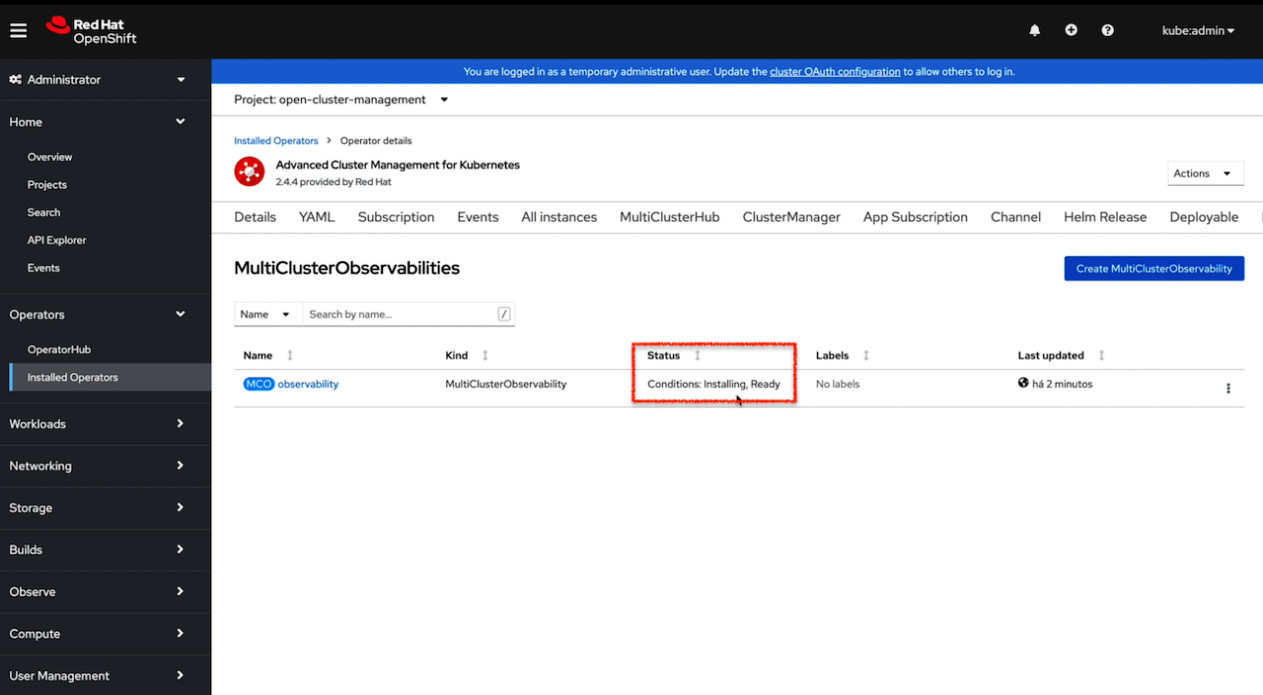
Figure 11.45 – Configuring an instance for MultiClusterObservability
- Now you can see, upon navigating to Main Menu | Overview, a route for Grafana’s observability dashboard.

Figure 11.46 – Configuring an instance for MultiClusterObservability
#[1]: Notice that Observability option is now available in Grafana link.
- Click on Grafana to see some great dashboards that aggregate metrics that come from multiple clusters.
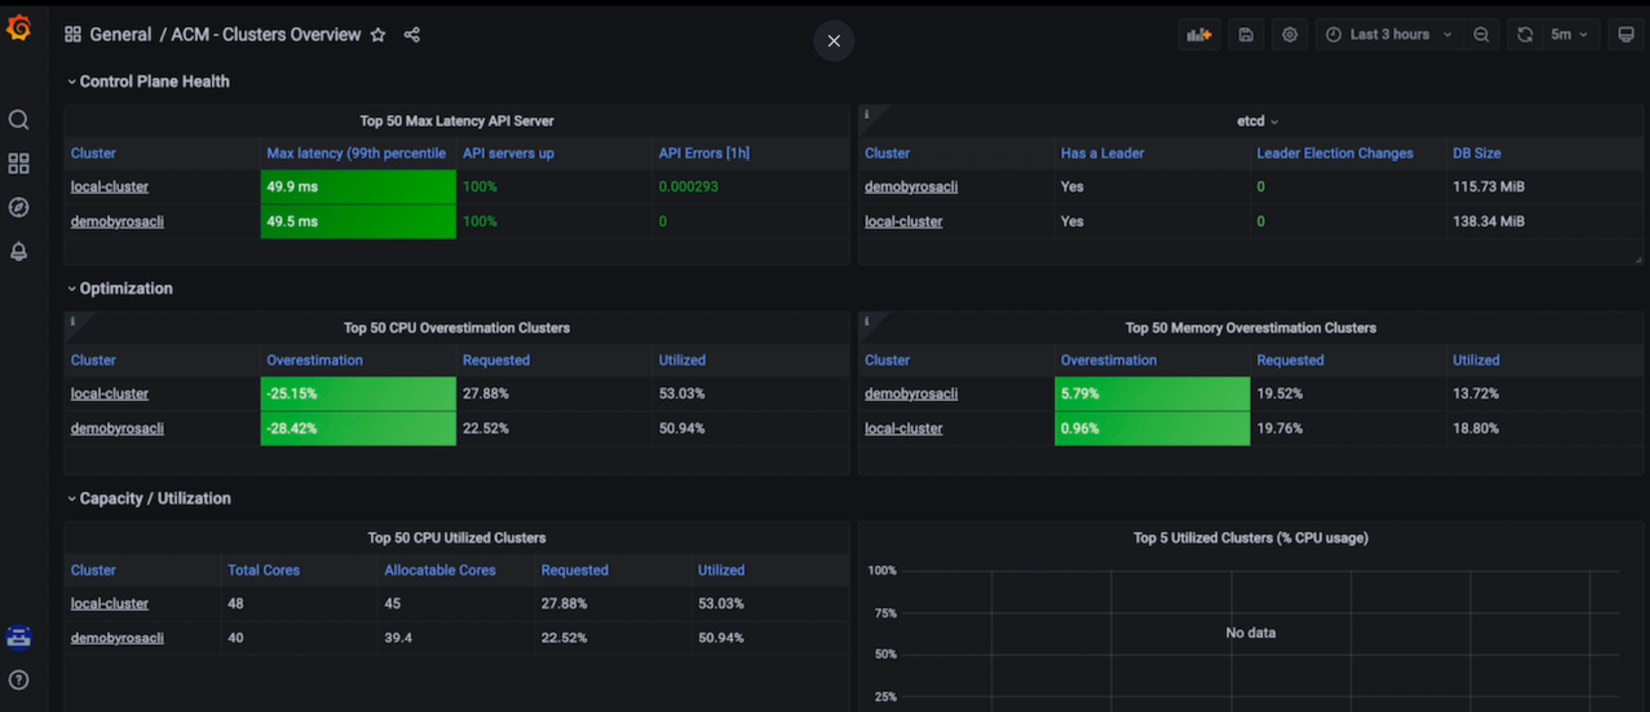
Figure 11.47 – MultiClusterObservability dashboard view sample
Now, you can count on this amazing ACM feature to help you and your organization monitor all your Kubernetes managed clusters from a central pane, independent of the infrastructure or cloud provider they are running over. In the next subsection, we will show you an option that gives you even more control over your cluster.
Configuring AlertManager to send alerts
As we have seen so far, observability can be a great ally for monitoring all your clusters from a central view, but now we will go even further and show you the icing on the cake, that will be one thing more to help you to manage your clusters.
As shown in Figure 11.42, AlertManager is a resource that is part of the observability architecture. We will show a sample now that you can use to enable this feature and get alerts from all managed clusters.
AlertManager is a tool that can send alerts to a set of other systems, such as email, PagerDuty, Opsgenie, WeChat, Telegram, Slack, and also your custom webhooks. For this example, we will use Slack, a short-messaging tool, as a receiver for all of our alerts.
Prerequisites
First, you will need the Slack app to set up alerts, and then point to https://api.slack.com/messaging/webhooks and follow the instructions to create and configure a channel. When you finish configuring the Slack app, you will get a webhook endpoint similar to the following: https://hooks.slack.com/services/T03ECLDORAS04/B03DVP1Q91D/R4Oabcioek. Save the webhook address in a safe place as it will be used in the next steps.
Configuring AlertManager
To configure AlertManager, you will need to create a new file named alertmanager.yaml. This file will have the webhook that you saved previously. The complete YAML files are available in our GitHub repository for your reference and use (github repository at https://github.com/PacktPublishing/OpenShift-Multi-Cluster-Management-Handbook/blob/main/chapter11/acm-observability/alertmanager.yaml):
global:
  slack_api_url: 'https://hooks.slack.com/services/T03ECLDORAS04/B03DVP1Q91D/R4Oabcioek' #[1]
  resolve_timeout: 1m
route:
  receiver: 'slack-notifications'
(.. omitted ..)
  routes:
    - receiver: slack-notifications #[2]
      match:
        severity: critical|warning #[3]
receivers:
- name: 'slack-notifications'
  slack_configs:
  - channel: '#alertmanager-service' #[4]
    send_resolved: true
    icon_url: https://avatars3.githubusercontent.com/u/3380462
    title: |-
     [{{ .Status | toUpper }}{{ if eq .Status "firing" }}:{{ .Alerts.Firing | len }}{{ end }}] {{ .CommonLabels.alertname }} for {{ .CommonLabels.job }}
(.. omitted ..)
In the preceding code, we have highlighted some parts with numbers. Let’s take a look:
- #[1]: Webhook Slack API URL
- #[2]: Name of the receiver for alerts
- #[3]: Filter critical or warning alerts
- #[4]: Slack channel inside the workspace
The next step is to apply the new alertmanager.yaml file to the ACM observability namespace:
$ oc -n open-cluster-management-observability create secret generic alertmanager-config --from-file=alertmanager.yaml --dry-run=client -o=yaml | oc -n open-cluster-management-observability replace secret --filename=-
The alertmanager.yaml file must be in the same execution directory. Wait until the new AlertManager pods are created and you will receive new [Firing] or [Resolved] alerts on the configured channel. See an example in the following screenshot:

Figure 11.48 – AlertManager multicluster alerts
Here we go; we have our AlertManager set and sending alerts to a Slack channel! Therefore, in this section, you have seen the observability feature, from the installation to configuration and use. This should help you in your multi-cluster journey to monitor all your clusters, no matter which provider they are running in.
Summary
In this chapter, you have been introduced to Red Hat ACM and have seen an overview of its features and how it can help you manage several clusters. Now you understand that Red Hat ACM provides features to manage multiple clusters, keep them compliant with the policies you define for them, deploy workloads into many of them at once, and also monitor all of them from a central pane.
We also walked through the ACM installation process, provisioned a new cluster on AWS using ACM, saw how to deploy an application by using either the embedded ACM Application Subscription model or integrated with Argo CD, had a brief overview of the ACM governance feature, and, finally, enabled the observability feature to monitor multiple clusters and aggregate metrics on ACM.
In today’s world, handling multiple clusters over multiple providers, either on-premises or in the cloud, is a reality in most companies; therefore, a multi-cluster management tool is a must-have. Red Hat ACM can provide you with the features you need to manage all clusters from a centralized place. We encourage you to explore and start using ACM now to reap all the benefits of this great tool.
Continue to the next chapter to learn how Red Hat Advanced Cluster Security can help you to keep your Kubernetes and OpenShift clusters secure.
Further reading
Looking for more information? Check out the following references to get more information about Red Hat ACM:
- Red Hat Advanced Cluster Management documentation: https://access.redhat.com/documentation/en-us/red_hat_advanced_cluster_management_for_kubernetes/2.5
- Red Hat ACM supportability matrix: https://access.redhat.com/articles/6663461
- Red Hat Advanced Cluster Management observability prerequisites: https://access.redhat.com/documentation/en-us/red_hat_advanced_cluster_management_for_kubernetes/2.3/html-single/observability/index#prerequisites-observability
- Supported object stores for Thanos: https://thanos.io/tip/thanos/storage.md/#supported-clients
- Red Hat ACM policy collection: https://github.com/open-cluster-management/policy-collection
- Integrating Red Hat ACM with Ansible for cluster deployment and upgrade: https://access.redhat.com/documentation/en-us/red_hat_advanced_cluster_management_for_kubernetes/2.5/html/clusters/managing-your-clusters#ansible-config-cluster
- Integrating Red Hat ACM with Ansible for application management: https://access.redhat.com/documentation/en-us/red_hat_advanced_cluster_management_for_kubernetes/2.5/html/applications/managing-applications#setting-up-ansible
- Creating policy violation automation using Ansible: https://access.redhat.com/documentation/en-us/red_hat_advanced_cluster_management_for_kubernetes/2.5/html/governance/governance#configuring-governance-ansible