
Chapter 3: Settling into the User Interface
In this chapter, we'll start by exploring Animate with an overview of the general workspace and explore how to get the most out of working with the software through customization. While Animate does come bundled with a number of workspaces targeting common workflows, it's also possible to create your own custom setup. You'll see how to choose which tools appear in the Tools panel and which ones are hidden away, in order to keep your go-to tools immediately present and accessible. We'll also look into customizing the timeline controls for more rapid animating and keyframe management. Finally, we'll have a look at the mechanisms that are in place for managing and preserving your finely tuned preferences. Animate boasts a very customizable experience across all aspects of the program!
After reading this chapter, you will be able to do the following:
- Achieve a working recognition of the general user interface (UI).
- Understand how to manage and customize the workspace to your liking.
- Learn how to manipulate the available tools and timeline options.
- Gain the ability to manage, export, and import Animate preferences.
Technical Requirements
You will need the following software and hardware in order to complete this chapter:
- Adobe Animate 2022 (version 22.0 or above).
- Refer to the Animate system requirements page for hardware specifications: https://helpx.adobe.com/animate/system-requirements.html.
Exploring the Animate interface
While Adobe does perform an interface refresh every 5 years or so on most of its creative software, many of the various panels and tools within Animate should be easily recognizable to those who have only had experience with Adobe Flash Professional or even Macromedia Flash. Animate has long been admired for the general workflows within the application and it would be a shame to break a good experience!
Note
Of course, that is not to say that the Animate UI hasn't changed and improved over the years. In fact, the 2020 version of Animate saw a complete interface refresh that was tweaked and improved upon for Animate 2021 and somewhat for Animate 2022 as well.
We'll now look over some of the more persistent interface elements that are part of any Animate workspace, no matter what type of project you are working on.
Important User Interface Elements
While it is absolutely true that the Animate interface can be customized to create hundreds of variants depending upon specific user preferences and workflows, there are certain elements of the general interface that remain so important as to be included in just about any imaginable configuration.
We'll now take some time to identify and provide some helpful information regarding these primary elements.
The Document Panel
The largest visual portion of the Animate interface is the Document panel, which includes both the Stage and Pasteboard:
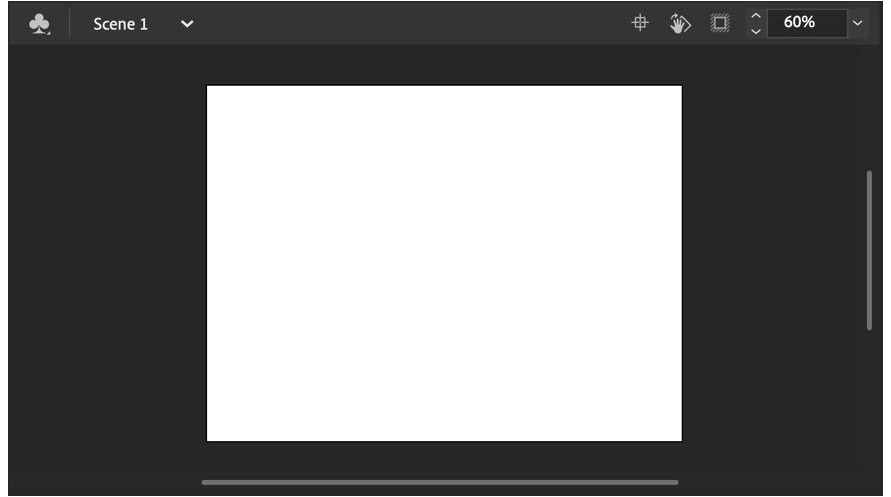
Figure 3.1 – Document panel with Stage and Pasteboard
Each document in Animate opens within the Document panel and multiple documents can be open simultaneously, through a system of tabs that display the document name above this panel.
Each document has both a Stage and a Pasteboard surrounding it. The Stage is effectively a viewable area through which any visual elements are displayed as you work on your project, and when published. This is the only portion that will be visible to the viewer once a document has been published or exported.
The Pasteboard is simply the area around the Stage. While objects on the Pasteboard are visible as you author your content, once published, viewers are not able to see anything on the Pasteboard unless these elements are animated across the Stage.
Tip
You can show or hide content on the Pasteboard when working in Animate by toggling the Clip content outside the stage button at the top right of the Document panel. It's just to the left of the document-level zoom percentage.
The Timeline Panel
Just as important as the Document panel is the Timeline panel, which contains your layers, frames, keyframes, tweens, and a full set of tools to manage these items along with project playback controls, as illustrated in the following screenshot:

Figure 3.2 – The Animate Timeline
The Timeline is where you control all of the layers within your project. They behave similarly to other Adobe creative applications, such as Photoshop, in that the content of layers at the top of the layer stack will obscure content within the layers beneath. Layers can be created and managed from tools within this panel.
Each layer has a number of frames that span the timeline. These frames can be basic frames to extend the content of that layer across time, keyframes, which designate some sort of change in properties, and various types of tweens to create motion across these frames.
Finally, we have a set of frame management, tween creation, and playback tools available here as well. We'll see later on in this chapter how to customize these tools.
The Tools Panel
When it comes to asset creation and manipulation within Animate, the Tools panel contains a set of varied selection, drawing, manipulation, and specialized creative tools for you to choose from, as illustrated in the following screenshot:

Figure 3.3 – The Tools panel
By default, certain tools are exposed, and certain others are hidden, requiring you to edit your Tools panel. Other tools are grouped among one another, requiring a long press to expose the full array. This can all be managed through the included customization dialog, which provides complete control over your entire set of tools.
The various tools are grouped into distinct sections, by default. There exists a visible separator between each section. It is also possible to widen the Toolbar so that there are multiple columns instead of just one as the default. Simply hover over the right edge and drag the Toolbar toward the Stage to widen it.
Selection tools include the Selection, Subselection, Free Transform, and Lasso tools:
- The following section includes various brush and shape tools, including the Fluid Brush, Classic Brush, Eraser, Rectangle, Oval, PolyStar, and Line tools.
- Next, we have a mix of variable tools, including the Pen, Text, Paint Bucket, Ink Bottle, and Asset Warp tools.
- Below that are the Hand and Zoom tools, which control the panning and zooming of your Stage within an open document.
The Tools panel also includes a set of Fill and Stroke selection tools, followed by an options area that can change to elevate certain tool properties, as illustrated in the following screenshot:

Figure 3.4 – Fill, stroke, and tool options shown with a wide Toolbar
This area is dependent upon the selected tool and changes depending upon which tool is currently chosen.
Note
Certain tools are only available with certain document types. For instance, the 3D Transform tool is only available with ActionScript 3.0 document types and is not available with any other type. It will appear grayed out in other document types, letting you know that it is unable to be used.
We'll see how to customize the tools that are visible as part of the Tools panel later in this chapter.
The Properties Panel
The Properties panel is essentially an ever-changing hub through which you can adjust the various attributes of anything you could possibly want within your project:

Figure 3.5 – The Properties panel
In older versions of Animate, it was a bit tricky to get to the set of properties you wanted at any given time, but no more! Now, a tabbed interface allows easy switching between the Tool, Object, Frame, and Doc (Document) properties, if available. Here's some further information about these properties:
- Tool properties include options for the currently selected tool in the Tools panel.
- Object properties appear once you've selected any object on the Stage. They often include properties for position and scale, but otherwise vary depending upon the type of object selected.
- Frame properties allow you to adjust both frame- and tween-specific attributes. These can include such things as binding a sound file to a frame span or modifying the specific easing options of a tween.
- Finally, Document properties involve everything to do with general document settings, including width, height, background color, and frames-per-second (FPS). This section will also include all your Publish settings.
The Properties panel cannot be customized much, though the content will constantly adapt to your current needs in light of the available options. One thing you can do is expand and collapse each properties section or even rearrange the section stacking order.
The Library and Assets Panels
Another set of important panels are the Library and Assets panels. Both of these panels are used to manage various objects within your Animate projects, but their purpose and use are entirely different.
While the Library panel has been around for quite some time, the Assets panel is entirely new:

Figure 3.6 – The Library and Assets panels
The Library panel is used to manage bitmap images, audio files, symbols, and other complex object types within your Animate document. It is important to note that this panel represents the project library and that each Animate document has its own library distinct from other documents. Therefore, objects in the Library panel are only accessible for the document they are associated with.
The Assets panel, on the other hand, exists apart from any particular Animate document in particular. It contains a shared set of assets that can be accessed across any document that you might be using and is in no way tied to a project, but rather is bound to the Animate software itself. Once you select and make use of any objects available in the Assets panel, those objects will then appear within that document's Library panel as well.
We will now move on to exploring the Animate start settings and how to manage them after your first run.
Choosing Your Start Settings
Apart from the general, persistent interface settings and panels previously outlined, how the Adobe Animate interface appears for you will largely depend upon a single choice made when you first run the application from a fresh install. A dialog appears before anything else and asks a simple question, New to Animate?:
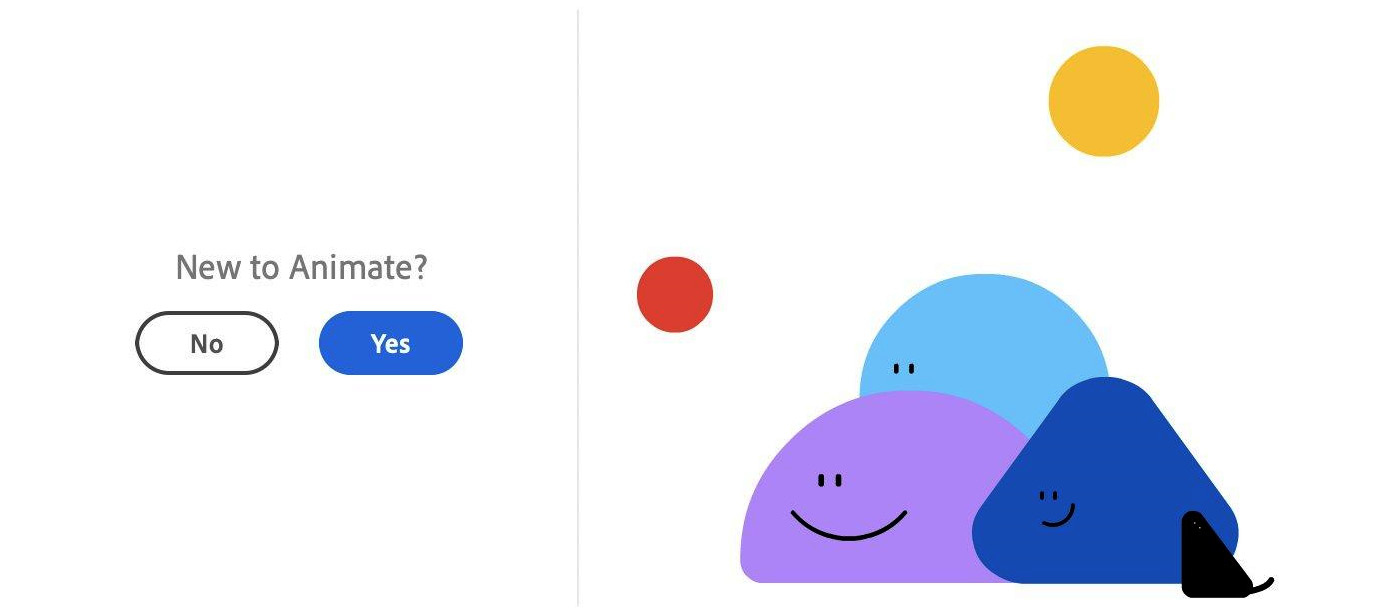
Figure 3.7 – The New to Animate? decision dialog
Answering Yes on this screen will create a default workspace within Animate that is simplified and caters to new users. Answering No will present a more traditional experience within the software.
You will either be taken to the Basic workspace with Beginner Preferences enabled or to the Essentials workspace with Expert Preferences enabled, as indicated in the following screenshot:
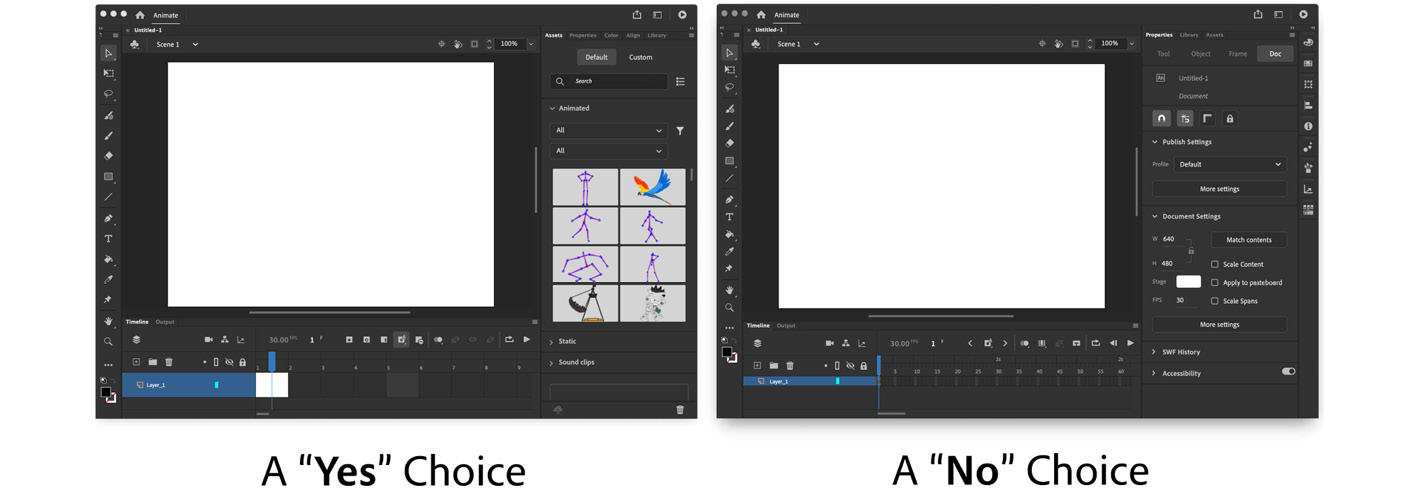
Figure 3.8 – The result of your choice
There are notable differences in the interface layout and preferences depending upon your choice. For instance, the Basic workspace includes far fewer panels and the overall UI elements are given a Comfortable appearance, where the various icons, panel sections, and other elements are given a bit more space between them all. In addition, the Assets panel is given prominent placement and the Timeline view is set to Preview in Context, displaying each frame as a visual preview.
The Essentials workspace includes many more panels; in fact, it includes an entire column of additional panels along the right-hand side of the interface. The Properties panel is given prominence here, and the Assets panel is hidden away. The UI elements are given a tighter, more Compact feel, with the icons and panel sections being given less space between them all. The Timeline view is also set to the much more traditional Standard setting, displaying keyframes rather than frame preview thumbnails.
Changing Your Start Settings
Okay—so, what if your choice of start settings was misguided, or you simply want to switch? Don't panic! It's not that difficult to switch between the results you've been given. Again, Animate is highly customizable.
The first course of action will be to change your preferences settings. From the application menu, choose Animate | Preferences on macOS and Edit | Preferences on Windows. This will reveal a submenu that includes the choices of Beginner Preferences or Expert Preferences. To follow along with this book and other references more closely, I suggest you switch to Expert Preferences:

Figure 3.9 – Switching preferences
Once you switch your preferences settings in this way, much of the Animate interface should conform to those settings and you are likely very close to getting Animate in proper shape. There are two additional items to check though, just to be sure.
The first additional item to check is your Workspace setting. In the upper right-hand area of the Animate interface is the Workspace switcher. The icon looks a bit like an application window:

Figure 3.10 – Switching the workspace
Clicking on this icon reveals the available workspaces you can choose.
Tip
When working alongside this book, I recommend that you choose the Essentials workspace if it hasn't already been chosen.
The second additional item to look for is the Timeline view setting. In the upper right-hand corner of the Timeline panel is a small icon that looks like three lines stacked atop one another:

Figure 3.11 – Fixing the Timeline view
All panels in Animate include this icon, and clicking it reveals additional options for that specific panel along with a number of standard options, such as the ability to close the panel. You will want to make sure that Standard is chosen here, not Preview or Preview in Context. Additional options, such as a frame height of Short, Medium, or Tall, are left to your discretion.
In this section, we had an overview of the set of important, persistent panels in Animate and talked about their specific functions. We then went on to explain the Animate start settings and the differences between the choices you are presented with. We concluded with information regarding how to adjust these settings following your initial choice. Coming up, we'll examine ways in which you can switch workspace settings and even create and manage your own custom workspaces.
Managing Workspaces and Panels
As we've seen, the Animate interface consists of a series of panels, arranged in specific configurations. These configurations are called Workspaces, and you can easily switch between them by using the workspace switcher. You can even configure and save your own custom workspaces!
We'll now see how to access and switch between workspaces in Animate, and also how to build your own.
Using the Default Workspaces
Animate comes with a number of preconfigured workspaces to choose from. As we saw earlier, depending upon your initial choices when first running Animate with a fresh installation, you will either be using the Essentials or the Basic workspaces.
You will find these default workspaces and more by activating the workspace switcher in the upper right-hand corner of the interface. Again, the icon looks like a tiny application window.
You initially have a choice between eight different workspaces:
- Animator: Emphasizes the Timeline panel along with the Library panel.
- Basic: This is a minimal configuration intended for new users.
- Classic: Rearranges the panels so that the Timeline panel is above the Stage, in the manner of Macromedia Flash.
- Debug: A specific configuration used when debugging ActionScript code.
- Designer: Focused on an expanded Tools panel and various layout panels.
- Developer: For those who use the programming features of Animate.
- Essentials: This is what was once the default configuration for everyone and is quite balanced and accessible.
- Small Screen: Intended for those running Animate on low-resolution displays.
In addition to this set of initial workspaces, we can add as many custom workspace configurations as we want. Let's see how to do this next.
Customizing the Workspaces
You can customize any workspace to your exact specifications through two primary methods. The first is to add and remove panels entirely from the interface, and the second is to arrange, place, and group the visible panels in certain ways that are beneficial to your work.
Any open panels can be closed by clicking the Close button in the corner of floating panels (looks like a small x), or by clicking the panel options button and choosing Close.
To open panels that have been closed and add them to the interface, look at the application menu and choose Window, as shown in the following screenshot:
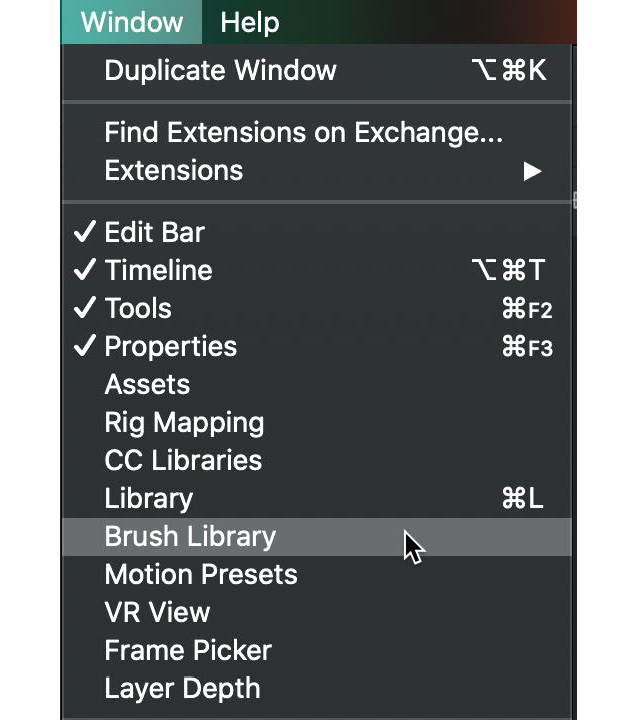
Figure 3.12 – Showing and hiding active panels
This action will display a list of all available panels, and clicking upon any panel without a checkmark next to it will open it up, adding it to the interface.
Tip
Choosing a panel from the Window menu with a checkmark next to it will actually close the panel, removing it from the existing interface configuration.
Once you have the panels that you want to include in your workspace open and available, you can then group them with other panels, move them to other areas of the interface, and even change their state from collapsed to fully open, floating, or docked—it's entirely up to you.
When open, each panel's contents are immediately accessible, but with a collapsed panel you must first click a panel icon to access the contents within, as indicated in the following screenshot:
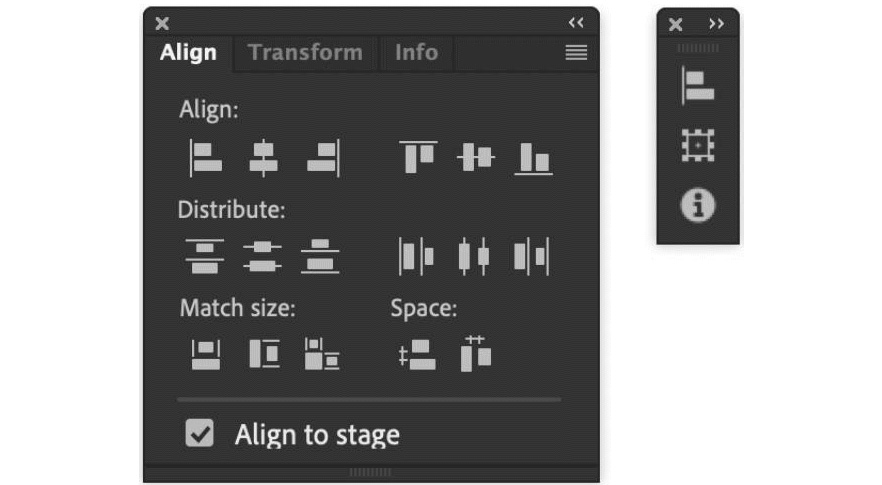
Figure 3.13 – Expanded vs. Collapsed panel group
All panels can be docked and grouped in various ways:
- To dock panels to other areas of the interface, click and drag the panel name to tear off the panel (or simply reposition a floating panel) to another area until a blue line appears in order to dock the panel at that location when the mouse is released.
- To group panels together, click and drag the panel name to tear off the panel (or simply reposition a floating panel) to another panel or panel group until a blue outline appears in order to group the panels when the mouse is released.
- To collapse a panel or panel group into its icon state, click on the small double-arrow icon at the top right of that panel or panel group.
- To expand a collapsed panel or panel group, click on the small double-arrow icon at the top right of that panel or panel group.
- To temporarily show the contents of a collapsed panel or panel group, simply click on the icon.
How you manage the variety of panels in any workspace is completely up to you. Of course, when you find a configuration you like, you can go ahead and save it for later use.
Saving a Custom Workspace
Saving a custom panel configuration as your own custom workspace couldn't be simpler. Follow these steps to create your own reusable workspace:
- After your customizations are complete, open the workspace switcher and note that there is a New Workspace section at the top of the overlay:

Figure 3.14 – Saving your custom workspace
- Provide the new workspace with a meaningful name and click the Save Workspace button immediately to the right of the name input field.
- The workspace is now saved! To verify this, open the workspace switcher once more and look at the very bottom of the overlay:

Figure 3.15 – Your saved custom workspace
Your saved workspace will appear under the SAVED section of the workspace switcher, and you can now freely switch between that and other workspaces as required.
Managing Workspaces
Depending upon whether you are using one of the default workspaces or one that you created yourself, the management options will differ. No matter which kind of workspace is currently in use, if you've made any changes to the layout of your panels, you will see a small button with an arched arrow pointing backward next to the workspace name.
If you click this button, it will reset both the default and custom workspaces to their original state:
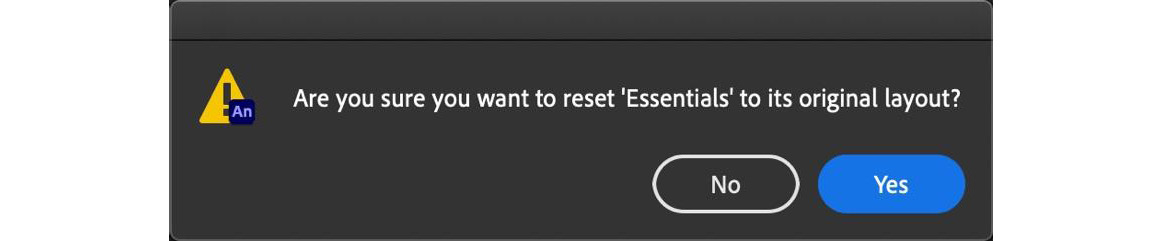
Figure 3.16 – Resetting a workspace
A dialog will appear asking if you are sure that you'd like to reset the workspace. Click Yes to reset the workspace.
When it comes to custom workspaces, you also have an option to remove the workspace entirely through the Delete Workspace button, which appears as a little trash can icon alongside any custom workspace while that workspace is in use. This cannot be undone, so be certain that this is what you want!
To delete a custom workspace, click the trash can button that appears alongside the Reset button:

Figure 3.17 – Deleting a custom workspace
This will cause another confirmation dialog to appear, but this time it asks if you want to delete the custom workspace. Clicking Yes will make it so.
In this section, we explored the workspace switcher and saw how to create and manage our own custom workspaces. Coming up, we'll explore the new capabilities of both the Tools panel and the Timeline panel toolset and see how to customize each to our individual liking.
Customizing the Tools and Timeline Panels
Both the Tools and Timeline panel customizations are relatively new to Animate but are absolutely required, with more tools and features being added in these areas. You can now keep your most frequently used tools in both the Tools and Timeline panels ready for immediate access instead of being hidden or grouped beneath other tools. It's completely under your control!
Customizing the Tools Panel
As of the time of writing, the Animate Tools panel consists of 37 individual tools— a lot to fit on one tiny panel! As a result of this, older versions of Animate would have many of these tools grouped together, making them difficult to locate. In newer versions of Animate, we can now hide any tools that we do not often use and can make individual decisions regarding whether to group tools together:
- To edit your Tools panel, look at the bottom area of the panel and locate the Edit Toolbar… button. It appears as a small set of three dots:

Figure 3.18 – Activating the tools editor
- Clicking the Edit Toolbar… button will reveal the Drag and drop tools editor, allowing you to make changes to the tools available within the Tools panel, how they are grouped, their order, and where tool separations occur:

Figure 3.19 – The Drag and drop tools editor
- To customize your tools, simply drag them from the editor to the Tools panel or from the Tools panel to the editor. You can change groupings, rearrange locations, and add or remove separators to cluster tools in the way that makes the most sense to you.
- To close the editor when you are finished customizing your tools, hit the Esc key on your keyboard, or simply click anywhere outside of it.
Note
Certain tools will not be available for all target documents. Tools that are unavailable in the currently open document will appear disabled in the Tools panel and have a small, yellow warning indicator in the lower-left corner when viewing the Drag and drop tools editor.
If you want to create additional, smaller toolbars in your workspace, you can drag a separator from the Tools panel and that cluster of tools will now appear as a floating mini toolbar:

Figure 3.20 – Floating toolbar orientations
Hovering over the end of the toolbar will activate its rotation feature, allowing it to be presented either vertically or horizontally.
With these customization options available to us, we can craft the ideal Tools panel for our particular needs and preferences, or even create small toolbars for specific use cases.
Exploring the Timeline Tools
The Timeline panel also has a set of tools. These, however, relate directly to the function of the timeline itself and include tools for managing frames, keyframes, tweens, and viewing options, along with general playback and navigation controls:

Figure 3.21 – The Timeline tools
Just about all of these tools can be modified and removed through the use of the Customize Timeline editor.
Customizing the Timeline Tools
To customize the tools within the Timeline panel, you will need to access the Customize timeline editor:
- In the Timeline panel, locate the panel options button in the upper-right corner (the three horizontal lines). Clicking this will expose the available options for this panel:
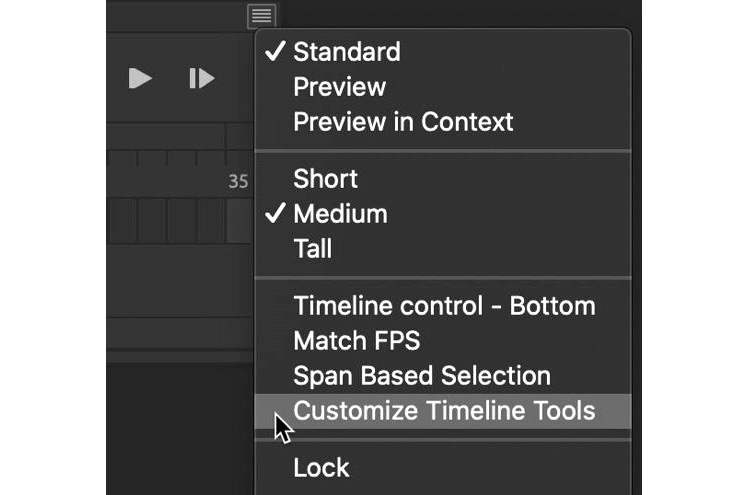
Figure 3.22 – The Customize Timeline Tools option
- With the options menu exposed, locate and choose the option labeled Customize Timeline Tools. This will open the Customize timeline editor.
- Now that the editor is open, you have a number of different actions you can take in order to customize which tools appear in the Timeline panel and even how they appear:
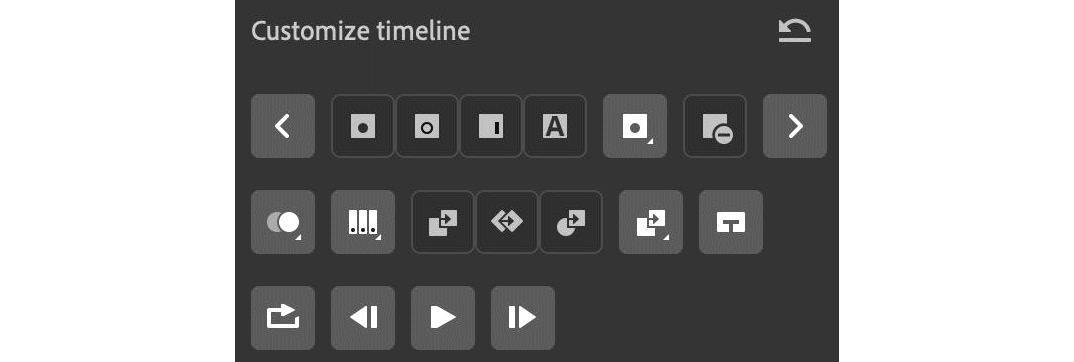
Figure 3.23 – The Customize timeline editor
By default, frame and tween options are grouped together within an Insert Frames group and an Insert Tweens group. When customizing the tools here, you can separate these groups out into individual buttons and include only those you specifically need. You can also disable any other controls that you do not normally use as well or add in extra controls such as the Remove Frames button, which is not regularly part of the Timeline tools.
Clicking each tool or tool group will cause the Timeline tools to adapt to your choices. Click away from the editor or hit the Esc key to dismiss the editor. Clicking the Reset button in the upper-right corner of the editor will reset the Timeline tools to their default configuration.
Tip
From this same panel options menu that we accessed during the last task, you can also choose to place the Timeline tools along the top or bottom of the Timeline panel by selecting the appropriate option.
In this section, we explored the Tools panel and the Timeline panel, seeing how to customize and manage the tools across both. Coming up, we'll have a look at how to manage our Animate preferences, explore keyboard shortcuts, and see how to export and save our individual preference settings through the use of an Animate preferences file.
Managing Animate Preferences
The preferences in Animate range from general settings, to how your code appears, to various drawing and text options. All of this is under your control through the Preferences dialog.
Customizing Preferences
To access the Animate Preferences dialog, go to the application menu and choose one of the following options:
- Animate | Preferences | Edit Preferences… on macOS
- Edit | Preferences | Edit Preferences… on Windows:

Figure 3.24 – Accessing Animate preferences
You'll be taken to the Preferences dialog and be able to customize your preferences according to the category:

Figure 3.25 – The Animate Preferences dialog
The various tabs along the side allow you to customize preferences for all sorts of things across the application:
- General: This is the most important area. Here, you can adjust the Animate user interface from dark to light and hide or show the Stage border, in addition to many other common settings.
- Code Editor: This area controls preferences for the Actions panel and coding preferences, including font family and font size.
- Script Files: You will likely not need to modify this. It is minimal and mostly has to do with the encoding of code files.
- Compiler: Again, no longer very important and you can likely leave this be. It has more to do with the Flex software development kit (SDK) and settings pertaining to that.
- Text: If you want to change the general font options, this is where you can do so.
- Drawing: This is actually more useful than most other tabs for most Animate users. It has to do with how vector paths are established while being drawn.
Clicking OK will commit your choices.
Keyboard Shortcuts
Keyboard shortcuts are a more advanced way of interacting with any software in a manner that is often much quicker than using a mouse or stylus. Many long-time Animate users use these shortcuts to perform common tasks, such as inserting keyframes or converting objects to symbols. You also have access to more common shortcuts, such as copy or paste.
Of course, you can also customize your keyboard shortcuts! To display the Keyboard Shortcuts dialog, choose one of the following options:
- Animate | Keyboard Shortcuts… on macOS
- Edit | Keyboard Shortcuts… on Windows:

Figure 3.26 – Managing keyboard shortcuts
You can customize or add as many shortcuts as you like through this dialog. In fact, not every function in Animate has a keyboard shortcut attributed to it, so if you have a workflow you'd like to speed up, adding a custom keyboard shortcut is a great way to accomplish this.
Tip
I would recommend keeping commonly used shortcuts in place and not changing them since many tutorials and guides will reference the default shortcuts. If an action does not have a shortcut assigned, however… it is fair game.
Managing Your Preferences
In more recent versions of Animate, you can export and import your preferences. This exported package can optionally include your custom workspaces and keyboard shortcuts.
To export your preferences, go to the application menu and choose one of the following options:
- Animate | Preferences | Export Preferences… on macOS
- Edit | Preferences | Export Preferences… on Windows:
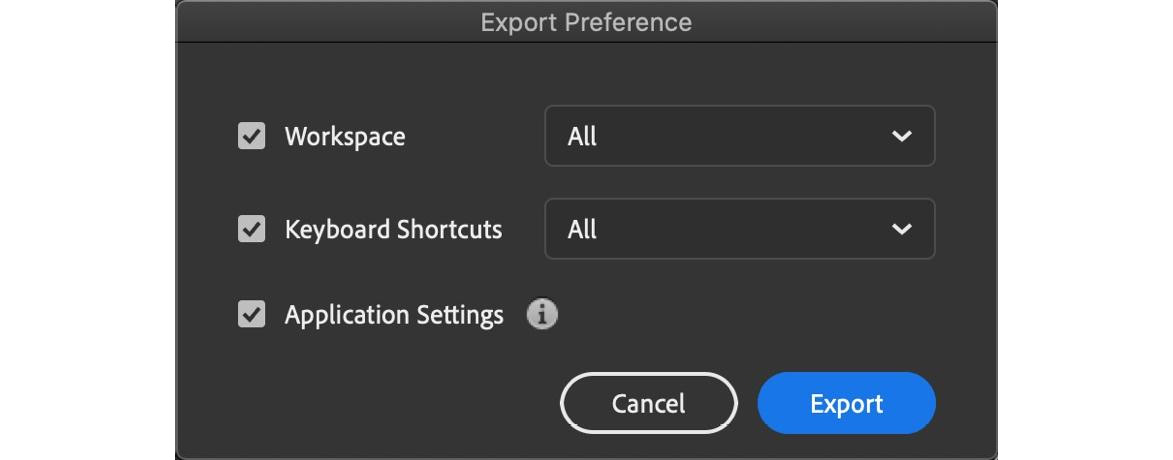
Figure 3.27 – Export preferences
The Export Preference dialog will allow you to choose what you would like bundled into the export file, including Workspace, Keyboard Shortcuts, and Application Settings. You can even choose specific workspaces and shortcut definitions to include if you do not want to package them all.
Clicking on the Export button will prompt you for a filename and location to save your preferences:

Figure 3.28 – Preferences are stored within an Animate Preferences (.anp) file
The resulting file is of the .anp type – an Animate Preferences file. You can use this file as a backup or for distribution to others.
To import a .anp file, open the Preferences menu once more and this time choose Import Preferences… from the submenu. You can browse for a .anp file and even choose which aspects of it to import, as indicated in the following screenshot:

Figure 3.29 – The Import Preference dialog
Clicking Import will result in your choices being imported from the chosen .anp file.
Note
A .anp file is also necessary when creating an In-App Tutorial for Animate. Now you know how to generate one! We'll see how to create such a tutorial in Chapter 14, Extending Adobe Animate.
In this section, we looked at Animate preferences and discovered how to manage these preferences alongside keyboard shortcuts, as well as how to export these same preferences for backup or distribution.
Summary
With this chapter concluded, you should now have a good general understanding of the Animate interface and which portions of that interface are most essential to working with the software. We also took some time to understand how to customize the workspace itself, along with the various tools and timeline controls that are available. Finally, we had a look at the various preferences available to us and how to preserve them for later use.
In the next chapter, we'll explore the various methods of getting content out of Animate to be used across different platforms through both the publish and export processes.