
Chapter 11: Developing Web-Based Games
In the previous chapter, we took a deep dive into Camera, Layer Depth, and several additional features available as part of the Advanced Layers mode in Animate.
We'll begin this chapter by providing an overview of our game concept and the HTML5 Canvas starter document, which already has several assets laid out concerning the techniques we learned about in the previous chapters. We will then prepare various assets on the stage and assets within the project library for interactivity. We'll also create all-new dynamic text assets for our gameplay screen that can display game data through our use of JavaScript. The majority of this chapter will be spent in the code editor as we build out the logic for our entire game bit by bit across the timeline and by using global scripts.
After reading this chapter, you'll be able to perform the following functions in Animate:
- Create a game using both designer and developer workflows in Animate.
- Configure and manage interactive content, game states, and data variables.
- Write JavaScript code to generate assets dynamically from the project library.
- Develop logic to control the game's flow and manage all aspects of gameplay.
Technical Requirements
You will need the following software and hardware to complete this chapter:
- Adobe Animate 2022 (version 22.0 or above).
- Refer to the Animate System Requirements page for hardware specifications: https://helpx.adobe.com/animate/system-requirements.html.
The code in action video for this chapter can be found here: https://bit.ly/3nmrIJ3
Understanding the Game Concept
The game we will build in this chapter makes use of one of the strongest aspects of Adobe Animate, and that is the ability to create assets with visual tools and then program them with code directly within the same application. The game concept is very simple: you control a kitty that can walk back and forth across the screen and shoot energy balls upward. Enemy pigs are dropping from above and the kitty must ensure that none reach the ground by blasting them out of the sky. If three pigs get past the kitty, it's game over.
We'll be dealing with a lot of code in this chapter. If you've never written much code, don't worry! We will be stepping through the visual aspects of the game first and will slowly build up to the programming aspects. Even when in the thick of development, all the code will be provided and explained piece by piece.
Starter Document Overview
An HTML Canvas document named GameStarter.fla is available from the file downloads, and for this chapter, you are highly encouraged to download it. Once you have the Animate file on your local system, open it up and have a look at what has been prepared.
Note
You can find the starter file we use here within the exercise files at https://github.com/PacktPublishing/Adobe-Animate-2022-for-Creative-Professionals-Second-Edition.
The starter project is an HTML5 Canvas document and will target the native web so that it can be run on any modern web browser. As we discussed in Chapter 2, Exploring Platform-Specific Considerations, an HTML5 Canvas document will specifically make use of the <canvas> element of HTML to render any static or animated content. However, it is also interactive, making it the ideal platform for web-based games.
The document itself exhibits a stage width of 640 and a height of 480:
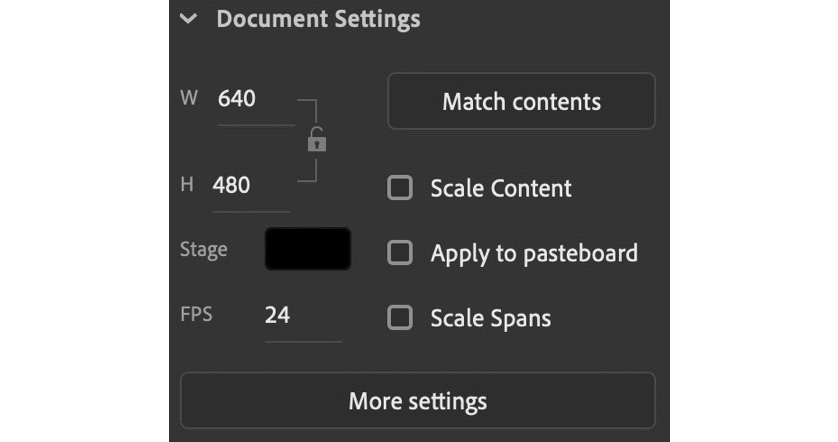
Figure 11.1 – Document Settings
This is a 4:3 aspect ratio, which often works well for games. The timeline is set to run at 24 frames per second and the background is black (#000000).
Before we get into the contents of the document, let's go over how we'll be programming the content. Since we are targeting the native web, we'll be using JavaScript to write all our code. JavaScript is fairly easy to pick up and start working with – especially since it can run within any standard web browser. JavaScript can be used within Animate when targeting HTML5 Canvas documents, as we are doing in this chapter, but it can also be used to the WebGL glTF Extended, VR Panorama, and VR 360 document types.
Note
A great resource for writing JavaScript is the following documentation, which is located on the Mozilla Developer Network: https://developer.mozilla.org/en-US/docs/Web/JavaScript.
If you'd like to have a comprehensive resource for learning JavaScript in the form of a book, I recommend The JavaScript Workshop from Packt: https://www.packtpub.com/product/the-javascript-workshop/9781838641917. I contributed a few chapters to this book and served as the lead author.
In addition to vanilla JavaScript, we'll also make use of the CreateJS JavaScript library within HTML5 Canvas documents. CreateJS is a set of libraries that includes EaselJS, TweenJS, SoundJS, and PreloadJS. Each of these libraries fulfills a different role in CreateJS but they all work together in making the HTML <canvas> element much easier to work with. Again, refer to Chapter 2, Exploring Platform-Specific Considerations, for a refresher.
Note
For deeper insight into how the CreateJS libraries function, you can access the CreateJS documentation from their website at https://createjs.com/docs.
With the general document settings and platform considerations covered, let's move on to examine how the document has been assembled.
Exploring the Timeline and Stage
Taking a look at the timeline, you'll notice two layers. Each of them has been divided into three sections separated by keyframes. These will serve as the three screens that make up our game.
Have a look at the starter document timeline:

Figure 11.2 – Starter document timeline
The Backgrounds layer contains a bitmap image for all three of the timeline sections. In the first and third sections, we have a shape overlay to dim the background a bit and make any additional assets stand out. In the middle section, the background is presented as-is since this will serve as the gameplay screen. In the Assets layer, we have several assets that overlay the background imagery and vary from text to shapes to symbol instances, depending on the section.
The sections of the timeline can be referred to by different names for clarity. This is how things have been configured:
- Start Screen: Covers frames 1-3 and represents the game's start screen and title.
- Game Screen: Consists of the next three frames (4-6) and is where actual gameplay will occur.
- End Screen: This is the game over screen once you've lost the game and covers frames 7-9. There is no way to win the game.
Let's have a look at each of these screens in detail, beginning with Start Screen:
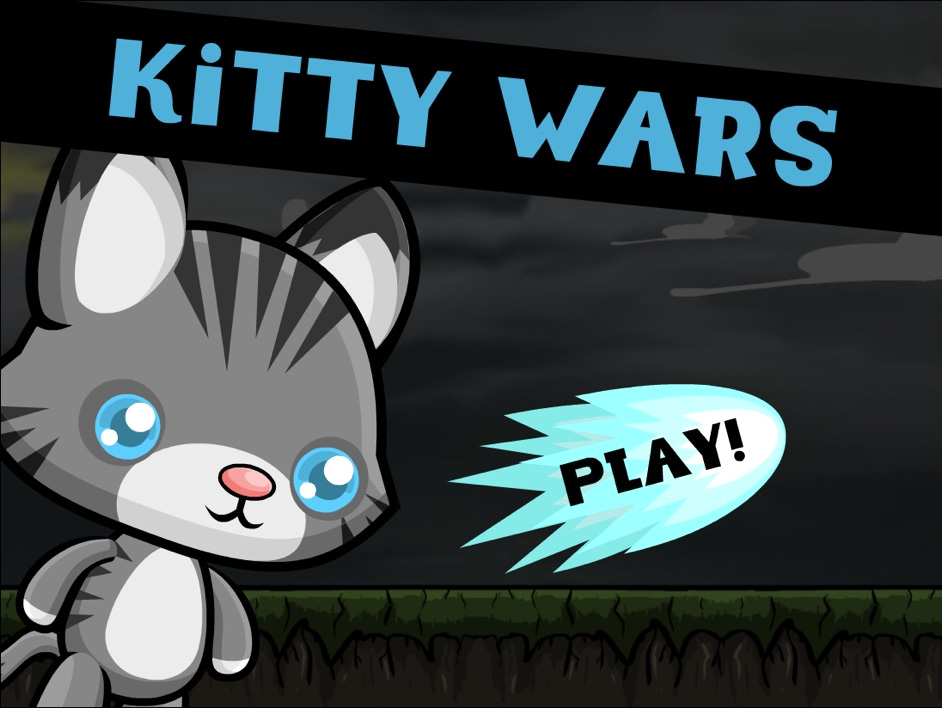
Figure 11.3 – Start Screen
We have our background image dimmed with a semi-opaque rectangular shape covering the stage. An instance of the player-controlled Kitty movie clip symbol instance appears on the left but has no interactivity associated with it. An animated KittyOrb movie clip symbol instance with a text overlay of PLAY! is present but also non-interactive at this time. Finally, we have the title, KITTY WARS, rotated slightly with a black shape behind it.
Next, we'll focus on Game Screen:
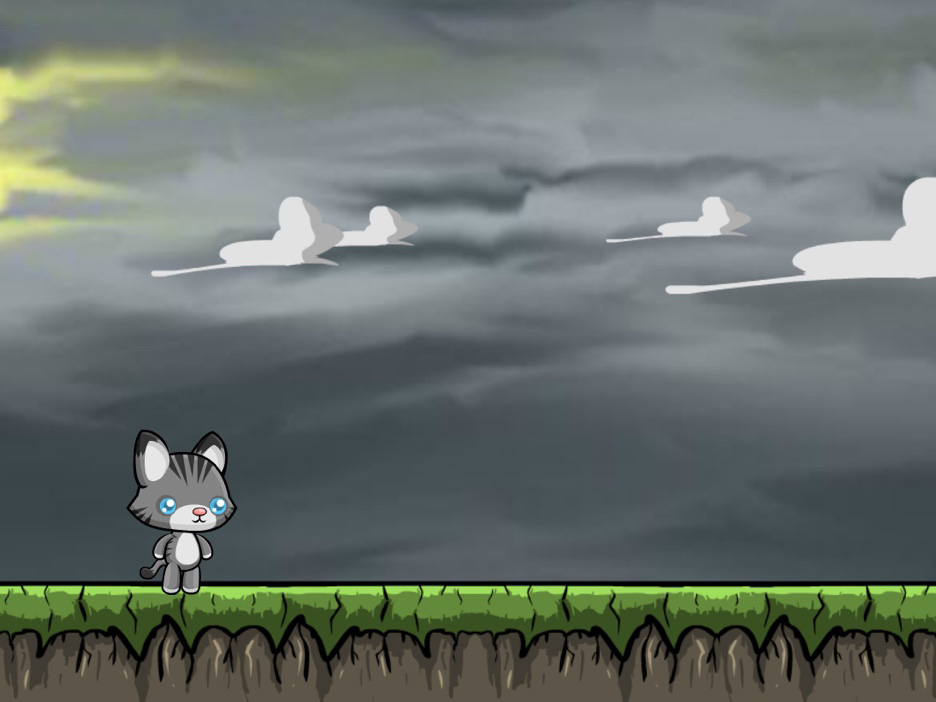
Figure 11.4 – Game Screen
This is the screen where all of the gameplay will happen but since we haven't written any code yet, it is the most minimal visually. Our background is present without any overlay obstruction and an instance of the player-controlled Kitty movie clip symbol instance appears, standing on the ground. That's it! We will be doing most of our work on this screen, adding dynamic text and writing the majority of our code to manage assets and game mechanics.
Finally, let's examine End Screen:
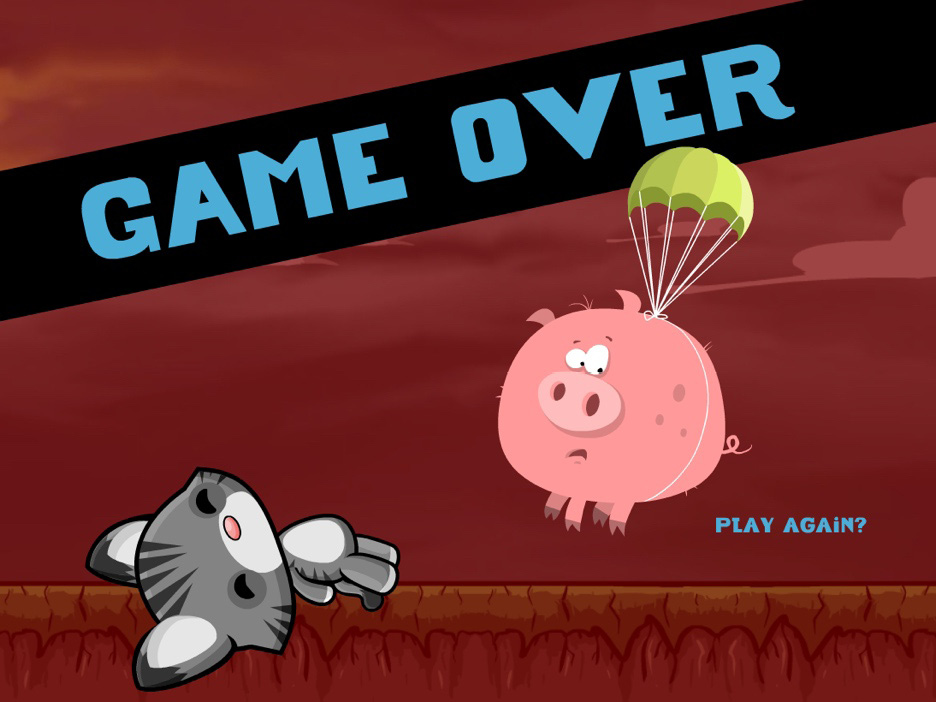
Figure 11.5 – End Screen
This screen is very similar in functionality to Start Screen but while that screen is presented to the user initially, this one is presented when the game is over. It includes the background image dimmed with a semi-opaque red shape. There is also a version of the kitty that appears defeated and laying on the ground. An instance of the PigEnemy movie clip symbol is present as well to further illustrate that the game has concluded. Instead of the game title, we have a banner that reads GAME OVER. There is a small text prompt in the bottom-right corner that prompts the user to PLAY AGAIN? if desired. Of course, none of this is interactive at all just yet.
With that, we are pretty familiar with the layout and functionality of each screen and how the timeline has been segmented to represent them. The last thing we need to look at is the project library and see what assets have been prepared.
Exploring the Project Library
Some of the library's content, such as the Kitty, PigEnemy, and KittyOrb movie clip symbols, have already been shown on different screens. We also know that there is a background image that's used across all three scenes. Some of these assets have been laid out on the various screens already, but others will need to be instantiated for more dynamic, gameplay-focused usage – even many of the assets currently being used statically. It's good to keep this in mind as we explore the project library.
Open the Library panel and have a look at the assets within it:
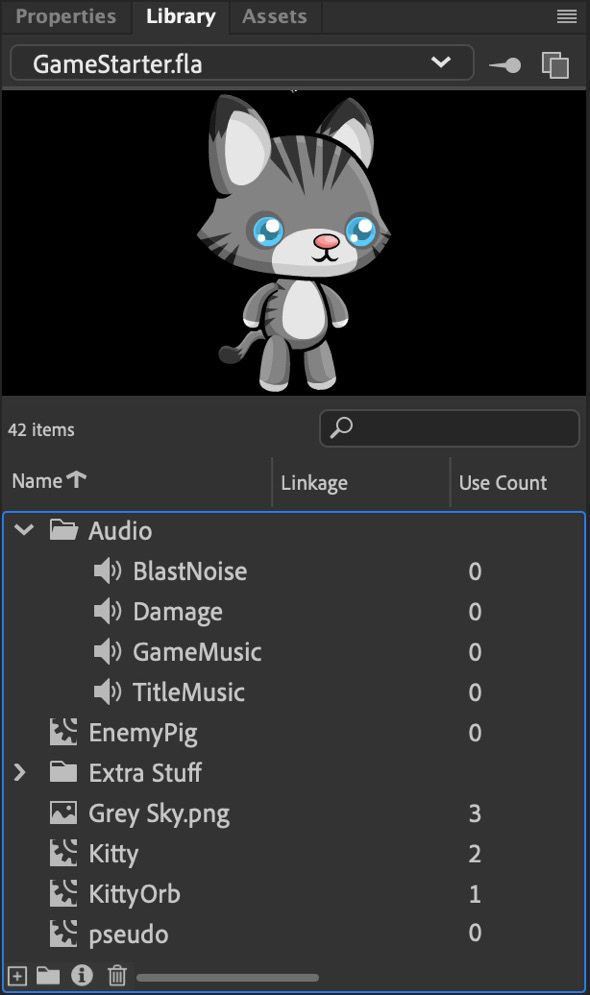
Figure 11.6 – The Library panel
The assets you see within the Library panel have all been gathered from the Assets panel and have been somewhat reconstructed or rearranged to fit our needs for this game.
All the assets we need for our game are included within the Library panel:
- A folder of audio files for music and effects.
- A set of movie clips for the player, enemies, clickable areas, and projectiles.
- A background image in the form of a bitmap PNG.
There is also a folder called Extra Stuff that can be ignored – this contains some of the simpler assets that our more complex assets are constructed of. Some text and additional shape content have been constructed and placed on the stage that does not exist within the library.
Within the Library panel is a set of columns. In the preceding screenshot, we can see columns for Name, Linkage, and Use Count. These are all important when building a game in this way. The functionality of the Name property of the symbol is obvious – this is the name we provide when the symbol is created. Use Count shows how many times a particular asset appears in some form on the stage, but this only counts objects that are manually placed on the stage, like everything we've seen so far in our start document. Linkage is very important for our game. This field, which is currently empty for all objects, can be used in conjunction with code to dynamically instantiate symbols from the library for use in the game at runtime. It is a very powerful feature and one we will be making use of shortly.
In this section, we opened the starter document and explored the timeline, stage, and library to familiarize ourselves with the assets and constructs that have been arranged for the game we'll be writing. Next, we'll make further preparations across all three of these aspects before writing our JavaScript code.
Preparing the Game Timeline, Stage, and Library
As we've seen, a lot of asset gathering and preparation has gone into our game already. The concepts that are involved in preparing these assets are tasks you are already familiar with after reading the previous chapters, and the pre-arranged content serves as a jump-start and foundation for actually building the game.
So, what else needs to be done? Elements such as layers to hold identifying labels and code must be created. Space for user interface elements such as dynamic text to relay information to the user during play should be included as well. Finally, clickable elements to start the game from the Start Screen area or restart it from the End Screen area should be added. Additionally, we need to make the various items within our library addressable through code.
We will accomplish all of this as we work through this section!
Labeling the Timeline
When developing a game, we need to be able to switch between certain screens, whether we are starting the game, playing the game, or have reached the end of the game. One of the ways we can do this with Animate is through the use of frame labels. When we provide a keyframe with a label, we are able to target that frame by its label name through code.
We also need a layer dedicated to the code itself. It is best practice when programming in Animate to have a layer – often named Actions – that contains all of our code and keeps it separated from any visual or animated elements. In this project, we are going to combine both the Actions layer and our labeling into a single layer, since they are so closely related.
Let's go ahead and modify the timeline, preparing for the insertion of frame labels:
- Create a new layer and name it Actions. Add keyframes at frame 4 and frame 7:
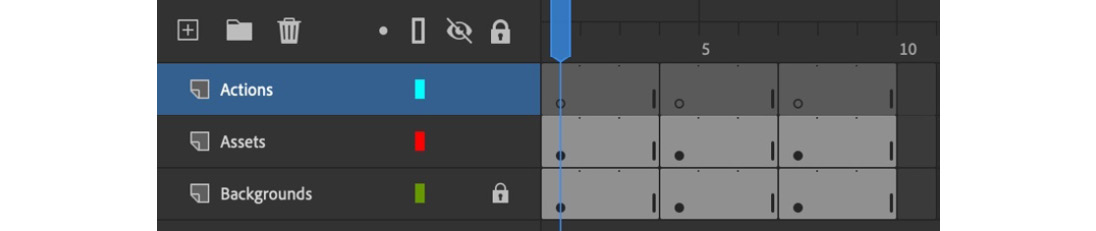
Figure 11.7 – Actions layer added with keyframes
This conforms to our previously established screen structure across the timeline. We'll be able to add frame labels to each of these keyframes, which represent each screen, and also include code specific to individual game states.
- To add a frame label to a specific keyframe, select that frame and look at the Frame tab of the Properties panel.
- Locate the Name field within the Label section to input your label identifiers:

Figure 11.8 – Adding a frame label
Using the Name field of the Label section for any keyframe, we can direct the playhead to that specific frame through code. Be sure to set Type to Name using the drop-down selection below the Name input.
Set the following label names across the timeline:
- Frame 1: Create a new keyframe and add a frame label of startscreen.
- Frame 4: Create a new keyframe and add a frame label of gamescreen.
- Frame 7: Create a new keyframe and add a frame label of endscreen.
Notice how the frame labels you've entered appear along the timeline, attributed to each screen we've defined:
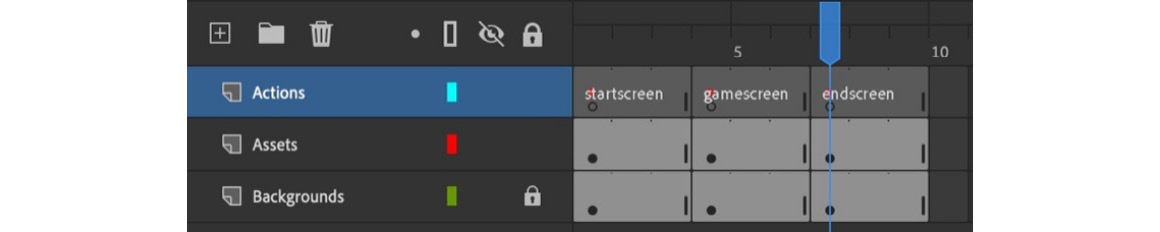
Figure 11.9 – Our Actions layer with defined frame labels
When we write JavaScript code to move between the different screens in our game, frame labels will help us direct the playhead to the correct frame, regardless of the assigned frame number. We also have specific keyframes to write our code in, directly bound to each screen.
Before moving on, be sure to lock all your layers. This will ensure that we don't mistakenly modify the content or add any visual assets to our Actions layer, which should contain only code.
With our Actions layer created and specific keyframes configured and labeled, we can start adding user interface elements to each game screen.
Creating Dynamic Text and Clickable Overlays
We'll now focus our attention on the more dynamic components of our game. We need to create a new layer to that will contain dynamic text objects that we can write game data to on our Game Screen, such as health and stats, and also set up some clickable elements on our Start Screen and End Screen.
Let's prepare a layer that will be specifically used to hold our UI elements:
- Create a new layer and name it UI. This will contain all the user interface elements of our game:
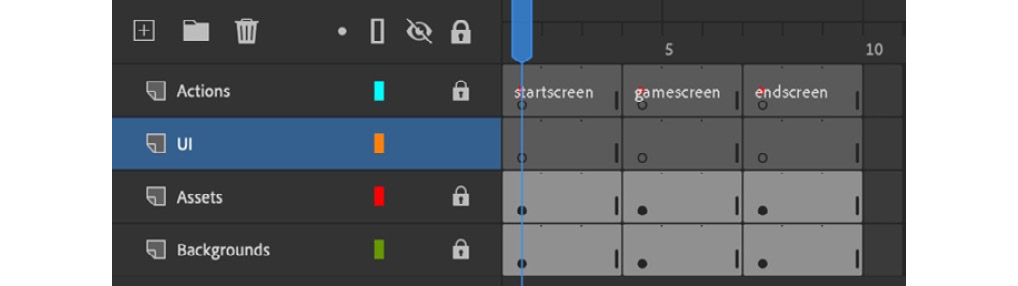
Figure 11.10 – UI layer added
- Additionally, add a set of new keyframes at frames 4 and 7, just like we have for every other layer in this project. We will include different interface elements bound to each keyframe. With the three keyframes established, we can now go ahead and add different elements to each screen.
With the UI layer prepared, we can work on building up the associated elements within this layer. We'll include clickable areas that overlay the existing prompts and dynamic text elements to inform the player as to how they are doing during gameplay.
Let's begin with the Start Screen area:
- Select frame 1 of the UI layer.
- You may have noticed a weird symbol in the Library panel named pseudo. This element is meant to exist as a non-visual, hit-enabled overlay. Drag an instance of this symbol onto the stage atop the PLAY! message.
- Use the Free Transform tool to adjust the size and rotation of this instance so that it covers the visual elements of the blast and text:
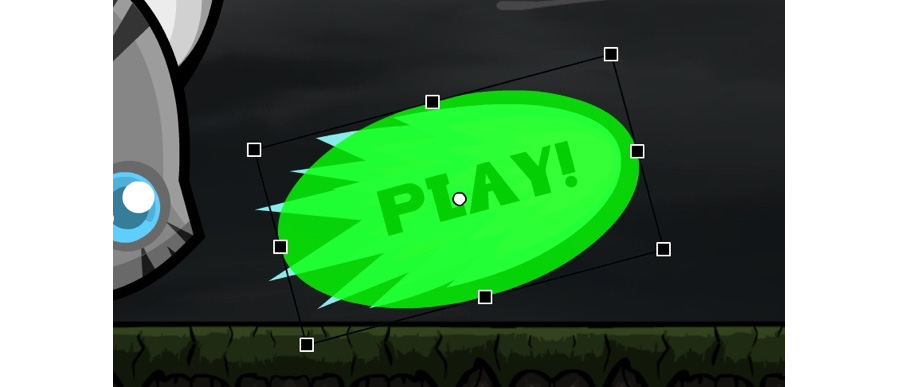
Figure 11.11 – Using the Free Transform tool on the overlay
- With the instance selected, look to the Object tab of the Properties panel and locate the Color Effects section. Take the Alpha property down to 1%, rendering it invisible. To make it clickable when you're using HTML5 Canvas, the object must not have 0% Alpha transparency!
- Now, let's provide an instance name to be able to address this object through JavaScript code. Give this object an instance name of startbutton:

Figure 11.12 – Instance name given
The Start Screen area is now complete. Next, we'll move on to the Game Screen area to add dynamic text fields to inform the user of both the player's health and the number of enemies they've destroyed.
Let's build up our Game Screen user interface elements by adding dynamic text objects:
- First, move the playhead to the middle section of the timeline representing our Game Screen, which is composed of frames 4, 5, and 6. Ensure that the UI layer is still unlocked and that it is the active layer.
- Select the Text tool from the tools panel and look at the Tool tab of the Properties panel.
So far, we have used Static Text as we haven't needed to change the character values within our text fields at runtime. Now that we need to update things such as the player's health and their overall score, we'll need to change these values while the game is being played.
- To accomplish this, set the text type to Dynamic Text in the Properties panel.
- To effectively use Dynamic Text in HTML5 Canvas documents, we will need to use a Web Font for the text fields we create. To choose a web font, click the little globe icon near the font selection dropdown:
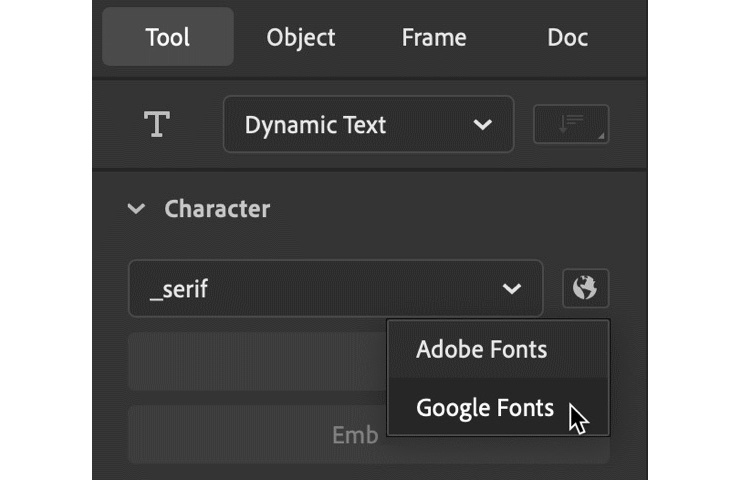
Figure 11.13 – Invoking Google Fonts
This brings up a small overlay that allows us to select a Web Font service from a choice of Adobe Fonts or Google Fonts. The workflows for each are identical, so I am going to choose Google Fonts.
- Once a service has been selected, a dialog will appear that allows you to filter through and search for the font library you've chosen:
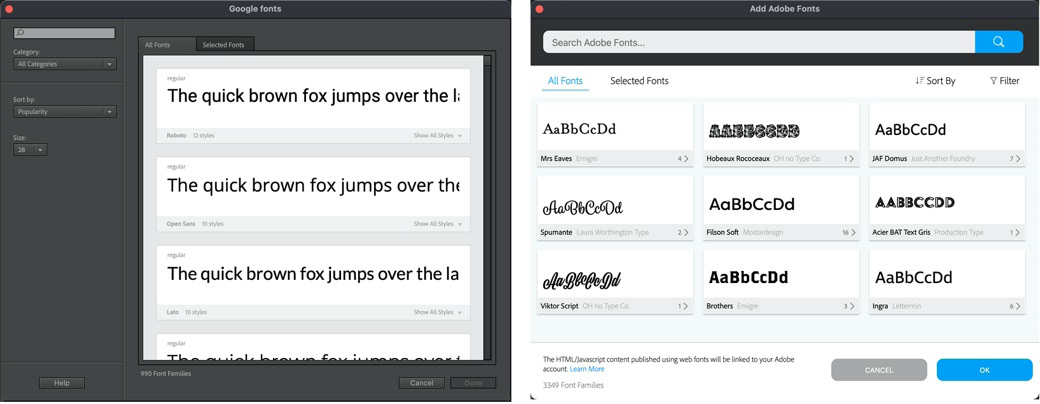
Figure 11.14 – Adding a web font using Google Fonts or Adobe Fonts
- Locate a font to use within the game, select it, and choose Done for Google Fonts or OK for Adobe Fonts. The dialog will close, and the selected font will be added to Animate for use in your project. The Output panel will also appear, letting you know the font was added successfully. This is only informational, and you can switch directly back to the timeline.
I'm using a popular Google font called Roboto Mono.
- Even though the font has been added, it isn't active in the Text tool yet. From the Tool tab of the Properties panel, locate the font selection dropdown and select the web font you just added:
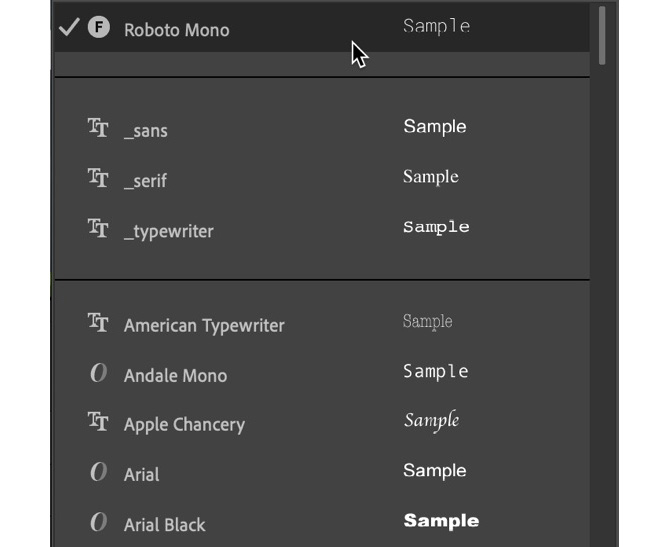
Figure 11.15 – Font selection dropdown
Web fonts are placed at the very top of the selection drop-down list, so they should be very easy to locate.
- With the font selection process complete, we need to set the remainder of our text properties. I've chosen white (#FFFFFF) for my fill color and have set the size value to 14 pt:
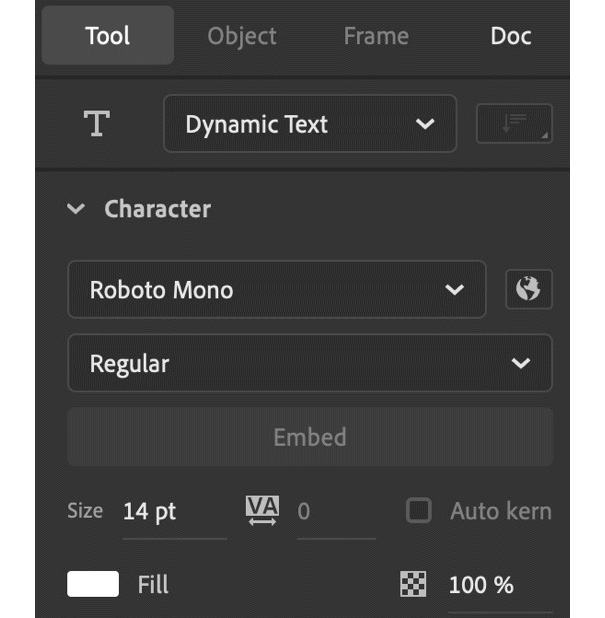
Figure 11.16 – Text Tool properties
- Click and drag across the top-left corner of the stage (release the mouse around the midpoint of the stage) to add Paragraph Text with a set width. It should be about as wide as half the stage.
- Type Health within the text object as this will display the player's current health. Within the Paragraph section of the Properties panel, be sure to set the text to align to the left.
- To make the text stand out better against the background, you can add a Drop Shadow filter. With the text object selected, go to the Object tab of the Properties panel, click the Add Filter button, and choose a Drop Shadow filter with the default settings:
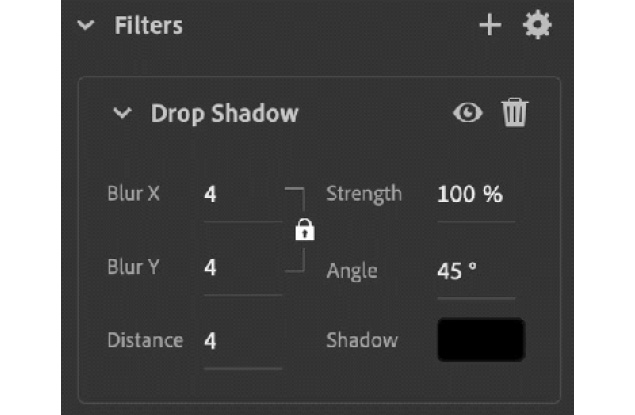
Figure 11.17 – The Drop Shadow filter
- With one text field complete, let's copy it to create the second. Duplicate the text field by holding the Alt key and click and drag a copy onto the opposite side of the stage.
- Change the text within the new text object to Blasted. Then, in the Paragraph section of the Properties panel, set the text so that it aligns to the right.
- The final task in preparing our Dynamic Text objects is to provide a unique instance name for each one. Select the text that reads Health and in the Object tab of the Properties panel, input an instance name of healthdisplay. This will be used to let the user keep track of the player's health:
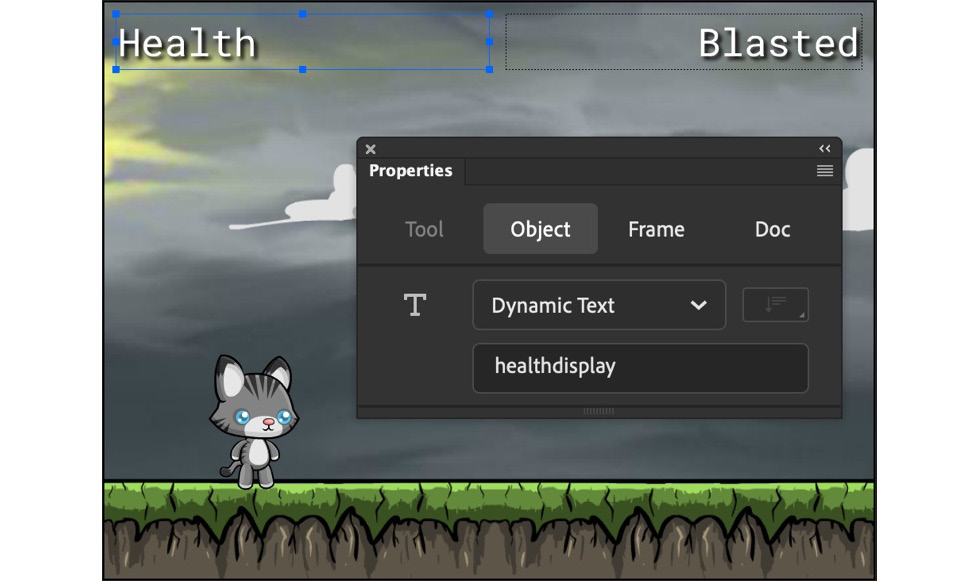
Figure 11.18 – Instance name provided
An instance name allows us to manipulate the Dynamic Text object through code. Be sure to add another instance name to the second text object that reads scoredisplay. This will eventually reflect the current score.
We'll next complete the interactive setup for this game by adding a clickable replay option to the End Screen area:
- Select frame 4 of the UI layer. It is a good idea to ensure any other layer is locked.
- We'll use another instance of the pseudo symbol, just like we did for the Start Screen area. Drag it from the Library panel onto the stage, over the PLAY AGAIN? message.
- Use the Free Transform tool to adjust the size and rotation of this instance so that it covers the visual elements of the message:
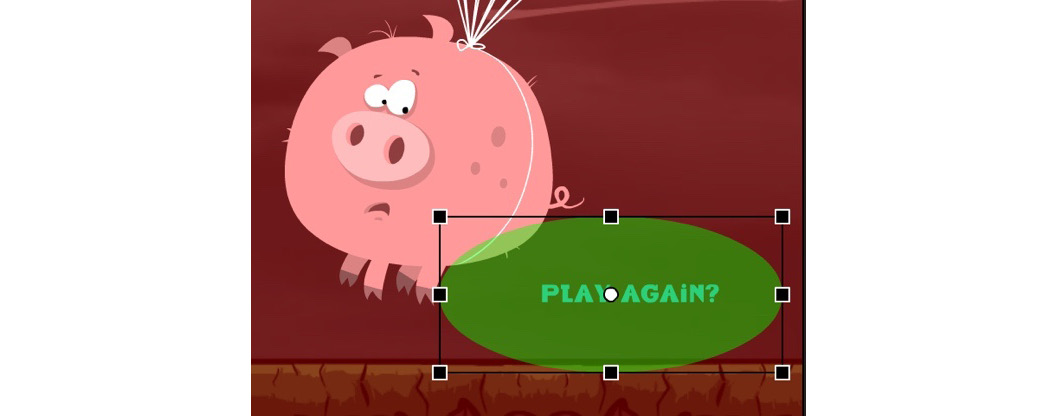
Figure 11.19 – Transform overlay across the prompt
- With the instance selected, look at the Object tab of the Properties panel and locate the Color Effects section. Take the Alpha property down to 1%, making it almost invisible.
- We will now provide an instance name to be able to address this object through JavaScript code. Give the object an instance name of reduxbutton.
That should take care of the user interface elements across all three states of our game:
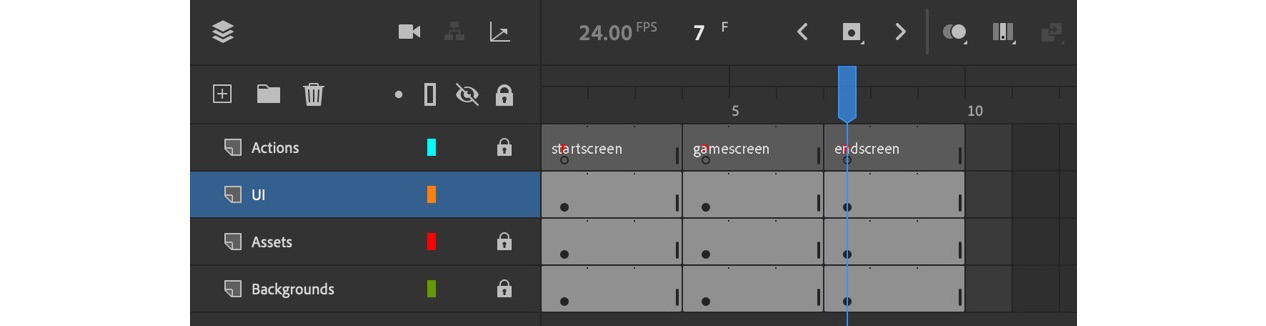
Figure 11.20 – The completed timeline
The Start Screen and End Screen areas both have what will eventually be clickable elements, and the Game Screen area is ready to program.
The next thing we need to do is supply similar linkages through the Library panel.
Adding Linkage IDs within the Library
When we're building our game, we'll need to create dynamic instances of different objects such as enemies and projectiles on the fly, at runtime. To instantiate symbols in the library on the stage as the game is being played, we must provide Linkage IDs to each item we want to address via JavaScript.
Note
Linkage IDs work very similarly to instance names, which you provide to symbol instances on the stage. The big difference is that Linkage IDs are provided to the symbols and other library assets themselves so that we can generate new instances of them by using code.
The Linkage column will be, by default, displayed to the right of the Name column within the Library panel:
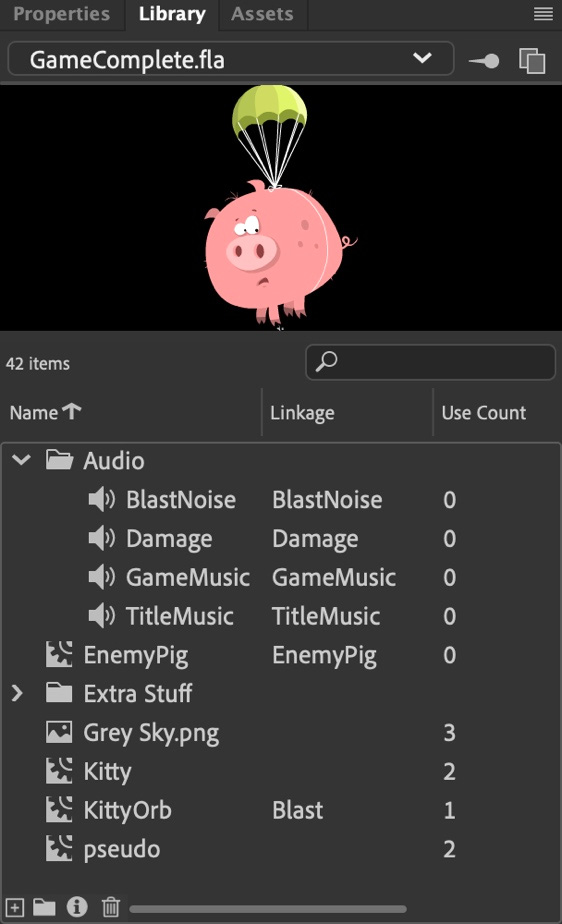
Figure 11.21 – Linkage IDs are assigned
Inputting a Linkage ID is simple. Just double-click within the Linkage column beside each item you want to provide a Linkage ID for. You can assign these IDs to both symbols and audio files for programmatic playback.
Set the following Linkage IDs within the game project:
- BlastNoise: Assign a Linkage ID of BlastNoise. This will be used when the kitty shoots a projectile into the sky.
- Damage: Assign a Linkage ID of Damage. This will be used when a pig enemy breaches the stage.
- GameMusic: Assign a Linkage ID of GameMusic. This will be used for the general gameplay music.
- TitleMusic: Assign a Linkage ID of TitleMusic. This will be used as the music for both the start screen and end screen.
- EnemyPig: Assign a Linkage ID of EnemyPig. Enemies will be generated randomly and move toward the ground.
- KittyOrb: Assign a Linkage ID of Blast. This is the projectile that's fired by the kitty to stop the enemies from reaching the ground. Note that the Linkage ID can be the same as or different from the symbol name.
You might have noticed the actual Kitty movie clip symbol does not receive a Linkage ID, even though this serves as the player. Instead of providing a Linkage ID to the symbol, since there is only one player object, we will give the Kitty symbol instance already on the stage an instance name to control it through code.
Unlock the Assets layer to select and manipulate the content within. Select the Kitty instance on the stage at frame 4 and provide an instance name of player.
In this section, we completed all the game preparation for the stage, timeline, and library so that we can address our content through code via frame labels, Linkage IDs, and instance names. Next, we'll write all the JavaScript code that's necessary for our game to function.
Programming the Game with JavaScript
As we mentioned in the previous section, Preparing the game's timeline, stage, and library, since we are targeting the native web with an HTML5 Canvas document, we'll be programming our game with JavaScript. Most code in Animate is bound directly to specific keyframes and is executed when the playhead reaches that frame.
The code we will write is composed of variables and functions. When we want to hold data or change data, we use variables. The first time a variable is declared, we use the var keyword. When we need to group a set of instructions to perform a task, we group them all within a function and then invoke that function when we want to execute the code.
As we start building the code for our game, recall that certain objects exist on the stage already and have been given instance names to allow us to manipulate them. In addition to this, there is a set of objects that only exist within the library and have been given Linkage IDs, which will allow us to create instances of these symbols and sound files at runtime.
The first step in our programming journey is to establish a set of global variables in our game. We'll do this next since many other bits of code will rely on these variables.
Creating Global Variables
Document types that support JavaScript, including HTML5 Canvas, can use Global Scripts. Any code placed within the Global | Script section of the Actions panel is unique, in that the code there is not bound to any specific frame on the timeline. The reason this is so important is that when variables and functions are defined as Global, they can be accessed from any nested timeline or varied scope within a project.
To add code to the global scripts area, open the Actions panel (Window | Actions) and twirl down the Global category in the left-hand column:
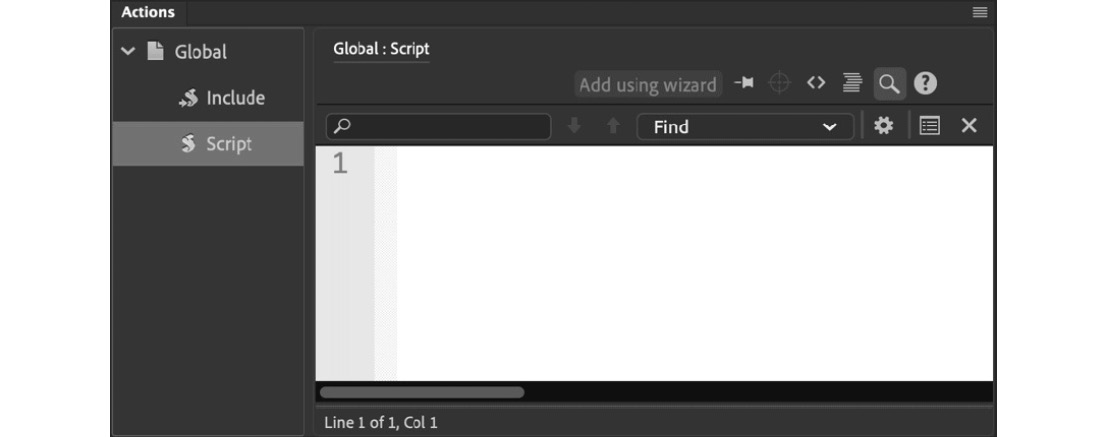
Figure 11.22 – Actions panel – Global: Script
Selecting Script and writing your code in the code editor will establish the variables and functions you create as Global in the scope.
We will declare a set of variables within this area so that they can be accessed throughout our game. Enter these declarations into the script editor:
var _this;
var stagew;
var stageh;
var health;
var score;
These five variables are simply declared here and will be populated with data values from within the frames-based code of our game. We will explore what the data values and other references are intended for once we declare them as part of the Start Screen area.
It is often helpful to keep small utility functions global as well. We'll declare a function called randomize that can be accessed across our game. Enter the following code into the same Global scripts area, along with the previously defined variables:
function randomize(min, max) {
return Math.round(Math.random() * max) + min;
}
The randomize function accepts a minimum and maximum number value and returns a random number between them. This is great for randomizing the values of position, scale, opacity, and so on.
Note
You have probably noticed the other option within Global called Include. The Include option allows you to link external JavaScript files to your project for use within a game or application. For instance, you could import a JavaScript-based game engine or some sort of effects library here for use within your game!
With our global variables and a global function established, let's move our attention to programming the Start Screen area and the game's initialization functionality.
Programming the Start Screen
The Start Screen area is pretty simple in terms of user-facing functionality but there is a bit more we need to do here than account for a single button press to start the game. We'll also look at the one-time establishment of core game data structures and make it possible to reinitialize the game parameters for this screen.
The first piece of code we will write in frame 1 of the Actions layer mostly defines the values for our Global variables:
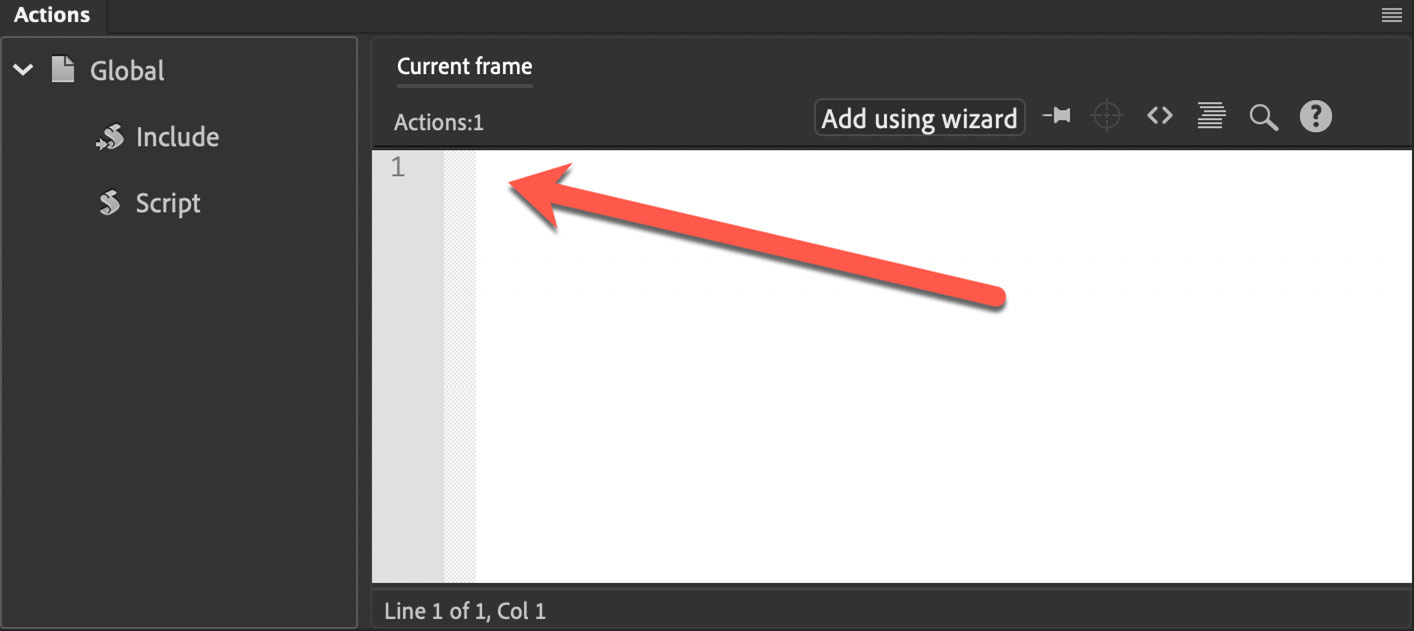
Figure 11.23 – The Actions panel should display "Current frame" and "Actions:1"
Type the following code into the script editor:
if (_this == undefined) {
_this = this;
_this.stop();
stagew = stage.canvas.width / window.devicePixelRatio;
stageh = stage.canvas.height /
window.devicePixelRatio;
createjs.Sound.play("TitleMusic");
}
There are a set of important variables we need to set right from the start as these will be used on every screen of our game and, for the most part, correspond with the Global variables that have already been declared.
We only need to execute these assignments when the game first loads, though. There is no need to declare the game's width and height or preserve reference variables at any other time – these stay the same no matter what and do not change value. To ensure we only perform these assignments once, never to be repeated, we can check whether we've assigned a reference to _this yet by checking if (_this == undefined) {}. If we haven't, it will return undefined and we can safely assign the references and data.
In the code block that follows, we set _this to refer to this, which preserves a reference to the main timeline since that is where we currently are, in the global scope. Now, we can make use of _this to invoke stop(), which immediately stops the playhead at frame 1. Then, we can preserve the width and height of the game stage to perform various calculations in our code against player, enemy, and projectile positions.
Note
Notice that we divide the actual canvas width and height by the device pixel ratio. The devicePixelRatio property will normally return either 1 or 2. The reason this is necessary is to target both retina and non-retina screens as browsers will increase the <canvas> pixel density when necessary. This ensures our calculations will be correct.
The last thing we must do is play the Start Screen music. Our sound object has been given a Linkage ID of TitleMusic in the library, so we can easily reference it and begin playback here. We can do so by invoking the play() method within createjs.Sound, which taps directly into the audio management capabilities of CreateJS and SoundJS.
When a user clicks the PLAY! button, we need to switch to the Game Screen area, but we'll also use this opportunity to set up additional items within the game. Type the following code below the existing code:
_this.startbutton.on('click', function () {
init();
});
function init() {
health = 3;
score = 0;
createjs.Sound.stop("TitleMusic");
createjs.Sound.play("GameMusic");
_this.gotoAndStop("gamescreen");
}
As you may recall, we gave our PLAY! object an instance name of startbutton so that it could be addressed with code. The first thing we must do is create an event listener on this object and have it run a function called init(), which will initialize and start the gameplay.
The init() function itself sets the initial values for the player's health and the game's score. The useful thing about setting values for things such as health and score in this way is that it can effectively reset the game whenever it is clicked, restoring the player's health and resetting the score.
We must also stop TitleMusic, which is already playing, and then immediately play GameMusic right before moving the playhead to the Game Screen area at the frame 4 keyframe, which includes a frame label of gamescreen.
Our programming for the Start Screen area is now complete. Next, we'll look at the gameplay and begin by focusing on player movement.
Programming Player Actions
In the game, we want the player instance to be able to move back and forth across the bottom of the stage based on directional arrow key presses. We also need the player to fire projectiles up to the sky to eliminate enemies.
Select the keyframe at frame 4 of the Actions layer and type the following:
window.addEventListener("keydown", handleKeys);
function handleKeys(e) {
var newPosition;
if (e.keyCode == 37) {
newPosition = _this.player.x - 30;
if (newPosition <= 0) {
newPosition = 0;
}
createjs.Tween.get(_this.player, {override:
true}).to({x: newPosition}, 300,
createjs.Ease.quintOut);
_this.player.play();
_this.player.scaleX = -1
} else if (e.keyCode == 38) {
fireWeapon();
} else if (e.keyCode == 39) {
newPosition = _this.player.x + 30;
if (newPosition >= stagew) {
newPosition = stagew;
}
createjs.Tween.get(_this.player, {override:
true}).to({x: newPosition}, 300,
createjs.Ease.quintOut);
_this.player.play();
_this.player.scaleX = 1
}
}
We add an event listener to window so that any part of the browser viewport can listen for key presses. We have it listen for a keydown event and when that occurs, invoke a function named handleKeys.
Within the handleKeys function, we detect which key was pressed by tapping into the event data that is captured by the keypress and reading the keyCode property within. This is numeric code that tells us exactly which key was pressed. The left arrow key is 37, the up arrow key is 38, and the right arrow key is 39. Depending on which of these three keys is detected, our code responds differently.
If a left or right arrow press is detected, we set a variable called newPosition, which is calculated based on the direction and represents where the character should end up on the stage. The new position will be 30px to the left or 30px to the right. Here, we compare the new position to the previously calculated stage width (alternatively, the left of the stage at 0px) to ensure that the player does not move off the screen. Additionally, if an up arrow press is detected, a function called fireWeapon() is invoked. We will create that function in a bit.
To animate the character's movement, we can invoke the play() method on the player instance and also adjust the scaleX property to force the instance to face the correct direction when walking. To move the player to a new position, we can use the Tween command in CreateJS. This command accepts a reference to an instance on the stage and tweens it along to a different position. We can set the length of time this will take, in milliseconds, and even apply Ease presets from CreateJS as part of the command.
If you were to test the game right now, the player instance's internal animation would be constantly looping since it is a Movie Clip symbol. We only want this to play when the user interacts with the arrow keys, so we need to stop the internal animation.
Double-click the Kitty symbol in the Library panel and type the following code into the Actions layer at frame 1:
this.stop();
This will effectively stop the walk cycle until we give the command for it to play() through the movement code. Once it hits frame 1 after playing, it will stop once again. This provides full control of the symbol's internal timeline.
As part of our keypress listener, we must invoke a function called fireWeapon() when an up arrow keypress is detected. We need to instantiate projectiles when this occurs and have some way of managing them as well.
Add a few line breaks below the handleKeys() function and enter the following lines of code below it:
var blasts = new createjs.Container();
stage.addChild(blasts);
function fireWeapon() {
var blast = new lib.Blast();
blast.x = _this.player.x;
blast.y = _this.player.y;
blasts.addChild(blast);
createjs.Sound.play("BlastNoise");
}
The first thing we do is create a CreateJS Container for our projectile Blast instances. By adding the instances to a Container in this way, we can keep track of and check the properties of each Blast instance in a loop later. Container is added to the stage.
The fireWeapon() function creates a new Blast instance from the library by using the given Linkage ID. Then, we set the position just atop the player instance and add the new Blast instance to our Container.
Lastly, we generate sound playback from the library so that firing projectiles makes an audible sound.
Projectiles are to be fired against an invading set of enemies. Next, we'll write some code to generate the enemies for our game.
Programming Enemy Behavior
The enemies in this game are pigs that parachute down from the sky. Their goal is to reach the ground, beyond the height of the stage, while the player's goal is to shoot them out of the sky before that happens.
To generate our enemies, we'll create an addEnemy() function that can be called from within our eventual game loop, as enemies are needed. Type the following below the previous code block:
var enemies = new createjs.Container();
stage.addChild(enemies);
function addEnemy() {
var enemy = new lib.EnemyPig();
enemy.x = randomize(50, stagew - 50);
enemy.y = randomize(100, 2000) * -1;
enemy.speed = randomize(0.5, 3);
var direction = randomize(-1, 2);
if (direction == 0) {
direction = -1;
}
enemy.scaleX = direction;
enemy.gotoAndPlay(randomize(1, 120));
enemies.addChild(enemy);
}
Enemies are added to a Container, much like the Blast projectiles are, and for the same reasons. When we write the game's heartbeat function, or game loop, we can constantly monitor both enemies and projectiles and respond to collisions, movements, and boundary extremes.
Within the addEnemy() function, we instantiate EnemyPig from the library and then make heavy use of the global randomize() function to add some variability to the enemy's position, fall speed, facing direction, and internal animation starting frame. Lastly, we add the new EnemyPig instance to our Container with these given properties.
At this point, our player character is set up with a full move set, projectiles can be generated, and enemies can be spawned. The game loop ties all of this together, and that is what we will write next.
Programming the Game Loop
The game loop (or heartbeat) is a function that runs continually and monitors the game environment for changes. When changes are discovered, a set of additional instructions are executed as the program requires. The game loop brings everything together in a meaningful way and controls all the reactions between the elements within the game's structure.
To begin writing our game loop, we will make use of CreateJS Ticker (which, in Animate, is bound to our document's FPS value) and a function that executes at every tick.
Write the following JavaScript below any previous code:
var heartbeat = createjs.Ticker.on("tick", gameLoop, _this);
function gameLoop(e) {
_this.healthdisplay.text = "Health: " + health;
_this.scoredisplay.text = "Blasted: " + score;
/* BLAST MANAGEMENT PLACEHOLDER */
/* ENEMY MANAGEMENT PLACEHOLDER */
}
It is important to give your Ticker listener an identifier so that you can manage it later. We set the listener to a new variable called heartbeat here, which will allow us to easily turn off the game loop once a game over occurs.
The game loop can also be made to constantly monitor and update things such as player health and overall score. Recall that we created dynamic text fields on the stage for each and gave them both instance names. This allows us to output health and score data within related text objects to let the player know how the game is going.
Following this are two placeholder comment blocks. Comments in JavaScript are not executed but can serve as developer notes or placeholders like this. Single-line comments in JavaScript are written as // COMMENT, whereas multiline comments are written as /* COMMENT */. Of course, you can use multiline comments for a single line as well.
The first of these comments has to do with projectile monitoring and management. Delete that comment and type the following code in its place:
for (var i = blasts.numChildren - 1; i >= 0; i--) {
var b = blasts.getChildAt(i);
b.y -= 10;
if (b.y < -50) {
blasts.removeChild(b);
}
var blastTarget = enemies.getObjectUnderPoint(b.x,
b.y, 0);
if (blastTarget) {
enemies.removeChild(blastTarget.parent.parent);
blasts.removeChild(b);
score++;
}
}
We begin this code block with a for loop. The for loop is constructed as follows:
for(index; condition; adjustment){ body }
- For our index, we set the i variable, which is assigned the number of projectiles within their Container, minus 1. We remove one because we want the index value of the projectile and not the total number of projectiles. If there are no projectiles present within Container, the index value will be -1.
- condition checks to see if our index value is greater than or equal to 0. Indexes in JavaScript begin with 0 and count upwards, so an index of 1 is the second spot and not the first, which would be 0.
- Finally, we make an adjustment to the index value for the next iteration of our loop. In this case, we decrement the index value by 1 each time the loop runs. When all the projectiles have had their turn, the loop terminates.
- Within the curly braces is the body area of our loop, which runs once for each loop iteration.
Within each loop iteration, we begin by creating a reference to a specific projectile with getChildAt(). Passing in the current index, we target a specific projectile instance within the blasts container.
Once we have established the reference, we can manage the blast projectile. We set a new position for the projectile that is 10px closer to the top of the stage than it currently is. Then, we check the position to see whether it has gotten so high as to have left the stage. At that point, we remove the instance entirely.
The last block of code is all about collision detection. We use the getObjectUnderPoint() function of CreateJS to check whether the position of the projectile overlaps any of our enemy instances. If it does, we remove the enemy it collided with, the projectile itself, and increment our score by a value of 1.
The second comment placeholder in our game loop has to do with enemy monitoring and management. Delete that comment and replace it with the following:
for (var i = enemies.numChildren - 1; i >= 0; i--) {
var e = enemies.getChildAt(i);
e.y += speed;
if (e.y > stageh + 50) {
enemies.removeChild(e);
health--;
/* GAME OVER DETECTION PLACEHOLDER */
}
}
if (enemies.numChildren < 10) {
addEnemy();
}
Very similar in construction to our projectile management loop, we manage enemies in a for() loop as well. The logic is the same, except we are performing the loop against the enemies container.
Here, we move each enemy down the stage toward the bottom by a number based on the random speed value that was assigned upon generation. If the enemy's position is more than 50px below the stage bottom, we remove the enemy instance and decrease the player's health by 1 point. It is at this time that we can also detect whether the health is low enough for a game over, but that is a placeholder comment for now.
Following the for() loop, we do a simple check to see whether the number of enemies we currently have at play is less than 10. If it is, we invoke addEnemy() to add another, ensuring there is a constant stream of enemies in play. Since this is part of the game loop, enemies will be constantly generated as the need arises.
The last bit we need to write is the game over detection and cleanup script. Replace the game over detection comment with the following code block:
if (health <= 0) {
createjs.Ticker.off("tick", heartbeat);
window.removeEventListener("keydown", handleKeys);
stage.removeChild(enemies);
stage.removeChild(blasts);
createjs.Sound.stop("GameMusic");
createjs.Sound.play("TitleMusic");
_this.gotoAndStop("endscreen");
}
The only condition for a game over is if the player's health drops to 0. When that happens, we disable Ticker so that the game loop no longer runs, remove the keydown listener, remove all instances of enemies and projectiles by removing their associated Containers, stop the GameMusic playback, play TitleMusic again, and send the playhead to the End Screen area. This effectively ends the game.
With the Game Screen code in place, all we need to do is program the End Screen events and the entire game is complete!
Programming the End Screen
The End Screen area contains the least amount of code out of all our game screens. This is because all we have to do is add an event listener to detect whether the player wants to go another round.
Select the keyframe at frame 7 of the Actions layer and write the following within the script editor:
_this.reduxbutton.on('click', function(){
_this.gotoAndStop("startscreen");
});
This should be easy for you to interpret by now. The Movie Clip instance called reduxbutton is given an event listener of the click type. Once a click is detected, we go back to the Start Screen area.
Once on the Start Screen area, the initial setup is ignored since those references already exist. When the player clicks startbutton again, health and score are reset to their default values and the game begins again.
In this section, we programmed an entire game using JavaScript for the native web. We examined how to write code to control existing elements on each screen, how to generate new elements from the document library, and how to write a game loop and associated logic to monitor and respond to all sorts of game events. Coming up, we'll consider a few things we can do to finish the project in Animate through Publish Settings.
Finishing the Game Project
Now that the code has been written and the game is functionally complete, it makes sense to look at everything we've done and reflect on how it is all organized within Animate.
Have a look at the Actions panel now that the game has been written:
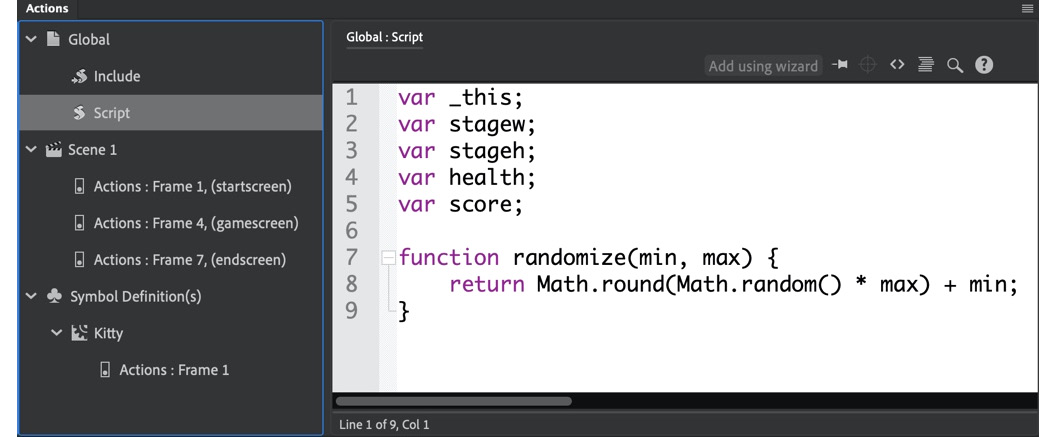
Figure 11.24 – Code bound to specific locations
Notice that in the left-hand column of the Actions panel, specific chunks of code are listed and organized according to the specific objects, layers, and frames they have been bound to. We have global script code, code segmented across the main timeline, and a bit of code within a symbol. It all works together to create a cohesive gameplay experience!
To finish the project, there are a few considerations you may want to look over to add some extra polish to how the game is published.
Open the Publish Settings dialog by choosing File | Publish Settings… or by going to the Doc tab of the Properties panel under More Settings…:
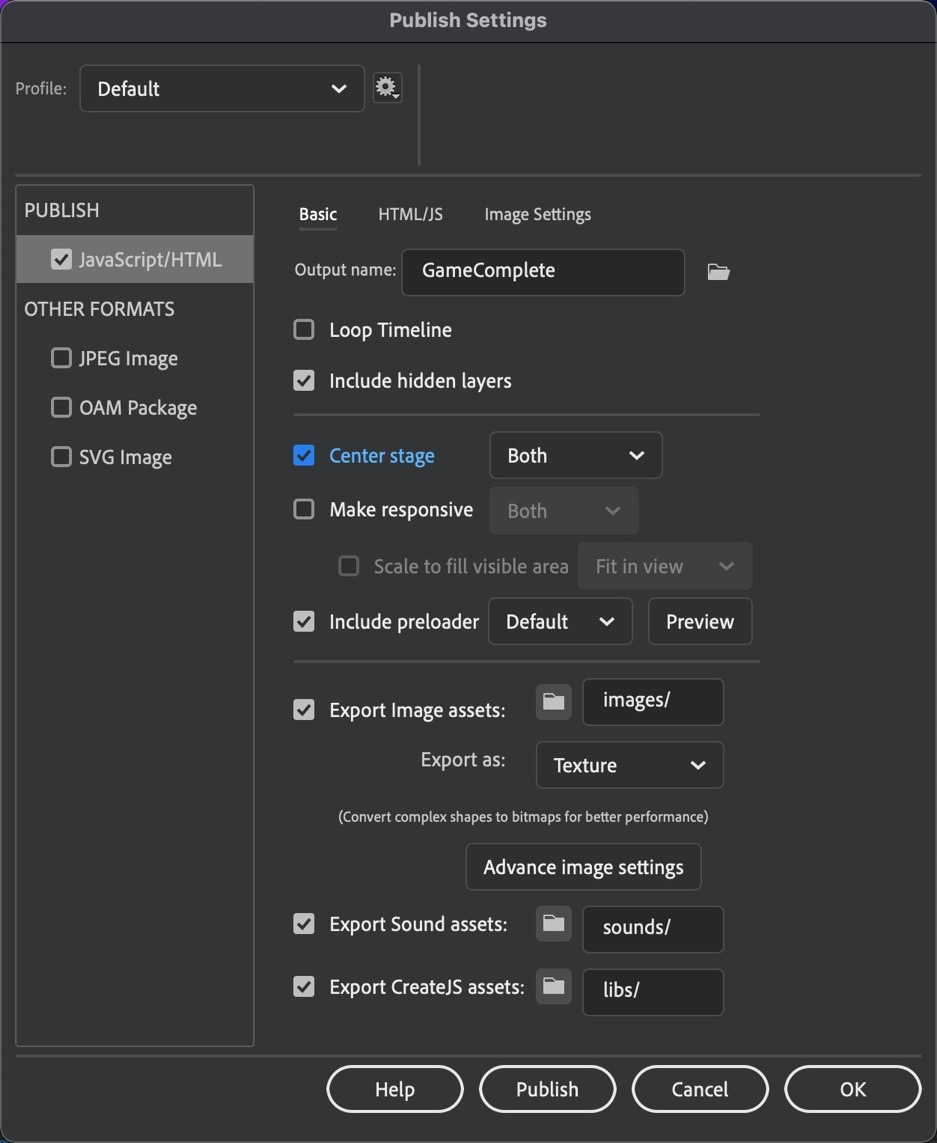
Figure 11.25 – HTML5 Canvas – Publish Settings
There are a lot of options here, as we discovered in Chapter 4, Publishing and Exporting Creative Content. For our game project, let's choose Center stage and Include preloader for our options. This will center the game on the HTML page that is generated and add a little preloader animation to let the user know the game is loading.
In this section, we finished our game project by organizing the code we've written and tweaking our Publish Settings to provide the user with a more refined game experience.
Summary
We've accomplished so much in this chapter! We began by examining the starter document, which already had several assets in place on the stage and within the project library, all derived from the Assets panel. Then, we went through each screen and library item to organize our timeline with frame labels and to provide instance names and Linkage IDs where needed. The bulk of our time in this chapter was spent in the Actions panel, writing all the JavaScript code that controls the player character, enemy and projectiles, internal variables and references, and how all of these elements interact with one another to produce a full game experience for the web. Closing out, we looked at Publish Settings and adjusted some of the attributes for our published game content.
In the next chapter, we'll explore a somewhat related web-based project in the form of virtual reality experiences using WebGL glTF document types.