
7
Building Solution Code with BDD and TDD
Now that we have gone through the fundamentals of writing test programs using test-driven development (TDD) and behavior-driven development (BDD), we can start using both processes in developing our example application. When working on commercially successful and large-scale applications, one thing is common: they all need maintenance. There will always be room for improvement in terms of the product’s functionality. There could be some bugs that were missed, and—more commonly—more features to improve the product will continuously be added to the application. This is usually how badly written code gets worse. A nicely written class can end up being a god class: a class that can do everything with a few thousand lines of code. A developer can start writing additional functions inside the god class while another developer is using that class, therefore changing the class’s behavior. You can guess what happens next! A new bug is introduced.
There are a lot of times during development when a developer may start working on a feature that will depend on other features that are not written yet. So, how do we write tests for these types of features? We’ll need to start mocking those dependencies. In this chapter, we will learn how to use mock objects and we will also start writing our code so that it will be cleaner and easier to maintain by following the SOLID principles. We will also be using the Red-Green-Refactor pattern to help us lay down the tests and features that we need to build. But before all that, we’ll first create a Behat feature to kickstart all of the tests and code we’ll be writing.
In this chapter, we will go through the following topics:
- Implementing the Red-Green-Refactor pattern
- Writing tests and solution code for the example project
- Creating a Behat feature based on a Jira ticket
- Passing the Behat registration feature
Technical requirements
In this chapter, you are advised to use the following base code from this code repository: https://github.com/PacktPublishing/Test-Driven-Development-with-PHP-8/tree/main/Chapter%207/base/phptdd. After completing the chapter, the resulting solution code can be found at https://github.com/PacktPublishing/Test-Driven-Development-with-PHP-8/tree/main/Chapter%207/complete for reference.
Preparing the development environment for the chapter
First, get the base code for this chapter found at https://github.com/PacktPublishing/Test-Driven-Development-with-PHP-8/tree/main/Chapter%207/base or simply run the following command:
curl -Lo phptdd.zip "https://github.com/PacktPublishing/Test-Driven-Development-with-PHP-8/raw/main/Chapter%207/base.zip" && unzip -o phptdd.zip && cd base && ./demoSetup.sh
To run the containers and execute the commands in this chapter, you should be inside the docker-server-web-1 container.
Run the following command to confirm the container name for our web server:
docker ps
To run the containers, run the following command from the /docker directory from the repository in your host machine:
docker-compose build && docker-compose up -d
docker exec -it docker-server-web-1 /bin/bash
Once inside the container, run the following commands to install the libraries required through Composer:
/var/www/html/symfony# ./setup.sh
/var/www/html/behat# ./setup.sh
Implementing the Red-Green-Refactor pattern
The Red-Green-Refactor pattern is a type of programming approach to implementing TDD. It’s a cycle where you first deliberately write a failing test, in which you see a red-colored failing message when you execute the test. Then, you write solution code to pass that test, in which you will see a green-colored passing message. After passing the test, you can then go back to clean up and refactor your test and solution code.
If you open the codebase/symfony/runDebug.sh file that we created earlier in this book in Chapter 5, Unit Testing, you’ll notice that we are running PHPUnit by adding the --color=always parameter. Then, whenever we run PHPUnit and we get a failing test, you will notice that we always get a red error or failed test message.
To demonstrate the pattern clearly, let’s go through an example:
- Create a new file called HelloTest.php:
codebase/symfony/tests/Unit/HelloTest.php
<?php
namespace AppTestsUnit;
use PHPUnitFrameworkTestCase;
class HelloTest extends TestCase
{
    public function testCanSayHello()
    {
        $this->fail("--- RED ---");
    }
}- After creating the new unit test, run the following command to make sure that PHPUnit can execute a testCanSayHello test:
/var/www/html/symfony# php bin/phpunit --filter testCanSayHello --color=always
You should then see the following result:

Figure 7.1 – Red highlighted failed message
In TDD, we always start by writing a test that will have no implementations to support or pass it. We then need to run the test to make sure that PHPUnit recognizes the test and that it can execute it. We also want to confirm that we’ve created the test class in the correct test suite and the correct directory and that it uses the correct namespace.
After running the command stated previously, this newly created test will fail as expected and PHPUnit will show a red colored error or fail message. This is the Red in the Red-Green-Refactor pattern!
Once we are sure that we can use PHPUnit to run a test, we can then move on to start writing code to pass our failing test. Remember TDD? Our test will start or drive the creation of the solution code to solve a problem, hence test-driven. So, now, to quickly pass the failing test, we will write some code to pass the failing test by following these steps:
- Modify the test and add a new class:
Codebase/symfony/tests/Unit/HelloTest.php
<?php
namespace AppTestsUnit;
use AppSpeaker;
use PHPUnitFrameworkTestCase;
class HelloTest extends TestCase
{
    public function testCanSayHello()
    {
        $speaker = new Speaker();
        $this->assertEquals('Hello' $speaker->
            sayHello());
    }
}codebase/symfony/src/Speaker.php
<?php
namespace App;
class Speaker
{
    public function sayHello(): string
    {
        return 'Hello';
    }
}
In the HelloTest class, we have modified the testCanSayHello() method so that it will create an instance of the new Speaker class we created, and then, in the assertion line, we directly compare the expected word Hello to the string returned by the sayHello() method. Now, if we run the test again, we should no longer see the red failure message.
- Run the same test by using the following command:
/var/www/html/symfony# php bin/phpunit --filter testCanSayHello --color=always
We should now see the following result from PHPUnit:

Figure 7.2 – Green highlighted message
We passed the test! Now, our testCanSayHello() test no longer returns a red error/failure message. We did the minimum work to pass the test, and we can now see a green OK (1 test, 1 assertion) message instead. This is the Green in the Red-Green-Refactor pattern.
When you’re working on your own project, at this stage after passing a test, you can either move on to the next test or next problem in your list of things to do or you can try improving both the test and the solution code to make it cleaner and easier to read.
In this example, we’ll go ahead and improve both the test and solution code to let it support more test scenarios.
Follow these steps:
- Modify the HelloTest class with the following content:
codebase/symfony/tests/Unit/HelloTest.php
<?php
namespace AppTestsUnit;
use AppSpeaker;
use PHPUnitFrameworkTestCase;
class HelloTest extends TestCase
{
    /**
     * @param Closure $func
     * @param string $expected
     * @dataProvider provideHelloStrings
     */
    public function testCanSayHello(Closure
        $func, string $expected)
    {
        $speaker        = new Speaker();
        $helloMessage   = $speaker->sayHello($func);
        $this->assertEquals($expected, $helloMessage);
    }
    /**
     * @return array[]
     */
    private function provideHelloStrings(): array
    {
        return [
            [function($str) {return ucfirst($str);},
                'Hello'],
            [function($str) {return strtolower($str)
                ;}, 'hello'],
            [function($str) {return strtoupper($str)
                ;}, 'HELLO'],
        ];
    }
}codebase/symfony/src/Speaker.php
<?php
namespace App;
class Speaker
{
    /**
     * @return string
     */
    public function sayHello(Closure $func): string
    {
        return $func('Hello');
    }
}
We have refactored the test so that we can add more flexibility to the Speaker.php class. We have also refactored the HelloTest.php test class itself to be more flexible as well. If we run the test again, we should still pass the test.
- Run the test again by running the following command:
/var/www/html/symfony# php bin/phpunit --filter testCanSayHello --color=always
Now, we should see the following result:

Figure 7.3 – Still green after the refactor
You will notice that instead of getting OK (1 test, 1 assertion) because we only executed one test, we are now getting OK (3 tests, 3 assertions) instead. This is because we have refactored the test so that it can use @dataProvider. We then created a new function called provideHelloStrings() that returns an array of closures and strings. Each array set will be used as parameters for the testCanSayHello() test method. At this stage, we still pass the test, even after we have done the refactors. This is the Refactor phase of the Red-Green-Refactor pattern.
It will be very common in a real-world enterprise project to write programs that rely on someone else’s project that is not readily available to you or your team. Should this stop you from developing your program that relies on something that is not complete yet? Probably not! Next, we’ll need a way to focus on testing a specific part of our application, even if it depends on other objects that are not built yet. For this, we will need to use mock objects.
Writing tests and solution code for the example project
Back in Chapter 2, Understanding and Organizing the Business Requirements of Our Project, we used Jira as a tool to organize the list of things we need to build for the project. Aside from using Jira, there is other project tracking software out there too, or we can just simply use a notepad or a piece of paper and write down the tasks we want to write programs for. But we just want to be a bit more organized, and if you’re working with a team of software developers and with other teams in the company, it’s easier to collaborate if you use issue-tracking software, rather than a piece of physical paper.
We have grouped the Jira user stories into two groups: the Inventory Clerk Solution group and the Visitors Page group. These groups are called epics. We will start working on the Inventory Clerk Solution epic first. This is to allow the car museum inventory clerk to enter that valuable data into the system for the visitors to view.
Up to this point, as we were going through BDD and TDD, we were playing with our development environment setup as an example. Now, we can use it to build our example project too. Download the base code from https://github.com/PacktPublishing/Test-Driven-Development-with-PHP-8/tree/main/Chapter%207/base/phptdd. You can use the base code and push it into your master branch that is linked to your Jira project. Then, all subsequent tickets that we will be working on moving forward will branch off and get merged from and into that master branch.
Let’s start with the first ticket, TOYC-2. Go back to your Jira Roadmap page and click on the TOYC-2 story, then click on the Create branch link from the popup:

Figure 7.4 – TOYC-2 story: Create branch link
We’ll need to create a new Bitbucket branch for this feature. This is where we will commit all additional code we will be building for this specific ticket. Ideally, you’ll need to develop a branch that is branched off the master branch. We will then branch off the develop branch, and after we finish a feature, we will merge it back into the develop branch.
Create a new feature branch from the develop branch. Let’s call this the TOYC-1 branch, which represents our Inventory Clerk Solution epic. Then, branch off the TOYC-1 branch and create a new feature branch—let’s call it TOYC-2. Check out the TOYC-2 branch into your local development environment, and at this stage, you should have all the base files cloned into your local machine.
We will need to make sure that our containers are running. Run the following commands to build and run the containers.
Using your terminal, within the docker directory, run the following command:
$ docker-compose build && docker-compose up -d
After successfully running the containers, execute the following command, and make sure you can go inside the web container:
$ docker exec -it docker_server-web_1 /bin/bash
At this point, you should now see our main behat and symfony directories:

Figure 7.5 – behat and symfony root directories
At this stage, our development environment is running properly again. Next, we will create a Behat feature that will help us start the development of the software solution for the TOYC-2 ticket.
Creating a Behat feature based on a Jira ticket
In the previous chapter, we learned how to create a simple Behat feature. In this section, we will create a new Behat feature that will represent the TOYC-2 Jira ticket we created earlier, in Chapter 2, Understanding and Organizing the Business Requirements of Our Project. This will then help drive the development of the integration and unit tests that will help us build the actual solution code. Let’s get started with the steps.
Create a Behat feature file, name it inventory_clerk_registration.feature, and save it with the following feature content:
codebase/behat/features/inventory_clerk_registration.feature
Feature: Inventory Clerk Registration
  In order to access the inventory system
  As an Inventory Clerk
  I need to be able to create a clerk account
  Scenario: Access Registration Page
    Given I am in the home "/" path
    When I click the "Register" link
    Then I should be redirected to the registration page
  Scenario: Register
    Given I am in the register "/register" path
    When I fill in Email "Email" with
        "[email protected]"
    And I fill in Password "Password" with "password"
    And I check the "AgreeTerms" checkbox
    And I click on the "Register" button
    Then I should be able to register a new account
If you read through the Behat feature we just created, it is going to be very self-explanatory about what we are trying to achieve. These steps are the steps that a real-life user would do to be able to register to our system. At this point, we won’t be building the solution code yet but will create Behat registration test code first.
Creating a Behat registration feature
Since we are using the base code for this chapter, we will have to make sure that we have all the libraries installed for us to be able to run Behat.
We need to install the Composer package again to be able to use Behat. Run the following command to reinstall the libraries needed:
/var/www/html/behat# composer install
This will then pull and install all the libraries we were using in the previous chapter. After the installation, let’s see whether we can generate a Behat PHP class for our login feature:
- Update the behay.yml file with the following content:
codebase/behat/behat.yml
default:
  suites:
    default:
      contexts:
        - FeatureContext
        - HomeContext
        - InventoryClerkRegistrationContext
- After updating the behat.yml file, let’s now try running this command to generate a PHP context class:
/var/www/html/behat# ./vendor/bin/behat --init
After running the command, we should have been able to generate a new PHP class in codebase/behat/features/bootstrap/InventoryClerkRegistrationContext.php.
- Now, let’s try to automatically generate PHP methods inside the InventoryClerkRegistrationContext.php class based on the inventory_clerk_registration.feature file.
/var/www/html/behat# ./vendor/bin/behat features/inventory_clerk_registration.feature --append-snippets
After running the command, you should see the following result:

Figure 7.6 – Autogenerating context methods
After running the preceding command, if you open the codebase/behat/features/bootstrap/InventoryClerkRegistrationContext.php class, you should be able to see the newly added methods. Now, if we run Behat, we’ll probably get a failing result.
- Run the following command:
/var/www/html/behat# ./vendor/bin/behat
You should see the following result:

Figure 7.7 – Behat failures
You will notice that we have failed the home feature, have skipped the pending tests, and at this stage, we can’t even visit the home page. This is because we also must install the missing libraries for the Symfony application. Like what we did for Behat, let’s install the missing Composer packages for the Symfony app.
- Run the following command:
/var/www/html/symfony# composer install
- After installing the missing Symfony packages, let’s modify the InventoryClerkRegistrationContext.php class so that we throw an exception on the iAmOn method:
codebase/behat/features/bootstrap/InventoryClerkRegistrationContext.php
/**
 * @Given I am on /
 */
public function iAmOn()
{
    throw new Exception();
}
Now, let’s try running Behat again and see whether we can at least pass the home page feature test.
- Run Behat again by running the following command:
/var/www/html/behat# vendor/bin/behat
We should now be able to pass the home page feature test and still continue to fail the inventory clerk feature test:

Figure 7.8 – Home page feature passing, login failing
Because we have installed the missing Symfony packages, the home page test now passes. But since we have not built any solution code to pass the login test yet, it will continue to fail.
By following the Red-Green-Refactor pattern, now that we have a failing test, which is the Red phase, we can now move on to writing the solution code needed to pass this failing test, which is the Green phase.
Passing the Behat registration feature
Now that we have a couple of failing Behat tests for the login feature, let’s try to do the minimum amount of work to complete the feature, and pass the tests. Luckily, Symfony makes it easy to implement security. We can use the symfony/security-bundle Composer package to add authentication and authorization to our application, without having to build everything from scratch.
You can read more about Symfony’s security documentation at https://symfony.com/doc/current/security.html.
To pass the failing Behat registration feature, as Behat simulates a user using a web browser, we will have to create all the programs needed for a real user to be able to register an account in our application from the web browser, which then hits the controllers, the services, and then down to the database persistence process. Let’s start with the controllers.
Writing failing controller tests
Before passing our main Behat feature tests, which can also be considered functional tests, let’s write some controller tests inside our Symfony application itself. Although the Behat tests will also run tests against the controllers, these Symfony controller tests will be less complex than the Behat feature tests.
By reading the Behat registration feature we created earlier, we can easily identify that we need two controllers at the very least: a home page controller and a registration page controller. The home page is where the user starts the journey, and the registration page is where the clerk registers for a new account.
Create home page test classes with the following content:
codebase/symfony/tests/ Integration /Controller/HomeControllerTest.php
<?php
namespace AppTestsIntegrationController;
use SymfonyBundleFrameworkBundleTestWebTestCase;
class HomeControllerTest extends WebTestCase
{
    public function testCanLoadIndex(): void
    {
        $client = static::createClient();
        $client->request('GET', '/');
        $this->assertResponseIsSuccessful();
    }
}
Next, create a registration page test class with the following content:
codebase/symfony/tests/ Integration /Controller/RegistrationControllerTest.php
<?php
namespace AppTestsIntegrationController;
use SymfonyBundleFrameworkBundleTestWebTestCase;
class RegistrationControllerTest extends WebTestCase
{
    public function testCanLoadRegister(): void
    {
        $client = static::createClient();
        $client->request('GET', '/register');
        $this->assertResponseIsSuccessful();
        $this->markTestIncomplete();
    }
}
Now that we have tests for the main controllers that we’ll be using to pass the Behat feature tests, let’s first see whether we pass these Symfony tests.
Run the following command:
/var/www/html/symfony# php bin/phpunit --testsuite Functional
After running the tests, you should get two failing tests. We used the --testsuite parameter so that we only execute the two controller tests we just created.
Now we know that we will have to pass these two tests, we can continue working on the solutions to pass them. At this stage, we are in the “Red” phase of the Red-Green-Refactor pattern we discussed earlier in the chapter.
We can now start working on the registration and registration solution first.
Implementing a registration solution using Symfony
The great thing about using open source frameworks is that there is a big chance of a lot of the software we developers need to build for our own projects having already been built as an open source library or package. And to pass our failing registration test, let’s use Symfony’s security-bundle package instead of writing everything from scratch.
Remember—as software developers, we don’t simply develop code alone. We develop solutions. And if there are existing packages or libraries that can help you speed up the development of your solution, and if they fit your specifications, you can consider using them instead. Otherwise, you’ll have to build the code from scratch.
You can read about Symfony’s security solution on its official documentation page at https://symfony.com/doc/current/security.html.
We can use Symfony’s security solution by running the following command:
/var/www/html/symfony# php bin/console make:user
Read the prompts and enter the default values suggested.
Next, we need to set up the databases we need. Remember—we are not only using one database, but we also need a separate test database as well. You can read more about this in Chapter 5, Unit Testing.
Database setup
We will need to create two databases: cars and cars_test databases. The cars database will serve as our main database, and the cars_test database will be like a replica database that our automated tests will use. After all, you don’t want to run data mutation tests against your production database.
Run the following commands to set up our databases:
/var/www/html/symfony# php bin/console doctrine:database:create --env=test
/var/www/html/symfony# php bin/console doctrine:database:create
/var/www/html/symfony# php bin/console make:migration
/var/www/html/symfony# php bin/console doctrine:migrations:migrate -n --env=test
/var/www/html/symfony# php bin/console doctrine:migrations:migrate -n
As we did in Chapter 5, Unit Testing, we have created our MySQL databases and tables based on the Doctrine entity found in the codebase/symfony/src/Entity directory.
Next, let’s create a registration form using Symfony’s security-bundle package.
Using Symfony’s registration form
Next, we can use Symfony’s registration form. The base solution code already has all the dependencies declared in the composer.json file, so you can just run the following command to generate the registration code:
/var/www/html/symfony# php bin/console make:registration-form
The preceding command will generate a few files—one of them is the RegistrationController.php class. If you open that class, you’ll see that it has a register method. We also created a test for this controller and method. Let’s see whether it now works.
Run the following command:
/var/www/html/symfony# php bin/phpunit --filter RegistrationControllerTest
After running the test, we should now be able to pass this test:

Figure 7.9 – Passing the register route test
At this stage, we are in the “Green” phase of the Red-Green-Refactor pattern. Does that mean we are done with the registration feature? Absolutely not. Since we are not completed with this test yet, usually I use PHPUnit’s $this->markTestIncomplete(); method and add it to the test class. This can help remind developers that the test is written and the solution is partially there but is still incomplete. Go ahead and add the $this->markTestIncomplete(); method inside the testCanLoadRegister method in the codebase/symfony/tests/Functional/Controller/RegistrationControllerTest.php test class.
Now, run the test again:
/var/www/html/symfony# php bin/phpunit --filter RegistrationControllerTest
You should see the following result:

Figure 7.10 – Incomplete register route test
Now the test is marked as incomplete, and we can go back to it later. It’s up to you whether you want to use this feature, but I find it useful when working on large projects. The only thing I don’t like about this is that sometimes it doesn’t grab my attention as much as a failing test would. For now, let’s remove the Incomplete mark.
Creating a home controller
Now let’s create a home controller where the users usually land first. Here, we will also find the Register link that the user will click to get redirected to the Registration page.
Create a home controller by running the following command:
/var/www/html/symfony# php bin/console make:controller HomeController
After running that command, we should now have a new Symfony controller in codebase/symfony/src/Controller/HomeController.php. Edit the route inside the controller and replace /home with just a forward slash (/).
Now, let’s see whether our controller tests now pass. Run the Symfony functional tests again:
/var/www/html/symfony# php bin/phpunit --testsuite Functional --debug
You should now see the following result:
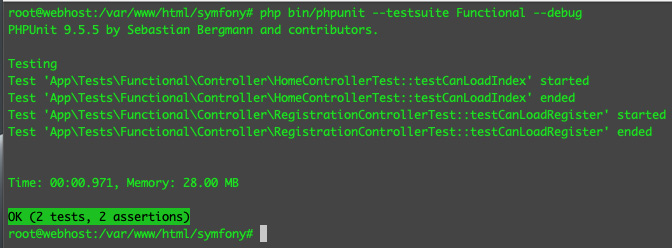
Figure 7.11 – Passing controller tests
Since our controller tests are very simple, we are basically just testing whether the page response for the route is successful; we can now be sure that both tests pass. This will not satisfy the Behat registration feature test, though. So, let’s continue working on it!
Let’s modify the home controller’s twig template content. Open the following file and replace the entire example-wrapper div content with the following:
codebase/symfony/templates/home/index.html.twig
<div class="example-wrapper">
    <h1>{{ controller_name }}</h1>
    <ul>
        <li><a href="/register" id="lnk-register">
            Register</a> </li>
    </ul>
</div>
We just added a link to the registration page. If you try to access the home page through the browser, you’ll see something like this:

Figure 7.12 – HomeController
Next, let’s go back to our BDD test in the behat directory. Let’s try to write some test code and see whether we can finally register a new user.
Passing the Behat feature
Our Behat registration feature simulates a user visiting the home page, clicking on the registration link, getting redirected to the registration page, filling up the registration form, clicking on the Register button, and then getting redirected to some elected page.
This is exactly like what a manual tester would do to test the registration feature. Instead of doing these steps manually using a browser, let’s just use Behat to do all these steps for us.
Open the following Behat context file, and replace the content with the following:
codebase/behat/features/bootstrap/InventoryClerkRegistrationContext.php
<?php
use BehatMinkMink;
use BehatMinkSession;
use BehatMinkDriverGoutteDriver;
use BehatMinkExtensionContextMinkContext;
use BehatMinkExtensionContextMinkAwareContext;
/**
 * Defines application features from the specific context.
 */
class InventoryClerkRegistrationContext extends MinkContext implements MinkAwareContext
{
    /**
     * Initializes context.
     *
     * Every scenario gets its own context instance.
     * You can also pass arbitrary arguments to the
     * context constructor through behat.yml.
     */
    public function __construct()
    {
        $mink = new Mink([
            'goutte'    => new Session(new GoutteDriver()), // Headless browser
        ]);
        $this->setMink($mink);
        $this->getMink()->getSession('goutte')->start();
    }
}
In the preceding snippet, we started with the constructor. We declared the emulator and session objects we will use in the class.
Next, add the following code:
/**
 * @Given I am in the home :arg1 path
 */
public function iAmInTheHomePath($arg1)
{
    $sessionHeadless = $this->getMink()->getSession
        ('goutte');
    $sessionHeadless->visit($arg1);
    // Make sure the register link exists.
    $assertHeadless = $this->assertSession('goutte');
    $assertHeadless->elementExists('css', '#lnk-register');
}
/**
 * @When I click the :arg1 link
 */
public function iClickTheLink($arg1)
{
    $sessionHeadless = $this->getMink()->getSession
        ('goutte');
    $homePage = $sessionHeadless->getPage();
    $homePage->clickLink($arg1);
}
The preceding code will simulate a user being on the home page, then clicking on the Register link.
In the next snippet, Behat will try to confirm that it got redirected to the register controller page:
/**
 * @Then I should be redirected to the registration page
 */
public function iShouldBeRedirectedToTheRegistrationPage()
{
    // Make sure we are in the correct page.
    $assertHeadless = $this->assertSession('goutte');
    $assertHeadless->pageTextContains('Register');
    $assertHeadless->elementExists('css', '#registration_form_email');
}
You can easily check whether you’re on the right page by checking the route, but the preceding snippet shows that you can inspect the DOM itself, returned by the controller.
Next, add the following code to mimic a user inputting values into input forms:
/**
 * @When I fill in Email :arg1 with :arg2
 */
public function iFillInEmailWith($arg1, $arg2)
{
    $sessionHeadless = $this->getMink()->getSession
        ('goutte');
    $registrationPage = $sessionHeadless->getPage();
    $registrationPage->fillField($arg1, $arg2);
}
/**
 * @When I fill in Password :arg1 with :arg2
 */
public function iFillInPasswordWith($arg1, $arg2)
{
    $sessionHeadless = $this->getMink()->getSession
        ('goutte');
    $registrationPage = $sessionHeadless->getPage();
    $registrationPage->fillField($arg1, $arg2);
}
In the preceding snippet, the code mimics entering text into the Email and Password fields. Next, we will simulate checking a checkbox and clicking on the Submit button. Add the following code:
/**
 * @When I check the :arg1 checkbox
 */
public function iCheckTheCheckbox($arg1)
{
    $sessionHeadless = $this->getMink()->getSession
        ('goutte');
    $registrationPage = $sessionHeadless->getPage();
    $registrationPage->checkField($arg1);
}
/**
 * @When I click on the :arg1 button
 */
public function iClickOnTheButton($arg1)
{
    $sessionHeadless = $this->getMink()->getSession
        ('goutte');
    $registrationPage = $sessionHeadless->getPage();
    $registrationPage->pressButton($arg1);
}
In the preceding code, we have checked the Agree terms checkbox, then clicked on the Register button.
Next, add the following code to complete the test:
/**
 * @Then I should be able to register a new account
 */
public function iShouldBeAbleToRegisterANewAccount()
{
    $sessionHeadless = $this->getMink()->getSession
        ('goutte');
    $thePage = $sessionHeadless->getPage()->getText();
    if (!str_contains($thePage, 'There is already an
        account with this email')) {
    $assertHeadless = $this->assertSession('goutte');
    $assertHeadless->addressEquals('/home');
}
Since, in the Symfony app, we are redirecting the user back to the home controller when successful, we can check whether we got redirected to the home page. You’ll notice that it also checks whether the user already exists; you can break down this test further as much as you want so that you can separate scenarios like this.
What we did in the preceding code block is break down the scenarios inside the codebase/behat/features/inventory_clerk_registration.feature file into PHP methods. We then wrote PHP code to click links and buttons, populate text fields, check a checkbox, and more.
But let’s see whether this works. Run the following command to run this test:
/var/www/html/behat# ./runBehat.sh --suite=suite_a features/inventory_clerk_registration.feature
It will take a few seconds to execute, but you should get the following result:

Figure 7.13 – Registration feature test
By running the Behat test, we can replace a manual testing process usually done from a browser. But we need to confirm whether we were really able to register, and persist the data into our MySQL database using Doctrine ORM! At this point, we are in the “Refactor” phase of the Red-Green-Refactor pattern, and I personally think that the “Refactor” phase can be a bit more open-ended and open to interpretation.
You can use your own MySQL client or the phpMyAdmin app that we configured earlier, in Chapter 3, Setting Up Our Development Environment Using Docker Containers, to verify the data.
You will get the following result using the command line in the MySQL container:

Figure 7.14 – User successfully registered: view from the CLI
And this is the result using the phpMyAdmin application we configured, which can be accessed with a local browser at http://127.0.0.1:3333:

Figure 7.15 – User successfully registered: view from phpMyAdmin
We can see from the database that we were able to persist the registration details. At this stage, we can say that our registration functionality works! And we were able to test it without manually opening a desktop browser to enter form details.
We now have a PHP program doing the registration feature testing for us, but we also need to build the login feature and the most important part: the inventory system itself. We have a lot of other features to build, but this is a great start!
Summary
In this chapter, we started by creating an easy-to-understand list of features and scenarios detailing what needs to be built, based on a Jira ticket. Before working on the solution code, we first started with a Gherkin feature called Inventory Clerk Registration. This feature can be read by anyone—even non-developers will be able to understand it. This feature explains how our system should behave. We then took that behavior and created simple and failing functional tests inside the Symfony application. Creating these failing tests gave us a list of things we need to build. We then proceeded to develop the solution to pass these failing functional tests. And finally, we wrote code to tell Behat the intricate steps to click a link or a button, and fill up fields. BDD and TDD are not just about writing automated tests—it’s about using them as a process to develop our solutions.
In the next chapter, we will continue building tests and solution code. We will go through the SOLID principles to help us structure our own code to make sure it is more maintainable and testable.