
Now that the feature has been exported, it can be installed into Eclipse. Either the current Eclipse instance can be used for this, or a new instance of Eclipse can be created by running the eclipse executable with a different workspace. (On OS X double-clicking on the Eclipse.app will show the current Eclipse instance again; to run a second instance on OSX, open up the application in the terminal and run eclipse from the home of the application folder.)
- To install the feature into Eclipse, go to Help | Install New Software....
- In the dialog that appears, type in the directory's URL in the work with box. If the feature was exported into
/tmp/exported, then putfile:///tmp/exportedinto the work with field. If it was exported on Windows, say toc: empexportedthen use a URL such asfile:///c:/temp/exported. Note that on Windows the directory slashes are reversed in the URL. - After the URL has been put in, hit Enter. The message may say no categorized items—but deselect the checkbox at the bottom Group items by category and the feature should appear:

- Select the checkbox next to the feature and click on Finish to install the feature and associated plug-in to the Eclipse workspace.
- Restart Eclipse to complete the install.
- Verify that the various Clock views are available by going to Window | Show View | Other | Timekeeping.
The feature exported from the earlier step was imported from the same location. Unless the feature is categorized, it won't show up on the list of things to install. Deselecting the Group items by category checkbox allows all features to be shown, not just categorized ones.
The Feature name here is derived from the default value in the feature.xml file; it can be replaced with a more appropriate value if desired.
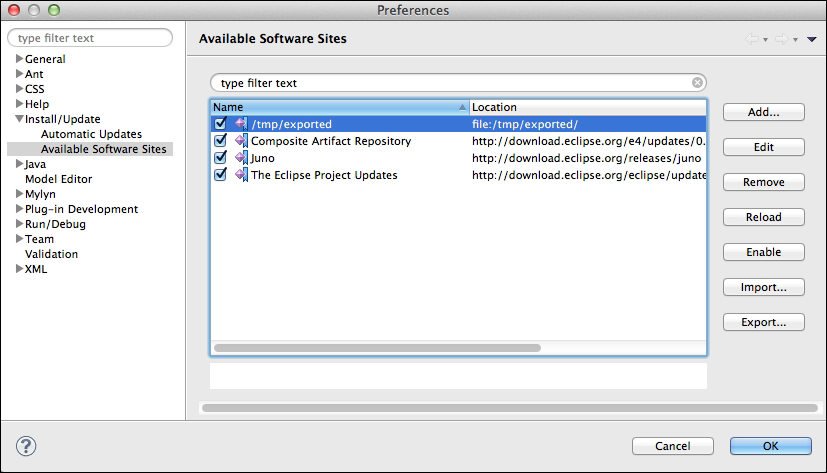
If the Eclipse instance isn't showing changes (for example, because the feature or plug-in has been modified), go to the preferences and find Install/Update | Available Software Sites and click on the exported repository. The Reload button on the right-hand side will be enabled, and clicking on that will refresh from disk the contents of the repository.
Once the repository is reloaded, go back into the Help | Install New Software and the update should be seen. If it is not, verify that the version ends with .qualifier on the end of the features' and plug-ins' version number. Without a monotonically increasing version number, Eclipse gets confused and cannot detect that the plug-in or feature has been changed and so refuses to re-install it. Check also that the exported version of the plug-in and feature ends with a more recent date, or remove the contents of the exported folder, export, and then reload.