


It sounds crazy when I say this now, but when I first started using Photoshop I didn’t think that brushes were for me. Actually, no, let me clarify what I mean. I didn’t think anything other than a normal, round, black or white brush was for me because that’s all I needed for using layer masks. I thought all the other really clever stuff you can do with brushes was for all those artsy types. How wrong I was!
Whether you’re what I would call a traditional artist—someone like my dear friend Aaron Blaise who does the most incredible drawings and paintings—a graphic designer like my buddy Dave Clayton, or a photographer like, well, me, there is definitely a place for brushes in your workflow.
So in this chapter, seeing as how I believe brushes are one of the three areas of Photoshop that everyone needs a grasp on, I thought we’d start by covering brush basics. Then I’ll show you how you can make your own brushes and use brushes in ways you may not have thought about before.
Let the fun begin!
BRUSH BASICS
Unsurprisingly, you’ll find the Brush Tool in the toolbar on the left side of the Photoshop workspace (Figure 3.1). There are other tools within the submenu—namely, the Pencil Tool, Color Replacement Tool, and Mixer Brush Tool—but we won’t be looking at those.

FIGURE 3.1
As with every tool in Photoshop, when you click on the Brush Tool in the toolbar, the options for that tool are shown in the options bar at the top of the screen (Figure 3.2).

FIGURE 3.2
Let’s take a look at the options bar and discuss each Brush Tool option.
Tool Preset Picker
The Tool Preset picker is always visible, regardless of what tool is selected, and it allows you to access presets for certain tools quickly. You’ll see that there are presets listed, but likely none of them relate to the actual Brush Tool. This is because there is another area where you access brush presets, which we’ll cover soon. However, if you remove the check mark from the Current Tool Only checkbox, a number of presets for other tools in Photoshop will be displayed (Figure 3.3).

FIGURE 3.3
Brush Preset Picker
This is where you can choose from a wide variety of brushes that are preinstalled in Photoshop, brushes you’ve downloaded and installed, or even brushes that you’ve made yourself (Figure 3.4).

FIGURE 3.4
In the top-left corner of the Brush Preset picker you’ll see a circle with a cross hair, two dots and an arrowhead (Figure 3.5). You can alter the shape of the brush by clicking on the dots and dragging them inward, and you can rotate it by clicking and dragging on the arrowhead (Figure 3.6). You’ll see how this can be incredibly useful and creative later.

FIGURE 3.5

FIGURE 3.6
You can alter the size of the brush in a range from 1px to 5000px by simply dragging the Size slider right or left.
Hardness relates to how hard or soft the brush tip is. A hard brush has a very defined edge (Figure 3.7) and a soft brush has an edge that fades out (Figure 3.8). The Hardness slider can be adjusted from 0% (maximum softness) to 100% (maximum hardness), and anywhere in between.

FIGURE 3.790-pixel brush at 100% Hardness

FIGURE 3.890-pixel brush at 0% Hardness
Below the sliders is a bar where you can quickly access any of the last seven brushes you used (Figure 3.9).

FIGURE 3.9
Clicking on a brush will give you the exact same attributes of the brush you previously used, including its size and any other attributes you set up to make it behave in a certain way.
Below the recently used brushes are all of the brushes that you have installed (Figure 3.10). Each one has a number that corresponds to the pixel size of the brush when it was made. Obviously, if you have installed a lot of brushes, then this area can become very full, making it difficult to locate the brush you want to use. Luckily, there are ways to organize and display the brushes to help with this.

FIGURE 3.10
For example, Figure 3.11 shows a number of smoke brushes that I made. Rather than having them all mixed up within the other brushes, I can organize them into a group. There are a couple of ways to do this. You can click on the gear icon in the top-right corner of the Brush Preset picker and choose New Brush Group (Figure 3.12); or you can click to highlight one of the brushes, hold down the Shift key and highlight the other brushes you would like to include in the group, and then right-click on one of the highlighted brushes and choose New Brush Group (Figure 3.13).

FIGURE 3.11

FIGURE 3.12

FIGURE 3.13
Once you have created a group you can close or expand the group by clicking on the arrowhead icon next to the group name (Figure 3.14). If at a later stage you want to add a brush to this group, simply click on the brush and drag it into the group. You can also drag a brush out of a group to remove it from the group.

FIGURE 3.14
There is a slider at the bottom of the Brush Preset picker that can be moved right or left to increase or decrease the size of the brush previews (Figure 3.15). This doesn’t affect the pixel size of the brushes.

FIGURE 3.15
When you click on the gear icon in the top-right corner of the Brush Preset picker a menu opens with a number of options. We’ll cover some of these as we work through the examples in this chapter, but while we’re on the subject of viewing the brushes, you can also choose to preview the brushes by their Tip, Stroke (shape), Name, or a combination of each (Figure 3.16).

FIGURE 3.16
Let’s head back to the options bar at the top of the screen (Figure 3.2).
Brush Settings
Clicking on this opens the Brush Settings panel where we can alter the brush attributes and make it look and behave in an unlimited number of ways. We’ll be covering this in more detail later on.
Mode
This is the blend mode menu. We’ll cover these modes in a lot more detail in the next chapter.
Opacity
This is where you control the transparency or density of the brush you are using—the lower the Opacity, the less dense the brush is (Figure 3.17). If you lower the Opacity and continually brush over an area without lifting off, then the opacity will remain the same. If, however, you lift the cursor off and then press down again and continue to brush over the area, the opacity (density) increases. For example, if the Opacity is set to 10% and you brush over the same area twice, lifting off in between each stroke, the brushstroke will have increased to 20% Opacity.

FIGURE 3.17
|
TIPWhen using the Brush Tool, you can quickly alter the Opacity of the brush with the numerical keys on the keyboard: 1 = 10%, 2 = 20%, and so on. Pressing 0 returns the brush to 100% Opacity. You can also press numerical keys in quick succession: 2 and 5 = 25%, 3 and 8 = 38%, and so on. |
Opacity – Pressure Sensitivity
If you are using something like a Wacom Graphic Tablet or Cintiq screen, you can use Pressure Sensitivity to control the opacity of the brush. When this option is turned on, the harder you press, the greater the opacity, and vice versa.
Flow
Flow is similar to Opacity except that the density of the brush builds up if you go over the same area without lifting the cursor from the screen. The more you continually brush over an area, the denser the brushstroke becomes.
|
TIPWhen using the Brush Tool, you can quickly alter the Flow of the brush by using the Shift key and the numerical keys on the keyboard: Shift + 1 = 10%, Shift + 2 = 20%, and so on. Pressing Shift + 0 returns the brush to 100% Flow. You can also press numerical keys in quick succession: Shift + 2 and 5 = 25%, Shift + 3 and 8 = 38%, and so on. |
Airbrush
You can use this to create really cool effects, but basically it does what the name suggests and turns your brush into an airbrush. For example, if you set the Opacity of the brush to 10% and press down with this airbrush option turned on, the density of the brush will continue to increase. This is similar to using Flow, except you don’t need to continually move the brush. It’s just like pressing down the nozzle on a spray can and keeping it pointed in the same area.
Smoothing
This was a very welcome enhancement! It was never easy to draw a line in Photoshop without it looking uneven and wobbly, but with Smoothing, it’s no longer a problem. In Figure 3.18 I’ve used a brush to write my name with no Smoothing, and in Figure 3.19 I’ve written my name with Smoothing.

FIGURE 3.18Smoothing off

FIGURE 3.19Smoothing on at 75%
There are more options available for Smoothing that you can access by clicking on the gear icon next to the Smoothing option in the options bar.
Brush Size – Pressure Sensitivity
When you’re using a Wacom Graphics Tablet, Cintiq, or similar, turning this option on allows you to alter the size of the brush by varying the pressure of your pen.
I have a few final shortcuts to mention at this point . . .
|
TIPS
|
Now let’s look at how we can use all this great stuff to create our own brushes, and go over some practical ways we can use them in our workflow.
BRUSH SETTINGS
The Brush Settings panel is where the magic happens because this is where you can alter settings to control what the brush looks like and how it behaves. This allows you to create all manner of cool effects and custom brushes.
Let’s start by modifying one of the preinstalled brushes.
- 1. Create a new document in Photoshop with the following dimensions: Width – 4000 Pixels, Height – 2500 Pixels, Resolution – 300 Pixels/Inch. Then choose a brush from the Brush Preset picker—let’s go for one that’s preinstalled in Photoshop called Dune Grass (number 112 in my Brush Preset picker; Figure 3.20).

FIGURE 3.20
IMPORTANT If you are using Photoshop CC and you don’t see this brush, click on the gear icon in the top-right corner of the Brush Preset picker, select Legacy Brushes from the menu, and click OK in the popup that says “Restore the Legacy Brushes Brush Set to the list of Brush Presets?” (Figure 3.21).
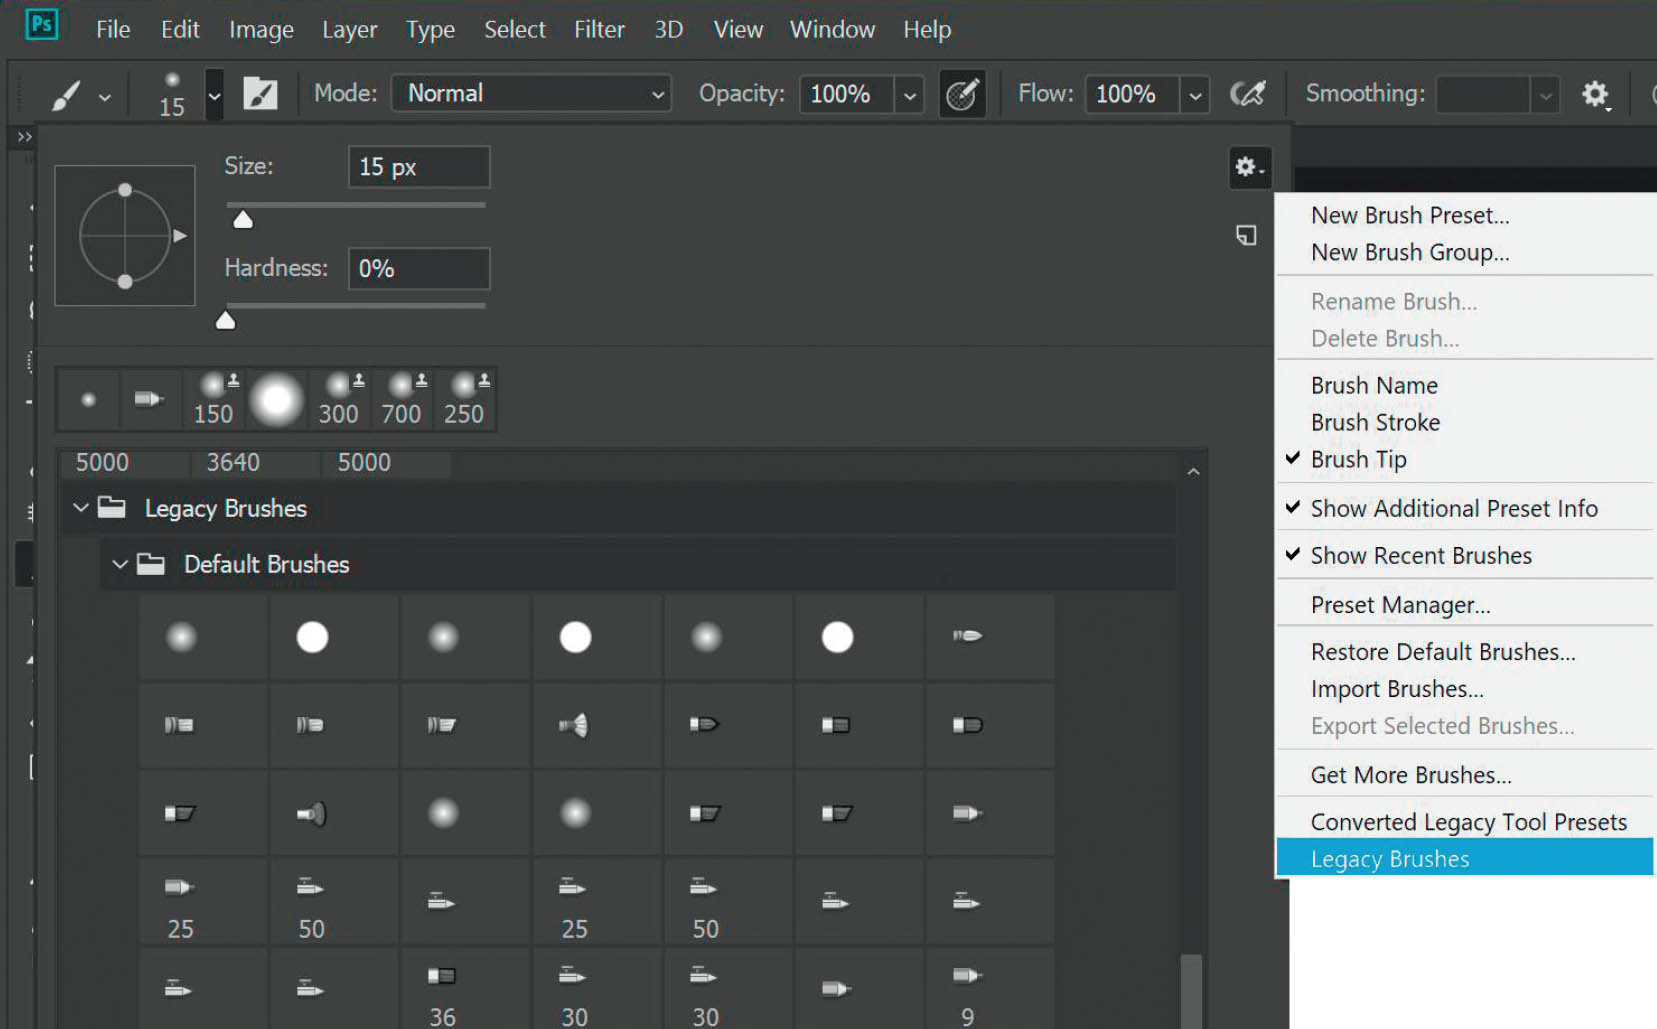
FIGURE 3.21
You’ll find the Dune Grass brush in the Brush Preset picker inside the Legacy Brushes > Default Brushes folder (Figure 3.22).

FIGURE 3.22
- 2. Press D on the keyboard to set the foreground and background colors in the toolbar to their defaults of black and white. Increase the size of the brush to around 500 pixels, and then apply a single brushstroke across the top of the document (Figure 3.23).

FIGURE 3.23
Notice how the individual lines in the brushstroke vary in size, angle, and tone? This is all done in the Brush Settings panel (Figure 3.24), which you can access by clicking on the icon in the options bar at the top of the screen (Figure 3.2), or by going to to Window > Brush Settings. This panel is definitely where the magic happens!

FIGURE 3.24
At the bottom of the Brush Settings panel is a preview of what the brush will look like if you use it with the current settings. If you make changes to any of the settings, you’ll see them reflected in this area. For example, if you click on the Shape Dynamics tab and adjust the Angle Jitter, you can see how the angle of the brush randomly rotates (Figure 3.25).

FIGURE 3.25
NOTEJitter basically means randomize. The higher the Jitter, the more random and varied the brush will be, depending on what it is you are using Jitter with. For example, Size Jitter varies the size of the brush with every brushstroke. In the Transfer tab, Opacity Jitter varies the Opacity (density) of the brush with each brushstroke. This is invaluable for creating effects such as snow, smoke, debris, etc., so that the brushstroke isn’t identical each time, and the effect is much more realistic.
- 3. Set the Angle Jitter back to around 5%, then click on the Color Dynamics tab and increase the Hue Jitter to around 5% and the Saturation Jitter to 15% (Figure 3.26).

FIGURE 3.26
- 4. Click on the foreground color in toolbar and choose a shade of green—I went for R: 97, G: 118, B: 83 (Figure 3.27). Click OK. Next, click on the background color and choose a different shade of green, such as R: 48, G: 108, B: 52 (Figure 3.28), then click OK. Now apply a single brushstroke across the document (Figure 3.29).

FIGURE 3.27

FIGURE 3.28

FIGURE 3.29
Notice how the green varies across the brushstroke in both hue and saturation; again, this is all due to the Brush Settings.
BRUSHES WITH SELECTIONS AND CUTOUTS
No matter how good the tools in Photoshop are, there’s never going to be a tool that works equally well on every picture. Selection tools are a perfect example of this. For example, there are some pictures on which the Quick Selection Tool works an absolute treat; however, there are others on which it struggles, and this is when using other tools in our Photoshop Toolbox can really help us out.
A perfect example would be in the picture shown in Figure 3.30. Let’s say we want to make a selection of the fawn in the middle and cut it out to create a composite. Because the color, tone, and contrast of the fawn is nearly identical to the others around it, we can use brushes to get a better selection and save a lot of time.

FIGURE 3.30
- 1. Open the fawn.psd file in Photoshop and make a selection of the fawn. You can use any tool you like to do this, but to save time I have already made a selection for you. Go to Select > Load Selection, choose fawn from the Channel Menu, and click OK.
- 2. With the active selection now around the fawn, add a layer mask by clicking on the icon at the bottom of the Layers panel to cut the fawn from the background (Figure 3.31). (We’re really just hiding the background behind the black area of the layer mask.)

FIGURE 3.31

Download all the files you need to follow along step-by-step at: http://rockynook.com/pstoolbox
- 3. Go to Layer > New Fill Layer > Solid Color, name it background, and click OK. Then choose a suitable color that could potentially be the sky in a final picture (although using a Solid Color layer means that you can double-click on it later to change the color if you want). I chose R: 108, G: 126, B: 138 (Figure 3.32). Click OK, and then drag this Solid Color layer underneath the fawn layer in the layer stack (Figure 3.33).

FIGURE 3.32

FIGURE 3.33
When we zoom in, we can see that despite using the Quick Selection Tool and a little bit of Refine Edge to pick up some of the fine hairs, there’s still some work that needs to be done to improve this selection and cutout. This is something we can do with brushes.
- 4. Press D on the keyboard to set the foreground and background colors to their defaults of black and white, and then choose a round brush from the Brush Preset picker (Figure 3.34) and set the Hardness to 100%.

FIGURE 3.34
- 5. Click on the layer mask attached to the fawn layer so that it is active (has the frame around it), and then use the black brush to paint around the outside of the fawn to remove the areas that don’t look very good, where Photoshop hasn’t selected the fine hair (Figure 3.35).

FIGURE 3.35
- 6. Now go back to the Brush Preset picker and choose the preinstalled brushed labeled Grass (Figure 3.36) and click to open the Brush Settings.

FIGURE 3.36
NOTEAs mentioned previously, if you don’t see this brush in the Brush Preset picker, then you’ll need to load the Legacy Brushes. See the note under step 1 in the Brush Settings section for instructions (page 79).
- 7. Click on Brush Tip Shape. Set the Spacing to 2%, the Angle to −7, and insert a check mark in the Flip X checkbox (this flips the brush side to side with each brushstroke to vary the look) (Figure 3.37).

FIGURE 3.37
- 8. Click on Shape Dynamics and set the Size Jitter to 10% and Angle Jitter to 10% (Figure 3.38).

FIGURE 3.38
- 9. Click on Scattering and set the Scatter to 40% (Figure 3.39). No other attributes in the left-hand column should be checked.

FIGURE 3.39
- 10. Press X to set the foreground color to white, and then start brushing around the outside of the deer to reveal the fur you previously concealed with the black brush. The fur looks much better now because you are revealing it in the shape of the brush, which you made look like fur using some simple brush settings (Figure 3.40). Clever, huh?! Figure 3.41 shows the layer mask—see how the white brush looks like fur?

FIGURE 3.40

FIGURE 3.41
|
TIPTo avoid brushing back too much and revealing the original background, lower the Density of the layer mask to around 50%. This way you’ll see the background showing through and can avoid painting over it. When you’re finished, set the Density back to 100%. |
This technique has saved me an incredible amount of time and frustration when working with selections and cutouts. Later on we’ll look at other brushes that can be used in the same way to cut out hair, and we’ll also cover a technique that involves using a brush on a separate layer to fake the cutout by painting in hair. This can look very realistic, especially when you use Color Dynamics to vary the color of the hair just like we did with the grass earlier in this chapter.
YOUR SIGNATURE AS A BRUSH
Now let’s look at how to make our own brushes. We’ll start by making a brush out of your signature, which can be really useful for signing your pictures before posting them online or printing them.
- 1. Create a new document in Photoshop with the following attributes: Width – 5000 Pixels, Height – 3500 Pixels, Resolution – 300 Pixels/Inch, Background Contents – White. (The reason I chose 5000 Pixels is because this is the maximum brush size we can create and I think it’s best to create the biggest brush you can so that it always looks its best. If you have to increase the size of brush considerably it can start to look pixelated.)
- 2. Choose a round brush with 100% Hardness and a black foreground color, and then sign your name (Figure 3.42).

FIGURE 3.42
NOTEPhotoshop can turn anything black into a brush. Any shade of gray leading all the way down to white will also form part of the brush, but will be of varying opacity (density) depending on the tone—i.e., the further from black, the more transparent the brush.
- 3. Go to Edit > Define Brush Preset (Figure 3.43), give your signature an identifiable name, and click OK. You now have your signature as a brush (Figure 3.44) and can access it at any time from the Brush Preset picker (Figure 3.45). Brushes you make will appear at the bottom of the Brush Preset picker unless you put them into a group.

FIGURE 3.43

FIGURE 3.44

FIGURE 3.45
Figure 3.46 shows one of my pictures with my signature in the bottom-right corner. In Photoshop I added a new blank layer to the top of the layer stack, chose my signature brush from the Brush Preset picker, selected a white foreground color, and clicked down once on the image to apply my signature. I lowered the opacity of the layer to 50%.

FIGURE 3.46
NOTEYou could also create a signature brush by signing a white piece of paper with a black pen and scanning it. Open the scan in Photoshop and go through the steps above.
CREATING A SMOKE BRUSH
Knowing that we can create brushes in Photoshop from anything that is black and varying shades of gray, let’s look at creating a smoke brush.
- 1. Open the smoke.jpg file in Photoshop. This is a picture I took in my office of a burning joss stick. I attached a piece of black card to my monitor as the background (Figure 3.47).

FIGURE 3.47
- 2. Start by using the Crop Tool (C) to crop out the bottom part of the picture so that you’re left with only the smoke. Then go to Image > Adjustments > Desaturate to remove any color from the picture (Figure 3.48).

FIGURE 3.48
- 3. For Photoshop to create the smoke brush, the smoke needs to be black, so go to Image > Adjustments > Invert. We need to make sure that the area around the smoke is completely white; otherwise, that will form part of the brush as well. Go to Image > Adjustments > Levels, select the Set White Point Sample icon (Figure 3.49), click on an area of white in the image, and click OK (Figure 3.50).

FIGURE 3.49

FIGURE 3.50
- 4. Finally, to create the brush go to Edit > Define Brush Preset, name the brush (e.g., smoke 1), and click OK. You now have a smoke brush that you can select from the Brush Preset picker (Figure 3.51).

FIGURE 3.51
NOTEIf the Define Brush Preset option is grayed out in the Edit menu, it is likely because your document size is too large. Go to Image > Image Size and check whether it has a Width or Height above 5000. If so, then reduce the dimension to 5000 Pixels and click OK. If you are using an earlier version of Photoshop, Brushes could be a maximum of 2500 Pixels.
This is the exact same technique I used to add smoke to the unlit cigarette and cigar in the pictures of model Lewis Thompson (Figure 3.52) and my mate Dave Clayton (Figure 3.53).

FIGURE 3.52

FIGURE 3.53
CREATING A DIRT, DEBRIS, AND SNOW BRUSH
Here’s a great way to make a special effect brush to add dirt, debris, or even snow into your pictures—all done using a little bit of soil from your garden.
- 1. Figure 3.54 is a photograph I took of a sheet of A4 paper with a small amount of soil that I sprinkled on it. Open this file (debris.jpg) in Photoshop and use the Crop Tool (C) to crop out the wooden table (Figure 3.55).

FIGURE 3.54

FIGURE 3.55
- 2. Go to Image > Adjustments > Desaturate to remove any color from the picture, and then go to Image > Adjustments > Levels. Drag the white point to the left to brighten the white areas and drag the black point toward the right to darken the soil (Figure 3.56). Click OK.

FIGURE 3.56
- 3. Now create the brush by going to Edit > Define Brush Preset, naming the brush debris (or whatever you like), and clicking OK. If the Define Brush Preset option is grayed out, see the note in the previous section of this chapter.
- 4. Now we’ve created a basic debris brush, but let’s take it a step further and adjust the Brush Settings. Start by creating a new blank document around 3000 Pixels by 3000 Pixels at 300 Pixels/Inch with a white background.
- 5. Open the Brush Settings panel and make the following changes:
Click on Brush Tip Shape and set the Spacing to around 35% (Figure 3.57).

FIGURE 3.57
Click on Shape Dynamics and set the Size Jitter to 100% and Angle Jitter to 100%, and tick the Flip X Jitter and Flip Y Jitter checkboxes (Figure 3.58).

FIGURE 3.58
Click on Scattering, tick the Both Axes checkbox, and increase Scatter to around 120%, Count to 3, and Count Jitter to 50% (Figure 3.59).

FIGURE 3.59
Click on Transfer and set the Opacity Jitter to 75% (Figure 3.60). Finally, ensure that no other options in the left-hand column have check marks.

FIGURE 3.60
Now we have a debris brush (Figure 3.61) that we could also use as a snow brush with maybe a few more tweaks of the Brush Settings (Figure 3.62). The settings I’ve used here are just to show how easy it is to change the attributes and look of the brushes in Photoshop, but I highly recommend you play with these to see what looks you can create.
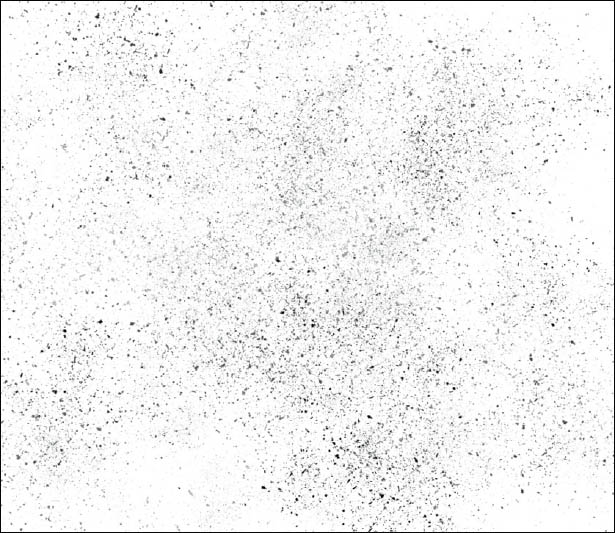
FIGURE 3.61

FIGURE 3.62
Having made all these changes in the Brush Settings panel, we wouldn’t want to have to repeat these steps every time we use the brush, so we can save the brush along with the settings as a preset.
- 6. Click on the menu icon in the top-right corner of the Brush Settings panel and choose New Brush Preset (Figure 3.63). Give the preset a name, such as Debris 1, and then choose whether the preset includes the brush size, all of the settings, and the color. I tend to leave all of these checked (Figure 3.64). Once you’ve made your selections, click OK.

FIGURE 3.63

FIGURE 3.64
This exact same brush is now available for you to use at any time. Best of all, no matter what colors your foreground and background are, or what brush and settings you are currently using, as soon as you choose this brush from the Brush Preset picker it will be there for you with the exact same settings, colors, and brush size (Figure 3.65).

FIGURE 3.65
CREATING FUR / HAIR WITH AARON BLAISE
I’d like to offer a huge thanks to my buddy Aaron Blaise (Figure 3.66) for contributing to the brushes section of this book with this walk through showing how to create fur and hair.

FIGURE 3.66
Aaron is someone who I would think of and refer to as an artist in the traditional sense of the word. By that I mean someone who creates his pictures by starting with a blank canvas and using his talent and skill to create scenes, characters, creatures, portraits, animals, and so on. I believe that as photographers, illustrators, and graphic designers there is so much we can learn from folks like Aaron, from his understanding of light and composition to how he creates his art and does it so quickly, while also making it look so easy—it is completely and utterly mesmerizing (Figure 3.67).

FIGURE 3.67
Needless to say, I highly recommend you check out Aaron’s website (www.creatureartteacher.com), which is packed full of learning materials and resources such as brushes and textures that can be downloaded and installed into Photoshop.
Before we go through the steps to create a fur/hair brush, I wanted to let you know that Aaron recorded this process as a video, which is available to you with the downloads for this book. Let’s get started.
- 1. Create a new document in Photoshop with the following dimensions: Width – 5 Inches, Height – 5 Inches, Resolution – 300 Pixels/Inch. Once in Photoshop, set the foreground color to black.
- 2. In the Brush Preset picker, choose one of the erodible brushes (Figure 3.68) and draw a line down the document that fades in and out (Figure 3.69).

FIGURE 3.68
FIGURE 3.69
NOTEIf you don’t see any of the erodible brushes in the Brush Preset picker, then you’ll need to load the Legacy Brushes. See the note under step 1 in the Brush Settings section for instructions (page 79). These erodible brushes are found in the Legacy Brushes > Default Brushes folder.
- 3. Now create the brush by going to Edit > Define Brush Preset. Name the brush “hair” and click OK.
Clearly, when we use this brush it doesn’t look like hair (Figure 3.70), so now we have to adjust its settings.

FIGURE 3.70
- 4. Open the Brush Settings panel and click on Brush Tip Shape. Rotate the Angle of the Brush so that it looks like a wave (Figure 3.71).

FIGURE 3.71
- 5. Click on Shape Dynamics and underneath Angle Jitter, change the Control menu to Direction (Figure 3.72). Now return to the Brush Tip Shape section and adjust the Angle so that the wavy line becomes tighter (Figure 3.73).

FIGURE 3.72

FIGURE 3.73
Now when we paint with the brush, notice how the tip of the brush changes its angle to follow the direction of the brush (Figure 3.74). This is very important when creating hair and fur brushes.

FIGURE 3.74
- 6. To continue making this hair brush, click on Scattering in the Brush Settings panel and increase the Scatter to around 126% and the Count to 1. As you do this, you’ll see in the preview area that the brush suddenly starts to look like fur (Figure 3.75).

FIGURE 3.75
Now if we use the brush we can see that it really is starting to look like hair or fur (Figure 3.76).

FIGURE 3.76
One thing you may notice, though, is that we get the same look with each brushstroke. We need to make this much more random to look realistic.
- 7. Go back to the Shape Dynamics section and at the bottom of the panel, insert a check mark in the Flip X Jitter and Flip Y Jitter checkboxes. This means that with every brushstroke, the brush will randomly flip left to right and upside down, which will give the hair a much more random and realistic look. Notice how doing this changed the preview (Figure 3.77).

FIGURE 3.77
Now when we paint with the brush the strokes aren’t continually being repeated, but are much more random as they jitter (Figure 3.78).

FIGURE 3.78
By varying the type of line you create at the beginning of this process and varying the brush settings, you can come up with completely different looks. Let’s create another brush, but this time instead of using one line, we’ll see what happens if we use multiple lines.
- 8. Create a new document with the same dimensions as before (5 Inches × 5 Inches at 300 Pixels/Inch) and add a new blank layer to the top of the layer stack.
- 9. Using the same erodible brush, draw out multiple lines (Figure 3.79) and then go to Edit > Free Transform. Use the Free Transform handles to stretch the lines out to make them longer, and then push in the side to squash them together a little so they almost look like a tuft of fur (Figure 3.80).

FIGURE 3.79

FIGURE 3.80
- 10. We need to fade out the top of this pattern so that the brush blends well later when we increase the number of strokes. Select a white foreground color, increase the size of the brush, and brush across the top of the strokes (Figure 3.81).

FIGURE 3.81
- 11. Now go to Edit > Define Brush Preset, name the brush “hair 2,” and click OK.
- 12. Open the Brush Settings panel and make the following adjustments:
- Click on Shape Dynamics and under Angle, make sure that Direction is chosen in the Control menu. Put a check mark in the Flip X Jitter checkbox, and then increase the Size Jitter to around 83% (Figure 3.82).

FIGURE 3.82
- Click on Scattering and increase the Scatter to around 135% (Figure 3.83).

FIGURE 3.83
- Click on Brush Tip Shape and set the Spacing to around 9% (Figure 3.84).

FIGURE 3.84
Figure 3.85 shows what the brushstrokes look like now!

FIGURE 3.85
NOTEWhen you watch Aaron’s video you’ll see that the brushes he makes are different than mine, despite the fact that we used the exact same settings. This is because the initial line(s) we created were different.
Again, a huge thank you to Aaron for not only putting this tutorial together, but also for creating the video that is available with the download files.
ADDING AND EXPORTING BRUSHES
Before we finish off I want to cover some important menu options that will be useful to you when you’re using brushes. In the Brush Preset picker, click on the gear icon in the top-right corner, and you’ll see a menu that includes several options that allow you to add brushes to your Brush Preset picker (Figure 3.86). You can also export brushes you’ve created. Let’s discuss some of these options.

FIGURE 3.86
How to Import Brushes
This menu option allows you to add more brushes to Photoshop. There’s a host of resources across the Internet where you can download free or paid brushes that will give you all manner of different effects, brush styles, and so on. Aaron Blaise has a ton of brushes available on his website: www.creatureartteacher.com.
To add brushes to your Brush Preset picker once you’ve downloaded them, click on the gear icon in the top-right corner of the Brush Preset picker, choose Import Brushes from the menu, and then navigate to the brushes you want to import. Select the brushes you want and click Load (Figure 3.87).

FIGURE 3.87
The brushes have now been added to your Brush Preset picker and are available for you to use (Figure 3.88).

FIGURE 3.88
How to Export Selected Brushes
Once you have created some custom brushes, you may want to share them with others. To do this from within the Brush Preset picker, highlight the brushes you want to export (Figure 3.89), click on the gear icon in the top-right corner of the Brush Preset picker, and choose Export Selected Brushes.

FIGURE 3.89
Navigate to where you want to save the brushes, enter a File name, and click Save (Figure 3.90). These files are now available to share with whomever you’d like.

FIGURE 3.90
Get More Brushes
Choosing this menu option will direct you to an Adobe webpage where there are a number of brushes that have been designed by award-winning illustrator Kyle T. Webster (Figure 3.91).

FIGURE 3.91
If you subscribe to Adobe Creative Cloud, with this running you can click to download the brushes and they will be automatically added to your Brush Preset picker.
Restore Default Brushes and Legacy Brushes
The last two menu items I want to briefly mention are Restore Default Brushes and Legacy Brushes.
Restore Default Brushes pretty much does what it says. This is a great way to restore some order in your Brush Preset picker if you find it becoming a little out of control and are struggling to find what you need.
The Legacy Brushes option brings in the many brush presets that have been a part of Photoshop for a long time and were superseded. There are some great Legacy Brushes that are useful for creating effects such as grass or fur, so if you don’t have them in your Brush Preset picker, I’d highly recommend you add them.
As I’m sure you can see, making and using brushes can be a whole lot of fun. Even if you’re not a traditional artist like Aaron, you can see the massive benefits brushes offer if you use them on layer masks to perfect cutouts, make hair cutouts better by filling in gaps that Photoshop couldn’t quite pick up, and so on. And clearly they offer so much more than that.
Whatever you do with them, enjoy!