
Chapter 4. Manage Privileged Identities
Cybersecurity attacks are commonly the result of administrative account penetration. Attackers can compromise privileged identities in a myriad of ways, some of which are simply not preventable using software and firmware tools, however sophisticated they become. Assuming that administrative accounts can conceivably be compromised, you should attempt to minimize the danger presented by such attacks by managing how privileged identities are used in the enterprise. Simply put, users requiring administrative access to perform certain tasks should employ administrative accounts only for those tasks, and those administrative accounts should have only the privileges needed to perform those tasks. Windows Server 2016 includes tools and architectures that enable you to control the privileges granted to administrative accounts, restrict the flow of administrative privileges, and limit the computers on which specific administrative accounts can be used.
Skills in this chapter:
![]() Implement an Enhanced Security Administrative Environment administrative forest design approach
Implement an Enhanced Security Administrative Environment administrative forest design approach
![]() Implement Just-in-Time Administration
Implement Just-in-Time Administration
![]() Implement Just-Enough-Administration
Implement Just-Enough-Administration
![]() Implement Privileged Access Workstations and User Rights Assignments
Implement Privileged Access Workstations and User Rights Assignments
Skill 4.1: Implement an Enhanced Security Administrative Environment administrative forest design approach
The Enhanced Administrative Security Environment (ESAE) is a reference architecture that is designed to protect administrative accounts and their credentials from exposure to malicious access by sequestering them in a separate Active Directory (AD) forest. ESAE is not a product, a role, or a feature. It is instead a collection of design principles that enables you to create a separate, single-domain forest that is dedicated to Active Directory management. Because the administrative forest sees limited use, you can harden it to a greater degree than your production forest(s).
Determine usage scenarios and requirements for implementing ESAE forest design architecture to create a dedicated administrative forest
The ESAE architecture calls for a separate AD forest that contains some or all of the administrative accounts with AD management privileges. By creating one-way forest trust relationships between the administrative forest and your production forest(s), as shown in Figure 4-1, and by using other protective measures, such as selective authentication, you can exercise more granular control over the authentication flow.

Note Limiting the Scope of the Administrative Forest
While it is possible to use the administrative forest for other management functions or applications, this is likely to increase the attack surface of the forest and reduce the effectiveness of the ESAE design. For maximum protection of the most privileged accounts in the enterprise, do not use the administrative forest for any other purposes.
Active Directory administrative tiers
Although it is possible to place all of your administrative accounts into an administrative forest, many organizations use a tier model to separate AD administrative accounts based on their access. The typical model consists of three tiers, as follows:
![]() Tier 0 Accounts that have direct administrative control over enterprise identities, including forests, domains, domain controllers, and their assets
Tier 0 Accounts that have direct administrative control over enterprise identities, including forests, domains, domain controllers, and their assets
![]() Tier 1 Accounts that have direct administrative control over enterprise servers and applications
Tier 1 Accounts that have direct administrative control over enterprise servers and applications
![]() Tier 2 Accounts that have direct administrative control over user workstations and devices
Tier 2 Accounts that have direct administrative control over user workstations and devices
Accounts in each tier have direct administrative access to servers in the same tier, but are permitted to access resources in lower tiers only when required by a specific administrative role, as shown in Figure 4-2. Accounts are blocked from accessing resources in higher tiers.

FIGURE 4-2 Administrative tiers limit account access to servers in the same tier or those in lower tiers
An ESAE architecture in a tiered environment typically places only the Tier 0 accounts in the administrative forest. Accounts that administer Tier 1 and Tier 2 assets remain as part of the production forest(s), as shown in Figure 4-3.

FIGURE 4-3 An ESAE architecture in a tiered enterprise can protect the Tier 0 administrative accounts by placing them in a separate forest
Trusts between forests
By creating a one-way domain or forest trust, the production forest trusts the administrative accounts stored in the administrative forest, enabling those accounts to manage Active Directory assets in the production forest.
There is no need for the administrative forest to trust the production forest for this AD management to take place. Therefore, a security breach in the production forest would not affect the administrative forest.
ESAE best practices
In addition to placing administrative accounts in a separate forest and limiting access using trust relationships, the ESAE architecture also calls for other methods of protecting the accounts, including the following:
![]() Server hardware Computers accessed by the accounts in the administrative forest should support the Secure Boot capability provided as part of the Unified Extensible Firmware Interface (UEFI) and have Trusted Platform Module (TPM) chips for the storage of BitLocker drive encryption keys.
Server hardware Computers accessed by the accounts in the administrative forest should support the Secure Boot capability provided as part of the Unified Extensible Firmware Interface (UEFI) and have Trusted Platform Module (TPM) chips for the storage of BitLocker drive encryption keys.
![]() Selective authentication When you create a forest trust, you have the option of using forest wide or selective authentication. Selective authentication enables you to restrict the accounts in the administrative forest to specific servers in the production forest.
Selective authentication When you create a forest trust, you have the option of using forest wide or selective authentication. Selective authentication enables you to restrict the accounts in the administrative forest to specific servers in the production forest.
![]() Multifactor authentication All of the accounts in the administrative forest (except one) should require multifactor authentication, using smart cards or another secondary authentication mechanism. One account should be accessible using only a password, in the event of a problem with the multifactor authentication mechanism.
Multifactor authentication All of the accounts in the administrative forest (except one) should require multifactor authentication, using smart cards or another secondary authentication mechanism. One account should be accessible using only a password, in the event of a problem with the multifactor authentication mechanism.
![]() Limited privileges Accounts in the administrative forest used to manage production forest resources should not have administrative privileges to the administrative forest, or its domains and workstations. Administrative accounts should also have no access to user resources that provide attack vectors, such as email and the Internet.
Limited privileges Accounts in the administrative forest used to manage production forest resources should not have administrative privileges to the administrative forest, or its domains and workstations. Administrative accounts should also have no access to user resources that provide attack vectors, such as email and the Internet.
![]() Server updates All computers in the administrative forest should be automatically updated with all new security updates using Windows Server Update Services (WSUS) or another mechanism.
Server updates All computers in the administrative forest should be automatically updated with all new security updates using Windows Server Update Services (WSUS) or another mechanism.
![]() Clean source All computers in the administrative forest should run the latest operating system version and should be installed using media that has been validated using the clean source principle.
Clean source All computers in the administrative forest should run the latest operating system version and should be installed using media that has been validated using the clean source principle.
![]() Whitelisting Computers accessed using administrative forest accounts should be restricted to safe applications using a whitelisting product such as AppLocker.
Whitelisting Computers accessed using administrative forest accounts should be restricted to safe applications using a whitelisting product such as AppLocker.
![]() Intrusion detection and prevention Systems in the administrative forest should be scanned regularly for potential security threats, using tools such as Attack Surface Analyzer or Advanced Threat Analytics.
Intrusion detection and prevention Systems in the administrative forest should be scanned regularly for potential security threats, using tools such as Attack Surface Analyzer or Advanced Threat Analytics.
Determine usage scenarios and requirements for implementing clean source principles in an Active Directory architecture
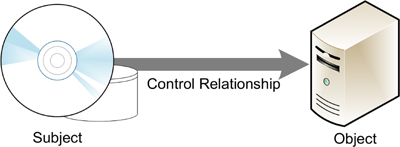
The clean source principle addresses the relationship between an object that you are trying to protect and a subject that is in control of the object. In this relationship, the security of the object is dependent on the security of the subject controlling it, as shown in Figure 4-4.

For example, you might take great pains to create a secure Active Directory architecture by hardening your domain controllers and creating dedicated administrative accounts. However, if you use one of those administrative accounts to log on at a workstation that is vulnerable to attack, then you are creating a security dependency between the workstation (the subject) and the domain controllers (the object). No matter how secure the domain controllers and the accounts are, the workstation becomes the weak link in the chain, and the administrative credentials could be compromised. The clean source principle dictates that for an object to be secure, all of its dependent subjects must be secure as well.
To implement the clean source principle in Active Directory, administrators must take control of system hardware, installation media, and the administrative architecture.
Transitive dependencies
Security dependencies are also transitive, meaning that an attack on a single subject can compromise objects all over the enterprise. For example, when system A has direct control of system B, and system B has direct control of system C, then an attacker compromising system A can gain direct control of system B and indirect control of system C in the process, as shown in Figure 4-5.

Security dependencies are rarely as linear as in this diagram, however. An attack on a single system A can result in direct control over dozens of B systems and indirect control of hundreds of C systems.
Clean source for system hardware
The clean source principle extends ultimately to the hardware of the computers involved in secure transactions. All of the computers involved in Active Directory administration, including not only the domain controllers and servers, but also the workstations used to administer them, should be equipped with the hardware necessary to create a secure administration environment.
For example, all of the computers on which AD is dependent for security should support the Secure Boot capability provided as part of the Unified Extensible Firmware Interface (UEFI) and have Trusted Platform Module (TPM) chips for the storage of BitLocker drive encryption keys. A workstation that is not capable of providing a secure platform equal to that of the systems it administers is a violation of the clean source principle and a potential avenue of attack.
Clean source for installation media
Applying the clean source principle to an operating system or application installation casts the computer as the object to be protected and the installation medium as the subject, as shown in Figure 4-6. The computer is dependent on the uncompromised state of the installation medium for the security of the software in its initial install state.
Theoretically, if an attacker tampers with your installation media, then all of the computers on which you install that software can be infected. Therefore, it is critically important to ensure that your installation media are protected from tampering during its acquisition from the source, during its storage prior to installation, and during the transfer from the storage medium to the system where you install it.
To ensure that the installation media you acquire are clean, you can use one of the following methods:
![]() Obtain the software on a physical medium (such as a DVD) directly from the manufacturer or from a reliable source.
Obtain the software on a physical medium (such as a DVD) directly from the manufacturer or from a reliable source.
![]() Download the software from the Internet that is validated with file hashed supplied by the vendor.
Download the software from the Internet that is validated with file hashed supplied by the vendor.
![]() Download the software from two independent locations on the Internet, using two separate computers with no security relationship, and compare the two copies using a tool like the Certutil.exe utility provided with the Certificate Services role.
Download the software from two independent locations on the Internet, using two separate computers with no security relationship, and compare the two copies using a tool like the Certutil.exe utility provided with the Certificate Services role.
Once you have acquired and validated the software, you must store it in such a way that it cannot be modified during the period before the actual installation. The physical or digital storage location should not be accessible by persons or computers with a lower security rating than the systems where it is ultimately installed.
When the installation media are stored for any appreciable length of time, they should also be revalidated immediately before installation.
Clean source for administrative architecture
To apply the clean source principle to the administrative architecture of an Active Directory installation, you must be certain that systems of a certain security level are never dependent on systems of a lower security level. A relatively insecure system that has direct control over a secure system compromises that security and provides an avenue for attack.
A control relationship between two systems can take many forms, including the following.
![]() Group memberships
Group memberships
![]() Agents running as System
Agents running as System
![]() Authentication
Authentication
For example, logging on to an AD domain controller using a Tier 0 administrative account exposes the account credentials to the workstation you are using to log on. This creates a control relationship in which the workstation is the subject and the domain controller is the object, as shown in Figure 4-7. If that workstation is insecure and becomes compromised, then the Tier 0 account credentials are compromised as well. An attacker can then gain control over your domain controllers and the Active Directory database.

To apply the clean source principle to your administrative architecture, you should limit the number of workstations and other computers on which your Active Directory domain controllers have dependent relationships.
Skill 4.2: Implement Just-in-Time administration
No matter what security solutions administrators apply, account credentials will continue to be improperly shared or maliciously stolen. Whatever innovations the future brings, there are still users who share their passwords and administrators who use privileged accounts improperly. To address these issues, Microsoft has designed an environment in which access to administrative accounts is automatically restricted to specific tasks and limited periods of time. This is the basis for just-in-time (JIT) administration. Privileged Access Management (PAM) is an implementation of this JIT administration philosophy that is included as part of the Microsoft Identity Manager 2016 product.
![]() Configure trusts between production and bastion forests
Configure trusts between production and bastion forests
![]() Create shadow principals in bastion forest
Create shadow principals in bastion forest
![]() Request privileged access using the MIM web portal
Request privileged access using the MIM web portal
![]() Determine requirements and usage scenarios for Privileged Access Management solutions
Determine requirements and usage scenarios for Privileged Access Management solutions
![]() Create and implement MIM policies
Create and implement MIM policies
![]() Implement Just-in-Time administration principals using time-based policies
Implement Just-in-Time administration principals using time-based policies
![]() Request privileged access using Windows PowerShell
Request privileged access using Windows PowerShell
Create a new administrative (bastion) forest in an existing Active Directory environment using Microsoft Identity Manager
A bastion forest is implementation of the separate administrative forest concept described earlier as part of the ESAE architecture. The Privileged Access Management tool in MIM 2016 enables you to establish a trust relationship between your production forest(s) and a new, separate forest that MIM then uses to store privileged administrative accounts and copies of privileged groups migrated from the production forest.
A bastion forest starts out as a standard Active Directory forest that you create using the Active Directory Domain Services role and the Active Directory Installation Wizard. The forest consists of a single domain, with at least one domain controller, and a member server on which you install MIM 2016.
At first, the new forest is not a bastion; it is completely separate from your production forest(s). It is not until after you create the forest and install MIM on the member server that you connect the bastion forest to your production forest(s) by establishing a trust relationship between the two.
The basic steps for creating a new administrative forest in an Active Directory environment are as follows:
1. On a new computer or virtual machine, install Windows Server and add the Active Directory Domain Services and DNS roles.
2. Create a new forest by promoting the server to a domain controller. The forest can have any name; it does not have to be part of the production forest naming structure.
Note Configuring DNS for a Bastion Forest
The bastion forest should have its own DNS server, typically running on the domain controller. It should not use the DNS server that services your production forest domains. The production DNS server is later configured to forward name requests to the bastion forest’s DNS server.
3. On the domain controller, create the domain user accounts that are required to run MIM.
4. On another new computer or virtual machine, install another copy of Windows Server. This is the member server in the bastion forest domain that runs MIM 2016.
5. Join the server to the domain in the bastion forest.
6. On the member server, install and configure the prerequisites needed for MIM, including SQL Server, SharePoint, and Internet Information Services (IIS).
7. Install and configure Microsoft Identity Manager 2016.
Need More Review? Creating a Bastion Forest Using PAM
For a detailed walkthrough of the procedure for creating a bastion forest and setting up PAM using Microsoft Identity Manager 2016, see https://docs.microsoft.com/en-us/microsoft-identity-manager/pam/configuring-mim-environment-for-pam.
Configure trusts between production and bastion forests
Once you have created the new AD forest to use as your bastion forest, and installed MIM on a member server, you must establish a trust relationship between the bastion forest and your production forest. This part of the bastion forest creation process consists of the three tasks, covered in the following sections.
Testing DNS connections
The bastion forest eventually contains administrative accounts moved from the production forest. Administrators whose accounts have been migrated must be able to seamlessly access production resources using the bastion forest accounts, and to do this, the systems in the production forest must be able to send DNS requests to the bastion forest DNS server.
To determine whether your production systems can contact the bastion DNS server, you can use the Nslookup tool at a Windows PowerShell or CMD prompt on any system in your production forest, with the DNS name of your bastion forest domain in place of server.domain.local:
nslookup -qt=ns server.domain.local
A successful result lists the name and IP address of the DNS server in the bastion forest, as shown in Figure 4-8.

FIGURE 4-8 The nslookup command can test for a DNS connection between the production forest and the bastion forest
You can also use the Resolve-DnsName PowerShell cmdlet, as in the following example:
resolve-dnsname -name priv.contoso.com -type ns
If the nslookup command fails to identify the DNS server in the bastion forest, you have to create a name server (NS) resource record using DNS Manager on your production DNS server. Figure 4-9 shows such a record for a bastion forest domain called priv.contoso.com.

Create a PAM trust
In a PAM environment, privileged users are moved from the production forest to the bastion forest. For those users to be able to access resources in the production forest, you must create a trust relationship between the two forests. The trust relationship must be a one-way forest trust from the production domain to the bastion domain. In essence, the bastion domain must be trusted by the production domain, so that the administrative users in the bastion forest can access production resources.
MIM includes a collection of Windows PowerShell cmdlets, including one called NewPAMTrust, which you run on the MIM server to create the required trust relationship between the forests. The syntax for the cmdlet is as follows:
New-PAMTrust -SourceForest "domain.local" -Credentials (Get-Credential)
Because you are executing this cmdlet from a computer in the bastion forest, the Source-Forest parameter identifies the production forest. You can use any standard Windows Power-Shell method to supply administrative credentials providing access to the production forest. If your environment contains more than one production forest, then you must run the cmdlet for each production forest in your enterprise.
The NewPAMTrust cmdlet does not provide any output, but if you look in the Active Directory Domains and Trusts tool on the production domain controller, you can see the bastion forest listed as an outgoing trust, as shown in Figure 4-10.

FIGURE 4-10 The trust relationship from the production forest (contoso.com) to the bastion forest (priv. contoso.com)
Note New-Pamtrust and Netdom
The New-PAMTrust cmdlet performs three tasks: it creates the forest trust, it enables SID history for the trust and it disables SID filtering. Instead of using New-PAMTrust, you can perform these three tasks individually with the following commands using the netdom tool:
netdom trust production.local /domain:bastion.local /userO:production
administrator /passwordO:password /add
netdom trust production.local /domain:bastion.local /EnableSIDHistory:yes /
userO:productionadministrator /passwordO:password
netdom trust production.local /domain:bastion.local /Quarantine:no /
userO:productionadministrator /passwordO:password
After you create the trust between the forests, you must also run the New-PAMDomain-Configuration cmdlet for each domain in your production forest(s). The syntax for the cmdlet is as follows:
New-PAMDomainConfiguration -SourceDomain "domain" -Credentials (Get-Credential)
Create shadow principals in bastion forest
Shadow principals are the copies of production AD objects—users and groups—that PAM creates in a bastion forest. Unlike a simple copy, a shadow principal has the same security identifier (SID) as the original, which remains in the production forest and is no longer used. When a user has to perform an administrative task that requires the privileges of a specific group that has been shadowed in the bastion forest, the PAM server is able to grant the user membership in the shadowed group and issue a token with the same SID as the original group in the production forest. This enables the user to access resources in the production forest using a token that was actually issued by a separate bastion forest. The access control lists for the production resources do not have to change, because the bastion group has the same SID as the production group.
Because the bastion forest is less vulnerable to attack than the production forest, the shadow principals are well protected. In addition, the memberships in the shadow group can be limited to a specific duration, resulting in an implementation of the just-in-time administration principle.
To create shadow principals, you use Windows PowerShell cmdlets that are installed as part of the PAM implementation in MIM 2016, such as New-PAMUser and New-PAMGroup. These cmdlets perform the following tasks:
![]() New-PAMGroup Creates a new group in the bastion forest with the same SID as a group in the production forest. Then the cmdlet creates an object in the MIM Service database that corresponds to the new group in the bastion forest.
New-PAMGroup Creates a new group in the bastion forest with the same SID as a group in the production forest. Then the cmdlet creates an object in the MIM Service database that corresponds to the new group in the bastion forest.
![]() New-PAMUser Creates a new user in the bastion forest with the same SID as a user in the production forest. Then the cmdlet creates two objects in the MIM Service database, corresponding to the original user account in the production forest and the new user account in the bastion forest.
New-PAMUser Creates a new user in the bastion forest with the same SID as a user in the production forest. Then the cmdlet creates two objects in the MIM Service database, corresponding to the original user account in the production forest and the new user account in the bastion forest.
To create a PAM group, use the New-PAMGroup cmdlet with the following syntax:
New-PAMGroup -SourceGroupName "group" -SourceDomain domainname -Credentials (Get-
Credential)
This command creates a duplicate of the production group specified in the SourceGroup-Name parameter by accessing the domain specified in the SourceDomain parameter, using the supplied credentials.
To create a PAM user, you use the New-PAMUser cmdlet with the following syntax:
New-PAMUser -SourceDomain domain -SourceAccountName user -Credentials (Get-Credential)
This command creates a duplicate of the user account specified in the SourceAccount-Name parameter by accessing the domain specified in the SourceDomain parameter, using the supplied credentials.
Configure the MIM web portal
Once you have installed and configured the MIM prerequisites on the PAM server, including SQL Server and SharePoint, it is time to install and configure the Microsoft Identity Manager 2016 service and web portal. The web portal functions, shown in Figure 4-11, within the SharePoint environment and provides the administrative interface to all MIM functions, including PAM administration.

To install the web portal, you run the Setup.exe program from the Service and Portal folder in the MIM 2016 installation source files. This launches a standard Windows Installer setup wizard. To install a PAM server, you have to select the Privileged Access Management and MIM Portal components in the Custom Setup page.
The installation creates a new database in your SQL Server instance and intranet sites for the MIM administration portal and for the PAM REST application programming interface (API), which you can use to build applications that interact with the PAM server.
Request privileged access using the MIM web portal
Once the bastion forest is operational and MIM is installed and configured to provide PAM services, users can request privileged access in two ways: using the Windows PowerShell cmdlets included with the PAM client and using the MIM web portal.
To request access to a role using the MIM portal, you click the PAM Requests link on the main page to display the PAM Request page. Then, click the New icon to open the Create PAM Request page, as shown in Figure 4-12. On this page, you specify the role to which you want access.

Determine requirements and usage scenarios for Privileged Access Management solutions
Privileges Access Management (PAM) is designed for enterprise installations that want to make it more difficult for potential attackers to compromise administrative credentials. For the sake of convenience, many users that perform administrative tasks only occasionally use their administrative credentials all the time. For the same reason, many of these users have access to administrative credentials that provide them with more privileges than they need to perform their assigned tasks. PAM is designed to provide these users with administrative access to specific resources for a limited amount of time. The users receive membership in administrative groups on request, and after a preset time limit, the group memberships expire.
In addition to limiting user access to administrative credentials, PAM also protects those credentials by storing them in an isolated bastion forest, where it is possible to implement security measures that would be impractical in a production forest.
Hardware and software requirements
Because it requires a separate bastion forest, PAM requires you to deploy at least one additional computer running Windows Server as a domain controller, and a member server that functions as the PAM server. These can be physical computers or virtual machines that are accessible to the rest of your network. The assumption is that you already have a production network that includes at least one domain controller plus user workstations. Thus, the basic configuration for the PAM deployment is as shown in Figure 4-13.
As mentioned earlier, the recommended practice is to dedicate the systems in the bastion forest to PAM functionality, and not use them for other applications or services. Therefore, the bastion forest domain controller requires only minimal hardware configuration. Microsoft also recommends that you use dedicated workstations to administer the bastion forest systems. Using a standard user workstation to administer highly secure systems puts the administrative credentials at risk.
The PAM server, which is a member of the bastion forest domain, requires a more robust configuration, however. In addition to Windows Server, the PAM server must run the following software components:
![]() Microsoft Identity Manager 2016
Microsoft Identity Manager 2016
![]() Microsoft SQL Server 2014
Microsoft SQL Server 2014
![]() Microsoft SharePoint 2013 Foundation SP1
Microsoft SharePoint 2013 Foundation SP1
Using high availability
A server with 8 GB of memory and 120 GB of storage is to be considered the bare minimum for a PAM server deployment. However, if you intend to configure the PAM implementation for high availability, the network configuration becomes more complex. To run duplicate PAM servers, for example, you must have a shared storage solution, such as a storage area network (SAN), which is supported by SQL Server. As with all PAM hardware, it should be dedicated to the bastion forest and not used for other applications.
Create and implement MIM policies
In PAM, MIM contains tools that provide an implementation of a just-in-time administration philosophy, but it is up to the managers of the enterprise to create the policies with which those tools are used.
Looking at your existing Active Directory infrastructure, you should begin by identifying which of your groups have significant privileges that you might want to protect using PAM. Depending on your existing security policies, you might be able to migrate your current groups to the bastion forest, or you might have to consider designing new groups.
The primary goal of PAM is to limit the time during which groups with significant privileges are in use. However, you might also want to consider limiting the privileges assigned to each group. This way, you can create a just-enough philosophy at the same time as your just-in-time implementation.
You must also consider which of your users are going to require access to your privileged groups. All of the privileged groups you want to protect using PAM and the users that need them have to migrate to the bastion forest. Depending on the size of your enterprise, this can mean creating dozens or hundreds of PAM users and groups. If you already have a tiered security administration architecture, it might be relatively easy to decide which users and groups to migrate; if you do not, you might want to consider creating one.
Implement just-in-time administration principals using time-based policies
As an MIM administrator, once you have created the appropriate PAM users and groups in the bastion forest, you must create PAM roles corresponding to the administrative tasks that the users have to perform.
A PAM role is an object that associates one or more PAM users with specific PAM groups. The groups presumably have the privileges necessary to perform certain administrative tasks. Because the groups originated from the production forest and have the same SIDs as their production counterparts, the ACLs of the production resources respond to the PAM groups just as they would to the production groups.
Later, when users need to perform specific administrative tasks, they submit activation requests that name a specific role. When the MIM server grants a request, it adds the requesting user to the group(s) specified in the role for a specific length of time, which is also defined in the role.
Adding users to a role makes it possible for them to submit activation requests. Additional parameters for the cmdlet enable you to specify a description of the role’s function, the Time-To-Live (TTL) for an activated PAM user’s membership in the specified group(s), the times of day that the role is available, and the users who are permitted to approve requests for the role.
Creating a PAM role
To create a PAM role, you can use the New-PAMRole cmdlet with the following basic syntax:
New-PAMRole -DisplayName role -TTL time -Privileges group -Candidates users -Description
string
This command creates a role using the name specified in the DisplayName parameter. The group(s) to which the role provides membership are specified in the Privileges parameter, and the users who are permitted to request access to the role are specified in the Candidates parameter.
Depending on the size of your organization and the operational workflow, the use of the Description parameter might be an important part of the role creation process. If you have users who later have to locate the correct role for a specific administrative task, they can use the Get-PAMRoleForRequest cmdlet to search for a specific role.
It is also possible to create a role using the MIM portal installed as part of the PAM server implementation. From the Privileged Access Management Roles page, you can view and manage the existing roles on your PAM server, as well as create new roles using Create PAM Role page, as shown in Figure 4-14.

Specifying time-based policies
To enable PAM to function as an implementation of just-in-time administration, the role also specifies how long the users remain members of the specified groups when MIM grants a request. You specify this time limit (in seconds) using the TTL parameter in the New-PAMRole cmdlet. The recommended minimum value for this parameter is 1800 seconds (30 minutes), but you can assign any value.
In addition to creating a time limit, you can also specify the time of day during which users are permitted to request the role. The AvailableFrom and AvailableTo parameters for the New-PAMRole cmdlet enable you to specify a range of time during which users are permitted to request access to the role. As with other Windows PowerShell cmdlets, these parameters accept date and time values in virtually any format, but the New-PAMRole cmdlet ignores any date values and uses only the times you specify. You must also include the AvailabilityWindowEnabled parameter for the cmdlet to recognize the times you specify.
Therefore, an example of a New-PAMRole command line that uses these parameters would appear as follows:
New-PAMRole -DisplayName "WebAdmins" -TTL 1800 -Privileges WebAdmins -Candidates JDaly
-Description "Web Administrators" -AvailabilityWindowEnabled -AvailableFrom "9:00 AM"
-AvailableTo "5:00 PM"
This command would create a role called WebAdmins that, when activated between 9:00 AM and 5:00 PM, would grant a user called JDaly membership in the WebAdmins group for 30 minutes.
Managing role access
By default, PAM servers approve client requests for access to a role automatically, but you can also configure a role to require approval before a request is granted. By adding the ApprovalEnabled parameter to a New-PAMRole command line, you override the automatic request processing. Requests for that role must then be approved by one of the users specified by the Approvers parameter, which you also must include in the command.
An example of a NewPAMRole command line that uses these parameters would appear as follows:
New-PAMRole -DisplayName "WebAdmins" -TTL 1800 -Privileges WebAdmins -Candidates JDaly -Description "Web Administrators" -ApprovalEnabled -Approvers SDavis
To approve requests, PAM administrators can use the Approve Requests page in the MIM portal or the Set-PAMRequestToApprove cmdlet, with either the Approve or Reject parameter.
Request privileged access using Windows PowerShell
Once you have installed and configured MIM 2016 to provide PAM for your network, and you have created the required users, groups, and roles in the bastion forest, the server is ready to process access requests from users.
To provide users with the Windows PowerShell cmdlets they need to submit PAM requests, you must install the PAM client supplied with Microsoft Identity Manager 2016 on each user workstation. To do this, you run the Setup.exe program in the Add-ins and Extensions folder in the MIM 2016 installation source files. The package includes both x64 and x86 versions.
The Microsoft Identity Manager Add-ins and Extensions Setup Wizard includes a Custom Setup page on which you can select the components you want to install. Only the PAM Client module is required to install the Windows PowerShell cmdlets, as shown in Figure 4-15. To proceed with the installation, you must specify the name of the MIM server in your bastion forest.

FIGURE 4-15 The Custom Setup page of the Microsoft Identity Manager Add-ins and Extensions Setup Wizard
Once the PAM Client is installed, workstation users that are logged on with an account that has been migrated to the bastion forest can open the Windows PowerShell interface, import the MIMPAM module to access the PAM client cmdlets, and create a new request. The syntax for the commands is as follows:
Runas /user:pamusername@pamdomain powershell
Import-Module MIMPAM
New-PAMRequest -role rolename
If your users do not know the name of the role they need, they can use the GetPAMRoleForRequest cmdlet to list all of the roles available on the PAM server. By adding the Filter parameter, they can limit the list of roles to those that contain a specified text string.
Once the server approves the request, the user is added to the requested group(s) in the bastion forest and immediately receives the privileges to the production forest resources associated with those groups. At this point, the timing of the TTL value begins, and at the expiration of that value, the user’s membership in the groups is revoked.
Skill 4.3: Implement Just-Enough-Administration
The just-in-time administration principle limits the time during which administrative users are granted access to elevated privileges. By contrast, Just-Enough-Administration (JEA, pronounced jee’-ah) is designed to limit administrative users to only the elevated privileges required to perform a given task. As with PAM, JEA provides users with privileges that time out after a specified period. Unlike PAM, JEA is a Windows PowerShell-based technique that you can implement easily on a server running Windows Server 2016. There is no need for a bastion forest or additional hardware or software.

For the purposes of the 70-744 exam, be sure that you are able to distinguish between the principles of Just-In-Time Administration and Just-Enough-Administration. You should also be familiar with the tools used to implement each of these principles on an enterprise network.
Many organizations have implemented a form of role-based access control, but it is often difficult to grant administrators the privileges they need without exposing other resources to them as well. For example, if you run the DNS Server service on your domain controllers, you might be forced to grant the person responsible for troubleshooting DNS problems full access to the servers. This exposes your Active Directory domains to someone who has no need for those privileges. You are trusting the person to stick to the DNS components and to not make any changes in Active Directory. This arrangement is inherently insecure.
The fundamental problem with this arrangement is the prevalent use of graphical tools for system administration. It is difficult to grant a user access to the DNS Manager console without providing access to other administrative tools as well. Windows PowerShell, however, is much more granular in the tasks performed by specific cmdlets and other elements. With JEA, you can provide a user with access only to the Windows PowerShell cmdlets they need for DNS administration, and prevent them from accessing any others.
For some organizations, JEA represents a fundamental shift in administrative practices, from graphical tools to character-based ones. There can be a substantial learning curve involved in such a shift, but it can be a worthwhile one, both for the security of the organization and for the market value of the individual administrators.
This section covers how to:
![]() Enable a JEA solution on Windows Server 2016
Enable a JEA solution on Windows Server 2016
![]() Create and configure session configuration files
Create and configure session configuration files
![]() Create and configure role capability files
Create and configure role capability files
![]() Connect to a JEA endpoint on a server for administration
Connect to a JEA endpoint on a server for administration
![]() Download WMF 5.1 to a Windows Server 2008 R2
Download WMF 5.1 to a Windows Server 2008 R2
![]() Configure a JEA endpoint on a server using Desired State Configuration
Configure a JEA endpoint on a server using Desired State Configuration
Enable a JEA solution on Windows Server 2016
JEA is incorporated into Windows Server 2016 and Windows 10, and is also incorporated into Windows Management Framework 5.0, which you can download and install on computers running Windows Server 2012 R2, Windows Server 2012, and Windows 8/8.1.
JEA is based on the remote user capabilities built into Windows PowerShell. Users log on to Windows using unprivileged accounts and then use Windows PowerShell to establish a connection to a PowerShell session configuration, also known as a PowerShell endpoint. By connecting to an endpoint and entering into a session, the user is running as a remote user on the same computer. That remote user account has privileges (and possibly restrictions) that the user’s own account does not have.
Stages in a JEA session
To connect to a PowerShell endpoint, you use the Enter-PSSession cmdlet, as shown in Figure 4-16. Notice that the command prompt changes as a result of the connection establishment, and the Get-UserInfo cmdlet displays both the user’s unprivileged account (OperatorUser) and, under RunAsUser, the temporary virtual account to which the user is now connected (VA_2_CONTOSO_OperatorUser).

While you are connected to the endpoint, you possess the privileges that have been granted to the virtual user account. In a typical session, the virtual user has access to a small subset of PowerShell cmdlets, only those required to perform the administrative tasks associated with a specific role. For example, a user responsible for web site administration might be granted the ability to restart IIS, but not the ability to restart the computer.
When you have completed your assigned tasks, you use the Exit-PSSession cmdlet to disconnect from the endpoint and return to your previous unprivileged state.
JEA components
To implement JEA on a computer running Windows Server 2016, you must create an endpoint. To do this, you must create and register two PowerShell script files, as follows:
![]() Session configuration file Script with a .pssc file extension that specifies the name of the endpoint to be created and identifies the role capabilities that should be assigned to specific groups.
Session configuration file Script with a .pssc file extension that specifies the name of the endpoint to be created and identifies the role capabilities that should be assigned to specific groups.
![]() Role capability file Script with a .psrc file extension that specifies what cmdlets and other capabilities should be associated with a particular role.
Role capability file Script with a .psrc file extension that specifies what cmdlets and other capabilities should be associated with a particular role.
Because these are script files that JEA administrators can change at any time, it is possible to adjust the capabilities being assigned to a particular role.
Create and configure session configuration files
The session configuration file is the key element of a JEA implementation, because it creates the endpoint to which users connect. To create your own session configuration file, you use the New-PSSessionConfigurationFile cmdlet.
The only required parameter for the New-PSSessionConfigurationFile cmdlet is Path, which you use to specify a location and file name for the new script file. Beyond that, there are two ways to configure the file. If you run the cmdlet with just a Path parameter, PowerShell creates a skeleton file, which you can then edit. There are also a great many optional parameters that you can include in the command, which configure the settings within the script file.
The default session configuration file created by the New-PSSessionConfigurationFile cmdlet appears as shown in Listing 4-1.
LISTING 4-1 A default session configuration file created by New-PSSessionConfigurationFile
@{
# Version number of the schema used for this document
SchemaVersion = '2.0.0.0'
# ID used to uniquely identify this document
GUID = 'eb70ac57-fb62-436f-a878-305bce71ae58'
# Author of this document
Author = 'Administrator'
# Description of the functionality provided by these settings
# Description = ''
# Session type defaults to apply for this session configuration. Can be
'RestrictedRemoteServer' (recommended), 'Empty', or 'Default'
SessionType = 'Default'
# Directory to place session transcripts for this session configuration
# TranscriptDirectory = 'C:Transcripts'
# Whether to run this session configuration as the machine's (virtual) administrator
account
# RunAsVirtualAccount = $true
# Scripts to run when applied to a session
# ScriptsToProcess = 'C:ConfigDataInitScript1.ps1', 'C:ConfigDataInitScript2.ps1'
# User roles (security groups), and the role capabilities that should be applied to
them when applied to a session
# RoleDefinitions = @{ 'CONTOSOSqlAdmins' = @{ RoleCapabilities = 'SqlAdministration'
}; 'CONTOSOServerMonitors' = @{ VisibleCmdlets = 'Get-Process' } }
}
When you create a new session configuration file with no optional parameters, most of the commands in the script are commented out with a pound (#) symbol. When editing the script, you must remove the comment symbol on the lines you want to activate.
The most important commands in a session configuration file are as follows:
![]() SessionType Specifies the preconfigured settings that the endpoint should use. JEA sessions typically use the RestrictedRemoteServer option, which supplies the user with a minimal set of eight cmdlets (Get-Command, Get-FormatData, Select-Object, Get-Help, Measure-Object, Exit-PSSession, Clear-Host, and Out-Default). This option also sets the PowerShell execution policy to RemoteSigned, which prevents the user from running downloaded scripts unless they are signed by a trusted publisher.
SessionType Specifies the preconfigured settings that the endpoint should use. JEA sessions typically use the RestrictedRemoteServer option, which supplies the user with a minimal set of eight cmdlets (Get-Command, Get-FormatData, Select-Object, Get-Help, Measure-Object, Exit-PSSession, Clear-Host, and Out-Default). This option also sets the PowerShell execution policy to RemoteSigned, which prevents the user from running downloaded scripts unless they are signed by a trusted publisher.
![]() TranscriptDirectory Specifies a path to the location where PowerShell should maintain text-based transcripts (logs) of the activity during a session. Session information is also logged by the Windows Eventing engine.
TranscriptDirectory Specifies a path to the location where PowerShell should maintain text-based transcripts (logs) of the activity during a session. Session information is also logged by the Windows Eventing engine.
![]() RunAsVirtualAccount Specifies whether the user entering a session should employ the Windows Run As capability to obtain the privileges of a virtual account. By default, when you enable this setting, the virtual user is a member of the local Administrators group (or the Domain Admins group on a domain controller). JEA session configuration files typically use additional settings to override the default.
RunAsVirtualAccount Specifies whether the user entering a session should employ the Windows Run As capability to obtain the privileges of a virtual account. By default, when you enable this setting, the virtual user is a member of the local Administrators group (or the Domain Admins group on a domain controller). JEA session configuration files typically use additional settings to override the default.
![]() RoleDefinitions Specifies associations between role capabilities—as defined in separate role capability scripts—and specific security groups. This is the setting that is responsible for defining what the connected user is capable of doing when connected to the endpoint.
RoleDefinitions Specifies associations between role capabilities—as defined in separate role capability scripts—and specific security groups. This is the setting that is responsible for defining what the connected user is capable of doing when connected to the endpoint.
An example of an edited and functional session configuration script is shown in Listing 4-2. In this script, the members of the JEA_NonAdmin_Operator group receive the privileges defined in a role capability file called Maintenance.psrc.
LISTING 4-2 A completed session configuration script file
@{
# Version number of the schema used for this document
SchemaVersion = '2.0.0.0'
# ID used to uniquely identify this document
GUID = 'eaff40a4-73e1-450c-83b2-4ce537620f41'
# Author of this document
Author = 'Administrator'
# Description of the functionality provided by these settings #
Description = ''
# Session type defaults to apply for this session configuration. Can be
'RestrictedRemoteServer' (recommended), 'Empty', or 'Default'
SessionType = 'RestrictedRemoteServer'
# Directory to place session transcripts for this session configuration
TranscriptDirectory = 'C:ProgramDataJEAConfigurationTranscripts'
# Whether to run this session configuration as the machine's (virtual) administrator
account
RunAsVirtualAccount = $true
# Scripts to run when applied to a session
# ScriptsToProcess = 'C:ConfigDataInitScript1.ps1', 'C:ConfigDataInitScript2.ps1'
# User roles (security groups), and the role capabilities that should be applied to
them when applied to a session
RoleDefinitions = @{
'contoso.comJEA_NonAdmin_Operator' = @{
'RoleCapabilities' = 'Maintenance' } }
}
Create and configure role capability files
As noted earlier, the session configuration script file contains references to role capability files. These are the script files that specify in detail what capabilities users have when they connect to the endpoint. The role capability file is essentially a whitelist; users receive access to the cmdlets and other capabilities specified in the file, and nothing else.
Creating role capability files is somewhat more involved than creating session configuration files, however. You might have noticed that the sample session configuration file shown earlier has a reference to a role capability file called Maintenance that has no path to the file’s location or even a file name extension. This is because role capability files must be created in a folder called RoleCapabilities inside a valid PowerShell module.
Modules are PowerShell packages that can contain a variety of components, including cmdlets, functions, Desired State Configuration (DSC) resources, and role capabilities. When modules are located in one of the folders on the designated PowerShell path, the system searches those modules for the requested resources. These modules are how PowerShell finds the cmdlets you type on the command line, and how it finds the role capability files referenced in a session configuration script with no directory location.
The locations in the PowerShell path by default are as follows:
![]() C:UsersAdministrator.CONTOSODocumentsWindowsPowerShellModules
C:UsersAdministrator.CONTOSODocumentsWindowsPowerShellModules
![]() C:Program FilesWindowsPowerShellModules
C:Program FilesWindowsPowerShellModules
![]() C:Windowssystem32WindowsPowerShellv1.0Modules
C:Windowssystem32WindowsPowerShellv1.0Modules
You can create a role capabilities file in an existing module in one of these locations or you can create a new module. In either case, you must create a RoleCapabilities subfolder in the module folder for your session configuration scripts to find it.
Note Creating a Rolecapabilities Subfolder
You can create a RoleCapabilities subfolder using File Explorer in the usual manner, or you can create it using the New-Item cmdlet with the ItemType parameter, as in the following example:
New-Item -Path "c:Program FilesWindowsPowerShellModulesJEA
RoleCapabilities" -ItemType Directory
Once you have created the RoleCapabilities subfolder, you can create a blank role capability script file in it, using the New-PSRoleCapabilityFile cmdlet, as in the following example:
New-PSRoleCapabilityFile -Path "c:Program FilesWindowsPowerShellModulesJEA
Maintenance.psrc"
A blank role capability file is shown in Listing 4-3.
LISTING 4-3 A blank role capability file created by New-PSRoleCapabilityFile
@{
# ID used to uniquely identify this document
GUID = 'd9c9953d-9e6f-4349-ab40-b4c7701f6d59'
# Author of this document
Author = 'Administrator'
# Description of the functionality provided by these settings
# Description = ''
# Company associated with this document
CompanyName = 'Unknown'
# Copyright statement for this document
Copyright = '(c) 2016 Administrator. All rights reserved.'
# Modules to import when applied to a session
# ModulesToImport = 'MyCustomModule', @{ ModuleName = 'MyCustomModule'; ModuleVersion
= '1.0.0.0'; GUID = '4d30d5f0-cb16-4898-812d-f20a6c596bdf' }
# Aliases to make visible when applied to a session
# VisibleAliases = 'Item1', 'Item2'
# Cmdlets to make visible when applied to a session
# VisibleCmdlets = 'Invoke-Cmdlet1', @{ Name = 'Invoke-Cmdlet2'; Parameters = @
{ Name = 'Parameter1'; ValidateSet = 'Item1', 'Item2' }, @{ Name = 'Parameter2';
ValidatePattern = 'L*' } }
# Functions to make visible when applied to a session
# VisibleFunctions = 'Invoke-Function1', @{ Name = 'Invoke-Function2'; Parameters = @
{ Name = 'Parameter1'; ValidateSet = 'Item1', 'Item2' }, @ {Name = 'Parameter2';
ValidatePattern = 'L*' } }
# External commands (scripts and applications) to make visible when applied to a
session
# VisibleExternalCommands = 'Item1', 'Item2'
# Providers to make visible when applied to a session
# VisibleProviders = 'Item1', 'Item2'
# Scripts to run when applied to a session
# ScriptsToProcess = 'C:ConfigDataInitScript1.ps1', 'C:ConfigDataInitScript2.ps1'
# Aliases to be defined when applied to a session
# AliasDefinitions = @ { Name = 'Alias1'; Value = 'Invoke-Alias1'}, @{ Name = 'Alias2';
Value = 'Invoke-Alias2'}
# Functions to define when applied to a session
# FunctionDefinitions = @ { Name = 'MyFunction'; ScriptBlock = { param
($MyInput) $MyInput } }
# Variables to define when applied to a session
# VariableDefinitions = @ { Name = 'Variable1'; Value = { 'Dynamic' + 'InitialValue' }
}, @ { Name = 'Variable2'; Value = 'StaticInitialValue' }
# Environment variables to define when applied to a session
# EnvironmentVariables = @ { Variable1 = 'Value1'; Variable2 = 'Value2' }
# Type files (.ps1xml) to load when applied to a session
# TypesToProcess = 'C:ConfigDataMyTypes.ps1xml', 'C:ConfigDataOtherTypes.ps1xml'
# Format files (.ps1xml) to load when applied to a session
# FormatsToProcess = 'C:ConfigDataMyFormats.ps1xml', 'C:ConfigDataOtherFormats.
ps1xml'
# Assemblies to load when applied to a session
# AssembliesToLoad = 'System.Web', 'System.OtherAssembly, Version=4.0.0.0,
Culture=neutral, PublicKeyToken=b03f5f7f11d50a3a'
}
As with the New-PSSessionConfigurationFile cmdlet, there are a great many optional parameters you can include in the command to configure script elements. Alternatively, you can edit the script file and add settings that way.
Some of the most commonly used settings for JEA roles include the following:
![]() VisibleCmdlets Specifies the cmdlets that you want to be made available to users inhabiting the role. These are in addition to the basic set of cmdlets supplied by the RestrictedRemoteServer session type in the session configuration file. You can list cmdlet names individually in this setting, use wildcard characters (as in Get-*, which grants access to all cmdlets beginning with the verb Get), or limit access to cmdlets used with specific parameters and values. For example, instead of just granting access to the Restart-Service cmdlet, which would enable users to restart any service, you can specify that access is only granted to the Restart-Service cmdlet when it is used with the Name parameter and the value Spooler, so that users can only restart that one service.
VisibleCmdlets Specifies the cmdlets that you want to be made available to users inhabiting the role. These are in addition to the basic set of cmdlets supplied by the RestrictedRemoteServer session type in the session configuration file. You can list cmdlet names individually in this setting, use wildcard characters (as in Get-*, which grants access to all cmdlets beginning with the verb Get), or limit access to cmdlets used with specific parameters and values. For example, instead of just granting access to the Restart-Service cmdlet, which would enable users to restart any service, you can specify that access is only granted to the Restart-Service cmdlet when it is used with the Name parameter and the value Spooler, so that users can only restart that one service.
![]() VisibleExternalCommands Specifies external commands that are to be made available to users inhabiting the role. You can identify commands by supplying the full path to an executable file or a PowerShell script.
VisibleExternalCommands Specifies external commands that are to be made available to users inhabiting the role. You can identify commands by supplying the full path to an executable file or a PowerShell script.
![]() FunctionDefinitions A PowerShell function is essentially a named block of code. You can provide endpoint users with access to functions by specifying them in the script and assigning them a name. For example, the Get-UserInfo command displayed earlier in Figure 4-16 is not a standard cmdlet; it is instead a function that has been defined with the name Get-UserInfo, so that users can run it as though it were a cmdlet.
FunctionDefinitions A PowerShell function is essentially a named block of code. You can provide endpoint users with access to functions by specifying them in the script and assigning them a name. For example, the Get-UserInfo command displayed earlier in Figure 4-16 is not a standard cmdlet; it is instead a function that has been defined with the name Get-UserInfo, so that users can run it as though it were a cmdlet.
An example of an edited role capability file is shown in Listing 4-4.
LISTING 4-4 A configured role capability file
@{
# ID used to uniquely identify this document
GUID = 'add6e229-647a-45a4-894b-cad514b9b7e0'
# Author of this document
Author = 'Contoso Admin'
# Company associated with this document
CompanyName = 'Contoso'
# Copyright statement for this document
Copyright = '(c) 2016 Contoso Admin. All rights reserved.'
# Cmdlets to make visible when applied to a session
VisibleCmdlets = 'Restart-Computer',
@{ Name = 'Restart-Service'
Parameters = @{ Name = 'Name'; ValidateSet = 'Spooler' }},
'Get-*'
# External commands (scripts and applications) to make visible when applied to a
session
VisibleExternalCommands = 'C:Windowssystem32ipconfig.exe'
# Functions to define when applied to a session
FunctionDefinitions = @{
'Name' = 'Get-UserInfo'
'ScriptBlock' = { $PSSenderInfo } }
}
Create a JEA endpoint
Once you have created your session configuration and role capability script files, you must register the session with PowerShell using the Register-PSSessionConfiguration cmdlet. This creates the endpoint and prepares it for use.
The basic syntax of the cmdlet is as follows:
Register-PSSessionConfiguration -Name endpoint -Path location
In this command, you specify the location of the session configuration script file using the Path parameter, and you assign the endpoint a name using the Name parameter. This is the name that users specify in the ConfigurationName parameter when connecting to an endpoint using the Enter-PSSession cmdlet.
At this point, the endpoint is ready to receive connections from users.
Note Modifying Role Capability Files
Once you have registered an endpoint, you can make changes to the associated role capability file, if necessary, without repeating the registration, because PowerShell loads the role capabilities each time a session starts. However, sessions that are already in progress when you modify the file retain their existing capabilities for the duration of the session.
Connect to a JEA endpoint on a server for administration
Once you have created and registered a PowerShell endpoint, users can connect to it using the Enter-PSSession cmdlet. The syntax for the cmdlet is as follows:
Enter-PSSession -ComputerName computer -ConfigurationName endpoint -Credentials
(Get-Credential)
In the Enter-PSSession command, the ComputerName parameter specifies the name of the system hosting the PowerShell endpoint. If that is the local system, you can use a period for this parameter, as in the following example. The ConfigurationName parameter specifies the name of the endpoint to which you are connecting, created when registering the session configuration file using the Register-PSSessionConfiguration cmdlet. The Credentials parameter can use any standard PowerShell method for supplying the account name and password of the user’s unprivileged account. For example, calling the Get-Credential cmdlet generates a standard Windows PowerShell Credential Request dialog box.
An example of an Enter-PSSession command appears as follows:
Enter-PSSession -ComputerName . -ConfigurationName JEA -Credentials (Get-Credential)
Once you are successfully authenticated, the command prompt in your PowerShell window changes to specify the name of the computer hosting the endpoint to which you are connected (or LocalHost if it is the same computer on which you are working).
When you have completed your tasks, you can terminate the connection to the endpoint using the Exit-PSSession cmdlet with no parameters. When you do this, the session ends and the command prompt returns to its initial state.
View logs
In your session configuration file, there is a TranscriptDirectory setting that you use to specify a location where PowerShell should save transcripts of endpoint sessions. This is an automated implementation of a PowerShell feature called over-the-shoulder transcription, which generates text logs that are the functional equivalent of looking over the user’s shoulder at the computer screen.
In PowerShell versions 4 and earlier, you created transcripts manually using the Start-Transcript cmdlet. In PowerShell 5, endpoints create transcripts automatically and save them to the location you specify in the session configuration file.
PowerShell creates a separate transcript file for each endpoint session, with the name of the computer hosting the endpoint and the date and time included in the file name. Each transcript begins with a header, as shown in Listing 4-5. The header specifies the start time of the session and the name of the computer hosting the endpoint. You can tell that this is a transcript of a JEA endpoint session by the difference between the Username and RunAs User values. In a transcript of a standard PowerShell session, these two values would be the same.
After the header, you can see a record of the commands issued by the user and their results. The transcript ends with the issuance of the Exit-PSSession command and a footer specifying the time the session ended.
LISTING 4-5 A JEA endpoint session transcript
**********************
Windows PowerShell transcript start
Start time: 20160831162904
Username: CONTOSOOperatorUser
RunAs User: WinRM Virtual UsersWinRM VA_2_CONTOSO_OperatorUser
Machine: SERVERD (Microsoft Windows NT 10.0.14300.0)
Host Application: C:Windowssystem32wsmprovhost.exe -Embedding
Process ID: 4012
PSVersion: 5.1.14300.1000
PSEdition: Desktop
PSCompatibleVersions: 1.0, 2.0, 3.0, 4.0, 5.0, 5.1.14300.1000
CLRVersion: 4.0.30319.42000
BuildVersion: 10.0.14300.1000
WSManStackVersion: 3.0
PSRemotingProtocolVersion: 2.3
SerializationVersion: 1.1.0.1
**********************
PS>CommandInvocation(Get-Command): "Get-Command"
>> ParameterBinding(Get-Command): name="Name"; value="Out-Default, Exit-PSSession"
>> ParameterBinding(Get-Command): name="CommandType"; value="Alias, Function, Filter,
Cmdlet, Configuration"
>> ParameterBinding(Get-Command): name="Module"; value=""
>> ParameterBinding(Get-Command): name="ArgumentList"; value=""
>> ParameterBinding(Get-Command): name="ListImported"; value="True"
>> ParameterBinding(Get-Command): name="ErrorAction"; value="SilentlyContinue"
>> ParameterBinding(Get-Command): name="ShowCommandInfo"; value="False"
>> CommandInvocation(Measure-Object): "Measure-Object"
>> ParameterBinding(Measure-Object): name="InputObject"; value=""
>> CommandInvocation(Select-Object): "Select-Object"
>> ParameterBinding(Select-Object): name="Property"; value="Count"
>> ParameterBinding(Select-Object): name="InputObject"; value=""
>> ParameterBinding(Measure-Object): name="InputObject"; value="Out-Default"
>> ParameterBinding(Measure-Object): name="InputObject"; value="Exit-PSSession"
PS>ParameterBinding(Select-Object): name="InputObject"; value="Microsoft.PowerShell.
Commands.GenericMeasureInfo"
Cmdlet Restart-Service 3.0.0.0
Microsoft.PowerShell.Management CommandInvocation(Get-Help): "Get-Help"
>> ParameterBinding(Get-Help): name="Name"; value="restart-service"
>> ParameterBinding(Get-Help): name="Category"; value=""
>> CommandInvocation(Out-Default): "Out-Default"
>> ParameterBinding(Out-Default): name="InputObject"; value=""
>> TerminatingError(Get-Help): "Cannot find path '' because it does not exist."
>> CommandInvocation(Out-Default): "Out-Default"
>> ParameterBinding(Out-Default): name="InputObject"; value=""
>> ParameterBinding(Out-Default): name="InputObject"; value="Cannot find path ''
because it does not exist."
Cannot find path '' because it does not exist.
+ CategoryInfo : ObjectNotFound: (:) [Get-Help], ItemNotFoundException
+ FullyQualifiedErrorId : PathNotFound,Microsoft.PowerShell.Commands.
GetHelpCommand
PS>CommandInvocation(Exit-PSSession): "Exit-PSSession"
>> CommandInvocation(Out-Default): "Out-Default"
>> ParameterBinding(Out-Default): name="InputObject"; value=""
**********************
Windows PowerShell transcript end
End time: 20160831171037
**********************
Download WMF 5.1 to a Windows Server 2008 R2
JEA is built into the Windows PowerPoint implementation in Windows Server 2016 and Windows 10. To use JEA on earlier Windows versions, including Windows Server 2012 R2, Windows Server 2012, Windows Server 2008 R2, Windows 8.1, Windows 8, and Windows 7 SP1, you must download and install Windows Management Framework (WMF) 5.0.
WMF 5.0 is available from the Microsoft Download Center at the following URL: https://www.microsoft.com/en-us/download/details.aspx?id=50395.
On Windows Server 2012 R2, Windows Server 2012, Windows 8.1, and Windows 8, you can simply download and install WMF 5.0. However, on Windows Server 2008 R2 and Windows 7 SP1, you must first install Windows Management Framework 4.0 and .NET Framework 4.5, and then install WMF 5.0.
Important Running JEA on Windows Server 2008 R2 and Windows 7 Sp1
Windows Server 2008 R2 and Windows 7 do not provide full JEA functionality, even with WMF 5.0 installed. On these platforms, Windows PowerShell endpoints cannot create and assign virtual accounts to connected users.
Configure a JEA endpoint on a server using Desired State Configuration
The primary limitation of JEA is that it is a technology implemented using Windows Power-Shell on individual systems. You have to create endpoints on each computer that you want users to manage in JEA sessions. Users can access endpoints from remote systems, but the session configurations themselves must be located on the computers to be managed.
How then can administrators in a large enterprise create JEA endpoints on many different computers without having to configure each one individually? One way is to use the Desired State Configuration (DSC) feature introduced as part of PowerShell in the Windows Server 2012 R2 release.
Desired State Configuration (DSC) is method for using declarative Windows PowerShell script files to apply, monitor, and maintain a specific system configuration. DSC resources take the form of PowerShell modules containing scripted configurations. Applying the module on a system implements the configuration, using PowerShell cmdlets and other resources called by the scripts.
The DSC Local Configuration Manager (LCM) is the component that applies and maintains a configuration using the DSC resources. The LCM monitors the system on a regular basis to ensure that a specific configuration is maintained. If it is not, the LCM uses the DSC resources to reapply the configuration. DSC configurations are idempotent, meaning that the scripts can be applied to a system repeatedly without generating errors or other undesirable results.
Deploying a DSC module
To deploy a DSC module, you run the Start-DSCConfiguration cmdlet. Depending on the parameters you include in this command, you can configure DSC to operate in one of two modes.
In Push mode, you run the cmdlet from a centralized DSC server where the module is stored and specify the names of the systems to receive the module using the ComputerName parameter. In Pull mode, you run the cmdlet from the computer to be managed, and it periodically retrieves the configuration from a centralized DSC server.
Using xJea
Microsoft has made available a PowerShell module called xJea that includes DSC resources you can use to implement JEA on your servers. The module is available from the PowerShell Gallery at http://www.powershellgallery.com/packages/xJea. To obtain the module, you perform the following cmdlet:
Install-Module -Name xJea
If you have not already done so, you have to approve a download of a NuGet provider, so that PowerShell can interact with the repository where the xJea module is stored.
The xJea module includes two resources that you can use to create JEA deployments, as follows. As with the session configuration and role capability files discussed earlier, you modify these files to create a JEA environment suifor your organization.
![]() JEA Toolkit Comparable to a role capability file, a JEA toolkit is a set of tasks that designated users can perform on a server when connected to a JEA endpoint.
JEA Toolkit Comparable to a role capability file, a JEA toolkit is a set of tasks that designated users can perform on a server when connected to a JEA endpoint.
![]() JEA Endpoint Comparable in part to a session configuration file, a JEA endpoint is created using one or more JEA toolkits and a list of users or groups that are provided access to the endpoint.
JEA Endpoint Comparable in part to a session configuration file, a JEA endpoint is created using one or more JEA toolkits and a list of users or groups that are provided access to the endpoint.
The advantage of using DSC to create endpoints is that you can create the resources once and deploy the module on computers all over the enterprise.
Skill 4.4: Implement Privileged Access Workstations and User Rights Assignments
Several of the security technologies described in this chapter include a recommendation that administrative users should only perform highly-privileged tasks using workstations that are dedicated to that purpose. Privileged Access Workstation (PAW) is a designation that Microsoft uses to define the hardware and software configurations required to create dedicated administrative workstations. Deploying PAWs properly is more than just a matter of purchasing new computers. The object of the PAW principle is to create a workstation environment that can only be used for administrative purposes, even if an administrator should try to do otherwise. This includes creating an Active Directory (AD) substructure devoted to PAW users and Group Policy settings that enforce the administrators’ roles.
This section covers how to:
![]() Configure User Rights Assignment group policies
Configure User Rights Assignment group policies
![]() Configure security options settings in Group Policy
Configure security options settings in Group Policy
![]() Enable and configure Remote Credential Guard for remote desktop access
Enable and configure Remote Credential Guard for remote desktop access
Implement a PAWS solution
As mentioned previously in this chapter, credential theft is one of the most serious security issues in today’s computing environment. Using a standard user workstation to log on using highly-privileged credentials exposes those credentials to attack. By deploying PAWs on your network and dedicating them solely to administrative activity, the vulnerability of the administrative credentials is minimized.
The fundamental reasons for a PAW deployment are as follows:
![]() to prevent users from performing privileged tasks using unsecured workstations
to prevent users from performing privileged tasks using unsecured workstations
![]() to prevent users from accessing vulnerable resources using administrative credentials
to prevent users from accessing vulnerable resources using administrative credentials
Thus, the problem is not only that administrators might use unprotected workstations to perform privileged tasks, they also might use their privileged credentials for dangerously insecure activities, such as web browsing and reading email.
The use of PAWs creates a separate, secure channel between dedicated administrative workstations and the sensitive resources that have to be managed. An administrative user then has two workstations and two user accounts, one for secure activities and one for everyday tasks, as shown in Figure 4-17.

FIGURE 4-17 Administrative user with separate accounts and workstations for privileged and everyday use
Providing administrative users with PAWs does not necessarily mean that they use the workstations properly, however. Some might find the extra steps needed to maintain a secure administrative environment to be too inconvenient or too time-consuming, and end up reverting to the old habits of using their administrative accounts for everything. Therefore, a PAW deployment also includes an implementation of security groups and Group Policy settings that prevent PAWs from being used to access insecure resources.
PAW hardware profiles
A PAW calls for a separate instance of an operating system dedicated to administrative use. While the hardware implementation of this concept can call for two separate computers, this does not necessarily have to be the case. There are three possible hardware profiles that you can use to create PAWs for administrative use, as follows:
![]() Dedicated hardware Using separate computers for PAWs provides a complete separation of sensitive and everyday tasks. This option also enables the implementers to ensure that the PAW hardware is properly equipped and the supply chain secure. However, a second computer for each administrative user consumes additional desk space and incurs additional expense. If the proximity of users allows it, it is possible for multiple administrative users (with separate accounts) to share one PAW without any additional security risk.
Dedicated hardware Using separate computers for PAWs provides a complete separation of sensitive and everyday tasks. This option also enables the implementers to ensure that the PAW hardware is properly equipped and the supply chain secure. However, a second computer for each administrative user consumes additional desk space and incurs additional expense. If the proximity of users allows it, it is possible for multiple administrative users (with separate accounts) to share one PAW without any additional security risk.
![]() Virtual machines The Client Hyper-V capability in Windows 10 makes it possible for a single computer to run two instances of the operating system, one for secured administrative tasks and one for everyday, unsecured tasks. To do this, however, it is imperative that the secured administrative operating system be the host operating system on the computer, and the everyday user operating system be a virtual machine running on the host. The opposite configuration, in which the everyday user operating system runs on the host and the administrative operating system runs on a virtual machine, is unacceptable. This is because the administrative operating system would be dependent on the everyday operating system for its security, enabling an attacker to gain indirect control over the sensitive resources, due to the transitive nature of control relationships. This option reduces hardware expenditures by requiring only one computer, but the hardware itself must meet PAW requirements.
Virtual machines The Client Hyper-V capability in Windows 10 makes it possible for a single computer to run two instances of the operating system, one for secured administrative tasks and one for everyday, unsecured tasks. To do this, however, it is imperative that the secured administrative operating system be the host operating system on the computer, and the everyday user operating system be a virtual machine running on the host. The opposite configuration, in which the everyday user operating system runs on the host and the administrative operating system runs on a virtual machine, is unacceptable. This is because the administrative operating system would be dependent on the everyday operating system for its security, enabling an attacker to gain indirect control over the sensitive resources, due to the transitive nature of control relationships. This option reduces hardware expenditures by requiring only one computer, but the hardware itself must meet PAW requirements.
![]() Remote desktop As an alternative to using client Hyper-V, it is also possible to separate administrative and everyday tasks by using a remote desktop or virtual application solution, either on-premises or in the cloud. For the same reason as in the Hyper-V solution, the computer must run the administrative operating system as its host environment and access the applications required for everyday production tasks using a Remote Desktop, RemoteApp, or other third-party solution. This way, the production applications are actually running on a remote server, and do not contaminate the control relationship between the host computer and the privileged resources. Apart from the reduced hardware expenditures, this option makes it possible to create a unified workstation environment for the user that does not require conscious switching between computers or virtual machines.
Remote desktop As an alternative to using client Hyper-V, it is also possible to separate administrative and everyday tasks by using a remote desktop or virtual application solution, either on-premises or in the cloud. For the same reason as in the Hyper-V solution, the computer must run the administrative operating system as its host environment and access the applications required for everyday production tasks using a Remote Desktop, RemoteApp, or other third-party solution. This way, the production applications are actually running on a remote server, and do not contaminate the control relationship between the host computer and the privileged resources. Apart from the reduced hardware expenditures, this option makes it possible to create a unified workstation environment for the user that does not require conscious switching between computers or virtual machines.
For any of these hardware profile, the computer hardware itself must be sufficient to support the PAW environment. Computers suifor use as PAWs should support Secure Boot and have Trusted Platform Module (TPM) chips for the storage of BitLocker drive encryption keys. For the Hyper-V option, the computers must have the hardware needed to support a hypervisor. If you plan to use multifactor authentication, the computers might also require card readers or biometric devices.
As dictated by the clean source principle described earlier in this chapter, the PAWs hardware must be acquired through a reputable supplier and stored in a secure location, so that unauthorized individuals cannot gain physical access to the computers, whether before, during, or after deployment.
One of the hardware profiles for a PAW deployment calls for the implementation of production applications on a secured workstation using a Remote Desktop or RemoteApp technology. Why is the opposite—the implementation of secure administrative tools on a standard workstation—not a valid alternative?
![]() Quick check answer
Quick check answer
In a Remote Desktop or RemoteApp arrangement, the host operating system of the client workstation is in control of the connections to the remote resources. Therefore, even if the remote applications are secured, they are being controlled by a workstation environment that is not secure. This is a violation of the clean source principle that can endanger the credentials used to connect to the remote resources, as well as the data exchanged through the remote connection.
PAW deployment phases
The deployment of a secured environment must be performed in a secure manner, It is therefore critical that the procurement, configuration, and distribution of PAWs be carefully planned and performed. The process of deploying PAWs should begin with the creation of usage scenarios that specify which users need secured workstations and the order in which they should get them.
If you already have a tiered administration model in place, as described earlier in this chapter, this task might be relatively easy. Tier 0 administrators are likely to be the first candidates for PAWs, with Tier 1 and possible Tier 2 administrators to follow. If you do not have an administrative model in place, you have to consider the individual administrative roles in your organization and prioritize them.
Microsoft has devised a three-phase plan for PAW deployment that provides for a gradual expansion of PAW distribution and security throughout the enterprise. The phases of the deployment are as follows:
![]() Phase 1 Provides for rapid deployment of PAWs to the most critically important users, including Active Directory and other Tier 0 administrators. This first phase includes the creation of the Active Directory Organizational Units (OUs), security groups, and Group Policy objects needed to separate PAW users and computers from the rest of the enterprise. PAWs distributed during this phase should include only the management tools these administrators need.
Phase 1 Provides for rapid deployment of PAWs to the most critically important users, including Active Directory and other Tier 0 administrators. This first phase includes the creation of the Active Directory Organizational Units (OUs), security groups, and Group Policy objects needed to separate PAW users and computers from the rest of the enterprise. PAWs distributed during this phase should include only the management tools these administrators need.
![]() Phase 2 Expands the scope of the project by deploying PAWs to users responsible for administration of application servers and cloud services, as well as other Tier 1 and Tier 2 administrative roles. This phase cannot begin until Phase 1 is completed, as it relies on the AD infrastructure created in Phase 1. PAWs distributed during Phase 2 is likely to require software and applications beyond those needed for Phase 1, due to the wider range of administrative roles being serviced. This phase might also include the creation of a request and distribution procedure for large-scale deployment of PAWs throughout the enterprise.
Phase 2 Expands the scope of the project by deploying PAWs to users responsible for administration of application servers and cloud services, as well as other Tier 1 and Tier 2 administrative roles. This phase cannot begin until Phase 1 is completed, as it relies on the AD infrastructure created in Phase 1. PAWs distributed during Phase 2 is likely to require software and applications beyond those needed for Phase 1, due to the wider range of administrative roles being serviced. This phase might also include the creation of a request and distribution procedure for large-scale deployment of PAWs throughout the enterprise.
![]() Phase 3 Enhances the security of the PAWs deployed in Phases 1 and 2 by applying additional protections, such as multifactor authentication (the use of smart cards, virtual smart cards, biometrics, or other technologies), whitelisting (the limitation of trusted applications using Device Guard, AppLocker, or other products), and/or the use of secured containers (including the Protected Users security group and the Authentication Policies and Authentication Policy Silos objects in Active Directory). Other system hardening techniques you can consider include Credential Guard in Windows 10, full disk encryption, disabling Internet browsing (by configuring the browser to use a loopback address as a proxy server), and restricting the use of USB ports to non-media devices. This phase is not dependent on Phase 2, and can begin any time after the completion of Phase 1.
Phase 3 Enhances the security of the PAWs deployed in Phases 1 and 2 by applying additional protections, such as multifactor authentication (the use of smart cards, virtual smart cards, biometrics, or other technologies), whitelisting (the limitation of trusted applications using Device Guard, AppLocker, or other products), and/or the use of secured containers (including the Protected Users security group and the Authentication Policies and Authentication Policy Silos objects in Active Directory). Other system hardening techniques you can consider include Credential Guard in Windows 10, full disk encryption, disabling Internet browsing (by configuring the browser to use a loopback address as a proxy server), and restricting the use of USB ports to non-media devices. This phase is not dependent on Phase 2, and can begin any time after the completion of Phase 1.
Configure User Rights Assignment group policies
As part of Microsoft’s PAW deployment, you create a structure of Organization Units in your existing Active Directory domain to contain the computer objects representing your PAWs and the user objects representing your administrative accounts. You then use those OUs to deploy Group Policy objects containing user rights assignments and other settings.
Need More Review? Deploying PAWS
Complete instructions for a PAW deployment, including details of the AD infrastructure modifications and Group Policy settings required, as well as scripts for creating them, are available at https://technet.microsoft.com/windows-server-docs/security/securing-privileged-access/privileged-access-workstations.
Configuring User Rights Assignments
To configure user rights assignments and other Group Policy settings for a PAW installation, you create a group policy object (GPO) and link it to an OU containing the AD objects (such as computer or users) that you want to configure. Any objects you then place in that OU receive the settings from the GPO.
To create and link a GPO, use the following procedure:
1. Open the Group Policy Management console on a domain controller or a workstation with Remote Server Administration Tools installed.
2. Browse to your domain and expand it.
3. Right-click the Group Policy Objects folder and, in the context menu that appears, select New. A New GPO dialog box appears.
4. Specify a name for the new GPO and click OK. The new GPO appears in the right pane.
5. In the left pane, browse to the OU you want to link to the GPO.
6. Right-click the OU and, in the context menu that appears, select Link an Existing GPO. A Select GPO dialog box appears.
7. Select the GPO you just created and configured and click OK. The GPO appears on the OU’s Linked Group Policy Objects tab.
8. Right-click the new GPO you created and, in the context menu that appears, click Edit. A Group Policy Management Editor window appears.
At this point, you can browse through the structure of the GPO, which contains hundreds of settings that you can configure. For example, to configure user rights assignment settings for the computers to which the GPO is applied, you browse to the Computer ConfigurationPoliciesWindows SettingsSecurity SettingsLocal PoliciesUser Rights Assignment container, as shown in Figure 4-18.

When you double-click one of the settings in the User Rights Assignments container, a Properties sheet appears, as shown in Figure 4-19. By default, all of the settings in a new GPO are blank, and the Properties sheet for each one contains controls that you can use to configure it. The controls vary for different types of settings, but User Rights Assignments settings typically have a checkbox to enable the setting and a list to which you can add the users or groups that you want to receive the setting.

Configuring a PAW computer GPO
As part of the Active Directory modifications for a PAW deployment, you create a new OU in which you place the computer objects representing all of the PAWs you intend to deploy, then you create a new GPO called PAW Configuration - Computer, in which you configure the settings that you want every PAW to receive.
![]() Limit logon rights In the Computer ConfigurationPoliciesWindows SettingsSecurity SettingsLocal PoliciesUser Rights Assignment container, enable the Allow Log On Locally setting and add the PAW Users group. This group contains all of the administrative user accounts that are to be allowed to access PAWs. This setting prevents unprivileged accounts from logging on to PAWs.
Limit logon rights In the Computer ConfigurationPoliciesWindows SettingsSecurity SettingsLocal PoliciesUser Rights Assignment container, enable the Allow Log On Locally setting and add the PAW Users group. This group contains all of the administrative user accounts that are to be allowed to access PAWs. This setting prevents unprivileged accounts from logging on to PAWs.
![]() Restrict maintenance access In the Computer ConfigurationPreferencesControl Panel SettingsLocal Users and Groups container, select the Administrators (built-in) group, remove all of the existing member users and groups, and add the PAW Maintenance group and the local Administrator. The PAW Maintenance group contains all of the user accounts that are to be allowed to administer the security environment of the PAWs. This prevents unauthorized users (including PAW users themselves, unless they are members of the PAW Maintenance group) from modifying the PAWs’ security settings.
Restrict maintenance access In the Computer ConfigurationPreferencesControl Panel SettingsLocal Users and Groups container, select the Administrators (built-in) group, remove all of the existing member users and groups, and add the PAW Maintenance group and the local Administrator. The PAW Maintenance group contains all of the user accounts that are to be allowed to administer the security environment of the PAWs. This prevents unauthorized users (including PAW users themselves, unless they are members of the PAW Maintenance group) from modifying the PAWs’ security settings.
![]() Restrict local group membership In the Computer ConfigurationPreferencesControl Panel SettingsLocal Users and Groups container, remove all member users and groups from the following built-in groups: Backup Operators, Cryptographic Operators, Hyper-V Administrators, Network Configuration Operators, Power Users, Remote Desktop Users, Replicator. This setting ensures that all of the built-in administrative groups remain empty. Administrative access is restricted to the PAW Maintenance group.
Restrict local group membership In the Computer ConfigurationPreferencesControl Panel SettingsLocal Users and Groups container, remove all member users and groups from the following built-in groups: Backup Operators, Cryptographic Operators, Hyper-V Administrators, Network Configuration Operators, Power Users, Remote Desktop Users, Replicator. This setting ensures that all of the built-in administrative groups remain empty. Administrative access is restricted to the PAW Maintenance group.
![]() Block inbound traffic In the Computer ConfigurationPoliciesWindows SettingsSecurity SettingsWindows Firewall with Advanced SecurityWindows Firewall with Advanced Security node, configure the firewall to block all unsolicited incoming traffic, prevent local Administrators members from creating new firewall rules, and log all incoming and outgoing traffic. Microsoft provides a firewall policy file as part of the PAW deployment instructions that adds the required modifications to the GPO.
Block inbound traffic In the Computer ConfigurationPoliciesWindows SettingsSecurity SettingsWindows Firewall with Advanced SecurityWindows Firewall with Advanced Security node, configure the firewall to block all unsolicited incoming traffic, prevent local Administrators members from creating new firewall rules, and log all incoming and outgoing traffic. Microsoft provides a firewall policy file as part of the PAW deployment instructions that adds the required modifications to the GPO.
![]() Configure updates In the Computer ConfigurationAdministrative TemplatesWindows ComponentsWindows Updates, enable the Configure Automatic Updates setting and select option 4 - Auto Download and Schedule the Install. Then, enable the Specify Intranet Microsoft Update Service Location setting and specify the name of a secure WSUS server on your network.
Configure updates In the Computer ConfigurationAdministrative TemplatesWindows ComponentsWindows Updates, enable the Configure Automatic Updates setting and select option 4 - Auto Download and Schedule the Install. Then, enable the Specify Intranet Microsoft Update Service Location setting and specify the name of a secure WSUS server on your network.
Restricting administrator logons
In the previous section, you configured settings on the PAWs that prevent unprivileged users from logging on. The converse situation also applies, however: you must also prevent privileged users from logging on to unprivileged workstations. To do this, you create a GPO containing the following user rights assignments and link the GPO to the OUs containing computer objects other than PAWs:
![]() Deny Log On Locally
Deny Log On Locally
![]() Deny Log On As a Batch Job
Deny Log On As a Batch Job
![]() Deny Log On As a Service
Deny Log On As a Service
Enable each of these user rights assignment settings and add all of the domain administrative groups that might contain PAW users, including the following:
![]() PAW Users
PAW Users
![]() Enterprise Admins
Enterprise Admins
![]() Domain Admins
Domain Admins
![]() Schema Admins
Schema Admins
![]() Administrators
Administrators
![]() Account Operators
Account Operators
![]() Backup Operators
Backup Operators
![]() Print Operators
Print Operators
![]() Server Operators
Server Operators
![]() Read-Only Domain Controllers
Read-Only Domain Controllers
![]() Group Policy Creators Owners
Group Policy Creators Owners
![]() Cryptographic Operators
Cryptographic Operators
By applying these settings to the unsecured computers on the network, you prevent users from logging on to them with administrative accounts. Administrators can still access these systems, but they must use their standard user account.
Configure security options settings in group policy
In addition to the user rights assignments and other settings shown in the previous section, group policy objects also include a container called Security Options, which has dozens of settings that you can use to harden the security of your workstations and servers.
To configure these settings using the Group Policy Management Editor, browse to the container located at Computer ConfigurationPoliciesWindows SettingsSecurity SettingsLocal PoliciesSecurity Options, as shown in Figure 4-20.

As with user rights assignment settings, double-clicking on a security option setting opens a Properties sheet, as shown in Figure 4-21. However, because security options apply to the entire computer, not to specific users and groups, there is no account list. Instead, security options can have various types controls that configure the functionality of the setting, such as the spin box in this example.

Settings in the Security Options container are categorized, to make it easier to locate specific types of settings. The Interactive Logon settings control functions that can help you to control the PAW logon behavior you configured in the previous section. Some of the most valuable settings are as follows:
![]() Interactive Logon: Require Smart Card Requires users to log on using multifactor authentication, in the form of a smart card. This can help to prevent attackers from accessing a PAW with stolen credentials or impersonating a PAW with a computer that lacks smart card support.
Interactive Logon: Require Smart Card Requires users to log on using multifactor authentication, in the form of a smart card. This can help to prevent attackers from accessing a PAW with stolen credentials or impersonating a PAW with a computer that lacks smart card support.
![]() Interactive Logon: Require Domain Controller Authentication to Unlock Workstation Prevents the computer from being unlocked using cached credentials. The system must be able to contact a domain controller to perform an interactive authentication, or it remains locked. This can help to prevent access to a PAW that has been disconnected from the network or removed from the premises.
Interactive Logon: Require Domain Controller Authentication to Unlock Workstation Prevents the computer from being unlocked using cached credentials. The system must be able to contact a domain controller to perform an interactive authentication, or it remains locked. This can help to prevent access to a PAW that has been disconnected from the network or removed from the premises.
![]() Interactive Logon: Machine Inactivity Limit Enables the computer to invoke the screen saver after a specified period of inactivity, forcing the user to supply credentials to reactivate the system. This can prevent an attacker from gaining access to a PAW that has been left unattended.
Interactive Logon: Machine Inactivity Limit Enables the computer to invoke the screen saver after a specified period of inactivity, forcing the user to supply credentials to reactivate the system. This can prevent an attacker from gaining access to a PAW that has been left unattended.
Enable and configure Remote Credential Guard for remote desktop access
Credential Guard is a security feature first introduced in Windows 10 Enterprise and Windows Server 2016 that protects user credentials by storing them in a virtualized container that is separate from the operating system. Windows traditionally stores credentials in the Local Security Authority (LSA), which uses process memory. Credential Guard creates a container called the isolated LSA process that is virtualized using the same hypervisor that Hyper-V uses. An attacking program running on the system with administrative privileges cannot access credentials stored in the isolated LSA process.
A variation on this concept, called Remote Credential Guard, was added in Windows 10, version 1607, and Windows Server 2016. Remote Credential Guard is designed to protect your credentials when you connect to another Windows system using Remote Desktop.
Normally, in a Remote Desktop connection, the target system authenticates the incoming user, and therefore gains access to the user’s credentials. In the case of a help desk operator, providing support often requires a Remote Desktop connection to an unsecured client workstation that might already be compromised, which results in the operator’s credentials being compromised as well. Remote Credential Guard works by redirecting the connector’s Kerberos authentication requests back to the source system. Because the credentials never reach the target computer, they are not endangered.
To use Remote Credential Guard, both systems involved in the Remote Desktop connection must meet the following requirements:
![]() Both systems must be running Windows 10, version 1607 or later, or Windows Server 2016.
Both systems must be running Windows 10, version 1607 or later, or Windows Server 2016.
![]() Both systems must be members of the same Active Directory domain, or two separate domains joined by a trust relationship.
Both systems must be members of the same Active Directory domain, or two separate domains joined by a trust relationship.
![]() Both systems must be configured to use Kerberos authentication.
Both systems must be configured to use Kerberos authentication.
![]() The connecting system must use the Remote Desktop classic Windows app.
The connecting system must use the Remote Desktop classic Windows app.
Enabling Remote Credential Guard
The first step required to use Remote Commercial Guard is to enable it in the registry on both computers. To do this, use the following procedure:
1. Open Registry Editor.
2. Browse to the HKEY_LOCAL_MACHINESystemCurrentControlSetControlLsa container.
3. Add a new DWORD value with the name DisableRestrictedAdmin and the value 0.
You can also do this by executing the following command at an administrative command prompt:
reg add HKLMSYSTEMCurrentControlSetControlLsa /v DisableRestrictedAdmin /d 0 /t
REG_DWORD
Configuring Remote Credential Guard
Once you have enabled Remote Credential Guard, you must turn it on before you can establish a secured connection. You can do this using a Group Policy setting, or you can use a command line parameter when running the Remote Desktop Connection client.
To configure Remote Credential Guard using Group Policy, use the following procedure:
1. Open a Group Policy object in Group Policy Management Editor that are applied to the connecting computer.
2. Browse to the Computer ConfigurationAdministrative TemplatesSystemCredentials Delegation folder.
3. Double-click the Restrict Delegation of Credentials to Remote Servers setting. The Restrict Delegation of Credentials to Remote Servers Properties sheet appears.
4. Click Enabled and, in the Use the Following Restricted Mode drop-down list, select Require Remote Credential Guard, as shown in Figure 4-22.

5. Click OK.
6. Close Group Policy Management Editor.
7. From a command prompt, run gpupdate.exe /force to apply the policy settings.
Instead of using Group Policy, you can also activate Remote Credential Guard when you launch the Remote Desktop Connection client from the command prompt, using the following command:
mstsc.exe /remoteGuard
Skill 4.5: Implement Local Administrator Password Solution
Active Directory provides a protected, centralized store for domain user accounts and their passwords, but there are some situations when domain users must log on to their workstations using local accounts. This creates a problem for IT management.
Leaving control of the local account passwords to the users is not practical. Some organizations use a single local account and password for all of the workstations, which is a security hazard. There are third-party password management solutions, but these cost money, often require additional hardware and software, and add another product for IT to manage.
Local Administrator Password Solution (LAPS) is a free Microsoft product that enables workstations to automatically change the passwords on local accounts and store those passwords as attributes of the computer objects in Active Directory. Using permissions, you can control which users are allowed to read the passwords and change them.
This section covers how to:
![]() Install and configure the LAPS tool
Install and configure the LAPS tool
![]() Secure local administrator passwords using LAPS
Secure local administrator passwords using LAPS
![]() Manage password parameters and properties using LAPS
Manage password parameters and properties using LAPS
Install and configure the LAPS tool
LAPS is a client/server tool that runs as a Group Policy client-side extension on your computers. The program is packaged as a single Microsoft Installer file, with an .msi extension, which you must download from the Microsoft Download Center. Both x64 and x86 versions are provided in the download, along with documentation.
Deploying LAPS on your network consists of three basic steps: installing the LAPS management tools, modifying your Active Directory schema, and deploying the LAPS client to your workstations. Fortunately, all of the components required for all three steps are provided in the single installer file.
Installing LAPS management tools
To install LAPS on a computer you are using for management, you download the appropriate LAPS installer file for your computer platform (LAPS.x64 or LAPS.x86) and run it to launch the Local Administrator Password Solution Setup Wizard. By default, the wizard is configured to install only the AdmPwd GPO Extension, as shown in Figure 4-23. This is the client side of the program that go on every computer you intend to manage. For the systems you use to manage LAPS, you must also select the Management Tools component and all of its subcomponents. This includes a graphical client interface, the PowerShell module, and the Group Policy templates.

You can install the management tools on other workstations later, but you need one to gain access to the tools for modifying the Active Directory schema.
Modifying Active Directory
As noted earlier, LAPS stores local account passwords in Active Directory. To do this you must modify the AD schema to add two attributes to the computer object type, as follows:
![]() msMcsAdmPwd Stores the local account password
msMcsAdmPwd Stores the local account password
![]() msMcsAdmPwdExpirationTime Stores the expiration date time for the current password
msMcsAdmPwdExpirationTime Stores the expiration date time for the current password
You do this using a Windows PowerShell cmdlet supplied with the LAPS management tools.
Note Modifying the Active Directory Schema
Active Directory consists of objects representing network resources, and objects consist of attributes, which store information about the object. It is the schema that defines the types of objects you can create in AD and the attributes each object type supports. By default, the computer object does not have an attribute for local account password storage, so by extending the schema, LAPS creates one.
To extend the schema you must open a Windows PowerShell window using an account that is a member of the Schema Admins group in your domain. This is only necessary once. All of the LAPS PowerShell cmdlets, for managers and clients, are supplied in a single module, which you must import before you can access them.
To import the module, use the following command:
Import-Module AdmPwd.PS
Adding the verbose parameter to the command displays a list of all the cmdlets included in the module, as shown in Figure 4-24.

To extend the schema, you use the following cmdlet, with no parameters.
UpdateAdmPwdADSchema
Modifying the schema adds the new attributes to all of your existing computer objects and to the object type that AD uses to create new computer objects as well, as shown in Figure 4-25.

As with files and directories, Active Directory objects and attributes have permissions, in the form of access control lists (ACLs). Using these permissions, you specify who can access the new attributes you created and what the users can do with them.
For LAPS client computers to be able to update their passwords, they must have the Write permission to the attributes LAPS created. To deploy these permissions, you use the Set-AdmPwdComputerSelfPermission cmdlet to apply them to the Active Directory organizational unit (OU) objects which contain your LAPS client workstations. Applying the permissions to the OUs causes them be inherited by all of the subordinate objects in those OUs, including other OUs.
To assign the Write permission for the two LAPS attributes to the SELF built-in account on your clients, you use the following PowerShell command syntax:
Set-AdmPwdComputerSelfPermission -Identity:OUname
You must repeat this command with the name of every OU containing the computer objects of LAPS clients, unless the OU is subordinate to another OU that you have already configured.
To grant users or groups the permissions needed to read the passwords stored in the AD attributes, you use the Set-AdmPwdReadPasswordPermission cmdlet, with the following syntax:
Set-AdmPwdReadPasswordPermission -OrgUnit OUname -AllowedPrincipals username
In this command, the OrgUnit parameter specifies the name of the OU that delegate the permissions (that is, the OU containing the client computers), and the AllowedPrincipals parameter specifies the names of the users or groups that should receive the permission. You can specify multiple users or groups in one command, separated by commas.
Granting users or groups the Write permission for the ms-Mcs-AdmPwdExpirationTime attribute enables them to force a reset of a local account password stored in AD using LAPS. The cmdlet that does this is Set-AdmPwdResetPasswordPermission, and the syntax is as follows:
Set-AdmPwdResetPasswordPermission -OrgUnit OUname -AllowedPrincipals username
LAPS client deployment
To deploy LAPS on your client workstations, you use the same installer as for your management systems. You can simply run the installer on each client computer manually, but because LAPS is packaged as an .msi file, there are also many ways to automate the installation process for a large enterprise.
To script the installation, you can use one of the following command lines, replacing the path variable with the location of the file:
msiexec /i pathLAPS.x64.msi /quiet
msiexec /i pathLAPS.x86.msi /quiet
By default, the package installs only the client, so there are no other parameters required. You can insert this command into a logon script or a batch file, but one of the easiest ways to perform a mass deployment of a Windows Installer package is to use Group Policy Software Installation.
To install the LAPS package using Group Policy, open a group policy object and, in the Computer ConfigurationPoliciesSoftware SettingsSoftware Installation container, right-click and choose NewPackage. After you supply the location of the package file (using a network path, so the client computers can access it), a new package appears in the right pane, as shown in Figure 4-26.

Once you have added the package, you link the GPO to the container where the computer objects for your intended clients are located. Once the GPO is in place, the next time the computers in that container restart, the LAPS package is automatically installed.
Secure local administrator passwords using LAPS
When you install the GPO Editor Templates with the LAPS management tools, the installer adds Group Policy settings that you can use to enable password management and configure LAPS. To enable LAPS on your clients, use the following procedure:
1. In Group Policy Management, create a new Group Policy object and link it to the OUs containing your LAPS client computers.
2. Open the new GPO in Group Policy Management Editor and browse to the Computer ConfigurationPoliciesAdministrative TemplatesLAPS folder, as shown in Figure 4-27.

3. Double-click the Enable Local Admin Password Management setting.
4. In the Enable Local Admin Password Management Properties sheet, select Enabled and click OK.
5. Close Group Policy Management Editor.
The next time your client computers restart (or you run gpupdate.exe /force on them) the LAPS client is enabled, the local Administrator passwords are reset, and the passwords and expiration dates are stored in their computer objects in Active Directory.
To demonstrate that LAPS is enabled on a client computer, you can open a PowerShell window, import the AdmPwd.PS module, as you did earlier, and run the Get-AdmPwdPassword cmdlet with the ComputerName parameter, as shown in Figure 4-28. If your user account has the appropriate permissions (set with the Set-AdmPwdReadPasswordPermission), the output from the PowerShell command displays the actual password stored in the AD computer object.

LAPS also includes a graphical client tool, which you can choose to install by selecting the Fat Client UI component in the Local Administrator Password Solution Setup Wizard. By running the tool, which appears as LAPS UI in the list of installed applications, and searching for the computer name, you see the display shown in Figure 4-29.

You’ve installed and configured LAPS, and your clients are receiving new Administrator passwords. However, your users are unable to view their passwords, either in the LAPS UI or by using the Get-AdmPwdPassword cmdlet, despite your having granted them the necessary user permissions using the Set-AdmPwdReadPasswordPermission. What is wrong?
![]() Quick check answer
Quick check answer
Check your command line syntax for the Set-AdmPwdReadPasswordPermission cmdlet. The OrgUnit parameter should specify the OU containing the client computer objects, not the OU containing the user objects and groups.
Manage password parameters and properties using LAPS
In addition to enabling LAPS, you can also use Group Policy settings to configure its behavior. You can control the nature of the passwords that LAPS assigns to local administrator accounts, and you can specify the name of the account that LAPS should protect.
Configuring password settings
When LAPS assigns passwords to the local Administrator account, it defaults to creating passwords that are 14 characters long and consist of a combination of capital and lowercase letters, numbers, and symbols. The default expiration date for each password is 30 days after its creation.
You can modify these defaults by enabling the Password Settings policy. To do this, double-click the Password Settings policy in a GPO, to display the Properties sheet shown in Figure 4-30.

When you click the Enabled button, controls appear that you can use to select the length of the passwords LAPS creates, choose a level of complexity, and specify a password age after which it expires.
Changing the account name
LAPS assigns passwords to the local Administrator account, which it can identify by its well-known SID. In some organizations, it is common practice to rename the local Administrator account, to prevent attackers from trying to compromise it. However, the account’s security identifier (SID) remains the same, so LAPS still assigns passwords to that account.
By default, the Windows workstation operating systems have the local Administrator account disabled, as a security measure. When you create a local account while installing the operating system, that account receives administrator privileges. If you want to configure LAPS to assign passwords to an account other than Administrator, you can do so using the Name of Administrator Account to Manage setting in Group Policy.
To use this setting, you double-click the Name of Administrator Account to Manage policy in a GPO, to open the Properties sheet shown in Figure 4-31. Click the Enabled button and specify the name of the local account you want LAPS to manage in the Administrator Account Name field.

Do not enable this setting and specify the name of the Administrator account, even if you have renamed it. LAPS can always identify the Administrator account by its SID. Configuring this policy setting causes LAPS to manage another local account instead of Administrator, not in addition to it. LAPS can only protect one account on a system.
Chapter summary
![]() Enhanced Administrative Security Environment (ESAE) is a reference model for a network security architecture that protects highly privileged accounts by storing them in a separate Active Directory forest, dedicated solely to that purpose.
Enhanced Administrative Security Environment (ESAE) is a reference model for a network security architecture that protects highly privileged accounts by storing them in a separate Active Directory forest, dedicated solely to that purpose.
![]() The clean source principle defines the nature of the relationships between objects that require protection and subjects that control the object. In practical terms, this principle calls for highly privileged resources to be administered using workstations that are equally privileged, and software installations to be performed using source media that is securely obtained and stored.
The clean source principle defines the nature of the relationships between objects that require protection and subjects that control the object. In practical terms, this principle calls for highly privileged resources to be administered using workstations that are equally privileged, and software installations to be performed using source media that is securely obtained and stored.
![]() Just-in-time administration is an administrative philosophy that calls for users to receive elevated privileges only when they are needed to perform certain tasks. The privileges are then revoked after a set time interval, protecting the credentials that provide those privileges.
Just-in-time administration is an administrative philosophy that calls for users to receive elevated privileges only when they are needed to perform certain tasks. The privileges are then revoked after a set time interval, protecting the credentials that provide those privileges.
![]() Privileged Access Management (PAM) is an implementation of the just-in-time concept included in the Microsoft Identity Manager (MIM) 2016 product. PAM calls for the creation of a bastion forest, a separate, hardened Active Directory forest that is joined to the production forest by a one-way trust relationship.
Privileged Access Management (PAM) is an implementation of the just-in-time concept included in the Microsoft Identity Manager (MIM) 2016 product. PAM calls for the creation of a bastion forest, a separate, hardened Active Directory forest that is joined to the production forest by a one-way trust relationship.
![]() The most highly-privileged administrative accounts are migrated to the bastion forest in the form of shadow principals, which are copies of the user and group objects that have the same security identifiers (SIDs) as the originals in the production forest.
The most highly-privileged administrative accounts are migrated to the bastion forest in the form of shadow principals, which are copies of the user and group objects that have the same security identifiers (SIDs) as the originals in the production forest.
![]() In addition to MIM, a PAM server installation requires Microsoft SQL Server in order to store information about the bastion forest, and Microsoft SharePoint in order to provide a web portal that functions as the PAM administrative interface.
In addition to MIM, a PAM server installation requires Microsoft SQL Server in order to store information about the bastion forest, and Microsoft SharePoint in order to provide a web portal that functions as the PAM administrative interface.
![]() Once the PAM server and the bastion forest are in place, users can request privileges using Windows PowerShell cmdlets or the MIM web portal.
Once the PAM server and the bastion forest are in place, users can request privileges using Windows PowerShell cmdlets or the MIM web portal.
![]() Just-enough administration (JEA) is a Windows PowerShell feature implemented in Windows Server 2016, Windows 10, and Windows Management Framework 5.0. It does not require any other additional software or hardware.
Just-enough administration (JEA) is a Windows PowerShell feature implemented in Windows Server 2016, Windows 10, and Windows Management Framework 5.0. It does not require any other additional software or hardware.
![]() JEA is a server-based technology that provides users with elevated privileges on a temporary basis. Users employ a PowerShell cmdlet connect to a JEA endpoint with an unprivileged account and are assigned a temporary Run As account that provides them with elevated privileges for the duration of the session. When they disconnect from the endpoint, the users return to their unprivileged state.
JEA is a server-based technology that provides users with elevated privileges on a temporary basis. Users employ a PowerShell cmdlet connect to a JEA endpoint with an unprivileged account and are assigned a temporary Run As account that provides them with elevated privileges for the duration of the session. When they disconnect from the endpoint, the users return to their unprivileged state.
![]() To create a JEA endpoint, you must have a session configuration script file and a role capability script file. These files specify who is permitted to connect to the endpoint and what privileges they are eligible to receive. Registering the session configuration using a PowerShell cmdlet makes the endpoint available for use.
To create a JEA endpoint, you must have a session configuration script file and a role capability script file. These files specify who is permitted to connect to the endpoint and what privileges they are eligible to receive. Registering the session configuration using a PowerShell cmdlet makes the endpoint available for use.
![]() Each server to be administered must have its own endpoints, though users can connect to them from remote systems. Using Desired State Configuration (DSC), you can perform a mass deployment of JEA endpoints throughout the enterprise.
Each server to be administered must have its own endpoints, though users can connect to them from remote systems. Using Desired State Configuration (DSC), you can perform a mass deployment of JEA endpoints throughout the enterprise.
![]() A Privileged Access Workstation (PAW) is a highly-secure computer that is intended for use only to manage secure resources. Based on the clean source principle, administrative credentials should not be exposed to systems that are insecure. A PAW provides a hardened software and hardware configuration that is not to be used for any activities that can potentially jeopardize the credentials, such as web browsing and email.
A Privileged Access Workstation (PAW) is a highly-secure computer that is intended for use only to manage secure resources. Based on the clean source principle, administrative credentials should not be exposed to systems that are insecure. A PAW provides a hardened software and hardware configuration that is not to be used for any activities that can potentially jeopardize the credentials, such as web browsing and email.
![]() In addition to the configuration of the computer itself, a PAW deployment calls for user rights assignments and other policies that prevent the PAW from accessing unprotected resources and protect sensitive resources from administrative access by any workstation other than a PAW.
In addition to the configuration of the computer itself, a PAW deployment calls for user rights assignments and other policies that prevent the PAW from accessing unprotected resources and protect sensitive resources from administrative access by any workstation other than a PAW.
![]() Remote Credential Guard is a feature of Windows Server 2016 and Windows 10 that prevents sensitive credentials from being transmitted to host computers during Remote Desktop connections. The Kerberos authentication requests are redirected back to the connecting system instead.
Remote Credential Guard is a feature of Windows Server 2016 and Windows 10 that prevents sensitive credentials from being transmitted to host computers during Remote Desktop connections. The Kerberos authentication requests are redirected back to the connecting system instead.
![]() LAPS is a tool that automatically assigns local Administrator passwords to client computers and stores the passwords in the Active Directory computer objects.
LAPS is a tool that automatically assigns local Administrator passwords to client computers and stores the passwords in the Active Directory computer objects.
![]() To deploy LAPS, you must install the client package, extend the AD schema using the PowerShell cmdlets provided, and set permissions granting access to the clients’ computer objects.
To deploy LAPS, you must install the client package, extend the AD schema using the PowerShell cmdlets provided, and set permissions granting access to the clients’ computer objects.
![]() Extending the schema for LAPS creates two new attributes in the computer object, which LAPS users to store the local Administrator password and its expiration date.
Extending the schema for LAPS creates two new attributes in the computer object, which LAPS users to store the local Administrator password and its expiration date.
![]() To enable the installed LAPS clients, use the settings added to Group Policy by the installer. You can also use the settings to control the length and complexity of the passwords and configure LAPS to protect a different local account.
To enable the installed LAPS clients, use the settings added to Group Policy by the installer. You can also use the settings to control the length and complexity of the passwords and configure LAPS to protect a different local account.
![]() Confirm that LAPS is operating on the client using the Get-AdmPwdPassword cmdlet or the graphical LAPS UI client tool.
Confirm that LAPS is operating on the client using the Get-AdmPwdPassword cmdlet or the graphical LAPS UI client tool.
Thought experiment
In this thought experiment, demonstrate your skills and knowledge of the topics covered in this chapter. You can find answer to this thought experiment in the next section.
Most of the technologies described in this chapter are designed to prevent the credentials that administrators use to access and manage sensitive resources from being compromised by attackers. For each of the following technologies, explain how it prevents highly privileged credentials from being compromised.
1. Privileged Access Management
2. Just-enough administration
3. Privileged access workstations
4. Remote Credential Guard
5. Local Administrator Password Solution
Thought experiment answers
This section contains the solution to the thought experiment.
1. Privileged Access Management protects privileged credentials by storing them in a bastion forest, a dedicated Active Directory forest that is connected to the production forest using a one-way trust relationship. The bastion forest is hardened and used only for PAM. Privileged users and groups are migrated to the bastion forest using shadow principals, copies of the objects that have the same security identifiers as the originals. Because of the trust relationship and the duplicate SIDs, the bastion forest can generate Kerberos tickets that are accepted by resources in the production forest.
2. Just-enough administration is a Windows PowerShell technology that protects privileged credentials by assigning them only to temporary user accounts that are assigned to users that connect to a PowerShell endpoint. The user establishes a remote connection to the endpoint and, while connected, runs as privileged user. When the connection is terminated, so is the user’s access to the privileged account.
3. Privileged access workstations protect privileged credentials by providing a secure workstation platform that can only be used for administrative tasks. A PAW cannot be used to access insecure resources, such as the open Internet, and unprivileged users cannot log on to a PAW.
4. Remote Credential Guard protects the privileged credentials often used to establish Remote Desktop connections. Instead of transmitting the credentials to the target system for Kerberos authentication, Remote Credential Guard redirects the credentials back to the connecting system, for authentication there.
5. Local Administrator Password Solution (LAPS) eliminates the need for IT personnel to assign the same local Administrator password on multiple workstations, a solution that is prone to credential theft. LAPS automatically assigns unique passwords to each computer, stores them in Active Directory computer objects, and resets them with new passwords at periodic intervals.