Touches
Here in your fifth app, you take a giant leap forward and really program some code. I want to say this right now: even though this is a big leap forward, there is always an easy way out. Yes, some of you will use DemoMonkey, and some will type in the all the code as you diligently follow the steps. Either way, I want you to carry on when you feel like giving up; but first, I want to clarify something with you, as I do with my students.
I need to talk about this for one page and I want you to read through this in order to prepare yourself for this chapter. In the past, you may have associated giving up with totally relinquishing a dream you had. So, let me share with you my outlook on three terms: giving up, dreams, and goals. I want to talk about these terms in the context of the following four points:
- A person can have a dream until the day she dies. For example, one could dream of being a supernova geek who programs phenomenal multimillion dollar apps. A person could have that dream until the day she dies, even if she had never even touched an iPhone or knew what the word Xcode meant. That’s because the equation that makes up a dream has no element of time.
- A goal, however, is a dream with an added element of time. Think about it. When the element of time in your goal’s equation runs out, you FAIL! It’s really simple. If you plan to sell a million apps within 12 months, and you can’t compile Hello World after 12 months, then you’ve FAILED!
- The more you accomplish goals within your time constraints, the more confident you become. That’s why a good professor sets up baby steps along the way to ensure that his students accomplish goals and feel really good about themselves. And that’s why a good professor makes little programs that move students a little closer to their ultimate goals. Each week, my students need to finish a set goal by programming an app. If they don’t send me that completed app within the time limit, I fail them for that assignment. But that’s rare, because rather than give up when it gets really hard, I have some backup angels that help my students succeed and meet their goals in time.
- Rather than give up when the going gets tough, you can do the following:
- First, watch me program this code in the video at http://www.rorylewis.com/docs/02_iPad_iPhone/06_iphone_Movies/iPhone%205%20iOX6%20Movies/005_touches.html and simply follow along. I go a little fast to keep the video short, but you can always pause it. In June 2011, the average viewer paused the video 28.5 times. The average student of mine paused the video 11.3 times.
- Second, if watching the video doesn’t result in total success, you can download my code for this program from http://bit.ly/ReiQ1k. That way, you can visually compare your code with mine. I tell students to try visually comparing first; if that doesn’t work, I have them paste my code into either Pages or Word and then paste their code into another similar document. After this, they should go away from their computers and check my code line by line against theirs.
- Third, if the preceding steps don’t work, you still shouldn’t give up. Instead, paste my code into your code after you’ve dragged your icons from the nib file into your header file. This means that you still do steps 1 through to 30, which involve mostly dragging and dropping. Then paste the implementation code into your implementation. When it compiles, I want you to try it again on your own before moving on to the next chapter.
The preceding steps eliminate the possibility of your giving up on being a supernova geek. I love receiving emails from students and readers telling me how proud they are of being geeks, and how they cannot believe that so many people are downloading and buying their apps. I especially love it when they tell me that they never programmed before in their lives, and how my book showed them that they could program apps and not give up. A wife and mother of four in Helena, Montana brought me to tears when she told me that when her husband lost his job as a boilermaker, she bought my book and never gave up—she supported her family for over a year and has continued to program and sell apps since her husband found another job.
Essentially, first try to do it by just reading the chapter. When you get stuck, check out the video. If the video doesn’t help, download the code, move away from your computer, and check your code visually, line by line. As a last resort, paste my code into yours after you drag-and-drop the other elements into your code.
OK—let’s do it.
To return to the car mechanic analogy from Chapter 4, remember that nowadays, car mechanics are very specialized: only a handful know how to completely disassemble and rebuild any specific car. So far, you’ve been peering over the shoulder of one such car mechanic as he’s changed and swapped specific components inside the engine. Today, you’ll build a very basic lawnmower engine. It will involve more steps than you’ve had to take thus far, but by the end of this chapter, you’ll have taken a huge leap forward.
As you build your lawnmower engine, you may look down and see a bigger mess of tools, nuts, and bolts than you’ve ever seen before. But hang in there. Follow me as I ask you to stand up from time to time and look at that “mess” from my point of view, not yours, and it will all make sense to you.
Touches: A View-Based Application
The touches app initially looks like the cover of this book. You can move the lulu fruit around with your fingertips after you touch it. There are also three buttons on the top called Shrink, Hide, and Change. The Shrink button is a special button; after you tap it, the lulu fruit icon shrinks, and the text inside the button automatically changes to Grow. When you tap the Grow button that used to be the Shrink button, the lulu fruit grows back to its original size. If you like, you can quickly have a look at Figures 5-36, 5-37, and 5-38. You can also see the app working right at the beginning of the video here: http://www.rorylewis.com/docs/02_iPad_iPhone/06_iphone_Movies/iPhone%205%20iOX6%20Movies/005_touches.html. Only look at the app working though—don’t follow the video through the code, because I want to explain the code to you in a specific way.
You’ll also be working on animation code that the clever people at Apple wrote into a bundle called a data structure. This is a critical tool that coders use to animate their objects. The data structure can shrink an object, change its angle, move it, tilt it, and make it do all sorts of other cool animations. All the code that Apple uses to perform these animations is kept in vaults located in core animation data structures called structs. Apple explains this by saying that the “CGAffineTransform data structure represents a matrix used for affine transformations.” Huh? What does that mean? It means that the CGAffine transforms all the critical points of an object you want to animate into a property called a transform. This transform property is simply a matrix. Once the object you want to animate is in this matrix, CGAffine obeys you when you instruct it to change your object’s position, angle, shape, scale, and so on. This is what you’ll do to the lulu fruit icon.
- Do I even need to say this? Close all programs, delete all trash, and drag all your important files and folders to their proper destinations so that you have a perfectly clean desktop. Download the DemoMonkey file and images from http://bit.ly/ReiGqK and upon unzipping the downloaded file, you’ll see one demoMonkey file and eight images on your desktop. The five background images are various versions of the front cover of this book. The first image is the center one in Figure 5-1, the cover without the lulu fruit icon. You can see that the three lulu fruit icons are separate from the backgrounds. The largest lulu fruit icon is the one that will appear on the user’s screen, and you’ll animate it using CGAffineTransforms to impose transforms. The two smaller lulu fruit icons are 57 x 57 icon.png and 114 x 114 icon.png, the latter being the Retina version. The Change button will scroll through all five background images. The Shrink and Hide buttons will use CGAffine structs to animate the lulu fruit icon.
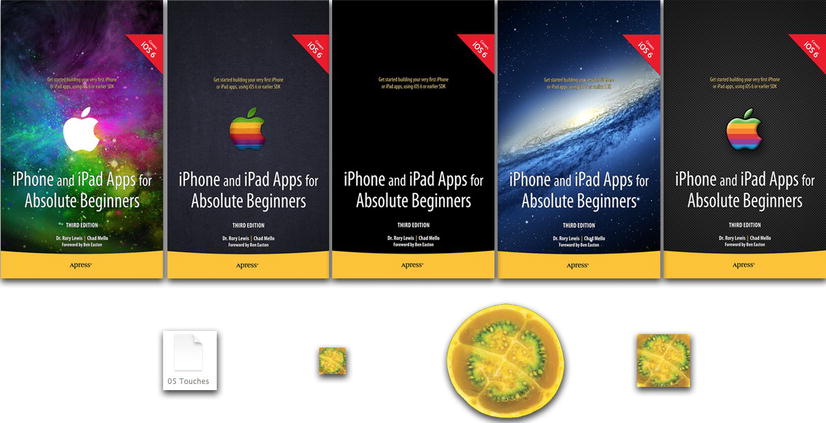
Figure 5-1. The five background images, demoMonkey file, and three lulu fruit icons downloaded from the repository
Note You can, of course, use your own images and icons. But this is a long chapter even without spending resources on creating your own images. In class, I tell students to hand in this homework assignment using my icons first. Later, if done on time (within three days), they can hand in their homework again with their own icons for extra credit. No students have done this yet.
- Your desktop should look similar to Figure 5-2, with nothing but the eight icons, the DemoMonkey file, and your Mac hard drive on your desktop. Once everything is clean and your images are stacked up and ready to go, you’re ready to blast off.

Figure 5-2. The eight images and DemoMonkey file on the desktop, ready to launch into Xcode
As you have done before, launch Xcode and open a new project using your keyboard shortcut
 . When you see the New Project wizard as depicted in Figure 5-3, click the Single View Application template. Press Return (Enter) or click the Next button.
Figure 5-3. Press
. Xcode 4.5 provides the option for a Single View Application, which is the same as the older versions of View-Based Application - Call your project touches and, most importantly, remember to deselect the Use Storyboards option, as shown in Figure 5-4. Press Return or click Next.

Figure 5-4. Call your project touches
Save your project to your desktop. You can probably guess by now that you always make sure your current project is located on the desktop. After you’re done with it, you’ll place it an appropriate folder. I have kept the “Create a Git Repository For Your New Project” option checked so that when you go to an interview to become a code programmer, or if you happen to work with some friends on a project, you’ll sound really smart if you say that you’re familiar with software control management (SCM), which keeps track of changes in the code and coordinates work groups. SCMs save all your many versions of each file of Xcode on disk, storing metadata about each version of each file in a location known as an SCM repository.
- Initially, when Xcode instantiates itself, it creates a large window that nearly covers your entire desktop. Grab the bottom right-hand corner and shrink the window just enough to see the seven images you downloaded from the repository at http://bit.ly/ReiGqK. Drag 57 x 57 icon.png into the left-hand App Icons slot and then drag 114 x 114 icon.png into the Retina Display App Icons slot, as shown in Figure 5-6.

Figure 5-6. Drag your icons into the App Icon slots
- Then grab your remaining 6 images and drag them into your Supporting Files folder in Xcode, again, as shown in Figure 5-7.

Figure 5-7. Drag your images over to your Supporting Files folder
- After dropping the image into the Resources folder, you’re prompted to define whether the image will always be associated with its position on your desktop or embedded with the code and carried along with the application file, as shown in Figure 5-8. You want it to be embedded, of course, so click the “Copy items into destination group’s folder (if needed)” box. Also, if not already checked by default, select the “Create groups for any added folders” radio button. Then click Finish or press Enter.
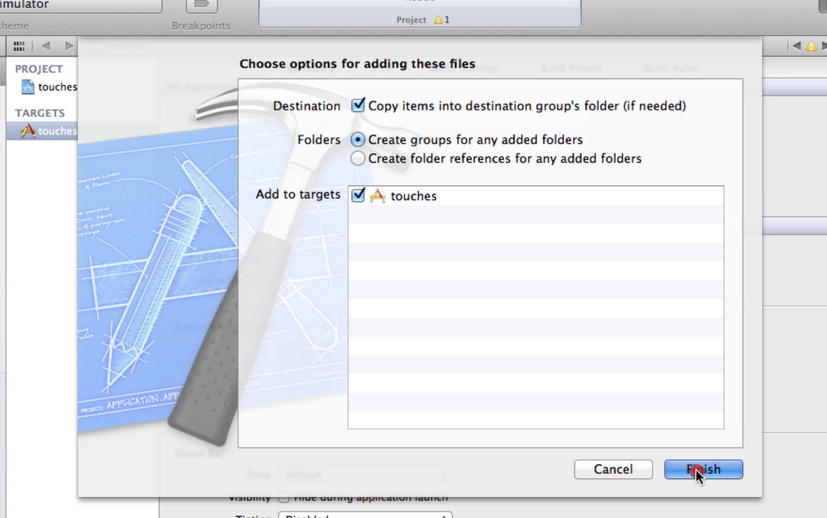
Figure 5-8. Check the “Copy items into the destination group’s folder (if needed)” box
- You now need to do a little housekeeping. Notice how the two icon files are in the root directory of touches? You don’t want them there, so drag them over to your Supporting Files folder, as shown in Figure 5-9.

Figure 5-9. Drag icon files into the Supporting Files folder
- Now you want to open your nib file, as shown in Figure 5-10. You need more space, so, as you’ve done before, open the Utilities View so you can see the tools and icons you need to dress up the View Design area.
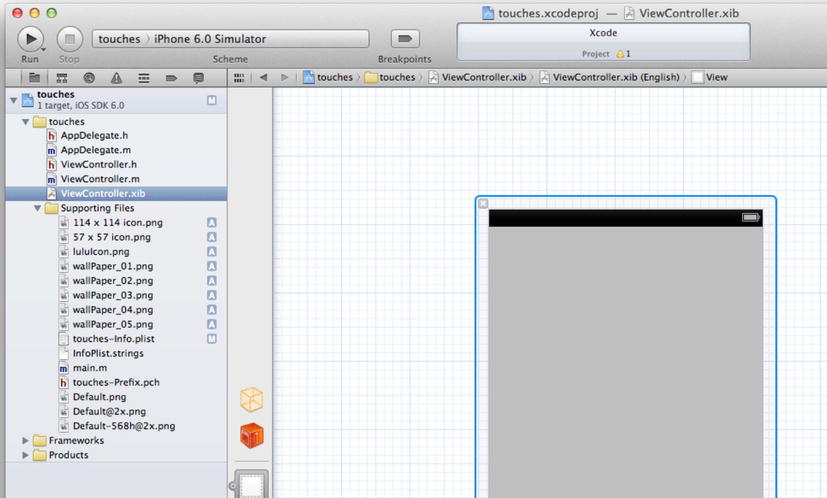
Figure 5-10. Click your nib file, open up the Utilities View, and close the Navigator View
- With your Utilities pane open, drag a UIImageView onto your View Design area, as shown in Figure 5-11. The UIImageView will hold the current backgrounds you downloaded, named wallPaper_01 to wallPaper_05. Later, I explain how you’ll write code that will determine which of the five background images will be housed on this UIImageView at any particular time. But you do know that the Change button will fire up the code that will switch the background, so you can guess that the next thing you need to do is drag some buttons onto the View Design area.

Figure 5-11. Drag a UIImageView onto your View Design area
Note Xcoders also call the View Design area the View screen or View frame. All those terms mean the same thing. I purposefully use the three terms interchangeably throughout this book.
- As shown in Figure 5-12, start dragging the first of your three buttons onto the top of your View frame.
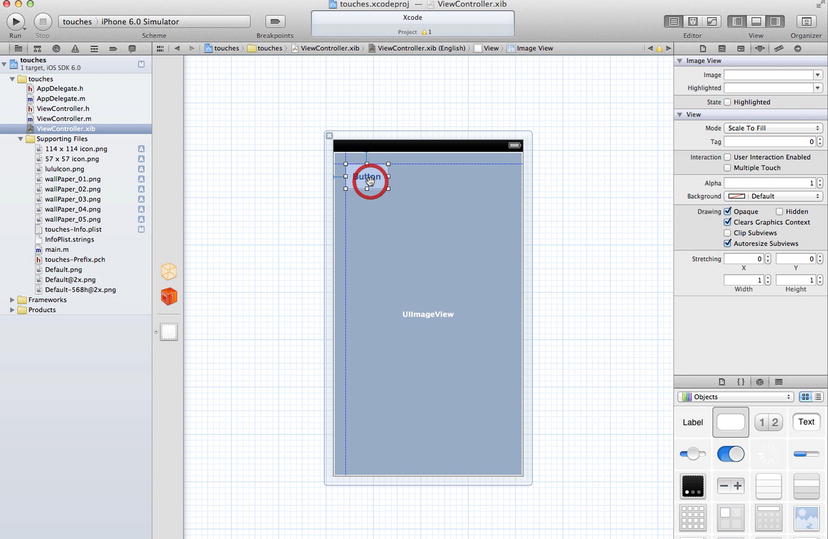
Figure 5-12. Drag the first of your three buttons onto your View Design area
- You’ll want to keep the buttons in line with one another. Keep the outer two buttons lined up with the outer margins and keep the center button centered on the screen. The blue indicator lines will tell you when you move your button close to the range of each of the respective boundaries. Once you’ve positioned your three buttons onto your View frame, click the buttons and name them Shrink, Hide, and Change, as illustrated in Figure 5-13.

Figure 5-13. Name your three buttons Shrink, Hide, and Change
- To associate the first wallpaper with the first UIImage you just brought in (your background image), click once on your background (UIImageView) and then go to the Image View and select wallpaper_01.png from the drop-down menu, as shown in Figure 5-14.

Figure 5-14. Associate your background image with wallPaper_01.png
- You need another UIImageView to hold the lulu fruit icon that can be moved around with a finger, scaled with a button, and hidden with a button, so add another UIImageView onto your View frame, as shown in Figure 5-15.
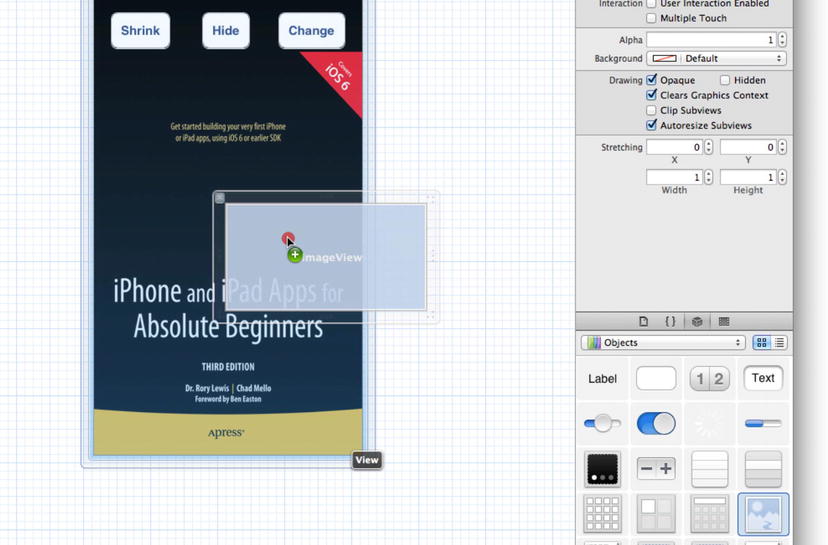
Figure 5-15. Drag a second UIImageView onto your View Design area
- After the UIImageView frames appear, leave the Attributes dialog in your Utilities pane and click the Size Inspector (
 5); make the width of the lulu icon a square consisting of 112 × 112 pixels. Also, set the x-axis at 160 pixels from the left (centered) and the y-axis height to be 314 pixels down from the top of the View pane. You can either center the icon manually (as I do) or do it in the x-axis box. This is illustrated in Figure 5-16.
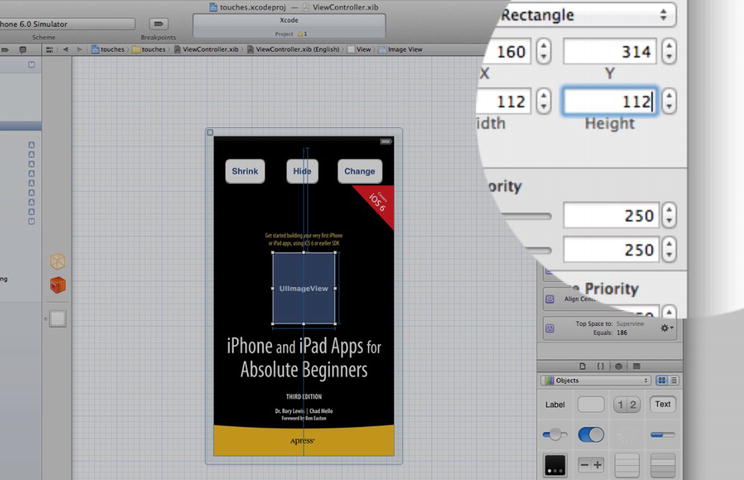
Figure 5-16. Size and locate luluIcon.png
- With the second UIImageView selected, go to the Image drop-down menu in the Attributes dialog in your Utilities pane, as shown in Figure 5-17. Select the luluIcon.png to associate it with your second UIImageView.

Figure 5-17. Associate the lulu fruit icon with the second UIImageView
- You’re done dragging and positioning all the items necessary onto your nib. Now you need to connect these items to your code, as you’ve done before. You’ll work on the ViewControllerheader file. Open the Assistant and close the Inspector (arrows 1 and 2 respectively in Figure 5-18). Your screen will look similar to Figure 5-18.
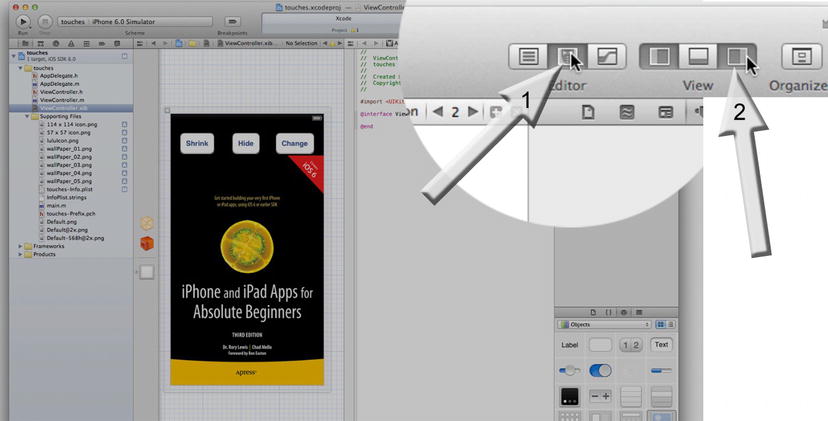
Figure 5-18. Click the Assistant to bring up your touchesViewController header file
- Before you bring in your outlets and actions, you need to create an array that will hold the background images. First, add curly brackets to the @interface directive and then drag in the first DemoMonkey file, named 01 ViewController.h @interface. As you drag it in-between the two curly brackets and let it go, there you’ll see the code I typed in magically appear, as illustrated in Figure 5-19.
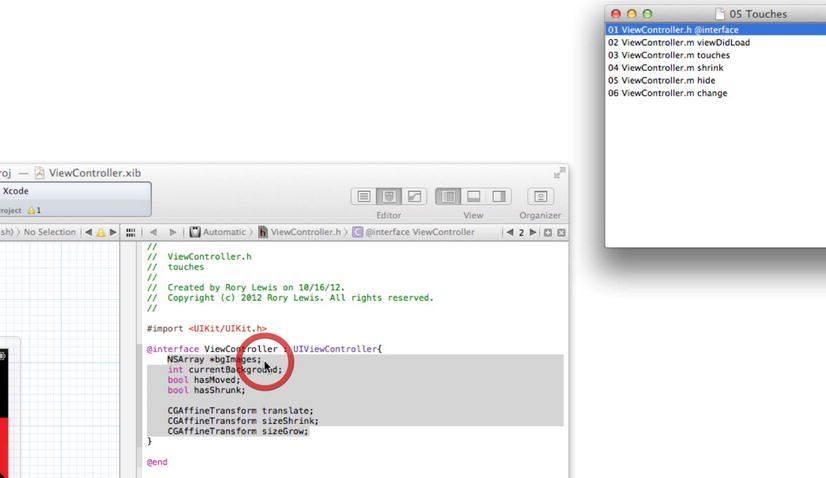
Figure 5-19. Create two curly brackets and drag the array code from DemoMonkey
Note If you’ve not already installed DemoMonkey, go back to the Chapter 1 section called “Installing DemoMonkey,” located near Figure 1-17.
Now, in the DemoMonkey code you brought in (and as shown below), the NSArray brings in an array, a list of things that right now is empty and unnamed. You want the array to store the background images. You could give it any name you like, so let’s call it something that denotes background images, such as bgImages. You need this array to be a pointer in the sense that it points to the address in memory where this list storing all your wallpapers is stored. So, add a star (*) there to call it a pointer. I go into this in more detail later, but for now, this is just perfect. Rename bgImages to *bgImages.
@interface ViewController : UIViewController{
    NSArray *bgImages;
    int currentBackground;
    bool hasMoved;
    bool hasShrunk;

    CGAffineTransform translate;
    CGAffineTransform sizeShrink;
    CGAffineTransform sizeGrow;
}
You also need to keep track of which background image is currently being displayed. For example, say that the third background in the sequence is currently the background image being displayed. Now say the user taps the Change button to see the next image. Because you know that background image number three is currently on the screen, you go to your array and get the next number background—background number four (that’s why we make it an integer). It grabs that fourth background from NSArray *bgImages and puts it onto the screen. To do this you need an item that you’ll call currentBackground(you could call it whatever you like, but let’s call it that). Make it of type integer Int:
@interface ViewController : UIViewController{
    NSArray *bgImages;
    int currentBackground;
    bool hasMoved;
    bool hasShrunk;

    CGAffineTransform translate;
    CGAffineTransform sizeShrink;
    CGAffineTransform sizeGrow;
}
You also need to keep track of whether your icon moved or shrunk—yes or no, has it moved or shrunk? This is Boolean. You can give either of these Boolean types any name you like, but let’s call them hasMoved and hasShrunk and make them of the Boolean type bool:
@interface ViewController : UIViewController{
    NSArray *bgImages;
    int currentBackground;
    bool hasMoved;
    bool hasShrunk;

    CGAffineTransform translate;
    CGAffineTransform sizeShrink;
    CGAffineTransform sizeGrow;
}
You also need to have three means of manipulating the lulu fruit icon. One to translate it, one to shrink it, and one to grow it. You’ll use CGAffines, as explained at the beginning of the chapter. As you manipulate it in your implementation file, this will all make more sense. For now though, move on and create your outlets and actions.
@interface ViewController : UIViewController{
    NSArray *bgImages;
    int currentBackground;
    bool hasMoved;
    bool hasShrunk;

    CGAffineTransform translate;
    CGAffineTransform sizeShrink;
    CGAffineTransform sizeGrow;
} - Before, when you’ve reached this juncture, I’ve instructed you to just blindly start Control-dragging outlets and action into your header file. This time, I want you to think about what you’re going to do, so you can fuse synapses in your brain and understand how to create a robust header file. To recap what you’ve done in the past, I fed you a ration of outlets and actions using the following very broad criteria:
- Outlets to connect nib file members with your UIImageView’s code, which the clever people at Apple wrote for you
- Actions to connect your buttons with code you write in the implementation file
Now, it’s time to grow up and move on. Remember how I mentioned that when you tap the Shrink button, it shrinks the lulu fruit icon and the text inside it changes to Grow—and then when you tap the button again, the icon grows? Well, you’ll use the code the folks at Apple wrote that allows you to do cool things like change the colors, text, and other appearances inside a button.
Note This code provided by Apple is located in a class called UIButton. When you use this code, we say you’re using an instance ofUIButton. In short, you need an outlet for your Change button so you can change the text in it from Shrink to Grow.
You’ll also need an outlet for the lulu fruit icon, of course, and the background that will hold whatever WallPaper_0x.png is being used. So, you’ll need three outlets. You now have six items:
- An array you’ll call bgImages
- A way to keep track of the currentBackground
- The state of hasMoved
- The state of Shrunk
- A way to transform translate (the position of the lulu fruit icon)
- A way to transform size (the size of the lulu fruit icon)
So how do you do this? Backtracking a little, after you’ve correctly Control-dragged your four outlets into the header, it will look something like this:
IBOutlet UIImageView *some variable name for our background;
IBOutlet UIImageView *some variable name for our icon;
IBOutlet UIButton *some variable name to change the text in the Shrink button;
IBOutlet UIButton *some variable name to change the text in the Shrink button;
Yup! You need to give each of these outlets variable names. Let’s use myBackground for the background, myIcon for the icon, hideButton for the button that fades out and hides the lulu fruit icon, and shrinkButton for the button that shrinks the lulu fruit icon. You could use different names, but do that later. Just follow along with me now and remember that it will look something like the following once you drag and associate these outlets into the header file:
IBOutlet UIImageView *myBackground;
IBOutlet UIImageView *myIcon;
IBOutlet UIButton *shrinkButton;
IBOutlet UIButton *hideButton;
Insofar as the actions for the three buttons are concerned, they stay the same. You’ll still have three actions for your three buttons sitting right after and outside the @properties directive, and the code will look something like this:
- (IBAction) some variable name for the Shrink button: (id)sender;
- (IBAction) some variable name for the Hide button: (id)sender;
- (IBAction) some variable name for the Change button: (id)sender;
Yup! You need to give each of these actions variable names. Let’s use shrink for the Shrink button, hide for the Hide button, and change for the Change button. Again, you could use different variable names here, but for now just follow along with me. It will look like this:
- (IBAction)shrink:(id)sender;
- (IBAction)hide:(id)sender;
- (IBAction)change:(id)sender;
Let’s get to it. Start off by Control-dragging from your background to the @interface directive, as illustrated in Figure 5-20.

Figure 5-20. Control-drag a connection from anywhere on the background and drop it after the @interface directive
Note You may have noticed that sometimes I say, Control-drag a connection from ____ in Interface Builder into your header file, and other times I say, Control-drag a connection from _____ in Interface Builder into the View Design area. This is not to confuse you; it’s to let you know that they mean the same thing, and you may work for, hire, or meet people who use one or the other in their nomenclature.
- You need to connect the UIImageView you dragged into the View Design area after the @interface directive that has your array code in it. When you reel the fishing line into your @property, keep it as an outlet and name it myBackground, as shown in Figure 5-21.
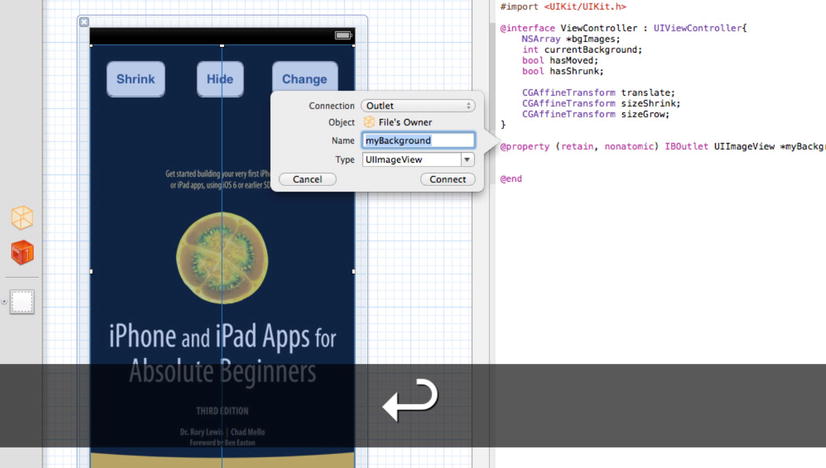
Figure 5-21. Name the outlet myBackground
- Control-drag from your icon to the View Design area, as shown in Figure 5-22. Keep it as an outlet and name it myIcon.

Figure 5-22. Keep the icon as an outlet and name it myIcon
- As shown in Figure 5-23, after clicking the Shrink button in Interface Builder once, Control-drag into your header.
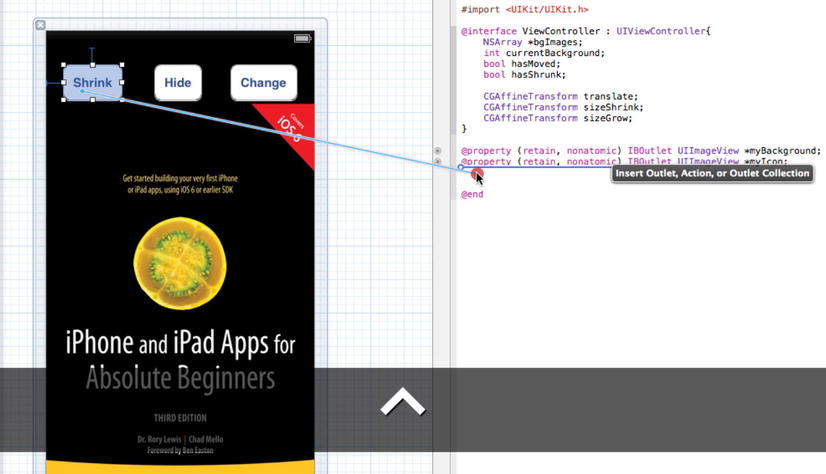
Figure 5-23. Control-drag a connection from your Shrink button in Interface Builder into your header file
Drop it and name it shrinkButton. Now, repeat that to enable you to also change the text in the Hide button.
- Control drag from the Hide button and name it hideButton, as shown in Figure 5-24. You should have four outlets now as follows:
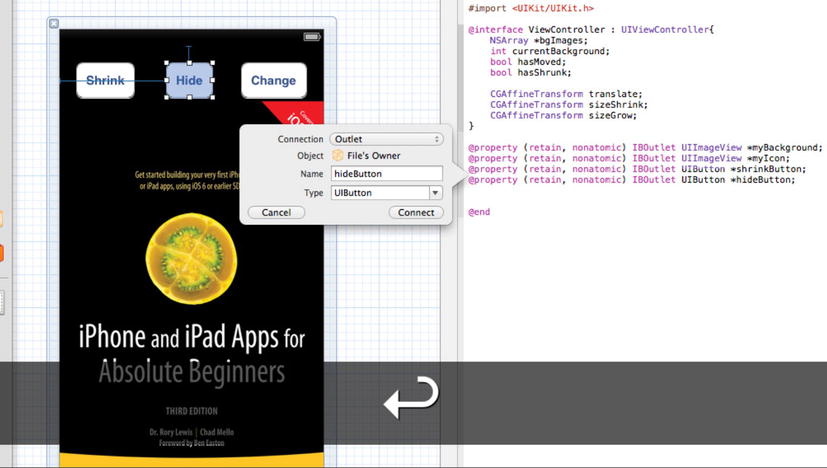
Figure 5-24. Finish outlets by naming the hideButton
@property (retain, nonatomic) IBOutlet UIImageView *myBackground;
@property (retain, nonatomic) IBOutlet UIImageView *myIcon;
@property (retain, nonatomic) IBOutlet UIButton *shrinkButton;
@property (retain, nonatomic) IBOutlet UIButton *hideButton; - Now you’ll make three actions for your three buttons. Control-drag from the Shrink button to your header file, drop it in, and change it to an action by selecting Action from the Connection drop-down menu. Call it shrink, as shown in Figure 5-25. Repeat this for the Hide button: make it an action, name it hide, and then, as you did before, Control-drag in from the Change button.

Figure 5-25. Now for the actions: Control-drag a connection from the Shrink button in Interface Builder into your header file
- After you’ve Control-dragged into the header from the Change button and made it an action, name it change, as shown in Figure 5-26. You should have three actions as follows:

Figure 5-26. Name the Change button change
- (IBAction)shrink:(id)sender;
- (IBAction)hide:(id)sender;
- (IBAction)change:(id)sender;
With this done, you’re now finished coding your header file. Before moving on to the implementation file, I strongly encourage you to check every letter, space, semicolon, empty line, and comma of your header code against mine. This is how your header file should look:
#import <UIKit/UIKit.h>

@interface ViewController : UIViewController{
    NSArray *bgImages;
    int currentBackground;
    bool hasMoved;
    bool hasShrunk;

    CGAffineTransform translate;
    CGAffineTransform sizeShrink;
    CGAffineTransform sizeGrow;
}

@property (retain, nonatomic) IBOutlet UIImageView *myBackground;
@property (retain, nonatomic) IBOutlet UIImageView *myIcon;
@property (retain, nonatomic) IBOutlet UIButton *shrinkButton;
@property (retain, nonatomic) IBOutlet UIButton *hideButton;

- (IBAction)shrink:(id)sender;
- (IBAction)hide:(id)sender;
- (IBAction)change:(id)sender;

@end
Once you’re confident that every line of your code matches mine, you need to start getting your View area ready to do some huge coding.
Coding the Implementation File
The implementation file for this project has more code in it than all the code you’ve coded so far put together. So don’t freak out. You’ll code five things:
- The viewDidLoad and the array that holds your background images
- The code to move the icon around with your finger
- The code to make things shrink and grow
- The code that makes things fade and then come back
- The code that changes the backgrounds
- Now and only now that you’ve correctly created and defined your variables do you open the implementation file, as shown in Figure 5-27.
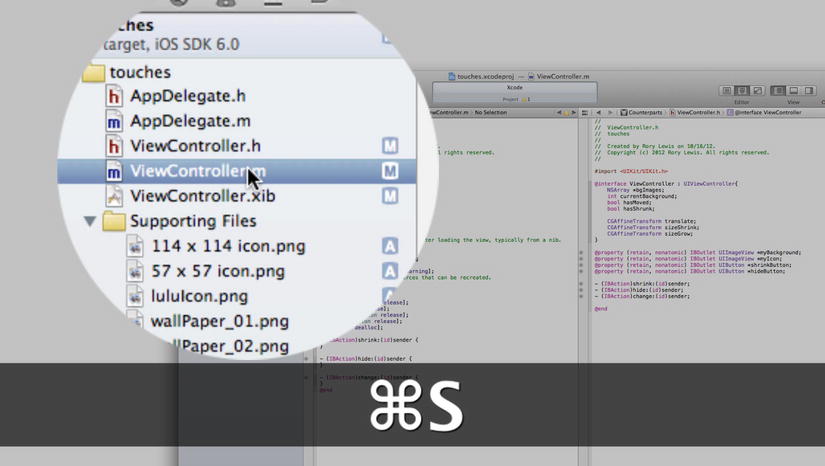
Figure 5-27. Open the implementation file
- As shown in Figure 5-28, open the Standard editor. The first thing you’ll code is the viewDidLoad method. You’ll go through this meticulously, but first drag in the DemoMonkey code and make sure it’s in the correct place. Then you’ll go through each line of the code.
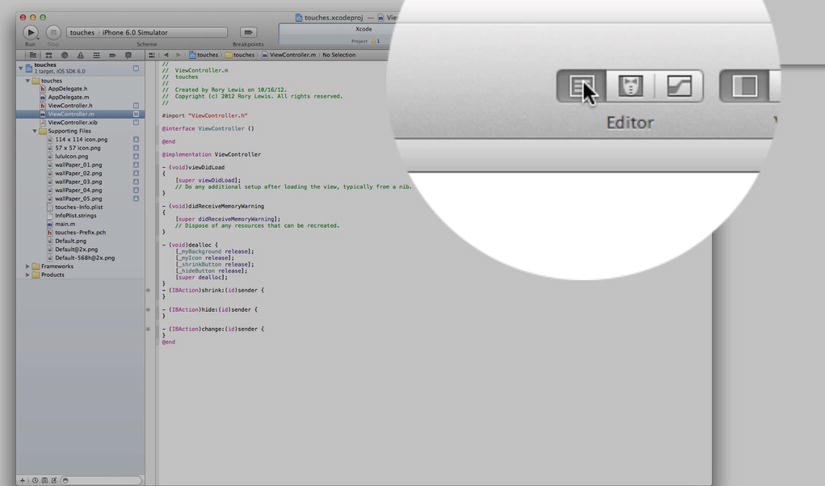
Figure 5-28. Change to the Standard editor
- Once your view loads, you need to clean things up and insert your array. Go to the ViewDidLoad method right at the top of the implementation file. Delete the comment code that says Do any additional setup after loading the view, typically from a nib.
- (void)viewDidLoad
{
    [super viewDidLoad];
    // Do any additional setup after loading the view, typically from a nib.
}
In its place drag in the DemoMonkey file named 02 ViewController.m viewDidLoad, as shown In Figure 5-29.

Figure 5-29. Drag in the viewDidLoad code from DemoMonkey
- (void)viewDidLoad
{
    [super viewDidLoad];
    02 ViewController.m viewDidLoad.
} - With your screen looking like Figure 5-30, let’s look at what you did.

Figure 5-30. The array code in its correct place in viewDidLoad
The code inside the viewDidLoad method runs after machine language code reserves some space in memory for your view. Notice that the first thing called inside viewDidLoad is its superclass, superviewDidLoad. Now, before you get nervous after reading the word superclass, think of it this way: just as rats are a subclass of rodents, viewDidLoad is a subclass of superviewDidLoad. So, the first thing viewDidLoad does is call all the code from its superclass. It’s here, at this exact moment, that you need to perform five tasks:
- (void)viewDidLoad
{
    [super viewDidLoad];

Set all y our button and backgrounds to the start state
Create an array with all y our wallpapers inside of it
Set how much the Shrink button will shrink the lulu fruit icon
Set how much the

Grow

button will grow the lulu fruit icon
Set the background image to the current background image

}
Set Buttons and Backgrounds to the Start State: Setting all your buttons and backgrounds to their start state creates a clean slate before the program starts to run. To create a clean slate in code, you need to set your state-changing variables to 0 (zero or nil). You have three such variables that tell you whether a state has changed hasMoved, hasShrunk, and currentBackground. Remember that both hasMoved and hasShrunk are Booleans, so they can either be YES or NO. The obvious start state for these is that they have not been moved yet. So, you need to set both hasMoved and hasShrunk to NO. This leaves you with currentBackground, which keeps track of which one of your five wallpapers is currently in the background being viewed by the user. Recall that you assigned currentBackground to be of type integer. Easy: set it to 0 (zero). See the following bold section of code:
- (void)viewDidLoad
{
    [super viewDidLoad];
   hasMoved = NO;
   hasShrunk = NO;
   currentBackground = 0;

Create an array with all our wallpapers inside of it
Set how much the shrink button will shrink the lulu fruit icon
Set how much the grow button will grow the lulu fruit icon
Set the background image to the current background image
}
Create the Array with All Your Wallpapers Inside It: It’s time to create an array, which is just a list of things, and fill it up with your wallpapers. The technical way to say that is You need to create an NSArray object and initialize it with some objects of type png. That’s not too obtuse, is it? Recall that you did declare the array in your header file. Often, students are so fearful of arrays that they forget to declare them when they write their exam code. In the header file, you wrote NSArray *bgImages, so you’ve declared an array and called it bgImages. You need to write bgImages = (the stuff that will make your array come to life). There are many complex ways to use arrays, but you’ll use the plain cheeseburger . . . or should I say Apple . . . methods using the NSArray initializers. They’re pretty much the same as the factory methods, only you do the allocation yourself, which is in the form of NSArray:
name of your array = [[NSArray alloc] initWithObjects: @"your 1st object", @" your 2nd object ", @" your 3rd object "... , @" your 2nd to last object ",@" your last object ", nil];That looks all cluttered. At the end of it, you’ll see that all your objects are separated by commas; then you tell the array it’s ended by putting that nil at the end. Let’s do two things here. First, plug the real name of your array—bgImages—into the template and then take the contents between these commas and place them onto their own separate lines and see if this makes more sense:
bgImages array  = [[NSArray alloc] initWithObjects:
@"your 1st object",
@" your 2nd object ",
@" your 3rd object ",
.
.
.
@" your 2nd to last object ",
@" your last object ",
nil];
Pretty cool, huh?! This really spooky code is actually making sense to you! Yeah! You’re not quite there yet, though. You need to do one more thing before you bring this array to life. Wrap your head around the UIImage class reference, which is an object the folks at Apple wrote to display images. Your objects are images, but really, they’re filenames that contain images. You need to use the UIImage together with a method called imageNamed that returns image objects connected to filenames. So, for each filename, you need to use UIImage imageNamed. I’ve illustrated this as follows:
name of your array  = [[NSArray alloc] initWithObjects:
[UIImage imageNamed:@ "WallPaper_01.png "],
[UIImage imageNamed:@ "WallPaper_02.png "],
[UIImage imageNamed:@ "WallPaper_03.png "],
[UIImage imageNamed:@ "WallPaper_04.png "],
[UIImage imageNamed:@ "WallPaper_05.png "],
nil];
With that code, you’ve created an array that contains your five images. All you need to do now is insert it into your code. See the following bold code lines:
- (void)viewDidLoad
{
    [super viewDidLoad];
    hasMoved = NO;
    hasShrunk = NO;
    currentBackground = 0;

bgImages = [[NSArray alloc] initWithObjects:
                [UIImage imageNamed:@ "WallPaper_01.png "],
                [UIImage imageNamed:@ "WallPaper_02.png "],
                [UIImage imageNamed:@ "WallPaper_03.png "],
                [UIImage imageNamed:@ "WallPaper_04.png "],
                [UIImage imageNamed:@ "WallPaper_05.png "],
                nil];

sizeShrink = CGAffineTransformMakeScale(.25, .25);
sizeGrow = CGAffineTransformMakeScale(1, 1);

_myBackground.image = [bgImages objectAtIndex:currentBackground];
}
Set How Much You’ll Shrink the Lulu Fruit Icon: It’s really easy to set how much you’ll shrink the lulu fruit icon when the Shrink button is tapped. Remember from the beginning of this chapter how CGAffine is able to obey you when you instruct it to change your object’s position, angle, shape, scale, and so on? Well, now you’re going to use it. I’ve randomly decided to shrink the lulu fruit icon by 25 percent. This means you need to tell CGAffine two things: first, that you want to scale the image, and second, how much you want to scale it on the x- and y-axes. You want to use CGAffine to scale the stuff you use . . . hmmm . . . let’s guess . . . Ah! How about CGAffineTransformMakeScale? Yes! You’re correct.
Now for the next assignment. To scale the image by 25 percent, you need to scale both the x- and y-axes equally at 0.25; but before you enter this into the code, remember in your header file you created a variable called sizeShrink of type CGAffineTransformMakeScale. You’ll we need to set the sizeShrink variable equal to the 25 percent shrinkage you tell the CGAffineTransformMakeScale code to perform. This is illustrated by the following:
- (void)viewDidLoad
{
    [super viewDidLoad];
    hasMoved = NO;
    hasShrunk = NO;
    currentBackground = 0;

bgImages = [[NSArray alloc] initWithObjects:
                [UIImage imageNamed:@ "WallPaper_01.png "],
                [UIImage imageNamed:@ "WallPaper_02.png "],
                [UIImage imageNamed:@ "WallPaper_03.png "],
                [UIImage imageNamed:@ "WallPaper_04.png "],
                [UIImage imageNamed:@ "WallPaper_05.png "],
                nil];

sizeShrink = CGAffineTransformMakeScale(.25, .25);
sizeGrow = CGAffineTransformMakeScale(1, 1);

_myBackground.image = [bgImages objectAtIndex:currentBackground];
}
Set How Much You’ll Grow the Lulu Fruit Icon: This is really simple. After you shrink the icon, the text in the button changes to Grow. You then tap the Grow button, and it goes from 25 percent back to 100 percent, or 1.
- (void)viewDidLoad
{
    [super viewDidLoad];
    hasMoved = NO;
    hasShrunk = NO;
    currentBackground = 0;

bgImages = [[NSArray alloc] initWithObjects:
                [UIImage imageNamed:@ "WallPaper_01.png "],
                [UIImage imageNamed:@ "WallPaper_02.png "],
                [UIImage imageNamed:@ "WallPaper_03.png "],
                [UIImage imageNamed:@ "WallPaper_04.png "],
                [UIImage imageNamed:@ "WallPaper_05.png "],
                nil];

sizeShrink = CGAffineTransformMakeScale(.25, .25);
sizeGrow = CGAffineTransformMakeScale(1, 1);

_myBackground.image = [bgImages objectAtIndex:currentBackground];
}
Set the Background Image to the Current Background Image: The last job we need to do in the viewDidLoad is set the background image to the current background image. What does that mean? You may be scratching your head, but think about it. You’ve created an array that holds your five images. You’ll set each of those images with a number. When you tap the Change button, whatever number image is on your background will be replaced by the next one. You’ve set currentBackground to 0 (zero). So, the first time somebody taps the Change button, it uses the code (that you have yet to code) to change the currentBackground from 0 to 0+1, which means that the current background will now be the next background in the array. This is how to use it now and later on your own: your variable that contains your image will be equal to [bgImagesobjectAtIndex: your variable that in your case holds the background image]. Don’t think about it too much. Just use it as illustrated in the following code. If you do want to think about this now, Dave, Jack, Jeff, and Fredrik explain this in their Apress book (Beginning iOS 6 Development: Exploring the iOS SDK):
- (void)viewDidLoad
{
    [super viewDidLoad];
    hasMoved = NO;
    hasShrunk = NO;
    currentBackground = 0;

bgImages = [[NSArray alloc] initWithObjects:
                [UIImage imageNamed:@ "WallPaper_01.png "],
                [UIImage imageNamed:@ "WallPaper_02.png "],
                [UIImage imageNamed:@ "WallPaper_03.png "],
                [UIImage imageNamed:@ "WallPaper_04.png "],
                [UIImage imageNamed:@ "WallPaper_05.png "],
                nil];

sizeShrink = CGAffineTransformMakeScale(.25, .25);
sizeGrow = CGAffineTransformMakeScale(1, 1);

_myBackground.image = [bgImages objectAtIndex:currentBackground];
}
Coding the touchesMoved Method
Now you’re going to code the touchesMoved method. Yes, I know you don’t even see it yet! What I want you to do after deleting the appropriate code in your viewDidload is scroll down through all the methods Apple instantiated for you. Now you’ll see three methods for your three actions you created in the header file for your three buttons.
- (IBAction)shrink:(id)sender {
}
- (IBAction)Hide:(id)sender {
}
- (IBAction)change:(id)sender {
}

@end
This is really great because you’ll place all your code inside these methods. But hold on—you’re missing the method that will handle your touching and moving the lulu fruit icon with your fingertip. Yup, you need to create that from scratch.
- You now need to create a method that will allow the user to touch the lulu fruit icon and move it around the screen with their finger. Make some space between the end of the
dealloc and shrink methods and drag the DemoMonkey file named 03 ViewController.m touches into that space you created, as shown in Figure 5-31. Okay—let’s talk about coding the touchesMoved method:

Figure 5-31. Make space for the touchesMoved method
Let’s look at it from a high altitude to start off with. Also, pretend you’re typing it from scratch, something many of my students do. With your code there, follow along and type the following underneath it. What do you want the touchesMoved method to do? Well, it may not seem obvious, but you simply want the touches method to do the following:
-(void) touchesMoved:(NSSet *)touches withEvent:(UIEvent *)event{
Grab code that can sense all touches on the screen
Check if a touch on the screen is on the lulu fruit icon. If yes then
Check if icon was hid and shrunk using buttons if yes then
Keep shrunk size and Hide icon to its position before Hide button
Check if icon was hid and not shrunk using buttons if yes then
Hide icon to its position before Hide button
Set icon to be at the current touch location
}
Part of my teaching method is that I don’t always teach you everything. You’ve seen this already when you blindly coded the first couple of Hello Worlds. Now I’m going to teach you how to use certain tools to perform tasks. I won’t teach you how all these tools work right now, but I will teach you what tool to grab. At this point, you need to get code that can sense all touches on the screen. Remember that when you want the user interface to do cool stuff with touches, you need to first call the code Apple wrote that senses and records all touches. So, type UITouches, and one of the options the code completion will present is UITouch *touch = [[event allTouches] anyObject]. That’s the tool I want you to invoke before you do anything with touches. Don’t think about how it works right now. Just know to call it at this point. See the bold code lines in the following example:
-(void) touchesMoved:(NSSet *)touches withEvent:(UIEvent *)event{
UITouch *touch = [[event allTouches] anyObject];
Check if a touch on the screen is on the lulu fruit icon. If yes then
Check if icon was moved and shrunk using buttons if yes then
Keep shrunk size and move icon to its new position
Check if icon was moved and not shrunk using buttons if yes then
move icon to its new position
Set icon to be at the current touch location
}
Now you need an if statement to check whether a touch on the screen is on the lulu fruit icon. You need to know that the iPhone looks at the rectangle that your object fits into and check whether the person’s finger is within that rectangle. To do that, you use if (CGRectContainsPoint([myIcon frame], [touch locationInView:nil])). You only need to type in if and CGRect, and then touch and code completion will fill in the rest. You’ll nest two more if statements inside this if statement. Notice how your road map tasks are nested inside this if statement, as illustrated in the following:
-(void) touchesMoved:(NSSet *)touches withEvent:(UIEvent *)event{
UITouch *touch = [[event allTouches] anyObject];
    if (CGRectContainsPoint([myIcon frame], [touch locationInView:nil]))
    {
Check if icon was moved and shrunk using buttons if yes then {
Keep shrunk size and move icon to its new position
}

Check if icon was moved and not shrunk using buttons if yes then {
move icon to its new position
}
Set icon to be at the current touch location
}
}
At this point, you need to insert two nested conditions inside the if statement you just created. But think about this. All you want to do is test to see whether the lulu fruit icon has been moved by the buttons, and if it has, regardless of whether it’s been shrunk, you need to reset whether it was moved back to a state in which it hadn’t moved. The two conditions that would have moved the lulu fruit icon are:
- When you moved it and shrank it
- When you moved it and didn’t shrink it
Either way, you want to change the state to not being moved so that when the user’s finger touches the lulu fruit icon, you can say, “You were not moved but now you are being moved.” You can’t say, “You were moved and now you’re being moved again.”
-(void) touchesMoved:(NSSet *)touches withEvent:(UIEvent *)event{
UITouch *touch = [[event allTouches] anyObject];

    if (CGRectContainsPoint([myIcon frame], [touch locationInView:nil]))
    {
        if (hasMoved == YES && hasShrunk == YES) {
            _myIcon.transform = CGAffineTransformTranslate(size, 0, 0);
            hasMoved = NO;
}

 if (hasMoved == YES && hasShrunk == NO) {
            _myIcon.transform = translate;
            hasMoved = NO;
     }

Set icon to be at the current touch location
}
}
Note In the video, in the second if statement, I write myIcon.transform = translate, and not CGAffineTransformMakeTranslation(0,0);. It doesn’t make too much difference, but it’s better to use the latter because this is the new way of programming Xcode (letting Xcode instantiate the make translation portion for the compiler). In the code that you download, it’s the latter.
The last thing you need to do is set the location of the icon to the exact position that the fingertip is moving it at any moment. This is stock boilerplate code that you will use over and over again to keep track of an object as a fingertip moves it around the screen. You use variable name.center = [touch locationInView:nil], as indicated in the following code:
-(void) touchesMoved:(NSSet *)touches withEvent:(UIEvent *)event{
UITouch *touch = [[event allTouches] anyObject];

    if (CGRectContainsPoint([myIcon frame], [touch locationInView:nil]))
    {
        if (hasMoved == YES && hasShrunk == YES) {
            _myIcon.transform = CGAffineTransformTranslate(size, 0, 0);
            hasMoved = NO;
}

 if (hasMoved == YES && hasShrunk == NO) {
            _myIcon.transform = translate;
            hasMoved = NO;
     }

_myIcon.center = [touch locationInView:nil];
    }
}
You’ve now completed writing the touchesMoved method. Compare your code to how mine looks in Figure 5-31.
- Drag the DemoMonkey file named 04 ViewController.m shrink into the implementation file, as shown in Figure 5-32.

Figure 5-32. Bring in the shrink method code
You now want to write the code you’ll invoke once the user taps the Shrink button. Remember how, in the header file, you created an outlet that lets you to change the label’s text from Shrink to Grow when the button is tapped? That’s because you can’t allow the lulu fruit to be shrunk twice in a row or it would virtually disappear! So, you need to change the text. The second thing you need to do is keep track of the possible states of the Shrink and Hide buttons so you can tell the CGAffine to properly transform the lulu fruit icon for you. The code looks something like this:
-(IBAction)shrink:(id)sender
{
if it has not been shrunk, keep the text saying Shrink, else change it to Grow
if it has not been shrunk  – do stuff
else – do stuff
}
To change the text, you’ll use the setTitle and forState:UIControlStateNormal with the following format: your variable namesetTitle:@"your text" forState:UIControlStateNormal. You’ve called the outlet for your Shrink button, shrinkButton, when you declared it many years ago in the header file. The text you’ll use will be Grow once it’s been changed, and then Shrink once it’s been changed again; this loop continues forever, as illustrated by the following:
-(IBAction)shrink:(id)sender
{
    if (hasShrunk) {
        [_shrinkButton setTitle:@"Shrink" forState:UIControlStateNormal];
    } else {
        [_shrinkButton setTitle:@"Grow" forState:UIControlStateNormal];
    }

if it has not been shrunk  – do stuff
else – do stuff
}
You’ll set the animation to null, update the animation, center the icon, grow or shrink it depending on whether it’s already shrunk or not, and then change the status of shrunk or not to the opposite.
- (IBAction)shrink:(id)sender {
    if (hasShrunk) {
        [_shrinkButton setTitle:@"Shrink" forState:UIControlStateNormal];
    } else{
        [_shrinkButton setTitle:@"Grow" forState:UIControlStateNormal];
    }

    if (hasShrunk == NO) {
        [UIView beginAnimations:nil context:NULL];
        [UIView setAnimationDuration:1.0];
        _myIcon.Center = CGPointMake(0,0);
        _myIcon.transform = CGAffineTransformTranslate(sizeShrink,165,0);
        [UIView commitAnimations];
        hasShrunk = YES;
    }

    else {
        [UIView beginAnimations:nil context:NULL];
        [UIView setAnimationDuration:1.0];
        _myIcon.Center = CGPointMake(0,0);
        _myIcon.transform = _myIcon.transform = CGAffineTransformTranslate(sizeGrow,0,0);
        [UIView commitAnimations];
        hasShrunk = NO;
    }

} - Make some space between the curly brackets in the hide method. Then drag the DemoMonkey file named 05 ViewController.m hide into that space you created, as shown in Figure 5-33.

Figure 5-33. Coding the Hide button that makes the icon fade in and out
Causing an object to fade in and out of sight can create some pretty cool effects that come in handy for games and animations. Because you have only one button in this example that does both, you toggle between hiding your icon and showing it. You do this by keying off of the alpha value of your icon. If the alpha value is 1 (100 percent visible to the user), you’ll fade it out of view by gradually changing alpha from 1 to 0 (0 percent visible to the user). To get the icon to reappear, gradually change alpha from 0 to 1 over three seconds.
Doing that is rather simple but requires an understanding of how to use animations in Objective-C. First, you must tell the UIView object the context on which to perform drawing or animations. In this case, it’s the same context that your ViewController object is under. The imageContext variable will hold this information after you’ve assigned it the current context:
CGContextRef imageContext = UIGraphicsGetCurrentContext();The first part of your function will handle the case where the icon is currently visible; it will fade the icon from the user’s sight. Look at this code:
if (_myIcon.alpha == 1) {
      [UIView beginAnimations:nil context:imageContext];
      [UIView setAnimationCurve:UIViewAnimationCurveEaseOut];
      [UIView setAnimationDuration:3];
      [UIView setAnimationDelegate:self];
      _myIcon.alpha = 0.0;
   [_hideButton setTitle:@"Show" forState:UIControlStateNormal];
That code tells the view to start the animation sequence using your current graphics context. Notice how you pass imageContext into the beginAnimation method; this method tells the UIView object to prepare for animation. The UIView will remember the current state of everything within the current context. Next, set your animation curve. The animation curve indicates how you want your animation to progress over time. In this case, you’re using UIViewAnimationCurveEaseOut. An ease-out curve causes an animation to quickly begin and then slow down as it completes. There are other curves as well. Apple describes them as follows:
- UIViewAnimationCurveEaseInOut: An ease-in ease-out curve causes the animation to begin slowly, accelerate through the middle of its duration, and then slow again before completing. This is the default curve for most animations.
- UIViewAnimationCurveEaseIn: An ease-in curve causes the animation to begin slowly and then speed up as it progresses.
- UIViewAnimationCurveLinear: A linear animation curve causes an animation to occur evenly over its duration. You can try using these last two curves on your own to see how they affect your animations.
setAnimationDuration tells the UIView how long the animation sequence will be. In our case, it will be three seconds. It will take three seconds to fade out the icon. Because your UIViewController has the built-in ability to handle the animation details, you tell the UIView that the ViewController will handle any technical details for you by setting setAnimationDelegate to self.
Finally, you set the alpha value of your icon to 0. So, when your last line in the function, [UIView commitAnimations], is invoked, the icon’s alpha value will slowly change from 1 to 0 over three seconds. When commitAnimations is invoked, the UIView applies your changes to the icon while transitioning from the starting state (alpha = 1) to the final state (alpha = 0).
The button text is changed to reflect the fact that the icon is no longer visible; the user will have to tap Show to bring it back. To get the icon to come back, simply execute the following code; it’s very similar to the preceding code, except now it’s fading the icon back into view by changing alpha from 0 to 1 over three seconds:
else if (_myIcon.alpha == 0.0) {
        [UIView beginAnimations:nil context:imageContext];
        [UIView setAnimationCurve:UIViewAnimationCurveEaseIn];
        [UIView setAnimationDuration:3];
        [UIView setAnimationDelegate:self];
        _myIcon.alpha = 1;
        [_hideButton setTitle:@"Hide" forState:UIControlStateNormal];
It’s amazing how astonishing these effects can look in apps with just a little code that describes in simple terms how you want things to unfold!
- Make some space between the curly brackets in the change method. Then drag the DemoMonkey file named 06 ViewController.m change into that space you created, as shown in Figure 5-34.

Figure 5-34. Code the Change button
Coding the Change Button
The only thing left to do now is to write the code that will change the backgrounds when you tap the Change button.
Essentially, you’ll perform five jobs:
- Increment the current background.
- Make sure the incrementation keeps the images contained in your array.
- Initialize the UIView.
- Create animations for your backgrounds as they get loaded.
- Commit and change the background.
Your starting roadmap for your change method is as follows:
-(IBAction)change:(id)sender
{
Increment background to the next background image
Check to see currentBackground doesn't go off the array
Initialize the UIView
Create animations
Commit and change
}
As I’ve said, each time you tap the Change button, the number of the background image changes. If wallPaper_01 is presently housed in the background, and you tap Change, then you’ll increment it—meaning, you’ll add 1 and bring on wallPaper_02 as the next background. All this means is that each time the Change button is tapped, before you do anything else, you need to increment the currentBackground as follows:
-(IBAction)change:(id)sender
{
currentBackground++;
Check to see currentBackground doesn't go off the array
Initialize the UIView
Create animations
Commit and change
}
If you keep incrementing, you’ll go beyond the number of images lined up in your array. Therefore, you need to reset the count back to 0 once you reach the number of images in your array, as illustrated by the following:
-(IBAction)change:(id)sender
{
currentBackground++;
if(currentBackground >= [bgImages count])
                currentBackground = 0;
Initialize the UIView
Create animations
Commit and change
}
To initialize the UIView, you need to do two things, but I’ve added a third task just to be cool. You have to reset (reboot, set to 0—however you want to say it) the beginAnimations method that those incredibly supercalifragilistic dudes at Apple wrote. Then you need to set how long each animation is going to be. As mentioned when you did the initializing before, I set the initializing in-between changes to 1 second. To be cool, I incorporated a third task: determining how smoothly each animation will start and end using the UIViewAnimationCurveEaseInOut method, as illustrated by the following:
-(IBAction)change:(id)sender
{
currentBackground++;
if(currentBackground >= [bgImages count])
currentBackground = 0;
[UIView beginAnimations:@"changeview" context:nil];
[UIView setAnimationDuration:1];
[UIView setAnimationCurve:UIViewAnimationCurveEaseInOut];
Create animations
Commit and change
}
Note To actually change the backgrounds, be careful how you wrap your head around this concept. Read this section carefully and follow along.
The changing of each background is divided into two steps:
- First, ask whether the current background’s numerical value, or tag, is the one you’re dealing with. If so, perform the code within the curly brackets (shown in the next bullet).
- Second, use the setAnimationTransitionmethod to perform whatever other method you’ve chosen. There are methods to curl up, curl down, hide in from the left or right, flip this way, do that, or do this. Or you can create your own method . . . when you become an übergeek. Right now, you’re just using curls and page flips, so I’ll call these transitions appropriately.
Looking at things a little more closely, for each animation, use the form as follows:
if(currentBackground ==the # we want )
[UIView setAnimationTransition:
UIViewAnimationTransition the animation we choose
forView:self.view
cache:YES];Now repeating this method and using randomly chosen animations for each animation, the code takes on the following form:
-(IBAction)change:(id)sender
{
currentBackground++;
if(currentBackground >= [bgImages count])
currentBackground = 0;
[UIView beginAnimations:@"changeview" context:nil];
[UIView setAnimationDuration:1];
[UIView setAnimationCurve:UIViewAnimationCurveEaseInOut];
if(currentBackground == 1)
[UIView setAnimationTransition:
UIViewAnimationTransitionFlipFromLeft
orView:self.
view cache:YES];
if(currentBackground == 2)
[UIView setAnimationTransition:
UIViewAnimationTransitionCurlDown
orView:self.
view cache:YES];
if(currentBackground == 3)
[UIView setAnimationTransition:
UIViewAnimationTransitionCurlUp
orView:self.
view cache:YES];
if(currentBackground == 4)
[UIView setAnimationTransition:
UIViewAnimationTransitionFlipFromRight
orView:self.
view cache:YES];
Commit and change
}The last step, as before, simply commit the change and execute the code:
-(IBAction)change:(id)sender
{
currentBackground++;
if(currentBackground >= [bgImages count])
currentBackground = 0;
[UIView beginAnimations:@"changeview" context:nil];
[UIView setAnimationDuration:1];
[UIView setAnimationCurve:UIViewAnimationCurveEaseInOut];
if(currentBackground == 1)
[UIView setAnimationTransition:
UIViewAnimationTransitionFlipFromLeft
orView:self.
view cache:YES];
if(currentBackground == 2)
[UIView setAnimationTransition:
UIViewAnimationTransitionCurlDown
orView:self.
view cache:YES];
if(currentBackground == 3)
[UIView setAnimationTransition:
UIViewAnimationTransitionCurlUp
orView:self.
view cache:YES];
if(currentBackground == 4)
[UIView setAnimationTransition:
UIViewAnimationTransitionFlipFromRight
orView:self.
view cache:YES];
[UIView commitAnimations];
myBackground.image = [bgImages objectAtIndex:currentBackground];
}Check your code against mine, as illustrated in Figure 5-37. You’re done. Can you believe that? All you need to do is run it, and your code will work beautifully!
Let me explain something. The odds that it will work are small, and that’s okay. Somewhere between 80–90 percent of my students have some error, even while using DemoMonkey. It’s all right if your code doesn’t work at first. Expecting your code to run beautifully the first time is similar to what my mother told me a couple of years ago. She called from across town at 5 p.m. and said, “Darling I’m just leaving now; I know it’s 5 o’clock, but I should be there soon because I hope there won’t be too much traffic today!” I couldn’t believe what she had just said. I replied, “Mom, rather than expecting to be here in 20 minutes, hoping there won’t be traffic, only to be horribly let down, why don’t you expect it to take an hour and enjoy that new Deva Premal meditation CD I bought you? Relax and enjoy yourself!”
Likewise, you should expect errors. Debugging our code is a huge part of being a computer scientist, and expecting not to see any errors will only let you down. If there were no errors, then you’d be lucky!

Figure 5-35. Save it and run it
- Once you run it (see Figure 5-35), you can do four things: tap one of the three buttons or hide the icon. This initial view is shown in Figure 5-36.

Figure 5-36. Left to right: Initial screen, moving the icon with finger (touchesMoved), tapping the Shrink button and seeing how it changes the text to Grow and shrinks the icon

Figure 5-37. Left to right: Touching the Hide button to see icon fading, Hide button turns into Show, Shrink being touched again
- Figure 5-38 illustrates the page curling to the fourth background and the lulu fruit icon being Hided by the touches function.

Figure 5-38. Three changing screens

Typically, I spend time digging the code that we flew over. However, this chapter was a huge leap, and I can’t justify making you flip back to understand what was going on while you typed the code. As far as going deeper into the code is concerned, there’s not much left to dig into—we did a pretty thorough job on it.
In the next chapter, you’ll look at Switch Views; you’ll “quickly” run the code and then come back to what you really did in the “Digging the Code” section. You’ll examine how a team of characters or roles within your code will work together to direct an outcome, or a series of outcomes, that will give the user the sense of seamless flow. You’ll learn about delegators, classes and subclasses, and “lazy loads.” You’ll get into the nitty-gritty of the .xib files, examine the concept of memory deallocation, and learn about imbedded code comments. It’s getting curiouser and curiouser. . .
Let’s close this chapter and give your brain a break.
Onward to the next chapter!