
C H A P T E R 10
![]()
TechieTogs: Adding E-commerce Features
In Chapter 9, we began the implementation of our e-commerce application, TechieTogs. So far, we have built a product catalog backed by an SQL Server Compact Edition database, which the user can browse or search for products.
In this chapter, we will continue with the next stage of development, which will involve adding a shopping cart, membership system, and checkout facility. As we design and develop these features, we will see how to:
- create bespoke objects to encapsulate custom data and logic;
- make use of the browser session to maintain state;
- use the ASP.NET Web Pages membership system and its related helpers to provide user account functionality; and
- use the WebMail helper to send e-mails to users.
Our first task is to build the shopping cart, which will allow users to store a list of products to make up a single order for checkout.
The Shopping Process
The TechieTogs shopping cart and checkout will work in the traditional manner. Users will browse for products in the catalog and then add items to the cart from the product details page. The contents of users' individual shopping cart will be maintained throughout their visit to the site and a page will be available to allow them to view the contents of the cart and remove items as necessary. The shopping cart page will also display the total order price of all items in the cart.
Once users are happy with the contents of their cart, they will click the ‘Proceed to Checkout’ button and then provide delivery details and confirm their order. The checkout page will require users to be authenticated. If they are not already logged in, users will be redirected to a login page and then sent back to the checkout page after logging in or registering.
Figure 10-1 details the TechieTogs shopping process.
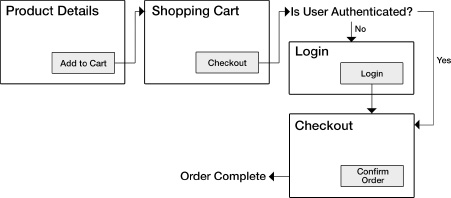
Figure 10-1. The shopping process for our site
The Shopping Cart
On our Product Details page, we added an order form that posts its values to Cart.cshtml. In this section, we will implement this page.
We need to store the contents of the shopping cart for the duration of the user's visit to the site. The browser session is an ideal place to store this information as it is maintained by the web server for the duration of the visit and can store any type of .NET object.
We will do this by creating a custom Cart class, which will encapsulate the data and methods required for shopping cart operations on the site.
Defining the Cart Class
Our cart class will need to store a list of cart items (products, sizes, and prices) and will need methods to allow us to carry out operations to add items, remove individual items, remove all items, and get the total value of all items within the cart.
To ensure the Cart class is available to all pages within the application, we will create it within the App_Code folder. Any code created with the App_Code folder of a site will be available to all pages within the site, but will never be served directly by IIS. So, inside the App_Code folder, add a class file called Cart.cs and enter the following code.
using System;

using System.Collections.Generic;


using System.Web;


/// <summary>

/// TechieTogs shopping cart

/// </summary>

public class Cart

{

    private List<CartItem> _Items = new List<CartItem>();
    public List<CartItem> Items { get { return _Items; } }


    public decimal TotalValue { get { return _Items.Sum(p => p.Price); } }


    public void AddItem(int productID, string size, decimal price)

    {

        _Items.Add( new CartItem { ProductID = productID, Size = size, Price = price } );

    }


    public void Clear()

    {

        _Items.Clear();

    }


    public void RemoveItem(int index)

    {

        _Items.RemoveAt(index);

    }


}
This code defines the Cart class in its entirety. Within the class, we have a read-only public property called Items, which is backed by a private field, _Items. Items and _Items are declared as List<CartItem>.
![]() Note The
Note The CartItem class is another separate custom class, which we will be defining later in this section. It will be used to store the ProductID, Size, and Price of individual line items within the shopping cart.
private List<CartItem> _Items = new List<CartItem>();


public List<CartItem> Items { get { return _Items; } }
We also have public property called TotalValue, which uses the List<T>.Sum() method to get the total price of all the CartItems within the _Items list.
public decimal TotalValue { get { return _Items.Sum(p => p.Price); } }
![]() Note The
Note The TotalValue property passes a lambda expression to the _Items.Sum() method. If you have not come across lambda expressions in the past, do not worry. They are a reasonably advanced C# technique we will only use in this one instance in the book. All you need to understand for now is that the call to _Items.Sum(p => p.Price) simply returns the sum of all the values stored in the Price property of the items within the cart. A good example of the use of lambda expressions with the Sum() method can be found on the MSDN web site at http://msdn.microsoft.com/en-us/library/bb397675.aspx
Next, we define the three methods of the Cart class, AddItem(), Clear(), and RemoveItem().
- The
AddItem()method is used to add a newCartItemto the list of items in the cart. It accepts theproductID,size, andpriceas parameters, which it uses to create a newCartItem. This is then appended to the_Itemslist. - The
Clear()method simply removes all items from the_Itemslist. We will call this method once an order is complete in order to empty the user's shopping cart. - The
RemoveItem()method removes theCartItemat the specified index within the_Itemslist.
Defining the CartItem Class
As mentioned above, CartItem is a custom class we will use to store each individual line item in a shopping cart. The class defines three public properties, ProductID, Size, and Price.
C# allows us to define multiple classes within the same physical file, so we now add the following code to the bottom of the Cart.cs file.
/// <summary>

/// TechieTogs shopping cart line item

/// </summary>

public class CartItem

{

    public int ProductID { get; set; }

    public string Size { get; set; }

    public decimal Price { get; set; }

}
This completes our custom class definitions for the shopping cart. By defining the cart in this way, we can store a Cart object within the browser Session variable, which will mean the cart is unique to each user and each individual cart's state is maintained throughout the lifetime of the user's visit.
The exact implementation and use of the Cart class will become much clearer as we continue to develop the shopping cart and checkout features.
The Shopping Cart Page
Now it's time to add the page that will store and retrieve values from the Cart object and present an overview of the cart contents to the user. This page will also allow users to remove items from their cart and will provide a button to take them to the checkout.
The shopping cart page contains some complex features that will take a little work to implement. In this section, we will walk through each stage of the implementation step-by-step.
Figure 10-2 shows the completed Shopping Cart page as displayed to the user.
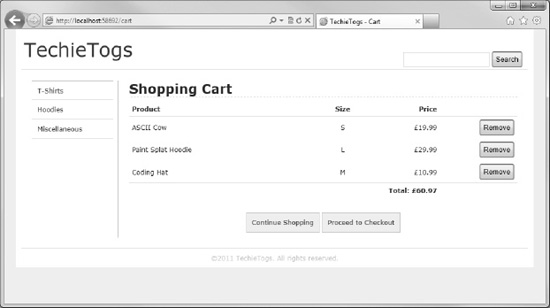
Figure 10-2. The TechieTogs Shopping Cart page
Create a new file in the root of the site and name it cart.cshtml. This page will be based on our default layout page, Shared/Layouts/_Layout.cshtml.
The first thing we need to do on this page is retrieve the current Cart object from the user's browser session. If no cart is present in the session, we will create a new empty Cart object and add it to the session.
Delete any markup in Cart.cshtml and insert the following code block.
@{


    Layout = "~/Shared/Layouts/_Layout.cshtml";

    Page.Title = "Cart";


    // Create a blank cart in Session if not present

    if (Session["cart"] == null)

    {

        Session["cart"] = new Cart();

    }


    // Get current cart from Session

    Cart cart = (Cart)Session["cart"];

}
Now that we have a Cart object, we'll add some markup and Razor code to iterate over the Cart.Items collection and output the contents in an HTML <table>. Add the following underneath the code block.
<table id="cartTable">
<tr>
<th class="product">Product</th>
<th class="size">Size</th>
<th class="price">Price</th>
</tr>
@foreach (var item in cart.Items)
{
<tr>
<td class="product">@item.ProductID</td>
<td class="size">@item.Size</td>
<td class="price">£@item.Price</td>
</tr>
}
<tr class="cartTotal">
<td colspan="2"> </td>
<td>Total: £@cart.TotalValue</td>
</tr>
</table>
In the final row of the <table>, we use the TotalValue property of the Cart object to display the total price to the user.
Before we run the project and take a look at the cart, let's give it a touch of style. Add the following CSS to Css/Style.css.
/* Cart

---------------------------------*/


#cartTable {

    width: 100%;

    border: none;

    border-spacing:0px;

}


#cartTable th {

    border-bottom: 1px solid #cdcdcd;

}


#cartTable td, th {

    padding:5px;

}


#cartTable .product {

    text-align:left;

    width: 50%;

}


#cartTable .size {

    text-align:center;
    width: 10%;

}


#cartTable .price {

    text-align:right;

    width: 20%;

}


#cartTable .cartTotal td {

    margin-top: 10px;

    border-top: 1px solid #cdcdcd;

    text-align:right;

    font-weight:bold;

}
With the markup and CSS in place, run the project, browse to a product in the catalog, and click the ‘Add to Cart’ button. You'll notice two immediate problems with this page:
- The chosen product has not been added to the cart.
- The cart page doesn't tell the user their cart is empty.
We'll deal with the second of these issues first, as it is the easiest to remedy.
Displaying an Empty Cart
If the user's shopping cart is empty, we want to display a useful message to the user rather than just display an empty table. To do this, we'll add an if statement at the top of the page body in Cart.cshtml, which we will call the Count() method of the carts Items collection. We first check to see if the collection has any rows. If the Cart has no Items, we'll display a suitable message; otherwise, we'll display the <table> as before.
![]() Note We have not explicitly defined a
Note We have not explicitly defined a Count() method within the Cart class. The method is utilized from List<T>, which is the generic collection type we use to store the Items collection. Hence, we have the call to cart.Items.Count() in the following code sample.
First, we add the following if statement to the top of the Cart.cshtml page directly underneath the <h1> header. Then we'll wrap the <table> inside an else block.
<h1>Shopping Cart</h1>


@if(cart.Items.Count() == 0)

{

    <p>There are no items in your shopping cart.</p>

}
else

{

    <text>

        <table id="cartTable">


            @* ... table as before ... *@


        </table>

    </text>

}
Now, when we run the page we'll see the message shown in Figure 10-3 instead of an empty table.

Figure 10-3. The empty shopping cart message
That resolves the empty cart display issue. Now we can take a look at how to add items to the cart from the Product Details page.
Adding Items to the Cart
The Product Details page (ProductDetails.cshtml) posts the values of the order form to Cart.cshtml in three fields, productID, size, and price. To add the chosen product to the cart, we'll add a post request handler to the code block at the top of the cart page.
The code inside the post request handler will simply retrieve the values of the posted form fields and pass them into the Cart.AddItem() method. Once the item has been added to the cart, we will save it back to the user's session.
Add the post request handler, highlighted in the code sample below, to the code block at the top of the Cart.cshtml page.
@{


    Layout = "~/Shared/Layouts/_Layout.cshtml";

    Page.Title = "Cart";


    // Create a blank cart in Session if not present
    if (Session["cart"] == null)

    {

        Session["cart"] = new Cart();

    }


    // Get current cart from Session

    Cart cart = (Cart)Session["cart"];


    if (IsPost)

    {

        var productID = Request["productID"];

        var size = Request["size"];

        var price = Request["price"];


        cart.AddItem(productID.AsInt(), size, price.AsDecimal());

    }


}
Now run the project again, choose an item from the catalog, and click ‘Add to Cart’. When you are taken to the Shopping Cart page, you will see the item you chose has been added. If you then go and add more products to the cart, they will all be displayed.
You will, however, have noticed our next problem. The shopping cart displays the ProductID instead of the product title. We'll fix this next.
Displaying the Product Title in the Shopping Cart
We do not store the product title in the Cart object, so we'll implement a simple helper function to fetch the title from the database.
Create a new page called Products.cshtml in the App_Code folder, delete the default content, and replace it with the following.
@* Product Functions *@

@functions {


    public static string GetProductNameFromId(int productID)

    {

        var db = Database.Open("TechieTogsData");

        var sqlQuery = "SELECT title FROM Products WHERE productID = @0";

        return db.QuerySingle(sqlQuery, productID).title;

    }


}
In this code, we define a function called GetProductNameFromId(). This function accepts a Product ID as a parameter and queries the database, returning the corresponding product title.
![]() Tip We could easily have added the functionality of the
Tip We could easily have added the functionality of the GetProductNameFromId() method directly into the Cart.cshtml page. However, as this may be a common task, moving this logic out into a helper function makes sense because we can make it available for use in other pages.
To display the product title, we'll call this function in the foreach loop in Cart.cshtml instead of outputting the item ProductID. Make the highlighted amendments to your foreach loop in Cart.cshtml.
@foreach (var item in cart.Items)

{

    <tr>

        <td class="product">@Products.GetProductNameFromId(item.ProductID)</td>

        <td class="size">@item.Size</td>

        <td class="price">£@item.Price</td>

    </tr>

}
Run the project again or refresh the Shopping Cart page in the browser to see the product titles displayed correctly.
Removing Items from the Shopping Cart
If users mistakenly add an item to their shopping cart or change their minds about an order, they need to be able to remove the item easily from the cart.
To achieve this, we will place a ‘Remove’ button against each item in the cart (see Figure 10-2). When the user clicks the button, the item will be removed directly from the cart. No confirmation page is necessary here since it is a trivial task to re-add a mistakenly removed item.
As mentioned in Chapter 5, the W3C HTML Specification states we should not make changes to persisted data as part of an HTTP GET request. Although our cart is not stored in a database, its data is maintained within the browser session, so we must use a POST request.
As also mentioned in Chapter 5, it is quite acceptable for a single page to have multiple HTML forms, provided they are not nested or overlapping. This may be a strange concept to developers of ASP.NET Web Forms, which is restricted to one form per page, but in cases like this, it is an extremely useful capability to have. We will render a separate form on each row of the cart contents table, which will POST its data back to the cart.cshtml page. The form will consist of a hidden field storing the zero-based index of the row and a submit button. When the form is submitted, we will pass the contents of the hidden field to the Cart.RemoveItem() method. This method requires the item index as the sole parameter. The form, including the button, will be displayed in an additional fourth column added to the right-hand side of the existing table.
Currently, Cart.cshtml uses a foreach loop to iterate over the cart items and build the cart contents table. We need to pass in a zero-based row index to the Cart.RemoveItem() method, so we will need to declare a variable to store the index before we enter the loop and increment it on each iteration.
Amend the contents of the cartTable <table> within Cart.cshtml to include the revisions highlighted in bold type below.
<table id="cartTable">

    <tr>
<th class="product">Product</th>
<th class="size">Size</th>
<th class="price">Price</th>
<th> </th>
</tr>
@{
// Declare and initialise index variable, i
int i = 0;
}
@foreach (var item in cart.Items)
{
<tr>
<td class="product">@Products.GetProductNameFromId(item.ProductID)</td>
<td class="size">@item.Size</td>
<td class="price">£@item.Price</td>
<td class="remove">
<form action="Cart" method="post">
@Html.Hidden("removeIndex", i)
<input type="submit" value="Remove" />
</form>
</td>
</tr>
// increment index
i++;
}
<tr class="cartTotal">
<td colspan="2"> </td>
<td>Total: £@cart.TotalValue</td>
<td> </td>
</tr>
</table>
We'll also need to make some changes to the page's POST request handler since the page can now have form data posted to it from two locations, ProductDetails.cshtml via the ‘Add to Cart’ button and Cart.cshtml via the ‘Remove’ button.
If the page passes a productID in the form data, we know the POST request has come from ProductDetails.cshtml via the ‘Add to Cart’ button and we can call the AddItem() method, as we do presently.
However, if the POST request contains a removeIndex value, we know this request has come via a remove form in Cart.cshtml. The removeIndex form value contains the row index, stored in the hidden field value for each form. We can pass this value as an integer to the Cart.RemoveItem() method to delete the row from the cart's items collection.
Apply the highlighted amendments below to the POST request handler in Cart.cshtml.
if (IsPost)

{

    if (Request["productID"] != null)
    {

        // Form posted from Product Details Page

        var productID = Request["productID"];

        var size = Request["size"];

        var price = Request["price"];


        cart.AddItem(productID.AsInt(), size, price.AsDecimal());

    }

    else if (Request["removeIndex"] != null)

    {

        // Form posted by Cart Remove Item button

        var removeIndex = Request["removeIndex"].AsInt();

        cart.RemoveItem(removeIndex);

    }

}
Finally, add the following CSS to Css/Style.css to format the Remove button column in the <table>.
table .remove {

    text-align:right;

    width: 20%;

}
Adding ‘Continue Shopping’ and ‘Proceed to Checkout’ Buttons
Now that users can successfully add and remove items from their individual shopping carts, we need to give them a choice to either continue shopping or, if their cart contains all the items they require, proceed to the checkout to finalize their order.
As the cart is stored in the user's browser session, we do not need to pass any data to the checkout page, so both of these ‘buttons’ can actually be hyperlinks.
Because the Shopping Cart page is now complete, the following code sample shows, for reasons of clarity, the complete listing for Cart.cshtml. The hyperlinks we need to insert are highlighted in bold.
@{


    Layout = "~/Shared/Layouts/_Layout.cshtml";

    Page.Title = "Cart";


    // Create a blank cart in Session if not present

    if (Session["cart"] == null)

    {

        Session["cart"] = new Cart();

    }


    // Get current cart from Session

    Cart cart = (Cart)Session["cart"];


    if (IsPost)

    {

        if (Request["productID"] != null)
{
// Form posted from Product Details Page
var productID = Request["productID"];
var size = Request["size"];
var price = Request["price"];
cart.AddItem(productID.AsInt(), size, price.AsDecimal());
}
else if (Request["removeIndex"] != null)
{
// Form posted by Cart Remove Item button
var removeIndex = Request["removeIndex"].AsInt();
cart.RemoveItem(removeIndex);
}
}
}
<h1>Shopping Cart</h1>
@if(cart.Items.Count() == 0)
{
<p>There are no items in your shopping cart.</p>
}
else
{
<text>
<table id="cartTable">
<tr>
<th class="product">Product</th>
<th class="size">Size</th>
<th class="price">Price</th>
<th> </th>
</tr>
@{
// Declare and initialise index variable, i
int i = 0;
}
@foreach (var item in cart.Items)
{
<tr>
<td class="product">@Products.GetProductNameFromId(item.ProductID)</td>
<td class="size">@item.Size</td>
<td class="price">£@item.Price</td>
<td class="remove">
<form action="Cart" method="post">
@Html.Hidden("removeIndex", i)
<input type="submit" value="Remove" />
</form>
</td>
</tr>
// increment index
i++;
}
<tr class="cartTotal">
<td colspan="2"> </td>
<td>Total: £@cart.TotalValue</td>
<td> </td>
</tr>
</table>
<div id="cartButtons">
<a href="/Default" class="linkButton">Continue Shopping</a>
<a href="/Checkout" class="linkButton">Proceed to Checkout</a>
</div>
</text>
}
We'll use CSS to style the hyperlinks to look like buttons. Add the following to the bottom of Css/Style.css.
div #cartButtons {

    text-align: center;

    margin: 40px 0px 20px 0px;

}


.linkButton  {

    border: 1px solid #cdcdcd;to yet)

    background-color: #efefef;

    margin: 0px;

    padding: 10px;

}


.linkButton:hover {

    background-color: #ddd;

}
Now, when you run the site and use the Shopping Cart page, it has all the functionality we require (although the ‘Proceed to Checkout’ button doesn't actually have a checkout page to go to yet) and it looks like the one in Figure 10-2.
At present, short of typing the URL into the browser address bar, the user can only get to the cart when they add an item from the product details page. Don't worry, I haven't overlooked this. We will provide a link to the cart in the layout page during the course of the next section, User Accounts.
User Accounts
When we defined ‘The Shopping Process’ for the TechieTogs site at the beginning of the chapter, we decided a user must be authenticated before they can progress to the checkout page. We are therefore clearly going to have to implement a membership system on the site. This section will cover that implementation.
Why Bother?
We could easily allow users simply to proceed to the checkout without having them log in or register for an account, so why are we making it a requirement? Well, there are several benefits to this process, including the following.
- The e-mail addresses of registered users can be used at a later date for marketing purposes.
- The users' perception of security on the site improves, thus increasing the trust level.
- Site administrators have the ability to view orders per unique user.
- The account system has the scope to be extended in future versions to provide additional functionality to users, such as storing a default delivery address, viewing past orders, and viewing the delivery status of current orders.
Initializing the Membership System
As we saw in Chapter 7, the ASP.NET Web Pages membership system must first be initialized by calling the WebSecurity.InitializeDatabaseConnection() method.
This method tells the membership system which database we wish to use to store the profile and membership information, which table should store the user profile data, and the column names used to identify the unique user ID and password fields. Because the user name must be unique within the table and we wish to collect the user's e-mail address for later use, it makes sense to use the e-mail address as the user name throughout the application.
Add a new file, _AppStart.cshtml, to the root of the TechieTogs site and replace the default markup with the following method call.
@{

    WebSecurity.InitializeDatabaseConnection("TechieTogsData",

        "UserProfile", "UserId", "Email", true);

}
Any code declared within the _AppStart.cshtml file will be run when the site is run for the first time, making it an ideal place to call the WebSecurity.InitializeDatabaseConnection(), which must be called before any interaction with the ASP.NET Web Pages membership system.
![]() Note An in-depth explanation of the ASP.NET Web Pages membership system can be found in this book in Chapter 7.
Note An in-depth explanation of the ASP.NET Web Pages membership system can be found in this book in Chapter 7.
Registering New Accounts
Now we have initialized the membership system, which has created the necessary tables in our database, we need to provide a page to allow new users to register on the site.
Create a new folder in the root of the site called Account. We will use this folder to help us organize the pages within our site by placing all pages that contain membership functionality inside it. Inside this new folder, create a file called Register.cshtml. The code listing below contains the complete code and markup required for this page.
@{


    Layout = "~/Shared/Layouts/_Layout.cshtml";

    Page.Title = "Register";


    var email = "";

    var password1 = "";

    var password2 = "";


    if(IsPost)

    {

        WebSecurity.Logout();


        email = Request["email"];

        password1 = Request["password1"];

        password2 = Request["password2"];


        // Validation

            if (email.IsEmpty()) {

            ModelState.AddError("email", "Email Address is required.");

        }


        if (!Validation.IsValidEmail(email))

        {

            ModelState.AddError("email", "Invalid Email Address.");

        }


        if (password1.IsEmpty()) {

            ModelState.AddError("password1", "Password is required.");

        }


        if(WebSecurity.UserExists(email))

        {

            ModelState.AddError("email", "An account with this name already exists.");

        }


        if(password1 != password2)

        {

            ModelState.AddError("password1", "The passwords do not match.");

        }


        // Create Account
        if(ModelState.IsValid)

        {

            WebSecurity.CreateUserAndAccount(email, password1, null, false);

            WebSecurity.Login(email, password1);

            if (Request.QueryString["sender"] != null)

            {

                // Return user to the URL sent in the “sender” key of the QueryString

                Response.Redirect(Request.QueryString["sender"]);

            }

            else

            {

                // Return the user to the home page

                Response.Redirect("~/Default");

            }

        }

    }


}


<h1>Register New Account</h1>

<form action="[email protected]" method="post" class="accountForm">

    <p>

        @Html.Label("Email Address: ", "email")<br />

        @Html.TextBox("email", email)

        @Html.ValidationMessage("email")

    </p>

    <p>

        @Html.Label("Password: ", "password1")<br />

        @Html.Password("password1", password1)

        @Html.ValidationMessage("password1")

    </p>

    <p>

        @Html.Label("Confirm Password: ", "password2")<br />

        @Html.Password("password2", password2)

    </p>

    <p>

         <input type="submit" value="Register" />

    </p>

</form>
When this page loads for the first time (that is, as the result of an HTTP GET request), an empty registration form is displayed to the user. The registration form consists of an e-mail address textbox and two password fields. Two password fields are displayed to minimize the chance of password typos being submitted to the database.
When the user submits the form, we log out any current user and perform validation on the submitted form values. This validation includes checks to ensure that none of the fields are empty, the two password fields have matching values, and a user with the requested name does not already exist in the membership database.
Because we are using an e-mail address as the required unique user name, we also need to perform validation to check the e-mail address is in a valid format. To do this, we will make use of the validation library we built in Chapter 5. For convenience, this code is repeated in full, as follows, and should be stored in a file called Validation.cshtml in the App_Code folder.
@* Validation Functions *@

@functions {


    @* Comparisons *@

    public static bool IsEqualTo<T>(T value, T comparator) where T : IComparable

    {

        return value.Equals(comparator);

    }


    public static bool IsGreaterThan<T>(T value, T comparator) where T : IComparable

    {

        return value.CompareTo(comparator) > 0;

    }


    public static bool IsLessThan<T>(T value, T comparator) where T : IComparable

    {

        return value.CompareTo(comparator) < 0;

    }


    public static bool IsGreaterThanOrEqualTo<T>(T value, T comparator) where T : IComparable

    {

        return value.CompareTo(comparator) >= 0;

    }


    public static bool IsLessThanOrEqualTo<T>(T value, T comparator) where T : IComparable

    {

        return value.CompareTo(comparator) <= 0;

    }


    @* Range Validation *@

    public static bool IsBetween<T>(T value, T minValue, T maxValue) where T : IComparable

    {

        return (value.CompareTo(minValue) >= 0 && value.CompareTo(maxValue) <= 0);

    }


    @* Pattern Matching *@

    public static bool IsNumbersOnly(string value)

    {

        string expression = @"^[0-9]+$";


        return System.Text.RegularExpressions.Regex.IsMatch(value, expression);
    }


    public static bool IsLettersOnly(string value)

    {

        string expression = @"^[A-Za-z]+$";


        return System.Text.RegularExpressions.Regex.IsMatch(value, expression);

    }


    public static bool IsAlphaNumeric(string value)

    {

        string expression = @"^[A-Za-z0-9]+$";


        return System.Text.RegularExpressions.Regex.IsMatch(value, expression);

    }


    public static bool IsValidEmail(string value)

    {

        string expression = @"^([a-zA-Z0-9_-.]+)@(([[0-9]{1,3}" +

                @".[0-9]{1,3}.[0-9]{1,3}.)|(([a-zA-Z0-9-]+" +

                @".)+))([a-zA-Z]{2,4}|[0-9]{1,3})(]?)$";


        return System.Text.RegularExpressions.Regex.IsMatch(value, expression);

    }


}
We will make further use of this validation library as we continue to develop the TechieTogs site.
![]() Tip A full explanation of this code can be found toward the end of Chapter 5.
Tip A full explanation of this code can be found toward the end of Chapter 5.
If any of the validations fail, the relevant error information is displayed to the user via the Html.ValidationMessage() helper.
Once a valid form has been submitted successfully, the account is created by passing the user name and password to the WebSecurity.CreateUserAndAccount() method and the user is logged in. The browser is then either redirected back to the Default page or to a URL passed in via the sender key of the QueryString. We will use this key in the QueryString when registering directly from the checkout page to return the user to it.
As with all the pages in the TechieTogs site, formatting for the registration page is conducted exclusively via CSS. Add the following, which styles both the form and the output of the validation helpers, to the bottom of your Css/Style.css file.
/* Account Forms

---------------------------------*/

.accountForm label {

    font-weight: bold;

    padding-right: 5px;

}


.accountForm p {

    padding: 5px 0px 5px 0px;

}


input[type="password"]
{

    border: 1px solid #cdcdcd;

}


/* Validation

---------------------------------*/

.validation-summary-errors,

span.field-validation-error {

    color: #FF0000;

}


input.field-validation-error  {

    border: 1px solid #FF0000;

    background-color: #FFCCCC;

}
Running the site and browsing to the Account/Register.cshtml page will display the registration form seen in Figure 10-4.
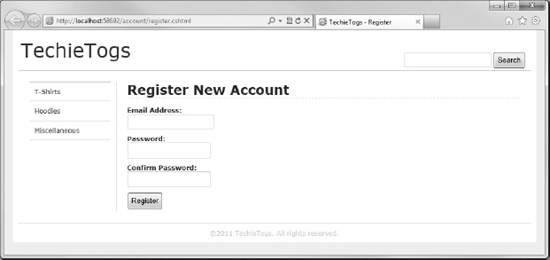
Figure 10-4. The account registration page
![]() Tip To minimize the chances of accounts being registered by automated bots or cross-site scripting, you may wish to use the ReCaptcha helper on your registration form. Complete instructions for the use of this helper can be found in Chapter 8.
Tip To minimize the chances of accounts being registered by automated bots or cross-site scripting, you may wish to use the ReCaptcha helper on your registration form. Complete instructions for the use of this helper can be found in Chapter 8.
Alternatively, you could implement an e-mail confirmation process, such as the one described in the Confirming Registration by E-mail section in Chapter 7.
The Account Summary Helper
In this section, we will add an account summary panel to the layout page. The account summary will display different content to users depending on their current authentication status, that is, whether they are logged in to the site.
If the user is not currently logged in (that is, they are an anonymous user), the account summary will display a link to their shopping cart along with links to the login and registration pages. However, if the user is logged in, they will see their username displayed, which will be a link to the Change Password page, a link to their shopping cart, and a link to allow them to log out from the site.
We'll implement this functionality in a helper, so add a new file to the App_Code folder called MembershipHelpers.cshtml and delete the default markup.
Inside the MembershipHelpers.cshtml file, add the following code.
@helper AccountSummary()

{

    if(WebSecurity.IsAuthenticated) {

        <text>

            Welcome <a href="@Href("~/Account/ChangePassword")">

                        @WebSecurity.CurrentUserName

                    </a> |

            <a href="@Href("~/Cart")">Cart</a> |

            <a href="@Href("~/Account/Logout")">Logout</a>

        </text>

    } else {

        <text>

            <a href="@Href("~/Account/Login")">Login</a> |

            <a href="@Href("~/Cart")">Cart</a> |

            <a href="@Href("~/Account/Register")">Register</a>

        </text>

    }

}
This code is fairly straightforward and simply checks the WebSecurity.IsAuthenticated property to see if the user is currently logged into the site and displays the appropriate set of content. The helper currently renders hyperlinks to some pages that we have yet to implement, Login, Logout, and ChangePassword. We will create all these pages during the remainder of this chapter.
To display the account summary helper to the user in every page, we will call it from within the layout page. Open Shared/Layouts/_Layout.cshtml and add the call to the helper, highlighted in the following code sample, within the "header" <div>.
<div id="header">

    <p class="logo"><a href="@Href("~/")">TechieTogs</a></p>

    <div id="headerRight">

        <div id="accountSummary">@MembershipHelpers.AccountSummary()</div>

        <div id="search">@RenderPage("~/Shared/Partials/_Search.cshtml")</div>

    </div>

</div>
We'll position the "accountSummary" <div> in the top right-hand side of the page by adding the following CSS in the “Layout” section of our stylesheet at Css/Style.css.
Now when we run the site, we will see the helper rendered in the top right-hand corner of the page header. Figure 10-5 and Figure 10-6 show the account summary helper as displayed to non-authenticated and authenticated users, respectively.
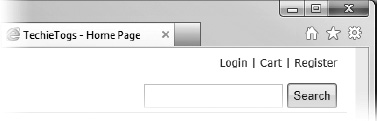
Figure 10-5. The account summary as displayed to anonymous users
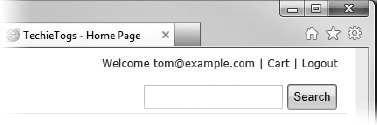
Figure 10-6. The account summary as displayed to an authenticated user
Showing the Number of Items in the Cart
This is great, but wouldn't it be nice if we could display some more useful user-specific information? Let's make use of the Cart object we created and display the number of items currently in the user's shopping cart.
Make the amendments to the AccountSummary() helper in MembershipHelpers.cshtml, as highlighted below.
@helper AccountSummary()

{

    var cartItemCount = 0;


    if (Session["cart"] != null)

    {

        cartItemCount = ((Cart)Session["cart"]).Items.Count;

    }


    if(WebSecurity.IsAuthenticated) {
        <text>

            Welcome <a href="@Href("~/Account/ChangePassword")">

                        @WebSecurity.CurrentUserName

                    </a> |

            <a href="@Href("~/Cart")">Cart - @cartItemCount item(s)</a> |

            <a href="@Href("~/Account/Logout")">Logout</a>

        </text>

    } else {

        <text>

            <a href="@Href("~/Account/Login")">Login</a> |

            <a href="@Href("~/Cart")">Cart - @cartItemCount item(s)</a> |

            <a href="@Href("~/Account/Register")">Register</a>

        </text>

    }

}
With these changes, we get the current number of items in the user's cart by calling the Cart.Items.Count() method and we display the number to the user as part of the cart hyperlink. Figure 10-7 shows the result.
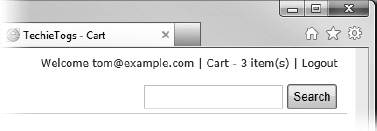
Figure 10-7. The account summary helper, showing the number of items in the user's cart
Displaying a Gravatar Image
The final flourish to our account summary helper will be to display the user's Gravatar image if they have associated an image to their e-mail address at Gravatar.com. A Gravatar, or Globally Recognized Avatar, is an image that can be associated with your e-mail address at ww.gravatar.com. Web sites that use the Gravatar service will be able to display the associated image against your name when you do things like comment or post on a blog. In our case, we'll display the Gravatar image in the AccountSummary, next to the user name.
We'll use the Gravatar() web helper from the ASP.NET Web Helpers Library package and pass in the user's e-mail address. Add the following method call to the AccountSummary() helper in MembershipHelpers.cshtml just before the word ‘Welcome’ and the user name will be displayed to an authenticated user.
@Gravatar.GetHtml(WebSecurity.CurrentUserName,

                    imageSize:24,

                    defaultImage:"mm")
Here, we have passed the user's e-mail address to the method and set the image size to 24 by 24 pixels.
In addition to the option of loading a default image from a specified URL, the Gravatar service provides a number of default image options that can be returned if no image is associated with the requested e-mail address. Table 10-1 shows the built-in options for Gravatar default images.

By passing "mm" to the defaultImage parameter, we instruct the helper to load the “mystery-man” image if none is associated with the e-mail address passed.
To align the image in the vertical middle of the account summary, we'll add the following CSS style to the “Layout” section of our stylesheet at Css/Style.css.
#accountSummary img {

    vertical-align: middle;

}
Figure 10-8 shows the finished account summary helper displayed on the page.
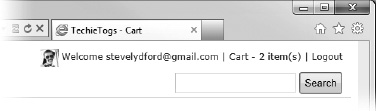
Figure 10-8. The final version of the account summary helper, displaying the Gravatar image associated with the user's e-mail address.
The Login Page
The Login page is used to authenticate users and will be accessed either from the account summary helper or via a redirect from the Checkout page if the current user is anonymous.
Create a new page, called Login.cshtml, within the Account folder and replace any existing default markup with the code listed below.
@{


    Layout = "~/Shared/Layouts/_Layout.cshtml";

    Page.Title = "Login";


    var email = "";

    var password = "";


    if(IsPost)

    {

        email = Request["email"];

        password = Request["password"];

        var rememberMe = Request["rememberMe"].AsBool();


        // Validation

        if (email.IsEmpty()) {

            ModelState.AddError("email", "Username cannot be blank.");

        }


        if (password.IsEmpty()) {

            ModelState.AddError("password", "Password cannot be blank.");

        }


        // Attempt login

        if(ModelState.IsValid)

        {

            if(WebSecurity.Login(email, password, rememberMe))

            {

                if (Request.QueryString["sender"] != null)

                {

                    Response.Redirect(Request.QueryString["sender"]);

                }
                else

                {

                    Response.Redirect("~/Default");

                }

            }

            else

            {

                ModelState.AddFormError("Unable to log in.");

            }

        }

    }

}


<h1>Login</h1>

@Html.ValidationSummary(true)

<form action="[email protected]" method="post" class="accountForm">

    <p>Please log in. If you do not have an exisiting account please <a href="../Account/[email protected]">register</a>.</p>

    <p>

        @Html.Label("Email Address: ", "email")<br />

        @Html.TextBox("email", email)

        @Html.ValidationMessage("email")

    </p>

    <p>

        @Html.Label("Password: ", "password")<br />

        @Html.Password("password")

        @Html.ValidationMessage("password")

    </p>

    <p>

        @Html.CheckBox("rememberMe", new { value = "true" })

        @Html.Label("Remember me on this computer?", "rememberMe")

    </p>


    <p>

         <input type="submit" value="Login" />

    </p>

    <p>

        <a href="ForgottenPassword">Forgotten Password?</a>

    </p>

</form>
When the page is loaded for the first time, the user is presented with a blank login form consisting of e-mail address (user name) and password textboxes, a ‘Remember Me?’ checkbox, and a submit button. The page also provides hyperlinks to the Account Registration and Forgotten Password pages.
Figure 10-9 shows the page displayed to the user. Note we do not need to declare any additional CSS styles since we are reusing the formatting styles we created when developing the registration page.
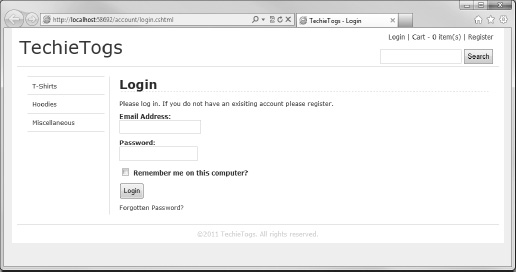
Figure 10-9. The user login page
When the form is submitted, the form values are validated and error messages are shown to the user, if relevant. If the submitted data are valid, we attempt a login by passing the values of the email, password, and rememberMe form controls to the WebSecurity.Login() method.
As mentioned in Chapter 7, the persistCookie parameter, to which we pass the Boolean value of the rememberMe checkbox, specifies whether the user wishes to persist the authentication cookie beyond the current session.
If the login attempt fails, that is, the Login() method returns false, we add a form error to the ModelState and re-display the form. If the login is successful, we redirect the user to the URL passed in the sender key of the QueryString if one is present; otherwise, we return them to the home page.
The Logout Page
The logout page is very simple and requires little explanation. When a user lands on the page, the WebSecurity.Logout() method is called, which removes the authentication cookie. Users are then shown a message informing them this has happened and they are given a hyperlink back to the home page.
Create Logout.cshtml in the Account folder and replace any existing content with the following.
@{


    Layout = "~/Shared/Layouts/_Layout.cshtml";

    Page.Title = "Log Out";


    WebSecurity.Logout();


}


<h1>Log Out</h1>

<p>You have been logged out from the site.</p>

<p><a href="@Href("~/Default")">Return to home page</a></p>
The Change Password Page
The Change Password page is accessed by clicking the user name in the account summary helper. It is essential for security purposes that we provide this facility to users.
The page, called ChangePassword.cshtml, should be created in the Account folder and should contain the following code and markup.
@{


    Layout = "~/Shared/Layouts/_Layout.cshtml";

    Page.Title = "Change Password";


    if (!WebSecurity.IsAuthenticated)

    {

        Response.Redirect("~/Default");

    }


    var currentPassword = "";

    var newPassword1 = "";

    var newPassword2 = "";


    if(IsPost)

    {

        currentPassword = Request["currentPassword"];

        newPassword1 = Request["newPassword1"];

        newPassword2 = Request["newPassword2"];


        // Validation

        if (currentPassword.IsEmpty()) {

            ModelState.AddError("currentPassword", "Current Password required.");

        }


        if (newPassword1.IsEmpty()) {

            ModelState.AddError("newPassword1", "Required.");

        }


        if (newPassword2.IsEmpty()) {

            ModelState.AddError("newPassword2", "Required.");

        }


        if(newPassword1 != newPassword2)

        {

            ModelState.AddError("newPassword1", "The passwords do not match.");

        }


        // Attempt password change

        if(ModelState.IsValid)

        {

            var currentUser = WebSecurity.CurrentUserName;


            if(WebSecurity.ChangePassword(currentUser, currentPassword, newPassword1))
            {

                Response.Redirect("~/Default");

            }

            else

            {

                ModelState.AddFormError("Unable to change password.");

            }

        }

    }

}


<h1>Change Password</h1>

    @Html.ValidationSummary(true)

    <form action="ChangePassword" method="post" class="accountForm">

        <p>

            @Html.Label("Current Password: ", "currentPassword")<br />

            @Html.Password("currentPassword", currentPassword)

            @Html.ValidationMessage("currentPassword")

        </p>

        <p>

            @Html.Label("New Password: ", "newPassword1")<br />

            @Html.Password("newPassword1”, newPassword1)

            @Html.ValidationMessage("newPassword1")

        </p>

        <p>

            @Html.Label("Confirm New Password: ", "newPassword2")<br />

            @Html.Password("newPassword2", newPassword2)

            @Html.ValidationMessage("newPassword2")

        </p>

        <p>

             <input type="submit" value="Change Password" />

        </p>

    </form>

</body>
The first time users land on the page as the result of an HTTP GET request, they are presented with a form containing three textboxes and a submit button. The first textbox requires they enter their current password; this is to prevent malicious changing of passwords on an account that has been left logged in. The other two textboxes require users to enter the new password twice; this is done to help prevent them from submitting a password with a typographical error. If users unknowingly submitted a misspelled password, they would be effectively locking the account until a password reset is performed (see the next section, Dealing with Forgotten Passwords).
When the form is submitted, the form values are validated and appropriate validation messages are displayed to the user, using the page ModelState and Html.ValidationMessage() helper if necessary (see Figure 10-10). Once an entirely valid form has been submitted, we call the WebSecurity.ChangePassword() method, passing in the current user name and password along with the new password to be stored. If the attempted password change is successful, the user is sent to the home page; otherwise, an error message is added to the page ModelState and the form is redisplayed.
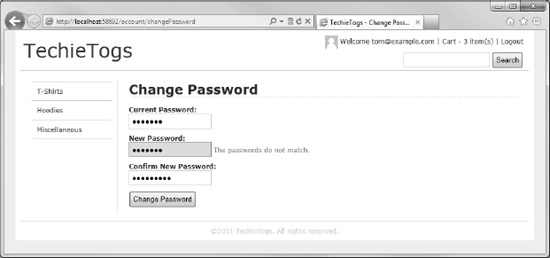
Figure 10-10. The Change Password page showing a validation error message
Forgotten Passwords
The last membership process to implement for our site is the one that deals with forgotten passwords. If users have forgotten their password, they can click the Forgotten Password link on the Login page to request a password reset e-mail, which will be sent to their registered e-mail address (in our case, this is the same as the user name).
In the password reset e-mail, they will receive a hyperlink to the Password Reset page (Account/PasswordReset.cshtml) on our site. This hyperlink will contain a unique password reset token, stored in the URL QueryString with a key of "passwordReset". When they visit the Password Reset page, they will be prompted to enter a new password. If both the new password entered and the password reset token are valid, the password entry in the database will be changed for that user.
Sending E-mail
In order to send the password reset e-mail to the user, we will first need to configure the site to send e-mail. Open your _AppStart.cshtml file and add the WebMail initialization code highlighted in bold type below. You will need to enter the details of your specific e-mail server/account.
![]() Tip The section The WebMail Helper in Chapter 7 covers this topic in much greater detail and includes some default settings for sending e-mail from a Google Gmail account.
Tip The section The WebMail Helper in Chapter 7 covers this topic in much greater detail and includes some default settings for sending e-mail from a Google Gmail account.
@{
    WebSecurity.InitializeDatabaseConnection("TechieTogsData",

        "UserProfile", "UserId", "Email", true);


    WebMail.SmtpServer = "<smtp server address>";

    WebMail.SmtpPort = <port number>;

    WebMail.EnableSsl = <true or false>;

    WebMail.UserName = "<email account user name>";

    WebMail.From = "<email account to send mail from>";

    WebMail.Password = "<email account password>";


}
Now that we have initialized the WebMail helper, we can build our Forgotten Password page.
The Forgotten Password Page
Add a new page called ForgottenPassword.cshtml to the Account folder. Inside this file, delete any existing markup and replace it with the following.
@{


    Layout = "~/Shared/Layouts/_Layout.cshtml";

    Page.Title = "Forgotten Password";


    var email = "";

    var message = "";


    if(IsPost)

    {

        email = Request["email"];


        // Validation

        if (email.IsEmpty()) {

            ModelState.AddError("email", "Email Address is required.");

        }


        // Generate and send password reset email

        if(ModelState.IsValid)

        {

            if(WebSecurity.UserExists(email))

            {

                // Generate confirmation link URL

                var resetToken = WebSecurity.GeneratePasswordResetToken(email);

                var hostUrl = Request.Url.GetComponents(UriComponents.SchemeAndServer,

                                                        UriFormat.Unescaped);

                var passwordResetUrl = hostUrl +

                                    "/Account/PasswordReset?resetToken=" +

                                    HttpUtility.UrlEncode(resetToken);


                // Send email
                WebMail.Send(to: email,

                    subject: "TechieTogs Password Reset for " + email,

                    body: "Please visit <a href='" + passwordResetUrl + "'>" +

                        passwordResetUrl +

                        "</a> to reset your TechieTogs account password."

                );


                message = "An email has been sent to your registered email address " +

                    "with a password reset link and further instructions.";

            }

            else

            {

                message = "Unable to find matching account.";

            }

        }

    }

}


<h1>Forgotten Password</h1>

@if (!message.IsEmpty()) {

    <p>@message</p>

}

else

{

    <form action="ForgottenPassword" method="post" class="accountForm">

        <p>Please enter your registered email address to be sent a password reset link:</p>

        <p>

            @Html.Label("Email Address: ", "email")<br />

            @Html.TextBox("email", email)

            @Html.ValidationMessage("email")

        </p>

        <p>

            <input type="submit" value="Reset Password" />

        </p>

    </form>

}
The user is asked for an e-mail address (see Figure 10-11). Once submitted, we check to see if it already exists in our database. If the e-mail address exists, we generate a unique password reset token using the WebSecurity.GeneratePasswordResetToken() method. This token is stored automatically by the method against the user record in the database. We also use the generated token to construct the URL for the password reset link sent by e-mail to the user. Finally, the e-mail is assembled and sent using the WebMail helper and a message is displayed to the user instructing them to check their e-mail inbox.

Figure 10-11. The Forgotten Password page
That completes the Forgotten Password page. Now we'll create the page the user will land on when they click the link in the password reset e-mail.
The Reset Password Page
The user is sent an e-mail by the Forgotten Password page that contains a link similar to the following.
http://localhost:58692/Account/PasswordReset?resetToken=0dogNPAJewCD%2b1MQIe%2fX0Q%3d%3d
The link sends the user to Account/PasswordReset.cshtml, which you should create now in your site. The page will contain a form with two password textboxes and a submit button (see Figure 10-12).
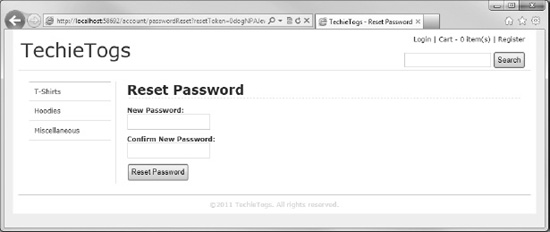
Figure 10-12. The Reset Password page, where the user is sent by the hyperlink in the Forgotten Password e-mail.
When the user submits a valid form, a password reset is attempted by passing the token, retrieved from the resetToken key of the QueryString, and the new password to the WebSecurity.ResetPassword() method. If the token matches the one stored in the database, the password is reset and a ‘Success’ message is displayed to the user; otherwise, a failure message is shown.
The code below is the complete listing for the Account/PasswordReset.cshtml page.
@{


    Layout = "~/Shared/Layouts/_Layout.cshtml";

    Page.Title = "Reset Password";


    var resetToken = Request["resetToken"] ?? "";

    var message = "";

    var newPassword1 = "";

    var newPassword2 = "";


    if(IsPost) {

        newPassword1 = Request["newPassword1"];

        newPassword2 = Request["newPassword2"];


        // Validation

        if (newPassword1.IsEmpty()) {

            ModelState.AddError("newPassword1", "Required.");

        }


        if (newPassword2.IsEmpty()) {

            ModelState.AddError("newPassword2", "Required.");

        }


        if(newPassword1 != newPassword2)

        {

            ModelState.AddError("newPassword1", "The passwords do not match.");

        }


        // Attempt password reset

        if(ModelState.IsValid)

        {

            if (WebSecurity.ResetPassword(resetToken, newPassword1))

            {

                message = "Password changed successfully.";

            }

            else

            {

                message = "Unable to change password.";

            }

        }

  }

}


<h1>Reset Password</h1>

@if (!message.IsEmpty()) {
    <p>@message</p>

}

else

{

    <form action="PasswordReset" method="post" class="accountForm">

        @Html.Hidden("resetToken", resetToken)

        <p>

            @Html.Label("New Password: ", "newPassword1")<br />

            @Html.Password("newPassword1", newPassword1)

            @Html.ValidationMessage("newPassword1")

        </p>

        <p>

            @Html.Label("Confirm New Password: ", "newPassword2")<br />

            @Html.Password("newPassword2", newPassword2)

            @Html.ValidationMessage("newPassword2")

        </p>

        <p>

            <input type="submit" value="Reset Password" />

        </p>

    </form>

}
That concludes the implementation of the TechieTogs membership system. Now that we have created a fully functional membership system in our application, it is time to complete the final task of this chapter, the Checkout process.
The Checkout Process
The checkout process of our site will require users to enter their shipping details and to confirm the order. Once they have done these things, the order will be stored in the database, a confirmation e-mail will be sent, and they will be redirected to an ‘Order Complete’ page.
Our first task then is to create the database tables necessary to store the completed orders.
Preparing the Database
We will add two new tables to the site database to store our orders. The first table, called Orders, will store the header details of the order, including the shipping address and User ID. The second table, OrderItems, will be used to store the individual line items that make up each order.
In the Databases workspace, right-click the Tables node within the TechieTogsData.sdf database in the Navigation Pane and choose ‘New Table’ from the context menu. Add the columns listed below in Table 10-2 and save the table as Orders.

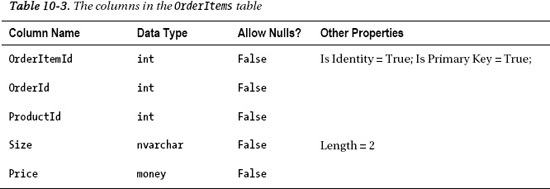
Next, add the columns listed in Table 10-3 to a new table called OrderItems.
Now that we have the required database tables in place, let's build our checkout page.
The Checkout Page
On the Checkout page, we will display the contents of the user's shopping cart and ask them to supply the shipping details for the order (see Figure 10-13). When the user clicks the ‘Place Order’ button, the following process will take place.
- The order details will be inserted into the database.
- A confirmation e-mail will be sent to the user.
- All current items will be removed from the shopping cart.
- The user will be redirected to an ‘Order Complete’ page.
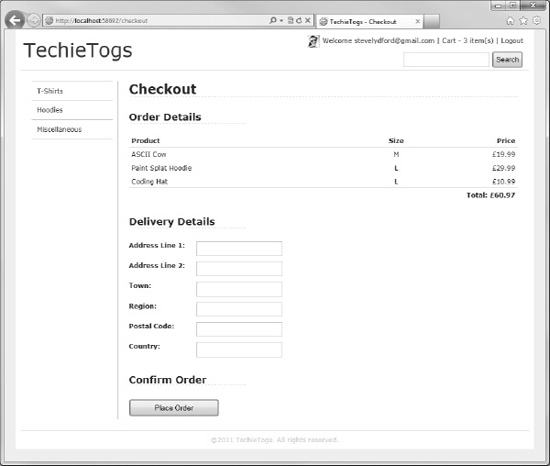
Figure 10-13. The TechieTogs Checkout page
Create a new page called Checkout.cshtml in the root of the TechieTogs site and remove any auto-generated content.
Add the following code and markup to the page to display the Checkout page to the user.
@{

    if (!WebSecurity.IsAuthenticated)

    {

        string currentUrl = Request.Url.ToString();

        Response.Redirect("~/Account/Login?sender=" + currentUrl);

    }


    Layout = "~/Shared/Layouts/_Layout.cshtml";

    Page.Title = "Checkout";


    var address1 = "";

    var address2 = "";

    var town = "";

    var region = "";

    var postalCode = "";

    var country = "";


    // Redirect to Cart.cshtml if no cart exists in Session

    if (Session["cart"] == null)

    {

        Response.Redirect("Cart");

    }


    // Get current cart from Session

    Cart cart = (Cart)Session["cart"];


    // Redirect to cart.cshtml if cart has no items

    if(cart.Items.Count() == 0)

    {

        Response.Redirect("Cart");

    }


    // POST REQUEST HANDLER GOES HERE


}


<h1>Checkout</h1>

<div id="checkout">

    <h2>Order Details</h2>

    <table id="cartTable">

        <tr>

            <th class="product">Product</th>

            <th class="size">Size</th>

            <th class="price">Price</th>

        </tr>


        @foreach (var item in cart.Items)

        {

            <tr>
<td class="product">@Products.GetProductNameFromId(item.ProductID)</td>
<td class="size">@item.Size</td>
<td class="price">£@item.Price</td>
</tr>
}
<tr class="cartTotal">
<td colspan="2"> </td>
<td>Total: £@cart.TotalValue</td>
</tr>
</table>
<h2>Delivery Details</h2>
<form action="Checkout" method="post">
<p>
@Html.Label("Address Line 1: ", "address1")
@Html.TextBox("address1", address1, new { maxlength = "100" } )
@Html.ValidationMessage("address1")
</p>
<p>
@Html.Label("Address Line 2:", address2)
@Html.TextBox("address2", address2, new { maxlength = "100" } )
</p>
<p>
@Html.Label("Town: ", "town")
@Html.TextBox("town", town, new { maxlength = "50" } )
@Html.ValidationMessage("town")
</p>
<p>
@Html.Label("Region: ", "region")
@Html.TextBox("region", region, new { maxlength = "50" } )
@Html.ValidationMessage("region")
</p>
<p>
@Html.Label("Postal Code: ", "postalCode")
@Html.TextBox("postalCode", postalCode, new { maxlength = "20" } )
</p>
<p>
@Html.Label("Country: ", "country")
@Html.TextBox("country", country, new { maxlength = "50" } )
</p>
<h2>Confirm Order</h2>
<p>
<input type="submit" value="Place Order"/>
</p>
</form>
</div>
The first action performed by the page is to check that the current user is logged in to the site. We do this by checking the Boolean property, WebSecurity.IsAuthenticated. If users are not authenticated, they are redirected immediately to the Login page. By passing the current URL in the sender key of the URL QueryString, we instruct the Login page to send the user back to the Checkout once they have logged in successfully.
Next, we set the layout page and title and declare a set of variables to store the data from the shipping details form. If at this point users currently have no shopping cart in their browser session, we redirect them to Cart.cshtml. If a cart is present in the session, we retrieve it and get the count of items, again redirecting users to Cart.cshtml if the cart is empty.
On the page, we then define an HTML <table> and iterate over the Items collection of the cart and display a summary of each item, adding one as a row to the table. In the final row, we display the total order value of all items in the cart from the Cart.TotalValue property.
Underneath the cart summary table, we display a form to collect the shipping details. This is a straightforward HTML form containing six textboxes and a submit button. The maxlength attribute of each textbox is set to match the length of the corresponding database columns in the Orders table.
To provide some formatting to the page, we will need to add some additional CSS styles to our Css/Style.css stylesheet. Add the following section immediately above the ‘Validation’ section.
/* Checkout

---------------------------------*/

#checkout h2 {

    width: 30%;

    border-bottom: 1px dashed #cdcdcd;

    margin: 25px 0px 20px 0px;

}


#checkout label {

    font-weight: bold;

    padding-right: 5px;

    width: 10em;

    float:left;

}


#checkout p {

    padding: 5px 0px 5px 0px;

}


#checkout input[type="submit"] {

    padding: 5px 45px 5px 45px;

}
With the Checkout page displaying correctly, we'll add a POST request handler to carry out the actions described earlier when the user clicks the ‘Place Order’ button. Insert the following code into the page in place of the // POST REQUEST HANDLER GOES HERE comment.
if (IsPost)

{

    address1 = Request["address1"];

    address2 = Request["address2"];

    town = Request["town"];

    region = Request["region"];

    postalCode = Request["postalCode"];

    country = Request["country"];
    // Validate Delivery Details

    if (address1.IsEmpty()) {

        ModelState.AddError("address1", "Address Line 1 is required.");

    }


    if (town.IsEmpty()) {

        ModelState.AddError("town", "Town is required.");

    }


    if (region.IsEmpty()) {

        ModelState.AddError("region", "Region is required.");

    }


    if(ModelState.IsValid)

    {

        // Save Order

        var UserID = WebSecurity.GetUserId(WebSecurity.CurrentUserName);


        var db = Database.Open("TechieTogsData");

        var orderSql = "INSERT INTO Orders (UserId, OrderShipped, OrderTotal, " +

                        "OrderDateTime, Address1, Address2, Town, " +

                        "Region, PostalCode, Country) " +

                        "VALUES ( @0, @1, @2, @3, @4, @5, @6, @7, @8, @9 )";

        db.Execute(orderSql,

                    UserID,

                    false,

                    cart.TotalValue,

                    DateTime.Now,

                    address1,

                    address2,

                    town,

                    region,

                    postalCode,

                    country);


        var orderId = db.GetLastInsertId();


        foreach(var item in cart.Items)

        {

            orderSql = "INSERT INTO OrderItems (OrderID, ProductID, Size, Price) VALUES (" +

                        "@0, @1, @2, @3)";

            db.Execute(orderSql, orderId, item.ProductID, item.Size, item.Price);

        }


        // Send confirmation email

        WebMail.Send(to: WebSecurity.CurrentUserName,

            subject: "TechieTogs Order Confirmation",

            body: "Many thanks for your order. Your items will be " +

            "dispatched shortly and should arrive within 3-5 working days."

        );
        // Clear shopping cart

        cart.Clear();


        Response.Redirect("OrderComplete");

    }

}
In the POST request handler, we retrieve the values of the shipping details form fields, assign them to the variables declared earlier, and validate the necessary fields. If any form fields contain invalid data, we add an error to the ModelState and display the relevant error message in the form.
If all the form data are valid, we insert the order header details into the Orders table, setting the UserId field to the UserId of the authenticated user, by calling the WebSecurity.GetUserId() method. We set the OrderShipped field to false and the OrderTotal field from the Cart.TotalValue property. Finally, the OrderDateTime field is populated with DateTime.Now and the remaining fields to the values submitted by the user.
Once we have executed the insert into the Orders table, we get the OrderId created by calling the GetLastInsertId() method. Then we iterate over the contents of the cart, inserting the details of each item into the OrderItems table using the OrderId we just retrieved.
![]() Tip This POST request handler is the best place to insert code to take an online payment. Web helper packages for taking payments via PayPal and Amazon are available in the WebMatrix Package Manager, although any online payment system can be integrated with WebMatrix.
Tip This POST request handler is the best place to insert code to take an online payment. Web helper packages for taking payments via PayPal and Amazon are available in the WebMatrix Package Manager, although any online payment system can be integrated with WebMatrix.
Next, we send an e-mail to the user thanking them for their order and advising them of the expected delivery timescales. To finish, we clear the contents of the shopping cart and redirect the user to the Order Complete page.
The Order Complete Page
The Order Complete page simply displays a message to the user thanking them for their order and informing them that a confirmation e-mail has been sent.
Insert the following code into a new page in the root of the site called OrderComplete.cshtml.
@{

    Layout = "~/Shared/Layouts/_Layout.cshtml";

    Page.Title = "Order Complete";

}


<h1>Order Complete</h1>

<p>Many thanks for your order. An email confirmation has been sent.</p>

<br />

<p>Your order will be dispatched shortly and should arrive in 3-5 working days.</p>
And that's it! Our checkout process is complete.
Summary
In this chapter, we have added the e-commerce features to the TechieTogs web site. These features included a fully-featured shopping cart, a checkout process, and membership system.
In the next chapter, we will add some final features to the site, including uploading, storing, and displaying product images, generating some dynamic content for the home page to show featured and popular products, and creating administration pages to facilitate the management of the site.