25
Apache Ignite in C#
This chapter's example uses C# to build a NoSQL key-value database. The example runs on the local computer, but it shouldn't be hard to adapt it to run in the cloud.
This example is much less complicated than the examples described in the previous chapters, largely because a key-value database has fewer features. Relational, graph, and document databases all provide sophisticated querying features. In contrast, a key-value database mostly just stores values and later retrieves them.
Apache Ignite can actually function as a relational database, but Chapters 16 through 19 demonstrated that kind of database, so this chapter uses only Ignite's key-value features.
A key-value database lets you associate a piece of data with a key and then later use the key to retrieve the data. By default, Ignite stores data in RAM, so the data is lost when your program ends. This chapter explains how to use volatile or nonvolatile data.
If you skipped Chapter 24, which built a similar example in Python, go to that chapter and read the beginning and the first two sections, which explain how to install Ignite and how to start a database node with or without persistence.
When you reach the section “Create the Program” in Chapter 24, return here and start on the following sections.
CREATE THE PROGRAM
Before you can make a C# program use the Ignite database, you need to install a database adapter for it. Then you can start writing code.
Install the Ignite Database Adapter
This example uses the Apache.Ignite database adapter to allow your program to communicate with the Ignite database. To add the adapter to your project, follow these steps:
- Open the Project menu and select Manage NuGet Packages.
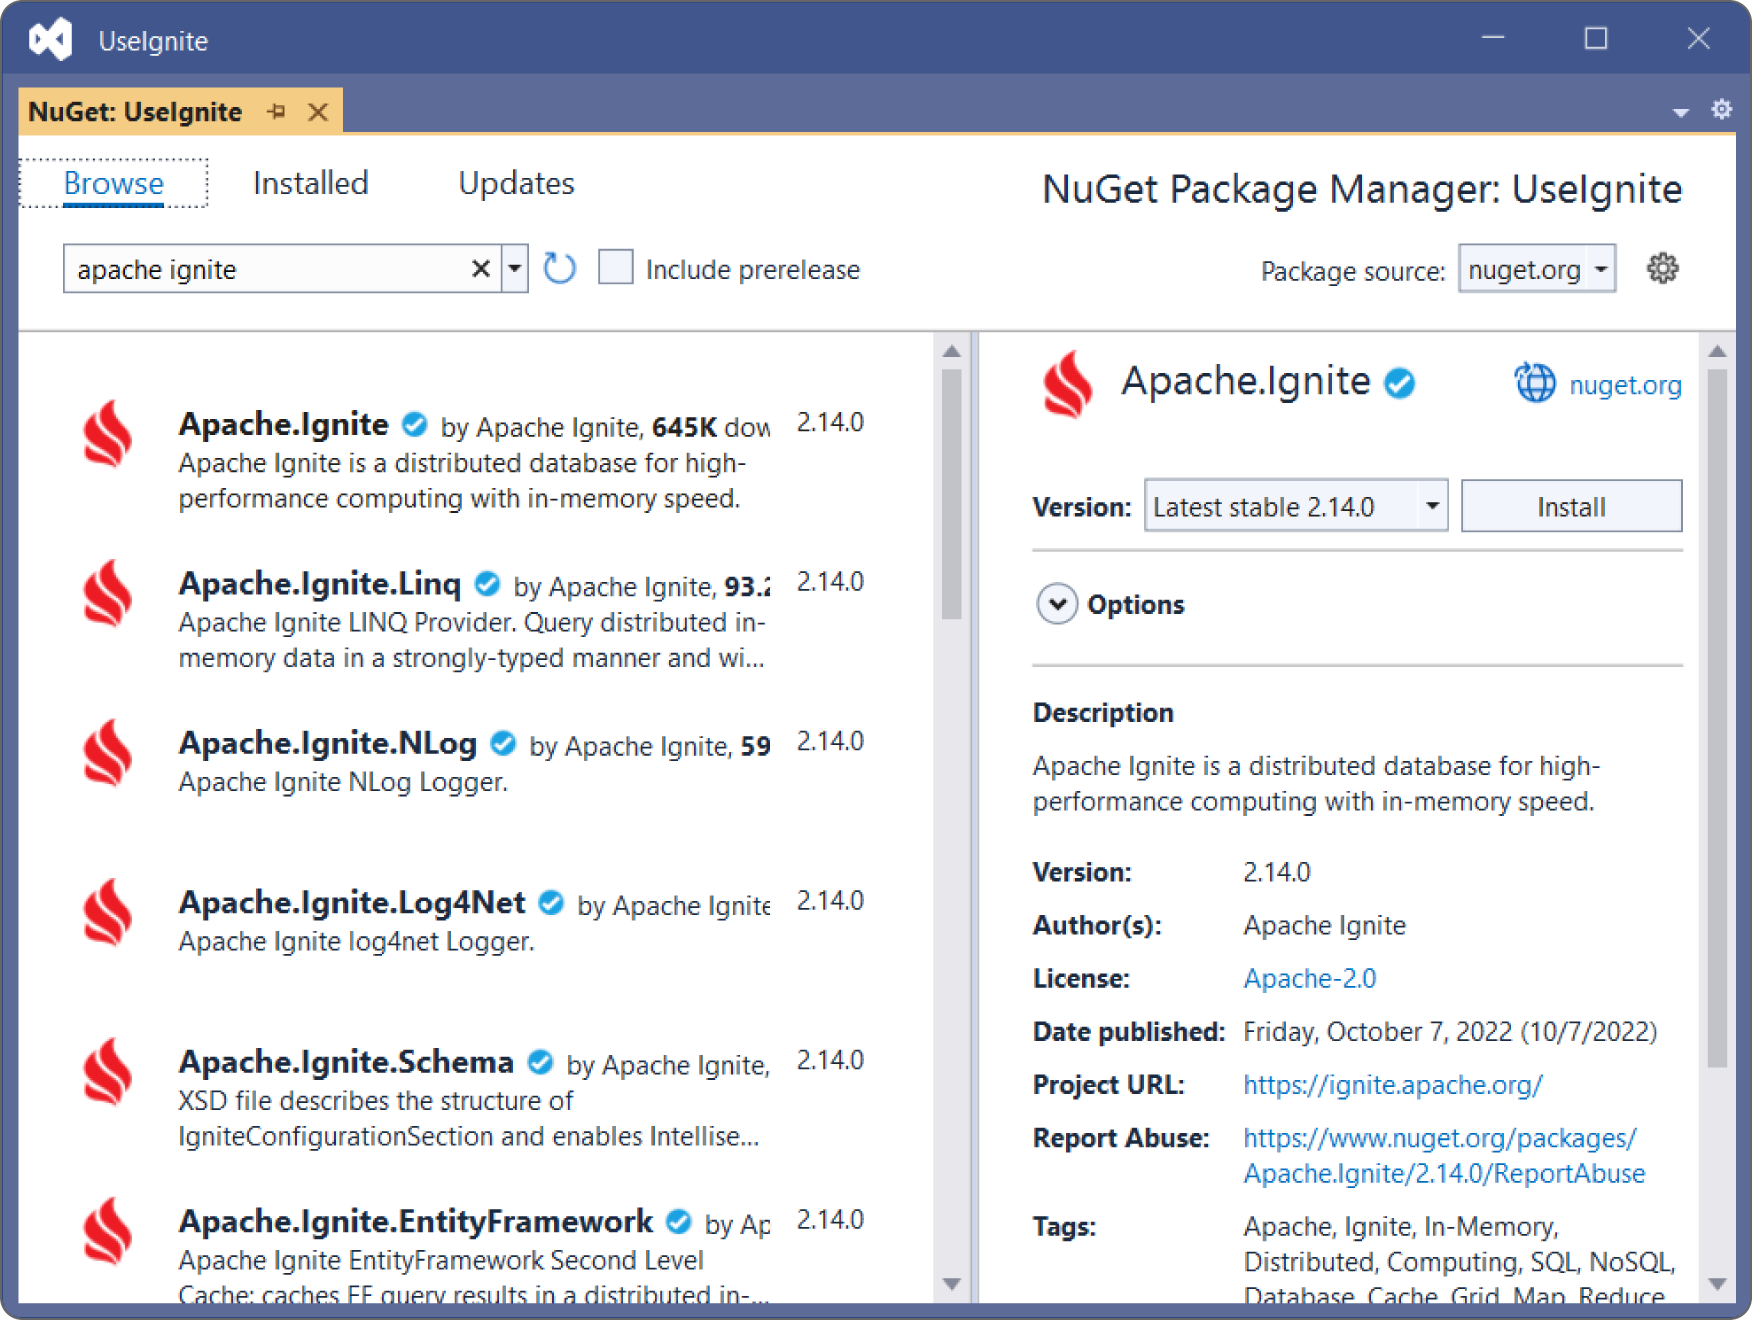
- Click the Browse tab and enter Apache.Ignite in the search box to see the list shown in Figure 25.1. Click the Apache.Ignite entry in the list on the left.
- Click the Install button on the right. This shouldn't take too long, but it's still nice to have a fast Internet connection.
To make using the database driver easier, add the following code to the program just below the other using statements:
using Apache.Ignite.Core;using Apache.Ignite.Core.Client;using Apache.Ignite.Core.Client.Cache;
The following section describes the program's main method. The sections after that describe the helper methods that the main method calls.
The Main Program
To make testing the database with and without persistence easier, the main method lets you write or read data separately. To do that, it enters an infinite loop where you can pick the operation that you want to run.
The following code shows the main method:
static void Main(string[] args){for (; ; ){Console.WriteLine("0. Quit");Console.WriteLine("1. Write data");Console.WriteLine("2. Read data");Console.WriteLine();Console.Write("Choice: ");string choice = Console.ReadLine();if (choice == "0"){break;}else if (choice == "1"){WriteData();}else if (choice == "2"){ReadData();}else{Console.WriteLine($"Unknown choice '{choice}'");}Console.WriteLine();}}
The code enters an infinite loop that lets you enter choices 0, 1, or 2 to trigger one of the following actions:
- 0—Exit the infinite loop so the program ends.
- 1—Call the
WriteDatamethod. - 2—Call the
ReadDatamethod.
The example writes several kinds of data into the database including a Building object. The following section describes the Building class. The two sections after that describe the WriteData and ReadData methods.
The Building Class
The following code shows the Building class:
// Define the Building class.internal class Building{internal String Name, City;internal int Height;internal Building(string name, string city, int height){Name = name;City = city;Height = height;}public override string ToString(){return $"{Name}, {City}, {Height}";}}
This class is relatively straightforward. It defines fields to hold a building's name, city, and height. It also defines a constructor that makes initializing the fields easy, and it overrides the ToString method to make it easy to print a Building object's values.
The WriteData Method
The following code shows how the WriteData method saves data in the database:
// Create some data.private static void WriteData(){try{IgniteClientConfiguration cfg =new IgniteClientConfiguration{Endpoints = new[] { "localhost:10800" }};using (IIgniteClient client = Ignition.StartClient(cfg)){// Activate the cluster if needed.IClientCluster cluster = client.GetCluster();cluster.SetActive(true);// Create the cache.ICacheClient<object, object> cache =client.GetOrCreateCache<object, object>("misc_data");// Add some data.Building building = new Building("Burj Khalifa", "Dubai", 2717);cache.Put(100, building);cache.Put("fish", "humuhumunukunukuapua'a");cache.Put(3.14, "pi");}}catch (Exception ex){Console.WriteLine(ex.ToString());}Console.WriteLine("Created data");}
This method creates an IgniteClientConfiguration object, setting its Endpoints property to an array of IP addresses and port numbers. This example uses the address localhost to represent the local computer, but you could add other addresses here.
The code then uses the configuration object to create an Ignite client. It creates the client in a using statement so it is automatically disposed of when the program no longer needs it.
Next, the method uses the client to get a cluster object and activates it in case it was started with persistence and is currently inactive. (If you know that the database is active, then you can skip this, and you don't need to create the cluster object.)
The program then uses the client's appropriately name GetOrCreateCache method to get or create the cache named misc_data.
The ICacheClient interface uses generic parameters to let you indicate the data types of the cache's keys and values. For example, if you're using integer keys to store string values, then you would use the generic types <int, string>. That's a good practice because it prevents you from using the cache incorrectly. For example, it would stop you from accidentally saving a KnockKnockJoke object in a cache filled with EarningsReports. For this example, though, I wanted to use different data types for both the keys and values, so I declared this cache using <object, object>.
At this point, adding data to the cache is simple. The code first creates a Building object and passes it into the cache with key 100.
Next, the method saves the string value “humuhumunukunukuapua'a” in the cache with the string key “fish.” (It is the official state fish of Hawaii. It's also called the reef triggerfish, but humuhumunukunukuapua'a is more fun to say.)
Finally, the code saves the string value “pi” in the cache with the floating point key 3.14.
This method finishes by displaying a message to show that it finished.
The ReadData Method
The following code shows how the ReadData method reads and displays data from the node:
// Read and display the data.private static void ReadData(){try{IgniteClientConfiguration cfg =new IgniteClientConfiguration{Endpoints = new[] { "localhost:10800" }};using (IIgniteClient client = Ignition.StartClient(cfg)){// Activate the cluster if needed.IClientCluster cluster = client.GetCluster();cluster.SetActive(true);// Create the cache.ICacheClient<object, object> cache =client.GetOrCreateCache<object, object>("misc_data");// Fetch some data.if (cache.ContainsKey(100))Console.WriteLine(cache.Get(100));elseConsole.WriteLine("Value 100 missing");if (cache.ContainsKey("fish"))Console.WriteLine(cache.Get("fish"));elseConsole.WriteLine("Value 'fish' missing");if (cache.ContainsKey(3.14))Console.WriteLine(cache.Get(3.14));elseConsole.WriteLine("Value 3.14 missing");}}catch (Exception ex){Console.WriteLine(ex.ToString());}}
The code first creates a configuration object, uses it to create a client, activates the cluster in case it is not already active, and gets or creates the cache as before.
The method then fetches the values that were added by the WriteData method. For each value, it first uses the cache's ContainsKey method to see if the key is present. The Python data adapter quietly returns None if you try to access a missing key, but the C# adapter ruthlessly throws a KeyNotFoundException exception. You can catch the exception, but it's better to avoid it in the first place by calling ContainsKey.
The method fetches and displays the three values saved by the WriteData method. The following shows the result:
Burj Khalifa, Dubai, 2717humuhumunukunukuapua'api
Demonstrate Volatile Data
To demonstrate the program using volatile data, use the following steps:
- Run
start_node.batto start the node without persistence. - Run the program and select option 1 to create some data.
- Select option 2 to fetch and display the data. It should look as expected.
- Close the node's command window and rerun
start_node.batto restart the node, again without persistence. - Keep the program running or restart it and select option 2 to read and display the data. Notice that the program displays missing messages for all the values.
Demonstrate Persistent Data
To demonstrate the program using volatile data, use the following steps:
- Run
start_node_persistent.batto start the node without persistence. - Run the program and select option 1 to create some data.
- Select option 2 to fetch and display the data. It should look as expected.
- Close the node's command window and rerun
start_node_persistent.batto restart the node, again with persistence. - Keep the program running or restart it and select option 2 to read and display the data. Notice that the program displays the expected values.
SUMMARY
This chapter showed how you can use C# and a key-value database to store and retrieve values in a cache. You can use a configuration file to enable persistence if you want to save data when you stop and restart the node. If persistence is enabled, the node starts in an inactive state, so you'll need to activate it either by using the control script control.bat (or control.sh in Linux) or by making the program do it.
If you like, you can use the database to pass information between the Python program described in Chapter 24 and the C# program described in this chapter. For example, you can use the Python program's Cell 2 to save data into the node and then use the C# program to read the data. That should work for simple data types such as integers and strings, but it may not work with objects. For example, the Python and C# programs represent the Building class in slightly different ways, so they can't reliably pass Building objects through the database. If you really need to pass an object back and forth, you could serialize the object in a string, pass that to the other program, and then deserialize it on the other end.
This chapter marks the end of the database demonstration programs. None of them are a complete customer-ready application, but they demonstrate many of the basic techniques that you need to get started. Using the techniques described up to this point in the book, you can design and implement flexible, robust relational databases, and use NoSQL databases.
Database programming is an enormous topic, however, and there's much more to study. The next part of the book explains some more advanced database design and development topics.
Some of the earlier chapters used SQL to define and manipulate relational databases. The following chapter provides a lot more detail about the SQL language.
Before you move on to Chapter 26, however, use the following exercises to test your understanding of the material covered in this chapter. You can find the solutions to selected exercises in Appendix A.