Chapter 7
Working with Images
Whether you load your images from a digital camera or a scanner, download them from the Internet, or draw them yourself, Windows comes with a number of useful tools for working with those images. In this chapter, you learn how to import images from a camera, view your images, fix photo problems, and delete images.
Import Images from a Digital Camera
You can import photos from a digital camera and save them on your PC. If your camera stores the photos on a memory card, you can also use a memory card reader attached to your PC to upload the digital photos from the removable drive that Windows sets up when you insert the card.
To perform the import directly from your digital camera, you need a cable to connect your camera to your PC. Most digital cameras come with a USB cable. After you have the digital photos on your system, you can view or print the images.
Import Images from a Digital Camera
![]() Plug in your mobile device, camera, or memory storage card reader.
Plug in your mobile device, camera, or memory storage card reader.
Note: If Windows displays a notification, click the notification and then skip to step 5.
Note: If your device asks if you want to allow access to its photos, click Allow.
![]() Click File Explorer (
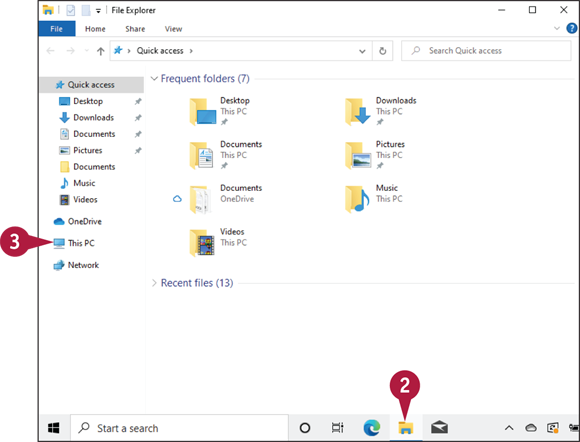
Click File Explorer (![]() ).
).
![]() Click This PC.
Click This PC.
File Explorer displays a list of the devices attached to your PC.
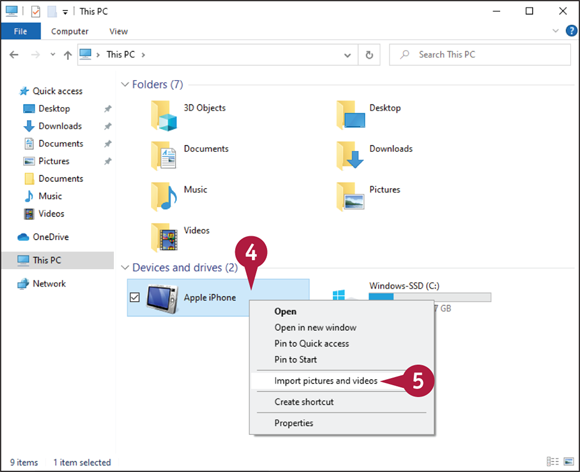
![]() Right-click your digital camera.
Right-click your digital camera.
![]() Click Import pictures and videos.
Click Import pictures and videos.
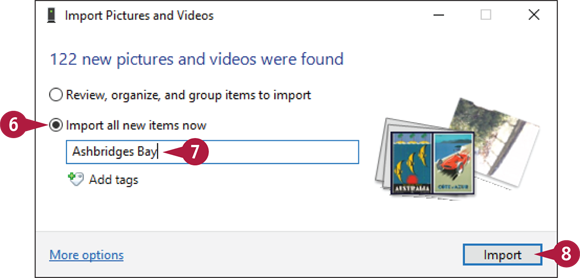
The Import Pictures and Videos dialog box appears.
![]() Click Import all new items now (
Click Import all new items now (![]() changes to
changes to ![]() ).
).
![]() Type a name to use for the import.
Type a name to use for the import.
![]() Click Import.
Click Import.
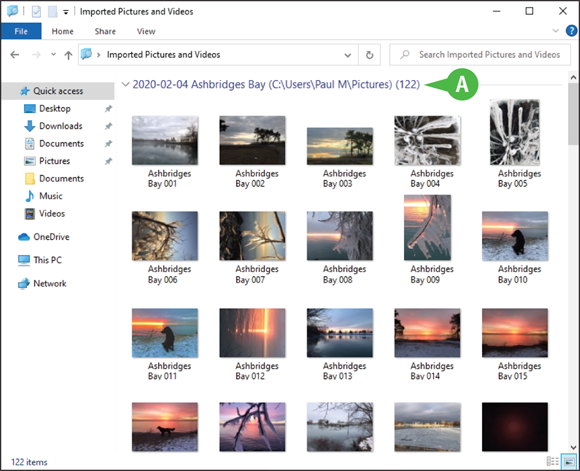
Windows imports the photos.
When the import is complete, File Explorer displays your imported photos.
![]() Windows stores the imported photos in your Pictures folder in a folder named after today’s date.
Windows stores the imported photos in your Pictures folder in a folder named after today’s date.
Scan an Image
You can create a digital copy of a photo or other image by using a document scanner, or the scanner component of an all-in-one printer. The scanner copies the image to your computer, where you can then store it as a file on your hard drive.
You can use a scanned image in many ways. For example, you can scan a photo to email to friends or publish on a web page. You can also scan a logo or other image to use in a document.
Scan an Image
![]() Turn on your scanner or all-in-one printer and position a photo or other image on the scanner bed.
Turn on your scanner or all-in-one printer and position a photo or other image on the scanner bed.
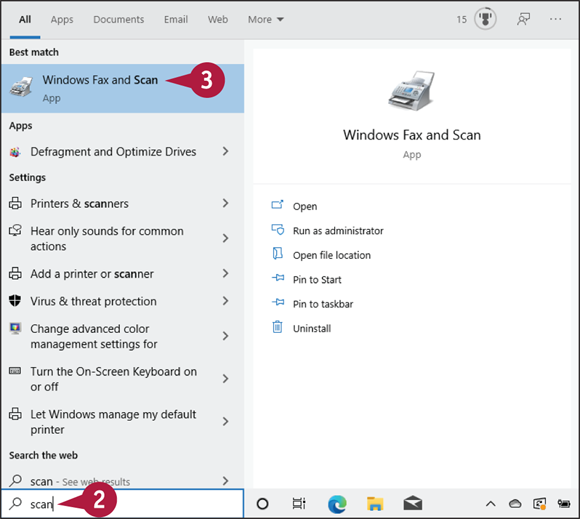
![]() In the taskbar’s Search box, type scan.
In the taskbar’s Search box, type scan.
![]() Click Windows Fax and Scan.
Click Windows Fax and Scan.
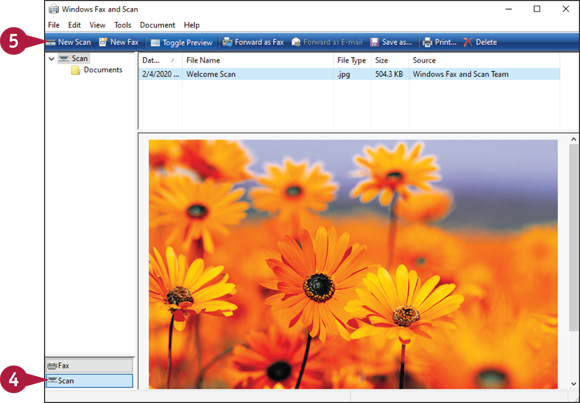
The Windows Fax and Scan window appears.
![]() Click the Scan tab.
Click the Scan tab.
![]() Click New Scan.
Click New Scan.
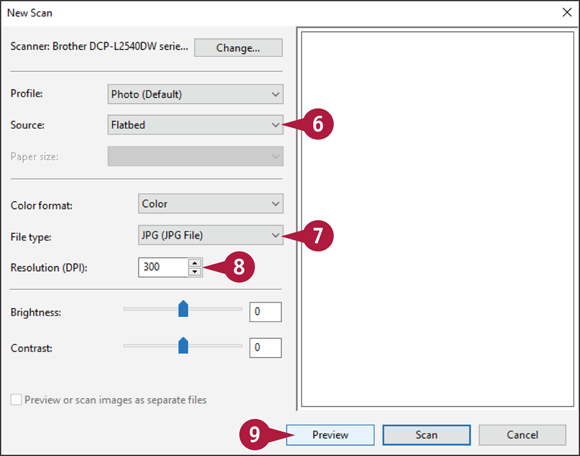
The New Scan dialog box appears.
![]() Click the Source
Click the Source ![]() to select from where in the device the document will be scanned.
to select from where in the device the document will be scanned.
![]() Click the File Type
Click the File Type ![]() to select the file type you want to use for the scanned image file.
to select the file type you want to use for the scanned image file.
![]() Click the Resolution
Click the Resolution ![]() to specify the scan resolution.
to specify the scan resolution.
Note: The higher the resolution, the sharper the image, but the larger the resulting file.
![]() Click Preview.
Click Preview.
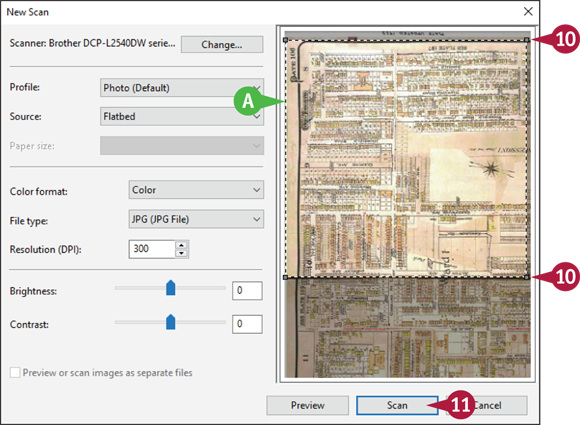
![]() A preview of the scan appears here.
A preview of the scan appears here.
![]() Click and drag the square handles at the corners of the rectangle to set the scan area.
Click and drag the square handles at the corners of the rectangle to set the scan area.
![]() Click Scan.
Click Scan.
Windows Fax and Scan scans the image.
Navigate the Pictures Folder
Before you can work with your images, you need to view them on your PC. You do that by using the Photos app to open the Pictures folder, which is a special folder designed specifically for storing images.
To get more out of the Pictures folder, you need to know not only how to open it, but also the basic techniques for opening any albums that you have stored in the folder.
Navigate the Pictures Folder
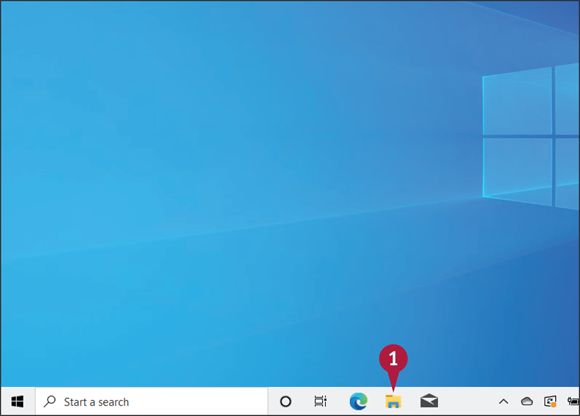
![]() Click File Explorer (
Click File Explorer (![]() ).
).
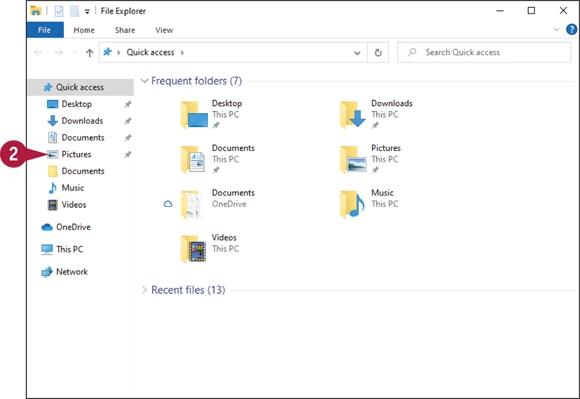
The File Explorer program window appears.
![]() Click Pictures.
Click Pictures.
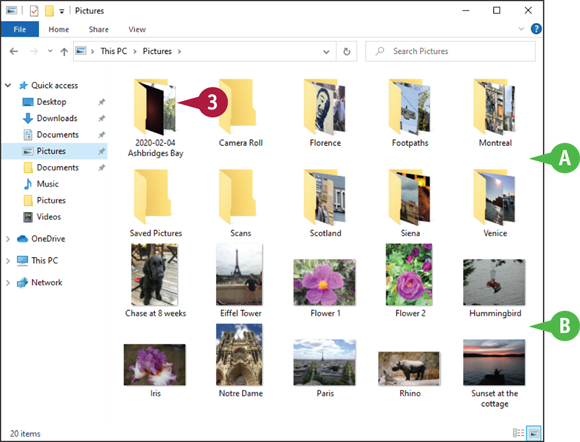
The Pictures folder appears.
![]() Items with folder icons are subfolders.
Items with folder icons are subfolders.
![]() Items without folder icons are individual images.
Items without folder icons are individual images.
![]() Double-click a subfolder.
Double-click a subfolder.
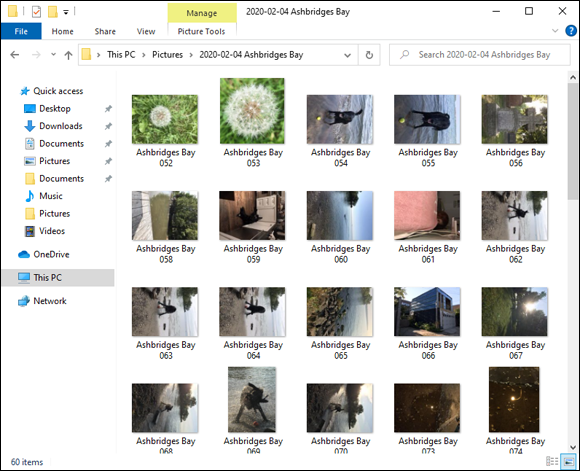
File Explorer displays the subfolder’s images.
View Your Images
If you want to look at several images, Windows gives you two methods to navigate backward and forward through the images in the Pictures folder. First, you can use File Explorer to open an individual image for viewing in the Photos app, and then navigate through the other images in the same folder. Second, you can use the Photos app directly to view your images by collection or by album.
View Your Images
View Individual Images
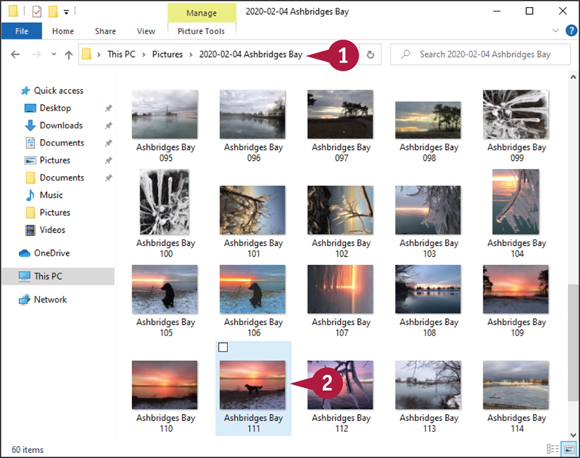
![]() In File Explorer, open the folder that contains the images you want to view.
In File Explorer, open the folder that contains the images you want to view.
Note: See the previous section, “Navigate the Pictures Folder,” for details.
![]() Double-click the first image that you want to view.
Double-click the first image that you want to view.
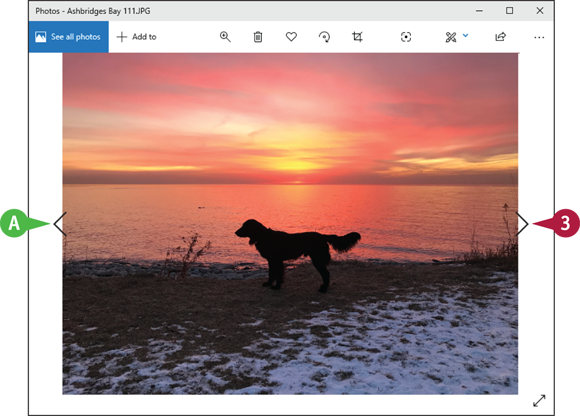
The image appears in the Photos app.
![]() Click the right-pointing arrow (
Click the right-pointing arrow (![]() ) to scroll right.
) to scroll right.
The Photos app displays the next image from the album.
![]() Repeat step 3 to continue viewing the album images.
Repeat step 3 to continue viewing the album images.
![]() You can return to the previous screen of images by scrolling left.
You can return to the previous screen of images by scrolling left.
You can also press ![]() to see the next image and
to see the next image and ![]() to see the previous image.
to see the previous image.
View Images by Collection or Album
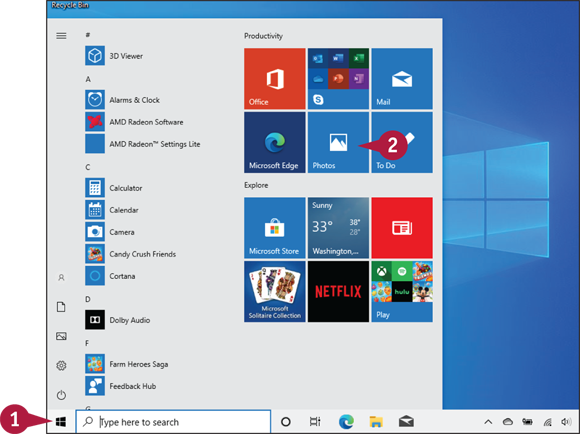
![]() Click Start (
Click Start (![]() ).
).
![]() Click Photos.
Click Photos.
The Photos app appears.
Note: The first time you start Photos, you might see an introduction to the app. If so, click Next to run through the screens, and then click Let’s go.
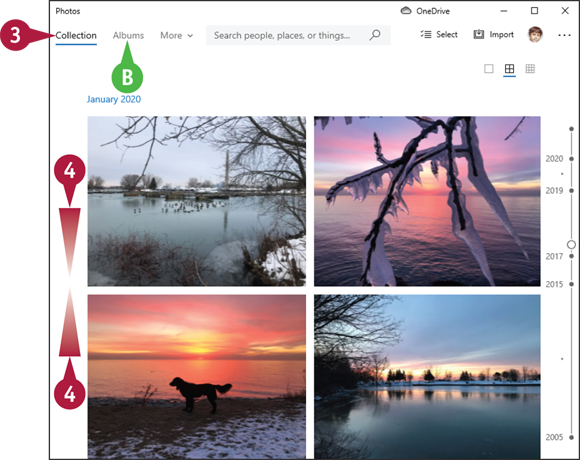
![]() Click Collection.
Click Collection.
![]() Alternatively, you can click Albums to view your pictures by album.
Alternatively, you can click Albums to view your pictures by album.
![]() Scroll down and up to view your images by collection or album.
Scroll down and up to view your images by collection or album.
Start a Slide Show
Instead of viewing your photos one at a time, you can easily view multiple photos by running them in a slide show. You can run the slide show from within the Photos app. The slide show displays each photo for a few seconds and then automatically moves on to the next photo.
Alternatively, you can view a slide show of images using the Photos tile on the Start menu. This slide show uses recent images from your Pictures folder.
Start a Slide Show
In the Photos App
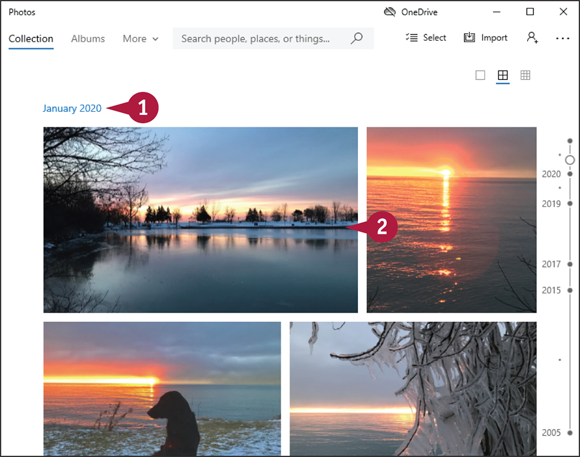
![]() In the Photos app, display the collection or album that contains the photos you want to display in your slide show.
In the Photos app, display the collection or album that contains the photos you want to display in your slide show.
![]() Click the first image you want to display in the slide show.
Click the first image you want to display in the slide show.
Photos opens the image.
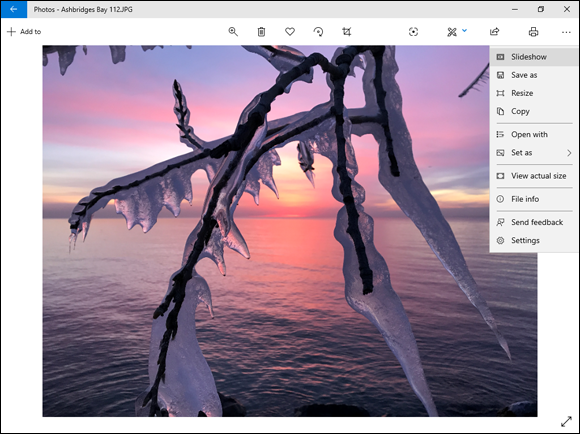
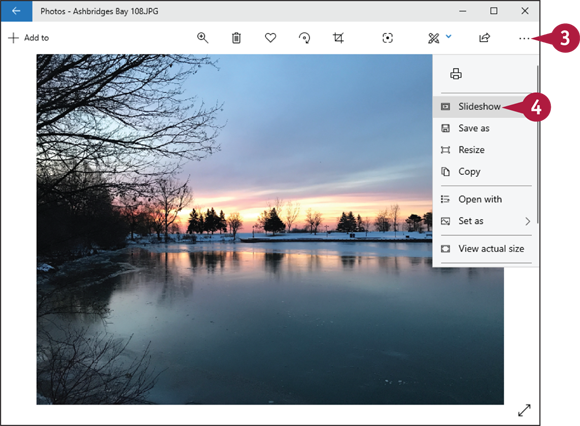
![]() Click See more (
Click See more (![]() ).
).
![]() Click Slideshow.
Click Slideshow.
The Photos app begins the slide show.
Note: You can also start the slide show by pressing ![]() .
.
On the Photos Tile
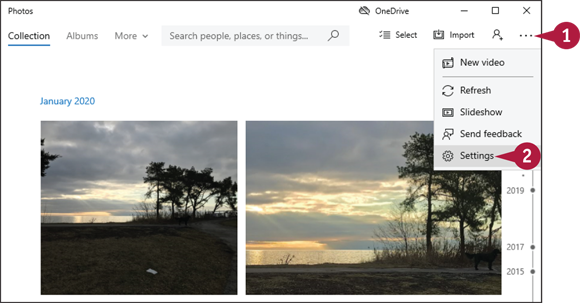
![]() In the main Photos app window, click See more (
In the main Photos app window, click See more (![]() ).
).
![]() Click Settings.
Click Settings.
The Settings window appears.
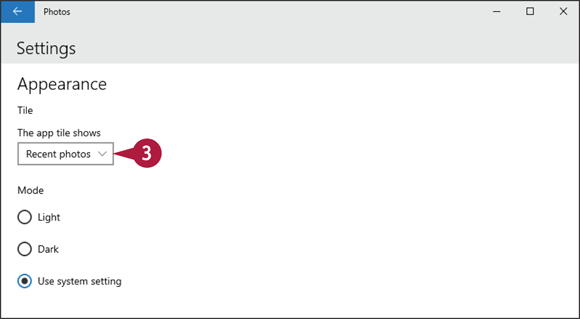
![]() In the Appearance section, click The app tile shows
In the Appearance section, click The app tile shows ![]() and then click Recent photos.
and then click Recent photos.
The next time that you display the Start screen, the Photos tile displays a slide show of recent images from your Pictures folder.
Note: If the Photos tile does not show the images, right-click the tile, click More, and then click Turn Live Tile on.
Repair an Image
You can use Photos to improve the look of digital photos and other images. When you open an image in Photos, the application bar offers a number of tools for repairing various image attributes.
The easiest way to repair an image is to use the Enhance Your Photo filter, which automatically adjusts an image’s brightness, color, and clarity. You can also correct any of these elements manually, as well as remove red-eye and hide photo flaws.
Repair an Image
Repair an Image Automatically
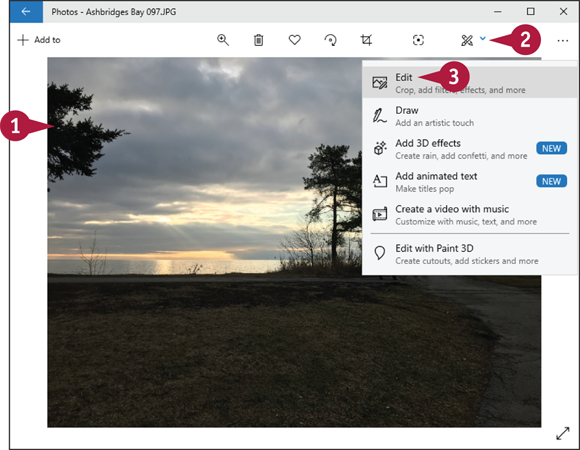
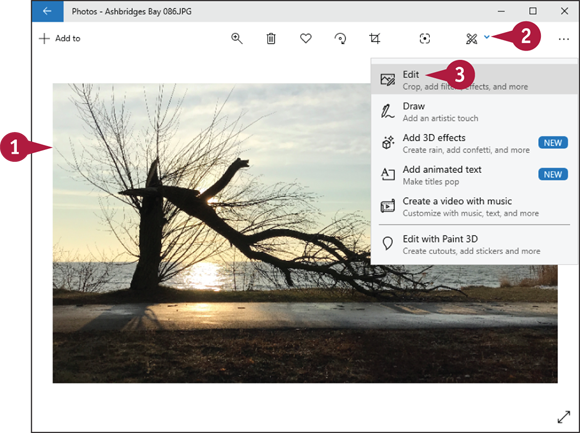
![]() In Photos, display the image you want to repair.
In Photos, display the image you want to repair.
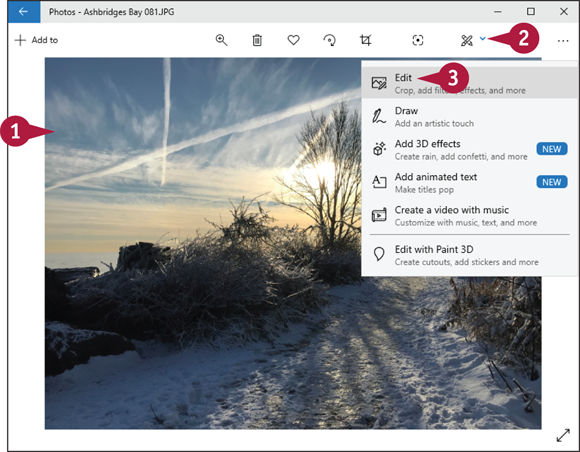
![]() Click Get creative with this photo (
Click Get creative with this photo (![]() ).
).
![]() Click Edit.
Click Edit.
Photos displays the image editing tools.
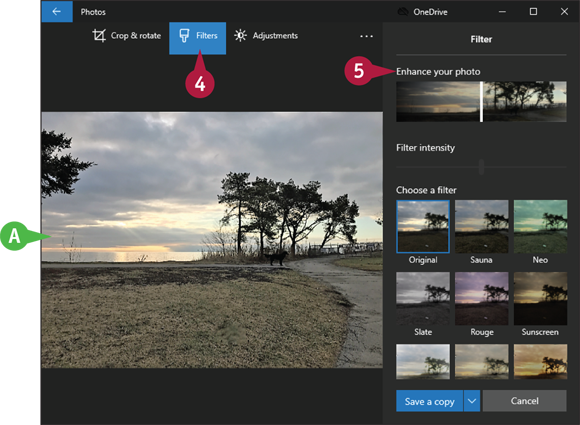
![]() Click Filters.
Click Filters.
![]() Click Enhance your photo.
Click Enhance your photo.
![]() Photos repairs the image automatically.
Photos repairs the image automatically.
Repair an Image Manually
![]() In Photos, display the image you want to repair.
In Photos, display the image you want to repair.
![]() Click Get creative with this photo (
Click Get creative with this photo (![]() ).
).
![]() Click Edit.
Click Edit.
Photos displays the image editing tools.
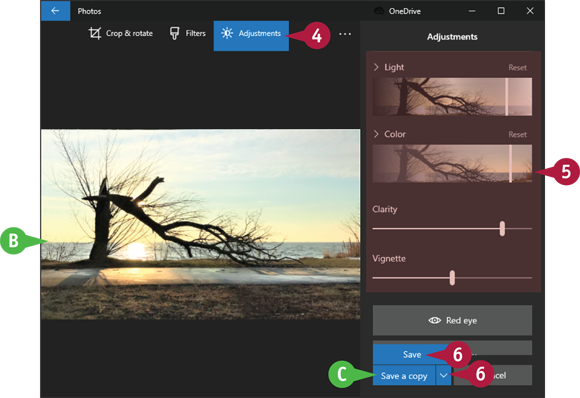
![]() Click Adjustments.
Click Adjustments.
![]() Use the sliders to repair the image as needed.
Use the sliders to repair the image as needed.
![]() Photos adjusts the image as you move the sliders.
Photos adjusts the image as you move the sliders.
![]() Click this
Click this ![]() and then click Save.
and then click Save.
Photos saves your changes.
![]() If you prefer to leave the original as is, you can click Save a copy, instead.
If you prefer to leave the original as is, you can click Save a copy, instead.
Add a Photo Effect
You can enhance the look of an image by applying one or more of the effects offered by the Photos app.
The Vignette effect darkens the edges and corners of the photo, which adds a natural frame around the image and draws attention to the interior of the photo. You can enhance the look of a photo by applying a filter. Some filters lighten the photo’s colors to make the image stand out more, while other filters darken the image to create a moodier look. There are also several black-and-white filters you can apply.
Add a Photo Effect
Apply a Vignette Effect
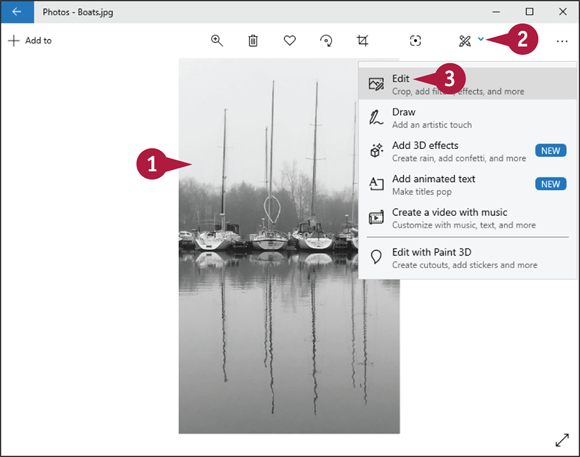
![]() In Photos, display the image you want to work with.
In Photos, display the image you want to work with.
![]() Click Get creative with this photo (
Click Get creative with this photo (![]() ).
).
![]() Click Edit.
Click Edit.
Photos displays the image editing tools.
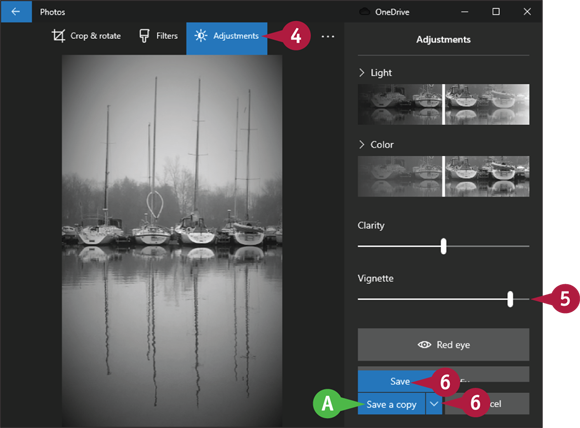
![]() Click Adjustments.
Click Adjustments.
![]() Click and drag the Vignette slider until the vignette is at the level you want.
Click and drag the Vignette slider until the vignette is at the level you want.
![]() Click this
Click this ![]() and then click Save.
and then click Save.
Photos saves your changes.
![]() If you prefer to leave the original as is, you can click Save a copy, instead.
If you prefer to leave the original as is, you can click Save a copy, instead.
Apply a Filter
![]() In Photos, display the image you want to work with.
In Photos, display the image you want to work with.
![]() Click Get creative with this photo (
Click Get creative with this photo (![]() ).
).
![]() Click Edit.
Click Edit.
Photos displays the image editing tools.
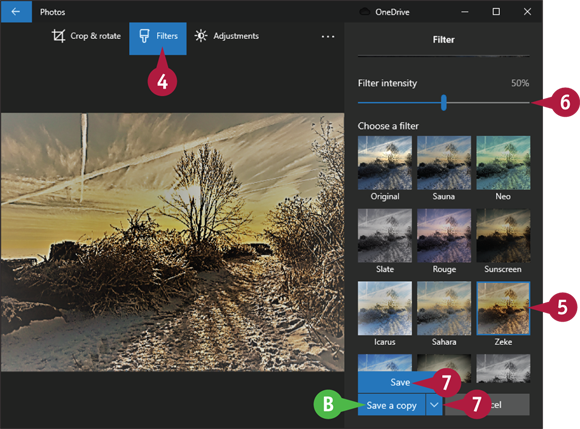
![]() Click Filters.
Click Filters.
![]() Click the filter you want to apply.
Click the filter you want to apply.
![]() Click and drag the Filter intensity slider to set the intensity of the filter.
Click and drag the Filter intensity slider to set the intensity of the filter.
![]() Click this
Click this ![]() and then click Save.
and then click Save.
Photos saves your changes.
![]() If you prefer to leave the original as is, you can click Save a copy, instead.
If you prefer to leave the original as is, you can click Save a copy, instead.
Crop an Image
If you have an image containing elements that you do not want or need to see, you can often cut out those elements. This is called cropping, and you can do this with Photos. When you crop a photo, you specify a rectangular area of the photo that you want to keep. Photos discards everything outside the rectangle.
Cropping is a useful skill to have because it can help give focus to the true subject of a photo. Cropping is also useful for removing extraneous elements that appear on or near the edges of a photo.
Crop an Image
![]() In Photos, display the image you want to crop.
In Photos, display the image you want to crop.
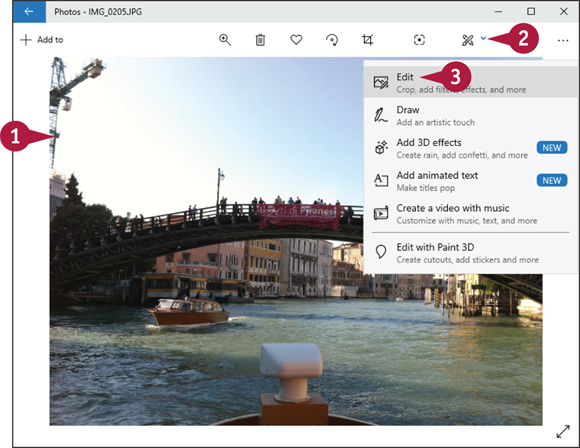
![]() Click Get creative with this photo (
Click Get creative with this photo (![]() ).
).
![]() Click Edit.
Click Edit.
Photos displays the image editing tools.
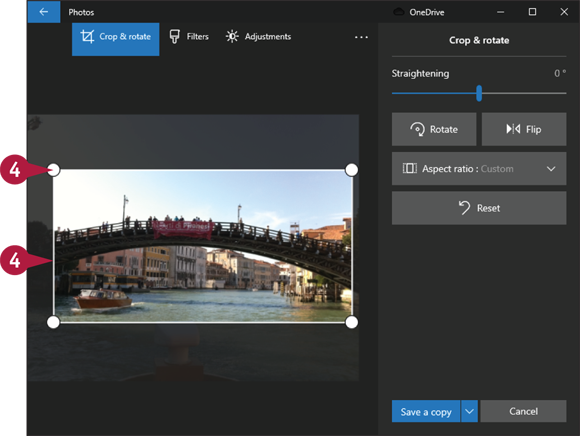
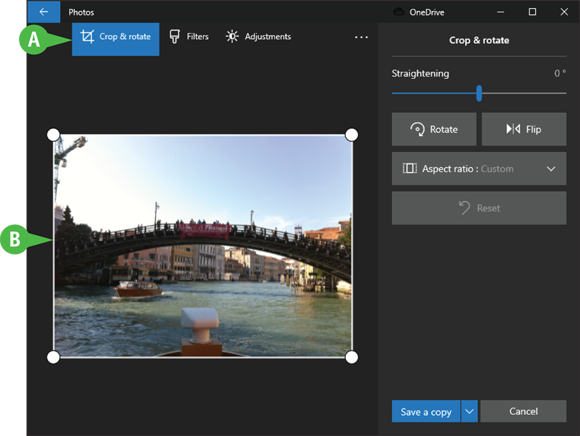
![]() The Crop & Rotate tab is selected by default.
The Crop & Rotate tab is selected by default.
![]() Photos displays a cropping rectangle on the photo.
Photos displays a cropping rectangle on the photo.
![]() Click and drag any edge or any corner of the rectangle to define the area you want to keep.
Click and drag any edge or any corner of the rectangle to define the area you want to keep.
Note: Remember that Photos keeps the area inside the rectangle.
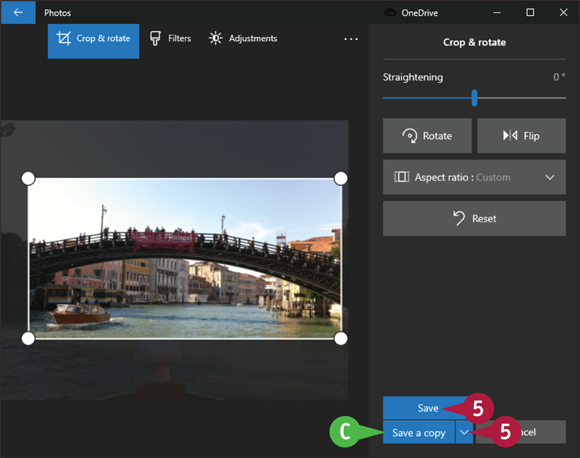
![]() Click this
Click this ![]() and then click Save.
and then click Save.
Photos saves your changes.
![]() If you prefer to leave the original as is, you can click Save a copy, instead.
If you prefer to leave the original as is, you can click Save a copy, instead.
Rotate an Image
You can rotate and straighten an image using Photos. Depending on how you hold your camera when you take a shot, the resulting photo might show the subject sideways or upside down. To fix this problem, you can use Photos to rotate the photo so that the subject appears right-side up. You can rotate a photo either clockwise or counterclockwise.
Rotate an Image
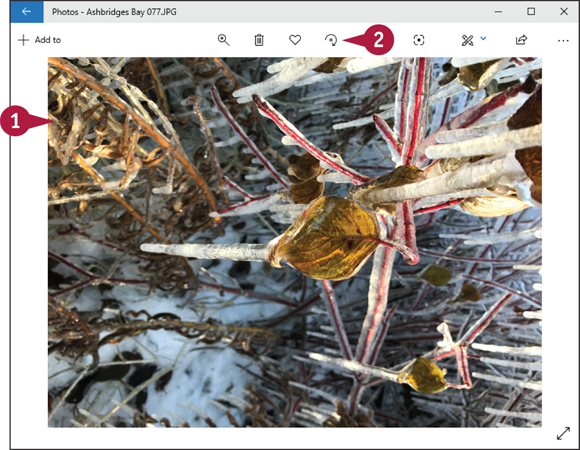
![]() Open the image you want to rotate.
Open the image you want to rotate.
![]() Click Rotate (
Click Rotate (![]() ) until the image is the way you want it.
) until the image is the way you want it.
Note: You can also rotate the image by pressing ![]() +
+ ![]() .
.
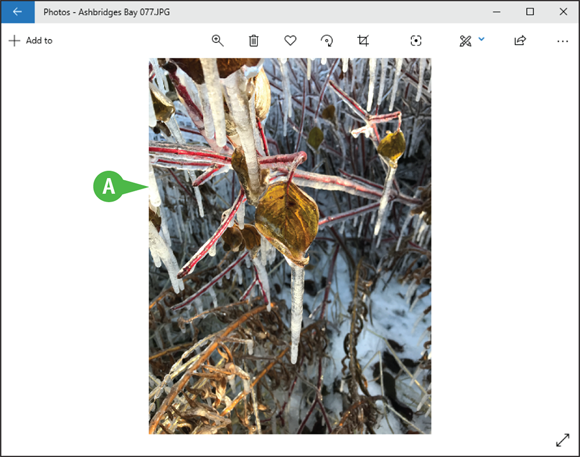
![]() Photos rotates the image and saves your changes.
Photos rotates the image and saves your changes.
Note: To straighten an image, click Get creative with this photo (![]() ), click Edit, and then drag the Straightening slider left or right until your image is straight.
), click Edit, and then drag the Straightening slider left or right until your image is straight.
Delete an Image
The images that you create may not always turn out perfectly. A photo may be blurry, or an edited image may not turn out the way that you want it to.
When you are viewing an album or watching a slide show, having a bad image can make the experience less pleasant. You can prevent that from happening by deleting an image you no longer want to work with or view. You can delete a single image or multiple images with a single command.
Delete an Image
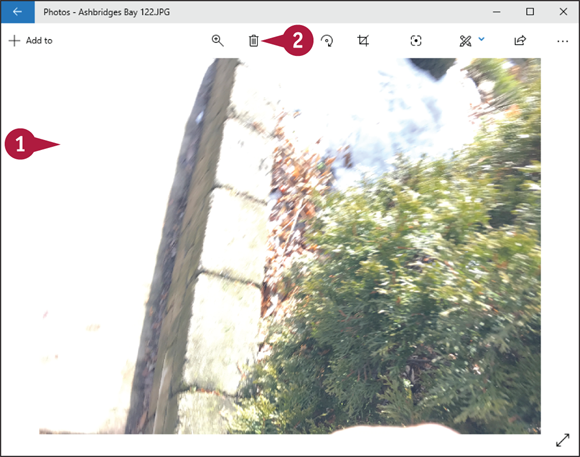
![]() Open the image you want to delete.
Open the image you want to delete.
![]() Click Delete (
Click Delete (![]() ).
).
Note: You can also delete the image by pressing ![]() .
.
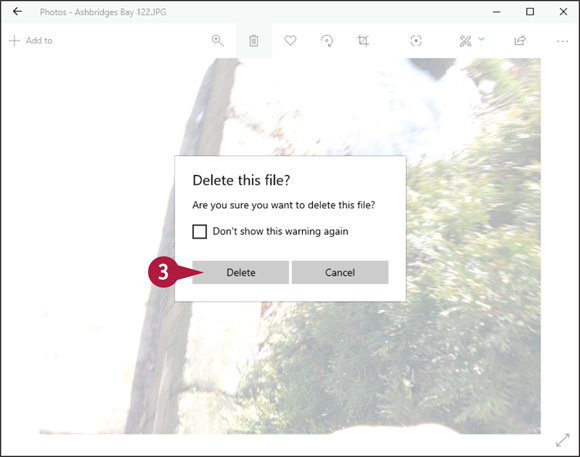
Photos asks you to confirm the deletion.
![]() Click Delete.
Click Delete.
Photos deletes the image.
Print an Image
You can print an image from the Pictures folder, or from any subfolder in the Pictures folder. When you activate the Print command, the Print Pictures dialog box appears. You can use this dialog box to choose a printer and a layout, and to send the image to the printer.
You can print a single image or multiple images. If you work with multiple images, you can print them individually or print two or more images per sheet.
Print an Image
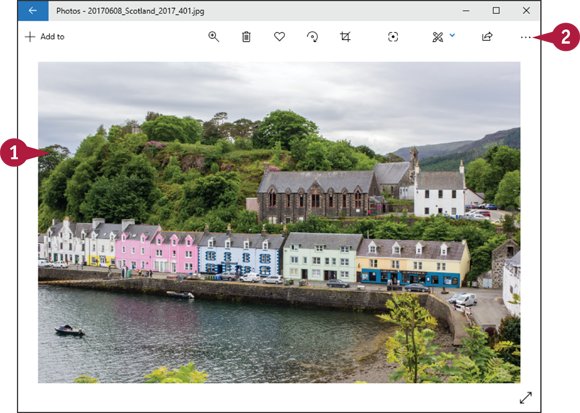
![]() Open the image you want to print.
Open the image you want to print.
![]() Click See more (
Click See more (![]() ).
).
Photos displays more commands.
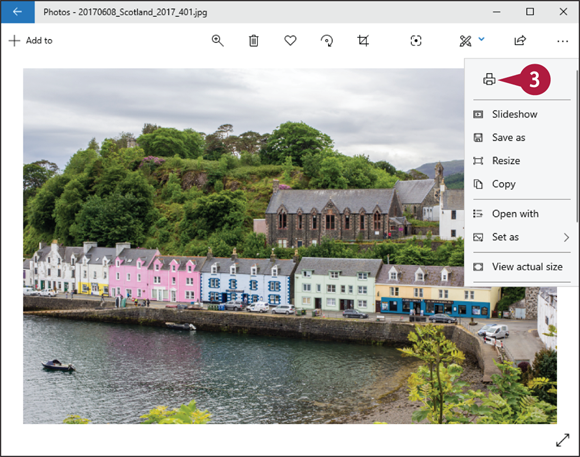
![]() Click Print (
Click Print (![]() ).
).
Note: You can also run the Print command by pressing ![]() +
+ ![]() .
.
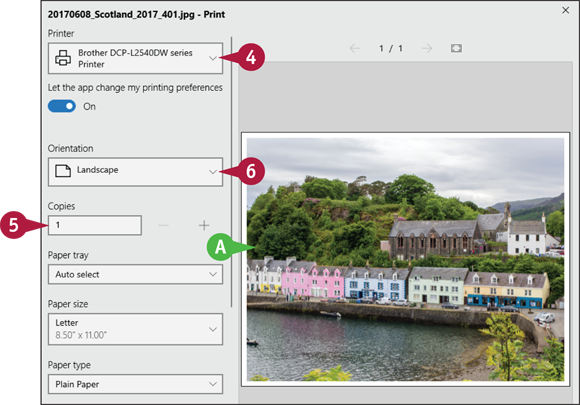
The Print pane appears.
![]() Photos displays a preview of the printout.
Photos displays a preview of the printout.
![]() Click
Click ![]() and click the printer you want to use.
and click the printer you want to use.
![]() Select the number of copies you want.
Select the number of copies you want.
![]() Click
Click ![]() and select the orientation of the photo.
and select the orientation of the photo.

![]() Click
Click ![]() and select the paper size of the printout.
and select the paper size of the printout.
![]() Click
Click ![]() and select the paper type of the printout.
and select the paper type of the printout.
![]() If you want to set extra options such as the color mode, you can click More settings.
If you want to set extra options such as the color mode, you can click More settings.
![]() Click Print.
Click Print.
Photos sends your image to the printer.
Take a Picture with Your PC Camera
If your PC comes with a built-in camera or if you have an external camera attached to your PC, you can use the camera to take a picture of yourself, someone else, your surroundings — anything you want — using the Camera app.
The Camera app also gives you the option of recording a video. The Camera app stores each photo or video in a folder called Camera Roll, which appears in your Pictures folder.
Take a Picture with Your PC Camera
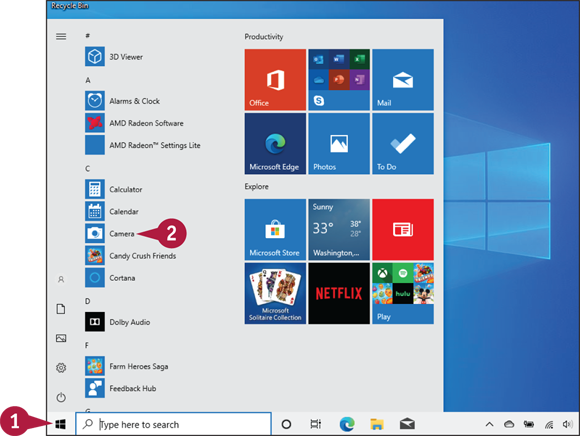
![]() Click Start (
Click Start (![]() ).
).
![]() Click Camera.
Click Camera.
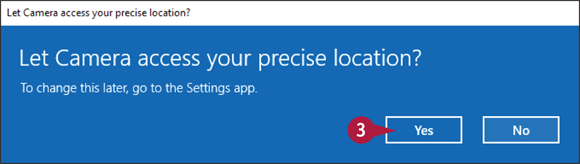
The first time that you start the Camera app, it asks for permission to use your location.
![]() Click Yes.
Click Yes.
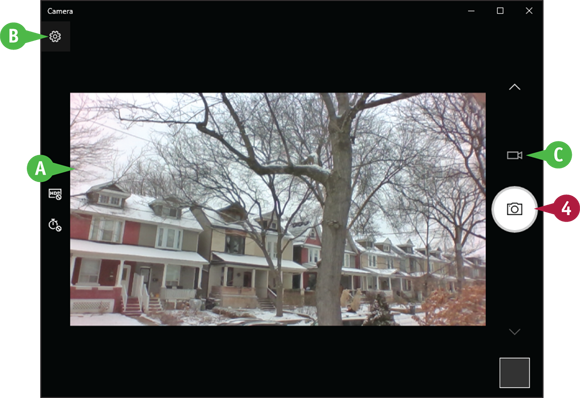
The Camera app loads.
![]() A live feed from the camera appears.
A live feed from the camera appears.
![]() If you want to adjust settings before taking the photo, you can click Settings (
If you want to adjust settings before taking the photo, you can click Settings (![]() ).
).
![]() When you are ready to take the photo, click Take Photo (
When you are ready to take the photo, click Take Photo (![]() ).
).

![]() If you want to record a video instead, you can click Video (
If you want to record a video instead, you can click Video (![]() ) and then click Take Video (
) and then click Take Video (![]() ).
).
The Camera app takes the photo or starts the recording.
![]() If you are recording a video, click Stop Taking Video (
If you are recording a video, click Stop Taking Video (![]() ) when you are finished.
) when you are finished.
The Camera app saves your photo or video.