
Chapter 34
Installing and Removing Hardware
A typical computer consists of hardware, firmware, and software. These three components work together to make the computer both usable and useful. This chapter helps you understand each of these with a focus on installing and removing hardware in Windows 10.
Before jumping into hardware-related tasks, take a quick look at just what hardware, firmware, and software really are.
Hardware, Firmware, and Software Demystified
Hardware is any physical device used by the computer, whether internal to the computer (such as the CPU on the computer's motherboard) or attached externally to the computer. A discrete hardware component that performs a given function is generally referred to as a hardware device or just device for short. You can use numerous types of hardware devices with a computer. Printers, scanners, mice, keyboards, monitors, disk drives, digital cameras, iPods, MP3 players, modems, and routers are all examples of hardware devices.
Before we describe firmware, you need a better understanding of software. Software is program code that is written to perform a given function. For example, all the program code that makes up WordPad is software. Likewise, all the program code that constitutes Windows 10 is software.
Device drivers are also software. A device driver is a program that serves as an intermediary between a piece of hardware and an application or the operating system. For example, a display driver enables Windows 10 to communicate with and control your computer's display. Likewise, a printer driver enables Windows 10 to communicate with and control a printer.
Firmware is also software, in the context that it is program code. The difference is in how the program code is stored. Firmware is program code stored in a hardware device, typically in non-volatile memory such as read-only memory or flash memory. For example, the program code that makes your Apple iPad or your digital camera work is firmware.
Generally, as a typical Windows 10 user, you deal with firmware only when updating firmware on your removable devices, such as MP3 players. You add device drivers and work with Windows updates much more than you do with firmware.
A Few Words about Device Drivers
As indicated in the previous section, device drivers enable the Windows operating system to communicate with and control devices. Although Windows 10 comes with a very large number of device drivers for a wide range of devices, most device drivers are written and distributed by the manufacturers of a given device. For example, your video adapter's device driver was written by the company that designed and manufactured the adapter.
Device drivers are very much device-specific. That is, a device driver written for one device doesn't work for a different type of device. For that reason, make sure you have the necessary device driver(s) for a device before you install it. If you've just purchased a new device that requires a device driver not included with Windows, that driver is included with the new device, typically on a CD or available for download on the manufacturer's website. Because the version of the device driver was developed specifically for the device, you don't have to obtain an updated driver before installing the new device. However, you can visit the manufacturer's website to see if an updated driver is available that adds features or fixes issues with the version you have. We recommend installing the device with the driver you have, and then checking later for an updated driver as needed.
Using Hot-Pluggable Devices
Many modern hardware devices are hot-pluggable, which means you simply connect them to your computer and start using them. You don't have to shut down the computer before connecting the device. Nor do you need to go through a formal installation process after you connect the device. However, you should read the instructions that came with a device before you connect it for the first time because sometimes you need to install software before you connect the device. When that's the case, as mentioned earlier, the software is usually on a CD that comes with the device.
Hot-pluggable devices generally connect to the computer through USB, IEEE 1392 (FireWire), or PC Card (different versions called PCMCIA, Cardbus, and ExpressCard). The latter two types of connections are not as popular now as they were several years ago because of advances in other types of connections. USB has become the predominant hot-pluggable connection on most desktop computers, laptops, and some tablets.
We look at USB in the sections that follow.
Connecting USB devices
Universal Serial Bus (USB) is the most common type of hot-pluggable device. USB is used by flash drives, smartphones, digital cameras, some types of microphones and headphones, external disk drives, and many other types of devices. Like most technologies, USB has evolved over the years, and several versions of USB are currently on the market.
The main differences among USB standard versions have to do with speed. USB 1.0 and 1.1 have two speeds: Low Speed (1.5 Mbps) used by mice and keyboards, and Full Speed (12 Mbps), more often used by digital cameras and disk drives. USB 2.0 added a third, High Speed, data rate, which can transfer data at the much faster rate of 480 Mbps. USB 3.0 and USB 3.1 now transfer data 5 Gbps and higher.
USB 2.0 is downwardly compatible with USB 1.1 and 1.0, which means that you can use a USB 2.0 device in a computer with USB 1.x ports. However, the device transfers at the 12 Mbps speed rather than the 480 Mbps speed available only in USB 2.0. (Although 480 Mbps is the highest speed possible, most devices do not meet that limit.) So, you don't need to know exactly which type of USB your computer has. If you plug a USB 2.0 device into a USB 1.0 or 1.1 port, Windows displays a message telling you that you'd get better performance from a USB 2.0 port. The device works; it's just slower than if you'd plugged it into a USB 2.0 port.
Released in 2008, USB 3.0 is the latest specification for USB. It has a speed that is ten times faster than USB 2.0, with a transfer speed of 5 gigabits per second (625MB per second). USB 3.0 is backward compatible with USB 2.0. In 2013, USB 3.1 was released. USB 3.1, named SuperSpeed+ USB, transfers at 10 gigabits per second.
Four USB plug shapes are available: Type A, Type B, Type C, and Mini-USB or On-the-Go (OTG). The computer has female Type A ports, into which you plug the male Type A plug on the cable. The device may have Type A, B, C, or a mini-port. Figure 34.1 shows the symbol for USB and the general shape of USB ports on the computer. An example of the Type A plug is third from the left in that figure. USB plugs are all keyed so that they fit only one way. Try pushing the plug gently into the port, and if it doesn't fit, flip the plug over and try again.

Figure 34.1 USB symbol, ports, and plug types.
Connecting a USB device should be easy, provided you've done any preliminary installations required by your specific device. The steps are as follows:
- If the device has an on/off switch, turn it off.
- Connect the device to the computer using the appropriate USB cable.
- If the device has an on/off switch, turn it on.
The very first time you connect a device, you may get some feedback on the screen indicating that Windows is loading drivers for the device. That message is followed by one indicating that the device is ready for use.
In many cases, you get a Windows 10 message instructing you to tap it to see options after you've connected a device. After you tap (or click) that message, a list appears with options so you can choose what you want to do with the device. In the case of a hard drive, that would most likely be the Open Folder to View Files option, unless you were using that hard drive to store one specific type of file.
Connecting IEEE 1394 devices
IEEE 1394 (often called 1394 for short) is a high-speed (800 Mbps) standard typically used to connect digital video cameras and high-speed disk drives to computers. The symbol and plug shape for an IEEE 1394 port are shown in Figure 34.2. IEEE 1394 also goes by the names FireWire and iLink. FireWire was once a popular standard, but it has been losing ground the last few years to USB 3.1. New hardware devices typically do not use the FireWire specification.

Figure 34.2 The FireWire symbol and plug shape.
Connecting a 1394 device is much the same as connecting a USB device:
- Leave the computer running, and turn the device off (if it has an on/off switch).
- Connect one end of the 1394 cable to the computer and the other end to the device.
- Turn on the device and wait.
What happens next depends on the device. For example, some devices transfer drivers and software to Windows to complete specific tasks (such as copying video files).
PC cards
PC Cards, PCMCIA, Cardbus, and ExpressCard cards were once commonly used on laptop computers. Newer laptops rarely have PC card capabilities because of the availability and pervasiveness of USB devices. However, you may still have a computer that includes a PC card slot and those devices can operate with Windows 10. You may need to hunt around for a device driver that supports Windows 10 (or even Windows Vista, Windows 7, or Windows 8/8.1) for that device to work.
A PC card device is usually a little larger and thicker than a credit card. Figure 34.3 shows an example of a PC ExpressCard wireless network adapter.
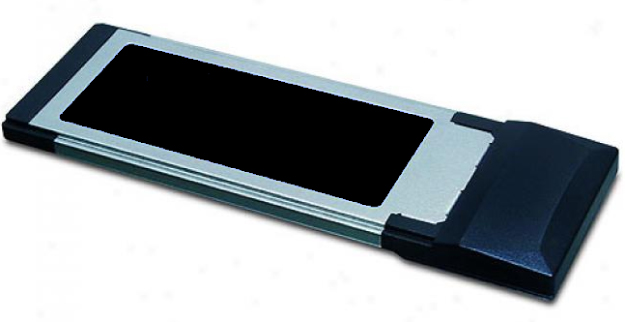
Figure 34.3 A PC card.
Connecting a PC card to a notebook computer is simple: Just slide the card into the slot, right side up, and push until it's firmly seated. As with USB and FireWire devices, you should get some feedback on the screen indicating when the device is connected and ready for use. How you use the device depends on the type of device you inserted.
Using memory cards
Memory cards are hot-pluggable storage devices. Figure 34.4 shows examples of some memory cards. Most memory cards are used in digital cameras, tablet computers, and jump drives. You just connect the camera or jump drive to a USB port to access the content on the memory card. However, if your computer has slots for memory cards, you can also insert the card directly into the appropriate slot.

Figure 34.4 Examples of memory cards.
After you insert a memory card into a slot, you should get some feedback on the screen indicating that the card is ready for use. That may be in the form of the Windows 10 auto play dialog box, or an Explorer window may open to show you the contents of the card. Either way, the card is treated as a USB mass storage device, as discussed next.
Memory cards and USB mass storage
Memory cards and USB devices that store data act like disk drives when you connect them to a computer. As such, each will have an icon in your Computer folder when it's connected. Figure 34.5 shows an example where we have connected a flash drive named ATTACHE (drive F:), and an external Hard Disk (made bySeagate) through USB ports.

Figure 34.5 External devices in the Computer folder.
Using such a device is no different from using any other disk drive. To see the contents of the device, open its icon. Use the standard techniques to navigate through folders, to delete files and folders, and to move and copy files and folders. See Chapters 20 and 21 for the necessary buzzwords and basic skills.
Disconnecting hot-pluggable devices
Before you disconnect a hot-pluggable device from a computer, you may want to make sure it isn't in the middle of a file transfer or holding a file that you have open in a program. To do that, look in the notification area for an icon that looks like the one shown in Figure 34.6. (That icon shows only when you have a storage device attached.) The icon's tooltip reads “Safely Remove Hardware and Eject Media.”

Figure 34.6 The Safely Remove Hardware and Eject Media icon.
To safely remove a device, click the Safely Remove Hardware and Eject Media icon. The menu shown in Figure 34.7 opens, listing each connected mass storage device. Click the action you want to take.

Figure 34.7 Safely Remove Hardware menu.
Simply click the Eject command for the drive you want to disconnect. The media does not physically eject from the computer, but Windows closes it and displays a message that the device can safely be disconnected from the computer. You can then safely remove it from the computer.
Not all devices are hot-pluggable. Some require a more elaborate connection and installation procedures. Those devices are discussed in the next section.
Not-So-Hot-Pluggable Devices
Hardware devices that aren't hot-pluggable require a bit more effort than hot-pluggable devices. Most require that you turn off the computer, connect the device, turn the device on, and then turn the computer back on. You may also need to install some software to get the device to work. It all depends on the device you're connecting. As always, you have to read the instructions that came with the device for specifics. We can provide only general guidelines and examples.
Most computers have the ports shown in Figure 34.8. Your computer may have more or fewer such ports, and your ports probably aren't arranged exactly like those in the figure. On a notebook computer, some of the ports are likely to be on the side of the computer, perhaps hidden under a sliding or hinged door. But the basic shape of each port is as shown in the figure.

Figure 34.8 Ports on the back of a computer.
You can install some devices inside the computer case. These connect to sockets inside the computer case on the motherboard (also called the mainboard). The motherboard is a circuit board that provides the wiring among all the hardware devices that make up the system, including the CPU, memory (RAM), internal disk drives, and everything else. The sockets that accept these devices are called expansion slots, and the devices that go in them are typically called adapter cards.
Figure 34.9 provides a general idea of what different types of internal slots and ports look like.

Figure 34.9 Slots on a computer motherboard.
Installing expansion cards
Many internal hardware devices are PCI cards, which slide into a PCI slot. The slots are positioned so that one end of the card lines up with the back of the computer, exposing one or more external connectors. Figure 34.10 shows a general example of what such a card looks like.

Figure 34.10 A sample expansion card.
Many motherboards may have PCI Express (PCIe) and PCI Express 16. These provide faster communication between the motherboard, which in turn allows for more powerful expansion cards. The PCI Express 16 slot is ideal for high-powered graphics cards designed to work with advanced graphics and large high-definition TV screens. The Accelerated Graphics Port (AGP) is designed specifically for a graphics card.
Before you buy an expansion card, you need to know what slots are available on your motherboard. Either open the computer case and make note of the available slots or contact your computer manufacturer for that information. Before you install a card, read the instructions that came with it. No one-size-fits-all rule applies to the thousands of hardware devices you can add to a PC. You should install the device exactly as instructed in the instructions provided by the manufacturer of the device.
Be sure to turn off the computer before opening the case to install a card. Remove the power cord as well. Ideally, you should wear an antistatic wrist strap so that you don't generate static electricity that could damage the components in the computer.
Many AGP and PCIe 16 slots have a locking mechanism to hold the card steady in the slot. You have to make sure that it's in the unlocked position before you try to insert the card into the slot. When installing the card, push firmly on the card to insert it. Don't force it and break it, but push it in well enough to ensure that it's firmly and evenly seated in its slot. If the slot has a locking mechanism, push it into the locked position. Put the case cover back together again, plug in the power cord, and then turn on the PC.
If the device is plug-and-play (as many modern devices are), the rest of the procedure should be easy. The computer should boot up normally, but you don't necessarily get to the desktop right away. Instead, Windows should detect the new device and go through an installation procedure to get the device working. You get some feedback on the screen in the form of notification area messages. When the notification messages stop and the desktop looks normal, the device should be ready to use.
Installing more memory (RAM)
Installing more RAM isn't exactly like installing other devices because you aren't likely to get any feedback at all on the Windows desktop when you're done. RAM is such an integral part of the computer that it doesn't really get “installed.” The processor detects it as soon as you turn on the power. One of the few places you'd even see that you have more RAM is on the System screen of the Control Panel applets.
The key consideration to adding more RAM is finding the right type of memory. You need to match the type and speed of your existing RAM chip, and you need an available DIMM slot on the motherboard. In addition, every motherboard has a limit as to the maximum speed and type of memory it can handle. When you build a PC, you know these specifications. But when you buy a prebuilt PC, finding this information isn't always easy.
Your best bet is to go to the computer manufacturer's website and find the main web page for your exact model of computer. You can often find out exactly what type and speed of RAM chip is currently installed using that method. PNY (a company that sells RAM chips) has memory information on its website (www.pny.com) to help you understand terms and product offerings.
Even so, installing more RAM isn't something for the technologically timid to undertake. Even the slightest mistake can prevent the computer from starting at all. If the speed of the new chip doesn't exactly match the speed of the existing chip, the computer may start but you're likely to end up with error messages when you try to work with the computer. When purchasing and installing RAM, consider installing them in pairs. Finally, sites that offer RAM are numerous, but a few you might consider include Crucial.com and Kahlon.com.
Installing a second hard drive
If you need more hard disk space, installing a second hard drive is a good option. Hard disk space is cheap, and adding another drive is much easier than pinching a few more megabytes out of a single drive by compressing files and moving them to removable disks.
Most internal drives are relatively easy to install, and today's computers automatically detect the drive type when they boot. If you don't feel up to the task of installing a new internal drive, however, consider an external drive.
Installing an external hard drive is relatively simple; just connect the drive to a USB or FireWire port. If you already bought an internal hard drive but you haven't connected it, you can convert it to an external drive by putting it in an external drive enclosure. Just make sure you get an enclosure that has the right internal connectors (IDE or SATA) for your drive.
Hard drives for most non-server PCs fall into two main categories: Serial ATA (SATA) and Parallel ATA (PATA), more commonly referred to as Integrated Drive Electronics (IDE) drives. (The ATA stands for Advanced Technology Attachment.) SATA III is the newer, faster, and easier technology.
The original SATA drives moved data at a good 150 Mbps (150 million bits per second). The newer SATA 3.2 drives move data at speeds up to 2GB/s. Before adding a second SATA drive, refer to your computer's documentation to ensure your motherboard has SATA connectors, and whether they're the appropriate connectors for the type of SATA device you want to install.
IDE drives come in multiple speeds, too, ranging from 33 Mbps to 133 Mbps. The maximum speed your PC can use depends on the speed of the IDE connectors on the motherboard.
IDE drives have an unusual configuration where you can connect two drives to a single IDE port. One drive is called the master drive; the other, the slave drive. You physically set a jumper on the drive to make the drive either master or slave. Then you connect the drive to the right place on the cable. The master goes at the end of the cable. The slave goes on the plug in the center of the cable.
Again, your best bet before installing any hardware device is to follow the instructions that came with the device — to the letter — before you even turn the computer back on and use Windows to configure the device. If in doubt, have a pro install the hardware for you. But, assuming you've installed the drive, either internally or externally, you can then use Windows 10 to partition and format the drive.
Primary and extended partitions
You can divide a basic disk into multiple partitions. Each partition looks like a separate item in your This PC folder. The drive can be divided into a maximum of four primary partitions, or three primary partitions and one extended partition. The difference is that a primary partition can be used as a system partition, meaning you can install an operating system on it and boot the computer from it. An extended partition can't be a boot disk and can't contain an operating system. However, you can divide an extended partition into multiple logical drives, where each logical drive has its own drive letter and icon in the This PC folder, and looks like a separate drive.
In Windows XP and previous versions of Windows, you could explicitly create extended partitions using the Disk Management console. Microsoft changed that in Windows Vista, and that change carries over to Windows 10. Now, instead of giving you the option to create either a primary partition or an extended partition, Disk Management gives you the option of creating a new simple volume. The type of volume created when you use this command depends on the number of partitions already on the disk. The first three partitions you create are created as primary partitions. The fourth is created as an extended partition.
You can use two types of disks in Windows 10:
- Basic: This is the type of disk supported by DOS and all previous versions of Windows.
- Dynamic: This type of disk was introduced in Windows 2000. Dynamic disks support the following types of volumes:
- Simple: These volumes make up space for a single dynamic disk and can use a single region on the disk or multiple regions on the disk.
- Spanned: These volumes make up space on more than one physical disk (they span multiple physical drives — hence, the name).
- Striped: These volumes stripe the data for a single logical volume across multiple physical disks, providing improved performance by distributing the read/write load across multiple disks.
- GPT: This stands for Globally Unique Identifier Partition Table. GPT supports theoretical volume sizes up to 18 EB. The primary advantages to using GPT are the very large volume size and the large number of partitions you can create on a GPT disk. Disk structure is also optimized for performance and reliability.
Which disk type you choose depends on the type of disk and your needs. If you're reinstalling a very high-capacity disk in a Windows 10 computer, we recommend using GPT. If you need to create a spanned or striped volume, use a dynamic disk. For general-purpose disks, a basic disk is fine.
Partitioning and formatting the disk
After you have a new hard drive installed, you can start Windows 10 and use the Disk Management tool to partition and format the drive. Log in to an account with administrative privileges for this task. If the Computer Management tool doesn't start automatically after you've logged in, you can get to it by following these steps:
- On the desktop, press Windows+X.
- Click Disk Management from the Quick Link menu.
The new drive appears at the bottom of the display, most likely as Disk 1 (assuming the system has one other disk drive, which will show as Disk 0), as shown in Figure 34.11. The drive's space is indicated by a dark bar showing Unallocated in the lower-left corner.

Figure 34.11 The Disk Management tool.
To partition the drive as a basic disk with a simple volume:
- Right-click within the unallocated space of the new drive and choose New Simple Volume.
- On the first page of the New Simple Volume Wizard that opens, click Next.
- The next wizard page asks what size you want to make the partition and suggests the full capacity of the disk. You can choose a smaller size if you intend to divide the disk into multiple partitions. After you make your selection, click Next.
- The next wizard page asks you to assign a drive letter to the drive. It suggests the next available drive letter, which is a good choice. Click Next.
- The next wizard page asks how you want to format and label the disk. Your options are as follows:
- Do Not Format This Volume: If you choose this option, you'll have to format the partition later. We don't suggest choosing this option.
- File System: Your choices here depend on the disk type. For volumes on basic and dynamic disks, you can choose between exFAT and NTFS. On a GPT disk, you can choose only NTFS.
- Allocation Unit Size: This defines the cluster size. The Default option automatically chooses the best allocation unit size given the type and capacity of the disk, so that would be your best choice.
- Volume Label: This is the name that appears with the drive's icon in This PC. You can also change that name at any time in the future.
- Perform a Quick Format: If you choose this option, formatting goes quickly, but the drive isn't checked for errors. Better to leave this option unselected.
- Enable File and Folder Compression: Only available if you chose NTFS as the file system, this option automatically compresses all files and folders on the drive. This conserves disk space, but there is a minimal performance overhead for the compression/decompression as the drive is used. You can still compress individual files and folders if you leave this option unselected.
- Click Next after making your selections.
- The last wizard page summarizes your selections. Click Finish.
Now you get to wait for the disk to be formatted. This can take some time, depending on the size of the volume and if you chose the quick format option. You can continue to use your computer while the drive is being formatted or you can wait until it finishes.
If you set up the drive as one large partition, you're finished when the Formatting indicator reaches 100 percent. You can close the Disk Management tool.
If you're partitioning the disk into smaller units, you can repeat the steps outlined previously for each partition. Just make sure that you right-click an unpartitioned portion of the disk in Step 1. If you create an extended partition with the DiskPart command, you need to add one or more physical volumes to the disk through the Disk Management console. Just right-click the extended partition and choose New Simple Volume; then follow the steps described previously to create the new volume. Repeat the process for any other volumes you want to create in the extended partition.
When the partitioning and formatting are complete, exit the Disk Management tool. Access the drive as you would any other — through the This PC folder. Figure 34.11 shows an example. Notice how each Hard Disk Drive icon represents a drive (or partition) defined in the Disk Management tool.
Other hard drive operations
This section covers some general issues concerning hard disks. All these operations pose some risk of data loss and should be attempted only by people who understand the risks and are confident they have backups of all important data.
Converting a disk to NTFS
Windows 10 offers two different file systems for formatting a hard drive. FAT32 was introduced with Windows 95. New Technology File System (NTFS) was introduced in Windows NT 4.0, largely to support user access control required in domain networking. Extended FAT (exFAT) is a new file system that removes several limitations of the older FAT file systems while providing compatibility with other operating systems and devices.
When you divide a hard drive into multiple volumes, you can format each independently of the other. (A volume is any partition or logical drive that has its own drive letter and icon in File Explorer's This PC view.) NTFS is the preferred file system for Windows 10 because of its better performance and stronger security. You don't need exFAT file systems unless you have multiple operating systems installed and can choose one or the other at startup. For example, if you can boot to Windows 10 and Linux, the Linux operating system will not be able to access files on a local NTFS volume (without adding third-party Linux tools).
Each file system imposes minimum and maximum volume sizes, and a maximum file size. Keep in mind that these file systems apply only to the hard drives, not to media such as USB flash drives, CDs, or DVDs. Table 34.1 summarizes the differences among the file systems.
Table 34.1 Differences among NTFS, exFAT, and FAT32 File Systems for Hard Drives
| Description | NTFS | exFAT | FAT32 |
| Locally accessible to | Windows 10, Windows 8/8.1, Windows 7, 2008 Server, Windows Vista, 2003, XP, and 2000 | Windows XP, Vista, and 7; Linux | Windows 95 and later |
| Minimum volume size | 10MB | 512MB | |
| Maximum volume size | More than 2TB | 64ZB1 | 32GB |
| Maximum file size | Entire volume | 64ZB | 4GB |
| Access Control Lists (ACLs) | Yes | No | No |
* Zettabyte, a sextillion bytes or 1 billion terabytes
You can convert a FAT32 file system to NTFS, but you can't go in the other direction. That is, you can always upgrade to NTFS, but you can't downgrade. Be sure to close all open documents and program windows before starting the conversion. To convert a FAT32 volume to NTFS, use the following syntax with the command console convert command:
convert volume: /fs:ntfsIn this syntax, volume is the letter of the hard drive you want to convert. Advanced users can enter convert /? at the command prompt or search Windows Help and Support for more advanced options. To enter the command, follow these steps:
- Close all open documents and program windows.
- Press Windows+X and choose Command Prompt (Admin).
- Type the command using the syntax shown. For example, to convert hard disk drive
D: from FAT32 to NTFS, type convert d: /fs:ntfs. - Press Enter and follow the instructions on the screen.
If you're converting your system drive (C:), you need to restart the computer to start the conversion. Don't use the computer during the conversion process.
Shrinking and extending partitions
You can shrink existing partitions to free up unallocated space. And if you have any unallocated space, you can extend existing partitions into that space. This procedure presents some risks. Therefore, you should back up everything before attempting to shrink or extend a partition.
You can shrink a basic volume that's either raw (unformatted) or formatted with NTFS quite easily right in the Disk Management tool. You can shrink to the current used space size or to the first unmovable files (such as a paging file) on the volume. To shrink a volume, right-click it at the bottom of the Disk Management screen and choose Shrink Volume. A dialog box opens to show how far you can shrink the selected volume. Make your selection and click OK.
Likewise, if you have some unallocated space on the drive, you can extend an existing partition into that space. Within the Disk Management tool, you can choose to extend an existing partition. When you choose to do this, a wizard opens to take you step-by-step through the process.
For more information on extending and shrinking volumes, including spanned volumes, search the Help in the Disk Management tool.
Changing a volume label
A volume label is the name of a volume as it appears in your This PC folder. By default, each volume is labeled Local Disk. To change a drive's volume label, right-click its icon in your This PC folder and choose Properties. On the General tab of the properties sheet, type the new name into the first text box, where you see New Volume in Figure 34.12.

Figure 34.12 Changing a volume label.
Changing a drive letter
Drive letters A, B, and C are reserved for floppy disk drives and your hard drive. They cannot be changed. Beyond those first three letters, you can assign drive letters as you see fit. Be aware that when you do, Windows does not update your settings and programs to reflect those changes. All settings you've made concerning locations of files in all programs become invalid. Virtual folders and items in Media Player and Live Photo Gallery must be updated to reflect the new drive locations. If you aren't sure how to deal with these issues, don't try to change any drive letters.
No two drives can have the same drive letter. If you need to swap two drive letters (for example, change drive E: to drive F: and change drive F: to drive E:), temporarily leave one of the drives without a letter or assign it an unused drive letter. The Disk Management tool, which you need to make this change, allows you to do that. Here's how the procedure works:
- Navigate to the Disk Management tool described at the beginning of this section.
- Right-click the graphical representation of the drive whose letter you want to change. Or, to change a removable drive, right-click its drive letter as shown in Figure 34.13. Choose Change Drive Letter and Paths.
The new drive letter shows up the next time you open your This PC folder.
- If the new letter to which you want to assign the drive is available, click Change, choose the new drive letter, and click OK. Otherwise, if you want to assign the current drive's letter to a different drive, click Remove and click Yes.
- Repeat steps 2 and 3 until all drives have the letters you want them to have. Then close the Disk Management tool.

Figure 34.13 Changing a drive letter.
The exFAT file system
Microsoft developed a file system called exFAT, for Extended FAT. exFAT is also sometimes referred to as FAT 64 (for 64-bit).
exFAT is not intended as a replacement for NTFS. Instead, exFAT is geared primarily toward mobile personal storage, as used in MP3 players and other mobile devices. exFAT offers several advantages:
- Theoretical volume size of 64ZB (recommended size 512TB)
- Theoretical maximum file size of 64ZB (recommended size 512TB)
- Supports more than 1,000 files per directory
- Provides cluster bitmap for fast storage allocation
- Better contiguous on-disk layout, useful for recording movies
- Is extensible
exFAT is supported natively by Windows 10, Windows 8/8/1, Windows 7, and Windows Vista. Windows Vista does not support the use of exFAT with ReadyBoost, but Windows 7, Windows 8/8.1, and Windows 10 do support it. exFAT is also supported under Linux through kernel update.
If you want to optimize performance for removable media such as flash drives, consider formatting the drive with exFAT. However, keep in mind that the device will be usable only in a computer that supports exFAT.
Removing Hardware
Hot-pluggable devices don't employ the type of removal discussed in this section. To remove a USB or FireWire device, or a PC card or memory card, see the section “Disconnecting hot-pluggable devices” earlier in this chapter. This section is about removing more complex devices such as internal components. Before you follow the procedures described in this section, make sure you understand what you're removing and why you're removing it. Do not attempt to fix a problem by removing devices based on guesswork.
You need administrative privileges to perform the tasks described here. We suggest signing into a user account before you begin so you don't have to rely on Windows to prompt you to sign on as administrator later.
Before you physically remove a device from the system, first uninstall its driver through Device Manager by following these steps:
- Open File Explorer and right-click This PC.
- Choose Manage and then click Device Manager in the left pane to open Device Manager.
- Expand the category in which the device is listed. Then, right-click the name of the device you intend to remove and choose Uninstall, as shown in Figure 34.14.
- Click OK.

Figure 34.14 Uninstall a hardware device.
Now you need to shut down the computer, unplug the power cord, and physically remove the device from the system. Then plug the machine in, start it, and everything should be back to the way it was before you installed the device. If you set a restore point (see Chapter 24 for steps to creating a restore point) just before installing the hardware, you can return to that protection point just to make sure.
Updating Drivers
At the start of this chapter, we discussed the importance of using Windows 10 drivers with your hardware. The quickest and easiest way to get an updated driver for a device is usually to search for it online by following these steps:
- Open Device Manager (press Windows+X and choose Device Manager).
- Right-click the device that needs an updated driver and choose Update Driver Software, as shown in Figure 34.15.
- Click Search Automatically for Updated Driver Software and follow the onscreen instructions.

Figure 34.15 Update a device driver.
Often, that's all you need to do. You may need to restart the computer after the driver installation is complete.
If that method doesn't work, you may have to go to the product manufacturer's website and search for a Windows 10 driver there. If you find the driver, be sure to follow the manufacturer's instructions carefully to download and install the updated driver. If you can't find a driver specifically for Windows 10 and Windows 8/8.1 but you find one for Windows 7 or Vista, that driver should work.
Dealing with Devices That Prevent Windows 10 from Starting
Sometimes a newly installed hardware device prevents Windows 10 from starting properly. In most cases, such devices are disabled automatically so that Windows 10 can start. If your device works that way, you can typically follow the steps described in the preceding section to try to get the updated driver online.
If Windows 10 can't disable or work with the new device, you may be able to start in Safe Mode with Networking and either get updated drivers there or disable the device manually. You also need to log in with the Administrator account.
When you're at the desktop, follow the procedure described in the preceding section to search for updated drivers. If you can't find updated drivers, your best bet may be to disable the device by right-clicking its name and choosing Disable from the shortcut menu. Close Device Manager and restart the computer again normally.
If you had to disable the device, it won't work when you restart the computer normally. But at least you can get Windows 10 started and try to find an updated driver through the product manufacturer's website.
Wrapping Up
This chapter has been about connecting, installing, and removing hardware. Some of this material is intended for more advanced users who are familiar with computer hardware. If some of the content is beyond your technical capabilities or comfort level and you need to install or remove hardware, consider having the job done professionally. The following are the main points to take away from this chapter:
- Most modern devices are hot-pluggable, which means you simply connect them to the computer as needed.
- Always read and follow the instructions that come with a device before connecting it to your computer. “Winging it” will likely result in frustration.
- Hot-pluggable devices that act as storage devices have icons in your This PC folder while connected. You can transfer files to and from such a device using basic techniques described in Chapter 20.
- More-advanced hardware devices generally require shutting down the computer, connecting the device, turning on the device, and then starting the computer again.
- Use the Disk Management tool to partition and format a new drive.
- To remove a hot-pluggable storage device, click the Safely Remove Hardware icon in the notification area and stop the device before physically removing it.
- To remove other devices, first uninstall them in Device Manager. Then shut down the computer and physically remove the device from the system.