
Section 4
Making Packages Dynamic
- Lesson 32: Making a Package Dynamic with Variables
- Lesson 33: Making a Package Dynamic with Parameters
- Lesson 34: Making a Connection Dynamic with Expressions
- Lesson 35: Making a Task Dynamic with Expressions
Chapter 32
Making a Package Dynamic with Variables
Your packages will be more flexible and more useful if they are dynamic. Dynamic packages in SQL Server Integration Services (SSIS) can reconfigure themselves at run time. Using variables is one of the ways you can make a package dynamic and reusable. You can use variables to set properties of components, parameters for T-SQL statements and stored procedures, in script components, in precedence constraints, and many other places. A variable is essentially a placeholder that has a name, data type, scope, and value. You can read and change the value of your variables within your package. Variables come in two forms: system variables and user-defined variables. System variables are predefined and include things like the package name and package start time. You cannot create system variables, but you can read them. User-defined variables are created solely by the developer.
To create a user-defined variable, simply right-click the design surface in SQL Server Data Tools (SSDT) and click Variables. This action opens the Variables window where you can create a new variable by clicking the icon in the top left. Once you create a new variable, you need to populate the fields Name, Data Type, and Value or Expression. The value can be a literal value or the result of an expression.
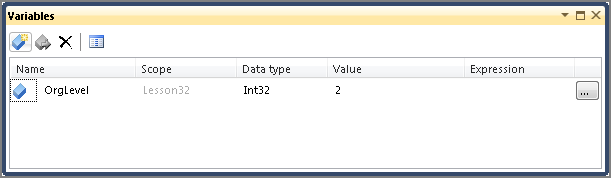
Scope is the context where the variable can be used. Each variable has a scope. You can set the scope to an individual component so it is available only to that object, or you can set it to the package level so it can be used anywhere in the package. For example, in Figure 32-1 the variable has a scope set to the package level. A new feature of SSIS enables you to change the scope of a variable. You can do this by selecting the Move Variable icon in the top left of the Variables dialog box and selecting a new scope.

When you configure the data types for variables, you may notice that their names are different from Data Flow data types. In fact, you are going to find that only a subset of the data types available in the rest of the SSIS environment can be used for variables. You can use the following table to map the variable data types to standard data types found in the Data Flow:
| Variable Data Type | SSIS Data Type | Description |
| Boolean | DT_BOOL | Value either True or False |
| Byte | DT_UI1 | 1-byte unsigned integer |
| Char | DT_UI2 | Single character |
| DateTime | DT_DBTIMESTAMP | Standard datetime structure |
| DBNull | N/A | Declarative NULL value |
| Decimal | DT_DECIMAL | 12-byte unsigned integer with separate sign |
| Double | DT_R8 | Double-precision, floating-point value |
| Int16 | DT_I2 | 2-byte signed integer |
| Int32 | DT_I4 | 4-byte signed integer |
| Int64 | DT_I8 | 8-byte signed integer |
| Object | N/A | Object reference; used to store data sets or large object structures |
| SByte | DT_I1 | 1-byte signed integer |
| Single | DT_R4 | Single-precision, floating-point value |
| String | DT_WSTR | Unicode string value |
| UInt32 | DT_UI4 | 4-byte unsigned integer |
| UInt64 | DT_UI8 | 8-byte unsigned integer |
The value of a variable can be a fixed value or the result of an expression. To create an expression for a variable, you can select a variable and press F4 to bring up the Properties window. From the Properties window, you can set EvaluateAsExpression to True and enter an expression in the Expression property. You can also type the expression directly into the Expression column of the Variables window. When you type the expression using the Variables window, SSIS automatically sets the value for the EvaluateAsExpression property. This property must be set to True for your expression to be used to set the value. To learn more about expressions and the SSIS expression language, read Lessons 34 and 35, which are dedicated to expressions.
Variable names are case-sensitive. When you use a variable in an expression, you must use the same case as the variable name. If you name a variable Test, referring to the variable as test will not work. When referring to a variable in a task or transform, as in the following tutorial, you place a question mark (?) as a placeholder for the variable name. For example, in an Execute SQL Task that is given the duty of deleting rows from the DimEmployee table in the AdventureWorksDW2012 database, the deleted rows should have an EmployeeNationalIDAlternateKey that is equal to a value in a variable named EmployeeID. To accomplish this, you would write the following query in the Execute SQL Task in the Control Flow window:
DELETE FROM DimEmployee
      WHERE EmployeeNationalIDAlternateKey = ?
Next, click the Parameters button, and on the Parameter Mappings tab assign the User::EmployeeID variable to the value for the question mark placeholder. Select User::EmployeeID in the Variable Name field, and enter “0” in the Parameter Name field. The Parameter Name field will be different for connection types other than OLE DB.
Try It
In this Try It, you create a flat file export of employees based on their level in the organization. The package you create should be easy to adjust based on what organization level you need. After this lesson, you will have an understanding of how to make a package dynamic using variables.
You can download the completed Lesson32.dtsx from www.wrox.com.
Lesson Requirements
Create a variable named OrgLevel to narrow down the number of employees returned based on the level in the organization. Create a flat file named OrganizationLevel.txt that contains all employees with an organization level of 2.
Hints
- Create a new variable that passes a value for the organization level to the OLE DB Source to return only employees with an organization level of 2.
- Create a flat file that has the following columns:
- NationalIDNumber
- LoginID
- OrganizationLevel
- JobTitle
- BirthDate
- MaritalStatus
- Gender
- HireDate
Step-by-Step
SELECT NationalIDNumber
,LoginID
,OrganizationLevel
,JobTitle
,BirthDate
,MaritalStatus
,Gender
,HireDate
  FROM HumanResources.Employee
  WHERE OrganizationLevel=?
