

In this chapter, you will learn how to | |
|---|---|
✓ | Collaborate with other people. |
✓ | Save presentations in other formats. |
✓ | Send presentations directly from PowerPoint. |
✓ | Password-protect presentations. |
✓ | Add and review comments. |
✓ | Merge presentation versions. |
In today’s workplace, many presentations are developed collaboratively by a team of people. You might be the lead developer of some presentations that are reviewed by your colleagues and managers, and you might be a reviewer of other presentations. With Microsoft PowerPoint 2010, you can collaborate on the development of presentations in new and exciting ways.
Even if you are not collaborating on a presentation with a team, you can easily attach a presentation to an e-mail message and send it to someone for review. If you want to send it to someone who doesn’t have PowerPoint 2010 installed on his or her computer, you can save the presentation in a different file format so that your colleague can read it. If you want to be sure that only authorized people can review a presentation, you can assign a password.
These days, most presentations are reviewed on the screen. With PowerPoint, it’s easy to insert comments, ask questions, and respond to comments made by others. If you send a presentation out for review and then receive back a copy with changes, you can merge the reviewed version with your version to simplify the process of reviewing and accepting or rejecting changes.
In this chapter, we’ll first discuss the new PowerPoint coauthoring capabilities., and then you’ll save presentations in a couple of different formats. You’ll send a presentation via e-mail directly from PowerPoint and then password-protect another presentation. You’ll review, add, delete, and hide comments, and finally, you’ll merge two versions of the same presentation.
Practice Files
Before you can complete the exercises in this chapter, you need to copy the book’s practice files to your computer. The practice files you’ll use to complete the exercises in this chapter are in the Chapter12 practice file folder. A complete list of practice files is provided in Using the Practice Files at the beginning of this book.
You might need to collaborate with other people on the development of a presentation for your company or organization. Or perhaps you are serving on a committee or working with a team of students or volunteers on a presentation that requires input from everyone. No matter what the circumstances, it can be difficult to keep track of different versions of a presentation produced by different people. With PowerPoint 2010, however, it is now possible to store one version of the presentation that can be worked on by multiple people simultaneously.
To develop a presentation with other users, you need to save it to a Microsoft SharePoint 2010 site. Display the Save & Send page of the Backstage view, click Save To SharePoint, and then use the settings in the Save As dialog box to save the presentation to the site. You then continue to work on it from the site. When another contributor begins making changes to the file stored on the site, PowerPoint alerts you to that person’s presence. You can display a list of the other people who are actively working on the presentation and their availability.
As the people working on the presentation make changes, PowerPoint keeps track of them. At any point, you can display the Info page of the Backstage view to see the status of the presentation. When you finish working with the presentation, you save and close it as usual. The next time you open it, you’ll see the changes made by anyone who has worked on the presentation in the meantime. In this way, several people can work efficiently on a presentation, whether they are in the same office building, on the other side of town, or in a different time zone, without fear that their changes will not make it into the final version or that their changes will overwrite someone else’s.
If your organization has implemented the PowerPoint 2010 Web App on a server, team members who travel frequently can review presentations while on the road. With the Web App, you can review a presentation stored on your organization’s server on any computer running Windows Internet Explorer 7, Internet Explorer 8, FireFox 3.5, or Safari 4 on the Mac. The presentation looks very similar to the way it does in PowerPoint on a desktop computer or portable computer, and you can make changes just as you would in PowerPoint.
You can also save a presentation to a Windows Live SkyDrive location and share it with other people from there. SkyDrive is part of Windows Live Online Services, a suite of useful programs that is available over the Internet from your computer or from mobile devices, such as portable computers or smart phones. You can visit www.windowslive.com/Online/ to learn about these services. All you need to start using them is a Windows Live ID.
You save a presentation to SkyDrive by displaying the Save & Send page of the Backstage view, clicking Save To Web, and then specifying the location where you want to save the file. You can make the presentation publicly available by saving it in the Public folder, or you can save it in your My Documents folder and then assign access permissions to specific people. You and colleagues who can access the file can then work on it by using the PowerPoint Web App from the site.
If you have a Windows smartphone, you can also use the PowerPoint 2010 Mobile App to view and edit presentations.
The Web App and the Mobile App allow you to continue collaborating with your team no matter where you are. Although a more in-depth discussion of these programs is beyond the scope of this book, if you are a "road warrior," you will certainly want to research them further.
When you save a PowerPoint presentation, the default file format is the PowerPoint 2010 .pptx format. To save a presentation in a different file format, you display the Backstage view, click Save As to open the Save As dialog box, and then change the Save As Type setting to the format you want to use.
If you want to save the file so that it can be used with an earlier version of PowerPoint, you need to save it in the .ppt format. You do this by changing the Save As Type setting to PowerPoint 97-2003 Presentation.

If you are confused by the wide variety of formats, you might want to display the Save & Send page of the Backstage view and click Change File Type to display descriptions of some of the common formats.

The format you choose will depend on what you want other people to be able to do with the presentation. If you want people to be able to view the presentation with a minimum of fuss, you might want to save it in PowerPoint Show (.ppsx) format. These files open automatically in Slide Show view. If you want people to be able to see the content of a presentation but not change it, you can save the presentation in one of two formats:
PDF (.pdf). This format is preferred by commercial printing facilities. You should also use this format if you know that recipients have a PDF reader, such as Adobe Acrobat Reader, installed on their computer.
XPS (.xps). This format precisely renders all fonts, images, and colors on recipients’ computers.
Both the PDF and XPS formats are designed to deliver presentations as electronic representations of the way they look when printed. The text and graphics in .pdf and .xps files are essentially static and content cannot be easily edited. Both types of files can be sent by e-mail to many recipients and can be made available on a Web page for downloading. However, the files are no longer PowerPoint presentations, and they cannot be opened, viewed, or edited in PowerPoint.
In this exercise, you’ll first save a presentation as a PowerPoint Show. Then you’ll save one slide of a presentation in XPS format, and you’ll view the .xps file.
Set Up
You need the CottageShow_start and WaterUse_start presentations located in your Chapter12 practice file folder to complete this exercise. Open first the WaterUse_start presentation and then the CottageShow_start presentation. Then follow the steps.
With slide 1 of the CottageShow_start presentation active, display the Save & Send page of the Backstage view, and in the center pane, click Change File Type.
In the right pane, click PowerPoint Show. Then at the bottom of the pane, click Save As.
The Save As dialog box opens with the PowerPoint Show format selected in the Save As Type box.
Change the file name to CottageShow, and then click Save.
Display Windows Explorer, navigate to your Chapter12 practice file folder, and double-click CottageShow.
The presentation opens in Slide Show view and advances automatically from slide to slide while playing the embedded music.
Press Esc to end the presentation.
PowerPoint stops the show and returns to Normal view.
Switch to the WaterUse_start presentation, and display slide 7.
Let’s save only this slide in XPS format.
Display the Save & Send page of the Backstage view. In the center pane, click Create PDF/XPS Document, and then in the right pane, click Create PDF/XPS.
The Publish As PDF Or XPS dialog box opens.
Display the Save as type list, and click XPS Document.
The dialog box is designed only for the PDF and XPS formats.
In the File name box, change the name to WaterUse.
In the Optimize for area, click Minimum size (publishing online). Then click Options.
The Options dialog box opens.
In the Range area, click Current slide.
Tip
If you are saving this presentation in a different format to send it for review, you might want to select the Include Hidden Slides check box in the Publish Options area to ensure that the reviewer sees all the slides. Similarly, you might want to select the Include Comments And In Markup check box to ensure that he or she can evaluate all the available information in the presentation.
In the Include non-printing information area, clear the Document properties check box, and then click OK.
Back in the Publish as PDF or XPS dialog box, select the Open file after publishing check box, and then click Publish.
The slide is saved in XPS format. Because you indicated that you wanted to open the file after saving it, the XPS Viewer starts and displays the file.
Tip
The XPS Viewer window includes two toolbars, one below the title bar and one at the bottom of the window. You can use the commands on the top toolbar to save a copy of the file, specify who can access the file, attach a digital signature, print the file, and search for particular words or phrases. You can use the tools on the bottom toolbar to move back and forth among pages, and zoom in or out.


After you create a presentation, you can quickly send it via e-mail from the Save & Send page of the Backstage view, without starting your e-mail program.

Clicking Send As Attachment opens a message window with the current presentation already attached as a PPTX file. All you have to do is enter the e-mail addresses of anyone you want to receive the message and its attachment. If you want, you can modify the subject line, which contains the name of the presentation you’re sending.
Tip
If you are working on a presentation that is stored on a server and you want other people who have access to the server to review that particular file, you can send an e-mail message with a link to the file by clicking Send A Link on the Save & Send page of the Backstage view.
Similarly, you can click Send As PDF or Send As XPS to have PowerPoint save and attach a version of the presentation in the corresponding file format.
In addition to sending a presentation as an e-mail attachment from within PowerPoint, if you have signed up with an Internet fax service provider, you can send the presentation as a fax. Although the exact terms vary from one Internet fax service provider to another, these services all enable you to send and receive faxes from your computer without needing a fax machine or dedicated fax line. After establishing an Internet fax service account, you can send the current presentation as a fax by clicking Send As Internet Fax on the Save & Send page. Then all you have to do is follow the procedure specified by your fax service provider.
Tip
If you do not sign up with an Internet fax service provider before clicking Send As Internet Fax, a message box appears. Clicking OK opens a Web page where you can choose a fax service provider.
In this exercise, you’ll attach three presentations to an e-mail message so that you can simulate sending them for review.
Set Up
You need the MeetingThemeA_start, MeetingThemeB, and MeetingThemeC presentations located in your Chapter12 practice file folder to complete this exercise. Open the MeetingThemeA_start presentation and save it as MeetingThemeA. Be sure to have an e-mail program installed on your computer and an e-mail account set up before beginning this exercise. Microsoft Outlook 2010 is recommended. You can use another e-mail program, but the steps for attaching and sending a message might vary from those given in this exercise. Then with the MeetingThemeA presentation open, follow the steps.
Display the Save & Send page of the Backstage view.
With Send Using E-mail selected in the center pane, click Send as Attachment in the right pane.
PowerPoint starts your default e-mail program, and a message window opens.
In the To box, type your own e-mail address.
In the message content pane, type Please review the attached presentations, and let me know which theme you prefer.
You can format the text of the message in the same way you would the text on a slide.
On the Message tab, in the Include group, click the Attach File button.
The Insert File dialog box opens.
Navigate to your Chapter12 practice file folder.
Click MeetingThemeB, hold down the Ctrl key, click MeetingThemeC, and then click Insert.
In the message window, the Attached box shows that three files are attached to the message.
On the Message tab, in the Tags group, click the High Importance button.
If the message recipient is using Outlook, the message header will display a red exclamation mark to indicate that it is important.
In the message header, click the Send button.
Outlook sends the e-mail message with the attached presentations. You’ll receive the message the next time Outlook connects to your mail server.

Sometimes you might want only specified people to be able to view a presentation. Or you might want some people to only be able to view it and others to be able to change it. In both cases, you can control who has access to the presentation and what they can do by assigning one or more passwords to the presentation.
You can assign two types of passwords to a presentation:
Password to open. When you assign a password that must be entered to open the presentation, the presentation is encrypted so that only people with the password can view the presentation.
Password to modify. When you assign a password that must be entered to modify the presentation, people who don’t have the password can open a read-only version but they cannot make changes or save a copy with a different name.
When you try to open a presentation to which a password has been assigned, the Password dialog box opens. If the password must be entered to open the presentation, you must enter the exact password—including capitalization, numbers, spaces, and symbols. If the password must be entered to modify the presentation, you can either enter the exact password to open it or click Read-Only to open a version that you can view but not modify.
In this exercise, you’ll assign a password that people must type in order to modify a presentation. You’ll open a read-only version of the password-protected presentation and then enter the password to open a version that you can edit.
Set Up
You need the ServiceProjects_start presentation located in your Chapter12 practice file folder. Open the ServiceProjects_start presentation, and save it as ServiceProjects. Then follow the steps.
Display the Backstage view, and then click Save As.
The Save As dialog box opens.
At the bottom of the dialog box, click Tools, and then in the list, click General Options.
The General Options dialog box opens.
In the Password to modify box, type P@ssword.
To keep your password confidential, black dots appear in place of the characters you type.
Important
In this exercise, we use a common password that is easy to type. For maximum protection, use a password of at least eight characters that includes a combination of uppercase and lowercase letters, digits, and punctuation symbols. Write it down and keep it in a safe place. Otherwise, if you forget the password, you will not be able to open the presentation.
Click OK.
The Confirm Password dialog box opens.
In the Reenter password to modify box, type P@ssword, and then click OK.
With the contents of your Chapter12 practice file folder displayed in the Save As dialog box, replace the name in the File name box with ServiceProjectsLocked, and then click Save.
PowerPoint saves a new version of the presentation with the password in place. To test the password protection, you need to close the presentation and open it again.
Display the Backstage view, and then click Close.
Display the Backstage view, and then in the Recent Presentations list, click ServiceProjectsLocked.
The Password dialog box opens.
In the Password box, type password, and then click OK.
A message box tells you that the password you have typed is incorrect.
Click OK in the message box, and then in the Password dialog box, click Read Only.
A read-only version of the ServiceProjectsLocked presentation opens, displaying slide 1 in Normal view. In the title bar at the top of the screen, the presentation is designated as (Read-Only).
On the slide, double-click and in the presentation title, and then press Delete.
Pressing the Delete key has no effect, because you cannot modify the presentation.
Close the presentation, and then reopen it.
In the Password dialog box, type P@ssword in the Password box, and then click OK.
The presentation opens, displaying slide 1 in Normal view. There is no Read-Only designation in the title bar, indicating that you can modify and save changes to the presentation.
Tip
To remove the password from a password-protected presentation, open it using the password, display the Save As dialog box, click Tools, and then click General Options. In the General Options dialog box, remove the password from the password box(es), and click OK. Then click Save to overwrite the password-protected version.


The development of a presentation, especially one that will be delivered to clients, shareholders, or other important people, is often a collaborative effort, with several people contributing ideas and feedback. Even if you are developing a presentation for your own purposes, you might want to ask other people to review and comment on it before declaring a presentation final.
If you are asked to review a presentation, you can give feedback about a slide without disrupting its text and layout by clicking the New Comment button in the Comments group on the Review tab, and then typing in a comment box. Clicking away from the comment box hides the comment but leaves a small comment icon with your initials and a number. If you add a comment without first selecting an object on the slide, the comment icon appears in the upper-left corner of the slide. If you select an object such as the title or a graphic before adding the comment, the comment icon appears in the upper-right corner of the object. In either case, pointing to the icon displays the comment temporarily and clicking the icon displays the comment until you click somewhere else.
You can manage and review comments by clicking these buttons in the Comments group:
Show Markup. Clicking this button hides all the comment icons so that you can view the slides without extraneous clutter.
Edit Comment. Clicking this button displays the comment box associated with the active comment icon and places a cursor at the end of the comment text so that you can make additions or changes.
Delete. Clicking this button deletes the active comment icon and its comment box. To delete all the comments on the current slide or all the comments in the entire presentation, select that option in the Delete list.
Previous and Next. Clicking these buttons moves backward or forward through the comments, displaying the comment box of each one in turn.
See Also
For information about marking up slides with an electronic pen while reviewing a presentation, see Delivering Presentations in Chapter 6.
In this exercise, you’ll add and edit comments in a presentation, move among the comments, delete a comment, and hide and display comments. Then you’ll remove all comments from the presentation.
Set Up
You need the HarmonyReview_start presentation located in your Chapter12 practice file folder to complete this exercise. Open the HarmonyReview_start presentation, and save it as HarmonyReview. Then follow the steps.
With nothing selected on slide 1, on the Review tab, in the Comments group, click the New Comment button.
PowerPoint adds a comment icon containing your initials and the number 1 to the upper-left corner of the slide, and opens a comment box.
Tip
Comment boxes include the user name and initials you specified the first time you started any program in the Microsoft Office 2010 system. To change this information, display the PowerPoint Options dialog box, and on the General page, under Personalize Your Copy Of Microsoft Office, change the entries in the User Name and Initials boxes, and click OK.
In the comment box, type Feng shui not mentioned. Good or bad?
Click away from the comment box to close it.
Point to the comment icon to display the comment, and then move the pointer away from the icon to close the box again.
Move to slide 2, click anywhere in the bulleted list, and in the Comments group, click the New Comment button.
In the comment box, type A graphic would add interest here, and then click away from the comment box.
Because this comment is attached to the bulleted list, its icon appears in that placeholder.
With the comment icon on slide 2 selected, in the Comments group, click the Edit Comment button.
The comment box opens so that you can edit the comment.
Click to the left of the word graphic, type tasteful, press the Spacebar, and then click away from the comment box to close it.
Move back to slide 1, double-click the word Your in the title, and add a comment that says Should this be "the"?
At the top of the slide, click comment icon 1 to open its comment box, and then in the Comments group, click the Next button.
PowerPoint closes the first comment box and displays the next comment.
In the Comments group, click the Previous button to move back to the first comment.
With the first comment displayed, in the Comments group, click the Delete button.
The comment is deleted from the slide.
In the Comments group, click the Show Markup button to turn it off.
The comment icon attached to the title on slide 1 disappears.
Move to slide 2 to verify that the comment icon is hidden there also.
In the Comments group, click the Show Markup button to redisplay the comment icons, and then click the comment icon on the active slide.
In the Comments group, click the Delete arrow, and then in the list, click Delete All Markup in this Presentation.
When asked to confirm that you want to delete all the comments, click Yes.
Both the remaining comments are removed.


Merging Presentation Versions
Sometimes you might want to compare two versions of the same presentation. For example, if you have sent a presentation out for review by a colleague, you might want to compare his or her edited version with the original presentation so that you can incorporate the changes you like and reject those you don’t.
Instead of comparing two open presentations visually, you can tell PowerPoint to compare the presentations and merge the differences into one presentation. The differences are recorded in the merged presentation as revisions. From within that one presentation, you can view the suggested changes and accept or reject them.
In this exercise, you’ll merge two versions of the same presentation. You’ll then review the changes and accept those you like.
Set Up
You need the MeetingCompareA_start and MeetingCompareB_start presentations located in your Chapter12 practice file folder to complete this exercise. Open the MeetingCompareA_start presentation, save it as MeetingCompareA, and then close it. Then open the MeetingCompareB_start presentation, and save it as MeetingCompareB. With that presentation open, follow the steps.
On the Review tab, in the Compare group, click the Compare button.
The Choose File To Merge With Current Presentation dialog box opens.
With the contents of your Chapter12 practice file folder displayed, double-click MeetingCompareA.
PowerPoint compares the two presentations and incorporates the differences into MeetingCompareB. To the right, it displays the Revisions task pane, with the Details tab active.
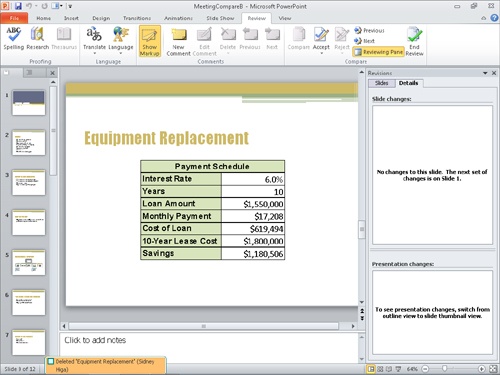
The orange revision box at the bottom of the screen tells you that the displayed slide has been deleted from MeetingCompareA.
Troubleshooting
The appearance of buttons and groups on the ribbon changes depending on the width of the program window. For information about changing the appearance of the ribbon to match our screen images, see Modifying the Display of the Ribbon at the beginning of this book.
In the orange revision box at the bottom of the screen, select the check box to accept the slide deletion.
The slide disappears, and an icon between slide 8 and slide 9 on the Slides tab of the Overview pane indicates that you have accepted the change.
Point to the icon on the Slides tab.
A ScreenTip tells you that you can click the icon to see which slide has been deleted.
Click the icon.
PowerPoint displays the revision box. If you want to reinstate the deleted slide, you can clear the check box.
Scroll to the top of the Slides pane, and click slide 1.
The Slide Changes area of the Revisions task pane tells you that there is a change on this slide.
Click Rectangle 7: Company meeting.
The revision box tells you that Sidney Higa deleted the word Company and inserted the word Annual.
In the revision box, select the All changes to Rectangle 7 check box.
On the Review tab, in the Compare group, click the Next button.
PowerPoint displays slide 2, and the Revisions task pane indicates that Sidney Higa made changes to the bulleted list.
In the revision box, select the Deleted "our" check box. Then reverse this step and clear the check box again.
You can flip back and forth to determine whether or not you like each change.
Accept all the changes, and then click the Next button.
Review and accept the remaining changes. When PowerPoint displays a message that it has reached the end of all changes, click Continue to return to the first change.
PowerPoint displays the revision box for the deleted slide. Let’s keep this change.
Click the Next button.
With slide 1 displayed, on the Review tab, in the Compare group, click the Reject button to restore the original slide title.
To apply all the decisions you have made, in the Compare group, click the End Review button. Then confirm that you want to end the review by clicking Yes in the message box.
PowerPoint accepts all the changes and closes the Revisions task pane.


If your organization has a SharePoint site, you and your colleagues can collaborate on a presentation. Or you can collaborate on a presentation stored in a Windows Live SkyDrive space.
You can save a presentation in several different file formats, including PowerPoint Show, PDF, and XPS.
You can send a presentation for review via e-mail. When you receive the reviewed versions, you can merge them so that all the changes are recorded in one presentation.
Assigning a password ensures that only people who know the password can review and work on the presentation.
When you review a presentation created by someone else, you can add comments to give feedback. You can also use comments in your own presentations to remind yourself of outstanding issues and tasks.