In most cases, it’s more appropriate to use MXML than ActionScript to define states. However, sometimes you want to define states dynamically (in which case you must use ActionScript). One such example is when you want to define a multipage form based on data loaded at runtime. Creating the form dynamically is advantageous because you can change the form without recompiling and republishing the SWF. However, because form elements aren’t known at compile time, you cannot use MXML to define the states.
The ActionScript used to work with states corresponds to the MXML. In the following sections, you’ll learn about the ActionScript equivalents to the MXML you learned about earlier.
When defining states using ActionScript, you use the mx.states.State class. You can use the constructor as part of a new statement to
define a new State
instance:
var stateA:State = new State();
You can assign a name to a state using the name property, in much the same way as you’d
use the name attribute of the
<mx:State> tag:
stateA.name = "exampleStateA";
And just as you can use the basedOn attribute of the <mx:State> tag to define state inheritance, you can use the basedOn property of the State class. The following code defines a new state that is based on
the state constructed in the previous two code snippets. Note that the
basedOn property expects a string
specifying the name of the state upon
which you want to base the new state; you cannot assign it a reference
to the State object.
var stateB:State = new State();
stateB.name = "exampleStateB";
stateB.basedOn = "exampleStateA";
With MXML, you use the <mx:states> tag to define an array of
states for an application or component. With ActionScript, you use the states property. The states property is defined in UIComponent, and it is inherited by all applications and
components. The data type of states is Array, and by default the value is an empty
array. If you want to add states to an application or component using
only ActionScript, you need only add states to the array:
states.push(stateA);
states.push(stateB);
As you’ll read in the next few sections, you can define overrides
(e.g., AddChild and SetProperty) using ActionScript. However, in addition to defining the overrides, you also
must add the overrides to a state. Using MXML, you simply nest the
override tags within the <mx:State> tag. With ActionScript, you
must use the overrides property of
the State class.
The overrides property is
defined as an array data type. By default, the overrides property value of a State object is an empty array and can add
overrides to the array:
stateA.overrides.push(exampleAddChild);
You can add and remove child elements in MXML using the <mx:AddChild> and <mx:RemoveChild> tags. The corresponding
ActionScript classes are mx.states.AddChild and mx.states.RemoveChild.
When you want to add child elements using the AddChild class, you must first construct a new
instance:
var addChild:AddChild = new AddChild();
When using MXML, nest the component tag within the <mx:AddChild> tag. When using
ActionScript, you must assign a component reference to the target property of the AddChild object:
var button:Button = new Button();
button.label = "Example";
addChild.target = button;
If you want to specify a parent, you can use the relativeTo property. Simply assign a reference
to the relativeTo
component:
addChild.relativeTo = vbox;
Also, just as you can specify where you want to add the child
element using the position attribute of the <mx:AddChild> tag, you can use the position property of the AddChild class. The property accepts the same values (firstChild, lastChild, before, and after) as the corresponding attribute. The
values have the same effects as when working with MXML. When you specify
a value of firstChild or lastChild, the child element is added as a
child of the target. When you specify a value of before or after, the child element is added as a sibling
of the target. If you don’t specify any value or you assign a value of
null, the default behavior is that
the component is added as the last child of the target:
addChild.position = "firstChild";
When you want to remove a child element, use the RemoveChild object and specify the child using
the target property:
var removeChild:RemoveChild = new RemoveChild();
removeChild.target = button;
To set properties and styles with ActionScript you use the
mx.states.SetProperty and mx.states.SetStyle classes. Each class has properties that correspond exactly to the
attributes of the <mx:SetProperty> and <mx:SetStyle> tags. Both classes define
target, name, and value properties. To simplify things you can
also pass the target, name, and value to the constructors. The following
example illustrates how to use the SetProperty and SetStyle classes:
var setProperty:SetProperty = new SetProperty(button, "width", 200);
var setStyle:SetStyle = new SetStyle(button, "color", 0xFF00FF);
The mx.states.SetEventHandler
class corresponds to the <mx:SetEventHandler> tag for setting
event handlers. The class defines target and name properties that
correspond to the target and name attributes of the <mx:SetEventHandler> tag. To make things even simpler, the SetEventHandler constructor allows you to pass
the target and name parameters:
var setEventHandler:SetEventHandler = new SetEventHandler(button, "click");
When you use the <mx:SetEventHandler> tag, you use the
handler attribute to specify the ActionScript to call when the event occurs.
However, when working with a SetEventHandler object, you use the
handlerFunction property. The handlerFunction
property requires a reference to a function/method. Flash Player then
calls that function/method when
the event occurs. The following instructs Flash Player to call a
function named clickHandler when the
user clicks the button:
setEventHandler.handlerFunction = clickHandler;
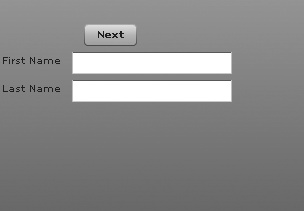
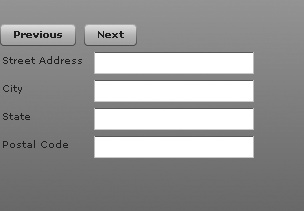
To better understand how to use ActionScript’s dynamic states created at runtime, let’s look at an example. Example 12-11 builds a multipage form from XML data and loads it at runtime. The form is composed of states for each page.
For the purposes of this example, the following XML data is used and saved in a file called forms.xml.
Example 12-11. forms.xml
<forms>
    <form id="1" label="Name">
        <item type="textinput" name="firstName" label="First Name" />
        <item type="textinput" name="lastName" label="Last Name" />
    </form>
    <form id="2" label="Address">
        <item type="textinput" name="address" label="Street Address" />
        <item type="textinput" name="city" label="City" />
        <item type="textinput" name="state" label="State" />
        <item type="textinput" name="postalCode" label="Postal Code" />
    </form>
    <form id="3" label="Phone and Email">
        <item type="textinput" name="phone" label="Phone Number" />
        <item type="textinput" name="email" label="Email" />
    </form>
    <form id="4" label="Address">
        <item type="textarea" name="agreement" label="">
        Example Corporation reserves all rights.
        </item>
        <item type="checkbox" itemName="city" label="I agree" />
    </form>
</forms>
To work with the data, you can define several classes: CustomFormItem, CustomForm, and CustomFormManager.
The CustomFormItem class can be
used to represent an item from the form. An item can consist of a
label and a form control such as a
text input, text area, or checkbox. Example 12-12
defines the CustomFormItem
class.
Example 12-12. CustomFormItem.as
package com.oreilly.programmingflex.states {

    public class CustomFormItem {

        private var _type:String;
        private var _label:String;
        private var _name:String;
        private var _value:String;

        public function get type():String {
            return _type;
        }

        public function get label():String {
            return _label;
        }

        public function get name():String {
            return _name;
        }

        public function get value():String {
            return _value;
        }

        public function CustomFormItem(type:String, label:String,
                                       name:String, value:String) {
            _type = type;
            _label = label;
            _name = name;
            _value = value;
        }

        public static function parseFromXML(xml:XML):CustomFormItem {
            var type:String = xml.@type;
            var label:String = xml.@label;
            var name:String = xml.@itemName;
            var value:String = null;
            if(type == "textarea") {
                value = xml.children()[0].toString();
            }
            return new CustomFormItem(type, label, name, value);
        }

    }
}
The CustomForm class (Example 12-13) is essentially a collection of form items
with the addition of a method that constructs a new state based on the
form.
Example 12-13. CustomForm.as
package com.oreilly.programmingflex.states {

    import mx.states.State;
    import mx.containers.GridRow;
    import mx.containers.GridItem;
    import mx.controls.Label;
    import mx.core.UIComponent;
    import mx.controls.TextInput;
    import mx.controls.CheckBox;
    import mx.controls.TextArea;
    import mx.states.AddChild;
    import com.oreilly.programmingflex.states.CustomFormItem;
    import mx.containers.Grid;

    public class CustomForm {

        private var _label:String;
        private var _items:Array;

        public function CustomForm(label:String, items:Array) {
            _label = label;
            _items = items;
        }

        public function getLabel():String {
            return _label;
        }

        public function getItems():Array {
            return _items.concat();
        }

        public function toState(parent:Grid):State {
            var state:State = new State();
            state.overrides = new Array();
            var gridRow:GridRow;
            var gridItem:GridItem;
            var count:uint = _items.length;
            var i:uint;
            var type:String;
            var label:Label;
            var component:UIComponent;
            var item:com.oreilly.programmingflex.states.CustomFormItem;
            var addChild:AddChild;
            for(i = 0; i < count; i++) {
                item = _items[i];
                gridRow = new GridRow();
                type = item.type;
                if(type != "checkbox" && item. label.length > 0) {
                    label = new Label();
                    label.text = item.label;
                    gridItem = new GridItem();
                    gridItem.addChild(label);
                    gridRow.addChild(gridItem);
                }
                if(type == "textinput") {
                    component = new TextInput();
                }
                else if(type == "checkbox") {
                    component = new CheckBox();
                    CheckBox(component).label = item.label;
                }
                else if(type == "textarea") {
                    component = new TextArea();
                    component.width = 200;
                    TextArea(component).text = _items[i]. value;
                }
                component.id = "component";
                gridItem = new GridItem();
                gridItem.addChild(component);
                gridRow.addChild(gridItem);
                addChild = new AddChild();
                addChild.relativeTo = parent;
                addChild.target = gridRow;
                state.overrides.push(addChild);
            }
            return state;
        }

        public static function parseFromXML(xml:XML):CustomForm {
            var label:String = xml.@label;
            var items:Array = new Array();
            var i:uint;
            for(i = 0; i < xml.children().length(); i++) {
                items.push(CustomFormItem.parseFromXML(xml.children()[i]));
            }
            return new CustomForm(label, items);
        }

    }
}
The CustomFormManager class
(Example 12-14) is a Singleton class that
loads the XML data and provides an interface to a collection of
forms.
Example 12-14. CustomFormManager.as
package com.oreilly.programmingflex.states {

    import flash.events.Event;
    import flash.events.ProgressEvent;
    import flash.events.IOErrorEvent;
    import flash.net.URLRequest;
    import flash.net.URLLoader;
    import flash.events.EventDispatcher;
    import com.oreilly.programmingflex.states;

    public class CustomFormManager extends EventDispatcher {

        private static var _instance:CustomFormManager;

        private var _forms:Array;
        private var _index:uint;

        public function CustomFormManager(enforcer:SingletonEnforcer) {
        }

        public static function getInstance():CustomFormManager {
            if(_instance == null) {
                _instance = new CustomFormManager(new SingletonEnforcer());
            }
            return _instance;
        }

        public function load(url:String):void {
            var request:URLRequest = new URLRequest(url);
            var loader:URLLoader = new URLLoader();
            loader.load(request);
            loader.addEventListener(Event.COMPLETE, dataHandler);
        }

        public function hasNextForm():Boolean {
            return _index < _forms.length;
        }

        public function getNextForm():CustomForm {
            if(_index >= _forms.length) {
                return null;
            }
            return _forms[_index++];
        }

        public function hasPreviousForm():Boolean {
            return _index > 0;
        }

        public function getPreviousForm():CustomForm {
            if(_index < 0) {
                return null;
            }
            return _forms[_index--];
        }

        private function dataHandler(event:Event):void {
            _index = 0;
            _forms = new Array();
            var xml:XML = new XML(event.target.data);
            var forms:XMLList = xml.children();
            var i:uint;
            var form:CustomForm;
            for(i = 0; i < forms.length(); i++) {
                form = CustomForm.parseFromXML(forms[i]);
                _forms.push(form);
            }
            dispatchEvent(new Event(Event.COMPLETE));
        }

    }
}
class SingletonEnforcer {}
The MXML (with embedded ActionScript) in Example 12-15 illustrates how to use the preceding code to construct dynamic states based on XML data.
Example 12-15. Dynamic states
<?xml version="1.0" encoding="utf-8"?>
<mx:Application xmlns:mx="http://www.adobe.com/2006/mxml" layout="absolute"
initialize="initializeHandler(event)">
    <mx:Script>
        <![CDATA[
            import mx.states.SetProperty;
            import mx.states.SetEventHandler;
            import mx.states.State;
            import com.oreilly.programmingflex.states.CustomForm;

            import com.oreilly.programmingflex.states.CustomFormManager;

            private var _stateIndex:uint;
            private var _stateCount:uint;

            private function initializeHandler(event:Event):void {
                var formManager:CustomFormManager = CustomFormManager.getInstance();
                formManager.load("forms.xml");
                formManager.addEventListener(Event.COMPLETE, dataHandler);
            }

            private function dataHandler(event:Event):void {
                _stateIndex = 1;
                _stateCount = 0;
                var formManager:CustomFormManager = CustomFormManager.getInstance();
                var form:CustomForm;
                states = new Array();
                var state:State;
                var index:uint = 1;
                var setProperty:SetProperty;
                var hasPreviousForm:Boolean;
                while(formManager.hasNextForm()) {
                    hasPreviousForm = formManager.hasPreviousForm();
                    _stateCount++;
                    form = formManager.getNextForm();
                    state = form.toState(grid);
                    setProperty = new SetProperty(next, "visible",
                      formManager.hasNextForm());
                    state.overrides.push(setProperty);
                    setProperty = new SetProperty(previous, "visible",
                      hasPreviousForm);
                    state.overrides.push(setProperty);
                    state.name = "form" + index++;
                    states.push(state);
                }
                currentState = "form1";
            }

            private function nextForm():void {
                currentState = "form" + ++_stateIndex;
            }

            private function previousForm():void {
                currentState = "form" + --_stateIndex;
            }

        ]]>
    </mx:Script>
    <mx:VBox id="vbox">
        <mx:Label id="formLabel" />
        <mx:HBox>
            <mx:Button id="previous" label="Previous" visible="false"
                click="previousForm()" />
            <mx:Button id="next" label="Next" click="nextForm()" />
        </mx:HBox>
        <mx:Grid id="grid">
        </mx:Grid>
    </mx:VBox>
</mx:Application>
Figure 12-8 through Figure 12-11 show what the states look like.