
Before you start animating, you will want to inflate and bind your layout in MainActivity, in the onCreate(…) function.
Listing 25.5 Inflating and binding the layout (MainActivity.kt)
class MainActivity : AppCompatActivity() {

    private lateinit var binding: ActivityMainBinding

    override fun onCreate(savedInstanceState: Bundle?) {
        super.onCreate(savedInstanceState)
        setContentView(R.layout.activity_main)
        binding = ActivityMainBinding.inflate(layoutInflater)
        setContentView(binding.root)
    }
}
Now, it is time to animate the sun down below the horizon. Here is the plan: Smoothly move binding.sun so that its top is right at the edge of the bottom of the sky. Since the bottom of the sky and the top of the sea are the same, the sun will be hidden behind the sea view. You will do this by translating the location of the top of binding.sun to the bottom of its parent.
The reason the sun view moves behind the sea is not immediately apparent. This has to do with the draw order of the views. Views are drawn in the order in which they are declared in the layout, so views declared later in the layout are drawn on top of those further up.
In this case, since the sun view is declared before the sea view, the sea view is on top of the sun view. When the sun animates past the sea, it will appear to go behind the sea.
The first step is to find where the animation should start and end. Write this first step in a new function called startAnimation().
Listing 25.6 Getting the start and end values (MainActivity.kt)
class MainActivity : AppCompatActivity() {
    ...
    override fun onCreate(savedInstanceState: Bundle?) {
        ...
    }

    private fun startAnimation() {
        val sunYStart = binding.sun.top.toFloat()
        val sunYEnd = binding.sky.height.toFloat()
    }
}
The top property is one of four properties on View that return the local layout rect for that view: top, bottom, right, and left. A rect (short for rectangle) is the rectangular bounding box for the view, which is specified by those four properties. A view’s local layout rect specifies the position and size of that view in relation to its parent, as determined when the view was laid out.
It is possible to change the location of the view onscreen by modifying these values, but it is not recommended. They are reset every time a layout pass occurs, so they tend not to hold their value.
In any event, the animation will start with the top of the view at its current location. It needs to end with the top at the bottom of binding.sun’s parent, binding.sky. To get it there, it should be as far down as binding.sky is tall, which you find by calling height.toFloat(). The height property’s value is the same as bottom minus top.
Now that you know where the animation should start and end, create and run an ObjectAnimator to perform it.
Listing 25.7 Creating a sun animator (MainActivity.kt)
...
private fun startAnimation() {
    val sunYStart = binding.sun.top.toFloat()
    val sunYEnd = binding.sky.height.toFloat()

    val heightAnimator = ObjectAnimator
        .ofFloat(binding.sun, "y", sunYStart, sunYEnd)
        .setDuration(3000)

    heightAnimator.start()
}
...
We will come back to how ObjectAnimator works in a moment. First, hook up startAnimation() so that it is called every time the user presses anywhere in the scene.
Listing 25.8 Starting animation on press (MainActivity.kt)
...
override fun onCreate(savedInstanceState: Bundle?) {
    super.onCreate(savedInstanceState)
    binding = ActivityMainBinding.inflate(layoutInflater)
    setContentView(binding.root)

    binding.scene.setOnClickListener {
        startAnimation()
    }
}
...
Run Sunset and press anywhere in the scene to run the animation (Figure 25.2).
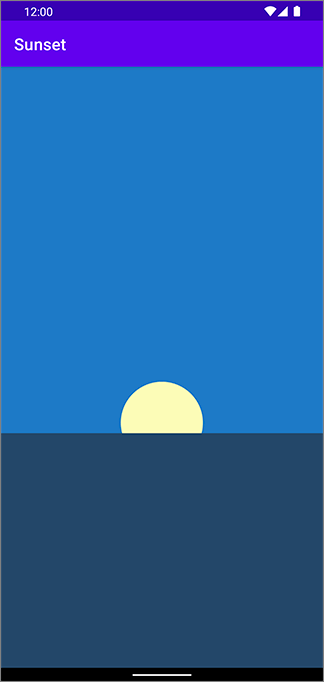
You should see the sun move below the horizon.
Here is how it works: ObjectAnimator is a property animator. Instead of knowing specifically about how to move a view around the screen, a property animator repeatedly calls property setter functions with different values.
For example, imagine the Y coordinate of the top of the sun is 120.00 and the Y coordinate of the bottom of the sky is 360.00.
The code that you just wrote would create an ObjectAnimator in the call to ObjectAnimator.ofFloat(binding.sun, "y", sunYStart, sunYEnd).
When that ObjectAnimator is started, it would repeatedly call binding.sun.setY(Float) with values starting at 120.00 and moving up.
Like this:
    binding.sun.setY(120.00)
    binding.sun.setY(121.33)
    binding.sun.setY(122.67)
    binding.sun.setY(124.00)
    binding.sun.setY(125.33)
    ...
… and so on, until it finally calls binding.sun.setY(360.00). This process of finding values between a starting and ending point is called interpolation. Between each interpolated value, a little time passes, which makes it look like the view is moving.
Property animators are great, but with them alone it would be impossible to animate a view as easily as you just did. Modern Android property animation works in concert with transformation properties.
We said earlier that your view has a local layout rect, which is the position and size it is assigned in the layout process. You can move the view around after that by setting additional properties on the view, called transformation properties.
You have three properties to rotate the view (rotation, pivotX, and pivotY, shown in Figure 25.3),
two properties to scale the view vertically and horizontally (scaleX and scaleY, shown in Figure 25.4),
and two properties to move the view around the screen (translationX and translationY, shown in Figure 25.5).


All these properties can be fetched and modified.
For example, if you wanted to know the current value of translationX, you would invoke view.translationX.
If you wanted to set it, you would invoke view.translationX = Float.
So what does the y property do?
The x and y properties are conveniences built on top of local layout coordinates and the transformation properties.
They allow you to write code that simply says, “Put this view at this X coordinate and this Y coordinate.”
Under the hood, these properties will modify translationX or translationY to put the view where you want it to be.
That means that setting binding.sun.y = 50 really means this:
binding.sun.translationY = 50 - binding.sun.top
Your animation, while pretty, is abrupt. If the sun was really sitting there perfectly still in the sky, it would take a moment for it to accelerate into the animation you see. To add this sensation of acceleration, all you need to do is use a TimeInterpolator. TimeInterpolator has one role: to change the way your animation goes from point A to point B.
Use an AccelerateInterpolator in startAnimation() to make your sun speed up a bit at the beginning.
Listing 25.9 Adding acceleration (MainActivity.kt)
private fun startAnimation() {
    val sunYStart = binding.sun.top.toFloat()
    val sunYEnd = binding.sky.height.toFloat()

    val heightAnimator = ObjectAnimator
        .ofFloat(binding.sun, "y", sunYStart, sunYEnd)
        .setDuration(3000)
    heightAnimator.interpolator = AccelerateInterpolator()

    heightAnimator.start()
}
Run Sunset one more time and press to see your animation. Your sun should now start moving slowly and accelerate to a quicker pace as it moves toward the horizon.
There are a lot of styles of motion you might want to use in your app, so there are a lot of different TimeInterpolators. To see all the interpolators that ship with Android, look at the Known indirect subclasses section in the reference documentation for TimeInterpolator.
Now that your sun is animating down, let’s animate the sky to a sunset-appropriate color. Pull the colors you defined in colors.xml into properties using a lazy delegate.
Listing 25.10 Pulling out sunset colors (MainActivity.kt)
class MainActivity : AppCompatActivity() {

    private lateinit var binding: ActivityMainBinding

    private val blueSkyColor: Int by lazy {
        ContextCompat.getColor(this, R.color.blue_sky)
    }
    private val sunsetSkyColor: Int by lazy {
        ContextCompat.getColor(this, R.color.sunset_sky)
    }
    private val nightSkyColor: Int by lazy {
        ContextCompat.getColor(this, R.color.night_sky)
    }
    ...
}
Now add an animation to startAnimation() to animate the sky from blueSkyColor to sunsetSkyColor.
Listing 25.11 Animating sky colors (MainActivity.kt)
private fun startAnimation() {
    val sunYStart = binding.sun.top.toFloat()
    val sunYEnd = binding.sky.height.toFloat()

    val heightAnimator = ObjectAnimator
        .ofFloat(binding.sun, "y", sunYStart, sunYEnd)
        .setDuration(3000)
    heightAnimator.interpolator = AccelerateInterpolator()

    val sunsetSkyAnimator = ObjectAnimator
        .ofInt(binding.sky, "backgroundColor", blueSkyColor, sunsetSkyColor)
        .setDuration(3000)

    heightAnimator.start()
    sunsetSkyAnimator.start()
}
This seems like it is headed in the right direction, but if you run it you will see that something is amiss. Instead of moving smoothly from blue to orange, the colors will kaleidoscope wildly.
The reason this happens is that a color integer is not a simple number.
It is four smaller numbers schlupped together into one Int.
So for ObjectAnimator to properly evaluate which color is halfway between blue and orange, it needs to know how that works.
When ObjectAnimator’s normal understanding of how to find values between the start and end is insufficient, you can provide a subclass of TypeEvaluator to fix things. A TypeEvaluator is an object that tells ObjectAnimator what value is, say, a quarter of the way between a start value and an end value. Android provides a subclass of TypeEvaluator called ArgbEvaluator that will do the trick here.
Listing 25.12 Providing ArgbEvaluator (MainActivity.kt)
private fun startAnimation() {
    val sunYStart = binding.sun.top.toFloat()
    val sunYEnd = binding.sky.height.toFloat()

    val heightAnimator = ObjectAnimator
        .ofFloat(binding.sun, "y", sunYStart, sunYEnd)
        .setDuration(3000)
    heightAnimator.interpolator = AccelerateInterpolator()

    val sunsetSkyAnimator = ObjectAnimator
        .ofInt(binding.sky, "backgroundColor", blueSkyColor, sunsetSkyColor)
        .setDuration(3000)
    sunsetSkyAnimator.setEvaluator(ArgbEvaluator())

    heightAnimator.start()
    sunsetSkyAnimator.start()
}
(There are multiple versions of ArgbEvaluator; import the android.animation version.)
Run your animation once again, and you should see the sky fade to a beautiful orange color (Figure 25.6).
