
The Python language has an excellent set of modules to handle various web service needs. The phrases in this chapter are designed to give you a quick insight into some of the more useful and common ways in which Python can be used to program web services.
The first set of phrases show how to write CGI scripts using the Python language to send HTML to web browsers, handle form requests, and send posts to themselves, as well as allow users to upload files to the server via the web browser.
The next set of phrases provide examples of using Python to create web servers to handle GET and POST requests, as well as creating a simple CGI script server.
The final two phrases show how to use Python to create HTTP client connections to web servers to send POST and GET requests and then handle the response back from the web server.
Example .
#!/usr/bin/python
print "Content-type: text/html
"
print "<title>CGI Text</title>
"
webText = """
<H1>Useful Python Links</H1>
. . .
"""
print webText
Adding HTML content to web pages using Python CGI scripts is a very straightforward and simple process. The first line of the CGI script should be nonexecutable and point to the location of the Python interpreter using the #!<path> syntax.
When the CGI script is called by the web server, all output to stdout is directed back to the web browser. All you need to do to send the HTML code to the browser is print it to stdout.
Note
The permission on the CGI scripts must be executable. You will need to set the file permission to 755 on Linux servers for the scripts to be able to execute.
Note
Scripts that are created with the DOS EOL character set
will not run properly on Linux web servers. Depending on the web server you are using, you might need to make configuration changes to understand how to serve CGI files.
#!/usr/bin/python

#Send header to browser
print "Content-type: text/html
"
print "<title>CGI Text</title>
"

webText = """
<H1>Useful Python Links</H1>
<li><a href="http://www.python.org">
Python Web Site</a></li>
<li><a href="http://docs.python.org">
Python Documentation</a></li>
<li><a href="http://cheeseshop.python.org">
Cheeseshop (Python Packages Library)</a></li>
"""

#Send page content to browser
print webText
<!DOCTYPE html>
<html lang="en" xml:lang="en">
<head>
<meta content="text/html; charset=utf-8"
 http-equiv="content-type" />
<title>Form Page</title>
</head>
<body>
<H1>Test Link to CGI Script</H1>
<A HREF="cgi_text.cgi">cgi_text.cgi</A></body>
</html>
cgi_link.html
Figure 10.1 shows how cgi_text.cgi appears in a web browser.

Example .
#!/usr/bin/pythonimport cgi, sys
sys.stderr = sys.stdout
data = cgi.FieldStorage()
print "Content-type: text/html
"
print "<title>CGI Form Response</title>
"
if data.has_key('name') and data.has_key('quote'):
    print "<B>%s</B>: %s" % (data['name'].value,
          data['quote'].value)
The cgi module included with Python provides basic access to the metadata that gets passed to the CGI script when it is executed. When writing a CGI script that needs to accept parameters, use the cgi.FieldStorage() function to parse the fields sent in the POST or GET request to the web server. FieldStorage returns a dictionary of fields that were included with the request.
Parameters can be accessed from the dictionary returned by FieldStorage by using the standard Python syntax to access the keys and values of the dictionary. In the example, has_key(key) is used to determine whether a key exists, and then the value is directly accessed using the d[key].value syntax.
Note
Parameters can be passed to CGI scripts through either a POST or a GET request. The example illustrates how to use a HTML form to send a POST request and a direct link to send a GET request.
#!/usr/bin/pythonimport cgi, sys
#Send errors to browser
sys.stderr = sys.stdout
#Parse data from form
data = cgi.FieldStorage()
#Send response to browser
print "Content-type: text/html
"
print "<title>CGI Form Response</title>
"
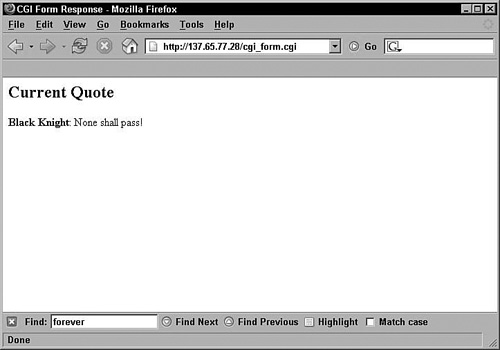
print "<h2>Current Quote</h2><P>"
if data.has_key('name') and data.has_key('quote'):
print "<B>%s</B>: %s" % (data['name'].value,
data['quote'].value)cgi_form.py
<!DOCTYPE html>
<html lang="en">
<head>
<meta content="text/html; charset=utf-8"
http-equiv="content-type" />
<title>Form Page</title>
</head>
<body>
<h2>Form Post</h2><p>
<form method="POST" action="/cgi_form.cgi">
Name <input type="TEXT" name="name">
<P>
Quote <input type="TEXT" name="quote" size="80">
<P>
<input type="SUBMIT" value="send">
</form><p>
<h2>Direct Links</h2><p>
<li><a href="cgi_form.cgi?
name=Brad"e=G'Day!">G'Day!</a>
<li><a href="cgi_form.cgi?
name=Brad"e=Bad Show!">Bad Show!</a>
</body>
</html>form.html
Figure 10.2 shows form.html loaded in a web browser.

Figure 10.3 shows the web page created when form.html executes cgi_form.cgi.
Example .
#!/usr/bin/pythonimport cgi, os, sys
data = cgi.FieldStorage()
formText = """Content-type: text/html

<form method="POST" action="cgi_selfpost.cgi">
    Name <input type="TEXT" name="name">
    Quote <input type="TEXT" name="quote" size="80">
    <input type="SUBMIT" value="send">
</FORM>
"""
print formText
if data.has_key('name') and data.has_key('quote'):
    f = open("quotes.dat", 'a')
    f.write("<li><b>%s:</b> %s</li>
" %
            (data['name'].value, data['quote'].value))
    f=open("quotes.dat", 'r')
if f:
    print f.read()
A self-posting CGI script is one that posts to itself. Self-posting scripts enable you to keep all your code in a single file rather than spread it out through multiple HTML and CGI files.
In addition to the first line, you will need to add code to parse the data from the CGI posts, handle the parameters from the CGI post, and write forms to the web browser that posts the CGI script.
Note
In the example, the self-posting form is added to the script even if no parameters are passed when the CGI script is loaded. However, the initial posting to the script can be from another script or web page, as well as a self-post from the same script.
Typically, you will want to parse the data and handle arguments first because most self-posting CGI scripts will write different views back to the web browser depending on what parameters were posted.
The CGI post data can be parsed using the cgi.FieldStorage() function. FieldStorage returns a dictionary of fields that were included with the request.
Parameters can be accessed from the dictionary returned by FieldStorage by using the standard Python syntax to access the keys and values of the dictionary. In the example, has_key(key) is used to determine whether a key exists, and then the value is directly accessed using the d[key].value syntax.
After you have accessed the parameters, you can use their values to determine what HTML view needs to be sent back to the web browser through stdout, which writes back to the web browser.
Note
Each time a post is received, the CGI script is reloaded. No local or global data is retained. If you need to have data survive between multiple posts, you will need to store it locally on the server. In the following example, the quotes are captured and stored in a local data file on the server so that they can be displayed each time a new post is received.
import cgi, os, sys

#Send errors to browser
sys.stderr = sys.stdout

#Parse data from form
data = cgi.FieldStorage()

#Send form to browser
formText = """Content-type: text/html

<title>CGI Self-Post Form</title>

<h2>Enter Quote</h2><P>
<form method="POST" action="cgi_selfpost.cgi">
    Name <input type="TEXT" name="name">
    <p>
    Quote <input type="TEXT" name="quote" size="80">
    <p>
    <input type="SUBMIT" value="send">
</form>
<hr>
<h2>Received Quotes</h2><p>"""
print formText

#Retrieve field from form and store data
if data.has_key('name') and data.has_key('quote'):
    f = open("quotes.dat", 'a')
    f.write("<li><b>%s:</b> %s</li>
" %
            (data['name'].value,
data['quote'].value))
    f.close()
#Send stored data to browser
f=open("quotes.dat", 'r')
if f:
    print f.read()
    f.close()
cgi_selfpost.cgi
<LI><B>King Arthur:</B> I am your king!</LI>
<LI><B>Peasant:</B> I didn't vote for you.</LI>
<LI><B>King Arthur:
</B> You don't vote for a king!</LI>
<LI><B>Black Knight:</B> None shall pass!</LI>
<LI><B>Bridge Keeper:
</B> What is the air speed velocity of
 an unlaiden swallow?</LI>
Contents of quotes.dat data file.
Figure 10.4 displays the web page that cgi_selfpost.cgi generates as items are posted to it.

Example .
#!/usr/bin/pythonimport cgi, os, sys, string
import posixpath, macpath
data = cgi.FieldStorage()
if data.has_key('uFile'):
    saveFile(data['uFile'])
    print "<B>%s</B> uploaded (%d bytes)."
        % (data['uFile'].filename, bytes)
A common task when programming web services is allowing users to upload files to the server using the web browser. This is fairly easy to accomplish with Python CGI scripts. First, create an HTML page that includes a form with a type=file INPUT tag. The name attribute of the INPUT tag will be used by the CGI script to retrieve the file information. The form should specify your Python CGI script as the action. The enctype attribute of the form element must be set to multipart/form-data.
Once you have built the HTML file, create a Python script that will parse the parameters from the POST request using the cgi.FieldStorage() function. FieldStorage() returns a dictionary of fields passed to the CGI script.
Using the dictionary returned by FieldStorage() should include the key you specified as the name of the INPUT tag in the HTML document. Use that key to obtain the file information object. The filename can be accessed by using the filename attribute of the object, and the actual data can be accessed using the file attribute. The file attribute acts similar to a read-only file that you can read using read(), readline(), or readlines().
Read the file contents from the file object and write it to a file on the server.
Note
In the example, the entire file was read at once. For larger files, you might want to break up the read into segments to reduce the load on the system.
Note
It might be a good idea in practical terms to filter the pathname to remove restricted characters and characters that might alter the path.
#!/usr/bin/pythonimport cgi, os, sys, string
import posixpath, macpath
saveDir = "/upload"
#Send errors to browser
sys.stderr = sys.stdout
#Parse data from form
data = cgi.FieldStorage()
#Save the file to server directory
def saveFile(uFile):
fPath = "%s/%s" % (saveDir, uFile.filename)
buf = uFile.file.read()
bytes = len(buf)
sFile = open(fPath, 'wb')
sFile.write(buf)
sFile.close()
#Send response to browser
webText = """Content-type: text/html
"
<title>CGI Upload Form</title>
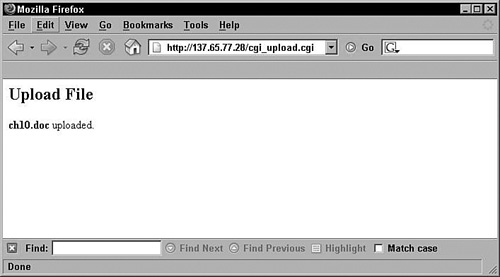
<h2>Upload File</h2><p>"""
print webText
if data.has_key('uFile'):
saveFile(data['uFile'])
print "<b>%s</b> uploaded (%d bytes)." %
(data['uFile'].filename, bytes)cgi_upload.cgi
<!DOCTYPE html>
<html lang="en">
<head>
<meta content="text/html; charset=utf-8"
 http-equiv="content-type" />
<title>Upload Form Page</title>
</head>
<body>
<h2>Upload File</h2><P>
<form enctype="multipart/form-data" method="POST"
 action="cgi_upload.cgi">
    <input type="file" size="70" name="uFile">
    <p><input type="SUBMIT" value="upload">
</form>
</body>
</html>
upload.html
Figure 10.5 shows upload.html loaded in a web browser.

Figure 10.6 shows the web page generated by cgi_upload.cgi when the upload action is performed by form.html.
Example .
import BaseHTTPServer, cgi
class httpServHandler
    (BaseHTTPServer.BaseHTTPRequestHandler):
    def do_GET(self):
     if self.path.find('?') != -1:
         self.path, self.query_string =
              self.path.split('?', 1)
     else:
         self.query_string = ''
     self.send_response(200)
     self.send_header('Content-type',
'text/html')
     self.end_headers()
     self.globals =
         dict(cgi.parse_qsl(self.query_string))
     sys.stdout = self.wfile
     self.wfile.write("<H2>Handle Get</H2><P>")
     self.wfile.write(
         "<LI>Executing <B>%s</B>" % (self.path))
     self.wfile.write(
         "<LI>With Globals<B>%s</B><HR>" %
         (self.globals))
     execfile(self.path, self.globals)

os.chdir('/myTest')
serv = BaseHTTPServer.HTTPServer(
             servAddr, httpServHandler)
serv.serve_forever()
A very common task when programming web services is to create web servers to handle special processing of GET requests from web browsers. The BaseHTTPServer module included with Python provides a set of classes and functions that allow you to create custom web servers to handle these requests. The first step is to define a handler class derived from the BaseHTTPServer.BaseHTTPRequestHandler class that overrides the do_GET() method.
Inside the do_GET method, you can use the path attribute to get the file path the GET request was directed toward. The path attribute includes the entire string of the GET request, including the path and parameters in the format path?param=value¶m=value.... If there were parameters passed in the GET request, they can be parsed out by using the split('?') function on the path string to split it into a path and query string, as illustrated by the sample code http_get_serv.py.
When you have the query string of the POST request in a buffer, use cgi.parse_qsl(string) to parse the query string into a dictionary, as shown in the example http_get_serv.py. The arguments will be added to the dictionary and can be accessed by using standard Python syntax.
Note
In the sample code, we are using the web server to remotely execute a Python script. We redirect the sys.stdout to the wfile attribute of the handler class so that normal output from the script executing will be displayed in the web browser.
Once you have defined the handler class and overridden the do_GET method, create an instance of the web server using BaseHTTPServer.HTTPServer(address, handler). The address argument is a list including the server address and port, respectively. The handler argument is the custom handler class you defined earlier.
After you have created an instance of the web server, start the web server by calling its serve_forever() function.
import os, sys
import BaseHTTPServer, cgi

servAddr = ('',8080)

#Define the HTTP handler that overrides do_GET
class httpServHandler(
     BaseHTTPServer.BaseHTTPRequestHandler):
    def do_GET(self):
        if self.path.find('?') != -1:
            self.path, self.query_string =
                 self.path.split('?', 1)
        else:
            self.query_string = ''
        self.send_response(200)
        self.send_header('Content-type',
'text/html')
        self.end_headers()

#Setup Global Environment
        self.globals =
            dict(cgi.parse_qsl(self.query_string))
#Redirect output to browser
        sys.stdout = self.wfile

#Execute the script remotely
        self.wfile.write("<h2>Handle Get</h2><P>")
        self.wfile.write(
           "<LI>Executing <b>%s</b>" % (self.path))
        self.wfile.write(
           "<li>With Globals<B>%s</b><hr>" %
          (self.globals))
        execfile(self.path, self.globals)

#Set the root directory
os.chdir('/myTest')

#Create server object
serv = BaseHTTPServer.HTTPServer(
           servAddr, httpServHandler)

#Start Server
serv.serve_forever()
http_get_serv.py
if name and quote:
    print "<B>%s</B> says <I>%s</I>"% (name, quote)
else:
    print "There were errors in the parameters."
http_text.py
Figure 10.7 shows the web page generated by http_get_serv.py when it receives a GET request.

Example .
import BaseHTTPServer, cgi
class httpServHandler(
      BaseHTTPServer.BaseHTTPRequestHandler):
    def do_POST(self):
       self.query_string = self.rfile.read
(int(self.headers['Content-Length']))
       self.args = dict(cgi.parse_
                      qsl(self.query_string))
       self.send_response(200)
       self.send_header('Content-type',
                        'text/html')
       self.end_headers()
       sys.stdout = self.wfile
       self.wfile.write(
           "<h2>Handling Post</h2><P>")
       self.wfile.write(
           "<li>Location: <b>%s</b>"%(self.path))
       self.wfile.write(
           "<li>Arguments:<b>%s</b><hr>"%
                          (self.args))
      execfile(self.path, self.args)

serv = BaseHTTPServer.HTTPServer(
           servAddr, httpServHandler)
serv.serve_forever()
A very common task when programming web services is to create web servers to handle special processing of POST requests from web browsers. The BaseHTTPServer module included with Python provides a set of classes and functions that allow you to create custom web servers to handle these requests.
The first step is to define a handler class derived from the BaseHTTPServer.BaseHTTPRequestHandler class that overrides the do_POST() method.
The first order of business inside the do_POST method is to get the arguments passed with the POST request. First, get the length of the content by accessing the value of the Content-Length key in the headers attribute of the handler object. When you know the size of the contents, read the query string from the rfile attribute into a buffer.
After you have the query string of the POST request in a buffer, use cgi.parse_qsl(string) to parse the query string into a dictionary, as shown in the example http_post_serv.py. The arguments will be added to the dictionary and can be accessed by using standard Python syntax.
Note
In the sample code, we are using the web server to remotely execute a Python script. We redirect the sys.stdout to the wfile attribute of the handler class so that normal output from the script executing will be displayed in the web browser.
After you have defined the handler class and overridden the do_POST method, create an instance of the web server using BaseHTTPServer.HTTPServer(address, handler). The address argument is a list including the server address and port, respectively. The handler argument is the custom handler class you defined earlier.
Once you have created an instance of the web server, start the web server by calling its serve_forever() function.
import os, sys
import BaseHTTPServer, cgi

servAddr = ('',80)

#Define the HTTP handler that overrides do_POST
class httpServHandler(
      BaseHTTPServer.BaseHTTPRequestHandler):
    def do_POST(self):
#Get arguments from query string
        self.query_string = self.rfile.read(
            int(self.headers['Content-Length']))
        self.args = dict(cgi.parse_
                         qsl(self.query_string))

        self.send_response(200)
        self.send_header('Content-type',
                         'text/html')
        self.end_headers()

#Redirect output to browser
        sys.stdout = self.wfile

#Handle the post
        self.wfile.write("<h2>Handling
            Post</h2><P>")
        self.wfile.write("<li>Location:
            <b>%s</b>"%(self.path))
        self.wfile.write("<li>Arguments:
            <b>%s</b><hr>"%(self.args))

#Execute the script remotely
        execfile(self.path, self.args)

#Set the root directory
os.chdir('/myTest')

#Create server object
serv = BaseHTTPServer.HTTPServer(
           servAddr, httpServHandler)

#Start Server
serv.serve_forever()
http_post_serv.py
<!DOCTYPE html>
<html lang="en">
<head>
<meta content="text/html; charset=utf-8"
http-equiv="content-type"/>
<title>Form Page</title>
</head>
<body>
<form method="POST" action=
 "http://testserver.net/myTest/http_text.py">
    Name <input type="TEXT" name="name">
    <p>
    Quote <input type="TEXT" NAME="quote" size="80">
    <p>
    <input type="SUBMIT" value="send">
</form>
</body>
</html>if name and quote:
print "<b>%s</b> says <i>%s</i>"% (name, quote)
else:
print "There were errors in the parameters."http_text.py
Figure 10.8 shows post_form.html displayed in a web browser.

Figure 10.9 shows the web page generated by http_post_serv.py when it receives a POST request.

Example .
import os
import BaseHTTPServer, CGIHTTPServer
serverAddr = ("", 80)
os.chdir("/myTest")
serv = BaseHTTPServer.HTTPServer(
    serverAddr, CGIHTTPServer.CGIHTTPRequestHandler)
serv.serve_forever()
Python includes the CGIHTTPServer module that provides a quick and easy way to create your own CGI script server, eliminating the need to set up and configure a web server. This can be extremely time-saving.
To set up a simple CGI script server, first set the root directory for the server to act in, and then create an instance of the CGI script server using BaseHTTPServer.HTTPServer(address, handler). The address argument is a list including the server address and port, respectively. A simple server handler should specify the default handler of CGIHTTPServer.CGIHTTPRequestHandler. The CGIHTTPRequestHandler is similar to a normal HTTPRequestHandler; however, the do_GET and do_HEAD functions have been modified to handle CGI scripts, and the do_POST method will only allow posting to CGI scripts.
Note
You can override the do_GET, do_HEAD, and do_POST methods to create a customized CGI script parser.
After you have created an instance of the CGI script server, start the server by calling its serve_forever() function.
Note
The default location for CGI scripts is /cgi-bin or /htbin, relative to the root directory of the script server. The CGI scripts will need to reside in one of these two locations, and the Linux permissions must be set so that the scripts are executable (typically 0755).
import os
import BaseHTTPServer, CGIHTTPServer

serverAddr = ("", 80)

#Set root directory
os.chdir("/myTest")

#Create server object
serv = BaseHTTPServer.HTTPServer(
   serverAddr, CGIHTTPServer.CGIHTTPRequestHandler)

#Start server
serv.serve_forever()
cgi_serv.py
Figure 10.10 shows the web page generated by cgi_form.cgi as it is executed by the cgi_serv.py script.

Example .
import httplib
httpServ =
httplib.HTTPConnection("testserver.net", 80)
httpServ.connect()
httpServ.request('GET', "/test.html")
response = httpServ.getresponse()
if response.status == httplib.OK:
printText (response.read())
httpServ.request('GET',
'/cgi_form.cgi?name=Brad"e=Testing.')
response = httpServ.getresponse()
if response.status == httplib.OK:
printText (response.read())Another important task when programming web services is to send GET requests directly to a web server from a Python script rather to than a web browser. This effectively allows you to write client-side applications without having to deal with the web browser.
The httplib module included with Python provides the classes and functions to connect to a web server, send a GET request, and handle the response.
First, create a server connection object by executing the httplib.HTTPConnection(address, port) function, which returns an HTTPServer object. Then, connect to the server by calling the connect() function of the HTTPServer object.
To send the GET request, call request(method [, url [, body [, headers). Specify GET as the method of the request, and then specify the location of the file as the url.
Note
In the sample code, we send a CGI script with parameters. Because the web server executed the CGI script, the response from the server will be the output of the CGI script, not the script itself.
After you have sent the request, get the servers’ response using the getresponse() function of the HTTPServer object. The getresponse() function returns a response object that acts like a file object, allowing you to read the response using the read() request.
Note
You can check the status of the response by accessing the status attribute of the response object.
import httplib
def printText(txt):
lines = txt.split('
')
for line in lines:
print line.strip()
#Connect to server
httpServ =
httplib.HTTPConnection("137.65.77.28", 80)
httpServ.connect()
#Send Get html request
httpServ.request('GET', "/test.html")
#Wait for response
response = httpServ.getresponse()
if response.status == httplib.OK:
print "Output from HTML request"
print "==========================="
printText (response.read())
#Send Get cgi request
httpServ.request('GET',
'/cgi_form.cgi?name=Brad"e=Testing.')
#Wait for response
response = httpServ.getresponse()
if response.status == httplib.OK:
print "Output from CGI request"
print "========================="
printText (response.read())
httpServ.close()http_get.py
Output from HTML request
===========================
<!DOCTYPE html>
<html lang="en" xml:lang="en">
<head>
<meta content="text/html; charset=utf-8"
 http-equiv="content-type" />
<title>HTML Page</title>
</head>
<body>
<h1>Test Link to CGI Script</h1>
<a href="cgi_text.cgi">cgi_text.cgi</A></body>
</html>

Output from CGI request
=========================
<title>CGI Form Response</title>

<h2>Current Quote</h2><p>
<b>Brad</b>: Testing.
Example .
import httplib
httpServ = httplib.HTTPConnection("testserver.net", 80)
httpServ.connect()
quote = "Use a Python script to post to the CGI Script."
httpServ.request('POST', '/cgi_form.cgi',
'name=Brad"e=%s'
% quote)
response = httpServ.getresponse()
if response.status == httplib.OK:
printText (response.read())
httpServ.close()You also might need to send POST requests directly to a web server from a Python script rather than a web browser. This effectively enables you to write client-side applications without having to deal with the web browser.
The httplib module included with Python provides the classes and functions to connect to a web server, send a POST request, and handle the response without the use of a web browser.
First, create a server connection object by executing the httplib.HTTPConnection(address, port) function, which returns an HTTPServer object. Then connect to the server by calling the connect() function of the HTTPServer object.
To send the POST request, call request(method [, url [, body [, headers). Specify POST as the method of the request. Specify the location of the script to handle the post as the url. Specify the query string that needs to be passed with the POST as the body.
Note
In the sample code, we send a CGI script with parameters. Because the web server executed the CGI script, the response from the server will be the output of the CGI script, not the script itself.
After you have sent the request, get the server’s response using the getresponse() function of the HTTPServer object. The getresponse() function returns a response object that acts like a file object, allowing you to read the response using the read() request.
Note
You can check the status of the response by accessing the status attribute of the response object.
import httplib
def printText(txt):
lines = txt.split('
')
for line in lines:
print line.strip()
#Connect to server
httpServ = httplib.HTTPConnection("testserver.net", 80)
httpServ.connect()
#Send Get cgi request
quote =
"Use a Python script to post to the CGI Script."
httpServ.request('POST',
'/cgi_form.cgi', 'name=Brad"e=%s' % quote)
#Wait for response
response = httpServ.getresponse()
if response.status == httplib.OK:
print "Output from CGI request"
print "========================="
printText (response.read())
httpServ.close()Output from CGI request ========================= <title>CGI Form Response</title> <h2>Current Quote</h2><P> <b>Brad</b>: Use a Python script to post to the CGI Script.
Output from http_post.py code.
Example .
import SimpleXMLRPCServer

serv =
SimpleXMLRPCServer.SimpleXMLRPCServer(servAddr)
serv.register_function(areaSquare)
serv.register_introspection_functions()
serv.serve_forever()
The SimpleXMLRPCServer module provided with Python allows you to implement web services that support the XML-RPC protocol for remote procedure calls or RPCs. The XML-RPC protocol uses XML data encoding to transmit remote procedure calls across the HTTP protocol. This section discusses how to use the SimpleXMLRPCServer module to create a simple XML-RPC server.
The first step is to create an XML-RPC server object by calling the SimpleXMLRPCServer(addr [, requestHandler [, logRequests]]) function of the SimpleXMLRPCServer module. The SimpleXMLRPCServer function accepts a list containing the address and port to use for the server and returns an XML-RPC server object. The requstHandler argument specifies a request handler object if needed, and the logRequests is a Boolean flag that specifies whether or not to log incoming requests.
After you have created the XML-RPC server object, register locally defined functions that will be provided remotely by calling the register_function(function) function of the XML-RPC server object.
After you have registered the local functions that will be provided remotely, register the introspection functions using the register_introspection_functions(function) function of the XML-RPC server object. The XML-RPC server supports the XML introspection API, which provides the system.listMethods(), system.methodHelp(), and system.MethodSignature() introspection functions. The register_introspection_functions() function registers those introspection functions so that they can be accessed by a remote client.
After you have registered the introspection functions, start the server using the serve_forever() function of the XML-RPC server object. The server will begin accepting remote procedure call requests from remote clients.
import SimpleXMLRPCServer

servAddr = ("localhost", 8080)

def areaSquare(length):
    return length*length

def areaRectangle(length, width):
    return length*width

def areaCircle(radius):
    return 3.14*(radius*radius)

serv =
SimpleXMLRPCServer.SimpleXMLRPCServer(servAddr)

#Register RPC functions
serv.register_function(areaSquare)
serv.register_function(areaRectangle)
serv.register_function(areaCircle)

#Register Introspective functions
serv.register_introspection_functions()

#Handle Requests
serv.serve_forever()Example .
import xmlrpclib
servAddr = "http://localhost:8080"
s = xmlrpclib.ServerProxy(servAddr)
methods = s.system.listMethods()
s.areaSquare(5)
s.areaRectangle(4,5)
s.areaCircle(5)
The xmlrpclib module provided with Python allows you to create clients that can access web services that support the XML-RPC protocol. The XML-RPC protocol uses XML data encoding to transmit remote procedure calls across the HTTP protocol. This section discusses how to use the xmlrpclib module to create a client to access an XML-RPC server.
The first step is to authenticate to the XML-RPC proxy server by calling the ServerProxy(uri [, transport [, encoding [ , verbose [, allow_none]]]]) function. The ServerProxy function connects to the remote location specified by uri and returns an instance of the ServerProxy object.
After you have connected to the XML-RPC server, you can invoke methods on the remote server by calling them as a function of the ServerProject object. For example, you can call the introspection system.listMethods() using the “.” syntax shown in the sample code xml-rpc_client.py. The system.listMethods() function returns a list of functions that are available on the XML-RPC server. Other remote functions that are registered on the XML-RPC server are invoked the same way.
import xmlrpclib

servAddr = "http://localhost:8080"

#Attach to XML-RPC server
s = xmlrpclib.ServerProxy(servAddr)

#List Methods
print "Methods
==============="
methods = s.system.listMethods()
for m in methods:
    print m

#Call Methods
print "
Area
================"
print "5 in. Square =", s.areaSquare(5)
print "4x5 in. Rectangle =", s.areaRectangle(4,5)
print "10 in. Circle =", s.areaCircle(5)
xml-rpc_client.py
Methods
===============
areaCircle
areaRectangle
areaSquare
system.listMethods
system.methodHelp
system.methodSignature

Area
================
5 in. Square = 25
4x5 in. Rectangle = 20
10 in. Circle = 78.5
Example .
from SOAPpy import WSDL

wServer = WSDL.Proxy(
        'http://api.google.com/GoogleSearch.wsdl')
print wServer.methods.keys()

methodData = wServer.methods['doGoogleSearch']
for p in methodData.inparams:
    print "  %s %s" % (p.name.ljust(12), p.type[1])
hits = wServer.doGoogleSearch(key, searchStr, 0,
        10, False, "", False, "", "utf-8", "utf-8")
print len(hits.resultElements), "Hits . . ."
for hit in hits.resultElements:
    print "
URL:", hit.URL
    print "Title:", hit.title
    print "Desc:", hit.snippet
The dynamics of the Python language make it a perfect fit for SOAP web services. The SOAPpy module, available at http://pywebsvcs.sourceforge.net/, includes functions that enable you to create Python scripts that allow you to access SOAP web services.
This phrase is designed to familiarize you with using the SOAPpy module to access SOAP web services through a Web Service Definition Language (WSDL) file. A WSDL file is an XML file that describes the URL, namespace, type of web service, functions, arguments, argument data types, and function return values of the SOAP web service. In this case, the sample code accesses the Google search SOAP web service through the GoogleSearch.wsdl file.
The first step is to create an instance of the WSDL proxy server using the WSDL.Proxy(wsdlfile) function of the SOAPpy module. The WSDL.Proxy function accepts a WSDL filename as its only argument and returns a WSDL proxy server object.
After you have created the WSDL proxy server object, you can view the available methods using the methods attribute of the WSDL proxy server object, as shown in the sample code wServer.methods.keys(). The methods attribute is a dictionary containing the available methods of the web service.
To view the arguments associated with a specific method, look up the method in the dictionary to get a method data object, as shown in the sample code Server.methods[’doGoogleSearch’]. Once you have the method data object, the arguments can be accessed using the inparams attribute, which is a list of parameter objects. The name and type of the parameter are available using the name and type attributes of the parameter object, as shown in the sample code p.name.ljust(12), p.type[1]).
The methods on the SOAP server can be called as methods of the WSDL proxy server object using the “.” syntax as shown in the example soap_wsdl.py.
Note
This phrase focuses on using Google’s SOAP web service; however, there are numerous services out there that can be accessed in much the same way. A good place to start is to look at the services provided at http://www.xmethods.net/.
Note
In the sample code, key is set to INSERT_YOUR_KEY_HERE. You will need to go to http://api.google.com and create an account to get your own key. Once you have your own key, insert it into the sample code.
from SOAPpy import WSDL

searchStr = 'python'
key = 'INSERT_YOUR_KEY_HERE'

#Create WSDL server object
wServer = WSDL.Proxy(
        'http://api.google.com/GoogleSearch.wsdl')

#Display methods
print "
Available Methods
======================"
print wServer.methods.keys()

#Display method arguments
print "
doGoogleSearch Args
===================="
methodData = wServer.methods['doGoogleSearch']
for p in methodData.inparams:
    print "  %s %s" % (p.name.ljust(12), p.type[1])

#Call method
hits = wServer.doGoogleSearch(key, searchStr, 0,
        10, False, "", False, "", "utf-8", "utf-8")

#Print results
print "
Results
==============================="
print len(hits.resultElements), "Hits . . ."
for hit in hits.resultElements:
    print "
URL:", hit.URL
    print "Title:", hit.title
    print "Desc:", hit.snippet
soap_wsdl.py
Available Methods
======================
[u'doGoogleSearch', u'doGetCachedPage',
 u'doSpellingSuggestion']

doGoogleSearch Args
====================
  key          string
  q            string
  start        int
  maxResults   int
  filter       boolean
  restrict     string
  safeSearch   boolean
  lr           string
  ie           string
  oe           string

Results
===============================
10 Hits . . .

URL: http://www.python.org/
Title: <b>Python</b> Language Website
Desc: Home page for <b>Python</b>, an interpreted,
interactive, object-oriented, extensible<br>
programming language. It provides an extraordinary
combination of clarity and <b>...</b>

URL: http://www.python.org/download/
Title: Download <b>Python</b> Software
Desc: The original implementation of <b>Python</b>,
written in C.

URL: http://www.python.org/doc/
Title: <b>Python</b> Documentation Index
Desc: Official tutorial and references, including
library/module usage, Macintosh<br>  libraries,
language syntax, extending/embedding, and the
<b>Python</b>/C API.
. . .
Output of soap_wsdl.py