
3
Logging and Mailing
In the previous chapter, we learned about some of the more common things most Drupal module developers will have to know, starting with the basics, that is, creating a Drupal module.
In this chapter, we will take things further and cover some other important tasks a developer will have to perform:
- We will look at how logging works in Drupal. In doing so, we will cover some examples by expanding on our Hello World module.
- We will look at the Mail API in Drupal, namely, how we can send emails with the default setup (PHP mail). However, more than that, I will show you how to create your own email system to integrate with your (perhaps external) mail service; remember plugins? This will be yet another good example of using a plugin to extend existing capabilities.
- At the end of the chapter, we will also look at the Drupal token system. We’ll do so in the context of us replacing certain tokens with contextual data so that the emails we send out are a bit more dynamic.
By the end of this chapter, you should be able to add logging to your Drupal module and feel comfortable sending emails programmatically. Additionally, you’ll understand how tokens work, and as a bonus, see how you can define your own tokens.
Logging
The main logging mechanism in Drupal is a database log through which client code can use an API to save messages into the watchdog table. The messages in there are cleared after they reach a certain number, but meanwhile, they can be viewed in the browser via a handy interface (at admin/reports/dblog):
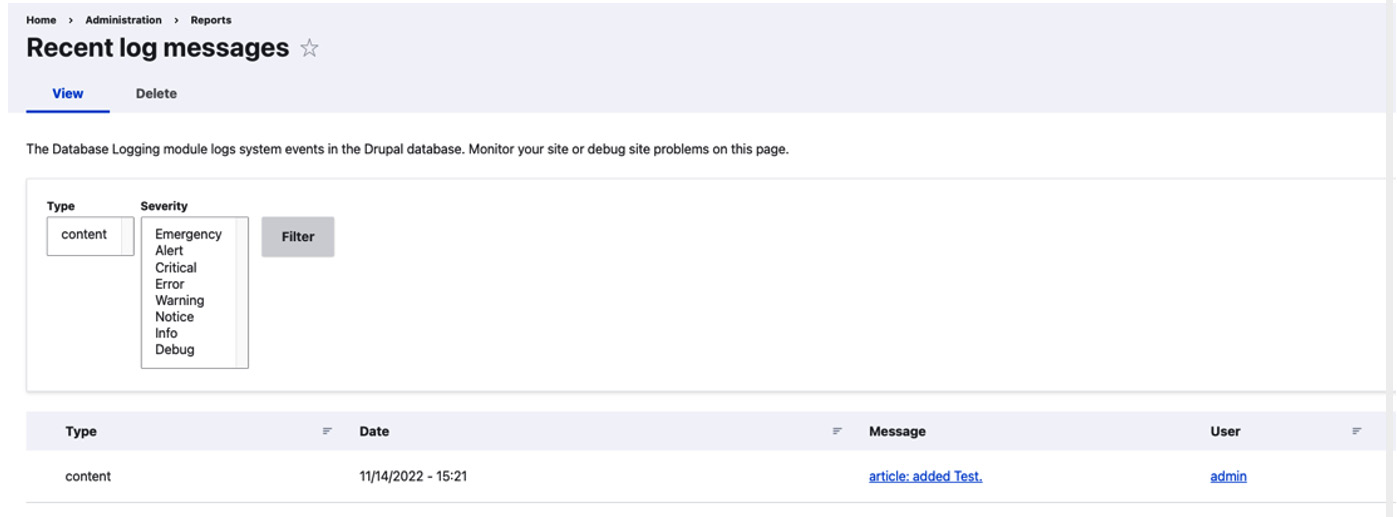
Figure 3.1: Viewing Recent log messages
Alternatively, a core module that is disabled by default, Syslog, can be used to complement/replace this logging mechanism with the Syslog of the server the site is running on. For the purposes of this book, we will focus on how logging works with any mechanism, but we will also look at how we can implement our own logging system.
The Drupal logging theory
Before going ahead with our example, let’s cover some theoretical notions regarding the logging framework in Drupal. In doing so, we’ll try to understand the key players we will need to interact with.
First, we have the LoggerChannel object, which represents a category of logged messages. Moreover, it is an object through which we do the actual logging, via logger plugins that are injected into it and which implement LoggerInterface (we will see about these in a minute). But for now, it’s enough to know that the logger channel also implements this interface and it simply delegates to the inner plugins that implement the same interface.
To this end, the logger channel is created by our second main player, LoggerChannelFactory, a service that is normally our main contact point with the logging framework as client code.
To understand these things better, let’s consider the following example of a simple usage:
Drupal::logger('hello_world')->error('This is my error
  message');
That’s it. We just used the available registered loggers to log an error message through the hello_world channel. This is our own custom channel that we just came up with on the fly and that simply categorizes this message as belonging to the hello_world category (the module we started in the previous chapter). Moreover, you’ll see that I used the static call for getting the logging service. Under the hood, the logger factory service is loaded, a channel is requested from it, and the error() method is called on that channel:
Drupal::service('logger.factory')->get('hello_world')->
  error('This is my error message');
When you request a channel from LoggerChannelFactory, you give it a name, and based on that name, the factory creates a new instance of LoggerChannel, which is the default channel class. The factory will then pass to that channel all the available loggers so that when we call any of the RfcLoggerTrait logging methods on it, it will delegate to each of the loggers to do the actual logging.
We also have the option of creating our own, more specific channel. An advantage of doing this is that we can inject it directly into our classes instead of the entire channel factory. Also, we can do it in a way where we don’t even require the creation of a new class, but it will inherit from the default one. We’ll see how to do that in the next section.
The third main player is the LoggerInterface implementation, which follows the PSR-3 standard and is responsible for doing the actual logging of the messages. This object has a number of methods to do so in different ways (different levels), but log() is the central one.
As an example, if we look at the DbLog class (which implements LoggerInterface and which is the database logging implementation we mentioned earlier) we note that it uses the RfcLoggerTrait. This trait is great cause it takes care of all the individual LoggerInterface methods, leaving DbLog to implement only log().
The LoggerInterface implementation (such as DbLog) is then registered as a service using the logger tag, which in turn means it gets registered with LoggerChannelFactory (which acts as a service collector).
As we saw in Chapter 2, Creating Your First Module, tags can be used to categorize service definitions and we can have them collected by another service for a specific purpose. In this case, all services tagged with logger have a standard “purpose”, and they are gathered and used by LoggerChannelFactory.
I know this has been quite a lot of theory, but these are some important concepts to understand. Don’t worry; as usual, we will go through some examples.
Our own logger channel
I mentioned earlier how we can define our own logger channel so that we don’t have to always inject the entire factory. So, let’s take a look at how to create one for the Hello World module we’re now writing.
Most of the time, all we have to do is add such a definition to the services definition file:
hello_world.logger.channel.hello_world:
  parent: logger.channel_base
  arguments: ['hello_world']
Before talking about the actual logger channel, let’s see what this weird service definition means, because this is not something we’ve seen before. I mean, where’s the class?
The parent key means that our service will inherit the definition from another service. In our case, the parent key is logger.channel_base, and this means that the class used will be DrupalCoreLoggerLoggerChannel (the default one). If we look closely at the logger.channel_base service definition in core.services.yml, we also see a factory key. This means that this service class is not being instantiated by the service container but by another service, namely the logger.factory service’s get() method.
The arguments key is also slightly different in that we don’t have the @ sign. That is because this sign is used to denote a service name, whereas our argument is a simple string. As a bonus tidbit, if the string is preceded and followed by a %, it denotes a parameter that can be defined in any *.services.yml file (like a variable).
Getting back to our example then, if you remember the logger theory, this service definition will mean that requesting this service will perform, under the hood, the following task:
Drupal::service('logger.factory')->get('hello_world');It uses the logger factory to load a channel with a certain argument. So, now we can inject our hello_world.logger.channel.hello_world service and call any of the LoggerInterface methods on it directly in our client code.
Our own logger
Now that we have a channel for our module, let’s assume that we also want to log messages elsewhere. They are fine to be stored in the database, but let’s also send an email whenever we encounter an error log. In this section, we will only cover the logging architecture needed for this and defer the actual mailing implementation to the second part of this chapter when we discuss mailing.
The first thing that we will need to create is the LoggerInterface implementation, which typically goes in the Logger folder of our namespace. So, let’s call ours MailLogger. And it can look like this:
namespace Drupalhello_worldLogger;
use DrupalCoreLoggerRfcLoggerTrait;
use PsrLogLoggerInterface;
/**
* A logger that sends an email when the log type is
  "error".
*/
class MailLogger implements LoggerInterface {
  use RfcLoggerTrait;
  /**
   * {@inheritdoc}
   */
  public function log($level, Stringable|string $message,
    array $context = []): void {
    // Log our message to the logging system.
  }
}
The first thing to note is that we are implementing the PSR-3 LoggerInterface. This will require a bunch of methods, but we will take care of most of them via the RfcLoggerTrait. The only one left to implement is the log() method, which will be responsible for doing the actual logging. For now, we will keep it empty.
By itself, having this class does nothing. We will need to register it as a tagged service so that LoggingChannelFactory picks it up and passes it to the logging channel when something needs to be logged. Let’s see what that definition looks like:
hello_world.logger.mail_logger:
  class: Drupalhello_worldLoggerMailLogger
  tags:
    - { name: logger }
As it stands, our logger doesn’t need any dependencies. However, note the property called tags with which we tag this service with the logger tag. This will register it as a specific service that another service (called a collector) looks for – just like we discussed in the previous chapter. In this case, the collector is LoggingChannelFactory.
Clearing the cache should enable our logger. This means that when a message is being logged, via any channel, our logger is also used, together with any other enabled loggers (by default, the database one). So, if we want our logger to be the only one, we will need to disable the DB Log module from Drupal core.
We will continue working on this class later in this chapter when we cover sending out emails programmatically.
Now that we have all the tools at our disposal, and more importantly, understand how logging works in Drupal, let’s add some logging to our module.
Logging for Hello World
There is one place where we can log an action that may prove helpful. Let’s log an info message when an administrator changes the greeting message via the form we wrote. This could happen at one of two moments: whenever the salutation configuration is changed or when the actual form is submitted. Technically, in this case, the former is the more appropriate one because this configuration could also be changed via the code (API), so it stands to reason that logging would be needed then as well. However, to keep things simpler, let’s handle it in the submit handler of SalutationConfigurationForm.
If you remember my rant in the previous chapter, there is no way we should use a service statically if we can instead inject it, and we can easily inject services into our form. So, let’s do this now.
First of all, FormBase already implements ContainerInjectionInterface, so we don’t need to implement it in our class, as we are extending from it somewhere down the line. Second of all, the ConfigFormBase class we are directly extending already has config.factory injected, so this complicates things for us a bit—well, not really. All we need to do is copy over the constructor and the create() methods, add our own service, store it in a property, and pass the services the parent needs to the parent constructor call. It will look like this:
/**
 * @var DrupalCoreLoggerLoggerChannelInterface
 */
protected $logger;
/**
 * SalutationConfigurationForm constructor.
 *
 * @param DrupalCoreConfigConfigFactoryInterface
   $config_factory
 *   The factory for configuration objects.
 * @param DrupalCoreLoggerLoggerChannelInterface
   $logger
 *   The logger.
 */
public function __construct(ConfigFactoryInterface
  $config_factory, LoggerChannelInterface $logger) {
  parent::__construct($config_factory);
  $this->logger = $logger;
}
/**
 * {@inheritdoc}
 */
public static function create(ContainerInterface
  $container) {
  return new static(
    $container->get('config.factory'),
    $container->get('hello_world.logger.
      channel.hello_world')
  );
}
And the relevant use statements at the top:
use DrupalCoreConfigConfigFactoryInterface;
use DrupalCoreLoggerLoggerChannelInterface;
use SymfonyComponentDependencyInjection
  ContainerInterface;
As you can see, we get all the services that any of the parents need, plus the one we want (the logger channel) via the create() method. Also, in our constructor, we store the channel as a property and then pass the parent arguments to the parent constructor. Now, we have our hello_world logger channel available in our configuration form class. So, let’s use it.
At the end of the submitForm() method, let’s add the following line:
$this->logger->info('The Hello World salutation has been
  changed to @message.', ['@message' => $form_state->
    getValue('salutation')]);
We are logging a regular information message. However, since we also want to log the message that has been set, we use the second argument, which represents an array of context values. Under the hood, the database logger will extract the context variables that start with @, !, or % with the values from the entire context array. This is done using the LogMessageParser service. If you implement your own logger plugin, you will have to handle this yourself as well—but we’ll see that in action soon.
And now we are done with logging a message when the salutation configuration form is saved.
Logging recap
In this first section, we saw how logging works in Drupal. Specifically, we covered a bit of theory so that you understand how things play together and you don’t just mindlessly use the logger factory without having a clue what goes on under the hood.
As examples, we created our own logging channel, which allows us to inject it wherever we need it without always having to go through the factory. We will use this channel going forward for the Hello World module. Additionally, we created our own logger implementation. It won’t do much now, except getting registered, but we will use it in the next section to send emails when errors get logged to the site.
Finally, we used the logging framework (and our channel) in the salutation configuration form to log a message whenever the form is submitted. In doing so, we also passed the message that was saved so that it also gets included in the log. This should already work with the database log, so go ahead and save the configuration form and then check the logging UI for that information message. We defined some new services, so make sure you clear the caches first if you haven’t already.
Now that we know how to log things in our application, let’s turn our attention to the Drupal Mail API.
Mail API
Our goal for this section is to see how we can send emails programmatically in Drupal. In achieving this goal, we will explore the default mail system that comes with the core installation (which uses PHP mail), but also create our own system that can theoretically use an external API to send mails. We won’t go all the way with the latter because it’s beyond the scope of this book. We will stop after covering what needs to be done from a Drupal point of view.
In the next and final section, we will look at tokens so that we can make our mailings a bit more dynamic.
The theory behind the Mail API
Like before, let’s first cover this API from a theoretical point of view. It’s important to understand the architecture before diving into examples.
Sending emails programmatically in Drupal is a two-part job. The first thing we need to do is define something of a template for the email in our module. This is not a template in the traditional sense, but rather a procedural data wrapper for the email you want to send. It’s referred to in code as the key or message ID, but I believe that template is a better word to describe it. And you guessed it, it works by implementing a hook.
The second thing that we will need to do is use the Drupal mail manager to send the email using one of the defined templates. If this sounds confusing, don’t worry—it will become clear with the example.
The template is created by implementing hook_mail(). This hook is a special one, as it does not work like most others. It gets called by the mail manager when a client (some code) is trying to send an email for the module that implements it.
The MailManager is a plugin manager that is also responsible for sending the emails using a mail system (plugin). The default mail system is PhpMail, which uses PHP’s native mail() function to send out emails. To create our own mail system means creating a new plugin. Also, the plugin itself is the one delivering the emails, the manager simply deferring to it. As you can see, we can’t go even a chapter ahead without creating plugins.
Each mail plugin needs to implement MailInterface, which exposes two methods—format() and mail(). The first one does the initial preparation of the mail content (message concatenation and so on), whereas the latter finalizes and sends it.
However, how does the mail manager know which plugin to use? It checks a configuration object called system.mail, which stores the default plugin (PhpMail) and can also store overrides for each individual module and any module and template ID combination. So, we can have multiple mail plugins each used for different things. A quirky thing about this configuration object is that there is no admin form where you can specify which plugin does what. You must adjust this configuration object programmatically as needed. One way you can manipulate this is via hook_install() and hook_uninstall() hooks. These hooks are used to perform some tasks whenever a module is installed/uninstalled. So, this is where we will change the configuration object to add our own mail plugin a bit later.
However, now that we have looked at a few bits of theory, let’s see how we can use the default mail system to send out an email programmatically. Do you remember our unfinished logger from the previous section? That is where we will send our email whenever the logged message is an error.
Implementing hook_mail()
As I mentioned earlier, the first step for sending mail in Drupal is implementing hook_mail(). In our case, it can look something like this:
/**
 * Implements hook_mail().
 */
function hello_world_mail($key, &$message, $params) {
  switch ($key) {
    case 'hello_world_log':
      $message['from'] = Drupal::config('system.site')->
        get('mail');
      $message['subject'] = t('There is an error on your
        website');
      $message['body'][] = $params['message'];
      break;
  }
}
This hook receives three parameters:
- The message key (template) that is used to send the mail
- The message of the email that needs to be filled in
- An array of parameters passed from the client code
As you can see, we are defining a key (or template) named hello_world_log, which has a simple static subject, and as a body, it will have whatever comes from the $parameters array in its message key. Since the From email is always the same, we will use the site-wide email address that can be found in the system.site configuration object. You’ll note that we are not in a context where we can inject the configuration factory as we did when we built the form. Instead, we can use the static helper to load it.
Additionally, you’ll notice that the body is itself an array. This is because we can build (if we want) multiple items in that array that can later be imploded as paragraphs in the mail plugin’s format() method. This is in any case what the default mail plugin does, so here we need to build an array.
Another useful key in the $message array is the header key, which you can use to add some custom headers to the mail. In this case, we don’t need to because the default PhpMail plugin adds all the necessary headers. If we write our own mail plugin, we can then add our headers in there as well—and all other keys of the $message array for that matter. This is because the $message array is passed around as a reference, so it keeps getting built up in the process, from the client call to the hook_mail() implementation, to the plugin.
That is about all we need to do with hook_mail(). Let’s now see how to use this in order to send out an email.
Sending emails
We wanted to use our MailLogger to send out an email whenever we are logging an error. So let’s go back to our class and add this logic.
This is how we can start our log() method:
/**
 * {@inheritdoc}
 */
public function log($level, Stringable|string $message,
  array $context = []): void {
  if ($level !== RfcLogLevel::ERROR) {
    return;
  }
  $to = $this->configFactory->get('system.site')->
    get('mail');
  $langcode = $this->configFactory->get('system.site')->
    get('langcode');
  $variables = $this->parser->parseMessagePlaceholders
    ($message, $context);
  $markup = new FormattableMarkup($message, $variables);
  Drupal::service('plugin.manager.mail')->
    mail('hello_world', 'hello_world_log', $to, $langcode,
      ['message' => $markup]);
}
First, we said that we only want to send mails for errors, so in the first lines, we check whether the attempted log is of that level and return early otherwise. In other words, we don’t do anything if we’re not dealing with an error and rely on other registered loggers for those.
Next, we determine who we want the email to be sent to and the langcode to send it in (both are mandatory arguments of the mail manager’s mail() method). We opt to use the site-wide email address (just as we did for the From value). We use the same configuration object as we used earlier in the hook_mail() implementation. Don’t worry—we will shortly take care of injecting the config factory into the class.
Note
When we talk about langcode, we refer to the machine name of a language object. In this case, that is what is being stored for the site-wide default language. Also, we’ll default to that for our emails. In a later chapter, we will cover more aspects regarding internationalization in Drupal.
Then, we prepare the message that is being sent out. For this, we use the FormattableMarkup helper class to which we pass the message string and an array of variable values that can be used to replace the placeholders in our message. We can retrieve these values using the LogMessageParser service the same way as the DbLog logger does. So, with this, we are basically extracting the placeholder variables from the entire context array of the logged message.
Lastly, we use the mail plugin manager to send the email. The first parameter to its mail() method is the module we want to use for the mailing. The second is the key (or template) we want to use for it (which we defined in hook_mail()). The third and fourth are self-explanatory, while the fifth is the $params array we encountered in hook_mail(). If you look back at that, you’ll notice that we used the message key as the body. Here, we populate that key with our markup object, which has a _toString() method that renders it with all the placeholders replaced.
You may wonder why I did not inject the Drupal mail manager as I did the rest of the dependencies. Unfortunately, the core mail manager uses the logger channel factory itself, which in turn depends on our MailLogger service. So, if we make the mail manager a dependency of the latter, we find ourselves in a circular loop. So, when the container gets rebuilt, a big fat error is thrown. It might still work, but it’s not right. So, I opted to use it statically, because, in any case, this method is very small and would be difficult to test due to its expected result being difficult to assert (it sends an email). Sometimes, you have to make these choices, as the alternative would have been to inject the entire service container just to trick it. However, that is a code smell and would not have helped anyway had I wanted to write a test for this class.
Even if I did not inject the mail manager, I did inject the rest. So, let’s look at what we need now at the top of the class:
/**
 * @var DrupalCoreLoggerLogMessageParserInterface
 */
protected $parser;
/**
 * @var DrupalCoreConfigConfigFactoryInterface
 */
protected $configFactory;
/**
 * MailLogger constructor.
 *
 * @param DrupalCoreLoggerLogMessageParserInterface
     $parser
 * @param DrupalCoreConfigConfigFactoryInterface
     $config_factory
 */
public function __construct(LogMessageParserInterface
  $parser, ConfigFactoryInterface $config_factory) {
  $this->parser = $parser;
  $this->configFactory = $config_factory;
}
And finally, all the relevant use statements that we were missing:
use DrupalCoreLoggerLogMessageParserInterface;
use DrupalCoreConfigConfigFactoryInterface;
use DrupalComponentRenderFormattableMarkup;
use DrupalCoreLoggerRfcLogLevel;
Finally, let’s quickly also adjust the service definition of our mail logger:
hello_world.logger.mail_logger:
  class: Drupalhello_worldLoggerMailLogger
  arguments: ['@logger.log_message_parser',
    '@config.factory']
  tags:
    - { name: logger }
We simply have two new arguments—nothing new to you by now.
Clearing the caches and logging an error should send the logged message (with the placeholders replaced) to the site email address (and from the same address) using the PHP native mail() function. Congratulations! You just sent out your first email programmatically in Drupal.
Altering someone else’s emails
Drupal is powerful not only because it allows us to add our own functionality but also because it allows us to alter existing functionality. An important vector for doing this is the alter hooks system. Remember those from Creating Your First Module? These are hooks that are used to change the value of an array or object before it is used for whatever purpose it was going to be used for. When it comes to sending emails, we have an alter hook that allows us to change things on the mail definition before it goes out: hook_mail_alter(). For our module, we don’t need to implement this hook. However, for the sake of making our lesson complete, let’s see how we could use this hook to, for example, change the header of an existing outgoing email:
/**
 * Implements hook_mail_alter().
 */
function hello_world_mail_alter(&$message) {
  switch ($message['key']) {
    case 'hello_world_log':
      $message['headers']['Content-Type'] = 'text/html;
        charset=UTF-8; format=flowed; delsp=yes';
      break;
  }
}
So, what is going on here? This hook implementation gets called in each module it is implemented in. It’s not like hook_mail() in this respect as it allows us to alter emails sent from any module. However, in our example, we will just alter the mail we defined earlier.
The only parameter (passed by reference as is usual with alter hooks) is the $message array, which contains all the things we built in hook_mail(), as well as the key (template) and other things added by the mail manager itself, such as the headers. So, in our example, we are setting an HTML header so that whatever is getting sent out could be rendered as HTML. After this hook is invoked, the mail system formatter is also called, which, in the case of the PhpMail plugin, transforms all HTML tags into plain text, essentially canceling out our header. However, if we implement our own plugin, we can prevent that and successfully send out HTML emails with proper tags and everything.
So, that is basically all there is to altering existing outgoing mail. Next, we will see how we can create our own mail plugin that uses a custom external mail system. We won’t go into detail here, but we will prepare the architecture that will allow us to bring in the API we need and use it easily.
Custom mail plugins
In the previous section, we saw how we can use the Drupal mail API to send emails programmatically. In doing so, we used the default PHP mailer, which although is good enough for our example, might not be good enough for our application. For example, we might want to use an external service via an API.
In this section, we will see how this works. To this end, we will write our own mail plugin that does just that, and then simply tell Drupal to use that system instead of the default one. Yet another plugin-based, non-invasive, extension point.
Before we start, I would like to mention that we won’t go into any kind of detail related to the potential external API. Instead, we will stop at the Drupal-specific parts, so the code you will find in the repository won’t do much—it will be used as an example only. It’s up to you to use this technique if you need to.
The mail plugin
Let’s start by creating our Mail plugin class, and if you remember, plugins go inside the Plugin folder of our module namespace. And mail plugins belong inside a Mail folder. This is what a simple skeleton mail plugin class can look like:
namespace Drupalhello_worldPluginMail;
use DrupalCoreMailMailFormatHelper;
use DrupalCoreMailMailInterface;
use DrupalCorePluginContainerFactoryPluginInterface;
use SymfonyComponentDependencyInjection
  ContainerInterface;
/**
 * Defines the Hello World mail backend.
 *
 * @Mail(
 *   id = "hello_world_mail",
 *   label = @Translation("Hello World mailer"),
 *   description = @Translation("Sends an email using an
       external API specific to our Hello World module.")
 * )
 */
class HelloWorldMail implements MailInterface,
  ContainerFactoryPluginInterface {
  /**
   * {@inheritdoc}
   */
  public static function create(ContainerInterface
    $container, array $configuration, $plugin_id,
      $plugin_definition) {
    return new static();
  }
  /**
   * {@inheritdoc}
   */
  public function format(array $message) {
    // Join the body array into one string.
    $message['body'] = implode("

", $message['body']);
    // Convert any HTML to plain-text.
    $message['body'] = MailFormatHelper::htmlToText
      ($message['body']);
    // Wrap the mail body for sending.
    $message['body'] = MailFormatHelper::wrapMail
      ($message['body']);
    return $message;
  }
  /**
   * {@inheritdoc}
   */
  public function mail(array $message) {
    // Use the external API to send the email based on the
       $message array
    // constructed via the `hook_mail()` implementation.
  }
}
As you can see, we have a relatively easy plugin annotation; no unusual arguments there. Then, you will note that we implemented the mandatory MailInterface, which comes with the two methods implemented in the class.
I mentioned the format() method earlier and said that it’s responsible for doing certain processing before the message is ready to be sent. Our implementation is a copy from the PhpMail plugin to exemplify just what kind of task would go there. However, you can do whatever you want in here, for example, allow HTML tags. Imploding the body is something you will probably want to do anyway, as it is kind of expected that the mail body is constructed as an array by hook_mail().
The mail() method, on the other hand, is left empty. This is because it’s up to you to use the external API to send the email. For this, you can use the $message array we encountered in the hook_mail() implementation.
Lastly, note that ContainerFactoryPluginInterface is another interface that our class implements. If you remember, that is what plugins need to implement in order for them to become container-aware (for the dependencies to be injectable). Since this was only example code, it doesn’t have any dependencies, so I did not include a constructor and left the create() method empty. Most likely, you will have to inject something, such as a PHP client library that works with your external API. So, it doesn’t hurt to see this again.
That is pretty much it for our plugin class. Now, let’s see how we can use it because for the moment, our hello_world_log emails are still being sent with the default PHP mailer.
Using mail plugins
As I mentioned earlier, there is no UI in Drupal to select which plugin the mail manager should use for sending emails programmatically. It figures it out inside the getInstance() method by checking the system.mail configuration object, and more specifically, the interface key inside that (which is an array).
By default, this array contains only one record, that is, 'default' => 'php_mail'. That means that, by default, all emails are sent with the php_mail plugin ID. In order to get our plugin in the mix, we have a few options:
- We can replace this value with our plugin ID, which means that all emails will be sent with our plugin.
- We can add a new record with the key in the module_name_key_name format, which means that all emails sent for a module with a specific key (or template) will use that plugin.
- We can add a new record with the key in the module_name format, which means that all emails sent for a module will use that plugin (regardless of their key).
For our example, we will set all emails sent from the hello_world module to use our new plugin. We can do this using the hook_install() implementation, which runs whenever the module is installed.
Install (and uninstall) hooks need to go inside a .install PHP file in the root of our module. So this next function goes inside a new hello_world.install file. Also, if our module has already been enabled, we will need to first uninstall it and then install it again to get this function to fire:
/**
 * Implements hook_install().
 */
function hello_world_install($is_syncing) {
  if ($is_syncing) {
    return;
  }
  $config = Drupal::configFactory()->
    getEditable('system.mail');
  $mail_plugins = $config->get('interface');
  if (in_array('hello_world', array_keys($mail_plugins))) {
    return;
  }
  $mail_plugins['hello_world'] = 'hello_world_mail';
  $config->set('interface', $mail_plugins)->save();
}
The first thing we do is check whether the module is installed as part of a configuration sync, and if it is, we do nothing. There are two main reasons for this. First, when modules are installed as part of a configuration sync (such as deployment to another environment), we cannot rely on what configuration has already been imported. Second, the assumption is that when we install this module locally via normal means and then export the site configuration to files, the configuration change we make will be exported as well. So, when we sync this configuration on another environment, our changes will be reflected. We will talk more about configuration later.
Next, we load the configuration object as editable (so we can change it), and if we don’t yet have a record with hello_world in the array of mail plugins, we set it and map our plugin ID to it. Lastly, we save the object.
The opposite of this function is hook_uninstall(), which goes in the same file and—expectedly—gets fired whenever the module is uninstalled. Since we don’t want to change a site-wide configuration object and tie it to our module’s plugin, we should implement this hook as well. Otherwise, if our module gets uninstalled, the mail system will fail because it will try to use a nonexistent plugin. So, let’s tie up our loose ends:
/**
 * Implements hook_uninstall().
 */
function hello_world_uninstall($is_syncing) {
  if ($is_syncing) {
    return;
  }
  $config = Drupal::configFactory()->
    getEditable('system.mail');
  $mail_plugins = $config->get('interface');
  if (!in_array('hello_world', array_keys($mail_plugins)))
  {
    return;
  }
  unset($mail_plugins['hello_world']);
  $config->set('interface', $mail_plugins)->save();
}
As you can see, what we did here is basically the opposite. If the record we set previously exists, we unset it and save the configuration object. And the same logic about the configuration sync applies equally.
So now, any mails sent programmatically for the hello_world module will use this plugin. Easy, right? However, since the plugin we wrote is not ready, the code you find in the repository will have the relevant line from the hook_install() implementation commented out so that we don’t actually use it.
Note
If you are following along, in order to get the hook_install() hook fired, you need to first uninstall the hello_world module and install it back.
Mail API recap
In this section, we talked about the mail API by covering some theoretical aspects first, as we are already starting to get used to it. We saw what modules need to have in order to send out emails and how we can alter emails being sent by other modules we don’t control. Finally, we saw how extendable the mail system is using plugins and how we can write our own to control exactly how and what mechanism we use for sending out emails.
Let’s now switch gears and talk about tokens and why they are important for us as module developers.
Tokens
The last thing we will cover in this chapter is the Token API in Drupal. We will cover a few bits of theory and, as usual, demonstrate them via examples on our existing Hello World module code. We will do this in the context of the emails we are sending out for error logs.
It would be nice if we could include some personalized information in the mail text without having to hardcode it in the module code or configuration. For example, in our case, we might want to include the username of the current user that is triggering the error log that is being emailed.
Let’s first understand how the Token API works, before going into our Hello World module.
The Token API
Tokens in Drupal are a standard formatted placeholder, which can be found inside a string and replaced by a real value extracted from a related object. The format they use is type:token, where type is the machine-readable name of a token type (a group of related tokens), and token is the machine-readable name of a token within this group.
The power of the Token API in Drupal is not only given by its flexibility but also by the fact that it is already a popular API. It is flexible because you can define groups that contain related tokens, linked by the data object that contains their value (for example, a node object or user object). It is popular because in previous versions of Drupal, it was the contributed module many others were dependent on to define their own tokens, and it is now available in Drupal core with many tokens already defined out of the box. So, you’ll find many existing tokens that you can use in your code, and if not, you can define your own.
There are three main components of this API—at least from the point of view of a Drupal module developer. These components are two hooks—hook_token_info() and hook_tokens()—and the Token service, which is used to perform the replacement.
The first hook is used to define one or more token types and tokens. It essentially registers them with the system. The second is fired when a token is found inside a string (a replacement is attempted by the service) and is used to do the replacement of the tokens based on the data that is passed to it from the service. For example, the User module defines two token types and a number of tokens using user_token_info(). With user_tokens(), it checks whether the token is one of its own and tries to replace it with the contextual data (either a user object or the currently logged-in account object). To read the documentation related to each of these in detail and to see an extended example, you can find them either on the Drupal.org API page or inside the token.api.php file. There, you will also find alter hooks that correspond to these two and can be used to alter either the defined token information or logic to replace these tokens written by other modules or Drupal core.
The Token service is what we can use as module developers if we have to replace tokens found inside a string. We will see how this is used in the next section.
Using tokens
To quickly demonstrate how we can use tokens, let’s include in our hello_world_log mails some information about the current user at the time the email is being sent out. This will naturally coincide with the user that is signed in at the time the error is being logged.
For this, we will need to alter our hook_mail() implementation. In there, we will use the current_user service, add another string to our mail body, and, of course, replace a token:
/**
 * Implements hook_mail().
 */
function hello_world_mail($key, &$message, $params) {
  switch ($key) {
    case 'hello_world_log':
      $message['from'] = Drupal::config('system.site')->
        get('mail');
      $message['subject'] = t('There is an error on your
         website');
      $message['body'][] = $params['message'];
      $user_message = 'The user that was logged in:
        [current-user:name].';
      $message['body'][] = Drupal::token()->
        replace($user_message, ['current-user' =>
          Drupal::currentUser()]);
      break;
  }
}
As you can see, we are adding a new “paragraph” to our email. This is a simple string that informs us about the user that was logged in. However, in doing so, we use the Token service (statically) to replace that piece of string with the token value. The replace() method of the service takes a string and optionally an array of data objects keyed by the type (group) of the tokens they should be used for.
The choice of token and type in this case is important. The User module defines the user and current-user types. The difference between the two, if you check inside user_tokens(), is that the latter simply delegates to the former after it loads a full user entity. We could, alternatively, have done that ourselves and then passed the user type, but why should we? If somebody has done that for us already, we should not have to do it again. And what we pass to the current-user token type as a data object to be used in the replacement process is the AccountProxy (current user session).
So, that’s it. Now, the email message will get an extra line that contains the dynamically generated username of the currently logged-in user at the time the error happened. Under the hood, the Token service scans the string, extracts the token, and calls all hook_tokens() implementations. The User module is the one that can return the replacement for this token based on the user object it receives.
Defining new tokens
We just saw how we can programmatically use existing tokens inside our strings and get them replaced with minimal effort. All we need is the token service and the data object that can be used to replace the token. Keep in mind that there are tokens that don’t even require any data objects due to their global nature. The hook_tokens() implementation will take care of that—let’s see how.
In the previous chapter, we created functionalities for a dynamic Hello World message: either calculated on the fly or loaded from a configuration object. How about we expose that message as a token? That would make its usage more flexible because our string becomes exposed to the entire token system.
As mentioned earlier, we will start with the hook_token_info() implementation:
/**
 * Implements hook_token_info().
 */
function hello_world_token_info() {
  $type = [
    'name' => t('Hello World'),
    'description' => t('Tokens related to the Hello World
      module.'),
  ];
  $tokens['salutation'] = [
    'name' => t('Salutation'),
    'description' => t('The Hello World salutation
      value.'),
  ];
  return [
    'types' => ['hello_world' => $type],
    'tokens' => ['hello_world' => $tokens],
  ];
}
In here, we will need to define two things—the types and the tokens. In our case, we are defining one of each. The type is hello_world and comes with a human-readable name and description in case it needs to be rendered somewhere in the UI. The token is salutation and belongs to the hello_world type. It also gets a name and description. In the end, we return an array that contains both.
What follows is the hook_tokens() implementation in which we handle the replacement of our token:
/**
 * Implements hook_tokens().
 */
function hello_world_tokens($type, $tokens, array $data, array $options, BubbleableMetadata $bubbleable_metadata) {
  $replacements = [];
  if ($type == 'hello_world') {
    foreach ($tokens as $name => $original) {
      switch ($name) {
        case 'salutation':
          $replacements[$original] = Drupal::service
            ('hello_world.salutation')->getSalutation();
          $config = Drupal::config
            ('hello_world.custom_salutation');
          $bubbleable_metadata->addCacheableDependency
            ($config);
          break;
      }
    }
  }
  return $replacements;
}
There is a bit more going on here, but I’ll explain everything. This hook gets fired whenever a replacement of tokens is attempted on a string. And it’s fired for each type that has been found inside that string, $type being the first argument. Inside $tokens, we get an array of tokens located in that string, which belong to $type. The $data array contains the objects needed to replace the tokens (and passed to the replace() method), keyed by the type. This array can be empty (as it will be in our case).
Inside the function, we loop through each token of this group and try to replace it. We only know of one, and we use our HelloWorldSalutation service to determine the replacement string.
Finally, the function needs to return an array of all replacements found (which can be multiple if multiple tokens of the same type are found inside a string).
The bubbleable_metadata parameter is a special cache metadata object that describes this token in the cache system. It is needed because tokens get cached, so if any dependent object changes, the cache needs to be invalidated for this token as well. By default, all objects inside the $data array are read and included in this object. However, in our case, it is empty, yet we still depend on a configuration object that can change—the one that stores the overridden salutation message. So, we will need to add a dependency on that configuration object even if the actual value for the salutation we compute uses the same HelloWorldSalutation service we used before. So, we have a simple example here, but with a complex twist. We will talk more about caching later in the book.
That’s all there is to defining our token. It can now also be used inside strings and replaced using the Token service. Something like this:
$final_string = Drupal::token()->replace('The salutation
  text is: [hello_world:salutation]');
As you can see, we pass no other parameters. If our token was dependent on an entity object, for example, we would have passed it in the second parameter array and made use of it inside hook_tokens() to compute the replacement.
Tokens recap
The token system is an important part of Drupal because it allows us to easily transform raw data into useful values using placeholder strings. It is a widely used and flexible system that many contributed modules build upon. The great thing about tokens is the UI component. There are modules that will allow users to define strings in the UI which contain tokens that can be replaced by the system. Also, this is something you can do as a module developer.
Summary
In this chapter, we discussed many things. We saw how logging works in Drupal, how the mail API can be used programmatically (and extended), and how the token system can be employed to make our text more dynamic.
While going through this chapter, we also enriched our Hello World module. So, apart from understanding the theory about logging, we created our own logging channel service and logger plugin. For the latter, we decided to send out emails when log messages were of the error type. In doing this, we looked at the Mail API and how we can use it programmatically. We saw that, by default, PHP’s native mail() function is used to send out emails. But we can create our own plugin very easily in order to use whatever external service we want—yet another great example of extensibility via plugins.
Lastly, we looked at tokens in Drupal. We saw what components make up the API, how we can programmatically use existing tokens (replace them with the help of contextual data), and how we can define our own tokens for others to use. These are the main tenets of extensibility (and sharing)—using something someone else has exposed to you and exposing something for someone else to use.
In the next chapter, we will look at another great topic—theming.