TOOLS & MATERIALS
Graphite pencil artwork requires few supplies, and fortunately they are fairly inexpensive. Choose professional pencils and paper, rather than student-grade materials; they will last longer and ensure a higher-quality presentation.

Pencils
Pencils are labeled based on their lead texture. Hard leads (H) are light in value and great for fine, detailed work, but they are more difficult to erase. Soft leads (B) are darker and wonderful for blending and shading, but they smudge easily. Medium leads, such as HB and F, are somewhere in the middle. Select a range of pencils between HB and 6B for variety. You can purchase wood-encased pencils or mechanical pencils with lead refills.
Wooden Pencil The most common type of pencil is wood-encased graphite. These thin rods—most often round or hexagonal when cut crosswise—are inexpensive, easy to control and sharpen, and readily available to artists.
Flat Carpenter’s Pencil Some artists prefer using a flat carpenter’s pencil, which has a rectangular body and lead. The thick lead allows you to easily customize its shape to create both thick and thin lines.

Carpenter’s Pencil
Mechanical Pencil Mechanical pencils are plastic or metal barrels that hold individual leads. Some artists prefer the consistent feel of mechanical pencils to that of wooden pencils; the weight and length do not change over time, unlike wooden pencils that wear down with use.

Mechanical Pencil
Woodless Graphite Pencil These tools are shaped like wooden pencils but are made up entirely of graphite lead. The large cone of graphite allows artists to use either the broad side for shading large areas or the tip for finer strokes and details.

Woodless Pencil
Graphite Stick Available in a full range of hardnesses, these long, rectangular bars of graphite are great tools for sketching (using the end) and blocking in large areas of tone (using the broad side).

Graphite Stick
Paper
Paper has a tooth, or texture, that holds graphite. Papers with more tooth have a rougher texture and hold more graphite, which allows you to create darker values. Smoother paper has less tooth and holds less graphite, but it allows you to create much finer detail. Plan ahead when beginning a new piece, and select paper that lends itself to the textures in your drawing subject.

Blending Tools
There are several tools you can use to blend graphite for a smooth look. The most popular blenders are blending stumps, tortillons, and chamois cloths. Never use your finger to blend—it can leave oils on your paper, which will show after applying graphite.
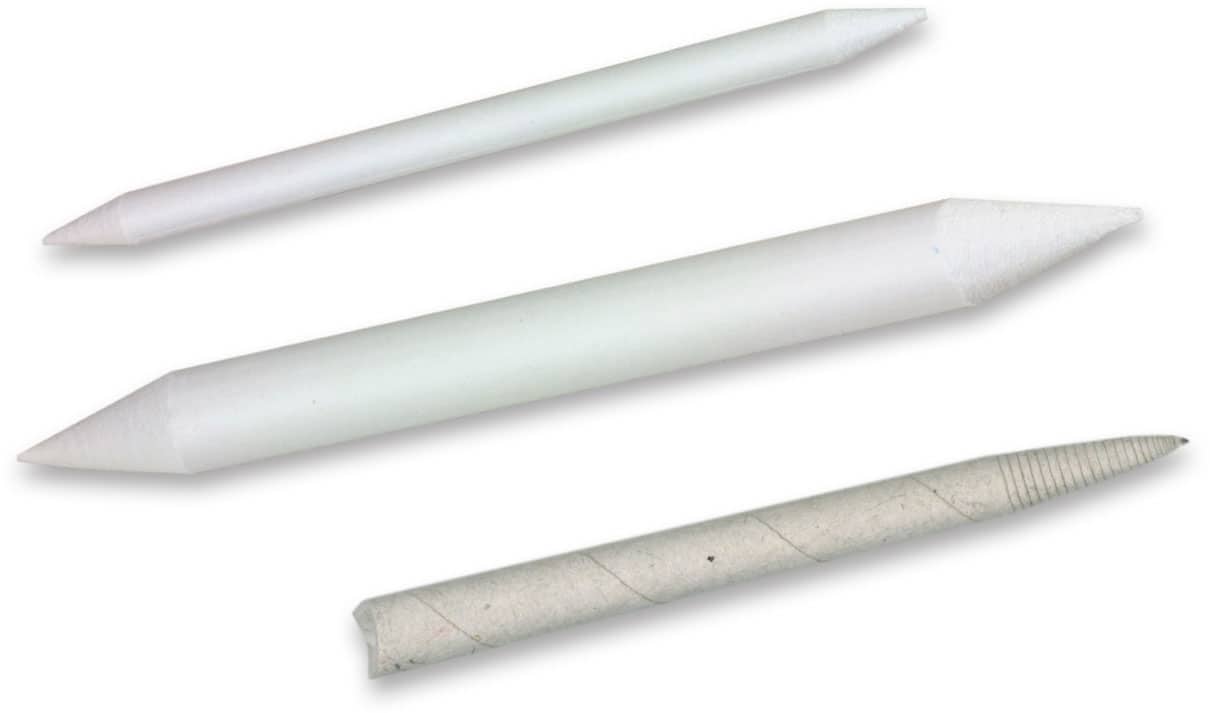
Stumps Stumps are tightly rolled paper with points on both ends. They come in various sizes and are used to blend large and small areas of graphite, depending on the size of the stump. You can also use stumps dipped in graphite shavings for drawing or shading.
Tortillons Tortillons are rolled more loosely than a stump. They are hollow and have one pointed end. Tortillons also come in various sizes and can be used to blend smaller areas of graphite.
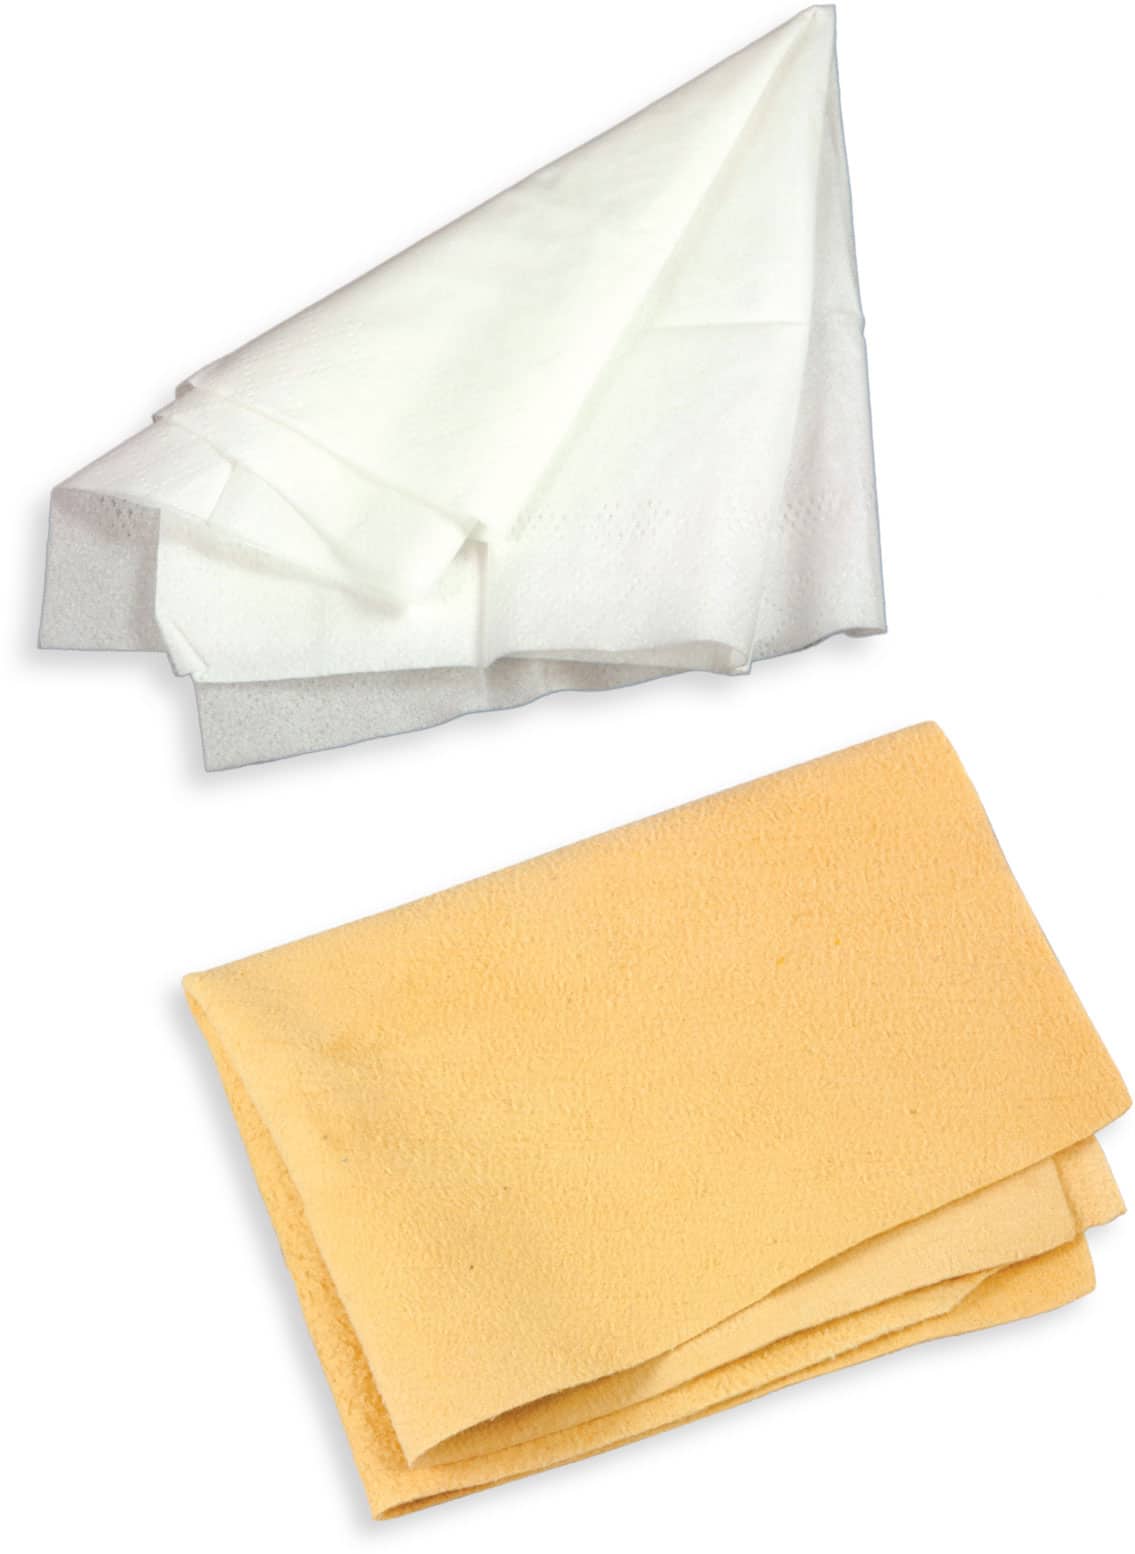
Facial Tissue Wrap tissue around your finger or roll it into a point to blend when drawing very smooth surfaces. Make sure you use plain facial tissue, without added moisturizer.
Chamois Chamois are great for blending areas into a soft tone. These cloths can be used for large areas or folded into a point for smaller areas. When the chamois becomes embedded with graphite, simply throw it into the washer or wash by hand. Keep one with graphite on it to create large areas of light shading. To create darker areas of shading, add graphite shavings to the chamois.
Erasers
Erasers serve two purposes: to eliminate unwanted graphite and to “draw” within existing graphite. There are many different types of erasers available.
Kneaded This versatile eraser can be molded into a fine point, a knife-edge, or a larger flat or rounded surface. It removes graphite gently from the paper but not as well as vinyl or plastic erasers.
Block Eraser A plastic block eraser is fairly soft, removes graphite well, and is very easy on your paper. Use it primarily for erasing large areas, but it also works quite well for doing a final cleanup of a finished drawing.
Stick Eraser Also called “pencil erasers,” these handy tools hold a cylindrical eraser inside. You can use them to erase areas where a larger eraser will not work. Using a utility razor blade, you can trim the tip at an angle or cut a fine point to create thin white lines in graphite. It’s like drawing with your eraser!

SHADING TECHNIQUES
The key to transforming flat, simple shapes into convincing, lifelike forms is employing a variety of shading techniques. These contrasts in value (the relative lightness or darkness of a color or of black) are what give depth and form to your drawings.
Creating Depth
Separating the dark values of your shading from the light areas and highlights of your drawing helps produce a sense of depth and volume. When creating highlights, you can either “save” the white of the paper by leaving areas of the paper white, or you can “retrieve” highlights by pulling out the value—removing graphite from the paper using the edge of a kneaded eraser that has been formed to a point. Value tells us more about a form than its outline does, so use a variety of techniques to create a range of shades and highlights.

Seeing Values This value scale shows the gradation from black—the darkest value—through various shades of gray, ending with white—the lightest value.

Shading to Create Form Shading must be added to create the illusion of depth. The plain circle to the left is simply a flat disk; but adding shading gives it form, creating a three-dimensional sphere.

As you shade, follow the angle of the object’s surface, and blend to allow the texture to emerge.
Practicing Basic Techniques
By studying the basic shading techniques below, you can learn to render everything from a smooth complexion and straight hair to shadowed features and simple backgrounds. Whatever techniques you use, though, remember to shade evenly. Shading in a mechanical side-to-side direction, with each stroke ending below the last, can create unwanted bands of tone throughout the shaded area. Instead try shading evenly, in a back-and-forth motion over the same area, varying the spot where the pencil point changes direction.
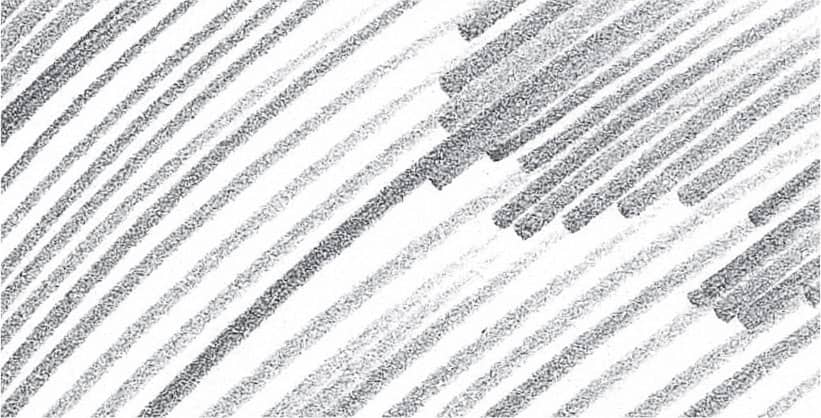
Hatching Hatching is a shading technique in which you make a series of parallel strokes placed closely together.

Crosshatching Crosshatching is a shading technique in which you make a series of crisscrossed hatching strokes.

Gradating To create graduated values (from dark to light), apply heavy pressure with the side of your pencil, gradually lightening the pressure as you stroke.

Blending To smooth out the transitions between strokes and create a dark, solid tone, gently rub the lines with a blending stump or tissue.
SURFACES & TEXTURES
A variety of techniques can be employed to help render the surfaces and textures found in landscapes. Use a razor blade or knife to sharpen leads into uneven or jagged points; these points create unique lines, textures, and patterns. Try changing the direction of your strokes, as well as the angle you hold the pencil, to vary line thickness.

Use an HB pencil to draw a simple outline of the subject. Then sketch the smaller areas within the foliage. With continuous circular strokes, bring out the tiny tree leaf edges.

To create contrast between the foliage and the background, shade the background with uniform vertical strokes.

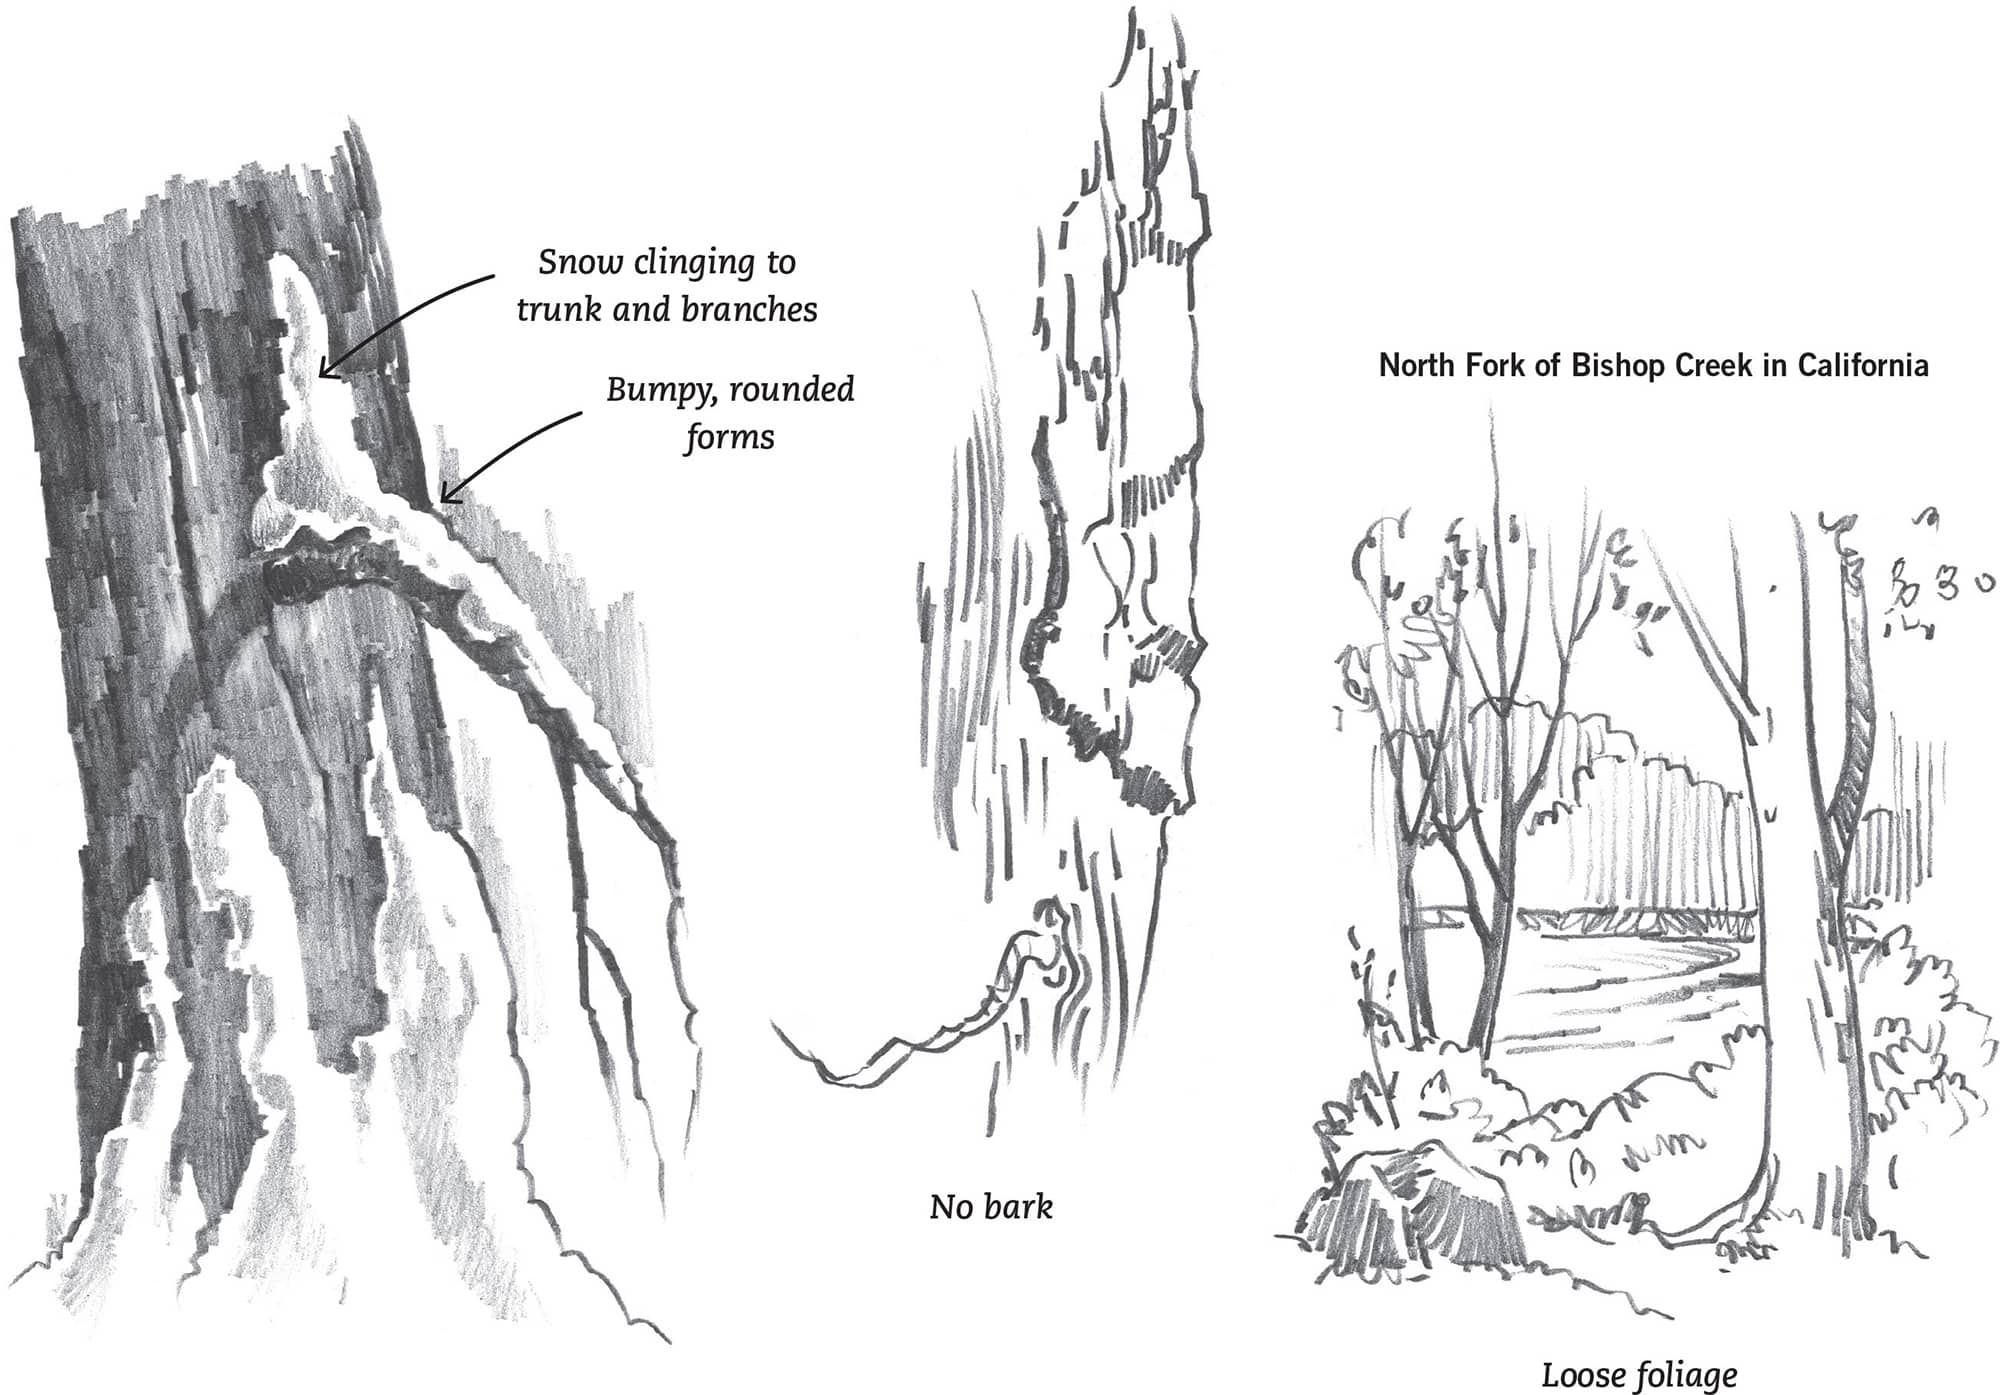
Notice that the light source is almost directly above this smooth fallen tree. The higher the light source, the shorter the shadow will be; the lower the light source, the longer the shadow will be.

Apply shading strokes in various directions to bring out the rounded form and rugged texture.
Make the cast shadows the darkest, smoothest areas of your drawing.

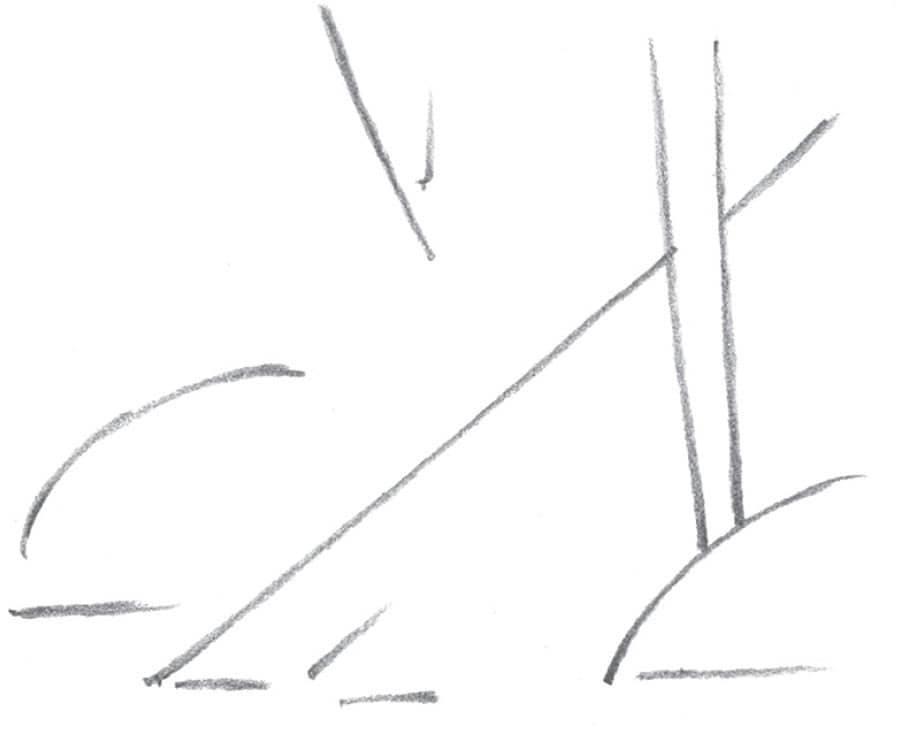
When you shade, make your strokes correspond with the form of the objects. The arrows indicate the directions to apply shading.

Shading strokes should follow the twisting and curving arrows shown in the water.
DRAWING PRACTICE
When drawing landscapes, it’s important to be patient. Observe your subjects, reducing them to the most basic angles, lines, and shapes. When you begin to draw, follow the same process each time. First sketch some simple lines, and then refine the shapes and add details. Finally, add the rest of the details and shading.

Notice how the vertical and diagonal shading lines create surface planes. The vertical lines make a flat surface, while the diagonal ones produce the slanting mountainsides.


The final sketch shows more details and provides a good study of line variation.
The thin, vertical strokes communicate tree shapes; uneven strokes create the full bushes; and uniform, angled lines bring out the mountain planes.

No matter the subject, start each drawing by sketching general shapes and lines.
Refine the shapes.

Begin adding details.

Shade to create form.

Add final details. Keep your shading simple.
Begin each drawing by observing your subjects and reducing them to the most basic angles, lines, and shapes.

Refine shapes into outlines of more recognizable objects.

Add some minimal shading to the darkest areas, or shadows, around the landscape.

Add the details, such as foliage and texture. Don’t try to reproduce every single leaf or crack; most of these details can be suggested through light and dark shading.
FINDING SUBJECTS
Landscape subjects are all around—in vacation snapshots, your backyard, or even the local park. Always look for landscapes to draw, and carry a pencil and sketchbook or small pad wherever you go. If you see an interesting landscape, quickly make a rough thumbnail sketch; it will help jog your memory later for a more detailed drawing.

Take many snapshots as you travel. They will make great references for landscape drawings.

Make sketches and notes of landscape elements; they will be helpful when you’re working on a final rendering.

If you make a sketch of a completed work or photo, give credit to the original artist or photographer, as shown in the practice sketch below.

Note an approximate tree height, trunk color, or other specific details. Your works will be more realistic if you take the time to do this.
These sketches were made from many beautiful locations. The notes written next to them are a reminder of important details to include in future landscape drawings.
COMPOSITION
When drawing, be sure to arrange the elements in a way that creates a pleasing design, or composition. The overall design is determined by the placement of different shapes and lines. The composition should direct the viewer’s attention to the most important area of the drawing.

The background, middle ground, and foreground do not have to take up equal space in a composition.


Overlapping subjects, such as trees, helps create a feeling of depth in a composition.

In this sketch, the elements direct the eye to the center by subtly “framing” that area.

The wide horizontal landscape illustrates what is known as a panoramic view.

PERSPECTIVE
The technique used to represent depth or three-dimensional objects on a flat surface is based on the principle of perspective. The rules of perspective are guides for keeping objects in proper proportion to one another in a composition.


The illusion of depth in the line drawing below is obvious in this line drawing; the road narrows as it travels back into the distance, and the hills overlap each other.
For the road, draw two relatively straight lines that move closer together as they recede.

The trees and bushes that surround the church make it appear far away. Study the arrow directions in the foreground; they help illustrate the correct perspective lines along the ground plane.
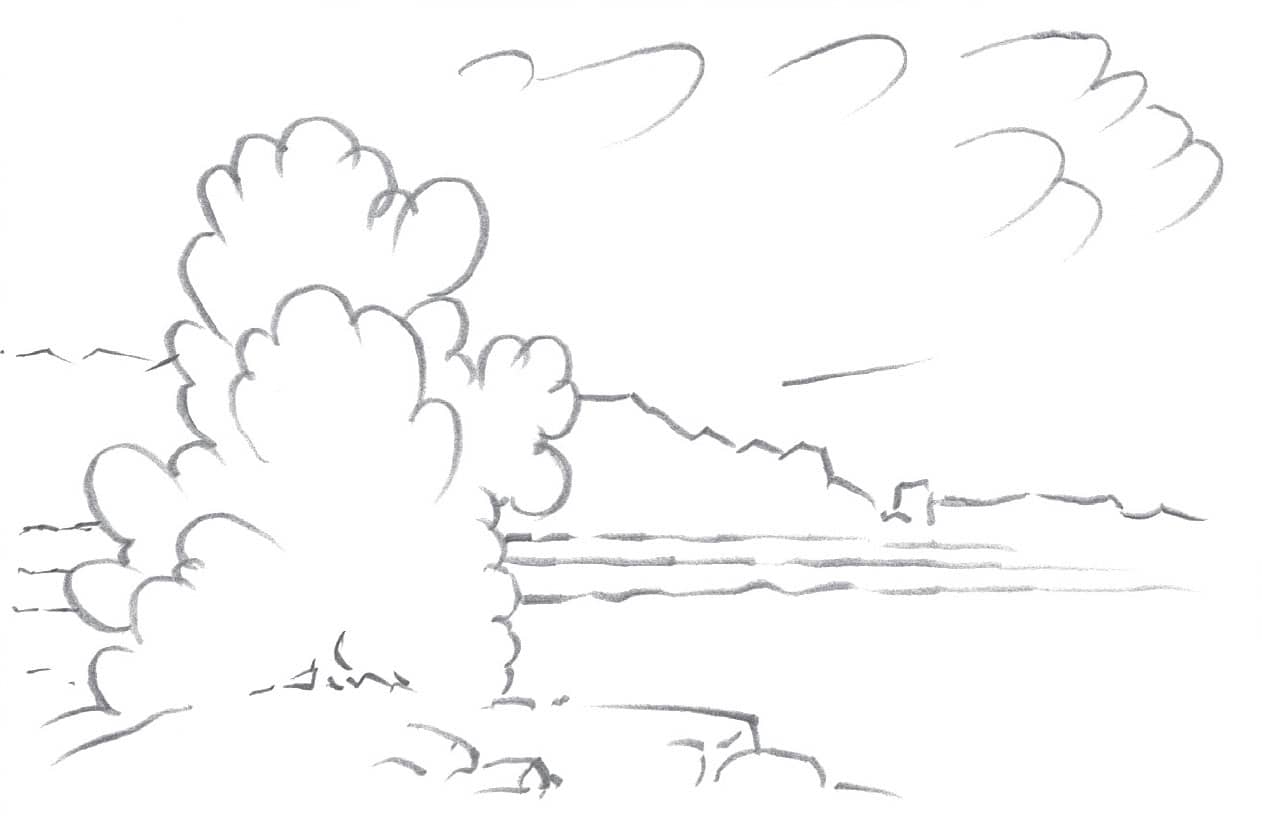
CLOUDS
Clouds are great elements to include in a landscape because they can set the mood of the drawing. Some clouds create a dramatic mood, while others evoke a calm feeling. Study the various cloud types on these pages, and practice drawing them on your own. Try to create puffy, cotton-like clouds, and thin, smoky ones. Observe clouds you see in the sky, and sketch those as well.
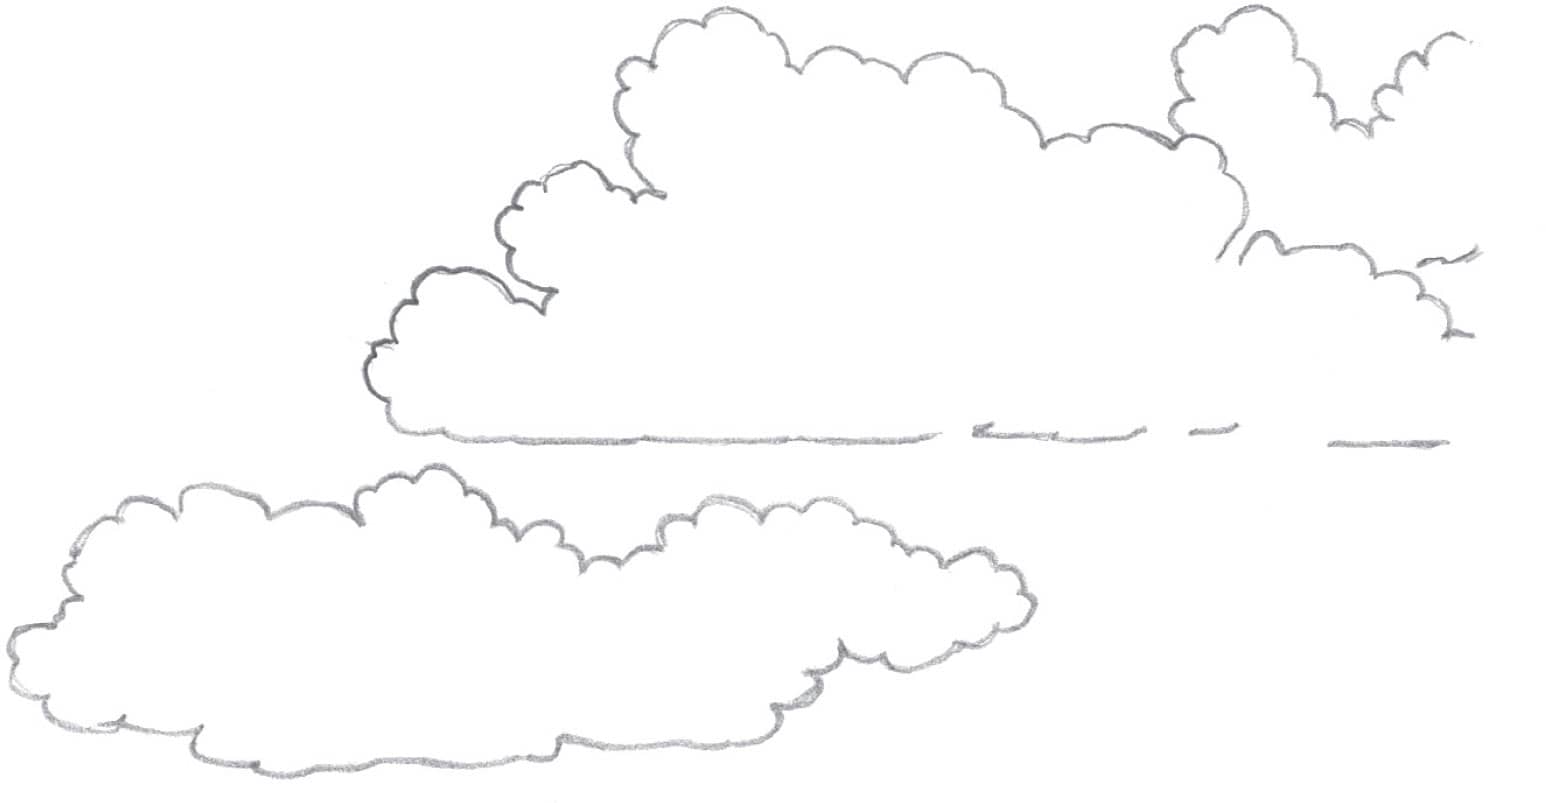
Using a soft pencil, such as a 2B, lightly outline the basic cloud shapes.


Use the side of the pencil lead to shade the sky in the background. Your shading will give the clouds fullness and form.


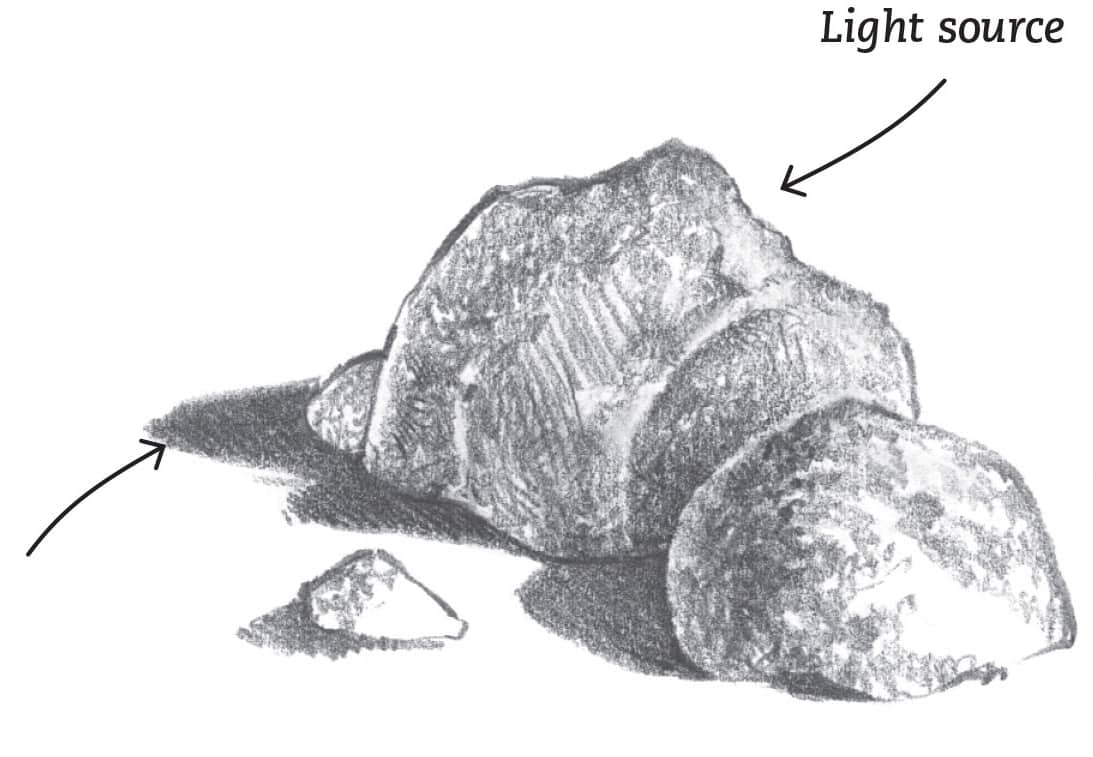
ROCKS
Because rocks come in many shapes, the best approach is to closely observe what you’re drawing. Pay close attention to foliage around the rocks, which provides an effective, natural background because the texture contrasts with the smoothness of the rocks.

Lightly block in the basic shapes to establish the different planes.


Block in the general outline for the bushes as you sketch the rocks.


TREES & BUSHES
One of the most common mistakes people make when rendering trees, or any type of foliage, is trying to draw every single leaf, branch, and stem. In fact, it’s much more effective to use shading techniques to suggest these forms. Push and pull the pencil in different directions, shade around the foliage outline, and leave areas white to accomplish these effects.

The darker areas within the trees suggest depth, while the light areas appear to come toward you.
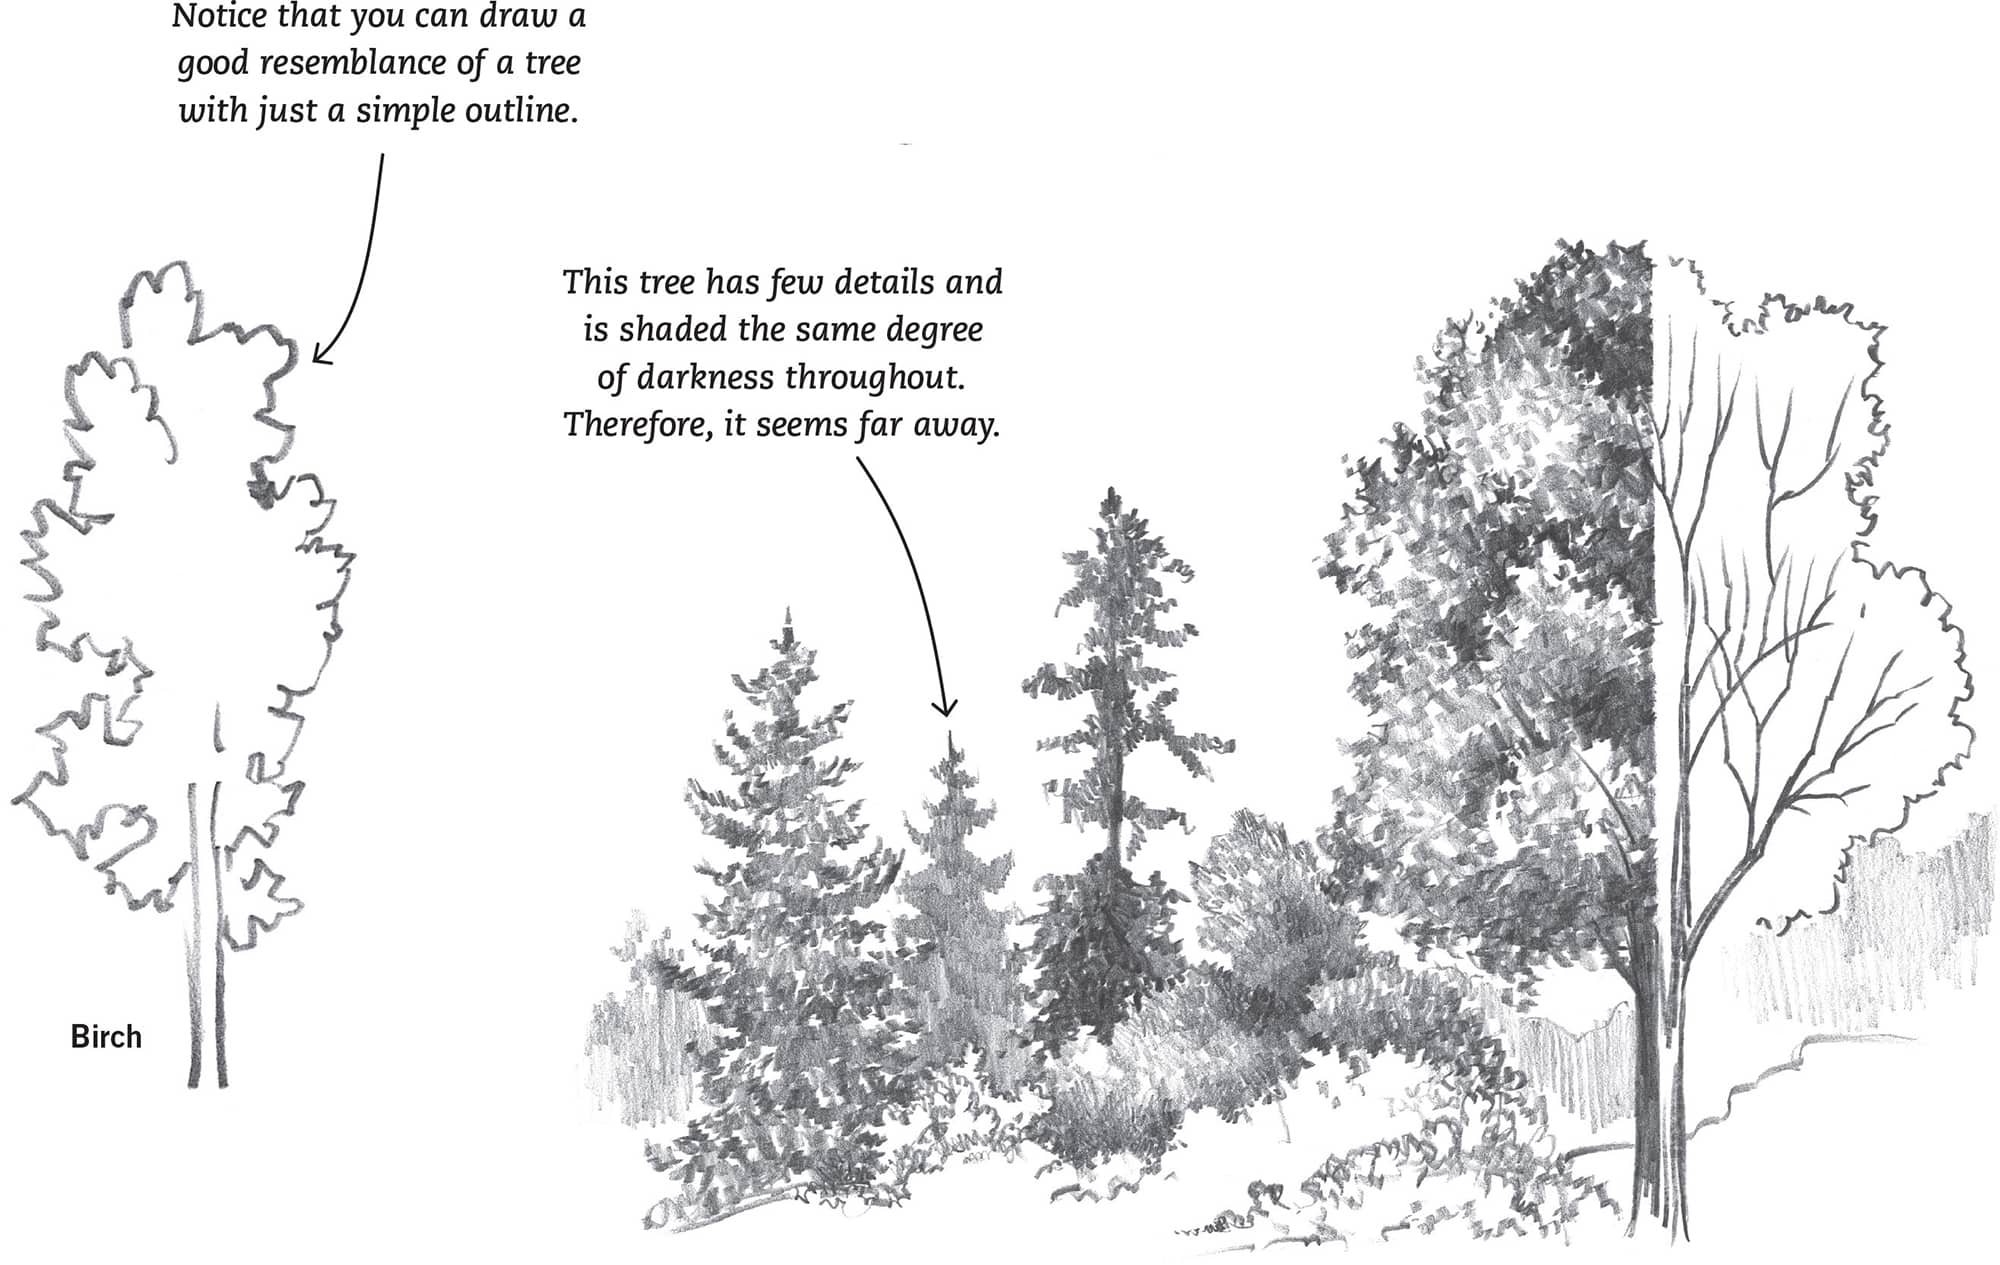

The trees on this page give the illusion of being detailed, but they are actually very simple to draw.

STRUCTURES
Important considerations when drawing structures are proportion and perspective. The building should be the correct size in relation to the surrounding trees, and all elements should be drawn in proper perspective. To make even a small structure the focal point of your drawing, shade it first and leave the background sketchy.

Start with simple shapes and lines to lay out most of the elements.

Refine the shapes, and begin to add some detail within the foliage and along the edge of the road.

Begin shading, starting in the background, filling in the shadows first.

Although the structure in this landscape lies in the background, it still appears to be the main focus.


MOUNTAINS
Block in mountain scenes with straight lines, and then refine the shapes to suggest the rugged terrain. The serene mountain landscape on these pages has two tall peaks on either side and a centered rock in the foreground to create a balanced composition. Distant pine trees are not drawn in detail, but suggested with dark, jagged lines.


Your mountain landscapes should produce a majestic, awe-inspired feeling.

As always, begin with very simple lines.

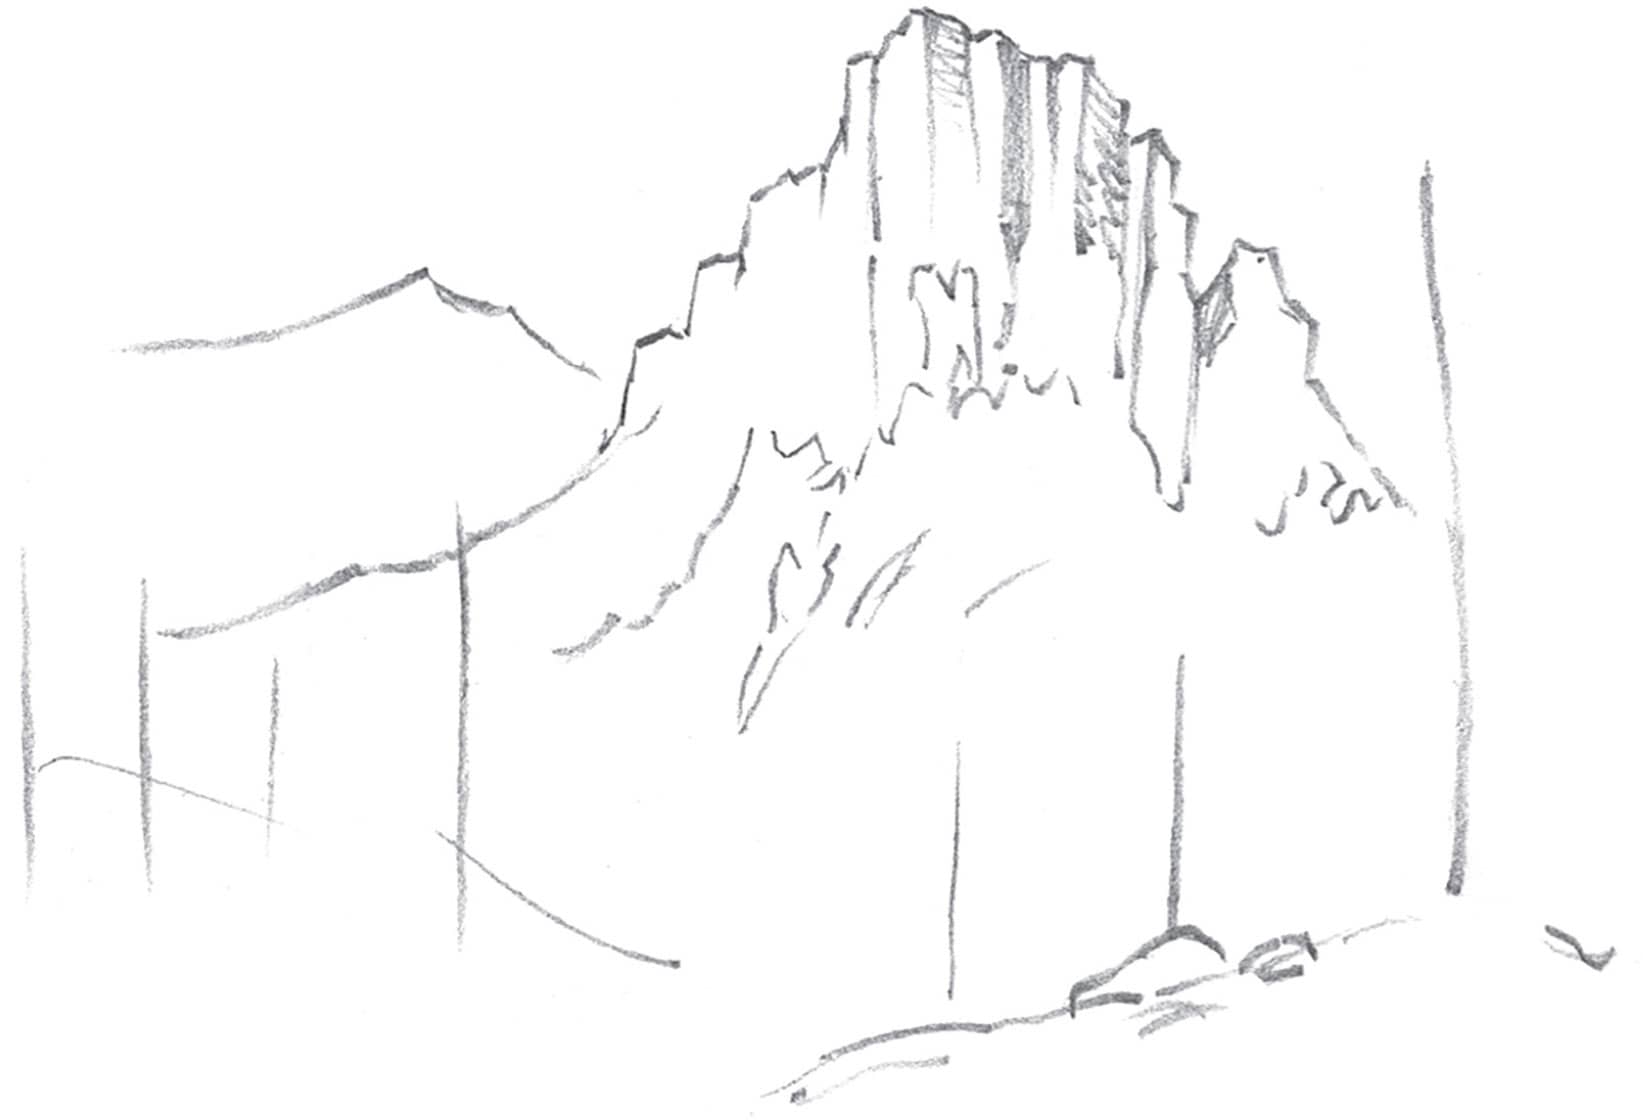
The background mountains are craggier and more detailed than the closer hills.

Since the background mountains are far away, keep the shading less detailed in those areas. Vary the light and dark values around the trees to create the effect that some trees are closer than others.

Add the trees in the foreground last, using jagged squiggles and lines for the branches.
DESERTS
Deserts make excellent landscape subjects because they provide a variety of challenging textures and shapes. These scenes evoke a calm, peaceful mood because everything appears to be quiet and still.

Lay out the major elements with an HB pencil.
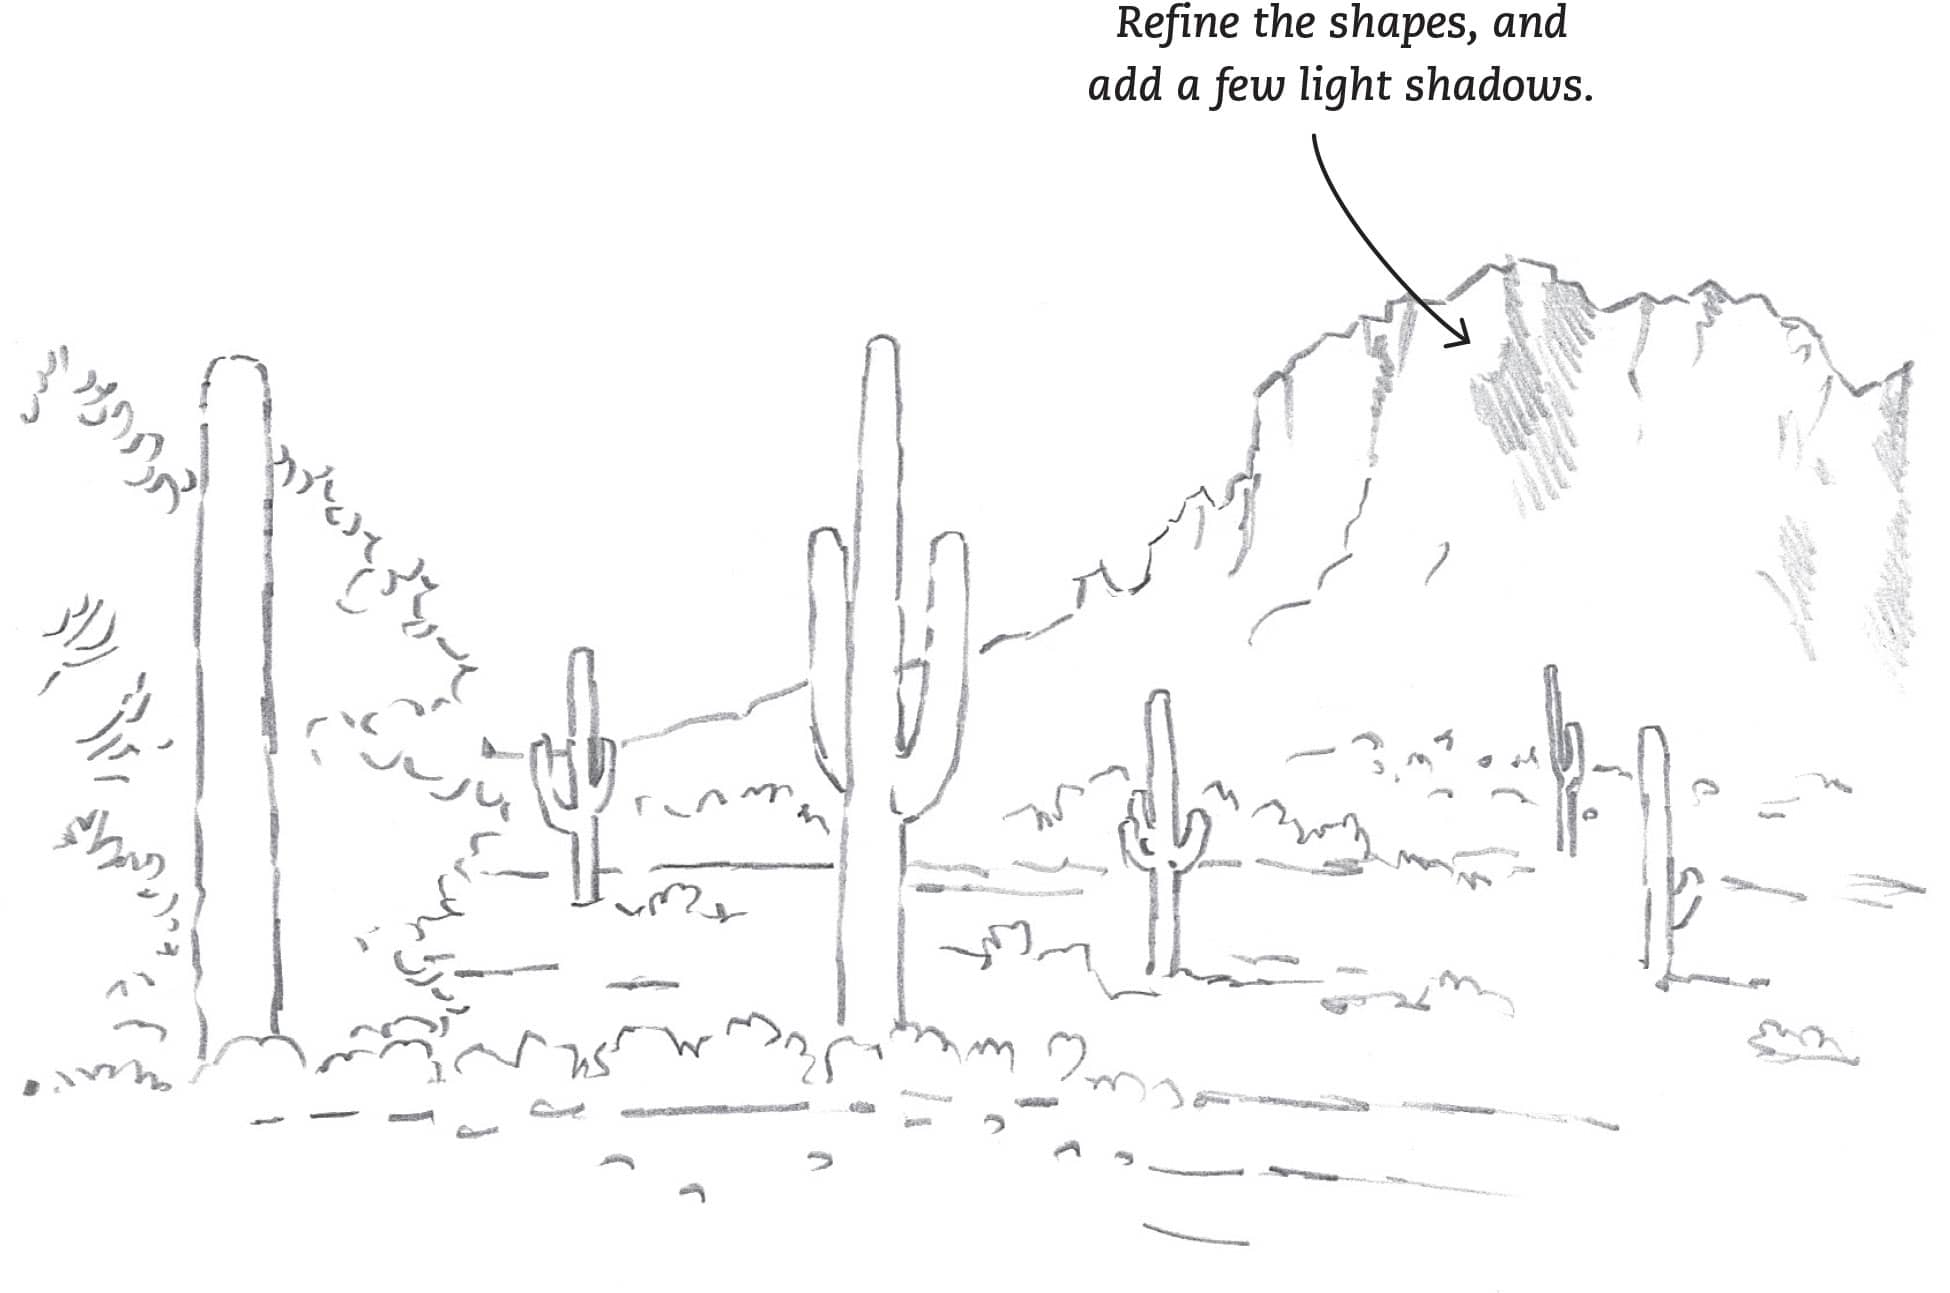

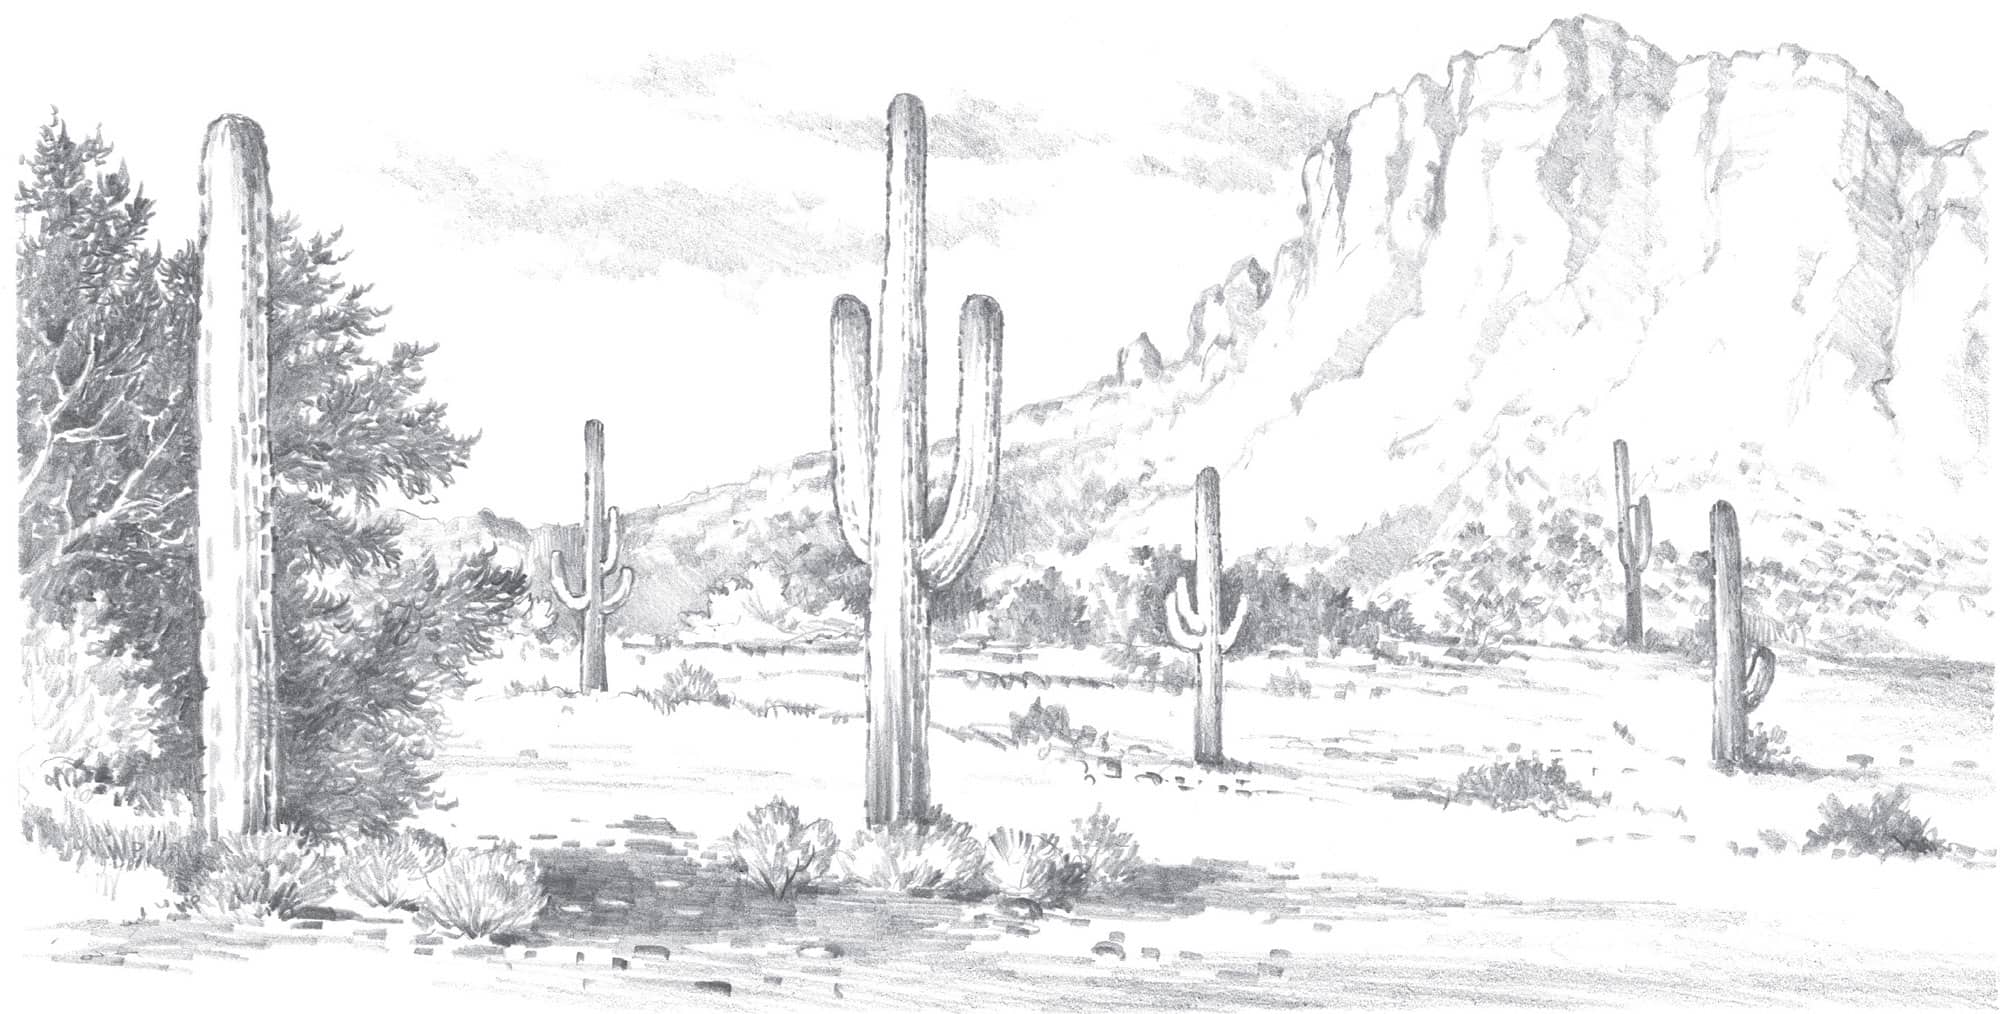
The finished drawing shows minimal shading, which creates the illusion of expansive light around the entire landscape.
CREEKS & ROCKS
Drawing landscapes containing creeks and rocks is a great way to improve artistic skills because of the variety of surface textures. As you begin to shade, remember not to completely shade each object before moving to the next one. Even though there are many light and dark areas throughout the drawing, the degree of shading should remain relatively consistent.

Make sure your preliminary drawing accurately shows depth by overlapping elements, uses proper perspective, and maintains a pleasing balance of elements. This will eliminate the need to make corrections later.


Use the side of an HB pencil, shading in even strokes, to create the reflections in the water. Keep in mind that an object’s reflection is somewhat distorted in moving water and mirrored in still water.

Apply strokes in directions that correspond with the rocks’ rugged, uneven texture, and fill in the areas between the cracks with a sharp 2B or 4B pencil.
HALF DOME, YOSEMITE
One side of Half Dome, located in Yosemite Valley, California, has a sheer face, while the other three sides are smooth and round. Because Half Dome is fairly well-known and recognizable, try to render the shapes and forms as close to the actual location as possible; pay close attention to the major crevices on the rock when shading.


GRAND FALLS, YELLOWSTONE
Another fantastic landscape subject is the beautiful Grand Falls in Yellowstone National Park, Wyoming. There are many subtle shapes within the waterfall, so take your time because you don’t want your drawing to look stiff.

Establish the preliminary shapes.

Use a 2B pencil to shade the cliff walls with short vertical strokes.

Angle the strokes on the cliffs to enhance the rocky texture.
Make sure the strokes on the rocks differ from the strokes in the water; two very different effects need to be created.

Create the illusion of mist around the base of the falls by incorporating lighter values and fewer details. Use the side of a pencil lead to accomplish this effect.
Draw the trees in the foreground with similar dark values to make them appear as silhouettes, giving the illusion that they are extremely close. Use the same technique for far-away trees. Remember that there isn’t much detail in these trees, so concentrate on the shadows and details of the waterfall.