
Granting Account Permissions
Before you can run the preceding code modules, you need to compile them into either a DLL or a server module that will be running independently from the user interface. This DLL or executable will need to be running on the server under a controlled user account that can be granted permission to execute as part of the operating system. The account needs to have permission configured to operate as part of the operating system before the code module can grant the privilege to itself.
Granting Permissions on NT 4.0
Granting a user account permission to act as part of the operating system is a fairly simple task. First, you need to be logged in either to the administrator account or to another account that is a member of the administrators group. Next, run the User Manager (Start|Programs| Administrative Tools|User Manager), as shown in Figure 11.1.
Figure 11.1. Running the User Manager utility.
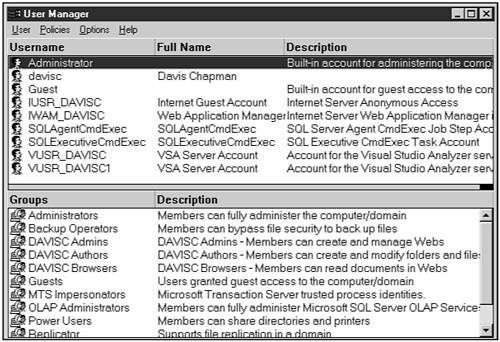
In the User Manager, you might want to consider adding a special account specifically for running modules like this that need to run as part of the operating system. After you have an account picked out, select Policies|User Rights from the menu, which opens the User Rights Policy dialog. Click the Show Advanced User Rights check box near the bottom left of the dialog, and then select Act as part of the operating system in the combo box, as shown in Figure 11.2.
Figure 11.2. Selecting the user rights to configure.
Click the Add button to add an account to have this right. This opens the Add Users and Groups dialog, which presents you with a list of active groups and accounts in the domain. Click the Show Users button to be able to select individual accounts and not just groups. Click the Add button to add the selected account to the list at the bottom of the dialog, as shown in Figure 11.3. Click the OK button to add the selected accounts to the User Rights Policy dialog, and then click OK on the User Rights Policy to add the selected accounts to have permission to act as part of the operating system.
Figure 11.3. Selecting the accounts for which to add a privilege.

If you are currently logged on to the account for which you are granting new privileges, you will need to log out and back in before the privileges will be granted.
Granting Permissions on Windows 2000
Granting the appropriate permissions on Windows 2000 is a little more involved than on NT 4.0, primarily because the privilege needs to be set in more places. First, you need to use the Active Directory Users and Computers utility to set up and configure the user account under which the login module needs to run, as shown in Figure 11.4.
Figure 11.4. Running the Active Directory Users and Computers utility.

After the account is set up and configured, two or three policy maintenance utilities need to be used to add the privilege, depending on the configuration of the server on which the login module will be run. The Local Security Policy utility maintains and modifies privileges on the computer on which it is run; the Domain Controller Security Policy utility maintains privileges on the Domain controller; and the Domain Security Policy utility maintains privileges across the domain. Any settings in the Domain policy override settings in the local policy, and if you are configuring the Domain Controller, the Domain Controller policy settings override the local settings.
To configure the policy, choose the appropriate security policy utility, expand the security settings tree, and select User Rights Assignment, as shown in Figure 11.5.
Figure 11.5. Selecting the user rights assignment to configure.

Double-click on the right to act as part of the operating system (or right-click it and select Security from the context menu) to display the Security Policy Setting dialog, as shown in Figure 11.6. In here, you can enable or disable the policy setting as needed, by toggling the check box next to the accounts shown.
Figure 11.6. Configuring the security policy.

To add a new account to the displayed list of accounts, click the Add button. This opens the Select Users or Groups dialog, as shown in Figure 11.7. In here, you can select the desired accounts, add them to the list of accounts in the bottom half of the dialog, and then add the selected accounts to the Security Policy Setting dialog, enabling you to enable or disable the specified privilege for those accounts.
Figure 11.7. Selecting the accounts to add to the Security Policy.

If you are currently logged on to the account for which you are granting new privileges, you will need to log out and back in before the privileges will be granted.