
9
Establishing TLS Connections and Sending Data over Them
In this chapter, we will learn about the Transport Layer Security (TLS) protocol. The TLS protocol is the successor of the Secure Sockets Layer (SSL) protocol and is used for secure network communication and serves as the basis for higher-level protocols, such as Hypertext Transfer Protocol Secure (HTTPS) and Simple Mail Transfer Protocol Secure (SMTPS). The TLS protocol is most visible on the World Wide Web but is also used in other applications, such as file transfer, email, instant messaging, Voice over IP, remote access, connection to databases, financial data transmission, and many other applications that require encrypted communication.
We will learn about the basics of the TLS protocol and take a quick look at its history. In the practical part of this chapter, we will learn how to establish TLS connections, send data over them, and shut them down correctly. There will be both command-line and C code examples that illustrate how to communicate over TLS.
We are going to cover the following topics in this chapter:
- Understanding the TLS protocol
- The history of the TLS protocol
- Establishing a TLS client connection on the command line
- Preparing certificates for a TLS server connection
- Accepting a TLS server connection on the command line
- Understanding OpenSSL BIOs
- Establishing a TLS client connection programmatically
- Accepting a TLS server connection programmatically
Technical requirements
This chapter will contain commands that you can run on a command line and C source code that you can build and run. For the command-line commands, you will need the openssl command-line tool with OpenSSL dynamic libraries. For building the C code, you will need OpenSSL dynamic or static libraries, library headers, a C compiler, and a linker.
We will implement some example programs in this chapter, in order to practice what we are learning. The full source code of those programs can be found here: https://github.com/PacktPublishing/Demystifying-Cryptography-with-OpenSSL-3/tree/main/Chapter09.
Understanding the TLS protocol
TLS is a general-purpose protocol that provides secure communication. The latest version of the TLS protocol at the time of writing is 1.3. TLS provides the following aspects of security:
- Privacy or confidentiality of transmitted user data, using symmetric encryption. It is computationally infeasible to decrypt and read the transmitted user data. Using the term user data here and later, I mean data that the users of the TLS protocol, the sender, and the receiving party exchange with each other, as opposed to service data of the TLS protocol needed for the protocol to function.
- Integrity and authenticity of transmitted user data, protection against tampering, using authenticated encryption or Message Authentication Code (MAC). It is computationally infeasible to alter the transmitted user data without the receiving party detecting it. Starting from TLS 1.3, authenticated encryption is mandatory.
- Peer identity proof and protection against Man in the Middle (MITM) attacks, using X.509 certificates.
- Perfect Forward Secrecy (PFS), using Ephemeral Diffie-Hellman (DHE) or Ephemeral Elliptic Curve Diffie-Hellman (ECDHE) key exchange. It is computationally infeasible to decrypt a recorded TLS session even if the server certificate’s private key becomes compromised in the future. Starting from TLS 1.3, PFS key exchange is mandatory.
What is PFS? To understand what PFS is, we have to understand key exchange. Key exchange or key agreement in TLS is a process of agreeing on a symmetric encryption key that will be used for encrypting user data in a TLS session. The oldest key exchange method is RSA key exchange, where the client generates a symmetric key and encrypts it with the server certificate public key. The newer methods are variants of Diffie-Hellman (DH) key exchange, where both the client and the server have an asymmetric keypair and derive a symmetric key from their own private key and the peer’s public key. Earlier TLS versions allowed non-PFS key exchange methods, such as RSA key exchange and static DH/ECDH key exchange. When a non-PFS key exchange method is used, the server certificate keypair is used for both authentication and key exchange. In such a case, if an attacker has recorded a TLS session and later stolen the server certificate private key, then the attacker can use it to recover the symmetric session key used in the TLS session and subsequently decrypt the user data sent during the TLS session. When a PFS key exchange method, such as DHE or ECDHE, is used, the client and the server generate temporary (ephemeral) keypairs for key exchange. Those ephemeral keypairs are only needed for the key exchange and can be destroyed after that. In such a case, even if the server certificate key gets stolen, the attacker will not be able to decrypt the TLS session, because they will not have any ephemeral private key from that TLS session. As we can see, when a PFS key exchange method is used, the certificate keypair is used for authentication and the ephemeral keypair is used for key exchange. We can conclude that PFS in TLS is a property of a key exchange method that prevents an attacker from decrypting a recorded TLS session even if the server certificate key gets compromised.
TLS usually runs on top of a reliable transport protocol, such as Transmission Control Protocol (TCP). TLS is typically used with an application-layer protocol, such as Hypertext Transfer Protocol (HTTP), running on top of TLS. The protocol layers for this typical use case can be visually represented as follows:
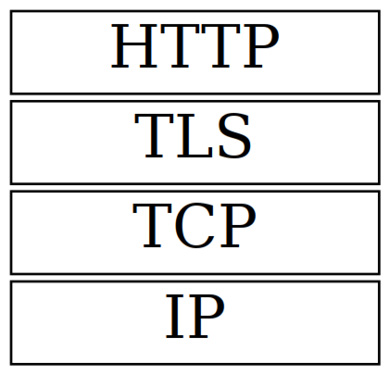
Figure 9.1 – The protocol layers
It is common to think about an application protocol running on top of TLS as a secure variant of that application protocol. For example, HTTPS protocol is a secure variant of the HTTP protocol. HTTPS is HTTP running on top of TLS, while SMTPS is SMTP running on top of TLS. As we can observe, secure variants of application protocols have the S suffix in their names. Ordinary and TLS-enabled variants of application protocols usually listen on different ports. For example, by default, HTTP listens on port 80 and HTTPS listens on port 443. However, some protocols support non-TLS and TLS variants on the same ports. For example, SMTP supports the STARTTLS command, which upgrades the current TCP connection to SMTPS. This method of starting a TLS session explicitly is called opportunistic TLS.
There is also a modification of the TLS protocol called Datagram Transport Layer Security (DTLS), designed for running on top of an unreliable transport protocol, such as User Datagram Protocol (UDP). It’s worth mentioning that TLS over TCP is much more widely used than DTLS over UDP. However, popular software that uses DTLS does exist. A notable example is OpenVPN. OpenVPN can use both DTLS over UDP and, as usual, TLS over TCP.
As with TCP, TLS is a client-server protocol. To start sending data over TLS, the client and the server must establish a TCP connection first and perform TLS handshaking.
Understanding a TLS handshake
The client usually starts TLS handshaking right after establishing the TCP connection, but, in the case of opportunistic TLS, the client and the server exchange some data in an unencrypted form first.
How exactly the TLS handshaking takes place depends on the TLS protocol version, but here are the important actions that are performed during the handshaking:
- The client sends the list of TLS protocol versions and cipher suites that the client supports. A TLS 1.3 cipher suite name is a compound value that looks similar to TLS_AES_256_GCM_SHA384 or TLS_CHACHA20_POLY1305_SHA256. As we can see, a cipher suite name identifies a symmetric encryption algorithm such as AES_256 or CHACHA20, a block cipher operation mode such as GCM or an encryption authentication method such as POLY1305, and a cryptographic hash function such as SHA384. Older TLS versions use a different naming convention for cipher suite names that results in longer names – for example, TLS_DHE_RSA_WITH_AES_256_CBC_SHA256. A cipher suite name in this case also includes a key exchange method such as DHE and a certificate signature algorithm such as RSA. The older naming convention was abandoned, as it causes a combinatorial explosion because of too many categories of algorithms and modes, such as a key exchange algorithm, certificate signature algorithm, symmetric cipher, symmetric key length, block cipher operation mode, and message digest algorithm. TLS 1.3 only supports Authenticated Encryption with Associated Data (AEAD) modes. Older TLS versions support non-authenticated encryption modes, in which case the Hash-Based Message Authentication Code (HMAC) algorithm is used to authenticate the encrypted data.
- The server chooses the highest protocol version and the preferred TLS cipher suite that both the client and the server support. If there is no mutually supported protocol version or cipher suite, the handshake fails.
- The server sends its X.509 certificate, possibly with other certificates that will help to build the certificate signing chain. The client verifies the server certificate using a possessed trusted certificate of a Certificate Authority (CA). The client also checks that the certificate Subject field matches the server hostname. More information about using X.509 certificates in TLS will be given in Chapter 10, Using X.509 Certificates in TLS.
- The server signs a small amount of data received from the client with the server’s private key, which corresponds to the public key contained in the server certificate. The client verifies the signature. This way, the server proves that it owns the certificate. In older versions of the TLS protocol, there was an alternative method of proving the certificate ownership: the client encrypts some data with the public key from the server certificate and the server decrypts it using its private key. But that alternative method, which involves encryption and decryption, only works with RSA server keys and certificates.
- Optionally, the client sends its own certificate and the server verifies it.
- If the client has sent its certificate, the client also proves that it owns the certificate by signing or decrypting some data with its private key.
- The client and the server negotiate the symmetric session key and the initialization vector (IV) to be used for the encryption of the user data that will be sent over the TLS protocol. The client and the server use a key exchange and key agreement algorithm, such as ECDHE, for agreeing on a handshake secret, also known as a pre-master secret in the older TLS versions. Then, both the client and the server use a pseudorandom function (PRF), for example, the HMAC-based key derivation function (HKDF), for generating the master secret and then the session key and the IV. Alternatively, instead of using a key agreement algorithm, the client can request the reuse of the saved handshake secret from an earlier TLS session. Reuse of the handshake secret saves computational resources because asymmetric cryptography used for the key agreement process is rather computationally expensive.
- The client and the server exchange data for TCP extensions that they would like to use. An example of a popular TCP extension is Server Name Indication (SNI), which selects a particular website on a shared hosting, where many websites can be served on the same host and port. Another example of a useful TCP extension is the pre_shared_key extension, which allows the use of pre-shared secrets and reuse of the handshake secret from an earlier TCP session, as mentioned previously.
- Finally, the client and the server authenticate all previously sent handshaking messages with HMAC. The other party of the connection verifies the authentication. If the HMAC verification fails, the handshake is considered to have failed, and the connection is aborted. This measure mitigates handshake tampering by a malicious third party – for example, intending to use a weaker cipher when the connection is not properly protected yet.
The TLS handshake is quite important, but it is not the only part of a TLS connection. Let’s learn what happens after the handshake.
What happens after the TLS handshake?
After the TLS handshake has succeeded, the client and the server can send data to each other, encapsulated into TLS records. The transmitted data is encrypted with the session key and authenticated either by an authenticated encryption tag or by HMAC if an older TLS protocol is used with a non-authenticated encryption mode. The receiving party checks the authentication of each TLS record and aborts the connection if an authenticity verification error is detected.
When one party of the TLS connection detects an error, it should communicate the error to the other party using a TLS alert message. Alert messages can indicate a fatal error or a warning. On receiving a fatal error, the receiving party must stop sending and receiving more data through the connection.
One of the possible alert messages is close_notify. This alert message is used for a proper shutdown of the TLS connection. With this warning-level message, one party of the connection notifies another party that the first party is closing its writing part of the TLS connection and will not send more data. The connection party that sent the close_notify alert may still read data from the TLS connection in TLS 1.3. Older TLS versions mandated the other party that received the close_notify alert to discard its pending writes and also send the close_notify alert, leading to the closure of the TLS connection. The TLS protocol specification mandates both the client and the server to send close_notify messages when the TLS connection has come to its logical end and no more data should be sent or received. This requirement mitigates a truncation attack on the connection. If both have received a close_notify message from each other, they can be sure that no MITM has truncated the connection. Note that the closing of a TLS connection does not automatically mean closing the underlying TCP connection. The TCP connection must be closed separately after the TLS connection closure – of course, only if no more data is going to be sent on it.
Note how various cryptographic concepts that we learned before are used to build up the TLS protocol. Symmetric encryption is needed for user data encryption. Cryptographic hash functions serve as a basis for HMAC, digital signatures, and certificates. Authenticated encryption and HMAC are used to authenticate both user and service data. Key derivation functions are used for generating secrets, session keys, and IVs. Digital signatures are used to confirm X.509 certificate validity and ownership. X.509 certificates are used for identity verification and mitigating MITM attacks. The TLS protocol as we know it now is the result of research and experience on the part of many people over many years and combines a lot of cryptographic technologies to provide us with the means of secure network communications.
In this section, we mentioned several times the differences between TLS 1.3 and older versions of the protocol. Let’s talk a bit more about the differences between TLS versions and the TLS protocol history in the next section.
The history of the TLS protocol
The TLS protocol is the successor of the SSL protocol. The SSL protocol was originally developed at Netscape Communications Corporation in the 1990s.
The SSL version 1.0 specification was never released to the public or used in a known software product because of security flaws in the protocols. SSL 1.0 was only used inside Netscape.
SSL 2.0 was published in 1995. It supported DES, 3DES, RC2, RC4, and IDEA symmetric ciphers, MD5-based MAC (not HMAC), RSA key exchange, and RSA-based certificates. Security researchers quickly discovered numerous security flaws in the protocol. SSL 2.0 had weak MAC authentication, unprotected handshakes, and was found to be vulnerable to length extension, truncation, cipher downgrade, and MITM attacks. SSL 2.0 did not gain much popularity and was soon superseded by SSL 3.0, which appeared in the next year. Even though SSL 2.0 was not used very much, it was only officially deprecated in 2011.
SSL 3.0, published in 1996, was a response to the flaws discovered in SSL 2.0. It featured a complete redesign of the SSL protocol. All existing TLS protocol versions are still built on the foundation of SSL 3.0 and have a lot in common with SSL 3.0. SSL 3.0 fixed the design flaws of SSL 2.0 and introduced a lot of new features, including support for both ephemeral and non-ephemeral DH key exchange, SHA-1-based MAC, DSA-signed certificates, compression, session reuse, session renegotiation, handshake authentication, and protocol version negotiation. Support for weak symmetric ciphers, such as single DES, RC2, and 40-bit RC4, was dropped. SSL 3.0 never officially supported the AES cipher, albeit some libraries, including OpenSSL, supported AES with SSL 3.0 as a non-standard extension. SSL 3.0 was popular for a long time, but over time, it was found to be vulnerable to certain attacks, such as Browser Exploit Against SSL/TLS (BEAST), Compression Ratio Info-Leak Made Easy (CRIME), and especially Padding Oracle On Downgraded Legacy Encryption (POODLE). It is worth noting that SSL libraries could mitigate those SSL protocol flaws by record splitting and compression disabling. SSL 3.0 also used flawed MAC-then-encrypt construction. Yet another drawback of SSL 3.0 is that it did not support TLS extensions. It led to the practical issue that web browsers, when negotiating the SSL 3.0 protocol, could not use the important SNI extension to specify the web server’s name on shared hosting. SSL 3.0 was finally deprecated in 2015.
TLS 1.0 protocol was published in 1999 as an upgrade to SSL 3.0. The TLS 1.0 specification was not developed by Netscape, but by the TLS Working Group (TLS WG) organized by the Internet Engineering Task Force (IETF). The protocol was renamed from SSL to TLS to avoid legal issues with Netscape. TLS 1.0 introduced support for TLS extensions and enhanced various aspects of the protocol, such as the PRF, MAC, the Finished message, and alert messages. Unlike SSL, TLS 1.0 used HMAC for TLS record authentication. Later, TLS 1.0 was extended with more symmetric ciphers, such as AES, Camellia, SEED, and GOST89, as well as with elliptic curve support, particularly support for ECDSA-signed certificates and ECDH/ECDHE key agreement methods. TLS 1.0 was vulnerable to BEAST and CRIME attacks in the same way as SSL 3.0. The original POODLE attack did not work for TLS 1.0, but it was later found that some TLS 1.0 servers used TLS libraries with a bug that makes a modified POODLE attack possible. TLS 1.0 was deprecated in 2021.
TLS 1.1 was published in 2006 as a further development of TLS 1.0. It featured explicit encrypted IV instead of implicit IV in the earlier protocol versions and thus was not vulnerable to the BEAST attack. TLS 1.1 also included improved handling of padding errors for mitigating attacks related to CBC padding, better session reuse, and other enhancements. Despite all the enhancements, TLS 1.1 did not support newer cryptographic algorithms, such as AEAD encryption modes and SHA-2 hash functions. TLS 1.1 relied on CBC-based cipher suites susceptible to padding oracle attacks and now-deprecated MD5 and SHA-1 hash functions for MAC and PRF. TLS 1.1 was officially deprecated in 2021 together with TLS 1.0.
TLS 1.2 was published in 2008. It added support for AEAD encryption modes, such as GCM and CCM, and more secure hash functions, such as SHA-256 and SHA-384, for MAC and PRF. At the same time, TLS 1.2 removed support for older algorithms, such as DES, IDEA, MD5, and SHA-1. Later, TLS 1.2 was extended with support for ARIA, ChaCha20, and Poly1305 algorithms. AEAD encryption modes completely mitigated padding oracle attacks, such as POODLE. As usual, the new protocol version had many small enhancements for various aspects of the protocol. At the time of writing, TLS 1.2 is not deprecated.
TLS 1.3, published in 2018, is a major cleanup of the TLS protocol. Adding more and more features to the earlier TLS versions accumulated a lot of legacies. TLS 1.3 drops support for a lot of older insecure or obsolete algorithms and features, such as non-AEAD cipher suites, non-PFS key exchange methods such as RSA and non-ephemeral DH/ECDH, DSA-signed certificates, weak and less-used elliptic curves, elliptic curve point format negotiation, custom DHE groups, ChangeCipherSpec protocol, compression, and renegotiation. TLS 1.3 only supports AES-GCM, AES-CCM, ChaCha20-Poly1305 symmetric AEAD ciphers, SHA-256- and SHA-384-based HMACs, and DHE/ECDHE key exchange methods. HKDF is used as the PRF. RSA-, ECDSA-, and PureEdDSA-based certificates are supported. RSA, and ECDSA-based certificates should be signed using a SHA-256, SHA-384, or SHA-512 hash function; however, as a special backward-compatibility measure, certificates signed using a SHA-1 message digest are still supported. As a result of the old feature dropping, TLS 1.3 is immune to both CRIME and POODLE attacks. Handshaking in TLS 1.3 is faster than in the former TLS versions because handshaking now only requires one data roundtrip instead of two as in the earlier versions. As a major speedup feature, TLS 1.3 also supports the zero round-trip time (0-RTT) handshaking mode, which allows the TLS client to send encrypted user data in the first data flight from the client to the server if an earlier TLS session can be reused. TLS 1.3 has a new session reuse mechanism that supports both earlier session resumption and pre-shared keys. TLS 1.3 also contains other improvements that are less important than those mentioned.
Which TLS version is the best? Of course, the latest one! But you may need to keep support for older versions for compatibility with the parties using older communication software. This is often the case with hardware that does not receive software updates anymore, such as old mobile phones, tablets, router boxes, or Internet-of-Things (IoT) devices.
We have now learned about the basics of TLS and the history of the protocol. Let us continue to the practical part of this chapter where we will learn how to make TLS connections on the command line and programmatically.
Establishing a TLS client connection on the command line
To establish a TLS client connection, we will use the s_client subcommand of the openssl tool. Its documentation can be found on its man page:
$ man openssl-s_client
There is an HTTPS server on the internet to use as an example, https://example.org/. Let’s connect to it via TLS and get its home page:
$ openssl s_client -connect example.org:443
The openssl tool will output a lot of information about how the TLS handshaking has gone, which cryptographic algorithms were used, and even the base64-encoded server certificate will be printed.
We can also request verification of the server certificate and its hostname by adding the -verify_return_error and -verify_hostname command-line options:
$ openssl s_client
-connect example.org:443
-verify_return_error
-verify_hostname example.org
If you want to verify the server certificate, you need to have trusted CA certificates in the directory where OpenSSL expects to find them. For example, on my Ubuntu Linux system, the system-installed OpenSSL looks for the trusted certificates in the /etc/ssl/certs directory. If you installed your own version of OpenSSL, for example, into the /opt/openssl-3.0.0 directory, that version of OpenSSL will look for certificates in the /opt/openssl-3.0.0/ssl/certs directory. In such a case, you can provide trusted CA certificates to OpenSSL using any of the following methods:
- Copy all files, including the symlinks, from the system OpenSSL certs directory, such as /etc/ssl/certs to /opt/openssl-3.0.0/ssl/certs
- Make /opt/openssl-3.0.0/ssl/certs a symlink to /etc/ssl/certs
- Set the SSL_CERT_DIR environment variable to /etc/ssl/certs
- Add a -CApath /etc/ssl/certs switch to the openssl s_client command
If you are using an OS that does not have a system OpenSSL certificate store, such as Windows, you can download Mozilla’s trusted CA certificate bundle from the curl utility website. At the time of writing, the certificate bundle URL is https://curl.se/ca/cacert.pem. You can download it, for example, using the curl utility itself:
$ curl --remote-name https://curl.se/ca/cacert.pem
Then, you can provide the downloaded certificate bundle to OpenSSL using any of the following methods:
- Set the SSL_CERT_FILE environment variable to the absolute or relative path of the downloaded cacert.pem file
- Add the -CAfile path/to/cacerts.pem switch to the openssl s_client command
After successfully establishing the TLS connection, we can type or copy and paste any data into the connection. Any data sent by the server will be printed to your terminal. Let’s type the following to make an HTTP request for getting the server home page:
GET / HTTP/1.1
Host: example.org
Connection: close
(empty line, just press Enter here)
We will get an HTTP response containing HTTP headers and the HTML code of the server home page. The server will close the connection because we have specified the Connection: close header in the HTTP request. You will return to the command line. If you omit that request header, the server will not close the connection and you will remain in the connection. If you want to finish the connection with proper TLS and TCP connection shutdown, you type Q followed by Enter or execute an End of File (EOF) on your terminal by pressing Ctrl + D on Unix-like systems or Ctrl + Z + Enter on Windows systems. If you want to forcibly exit openssl s_client without proper connection shutdown, you can press Ctrl + C.
That’s how easy it was. Let’s now try establishing a TLS server connection. The TLS server connection will require a server certificate and its corresponding private key. Therefore, we have to generate a couple of certificates first.
Preparing certificates for a TLS server connection
To accept a TLS server connection, we will need to generate two keypairs and certificates: the server certificate and the self-signed CA certificate, which signs the server certificate. Why can’t we just generate a self-signed server certificate, a curious reader may ask? Because using a self-signed certificate as a server certificate is considered an error by most TLS clients and libraries, including the OpenSSL library. Another question you may have is: why can’t we reuse certificates from the OS certificate store for our TLS server? Because we don’t possess private keys for those certificates.
As in Chapter 8, X.509 Certificates and PKI, we will use the openssl req and openssl x509 subcommands for keypairs and certificate generation. But, this time, we will use combined generation commands to demonstrate them too.
We have to generate the CA certificate first. This time, we will use a command that combines the generation of a keypair, Certificate Signing Request (CSR), and certificate in one command. This kind of command, combining the three mentioned actions, is only possible for generating a self-signed certificate:
$ openssl req
-newkey ED448
-x509
-subj "/CN=Root CA"
-addext "basicConstraints=critical,CA:TRUE"
-days 3650
-noenc
-keyout ca_keypair.pem
-out ca_cert.pem
Now, we have the CA keypair and certificate and can create and sign the server certificate. This time, we will also use a combined command, but we cannot combine all three operations. We can only combine two operations, namely the generation of the server keypair and the CSR:
$ openssl req
-newkey ED448
-subj "/CN=localhost"
-addext "basicConstraints=critical,CA:FALSE"
-noenc
-keyout server_keypair.pem
-out server_csr.pem
The next command will create (or issue) the server certificate signed by the CA certificate:
$ openssl x509
-req
-in server_csr.pem
-copy_extensions copyall
-CA ca_cert.pem
-CAkey ca_keypair.pem
-days 3650
-out server_cert.pem
Note that we used the server hostname (localhost) in the server certificate Subject field. It is needed to pass the hostname validation of the certificate if the TLS client decides to perform it.
Now that our certificates are ready, let’s try to establish a TLS server connection.
Accepting a TLS server connection on the command line
Follow these steps for accepting a TLS server connection on the command line:
- To accept a TLS server connection, we will use the s_server subcommand of the openssl tool. Its documentation can be found on its man page:
$ man openssl-s_server
- We will provide a port number, a server certificate, and the corresponding server keypair to openssl s_server. That’s how we start a TLS server:
$ openssl s_server
-port 4433
-key server_keypair.pem
-cert server_cert.pem
- To check that our TLS server can accept connections and send and receive data over them, we can start a TLS client in another terminal window and connect to our TLS server:
$ openssl s_client
-connect localhost:4433
-verify_return_error
-verify_hostname localhost
-CAfile ca_cert.pem
Note that this time, we have supplied a -CAfile switch to openssl s_client so that it could find the trusted CA certificate and verify the server certificate.
- Now, the TLS client and the TLS server running in the different terminal windows are connected and can send data to each other. Try to type something in one terminal window, press Enter, and you will see that your typed string will appear in another terminal window. You can finish the connection by sending EOF or by pressing Ctrl + C.
We have now learned how to establish TLS client and server connections on the command line and send data over them. Now, let’s learn how to do it programmatically.
Understanding OpenSSL BIOs
To establish TLS connections and send data over them, we will use OpenSSL Basic Input/Output (BIO) objects. BIOs provide the same Application Programming Interface (API) for working with different types of Input/Output (I/O) channels, such as files, sockets, and TLS streams.
BIOs are divided into two types: source or sink BIOs and filter BIOs. A source or sink BIO represents an I/O endpoint, such as a file or a socket. A filter BIO transforms data that is being passed through the BIO. For example, a cipher BIO encrypts data when being written to and decrypts data when being read from. BIOs can be connected and form a chain of BIOs. For example, an SSL BIO can be connected to a socket BIO, providing TLS communication on a socket.
OpenSSL supports the following source or sink BIOs:
- Accept BIO (BIO_s_accept): TCP/IP socket or Unix socket accept routines.
- BIO BIO (BIO_s_bio): A BIO pair where whatever is written to one half of the pair can be read from another half of the pair.
- Connect BIO (BIO_s_connect): TCP/IP socket or Unix socket connect routines.
- FD BIO (BIO_s_fd): I/O using an integer file descriptor (fd).
- File BIO (BIO_s_file): I/O using C language FILE pointers.
- Memory BIO (BIO_s_mem): I/O to and from memory buffers.
- Null BIO (BIO_s_null): BIO that discards any data written to it and does not contain any data for reading. Works similar to a Unix /dev/null or a Windows NUL device.
- Socket BIO (BIO_s_socket): TCP/IP socket or Unix socket I/O.
OpenSSL also supports the following filter BIOs:
- Base64 BIO (BIO_f_base64): Base64 encoding and decoding.
- Buffering BIO (BIO_f_buffer): Buffering for the next BIO in the BIO chain.
- Cipher BIO (BIO_f_cipher): Symmetric encryption and decryption.
- Message digest BIO (BIO_f_md): Calculating the message digest of data written to the BIO or read through the BIO.
- Null filter BIO (BIO_f_null): A pass-through BIO that just passes data to the next BIO. Not to be confused with a null source or sink BIO.
- SSL BIO (BIO_f_ssl): SSL and TLS protocol routines. As a rule, it is used with a socket BIO, but can be used with other BIO types as well. Due to historical reasons, OpenSSL still has an SSL substring in the object and function names instead of a TLS substring.
- Read buffering BIO (BIO_f_readbuffer): A read-only BIO that uses its own buffer to add tell or seek support for a stream BIO
In order to work with BIOs, you use a BIO API consisting of functions with the BIO_ prefix.
You can create a BIO using the BIO_new() function or BIO-type-specific functions, such as BIO_new_socket() or BIO_new_accept(). Some functions can even create short BIO chains. For instance, the BIO_new_buffer_ssl_connect() function creates a BIO chain consisting of a buffering BIO, an SSL BIO, and a connect BIO.
Reading from BIOs and writing to BIOs can be done using functions such as BIO_read(), BIO_write(), BIO_read_ex(), BIO_write_ex(), BIO_gets(), BIO_get_line(), and BIO_puts().
The BIO_puts() function is convenient when it is needed to write a null-terminated string to a BIO. Note that unlike the puts() function from the standard C library, BIO_puts() does not add a new line to the output. Rather, BIO_puts() works as fputs() does, which also does not add an extra new line.
BIO_gets() reads a line from a BIO and, as with fgets(), preserves the new line character in the read input data. BIO_gets() returns the number of read bytes but has the following caveat: if the read data contains a null character, BIO_gets() will return the number of bytes up to the first read null character, even if more bytes were read. Therefore, it is better to use the BIO_get_line() function introduced in OpenSSL 3.0, which always returns the number of read bytes irrespective of the null characters encountered.
Reading and writing functions are supported by most BIOs. But some BIOs also support BIO-specific functions. For example, SSL BIOs have a BIO_do_handshake() function that performs the TLS handshake.
When an error happens during a BIO operation, the error is usually both signaled via a function return code and an error added to the OpenSSL error queue. Therefore, the OpenSSL error queue must be inspected, handled, and cleared after the BIO operations.
When a BIO object is not needed anymore, it must be freed by the BIO_free() function. When BIO_free() is called, it may have effects on the underlying I/O structures – for example, a file or a network connection may be closed. There is also the BIO_free_all() function, which frees the whole BIO chain.
More information about BIOs can be found on the relevant man pages. Here are some of them:
$ man bio
$ man BIO_new
$ man BIO_s_connect
$ man BIO_s_accept
$ man BIO_f_ssl
$ man BIO_read
$ man BIO_push
$ man BIO_ctrl
In the next section, we will put BIOs to some use. We will use a BIO to establish a TLS connection, send and receive some data over it, and properly shut it down.
Establishing a TLS client connection programmatically
We are going to develop a small tls-client program that will connect to an HTTPS server via TLS, make an HTTP request, and read the response from the server.
To do so, we will use an OpenSSL BIO API and SSL API. The BIO API will help us to make a TLS connection, send and receive data over the connection, and properly shut it down. The SSL API will help us with setting up server certificate verification, detecting whether the connection is still alive, and distinguishing error types on the connection. As was mentioned, due to historical reasons, OpenSSL still has the SSL substring instead of TLS in the names of objects and functions that work with TLS.
More information about the SSL API can be found on the OpenSSL man pages. Here are some relevant pages:
$ man ssl
$ man SSL_CTX_new
$ man SSL_CTX_free
$ man SSL_CTX_load_verify_locations
$ man SSL_CTX_use_certificate_chain_file
$ man SSL_CTX_set_verify
$ man SSL_new
$ man SSL_free
$ man SSL_set_tlsext_host_name
$ man SSL_set1_host
Our program will take three command-line arguments:
- The server hostname
- The server port
- Optional argument: the name of the file containing one or more trusted CA certificates for server certificate verification
Our high-level implementation plan will be as follows:
- Create an SSL context, an SSL_CTX object.
- Load the trusted CA certificates into the SSL context.
- Enable server certificate verification in the SSL context.
- Create an SSL BIO from the SSL context.
- Establish a TLS connection with the server.
- Send an HTTP request to the server.
- Read the server response.
- Shut down the TLS connection.
Implementing the tls-client program
Let’s implement the tls-client program according to our plan:
- First, allocate read and write access to the buffers:
const size_t BUF_SIZE = 16 * 1024;
char* in_buf = malloc(BUF_SIZE);
char* out_buf = malloc(BUF_SIZE);
- Next, create an SSL context:
SSL_CTX* ctx = SSL_CTX_new(TLS_client_method());
An SSL context is an object that stores common settings and data for TLS session establishment. An example of common data is a collection of trusted CA certificates. An example of a common setting is a peer certificate verification flag. We will use both examples in our code. Many settings that can be set to an SSL context can also be set to individual TLS connections, represented by objects of the SSL type. If the same setting is set to both the SSL_CTX object and the SSL object, the setting in the SSL object takes precedence.
Note that we used TLS_client_method() as the argument to SSL_CTX_new(). This is how we specify that TLS connections created in this context will be TLS client connections.
- The next step is to load the trusted certificates. If the third argument is provided to our program, we will load the certificates from the provided file. Otherwise, we will load certificates from the default locations, such as /etc/ssl/certs on Ubuntu Linux or the paths specified by the SSL_CERT_DIR and SSL_CERT_FILE environment variables:
const char* trusted_cert_fname = argv[3];
if (trusted_cert_fname)
err = SSL_CTX_load_verify_locations(
ctx, trusted_cert_fname, NULL);
else
err = SSL_CTX_set_default_verify_paths(ctx);
if (err <= 0) {
if (error_stream)
fprintf(
error_stream,
"Could not load trusted certificates ");
goto failure;
}
- Let’s also set some settings in the SSL context:
SSL_CTX_set_verify(ctx, SSL_VERIFY_PEER, NULL);
SSL_CTX_set_mode(ctx, SSL_MODE_AUTO_RETRY);
Setting the SSL_VERIFY_PEER flag enables verification of the peer certificate. In our case, the peer is the TLS server, so the server certificate will be verified. If the verification fails, the TLS handshake will fail as well and the TLS connection will be aborted.
Setting the SSL_MODE_AUTO_RETRY flag simplifies TLS I/O programming. Sometimes, when we want to write some user data to a TLS connection, the TLS protocol wants to read some service data to proceed, and the writing attempt results in the SSL_ERROR_WANT_READ error. In such a case, we have to read from the connection and then retry writing. And vice versa, sometimes we want to read but the TLS protocol wants to write and then we get the SSL_ERROR_WANT_WRITE error. When the SSL_MODE_AUTO_RETRY flag is set, OpenSSL will retry reading or writing as necessary and handling of the SSL_ERROR_WANT_READ and SSL_ERROR_WANT_WRITE errors will not be needed.
- The next step is to create an SSL BIO using the SSL context and set the hostname and port of the remote TLS server:
const char* hostname = argv[1];
const char* port = argv[2];
BIO* ssl_bio = BIO_new_ssl_connect(ctx);
BIO_set_conn_hostname(ssl_bio, hostname);
BIO_set_conn_port(ssl_bio, port);
The SSL BIO contains an SSL object, representing a TLS connection.
- We have to get that SSL object and set some parameters on it:
SSL* ssl = NULL;
BIO_get_ssl(ssl_bio, &ssl);
SSL_set_tlsext_host_name(ssl, hostname);
SSL_set1_host(ssl, hostname);
The SSL_set_tlsext_host_name() function sets the hostname for the SNI extension so that it is possible to connect to the correct server on shared hosting. The SSL_set1_host() function sets the hostname for the peer certificate verification. During the handshake, OpenSSL will try to match the provided hostname with the certificate Common Name (CN) and Subject Alternative Names (SANs). In case of a hostname mismatch, the TLS handshake will fail and the TLS connection will be aborted. If SSL_set1_host() is not called, the hostname verification will not be done – only the certificate chain verification will be done.
- The next step is to establish the TLS connection:
err = BIO_do_connect(ssl_bio);
if (err <= 0) {
if (error_stream)
fprintf(
error_stream,
"Could not connect to server %s on port %s ",
hostname,
port);
goto failure;
}
The BIO_do_connect() call will attempt to perform both TCP and TLS handshaking. For our convenience, SSL BIO allows us to skip an explicit BIO_do_connect() call. Both TCP and TLS handshaking would also be attempted on the first read or write attempt on the SSL BIO. However, it usually makes sense to establish a TLS connection explicitly and handle possible connection errors after the call.
- The next step is to send the HTTP request:
snprintf(
out_buf,
BUF_SIZE,
"GET / HTTP/1.1 "
"Host: %s "
"Connection: close "
"User-Agent: Example TLS client "
" ",
hostname);
int request_length = strlen(out_buf);
printf("*** Sending to the server: ");
printf("%s", out_buf);
int nbytes_written =
BIO_write(ssl_bio, out_buf, request_length);
if (nbytes_written != request_length) {
if (error_stream)
fprintf(
error_stream,
"Could not send all data to the server ");
goto failure;
}
printf("*** Sending to the server finished ");
- Next, read the server response:
printf("*** Receiving from the server: ");
while ((SSL_get_shutdown(ssl) & SSL_RECEIVED_SHUTDOWN)
!= SSL_RECEIVED_SHUTDOWN) {
int nbytes_read = BIO_read(ssl_bio, in_buf, BUF_SIZE);
if (nbytes_read <= 0) {
int ssl_error = SSL_get_error(ssl, nbytes_read);
if (ssl_error == SSL_ERROR_ZERO_RETURN)
break;
if (error_stream)
fprintf(
error_stream,
"Error %i while reading data"
" from the server ",
ssl_error);
goto failure;
}
fwrite(in_buf, 1, nbytes_read, stdout);
}
printf("*** Receiving from the server finished ");
- We are reading from the server until the server shuts down its side of the TLS connection. Then, it is good practice to also shut down our side of the connection:
BIO_ssl_shutdown(ssl_bio);
- After the closed connection, we have to free the used objects and buffers:
if (ssl_bio)
BIO_free_all(ssl_bio);
if (ctx)
SSL_CTX_free(ctx);
free(out_buf);
free(in_buf);
- Finally, we have to check and clear the OpenSSL error queue:
if (ERR_peek_error()) {
exit_code = 1
if (error_stream) {
fprintf(
error_stream,
"Errors from the OpenSSL error queue: ");
ERR_print_errors_fp(error_stream);
}
ERR_clear_error();
}
The complete source code of our tls-client program can be found on GitHub as the tls-client.c file: https://github.com/PacktPublishing/Demystifying-Cryptography-with-OpenSSL-3/blob/main/Chapter09/tls-client.c.
Running the tls-client program
Let’s run our program against the example.org website:
$ ./tls-client example.org 443
*** Sending to the server:
GET / HTTP/1.1
Host: example.org
Connection: close
User-Agent: Example TLS client
*** Sending to the server finished
*** Receiving from the server:
HTTP/1.1 200 OK
…
*** Receiving from the server finished
TLS communication succeeded
As we can observe, our tls-client program could successfully connect to the server, send and receive some data, and successfully close the connection.
Let’s also check how error handling works in tls-client. To do so, let’s try to run tls-client against a non-TLS port from the same server:
$ ./tls-client example.org 80
Could not connect to server example.org on port 80
Errors from the OpenSSL error queue:
C0F17C57A97F0000:error:0A00010B:SSL routines:ssl3_get_record
:wrong version number
:ssl/record/ssl3_record.c:354:
C0F17C57A97F0000:error:0A000197:SSL routines:SSL_shutdown
:shutdown while in init
:ssl/ssl_lib.c:2242:
TLS communication failed
As we can see, our tls-client program has detected errors and reported them. We can conclude that the tls-client program can both communicate with a TLS server and handle errors.
In the next section, we will learn how to establish TLS server connections and send data over them.
Accepting a TLS server connection programmatically
We are going to develop a small tls-server program that will accept TLS connections, read an HTTP request from the connected TLS client, and send an HTTP response back to the client.
Our program will take three command-line arguments:
- The server port
- The name of the file containing the TLS server keypair
- The name of the file containing the TLS server certificate chain
In our case, the certificate chain file will only contain one certificate – the server certificate. But if we had intermediate CA certificates, we could include them in the file after the server certificate to help the TLS client with the server certificate verification. It does not make much sense to include the root CA certificate in the certificate chain file, because the TLS client must have the root CA certificate among the trusted certificates anyway to be able to verify the server certificate.
Our high-level implementation plan will be as follows:
- Create an SSL context, an SSL_CTX object.
- Load the TLS server keypair into the SSL context.
- Load the TLS server certificate chain into the SSL context.
- Check that the loaded keypair matches the loaded server certificate.
- Create an accept BIO from the SSL context and start accepting incoming TCP connections.
- When a TCP connection is accepted, the accept BIO will create a new socket BIO, which will represent the accepted connection. We will detach that socket BIO from the accept BIO.
- Create a new SSL BIO and link it with the socket BIO.
- Handle the accepted connection using the SSL-socket BIO chain formed. We will cover the connection handling plan shortly.
- After the connection is handled, continue listening on the port and accepting the incoming connections.
Here is the plan on how to handle the accepted connection:
- Perform a TLS handshake on the accepted connection.
- Read an HTTP request from the TLS client.
- Send the server response.
- Shut down the TLS connection.
Implementing the tls-server program
Let’s implement the tls-server program according to our plans:
- First, create an SSL context:
SSL_CTX* ctx = SSL_CTX_new(TLS_server_method());
Note that we used TLS_server_method() as the argument to SSL_CTX_new() this time. This is how we specify that TLS connections created in this context will be TLS server connections.
- Next, load the server keypair:
const char* server_keypair_fname = argv[2];
err = SSL_CTX_use_PrivateKey_file(
ctx, server_keypair_fname, SSL_FILETYPE_PEM);
if (err <= 0) {
if (error_stream)
fprintf(
error_stream,
"Could not load server keypair from file %s ",
server_keypair_fname);
goto failure;
}
- Next, load the server certificate chain:
const char* server_cert_chain_fname = argv[3];
err = SSL_CTX_use_certificate_chain_file(
ctx, server_cert_chain_fname);
if (err <= 0) {
if (error_stream)
fprintf(
error_stream,
"Could not load server certificate chain"
" from file %s ",
server_cert_chain_fname);
goto failure;
}
- Next, check that the loaded keypair matches the server certificate, which is the first certificate in the loaded certificate chain:
err = SSL_CTX_check_private_key(ctx);
if (err <= 0) {
if (error_stream)
fprintf(
error_stream,
"Server keypair does not match"
" server certificate ");
goto failure;
}
- Next, set the same SSL_MODE_AUTO_RETRY flag as we set when developing tls-client in the previous section, Establishing a TLS client connection programmatically:
SSL_CTX_set_mode(ctx, SSL_MODE_AUTO_RETRY);
In the server mode, we are not going to request and check the peer (client) certificate – thus, we will not enable the SSL_VERIFY_PEER option.
- Next, create a new accept BIO and start listening on the specified port:
const char* port = argv[1];
BIO* accept_bio = BIO_new_accept(port);
err = BIO_do_accept(accept_bio);
if (err <= 0) {
if (error_stream)
fprintf(
error_stream,
"Could not bind to port %s and start listening"
" for incoming TCP connections ",
port);
goto failure;
}
- Next, organize a loop that will listen for incoming TCP connections:
while (1) {
printf(" ");
printf("*** Listening on port %s ", port);
printf(" ");
- Inside the loop, try to accept an incoming TCP connection:
err = BIO_do_accept(accept_bio);
if (err <= 0) {
if (error_stream)
fprintf(
error_stream,
"Error when trying to accept connection ");
if (ERR_peek_error()) {
if (error_stream) {
fprintf(
error_stream,
"Errors from the OpenSSL error queue: ");
ERR_print_errors_fp(error_stream);
}
ERR_clear_error();
}
continue;
}
Note that we are calling BIO_do_accept() the second time. That’s how the accept BIO works. The first BIO_do_accept() call sets up the listening socket. It is equivalent to invoking the bind() and listen() system calls. The second BIO_do_accept() call actually accepts an incoming TCP connection on the listening socket. It is equivalent to invoking the accept() system call.
When a TCP connection is successfully accepted, the accept BIO will create a new socket BIO, similar to how the accept() system call creates a new connection socket. The accept BIO will also attach to the newly created socket BIO, creating an accept-socket BIO chain. The newly created BIO represents the accepted connection, as opposed to the listening socket or BIO. We are going to detach the socket BIO, create and attach an SSL BIO in front of the socket BIO, and do the rest of the communication on the newly created SSL BIO. Let’s do it step by step.
- Detach the socket BIO from the accept BIO:
BIO* socket_bio = BIO_pop(accept_bio);
- Create a new SSL BIO:
BIO* ssl_bio = BIO_new_ssl(ctx, 0);
- Attach the SSL BIO in front of the socket BIO:
BIO_push(ssl_bio, socket_bio);
- We will do the rest of the communication on the SSL BIO in a separate function, called handle_accepted_connection():
handle_accepted_connection(ssl_bio, error_stream);
- Remember that we are still in the listening while() loop, so let’s close it:
} // end of while loop
The handle_accepted_connection() function will perform TLS handshaking, receive and send data on the connection, shut it down, handle errors, and free both the SSL BIO and the socket BIO. The handle_accepted_connection() function can be run in a separate thread if desired. In such a case, several incoming connections can be handled simultaneously. The accept BIO is already detached from the socket BIO, so the accept BIO can accept the next connections without affecting the running connections. For simplicity and portability, we will run a single thread in this example.
Time to implement the handle_accepted_connection() function:
- First, allocate the read buffer:
const size_t BUF_SIZE = 16 * 1024;
char* in_buf = malloc(BUF_SIZE);
- Next, perform the TLS handshake:
err = BIO_do_handshake(ssl_bio);
if (err <= 0) {
if (error_stream)
fprintf(error_stream, "TLS handshaking error ");
goto failure;
}
- Next, read an HTTP request from the client. For simplicity, we are not going to parse the request thoroughly, but we are going to stop reading from the client when we encounter the first empty line:
printf("*** Receiving from the client: ");
while ((SSL_get_shutdown(ssl) & SSL_RECEIVED_SHUTDOWN)
!= SSL_RECEIVED_SHUTDOWN) {
int nbytes_read =
BIO_get_line(ssl_bio, in_buf, BUF_SIZE);
if (nbytes_read <= 0) {
int ssl_error = SSL_get_error(ssl, nbytes_read);
if (ssl_error == SSL_ERROR_ZERO_RETURN)
break;
if (error_stream)
fprintf(
error_stream,
"Error %i while reading data"
" from the client ",
ssl_error);
goto failure;
}
fwrite(in_buf, 1, nbytes_read, stdout);
if (!strcmp(in_buf, " ") || !strcmp(in_buf, " "))
break;
}
printf("*** Receiving from the client finished ");
- After the client request is read, we will send the server response:
const char* response =
"HTTP/1.0 200 OK "
"Content-type: text/plain "
"Connection: close "
"Server: Example TLS server "
" "
"Hello from the TLS server! ";
int response_length = strlen(response);
printf("*** Sending to the client: ");
printf("%s", response);
int nbytes_written =
BIO_write(ssl_bio, response, response_length);
if (nbytes_written != response_length) {
if (error_stream)
fprintf(
error_stream,
"Could not send all data to the client ");
goto failure;
}
printf("*** Sending to the client finished ");
- After the response is sent to the client and no more data is to be sent further, it is a good practice to shut down our side of the TLS connection:
BIO_ssl_shutdown(ssl_bio);
- After the communication is over, we have to free the used objects and buffers:
if (ssl_bio)
BIO_free_all(ssl_bio);
free(in_buf);
- Finally, let’s inspect and clear the OpenSSL error queue. Note that we do the error queue handling per incoming connection, not per application run:
if (ERR_peek_error()) {
exit_code = 1;
if (error_stream) {
fprintf(
error_stream,
"Errors from the OpenSSL error queue: ");
ERR_print_errors_fp(error_stream);
}
ERR_clear_error();
}
That would be the end of the handle_accepted_connection() function. After the handle_accepted_connection() function is finished, the execution returns to the while() loop that is accepting incoming connections, and a new incoming connection can be accepted and handled.
The complete source code of our tls-server program can be found on GitHub as the tls-server.c file: https://github.com/PacktPublishing/Demystifying-Cryptography-with-OpenSSL-3/blob/main/Chapter09/tls-server.c.
Running the tls-server program
Let’s run our tls-server program and handle some incoming connections:
- Open a terminal window and start the tls-server program:
$ ./tls-server 4433 server_keypair.pem server_cert.pem
*** Listening on port 4433
The server is now running and accepting connections.
- Open another terminal window and run the previously developed tls-client program against the running tls-server program:
$ ./tls-client localhost 4433 ca_cert.pem
*** Sending to the server:
GET / HTTP/1.1
Host: localhost
Connection: close
User-Agent: Example TLS client
*** Sending to the server finished
*** Receiving from the server:
HTTP/1.0 200 OK
Content-type: text/plain
Connection: close
Server: Example TLS server
Hello from the TLS server!
*** Receiving from the server finished
TLS communication succeeded
As we can observe, the TLS connection has proceeded quite well from the tls-client point of view. Note that this time, we gave the third command-line argument to tls-client, namely the file containing the server CA certificate, so that tls-client could verify the server certificate.
- Switch to the first terminal window and check the tls-server output:
*** Receiving from the client:
GET / HTTP/1.1
Host: localhost
Connection: close
User-Agent: Example TLS client
*** Receiving from the client finished
*** Sending to the client:
HTTP/1.0 200 OK
Content-type: text/plain
Connection: close
Server: Example TLS server
Hello from the TLS server!
*** Sending to the client finished
*** Listening on port 4433
As we can see, tls-server has successfully handled the connection from tls-client and continued to listen for the next incoming connections.
- Let’s try one more thing, another TLS client, the curl utility. Let’s run the following command in the second terminal windows:
$ curl https://localhost:4433 --cacert ca_cert.pem
Hello from the TLS server!
As we can observe, tls-server is also compatible with curl! The tls-server output in the first terminal window confirms that our tls-server program has just serviced curl. See the User-Agent header in the request:
*** Receiving from the client:
GET / HTTP/1.1
Host: localhost:4433
User-Agent: curl/7.74.0
Accept: */*
*** Receiving from the client finished
*** Sending to the client:
HTTP/1.0 200 OK
Content-type: text/plain
Connection: close
Server: Example TLS server
Hello from the TLS server!
*** Sending to the client finished
*** Listening on port 4433
tls-server will run and accept connections until it is aborted. It can be done, for example, by pressing Ctrl + C in the terminal window where it is running.
We have come to the end of the practical part of this chapter. We have learned how to establish TLS connections and use BIOs, and wrote two excellent example programs that use those features.
Let’s proceed to the summary.
Summary
In this chapter, we learned about the importance of the TLS protocol, why it is needed, and where it is used. We also learned about how the protocol works on a high level, what is included in the TLS handshake, and what happens after the handshake. We finished the theoretical part by taking a look at the TLS protocol history, learning about its development, and how old and new versions of SSL and TLS differ from each other.
In the practical part of the chapter, we learned how to establish client and server TLS connections, both on the command line and programmatically using C code. We also learned about OpenSSL BIOs.
In the next chapter, we will learn about the more advanced usage of X.509 certificates in TLS, including user-controlled certificate verification and client TLS certificates.