3
Governance on Betty Blocks
Now, we’ve arrived at the point at which we will cover the Betty Blocks platform in depth. We’ll start this chapter by talking about governance in general and how this applies to the Betty Blocks platform. Then, we’ll get you started by creating your account on the platform, which will enable you to follow along with the book – you can try out everything that we will describe.
In the next section, we’ll talk about My Betty Blocks. This is where all the governance of the platform takes place. We’ll dive into organizations, what they are, and what they do to help you in the development of your applications.
We’ll create our first application and show you how to do that. Once you’ve created your application, we’ll take you through all the options that are available for applications and how you can invite new admins or users to your applications. I’ll also show you how you can create a sandbox of your application and explain what exactly sandboxing is and means and how useful it is to use sandboxing.
Lastly, we’ll talk about templates and how you can utilize them so you can get started with your application more quickly.
We will cover the following topics:
- What is governance on Betty Blocks?
- Organizations – the primary layer for your apps
- Applications within your organization
- User management
- What is sandboxing?
- Using application templates
By the end of this chapter, you’ll have learned how to govern your applications in Betty Blocks, manage your users within your organizations and applications, and what sandboxing is and how to use it.
What is governance on Betty Blocks?
The whole process of creating new applications starts with governance. The reason for this is that for every application that is created, you want to know about it. Otherwise, there will be a wild growth in applications and no monitoring of what those applications do or what they are being used for. This will lead to shadow IT and the risk of losing data since nobody knows where this data has been stored.
This is why the governance of Betty Blocks usually lies in the hands of the IT department or the innovation department. This way, they can facilitate and manage the creation of new applications and Development, Testing, Acceptance, and Production (DTAP)-streets, merge work that has been done in production, and invite new developers to applications. This way, the citizen developer and the non-coder don’t have to worry about these things, especially within larger companies, as everything is managed from one central point.
So, where does governance in Betty Blocks take place? It all takes place at My Betty Blocks (https://my.bettyblocks.com). Here, you can do everything related to the things mentioned in the previous paragraph. We’ll go through all of this in detail so that you understand what all of this does and how it can help you get the best out of the platform.
Setting up your account
You might be completely new to Betty Blocks or no-code solutions, so you’ll have no Betty Blocks account yet. Let’s get that fixed first so that you can follow along with this book more easily. First, you’ll need to open your browser and go to https://www.bettyblocks.com.
This will land you on the home page of Betty Blocks as shown. In the top-right corner and center of the page, you’ll see buttons called Start free trial. This trial is accessible for at least 30 days. It’s not automatically canceled after 30 days, but the marketing or sales department at Betty Blocks controls the overall length of your trial.

Figure 3.1 – Betty Blocks home page
Click on that button. This will take you to the registration page for the platform. Fill your information in here to get started:
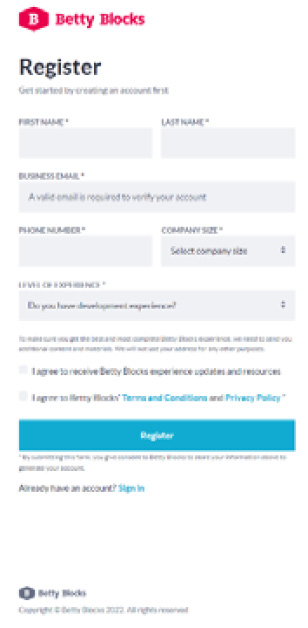
Figure 3.2 – Registration page
Afterward, you should receive an email to confirm your registration. Once you have, you’ll be asked to choose a password and you should be logged in to my.bettyblocks.com.
You’re now registered on the platform and ready to get started building your first application.
Introduction to my.bettyblocks.com
Now that you are logged in to My Betty Blocks, let’s quickly introduce where you have landed in My Betty Blocks.
Once you log in to My Betty Blocks, you land on the dashboard, from which you can quickly access some of the pre-built templates offered by Betty Blocks. It also gives you quick access to the learning section of Betty Blocks, which offers different types of videos for learning on the platform, and also offers a tour to provide a quick overview of the platform.
Next, we’ll have a look at what organizations are and how you can manage them as an admin.
Organizations – the primary layer for your apps
Organizations are the basis of your applications. Every application in My Betty Blocks resides in an organization. An organization can hold multiple applications, but it also decides where your application will live in the world. Betty Blocks is hosted on different servers in the world. Since laws differ across countries, you may want to host specific applications in specific countries to make sure your application and the data in that application apply to a particular country’s set of laws.
Once an organization has been created in a specific zone – a zone is a specific area in which your application lives (i.e., the EU, the US, or Canada) – it will always create its applications there as well. As talked about before, Betty Blocks runs by default on Azure in the public cloud, but it can also run on other cloud providers. In the public cloud, you have the choice to deploy your applications to different zones – for example, in the EU, the UK, the US, or Canada. Depending on which zone your organization is created in, your applications will be automatically deployed there.
When you created your trial account on the platform earlier, the platform also created an organization for you. Log in to the platform and let’s have a look at this organization. After you log in, you should end up on the dashboard in My Betty Blocks. On the left, you should see the vertical menu. Click on the icon that looks like a building: this should take you to the organization overview page. The following screenshot shows an example of what this looks like:
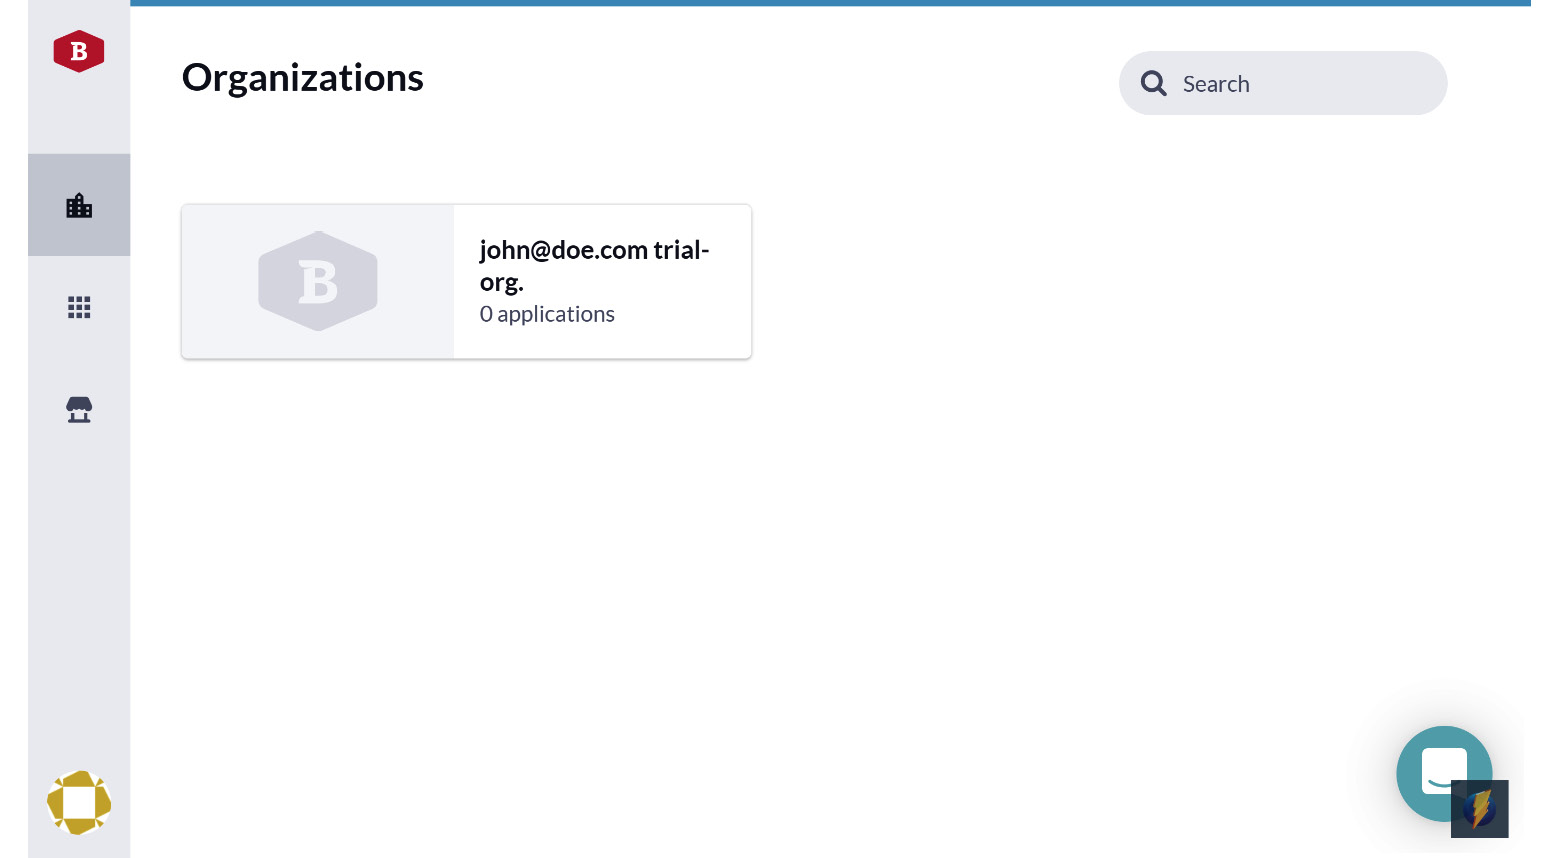
Figure 3.3 – Organization overview
Now, let’s click on the organization panel that you can see. This should open up the organization itself. You should see a screen like this:

Figure 3.4 – Inside the organization
Organizations have the following options that you can interact with:
- Settings
- Members
- Create application
Settings for organizations is not very extensive, but you can change the name of your organization here and view the zone your organization is part of.
The Members option shows you all the members of your organization. You can either invite users directly to your organization, or you can invite users to an application that is part of this organization. In both cases, the user is added to the organization members as well. There is a distinction between types of users in organizations: you can either just be a member or be an admin. Being a member means that you can only see the applications that you are added to. If you don’t have access to any applications, you will just see an empty organization. The user you are logged in with now should be an admin. Being an admin allows you to create applications in the organization and also invite users to these applications. It allows you to merge application sandboxes. We’ll dive deeper into this in the What is sandboxing? section later in the chapter.
Members are always invited to join an organization by using their email addresses (see Figure 3.5). Betty Blocks also has options for larger organizations to add members automatically through their identity provider. This allows organizations to quickly add and remove members using their identity provider without having to manage them in My Betty Blocks:

Figure 3.5 – Organization members
With the Create application button, you can create new applications in your organization. Once you click on this button, it will open the application template overview. Here, you can select a template or click on the Start from scratch button. This will create an empty application without anything preconfigured.
Let’s create an application so that we can have a look at the options there are for applications as well. Click on the Start from scratch button. A dialog box will open, in which you can enter the name of your application. Enter any name that you like:

Figure 3.6 – The new application dialog
As you can see, the identifier is also filled in with your application name. The identifier needs to be unique, so if it’s not unique, you need to change it so that it is unique within the platform. Once you are finished, click on the Create application button.
Applications within your organization
Creating your new application might take a few seconds or minutes, so wait for that time. Once it is done, let’s have a look at our new application in My Betty Blocks. You should have been redirected to the organization overview in which you can see all of your applications. It looks as follows:

Figure 3.7 – Organization overview with one application in it
When you hover your mouse over the application, you should be able to click on it, and it should take you to the application overview. Be careful not to click on the Open button because this will take you to the development environment for the application (we’ll go there in the next chapter).
Now, we are in the overview of your application, in which you can manage your application settings and invite users to your application. Let’s start with the settings of an application. You can access the settings of an application by clicking on the three dots on the right-hand side:

Figure 3.8 – Application overview – settings menu
Here, click on the Settings menu option. This should take you to the application settings for your application. Here, you have six different settings tabs:
- Options
- Web options
- Hostnames
- Invitation
- Template
Let’s discuss each setting in detail.
Options
Here, you can set up most of the basics of your application for My Betty Blocks. You can add an image for this application so that it shows up in your application overview instead of a gray Betty Blocks logo. Next, we have the name of the application. You will have already named your application during the creation of your application, but you have the option to change it here.
You also have the option to change your identifier since this needs to be unique and also changes the URL of your application. Changing this might have a considerable impact on your application, so please choose your identifier carefully:

Figure 3.9 – Options
If you are an admin for multiple organizations, you can also switch organizations within your application, and move from one organization to another.
Next up are the more advanced options, starting with logging. As we start building our application, we might want to log some of the actions taking place in our application. Logging can be quite useful for debugging, but it also slows down your application. So, with this option, you can turn off all the logging options across your whole application with just one click. This is especially useful when you are deploying your application to production later.
The private data mode is a very important option. This is turned on by default when you start your application. What does this mean? Your application will have a database with data inside it. By default, this data won’t be accessible if you are not logged in to the platform itself. Basically, it protects your data by not setting the data as public. This allows your application builders to build applications without the risk of exposing data to the outside world before the application has been officially released and checked by, for example, IT or an experienced developer. When this option is not enabled and you’re visiting the frontend of your application, the system will recognize that you’re not logged in to the platform and redirect you to the login page first.
Web options
Web options has been specifically designed for the part of Betty Blocks that allows you to build web pages:

Figure 3.10 – Web options
The MAINTENANCE MODE option can turn on maintenance mode for your applications. This will display a maintenance message for all users of the application so that nobody can use the application during maintenance. This goes for both the development and the runtime (the frontend) part of the application – be aware that this is only for the older IDE in the platform.
CROSS-ORIGIN RESOURCE SHARING PROTECTION is a very technical option. Essentially, this option allows you to share resources across multiple websites – so if, for example, you want to use things you have built within Betty Blocks on another website or application, this option needs to be enabled.
ALLOW IN IFRAME has multiple options: allow your application to be embedded in iframes from external applications, deny your application to be embedded in iframes from external applications, or allow your application to only be embedded in iframes from the same application. This can be useful if you are building an application that needs to be part of another application and be hosted in an iframe within that application.
CONTENT SECURITY POLICY lets you specify the content of your content security policy headers. This will add specific headers to your pages for security. This only works in the custom endpoints of Betty Blocks, not in the page builder, so if you are building with the page builder, you don’t have to worry about this option.
The three options for setting your 404, 500, and MAINTENANCE MODE pages are also specifically for the endpoint pages of Betty Blocks. You set these here based on pages that you’ve created in the application so that those pages will show up instead of the standard 404, 500, or maintenance pages of Betty Blocks. The page builder has a new setup for this, which is handled in the Betty Blocks application.
Hostnames
Hostnames allows you to use your own domain for your application. By default, your application will have a name such as <identifier>.betty.app for the application frontend. To change this to your own domain or subdomain, you can use a hostname to set this up:

Figure 3.11 – Hostnames
Here, you can set up your own domain and then upload a certificate for your domain. All domains for Betty Blocks are secure (SSL) by default, so you always need to upload and send an SSL certificate to Betty Blocks in order to get your domain working. This part of the process is handled by Betty Blocks support – installing the certificate, for example. You can read the instructions about that on this page as well.
The Mail options for Betty Blocks are configured here. There are three variants that you can choose from:

Figure 3.12 – Mail options
The first Demo settings option is the standard one that is activated when you have just created a new application. This option allows you to send emails from the betty.app domain (for example). This is the only extension you can use by default. This one allows you to send emails by using [email protected] as an email address. You can change the noreply part of this email address, but @betty.app is the only extension that you can use. This prevents users from accidentally emailing from specific accounts during the development of their application.
For production applications, we have Custom smtp configuration and Mandrill; these two options allow you to use your own domain.
SMTP needs to be set up first. You’ll need to configure the SMTP settings for your domain so that you can send emails from your domain first. Once you’ve filled in these settings, you are good to go.
For Mandrill, you need to have a Mandrill account or use the default one that Betty Blocks provides. Mandrill is an external transactional email service, so, if you are going to use a lot of bulk emailing, this might be a good option. You can also use Mandrill to verify your own domain. This will allow you to send emails from your own domain as well, just like with SMTP.
If you are not going to be bulk emailing – just sending emails to external parties and internal employees – then SMTP is the best choice since you use your own email server to send emails.
Invitation
Invitation handles the email that is sent to users when they are invited to the application. This is purely for the backend part of the application, where you develop your application and have access to the back office of the application. These users will become part of the Betty Blocks ecosystem. The frontend users who are invited to the application are only a part of that specific application and have nothing to do with Betty Blocks. We’ll dive deeper into this in the chapter where we talk about the page builder:

Figure 3.13 – Invitation
Here, you have the option to make changes to the email that is being sent out to the user who is being invited. By default, it’s the standard email that Betty Blocks sends, but if you would like to personalize this email, you can do that here. There are also a few options that you can use, which are shown between curly brackets. For example, {{user}} will replace this part of the email with the name of the user. Let’s see what all of these do so that you know how to use them:
- {{user}}: Shows the user’s name
- {{type}}: Shows the type of the application
- {{sender}}: Shows the name of the user who sent the email
- {{name}}: Shows the name of the application
- {{invitation_url}: Shows the URL of the invite so that the user can accept the invitation
With this, you should be able to modify your email to suit your own.
Template
Template allows you to convert your application into a template. Once you are done with your application and you want your application to function as a template for other users, you can use this to set it up as a template. When you do this, only people within your organization can use this template. Not all users within the platform will be able to see it.
You can fill in all the fields here and you’re ready to go:

Figure 3.14 – Template
These are all the options you can set for your application. You don’t have to worry about most of them when you first get started with building your application, but it’s good to know that these options are there for you. Let’s talk more about user management now.
User management
As mentioned before, there are two different types of users: application users and organization users. Eventually, all application users will end up as organization users as well because an application is always part of an organization. We’ve already talked about organization users, so let’s dive deeper into application users now. In the next screenshot, you can see an example of a user who has been added to an application:

Figure 3.15 – User overview
An application user comes in two different types: an admin or a member. The admin is essentially a builder of the application. This user has full access to all the elements of Betty Blocks that allow them to build and make changes to an application, such as the page builder, the models, the actions, and the web services. This user also has access to the data API, which means that you can access the data in your application from the frontend of your application while it’s still in development. Frontend users don’t have this option (don’t confuse frontend users and members here).
Members are users that have access to a small part of the application’s backend. The only thing they have access to is the back office. This is a special part of the application that allows users to quickly interact with and manage the data inside the application. The back office is something that can be set up very easily and quickly, but still has all the power of the CRUD user roles that all the other users also have, which means you can also use this as your CMS or admin environment. What exactly does this mean then? Why would you use this user at all?
This has to do with where the Betty Blocks platform comes from. When Betty Blocks was first developed, it only had what we now call the back office. It was a simple CRUD interface that allowed users to quickly set up an interface to interact with data. There was no frontend in Betty Blocks at that point (we’re talking about 2013-2014 now). The back office still remains a powerful tool because of its ease of use, although it is something that is a less prominent part of the platform nowadays. We’ll still cover it in this book since it’s so easy and powerful. You can create internal applications with this back office for your employees.
So, what happens if you delete a user? If you delete a user from My Betty Blocks, the user doesn’t have any access to this application anymore, but the actual user data is not deleted from the application because that would mean that you would lose all the reference data for that user as well. The user can’t see the application anymore in My Betty Blocks and can’t log in anymore, but the data remains intact. Of course, you can write an action in your application that removes all user data as well if you wish to, but it’s not done by default.
Users also need to be invited to each sandbox of an application separately. This means that if you are invited to one of the sandboxes, you don’t automatically have access to all the other sandboxes. Let’s talk about sandboxing in more detail now.
What is sandboxing?
Betty Blocks has an option called sandboxing for your application. If you have never programmed before, this won’t immediately make sense – so, what is it exactly?
Sandboxing is a way of splitting up your application into multiple applications, so to speak, which allows you to develop your application without changing the production application. Now, you might be thinking, but that’s exactly what I want to do – change my production application. Of course, that’s the goal, but if you are making a change to your production application and someone visits your application at that point, they might get a broken page, for example – and you don’t want that. You want users to be able to keep doing what they are doing while you work on your application because it might take several hours or maybe even a few days before you are done with making your changes and testing them. This is where sandboxing comes into play.
When you sandbox your application in My Betty Blocks, you basically make a copy of your production application. This copy is still connected to your production application and each sandbox has its own database, so you never mess up your production data in those sandboxes. In this copy, you can make changes, which you can also test in this same copy that you’ve made. Once you are happy with your changes, Betty Blocks offers you an option called merging. This means that you can copy over all of the changes to the application that is connected to your copy. Let’s see how this works.
Here you can see an example of what your current application should look like:

Figure 3.16 – A production application without a sandbox
Underneath your application, you will see a box with the Create new sandbox button in it. Click on it, which should open up a dialog that allows you to name your sandbox. Because it will be a completely new application, you need to give it a new name. Let’s name it My First Betty Acceptance. The identifier of your sandbox will still have part of the original identifier, as you can see in the dialog, and it will copy the name of your application there as well. Since this will make the identifier extremely long, we’ll change it to just acceptance. Let’s click on the Create new sandbox button. This will take a minute to run.

Figure 3.17 – Creating a new sandbox
So, why the name acceptance? In most cases, you create four sandboxes for your applications, which are called a DTAP-street in the programming world. As you can see, we already have our production environment, so now we are creating an acceptance environment. The acceptance environment is usually used to test the latest changes by a specific group of users, for example. The test environment is used by developers or specific testers to test the application, and then there is the development environment, in which the actual development is being done. This way, testers can test without having to worry about sudden changes from the developers, and changes can be pushed slowly from sandbox to sandbox until they are production ready.
Now that your acceptance sandbox is ready, it should look something like the following screenshot:

Figure 3.18 – Application with one sandbox
Let’s create the whole DTAP-street now – name the sandboxes:
- Name: My First Betty Test
- Identifier: Test
- Name: My First Betty Development
- Identifier: Development
Every time you create a new sandbox, it will take a minute before you can create a new one again, so this might take a short while. Once this is done, it should look like this:

Figure 3.19 – Application with a full DTAP-street
Now you’ve set up a full DTAP-street for your application – so if you made a change to your application, how would you push this to the production application?
You can do this by clicking on the merge button (![]() ). As you can see, each application has a merge button and merging is always done from bottom to top. One of the things that sandboxing does is disable development in all applications except for the lowest one, so you can only develop one application, which is always the last one you created. If you were allowed to make changes to the other applications, the merging would become a mess, and your applications wouldn’t match anymore. Of course, you can manipulate data in any of the applications. Each application has its own data, so if you make a change to your data in one application, it won’t affect the others.
). As you can see, each application has a merge button and merging is always done from bottom to top. One of the things that sandboxing does is disable development in all applications except for the lowest one, so you can only develop one application, which is always the last one you created. If you were allowed to make changes to the other applications, the merging would become a mess, and your applications wouldn’t match anymore. Of course, you can manipulate data in any of the applications. Each application has its own data, so if you make a change to your data in one application, it won’t affect the others.
Now, let’s say you’ve added a page to your application and you then click on the merge button for your development application. You’ll see an overview of all your changes after clicking on the button, which you can start to merge to the next application (in this case, the test application). Once they have been tested in the test application, you can merge them from the test environment to the acceptance environment, and then from acceptance to production. This sounds like a lot of work, but it does reduce the chance of breaking your production application because everything goes through a test cycle as well.
The last thing about merging: the only users that can merge are organization admins. Developers of applications can’t merge – if you are both a developer and an organization admin, you can merge, but you’ll need to have both admin roles. Otherwise, you’ll have to ask your organization admin to merge the changes for you. This way, you ensure that you have one person making the changes and another person applying them and making sure things get tested.
In a later chapter, we’ll do an actual merge since we haven’t done any actual development in the platform yet – we’ll get to that later. We’ll merge our changes to an underlying sandbox so that the sandbox will also have all the changes that have been made to the development environment.
Now, the last thing we’ll talk about in this chapter is how to use templates. Let’s check that out in the next section.
Using application templates
Betty Blocks has a library of standard templates available. All of these templates are free to use for anyone who has access to the platform. As mentioned before, you can also create your own templates once you’ve finished building your application or template. You can publish it to the template section of My Betty Blocks, where anyone who is part of your organization can use it. Let’s have a look at the standard templates first:

Figure 3.20 – Standard templates in My Betty Blocks
As you can see, these are a few standard templates that Betty Blocks offers. There are templates here that can help you kickstart your application, and there are templates that are already complete applications. The ones that are there to kickstart your applications include the Google SSO template, for example, which has Google SSO built in, so you don’t have to build it yourself anymore. There is no actual application with a workflow besides the login in this template – that is the part you’ll have to build yourself. However, it does save you a lot of time that you don’t have to set up the whole Google SSO anymore. The only thing you need to add here is the credentials for Google and you’re all set. That takes just a few minutes.
You can also see an application here called Document Approval Application. This is a complete application that has a workflow built in for approving documents and being able to upload documents. Of course, you can add to this template as well – even though it’s a fully functional application, you can still add more functionality to it yourself. Maybe you would like this application to upload these documents to your own server once they are approved. That is something you can absolutely do with the platform.
There is even a template that has a guided building system built into it:
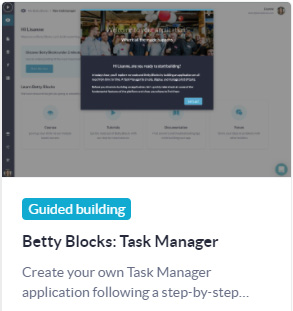
Figure 3.121 – The Guided building template
It will take you by the hand and guide you through making changes to an application. Every step is highlighted for you, so you won’t get lost along the way. Of course, you have this book to help you with that, but if you want to get your first taste of a building Betty Blocks application, I’d recommend using that one. It’s a great way to get started or just get a quick feel for the platform.
Summary
My Betty Blocks is all about the governance of your applications and users. It all starts with registering on the platform or being invited to an application or organization on the platform by an admin. Once you’ve completed your registration, you can get started on the platform.
Organizations hold your applications. Within an organization, you can have multiple applications and users. When a user is an admin of an organization, they can invite users to the applications of this organization and create new applications. These admins also have the option to create or merge sandbox applications.
We’ve talked about how you can create applications on the platform. You can create applications with or without using templates. Using a template can kickstart your development process. Once your applications have been created, you can invite users to your application. A user for an application can be an admin or a member. An admin can be built in the application, while a member can only access the back office of the application. This only allows them to modify data in the application through the back office.
I hope all of this gave you a good insight into what you can do with My Betty Blocks. Let’s move on to actually using a template now and explore this template to see what you can actually build with Betty Blocks.
Questions
- What are organizations used for?
- What is a sandbox?
- What are templates for?
Answers
- Organizations are used to store all your applications in one central place. Here, it’s easy for an admin to manage all the applications in your organization.
- A sandbox allows you to create a copy of your production application so that you can make changes without breaking the production application. At a later stage, you can merge all these changes back into the production application.
- Templates are pre-defined applications that allow you to get a quick start on your application development without having to reinvent the wheel every time.