
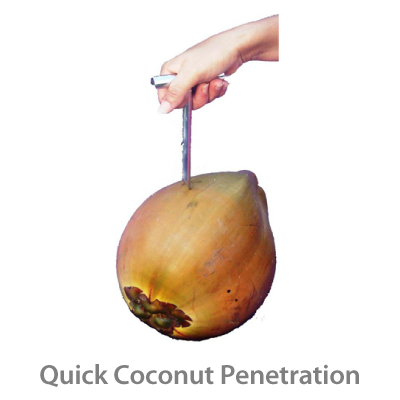


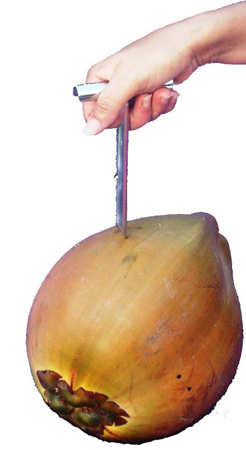
Considering the implications of carrying around a machete and the likelihood of hacking off a finger, a CocoTap is an invaluable tool for accessing a coconut. A solid 316 stainless tube crafted with a pointed end and a fold-out T-style handle, the device will easily pierce everything from a green coconut and jelly nut to a mature drinking coconut.
I picked up my “Barman” model at a market in Cairns, Australia. At the time, I was actually after a machete, which I’d used while living in Ecuador for many years. When the guy at the market showed me the CocoTap, I was skeptical. But after more than a year of use, I’m now on my second trip to the tropics with it. It folds up conveniently and is a hell of a lot easier to pack than a machete. I also use it for all kinds of small jobs requiring something strong, sharp, and pointy. As the website says, it’s like an extra finger.

- CocoTap
- $35
- Available from CocoTap
I used to buy soy milk from the store in cartons. Aside from the fact it’s heavy (I transport groceries without a car), it comes in a tetra-pack, which is difficult to recycle. More importantly, commercial soy milk tends to include a number of ingredients I can do without, like chalk (calcium carbonate) and guar gum.
Unless you really like mucking with cheesecloth and lots of pots covered in soy scum, you owe it to yourself to buy a soy milk maker. After some research, I settled on the Joyoung CTS1048. This “filterless” model is a major improvement compared to earlier soy milk makers. Other devices require filter cups, which tend to get clogged with gummy okara (soy pulp) and are a terrible headache to clean. Instead, the CTS1048’s immersion blender head is contained inside a small steel cage. From there, the milk strains through a second, basket-style strainer. Clean-up is no harder than what’s required by a food processor.
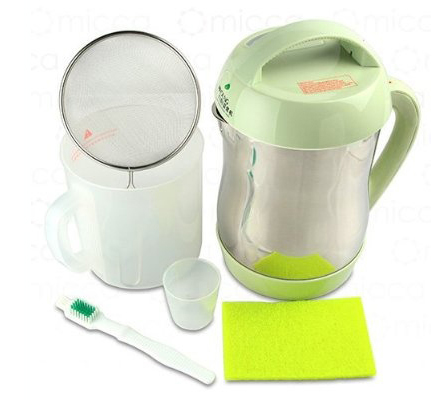
Since the Joyoung makes 1.6 Liters per run, there’s plenty to serve up hot and/or store in the fridge. It doesn’t take long either, so you can always run it twice. Plus, it only costs around 15 cents a batch. I drink four times as much soy milk now, so the machine paid for itself in two months.
If you’ve never had fresh, hot soy milk, the way the Chinese like it, you’re missing out; it’s rich, foamy and all-around delicious. I always enjoy a warm glass as soon as a batch is done. Bonus: Aside from soy beans, you can add other ingredients. The Joyoung makes excellent coconut milk, for example, which eliminates an often preservative-laden canned good from the kitchen.
During my research, I discovered that most of the more-expensive soy milk makers are just rebranded Joyoung appliances, making the Joyoung the smart and economical pick. This is that rare product I can recommend with no reservations.
Note: Before starting, soak the beans until they’re plump. Although the Joyoung features a dry-bean mode, the end product is inferior and your patience will be well-rewarded.

A spout ladle is the optimal tool for basting. I’ve tried spoons, suction basters, basting mops, and even those new silicone basting brushes. All but the first are less efficient at getting enough liquid out of the bottom of a pan.
Regular spoons, even so-called “basting spoons,” aren’t the right shape for getting down deep into the pan while simultaneously letting you scoop up enough liquid without having to tilt the pan too much. Enter the spout ladle, which is the perfect shape for this. The angles line up; The tilt is right; And it’s long enough you don’t run the risk of burning yourself on the pan or the rack while doing it.
I got mine in Chinatown, which is the only place I’ve ever seen this exact shape. You want a slight angle, not a 90-degree between spoon and handle as in most serving ladles. You can get one close to, but not exactly, that design online.
- Spout Ladle
- $5 (1 oz.)
- Available from Amazon
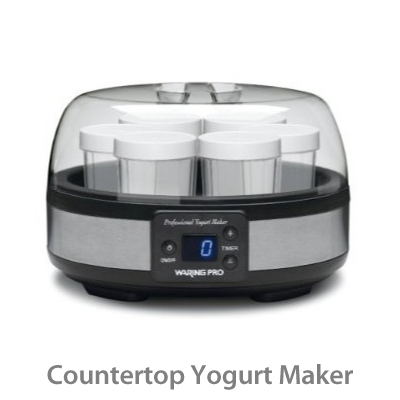
I’ve been making my own yogurt for the past couple of years. Not only is it much tastier than store-bought yogurt, but it’s also much cheaper. At my local supermarket, an 8-ounce container of yogurt costs $1. That adds up to $16 per gallon. At the same supermarket, one gallon of low-fat organic milk costs $4.
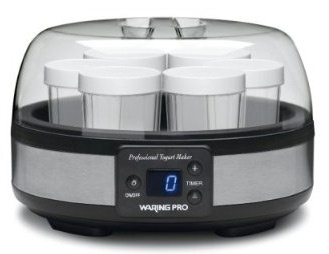
Since I’m a believer in the power of probiotics (i.e. bacteria is good for your immune system), I usually eat three cups of home-made yogurt a day. That translates to a savings of $2.25 per day, or $67.50 per month—which means my $89 Waring Pro YM350 yogurt maker paid for itself in just a few months. Even if you don’t eat as much yogurt as I do, I recommend you try making it yourself. It’s so easy, and even fun.
Here’s how:
-
Pour 4–6 cups of low fat milk into a microwave-proof glass bowl, and heat it until the milk begins to boil. (Boiling changes the milk’s composition so it will solidify when mixed with the starter culture.) If a skin forms on top of the milk, that’s a good sign you boiled it long enough.
-
Let the milk cool to the point where you can tolerate holding your hand against the bowl. Remove and discard the milk skin. Add one tablespoon of your previous batch of yogurt (or plain store-bought yogurt if you’re just starting out), and mix together with a whisk. Do NOT add more starter yogurt to the mix in an attempt to speed up the process. Paradoxically, it will only slow down the fermentation (I’ve read that too much starter crowds out the bacteria from doing its job).
-
Pour the yogurt into 8- or 16-ounce containers. Do NOT put on the lids yet. If you have an older-style oven with a pilot light, you can stick the glass jars in there and allow the warm oven to act as an incubator. Otherwise, use the yogurt maker or a seed-starter warming pad to ferment the milk into yogurt.
-
Wait 8–10 hours, then screw the lids onto the jars and place them in the refrigerator.
Note: I like to mix my yogurt with nuts, blueberries, and honey from my beehive. My kids love yogurt, banana, and berry smoothies.
Note: Watercolorist Jana Bouc has put together a great set of illustrated instructions on how to make yogurt using this device. —OH
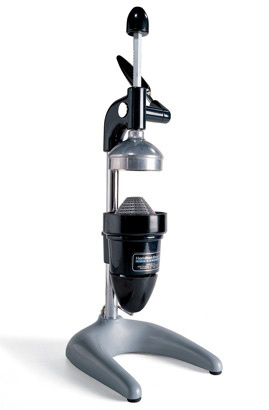
While some gadgets gather dust in our kitchen cupboards, this industrial-strength juicer remains on the counter. A glorified lever, it is the most efficient, easiest to clean, and most satisfying kitchen tool we own. The juicer boasts a simple design, few moving parts, and a removable cup to catch the drips. Unlike other juicers, it doesn’t spew flecks of fruit all over the wall; there’s no messy pulp to mop up; and the six-inch lever delivers steady power.
We bought ours two years ago and use it at least twice a week, depending on what citrus is in season. It works just as well and—with no motor to burn out—should continue working like a champ for some time. We also own a Black & Decker electric model (which now has a blown-out motor), a Juiceman Jr., a wooden hand reamer, and a little metal one you insert into a lemon just for a squeeze. The Hamilton remains our absolute favorite. In the dark winter months, when the backyard tree gives us lemons...well, you know.
- Hamilton Beach Commercial Juicer
- $165
- Manufactured by Hamilton Beach
- Available from Amazon
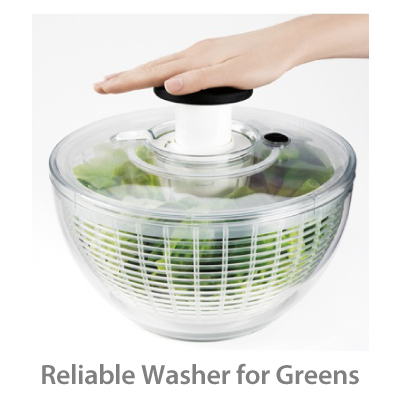
For any salad lover, the spinner is perhaps the most elegant and useful invention of all time. Known for years as that cool, design-minded brand that manufactures everything from garlic presses to tea kettles, OXO has taken the reins of the salad spinner market.
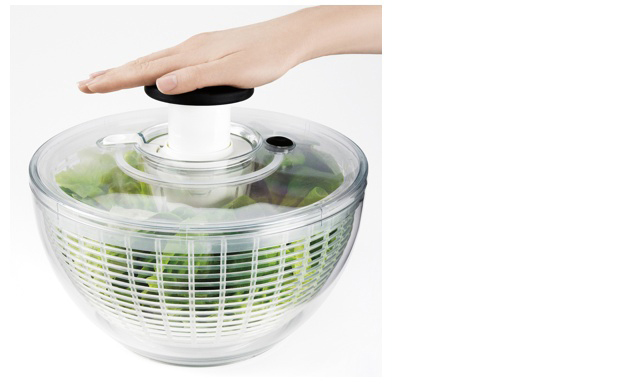
Instead of a crank arm and string pulley, the OXO model sports a pump-action plunger-like mechanism. Click a button, and the pump springs up from being flush with the lid. Depress the pump a few times to get the sucker spinning real fast. Then, a push of the brake button stops the spinning in seconds.
The plastic is non-porous, so it’s much more resistant to odors. To top it off, there’s a rubber rim around the bottom, which keeps the bowl from slipping as you enthusiastically spin your Cocard or Rouge d’hiver.
For several years, the Zyliss was the gold standard in salad spinners. They first replaced the traditional crank arm design with a pull-string that reduced time and elbow strain dramatically. But eventually they changed their design just enough to make a once-elegant device clunky and annoying. Since the Zyliss doesn’t spin freely (it stops when the string gets reeled back in), the parts are yanked to a stop, which puts a lot of stress on them.
The OXO beats the Zyliss hands-down. I’ve been using mine almost daily for a year. I haven’t found another spinner quite like it. I grew up in a family that graduated from keeping a small garden to an actual farm, so I have always eaten copious amounts of salad, even when it wasn’t bursting out of the ground chez nous. Needless to say, I really appreciate a good salad spinner!
- OXO Salad Spinner
- $30
- Manufactured by OXO International, LTD
- Available from Amazon
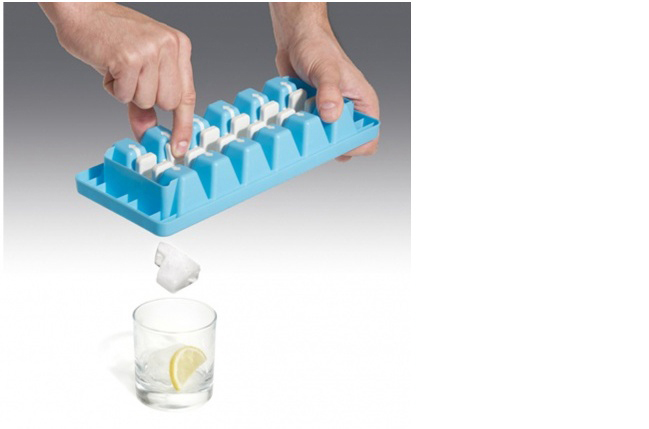
These ice trays aren’t glamorous or costly, but they do the job. Below each cube’s compartment is a button that releases the cube. The trays are very easy to use. My husband has very little hand strength. As such, we’ve tried aluminum, plastic and several other different ice trays. These are the only ones he has been able to use in several years.
- Joseph Joseph Quick Snap Ice Tray
- $8
- Available from Amazon
- Manufactured by Joseph Joseph
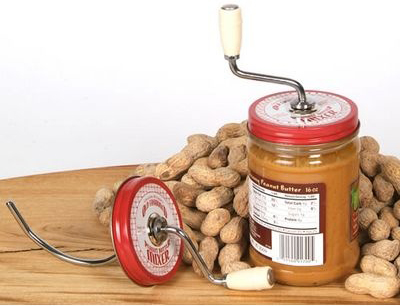
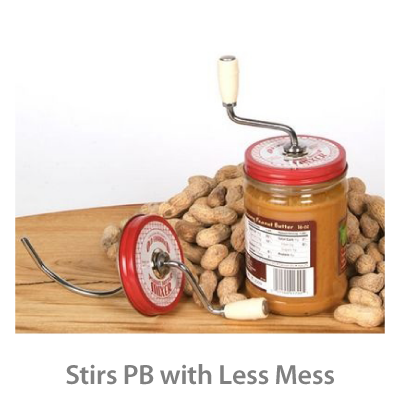
Natural peanut butter is delicious, but the initial stirring causes a mess. The minute you put in a spatula, the oil on top overflows everywhere. Instead, try this stirrer integrated into a screw-on lid. With a few quick turns, the peanut butter is completely mixed with zero spillage. Plus, when you remove the stirrer from the gasket once you’re done, it automatically cleans the stirrer! These days, my husband actually sneaks in a new jar of peanut butter just so he can mix it up before I get to.
- Peanut Butter Mixer
- $12
- Manufactured by Witmer Products, Inc.
- Available from Amazon
- Or $10 from Lehman’s
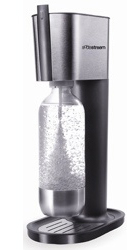
Concerned with our household’s waste-stream of plastic bottles and cans, we started using this counter-top soda maker to concoct our own soft drinks with tap water processed through a Britta. It’s easy to use. The durable bottles are said to be good for three years. Best of all, Sodastream’s proprietary CO2 cartridges can be conveniently exchanged either via mail or at accessible chain stores like Williams-Sonoma.
If you’re looking to save a little money, you can build your own set up, like the previously-reviewed carbonation system. However, the Sodatream has the benefit of being plug-and-play; it’s smaller and less clunky; and it’s only about $30 more than the DIY set-up. Plus, the DIY set-up requires you to lug around a big scuba tank every time you refill the CO2. But hey, to each his own, no?
After the initial investment, the only things I ever need purchase are carbonator refills and new bottles of flavoring. So far, we’ve enjoyed Sodastream’s cola, faux Dr. Pepper, tonic, and pink grapefruit—all diet with Splenda instead of aspartame (They also sell sweetened syrups without hi-fructose corn syrup). I find the taste is excellent. The pink grapefruit is one of the best soft drinks I’ve had anywhere.
Aside from reducing our waste, we no longer have to lug bottles back from the store. I also like to think about all the energy we will save annually by not buying water that’s been shipped from one part of the country to another.
- Sodastream Pure
- $130
- Manufactured by Soda Stream Direct
- Available from Amazon
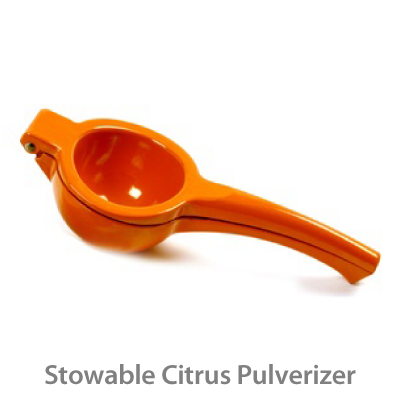
We make tapenades for the local farmers’ markets and each contain the juice of half a lemon. Before getting this sturdy juicer, not only were my hands and wrists aching after a morning squeezing (literally by hand), but the lemon juice would get onto my fingers and, after a while, burn.
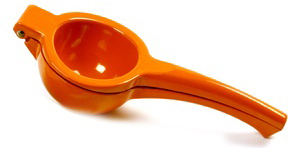
With this juicer, I insert half a lemon and push down using my whole arm rather than squeezing the lemon with my fingers. It works great and takes half the effort. No juice is wasted by dripping onto the hands. And the device is small enough to tote around. One caveat: Smaller seeds can sometimes pass through the juice holes, so I prefer to squeeze the juice through a sieve.
I’m sure some folks are partial to using the specific color-coated sizes, but we rely on the orange juicer for all of our citrus needs. If you’re tackling a bucket of lemons at home you’ll probably want a counter-top unit like the previously-reviewed Hamilton Beach juicer. However, if you’re juicing a few on the fly, I highly recommend these enameled aluminum juicers. There are similar stainless steel hand presses with soft grips, but they can be twice as expensive. Ours is tough enough. Besides, there’s nothing like a bright orange tool to break up the monotony of the silverware drawer.
Unlike other splatter screens made of mesh or metal, the OXO is made of perforated stainless steel. This renders it nearly indestructible, even when teenagers are involved.
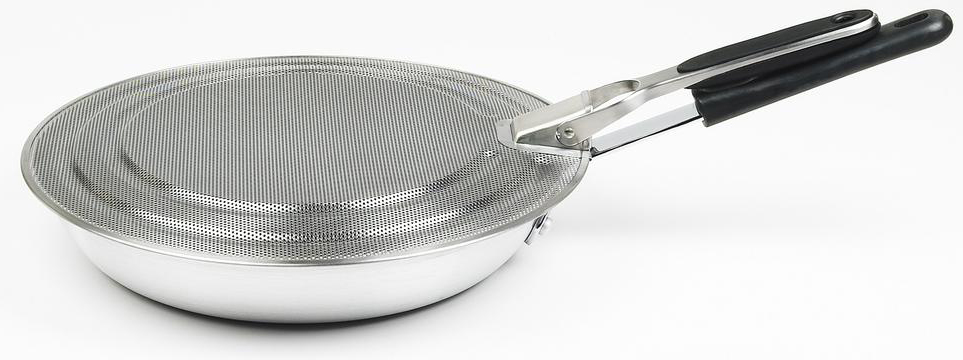
Two concentric rings center and secure the screen so it stays put on all our pans. Steam easily escapes through the perforations, avoiding sogginess. The sturdy handle folds for dishwashing and easy storage.
Before we found the OXO, a typical mesh splatter screen would last about nine months before inevitably getting damaged. What tends to happen is the mesh comes loose from the frame, either in use or during cleaning. I’ve used the OXO screen on a near-daily basis for the past year. The OXO splatter screen is so superior, it reinvents the tool.
I hate most kitchen gadgets with a passion. Seeing things like an avocado slicer, mango corer, or left-handed inverted egg whatsizinger give me the hives. For the longest time, I prided myself on being able to do the most with the least in the kitchen.
I’m saying all this because I wanted to convey just how hard it was to buy the Smart Stick a year ago on the recommendation of my wife. Normally blenders are hard to clean, bulky, loud, and can only be used for low-viscosity liquids; if the mixture is too thick, the blade just whirs uselessly.
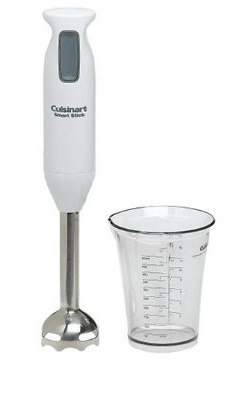
The Smart Stick solves all that. It takes up virtually no space. It is easy to clean. Instead of scrubbing out a blender, you just pop off the Smart Stick’s head, so it can be cleaned in eight seconds under running water. It’s impressively powerful and can be jammed full force down into a glass of ice to chop it up quickly. Yet, it’s still much quieter than a blender. The measuring cup it comes with is also well designed to break up the vortex the blender creates.
The Smart Stick is the cheapest and most basic hand blender I could find. Others come with whisks and choppers and brushed metal finishes, but I think the regular head works just fine. I found that the Smart Stick did 150% of what I’ve used a blender for and 75% of what I used a food processor for.
It’s very versatile. No more “pour boiling hot broccoli soup into blender to cream it, then pour back into pot.” You can use the Smart Stick right inside a stockpot on the stove. You can use it on thicker foods because you can stir and mash while blending, continuously bringing new material into the blade as opposed to a stand blender’s reliance on gravity to find unblended parts.
Making hummus, salsa, applesauce, and pesto went from “giant mess” to “easy.” Making smoothies went from “big production” to “two minutes.” Guacamole and whipped cream turn out wonderfully smooth. Margaritas can be made right in the pitcher. Almond butter can be made without too much trouble. I imagine this would also be a lifesaver for making baby food.
There are some downsides: It only has one speed (high!), so you have to be careful and use it in bursts if chopping ice, as it will happily sling iced coffee circumferentially around your kitchen in a ten-foot radius if you get too enthusiastic. You also have to be careful using it with plastic bowls as the metal head can punch through the bowl bottom if you push it too hard. The blade is SHARP. It’s not really suitable for use by children (or klutzy adults). If you need to clean around the blade’s backside with a finger, REMOVE the head from the motor first.
Again, I really really wanted to hate this thing and didn’t buy one for the longest time because I considered it useless. Now it’s the only electric kitchen tool that remains permanently plugged in on my counter other than a Kitchen-Aid six-quart mixer.
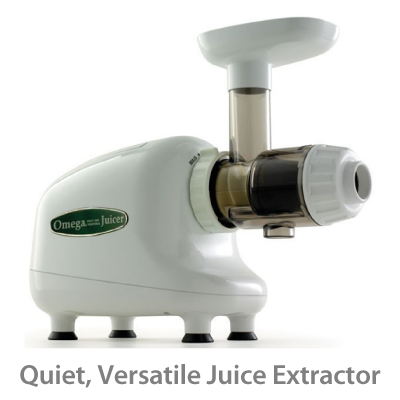
I eat fruits and veggies, but based on everything I’ve read, the potential health benefits of juicing are too great to pass up. Unless you’re an impatient person, the Omega 8003 is great for a beginning juicer. It not only handles apples, oranges and carrots, but won’t get bogged down with wheatgrass, spinach and other leafy greens. Unlike a centrifugal juicer, which violently shreds what you put in it, the Omega 8003 uses what is known as a dual-screen, single auger. That means it doesn’t cut or chew as much as it mashes pulp forward into the end of a cone using the pressure of a spinning auger. The juice yield definitely trumps my old Braun centrifugal juicer, which can’t handle wheatgrass. The pulp I get from the Omega is drier and if need be, I can easily put it back through for a tiny bit more juice. I put the pulp from the Braun into the Omega and actually got several extra tablespoons of juice!
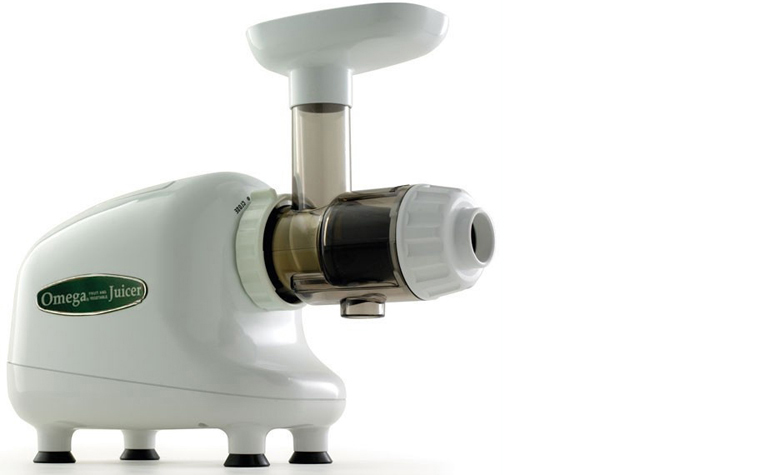
Of all the machines I’ve researched, tested and used, the Omega 8003 just crushes every piece of machinery, especially at this price. After eight months, I still use the juicer almost every other day and nothing has broken or malfunctioned. Juice extractors tend to be jet-engine loud. While the Omega’s motor is strong and hums with authority, it’s killer quiet. I can easily juice in the early morning or night without waking my wife or the neighbors. It’s also not too large in size and the folding handle on top makes moving the machine around much easier than other machines. The construction is solid. Omega backs it up with 10-year warranty.
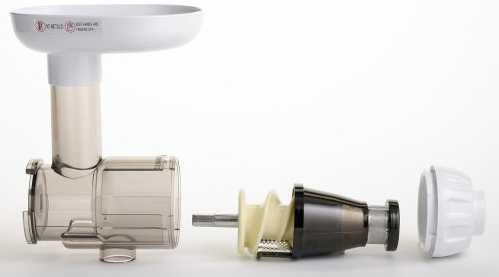
Juicing itself is relatively subjective. Some people want to process lots of fruit, and fast. While the Omega isn’t as quick as some centrifugal juicers and while it can’t handle soft fruit like bananas or strawberries quite as well as other juicers, it gets the job done. Plus, I feel the juice quality is better. The only other juicer in the same realm is the Green Star, which is harder to clean, bigger and almost twice the price! Since the 8003 has only a few parts, it is by far the easiest and fastest juicer I’ve seen and tried to clean. You can also use it as a food processor and grinder for coffee beans, flour, garlic, etc. There are also several optional attachments if you wish to make nut butters, baby food, frozen desserts, pasta and other things.
For those who are concerned about heat destruction of enzymes, the Omega’s auger turns slowly and doesn’t appear to generate much heat. Granted the process of crushing and squeezing the vegetable matter through a small screen will cause friction, but I don’t feel it’s a deal for the average user. Same goes for oxidation. All juicers introduce some oxygen into the juice because of the mechanical process of extraction. With some fruits and vegetables, however, this machine does a noticeable job of reducing the amount of foam. Using two carrots from the same bag, I juiced one in a centrifugal juicer and one in the Omega. There was a lot less foam with the Omega, and the color of the juice was also darker and richer.
Overall, I’m thrilled with my Omega 8003 juicer. I paid about $229 for mine, plus shipping. I feel that’s a very reasonable price to start changing my life and health.
Note: The feeder chute is relatively small in diameter, so it’s best to cut up anything large to make it fit or be more manageable.
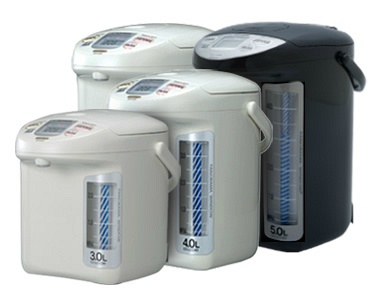
Like the rice cooker, the electric dispensing pot is an appliance that EVERY Japanese household has. Its function is simple: It heats and dispenses hot water at just-below-boiling, as much or as little as you want. Perfect for a cup of tea or a cup of noodles. There’s even a “Keep Warm” feature for maintaining the water temp at 208°F, 195°F, or 175°F for a set amount of time.
We picked up Zojirushi’s 3.0-liter US version when we moved back from Japan. It’s performed flawlessly for well over a decade. Lots of nice little touches: The “MagSafe” magnetic power cord featured in Apple’s laptop computers? Zojirushi did it first; makes it easy to move the pot to the tap to fill it up.
- Zojirushi 3.0-Liter Electric Dispensing Pot
- $120
- Available from Amazon
- Also available in 4.0- and 5.0-liter capacities (pictured).
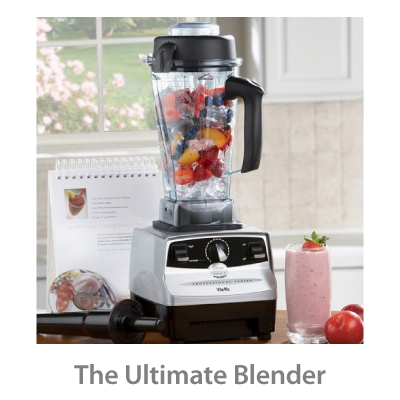
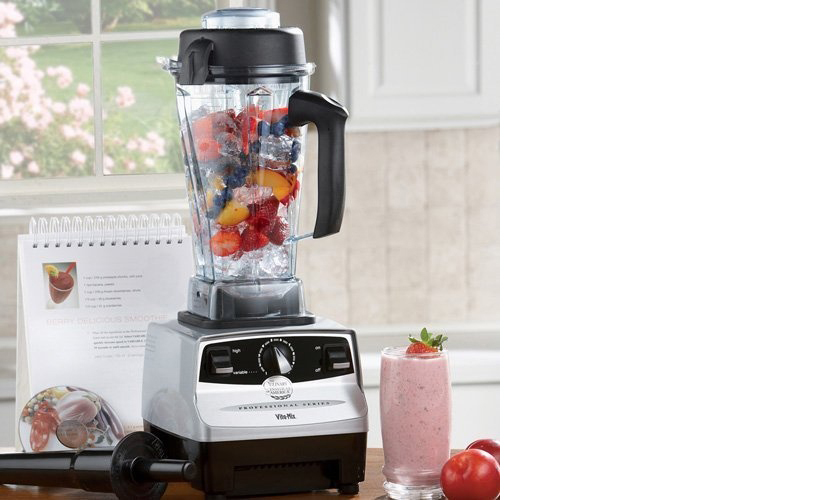
At Costco, my wife and I happened upon one of those salesman wearing a headset a-la-Madonna. He was demoing a blender. As we stood and watched, I commented to my wife that all these people were just waiting to try a smoothie; and there was no way this guy would get one of these suckers to pay $350 for a blender. A BLENDER!
But guess who walked out with one? Because of Costco’s liberal return policy, we figured it was worth a shot. So for the next month, we used it...and used it...and used it. Every time, I thought to myself, $350 for a blender!? But man, this thing is an incredible MACHINE.
I once believed that a blender only needed two speeds: Off and High. I was wrong. With ten variable speeds, it makes short work of anything and everything we’ve ever put in it. We use it every single day, often multiple times. The 1380-watt motor surprisingly quiet on low, and a barracuda at high speeds. Clean-up is incredibly quick: Add water, a bit of soap, turn on high for ten seconds, and then rinse and dry.
The 64-ounce Lexan pitcher is amazingly tough. I always figured plastic was plastic, but this stuff is really tough. If you do happen to somehow break it, the company will replace it free of charge through its seven-year warranty. After that, you can simply purchase parts/replacements.
So we extended our 30-day trial to 90-days, since I still thought it was a lot of money for a blender. Ultimately—after using it EVERY day, usually multiple times a day—I realized it’s worth $350. I hesitated to send this review, because of the considerable expense. Anyone who uses a blender regularly will find this to be the best blender they ever own. My previous $45 blender, which I once thought was pretty good, now sits gathering dust. I’ve been spoiled.
Note: Check Costco, if there’s one near you. They tend to sell the blender at a discount.