
In This Chapter
If you're new to photography or if you're returning after some time away from shooting, the information in this chapter serves as a refresher on the elements of exposure and a short guide to traditional photographic composition guidelines. This chapter can also help you build a foundation from which you can expand your skills and creative options in using the Rebel T1i/500D.
The goal of making a picture is to capture the scene or subject as you envision it. Making a picture begins with your creative eye and your personal expression. Your creative tool, the camera, is governed by technical factors collectively referred to as the elements of exposure. While the technical aspects may not seem as exciting as the creative aspects of picture making, the more you understand what goes into making a photographic exposure, the more creative control you'll have over the Rebel. And once you have that understanding, you're better able to find creative ways to work around the technical limitations of the camera when you encounter scenes that require both creative vision and creative use of the Rebel.
Exposure is a precise combination of four elements, all of which are related to light. The four elements of exposure are:
Light. The starting point of exposure is the amount of light that's available in the scene to make a picture. With every image, the Rebel T1i/500D measures, or "meters," the amount of light in the scene, and then it bases its suggested exposure settings on the meter reading. Your range of creative control with the Rebel T1i/500D is directly related to the amount of light in the scene, often referred to as "existing light."
Sensitivity. Sensitivity refers to the amount of light that the camera's image sensor needs to make an exposure or to the sensor's sensitivity to light. Sensitivity is controlled by the ISO setting.
Intensity. Intensity refers to the strength or amount of light that reaches the image sensor. Intensity is controlled by the aperture, or f-stop. The aperture controls the lens diaphragm, an adjustable opening that opens or closes to allow more or less light into the camera.
Time. Time refers to the length of time that light is allowed to reach the sensor. Time is controlled by setting the shutter speed, which determines how long the camera's shutter stays open.
The following sections look at each exposure element in more detail. As you read, know that every exposure element is related to the other elements. That means that if one exposure element changes, one or all of the other elements must also change proportionally.
As mentioned earlier, all photographs depend on the amount of light that's available to make a photographic exposure. To determine the exposure settings, the Rebel T1i/500D must first measure the light in the scene using the onboard light meter. Every time that you half-press the Shutter button, the camera measures, or meters, the light that is reflected from the subject back to the camera. The light meter reading is biased toward the autofocus (AF) point that you or the camera selected. The camera takes the meter reading, looks at the current ISO setting, and then calculates how much light (the light intensity that's set by the aperture) is needed and for how long (the time factor that's set by the shutter speed) to make a good exposure.
Note
Chapter 2 details using Auto Exposure (AE) Lock, a technique that enables you to bias the meter reading on an area of the scene or subject but set the point of sharpest focus on another area of the scene. You will also find information on choosing and using different shooting and metering modes.
With the camera's "ideal" exposure calculated, the camera then automatically applies those exposure settings in the Basic Zone modes such as Portrait, Landscape, Sports, and so on. In semiautomatic modes, the camera sets either the aperture, if you're using Tv mode, or shutter speed, if you're using Av mode, based on the ISO (International Organization for Standardization) setting you've selected. In M (Manual) mode, you set both the aperture and the shutter speed by watching the Exposure Level Indicator shown in the viewfinder. When the tick mark is at the center of the indicator, then you've set the Rebel T1i/500D's suggested exposure.
Note
A "slow" lens is one with a maximum aperture of f/5.6 — the widest aperture you can choose. At f/5.6, the camera needs a good deal of light in the scene for you to be able to handhold the camera and get a sharp image. A "fast" lens is one with a maximum aperture of f/2.8 to f/1.4. A fast lens enables you to handhold the camera in lower light and get a sharp image.
In very general terms, the ISO setting determines how sensitive the image sensor is to light. The higher the ISO number is, the less light that's needed to make a picture. The lower the ISO number, the more light that's needed to make a picture. High ISO numbers or settings such as ISO 800 to 1600 provide faster shutter speeds so that you can handhold the camera and get a sharp image in low-light scenes. Conversely, in bright to moderately bright light, low settings from 100 to 400 work well because there is enough light in the scene to ensure a fast enough shutter speed to get a sharp image.
Each ISO setting is twice as sensitive to light as the previous setting. For example, ISO 800 is twice as sensitive to light as ISO 400. As a result, the sensor needs half as much light to make an exposure at ISO 800 as it does at ISO 400.
In P, Tv, Av, M, and A-DEP shooting modes, the ISO sequence encompasses Auto (ISO 100 to 1600, which is set automatically by the camera) and ISO 100, 200, 400, 800, and 3200. The ISO can also be expanded to include ISO 6400 and 12800 using Custom Function (C.Fn) 2. In the automated Basic Zone modes, the T1i/500D automatically sets the ISO between 100 and 1600, depending on the light. In P, Tv, Av, M, and A-DEP shooting modes, the Auto ISO setting ranges form 100 to 3200.
Note
The International Organization for Standardization (ISO) measures, tests, and sets standards for many photographic products, including the rating or speed for film, which has, in turn, been applied to equivalents for the sensitivity of digital image sensors.
In addition to setting the relative light sensitivity of the sensor, ISO also factors into the overall image quality in several areas, including sharpness, color saturation, contrast, and digital noise or lack thereof.
On a digital camera, increasing the image sensor's sensitivity to light amplifies the signal. This amplification also can increase digital noise in the image, much like hiss or static in an audio system that becomes more audible as the volume increases. Noise in digital images is roughly analogous to grain in high-ISO film. However, in digital photography, noise is comprised of luminance and chroma noise. Luminance noise is similar to film grain. Chroma noise appears as mottled color variations and as colorful pixels in the shadow areas of the image.
Regardless of the type, digital noise degrades overall image quality by overpowering fine detail in foliage and fabrics, reducing sharpness and color saturation, and giving the image a mottled look. Digital noise increases with high ISO settings, long exposures, and underexposure as well as high ambient temperatures, such as from leaving the camera in a hot car or in the hot sun. This occurs because the hotter the sensor gets, the more digital noise appears.
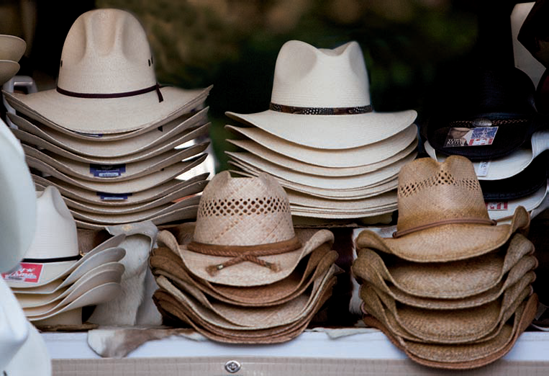
Figure 9.1. This image was taken using ISO 1000, and the digital noise isn't apparent until the image is viewed at 100 percent in an image-editing program. Exposure: ISO 1000, f/2.8, 1/4000 second.
The tolerance for digital noise is subjective and varies by photographer. It's important to shoot images at each of the ISO settings and examine the images for noise. This type of testing helps you know what to expect in terms of digital noise at each ISO setting. Then you can determine how high an ISO you want to use on an average shooting day.
For long exposures, you can also enable a Custom Function (C.Fn-4: Long exp. noise reduction) to reduce digital noise in exposures of 1 second or longer. This option doubles the exposure time duration, but the noise is virtually imperceptible. And you can enable C.Fn-5: High ISO speed noise reduction.
Note
See Chapter 6 for details on setting Custom Functions.

Figure 9.2. This detail of figure 9.1 shows the grainy appearance from digital noise in the shadow areas as well as a mottled appearance from using color noise reduction during RAW image processing.
The lens aperture (the size of the lens diaphragm opening) determines the intensity of light that strikes the image sensor. Aperture is indicated as f-stop numbers, such as f/2.8, f/4.0, f/5.6, f/8, and so on. When you increase or decrease the aperture by a full f-stop, it doubles or halves the exposure, respectively. For example, f/5.6 provides twice as much light as f/8 provides, while f/5.6 provides half as much light as f/4.0.
Note
The apertures that you can choose depend on the lens that you're using. For example, the Canon EF-S 18-55mm f/4.5-5.6 lens has a maximum aperture of f/4.5 at 18mm and f/5.6 at 55mm and a minimum aperture of f/22, while the EF 100-300mm f/4.5-5.6 USM lens has a maximum aperture of f/4.5 at 100mm and f/5.6 at 300mm and a minimum aperture of f/32-38 at the same respective zoom settings.
Smaller f-stop numbers, such as f/2.8, set the lens diaphragm to a large opening that lets more light reach the sensor. A large lens opening is referred to as a wide aperture. Based on the ISO and in moderate light, a wide aperture (a large diaphragm opening) such as f/5.6 delivers sufficient light to the sensor so that the amount of time that the shutter has to stay open to make the exposure decreases, thus allowing a relatively faster shutter speed as compared to a narrow aperture of f/8 or f/11. In very general terms, this means that wide apertures of f/5.6 to f/1.4 enable you to shoot in lower-light scenes with a reasonably fast shutter speed (depending on the existing light and ISO setting). And that combination helps you get sharp handheld images in lower light.

Larger f-stop numbers, such as f/8, f/11, f/16, and narrower, set the lens diaphragm to a small opening that allows less light to reach the sensor. A small lens opening is referred to as a narrow aperture. Based on the ISO and in moderate light, a small diaphragm opening such as f/11 delivers less light to the sensor so the amount of time that the shutter has to stay open increases allowing a comparatively slow shutter speed. Thus, because narrow apertures of f/8 to f/32 require longer shutter speeds you need lots of light to shoot with narrow apertures, or you need to use a tripod and have a scene or subject that remains stock still.

In everyday shooting, photographers most often select an aperture based on how they want background and foreground to look — either showing acceptably sharp detail or with blurred detail. This is called controlling the depth of field, discussed next. In addition, choosing a specific aperture may involve other factors. For example, if you want to avoid blur from camera shake in lower light, choose a wide aperture (smaller f-number) so that you get the faster shutter speeds. Or if you want selective focus, where only a small part of the image is in sharp focus, choose a wide aperture. But if you're shooting a group of people or a sweeping scene, then choose a narrow aperture to render sharper detail throughout the frame.
You can control the aperture by switching to Av or M mode. In Av mode, you set the aperture, and the camera automatically sets the correct shutter speed based on the selected ISO. In M mode, you set both the aperture and the shutter speed based on the reading from the camera's light meter. The Exposure Level Indicator is displayed in the viewfinder as a scale and it indicates over-, under-, and correct exposure based on the aperture, shutter speed, and ISO.
Tip
You can use P mode to make one-time changes to the aperture that the camera initially sets. Unlike Av mode where the aperture you choose remains in effect until you change it, in P mode, changing the aperture is temporary. After you take the picture, the camera reverts to its suggested aperture and shutter speed.
Note
You can learn more about shooting modes in Chapter 2.
Depth of field is the zone of acceptably sharp focus in front of and behind a subject. In simple terms, depth of field determines if the foreground and background are rendered as a soft blur or with distinct detail. Depth of field generally extends one-third in front of the point, or plane, of sharp focus and two-thirds behind it. Aperture is the main factor that controls depth of field, although camera-to-subject distance and focal length affect it as well.
Depth of field is as much a practical matter — based on the light that's available in the scene to make the picture — as it is a creative choice to enhance the rendering of background and foreground elements in the image. For example, if you are shooting at a music concert and you've set the ISO where you want it, you might creatively prefer a moderate depth of field provided by f/8 to show midstage props in acceptably sharp focus. But to be able to handhold the camera and get a sharp image, practicality dictates using a wide aperture to get as fast a shutter speed as possible.
Images where the background is a soft blur and the subject is in sharp focus have a shallow depth of field. As a creative tool, shallow depth of field is typically preferred for portraits, some still-life images, and food photography. As a practical tool, choosing a wide aperture that creates a shallow depth of field is necessary when shooting in low light. In general terms, to get a shallow depth of field, choose a wide aperture ranging from f/5.6 to f/1.4 depending on the lens. The subject will be sharp, and the background and foreground will be soft and nondistracting. Lenses also factor into depth of field, with a telephoto lens offering a shallower depth of field than a normal or wide-angle lens.
Pictures with acceptably sharp focus in front of and behind the point of sharpest focus in the image are described as having extensive depth of field. Extensive depth of field is preferred for images of large groups of people, landscapes, architecture, and interiors. To get extensive depth of field, choose a narrow aperture, such as f/8 or f/11, or smaller.
Given the same ISO, choosing a narrow aperture such as f/16 requires a slower shutter speed to ensure that enough light reaches the sensor for a correct exposure. Conversely, choosing a wide aperture provides a faster shutter speed.
While aperture is the most important factor that affects the range of acceptably sharp focus in a picture, other factors also affect depth of field:

Figure 9.6. A narrow f/14 aperture provides extensive depth of field of a golf course with Mt. Rainier in the background. Exposure: ISO 100, f/14, 1/250 second.
Camera-to-subject distance. At any aperture, the farther you are from a subject, the greater the depth of field is and vice versa. Additionally, the farther the subject is from the background the shallower the depth of field.
Focal length. Focal length, or angle of view, is how much of a scene the lens "sees." From the same shooting position, a wide-angle lens produces more extensive depth of field than a telephoto lens.
Lenses with a wide maximum aperture such as f/2.8 are referred to as fast lenses, while lenses with a maximum aperture of f/4 or f/5.6 are referred to as slow lenses. In addition, some lenses have variable apertures, where the maximum aperture changes based on the zoom setting on the lens. For example, the Canon EF 28-300mm f/3.5-f/5.6L IS USM lens allows a maximum aperture of f/3.5 at the 28mm zoom setting and f/5.6 at the 300mm zoom setting.
Note
For more information on lenses, see Chapter 8.
Shutter speed controls how long the shutter stays open to let light from the lens strike the image sensor. The longer the shutter, or curtain, stays open, the more light reaches the sensor (at the aperture and ISO that you've set). When you increase or decrease the shutter speed by one full setting, it doubles or halves the exposure. For example, twice as much light reaches the image sensor at 1/30 second as at 1/60 second.
In daily shooting, shutter speed is also related to:
The ability to handhold the camera and get sharp images, particularly in low light. The general rule for handholding a non-image stabilized lens is the reciprocal of the focal length, or 1 over the focal length. For example, if you're shooting at 200mm, then the slowest shutter speed at which you can handhold the lens and get a sharp image is 1/200 second.
The ability to freeze motion or show it as blurred in a picture. For example, you can set a fast shutter speed to show a basketball player's jump in midair with no blur. As a general rule, set the shutter speed to 1/125 second or faster to stop motion. Or set a slow shutter speed to show the motion of water cascading over a waterfall as a silky blur. To show motion as a blur, use a 1/30 second or slower shutter speed and use a tripod.
You can control the shutter speed in Shutter-priority AE (Tv) or Manual (M) mode. In Shutter-priority AE (Tv) mode, you set the shutter speed, and the camera automatically sets the correct aperture. In Manual (M) mode, you set both the shutter speed and the aperture based on the reading from the camera's light meter and the ISO. The light meter is displayed in the viewfinder as a scale — the Exposure Level Indicator — and it shows over-, under-, and correct exposure based on the shutter speed, aperture, and ISO.
Cameras require a specific amount of light to make a good exposure. As you have seen, after the camera meters the light and factors in the selected ISO, the two remaining factors determine the exposure — the aperture and the shutter speed.
Many combinations of aperture (f-stop) and shutter speed produce exactly the same exposure at the same ISO setting. For example, f/22 at 1/4 second is equivalent to f/16 at 1/8 second, as is f/11 at 1/15, f/8 at 1/30, and so on. And this is based on the doubling and halving effect discussed earlier. For example, if you are shooting at f/8 and 1/30 second, and you change the aperture (f-stop) to f/5.6, then you have doubled the amount of light reaching the image sensor, so the time that the shutter stays open must be halved to 1/60 second.
While these exposures are equivalent, the rendering of the image and your shooting options change proportionally. An exposure of f/22 at 1/4 second produces extensive depth of field in the image, but the shutter speed is slow, so your ability to handhold the camera and get a sharp image is dubious. But if you switch to an equivalent exposure of f/5.6 at 1/60 second, you are more likely to be able to handhold the camera, but the depth of field will be shallow.
As with all aspects of photography, evaluate the tradeoffs as you make changes to the exposure. And again, it all comes back to light. Your creative options for changing the exposure setting are ultimately limited by the amount of light in the scene.
ISO, aperture, shutter speed, and the amount of light in a scene are the essential elements of photographic exposure. On a bright, sunny day, you can select from many different f-stops and still get fast shutter speeds to prevent image blur. You have little need to switch to a high ISO for fast shutter speeds at small apertures.
As it begins to get dark, your choice of f-stops becomes limited at ISO 100 or 200. You need to use wide apertures, such as f/4 or wider, to get a fast shutter speed. Otherwise, your images will show some blur from camera shake or subject movement. Switch to ISO 400 or 800, however, and your options increase and you can select narrow apertures, such as f/8 or f/11, for greater depth of field. The higher ISO enables you to shoot at faster shutter speeds to reduce the risk of blurred images, but it also increases the chances of digital noise.
The technical aspects of photography are unquestionably important, and until now, that's been the primary concentration of this book. But technical competence alone doesn't create memorable images. Among the qualities that make images memorable are artful composition and compelling content. I will leave the content of images to your imagination, but will discuss some widely used approaches to composition.
While composition guidelines will help you design an image, the challenge and the joy of photography is combining your visual, intellectual, and emotional perceptions of a scene from the objective point of view of the camera. And, while composition guidelines are helpful, your personal aesthetic is the final judge. After all, for every rule of composition, there are galleries filled with pictures that break the rules and succeed famously.
Tip
As you think about composition, remember that if you're in doubt about how to compose an image, keep it simple. Simple compositions clearly and unambiguously identify the subject, and they are visually easy to read.
One of the first tasks in making a picture is to decide how to divide the photographic frame. Since antiquity, artists, builders, and engineers have looked to nature and mathematics to find ways to portion spaces that create a harmonious balance of the parts to the whole space.
From the fifth century BCE, builders, sculptors, and mathematicians applied what is now known as the Divine Proportion. Euclid, the Greek mathematician, was the first to express the Divine Proportion in mathematical language. The Divine Proportion is expressed as the Greek symbol Phi where Phi is equal to ½(1 + square root of 5) = 1.618033989. This proportion divides a line in such a way that the ratio of the whole to the larger part of the line is the same as the larger part is to the smaller part. This proportion produced such pleasing balance and symmetry that it was applied in building the pyramids of Egypt; the Parthenon in Athens, Greece; and Europe's Gothic cathedrals. The proportion also made its way into art. For example, some believe that the Divine Proportion provides the underlying structure for Leonardo da Vinci's The Last Supper and Mona Lisa paintings. Over time, harmonious balance was expressed as the Golden Section, or the Golden Rectangle. The 35mm photographic frame, although being slightly deeper and having a ratio of 3:2, is very similar to the Golden Rectangle. The Golden Rectangle provided a map for artists to balance color, movement, and content within the confines of a canvas.
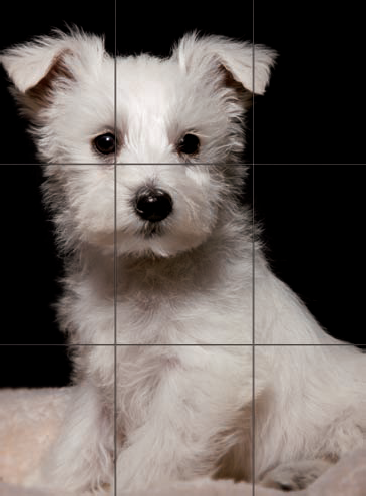
However, unlike painters, photographers don't begin with a blank canvas but with a scene that often presents itself ready-made. Even with a ready-made scene, photographers have a variety of creative guidelines at their disposal to structure the photographic frame. A popular device is the rule of thirds. This "rule" divides the photographic frame into thirds, much like superimposing a tic-tac-toe grid on the frame. To create visually dynamic compositions, place the subject or the point of interest on one of the points of intersection, or along one of the lines on the grid.
The rule is, of course, approximate because not all scenes conform to the grid placement. But the rule of thirds provides a good starting point for subdividing the frame and for placing the subject within the subdivisions. For example, if you're taking a portrait, you might place a subject's eyes at the upper-left intersection point of the grid. In a landscape scene, you can place the horizon along the top or bottom line of the grid depending on what you want to emphasize.
Balance is a sense of "rightness" or harmony in a photo. A balanced photo appears to be neither too heavy (lopsided) nor too off-center. To create balance in a scene, evaluate the visual "weight" of colors and tones (dark is heavier than light), the shape of objects (larger objects appear heavier than smaller objects), and their placement (objects placed toward an edge appear heavier than objects placed at the center of the frame).
The eye seeks balance in an image. Whether it is in tones, colors, or objects, the human eye seeks equal parts, equal weight, and resolved tension. Static balance begins with a single subject in the center of the frame with other elements emanating from the center point to create equal visual weight. Variations on this balance include two identical subjects at equal distances from each other, or several subjects arranged at the center of the frame.
Conversely, dynamic balance is created when tones, colors, or weights are asymmetrical, or unequally balanced, creating visual tension.
Because the human eye seeks balance and symmetry, should compositions be perfectly balanced? Perfectly symmetrical compositions create a sense of balance and stability. And while symmetry is a defining characteristic in nature, if all images were perfectly balanced and symmetrical, they would tend to become boring. While the human eye seeks symmetry and balance, once it finds it, the interest in the image quickly diminishes.
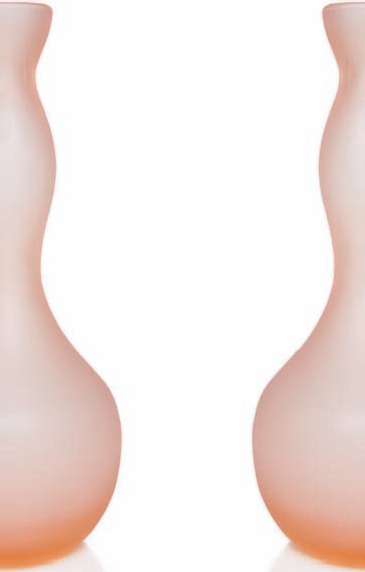
Figure 9.9. This image shows equal balance between the two vases. Exposure: ISO 100, f/22, 1/125 second using an EF 24-70mm, f/2.8L USM lens.
In real-world shooting, the choice of creating perfect balance or leaving tension in the composition is your choice. If you choose perfect symmetry, then it must be perfect, for the eye will immediately scan the image and light on any deviation in symmetry. In dynamic balance, the viewer must work to find balance, and that work can be part of the satisfaction in viewing the image.
At the most fundamental level, contrast is the difference between light and dark tones in an image. But in a larger context, contrast includes differences in colors, forms, and shapes, and it is at the heart of composition. In photography, contrast not only defines the subject but also renders the shape, depth, and form of the subject and establishes the mood and the subject's relationship to other elements in the image.
Related to tones are colors used in composition. Depending on how colors are used in a photo, they can create a sense of harmony, or visual contrasts. In very basic terms, colors are either complementary or harmonizing. Complementary colors are opposite each other on a color wheel — for example, green and red, and blue and yellow. Harmonizing colors are adjacent to each other on the color wheel, such as green and yellow, yellow and orange, and so on, and offer no visual conflict.
If you want a picture with strong visual punch, use complementary colors of approximately equal intensity in the composition. If you want a picture that conveys peace and tranquility, use harmonizing colors.
The more that the color of an object contrasts with its surroundings, the more likely it is that the object will become the main point of interest. Conversely, the more uniform the overall color of the image, the more likely that the color will dictate the overall mood of the image.
The type and intensity of light also strongly affect the intensity of colors, and, consequently, the composition. Overcast weather conditions, such as haze, mist, and fog, reduce the vibrancy of colors. These conditions are ideal for creating pictures with harmonizing, subtle colors. Conversely, on a bright, sunny day, color is intensified and is ideal for composing pictures with bold, strong color statements.
While a full discussion of tone and color are beyond the scope of this book, knowing some characteristics of tone and color will help you make decisions about photographic compositions.
The viewer's eye is drawn to the lightest part of an image. If highlights in an image fall somewhere other than on the subject, the highlights will draw the viewer's eye away from the subject.
Overall image brightness sets the mood of the image. In addition, the predominance of tones determines the "key." Images with primarily bright tones are said to be "high key," while images with predominately dark tones are "low key."
Colors, like tones, advance and recede; they have symbolic, cultural meanings; and they elicit emotional responses from viewers. For example, red advances and is associated with energy, vitality, and strength as well as with passion and danger. Conversely, blue recedes and tends to be dark. It is widely associated with nature and water.
Because lines have symbolic significance, you can use them to bolster communication, to direct focus, and to organize visual elements. For example, you can place a subject's arms in ways that direct attention to the face. In an outdoor scene, you can use a gently winding river to guide the viewer's eye through the scene. You can use a strong diagonal beam in an architecture shot to bolster the sense of the building's strength. When planning the composition, keep in mind that images have both real and implied lines. Examples of implied lines include the bend of a leaf or a person's hand. Ideally, lines will also lead the viewer's eye toward the subject, rather than away from it or out of the frame.
Leaving space in the frame can reinforce a sense of direction. For example, leaving space in the direction that the subject is looking or moving provides visual space to look or move into.
Lines traditionally convey these meanings:
Horizontal lines imply stability and peacefulness.
Diagonal lines create strength and dynamic tension.
Vertical lines imply motion and strength.
Curved lines symbolize grace.
Zigzag lines convey a sense of action.
Wavy lines indicate peaceful movement.
Jagged lines create tension.

Just as an artist would not leave part of a canvas blank or filled with extraneous details, you should try to fill the full image frame with the subject and elements that support the subject and the message of the image. Try to include elements that reveal more about the subject.
In any picture, the elements behind and around the subject become as much a part of the photograph as the subject, and occasionally more so because the lens tends to compress visual elements. As you compose the picture, check all areas in the viewfinder or LCD for background and surrounding objects that will, in the final image, seem to merge with the subject, or that compete with or distract from the subject.
A classic example of failing to use this technique is the picture of a person who appears to have a telephone pole or tree growing out of the back of his or her head. To avoid this type of background distraction, you can change your shooting position or, in some cases, move the subject.
Photographers often borrow techniques from painters — and putting a subject within a naturally occurring frame, such as a window or an archway, is one such technique. The frame may or may not be in focus, but to be most effective, it should add context and visual interest to the image.
Sharp focus establishes the relative importance of the elements within the image. And because the human eye is drawn first to the sharpest point in the photo, be sure that the point of sharpest focus is on the part of the subject that you want to emphasize; for example, in a portrait, the point of sharpest focus should be on the subject's eyes.
Differential focusing controls the depth of field, or the zone (or area) of the image that is acceptably sharp. In a nutshell, differential focusing works like this: the longer the focal length (in other words, a telephoto lens or zoom setting) and the wider the aperture (the smaller the f-stop number), the shallower the depth of field is (or the softer the background). Conversely, the shorter the focal length and the narrower the aperture, the greater the depth of field.
You can use this principle to control what the viewer focuses on in a picture. For example, in a picture with a shallow depth of field, the subject stands in sharp focus against a blurred background. The viewer's eyes take in the blurred background, but they return quickly to the much sharper area of the subject.

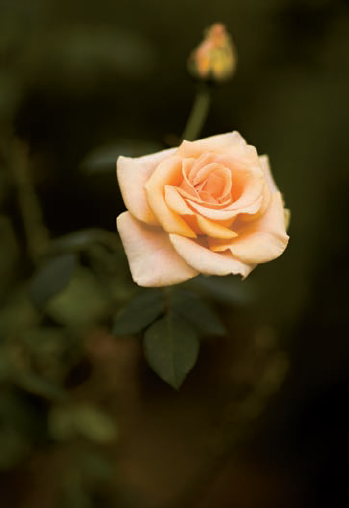
Figure 9.11. For this rose shot, I wanted to maximize the depth of field given the close shooting distance, so I used a narrow f/14 aperture. Exposure: ISO 100, f/14, 1/125 second.
Tip
For portraits, experiment with different viewpoints. For example, if you photograph a subject from a position that is lower than eye level, the subject seems powerful, while a position that is higher than eye level creates the opposite effect.
To control depth of field, you can use the techniques in Table 9.1 separately or in combination with each other.
Table 9.1. Depth of Field
To Decrease the Depth of Field (Soften the Background Details) | To Increase the Depth of Field (Sharpen the Background Details) |
|---|---|
Choose a telephoto lens or zoom setting | Choose a wide-angle lens or zoom setting |
Choose a wide aperture from f/1.4 to f/5.6 | Choose a narrow aperture from f/8 to f/22 |
Move closer to the subject and move the subject farther from the background | Move farther away from the subject |
Some ways to control the perception of space in pictures include changing the distance from the camera to the subject, selecting a telephoto or wide-angle lens or zoom setting, changing the position of the light in a studio or changing the subject position in an outdoor setting, and changing the camera position.
For example, camera-to-subject distance creates a sense of perspective and dimension so that when the camera is close to a foreground object, background elements in the image appear smaller and farther apart. A wide-angle lens also makes foreground objects seem proportionally larger than midground and background objects.
While knowing the rules provides a good grounding for well-composed pictures, Henri Cartier-Bresson summed it up best when he said, "Composition must be one of our constant preoccupations, but at the moment of shooting it can stem only from our intuition, for we are out to capture the fugitive moment, and all the interrelationships involved are on the move. In applying the Golden Rule, the only pair of compasses at the photographer's disposal is his own pair of eyes." (From The Mind's Eye: Writings on Photography and Photographers by Henri Cartier-Bresson [Aperture, 2005].)

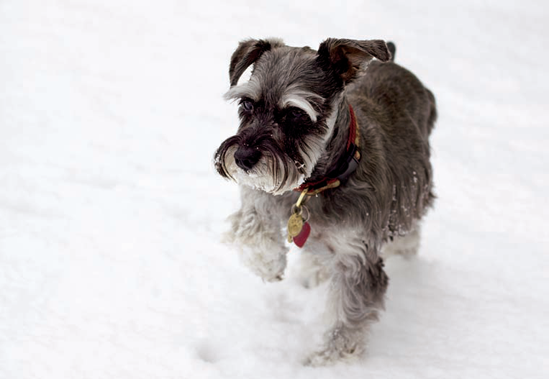
Figure 9.12. Weather conditions and the range of tones create a sense of depth in this snow scene. Exposure: ISO 200, f/8, 1/30 second using +1.33-stop Exposure Compensation.
As you can see from this chapter, a combination of technical exposure considerations combined with your creative vision and composition form the foundation for all the images you make. While it seems like a lot to learn, you can approach learning by choosing one aspect of exposure and composition at a time. Practice until you are comfortable with that aspect, and then move to the next aspect.
And to spark your creativity, become an avid observer of how nature organizes elements, watch movies and music videos to see how videographers approach composition, and study classic art and photography books. Along the way, your study and observation will translate into your personal and unique signature and style.