
Painting Techniques
To start, have plenty of water and paper towels, rags, or tissue on hand for cleaning your brushes. It’s important to remove any residual paint from your brush between colors.
Consistency
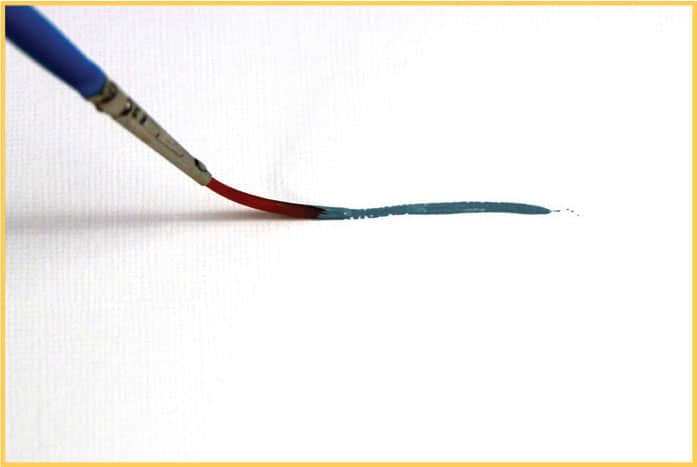
Paint can be mixed watery thin to stiff and billowy. Thin paints can be used for washes, for thin layers, and for drippy, almost watercolor effects. To mix thin paint, add water. There are also some glazing mediums one can buy to mix with acrylic paints. But for this book, we will just stick with using water.
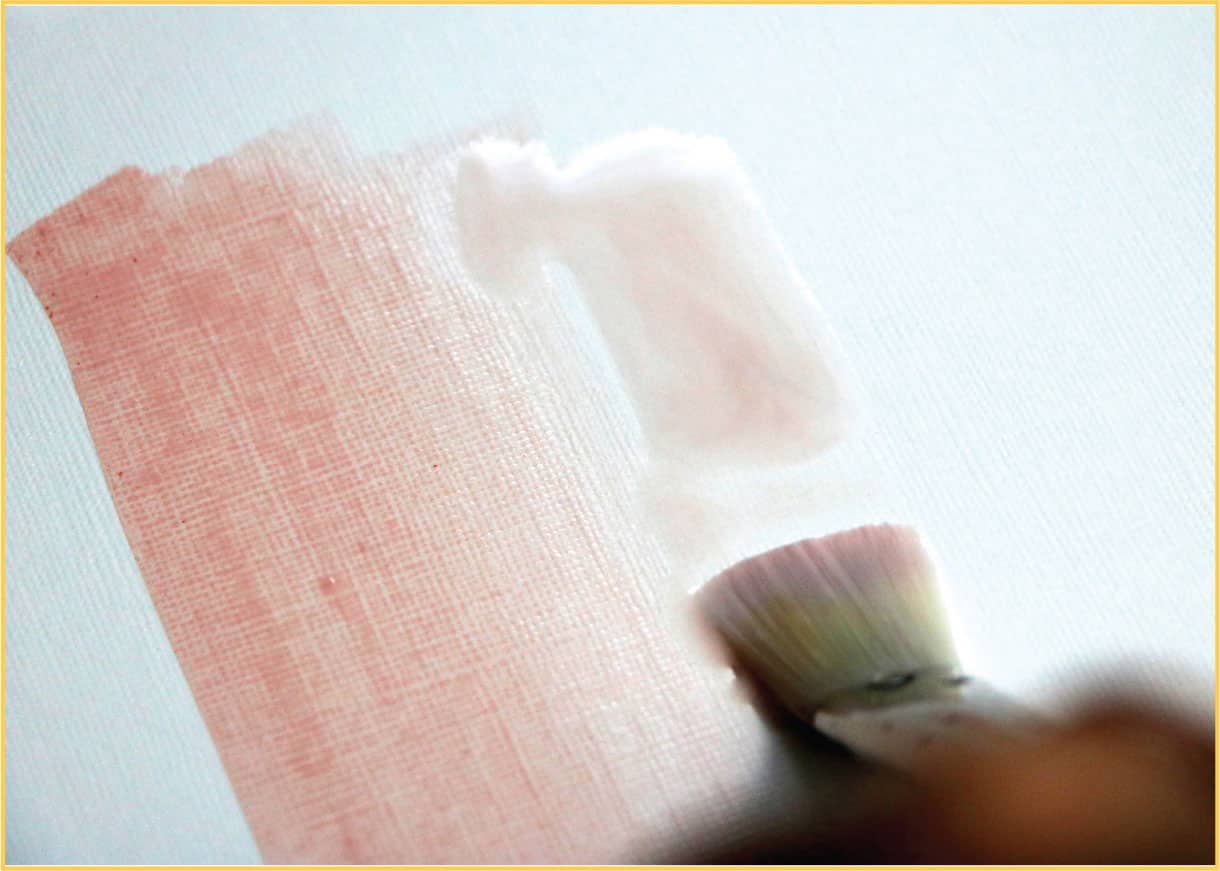
Example of a thin wash for an underpainting (first layer)
Wipe away any extra water and paint to create a thin background wash over the canvas.
When paint pigments come apart with large amounts of water and appear blotchy or grainy, you have reached the breaking point of the paint binder. Most professional paints can be thinned quite well, as they have very high pigment loads. Acrylics can make nice watercolor-like washes for layering or even be used in place of watercolor paints.

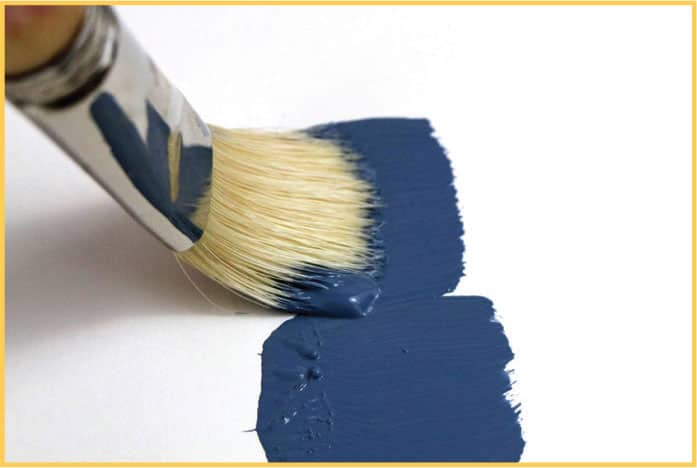
Heavy-body acrylic paints are thick straight out of the tube. You don’t need to add water if you are happy with this thick consistency; however, in my experience, I usually add some water to create a more spreadable consistency.

Alla Prima (Wet-into-Wet)
Alla prima means painting wet-into-wet. This means that the painting is completed in one sitting while the paint is still wet. Instead of waiting for each layer of paint to dry or adding glazes over the top, alla prima painting applies wet paint next to or on top of wet paint. Some practice is required to get proficient with this technique, but once mastered, it can be used to create many great effects in painting.

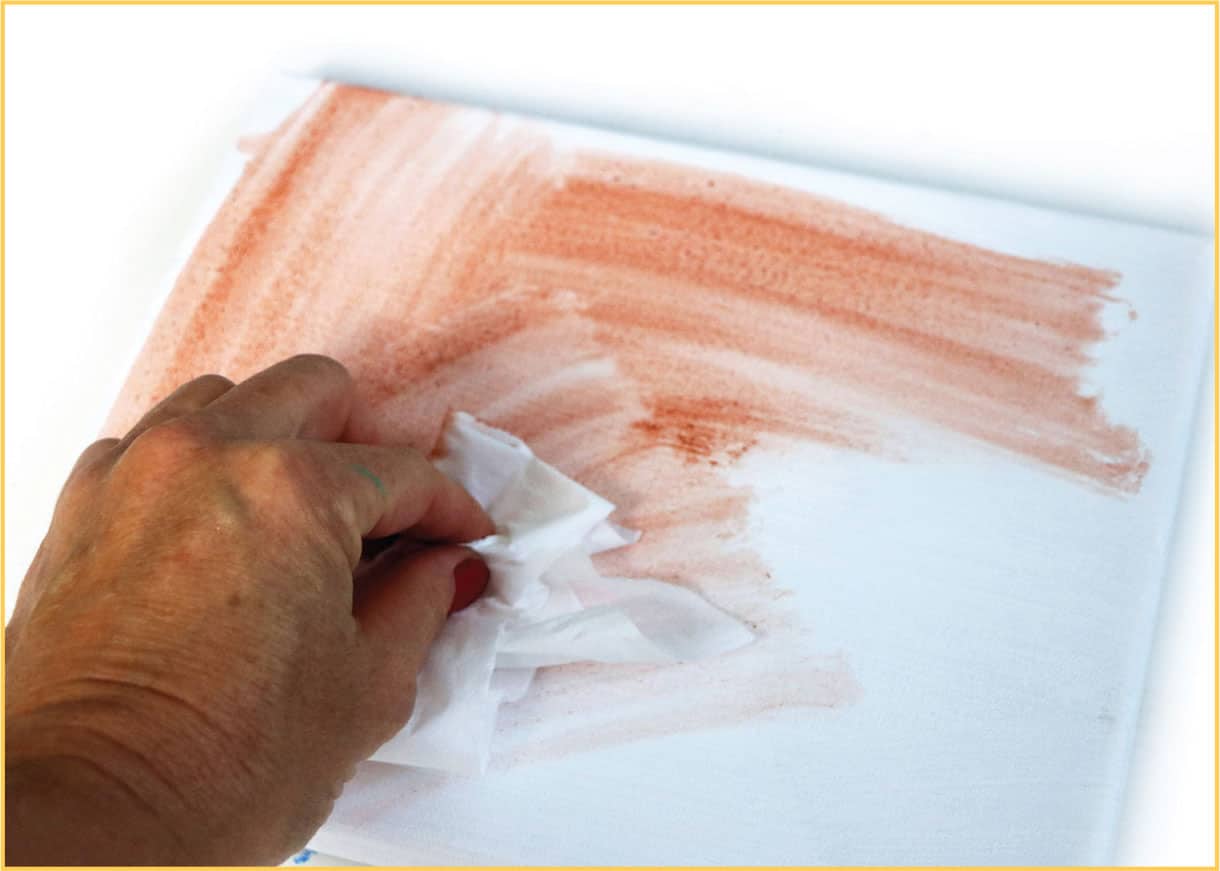
Painting with bold brushstrokes often involves the alla prima technique. Often, you will first create an underlayer with a wash of thin paint across the entire canvas. Let the underlayer dry completely before starting to paint. The underlayer creates a color value base, which will add interest and greatly enhance the mood and feeling of a painting. For example, a landscape with an earthy orange underpainting will create a glow that shines through the green grass and trees.
Underlayer
Brush Techniques
You can manipulate your paints with the use of certain brush techniques, which push and blend the paints to achieve desired effects.
• Long, bold strokes Use a flat or filbert brush to make long, confident strokes across the surface of the canvas.
• Controlled short strokes Useful for detailed areas.
• Flick A flick at the end of a stroke can add a subtle and spontaneous blending and softening to an area of the painting.
• Liner drag Dragging a liner brush will create fine lines for details.
• Curvy strokes A round or liner brush works well for this technique.
• Dots Using a liner brush or the corner of a flat brush to press-and-release without drag to create a dot.
• Scrubbing Using a stiff brush to scrub or scratch the paint. You can remove, blend, or apply paint with some of the underlayer showing through.
• Pushing A stuff brush can push loads of paint around the canvas.

Long, bold strokes
Controlled short strokes
Flick
Liner drag

Curvy strokes

Dots

Scrubbing
Pushing
Practice Makes Perfect
It’s a good idea to experiment with your brushes and paint colors before starting a project. Invest in some cheap stretched canvas or canvas panels for some quick practice.
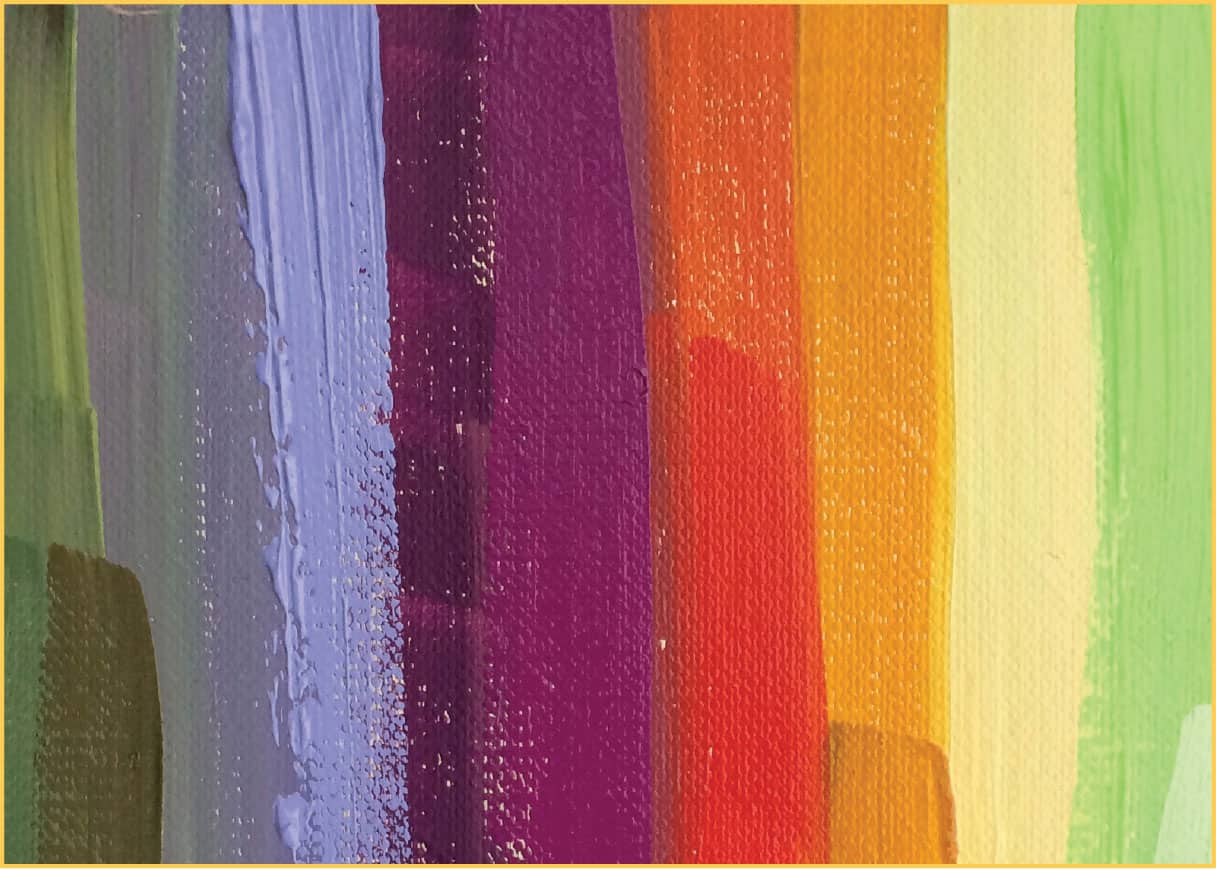
Layering
At right is an example of layering blocks of single and mixed colors. You can see some of the underlayers showing through. This color exercise shows you which paints are more transparent and which paints are more opaque.

Overlap
Practice strokes that touch up against each other and even slightly overlap.
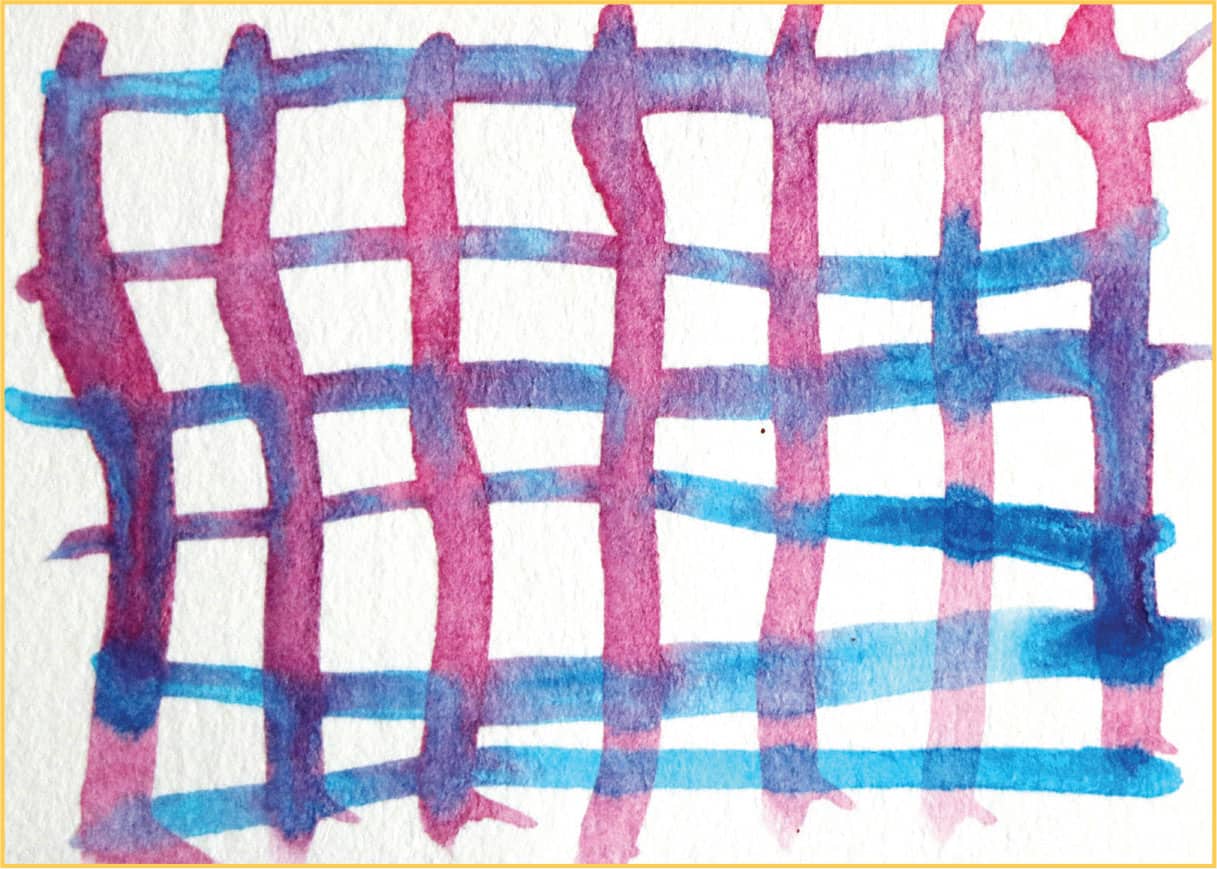
Striped Lines
Practice with the liner brush and thinned acrylic paint. You can also use a small round brush or the thin side of a flat brush. Practice making long thin lines. You can cross them to create hatching as shown. It is easier to create this effect if the paint is thinned to a runny consistency.
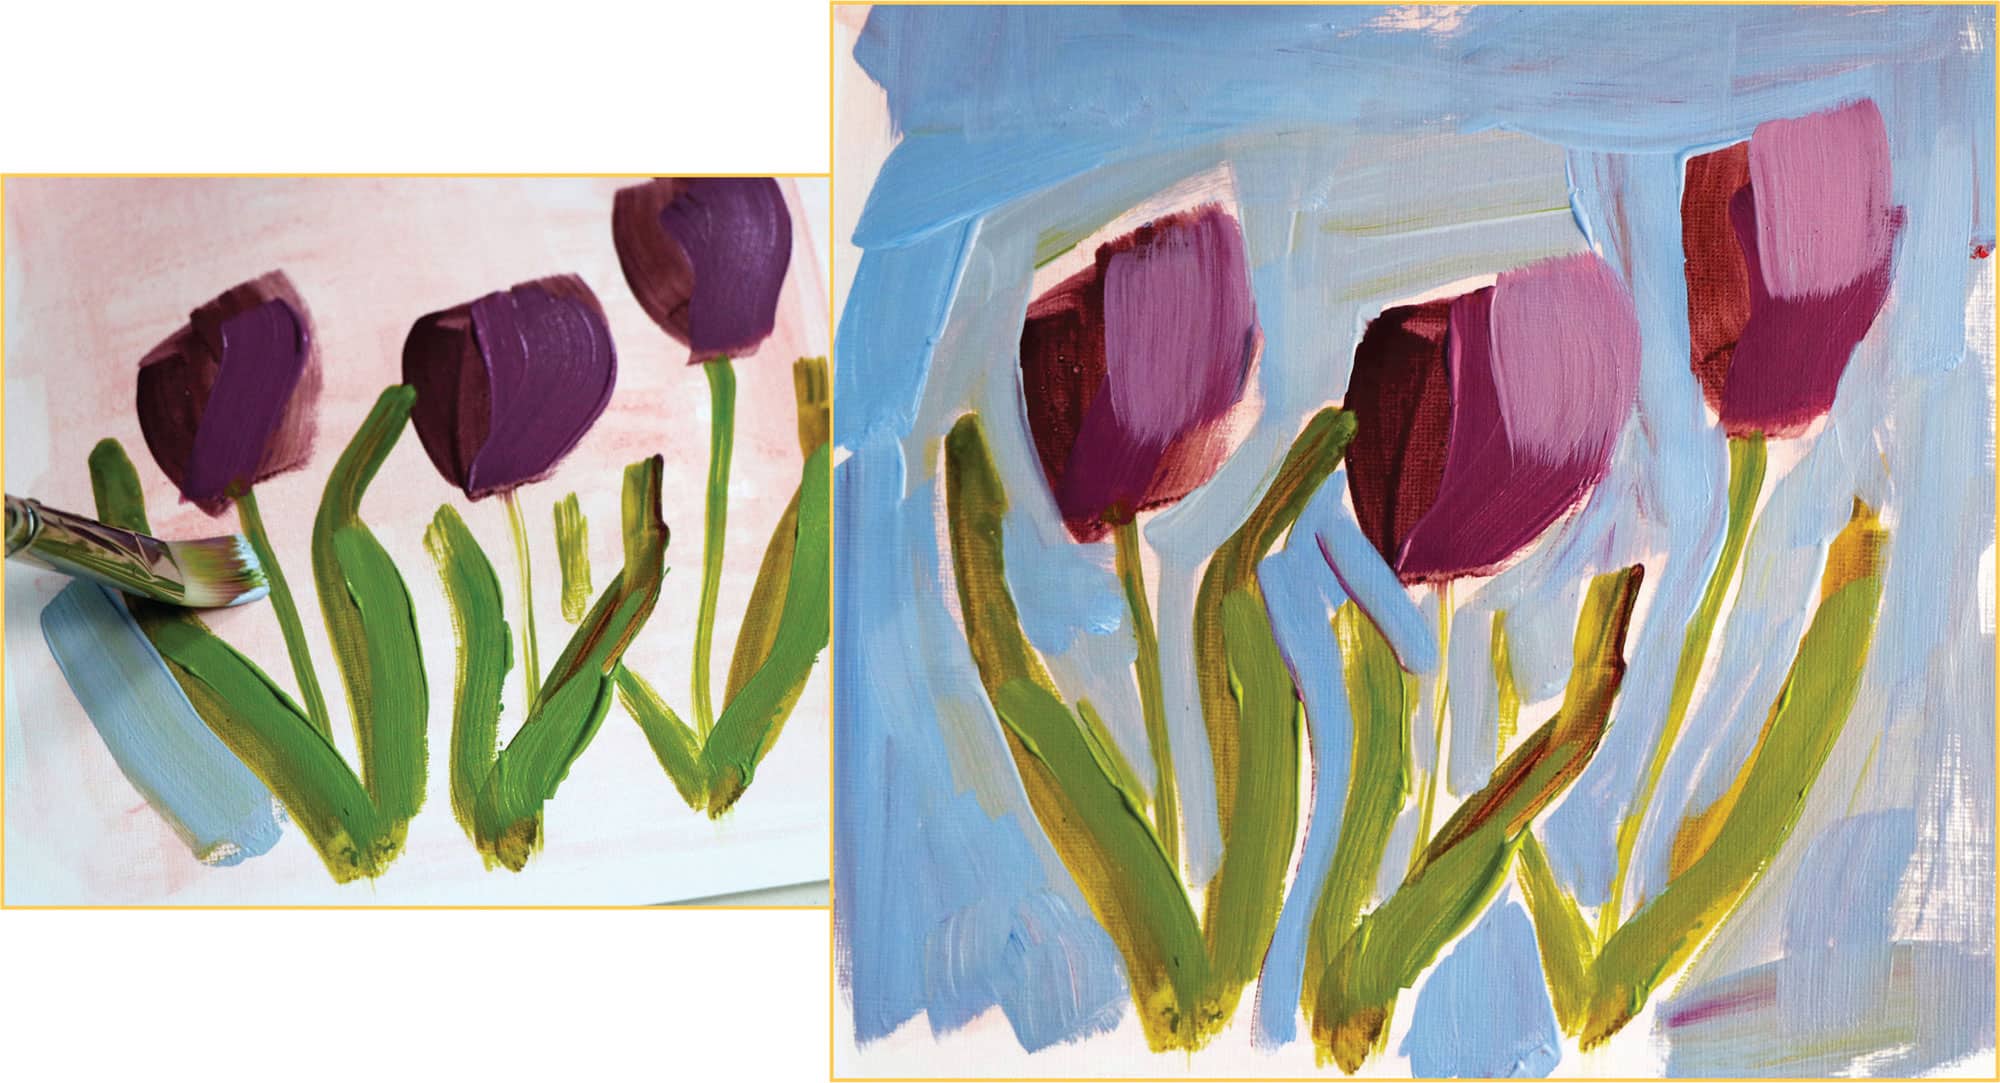
Floral Exercise
Pick a color or colors that speak to you. Try thicker paint first, and then thin it to see how it behaves. See how the paint looks when dry. Sometimes the drying process creates subtle nuances to the finished result.

