16
MariaDB in Python
This example uses the MariaDB database, which is a descendant of the very popular MySQL database. It is a relational database that has a columnar storage engine to give it column-oriented database features. Those features don't change the way you can use MariaDB as a relational database, but they make large column-oriented queries more efficient. That makes MariaDB particularly useful for data warehousing and large-scale data analysis and analytics.
This example builds a database of extraterrestrial animals as described in Chapter 8, “Designing Databases to Support Software.” Figure 16.1 shows the design with some data added to the tables.

INSTALL MariaDB
To install MariaDB, first go to https://mariadb.com/downloads/community and select the MariaDB Community tab. Then pick the version that you would like (I used the most recent production version) and your operating system. Scroll down slightly and click Download. The installer file is pretty large (around 66 MB for 64-bit Windows), so you'll probably want to download it over a fast Internet connection.
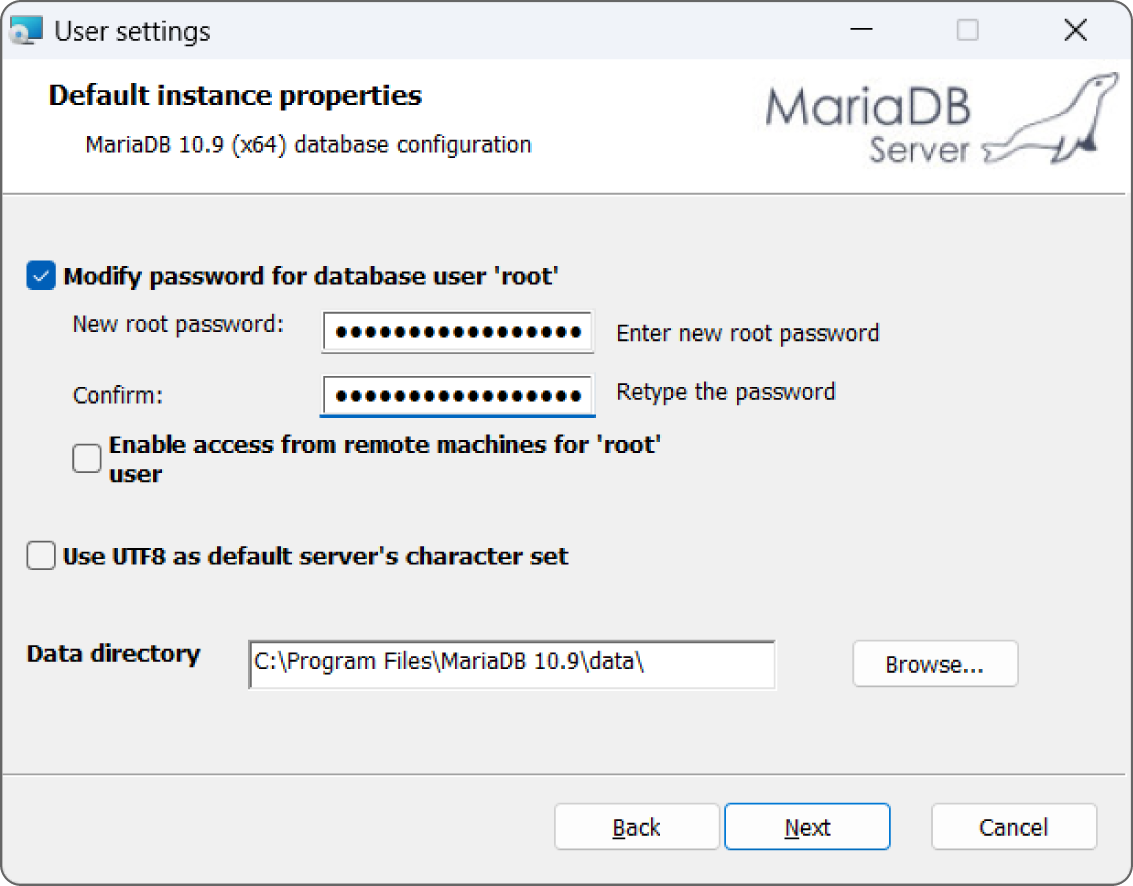
Execute the installer and follow its instructions. When you get to the stage shown in Figure 16.2, pick a nice secure password for the database root. (Root is an all-powerful user who has complete access to the entire database, so this password should be hard to guess and you need to keep it safe.) Don't use an obvious password like “secret,” don't leave it on a sticky note (unless you put that in a safe place), and don't publish your password in a database design book. (I used TheSecretPassword.)
RUN HeidiSQL
You can search online for database management tools that can work with MariaDB if you like. In my exhaustive 20-second search, I found a few dozen options but none looked trivial to install and none were obviously free, so I decided to do without.
Then I noticed that MariaDB had installed HeidiSQL, a free open source database administration tool that works with MySQL, Microsoft SQL Server, PostgreSQL, SQLite, and probably others. Because it's already installed and free, why not use it?
I'll briefly explain how to use HeidiSQL to build a database, but this chapter also shows how to build the database with Python code. When you're writing a program to work with a database, it's often useful to build the database in code or with scripts. That approach lets you easily reset the database to a known state so that it contains specific test records that you can work with.
When you launch HeidiSQL, the session manager shown in Figure 16.3 appears.
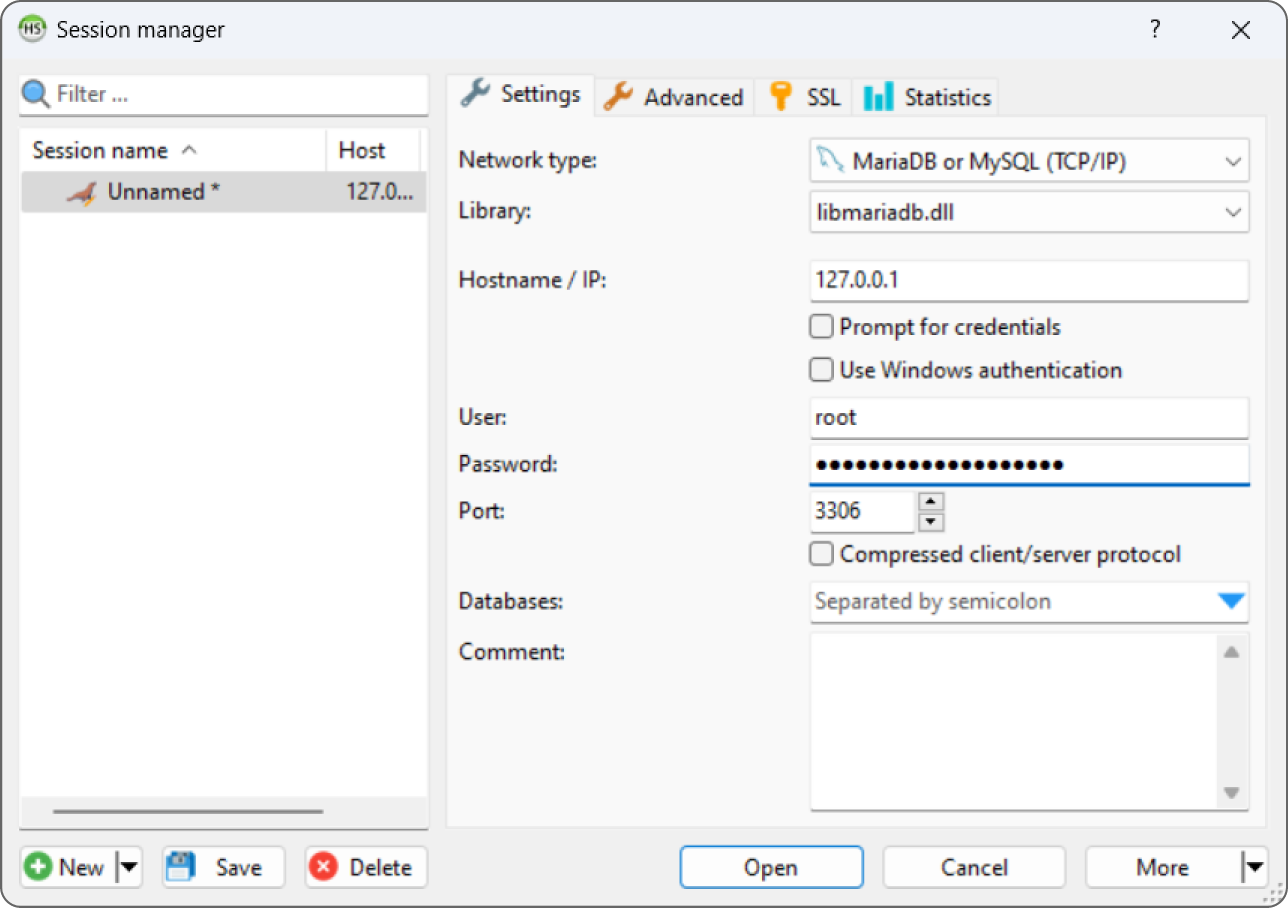
This example runs locally on your computer, so you should leave the Hostname / IP field with its default setting 127.0.0.1. Enter the password that you gave the root account when you installed MariaDB and click Open to see a window similar to Figure 16.4.
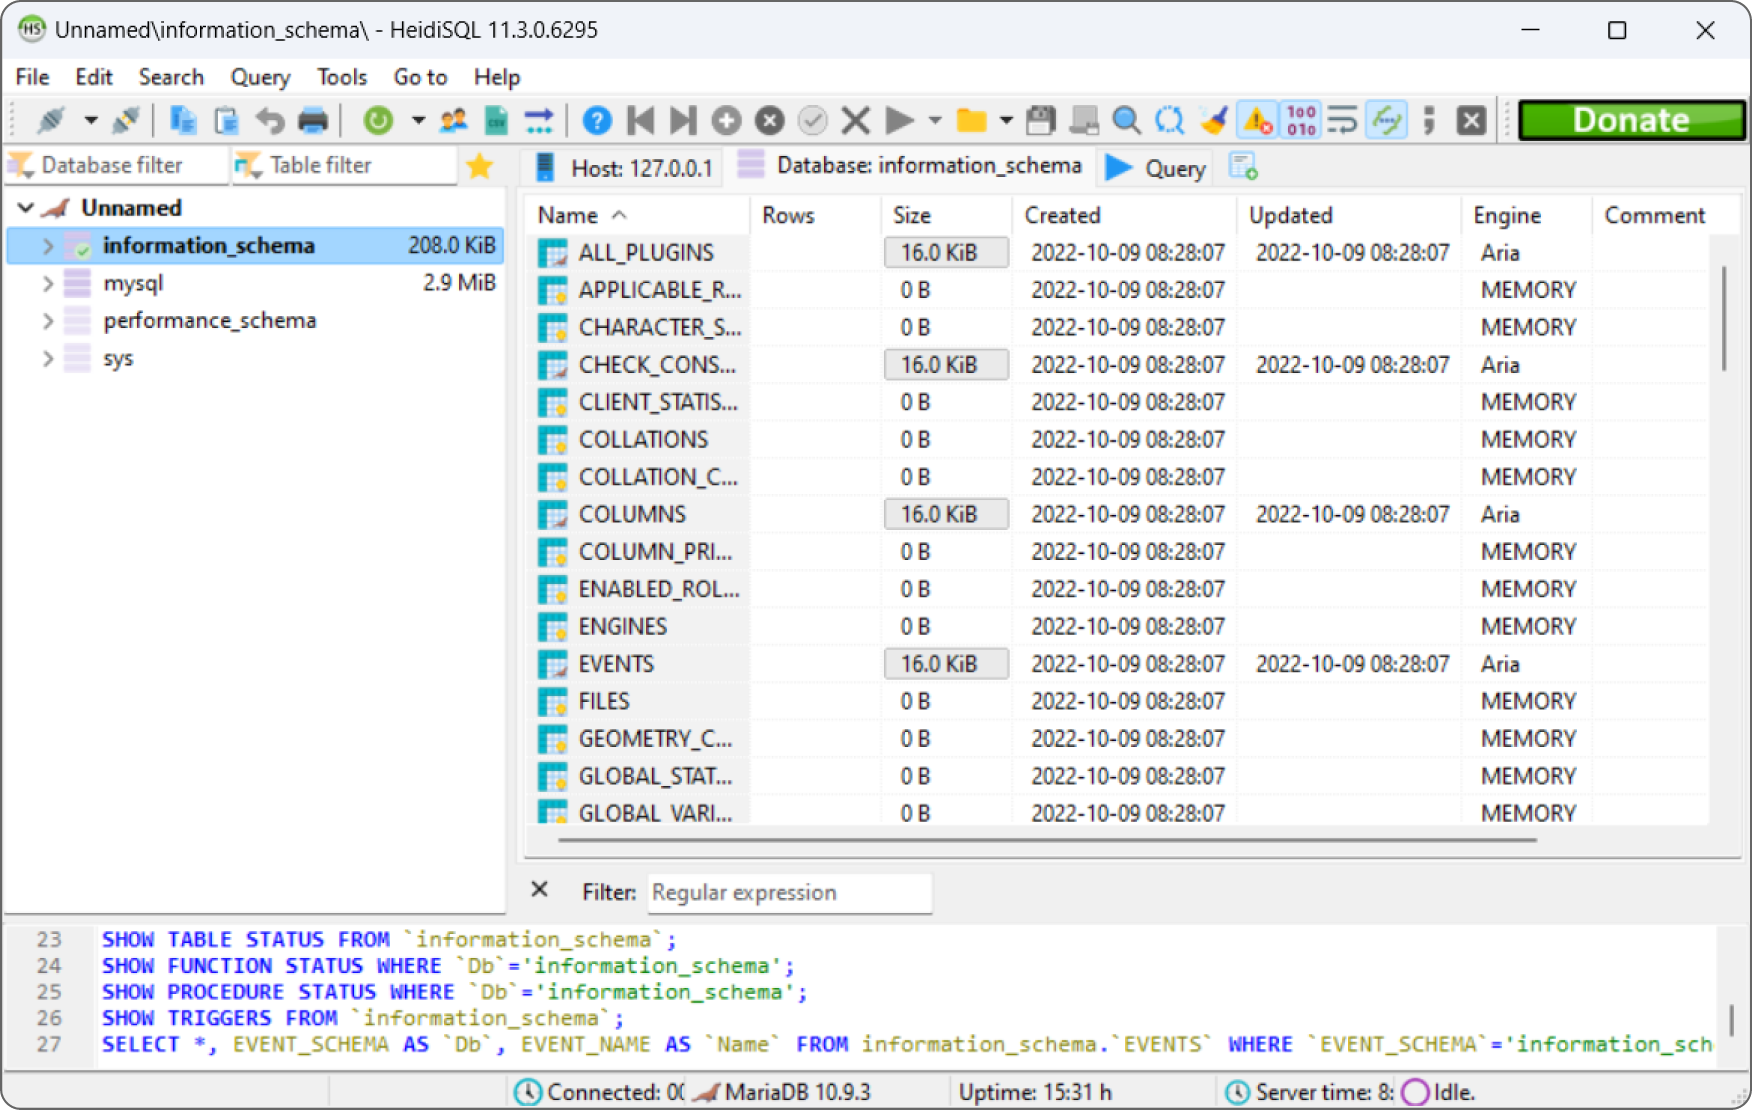
You can click the system databases on the left if you want to see what they contain.
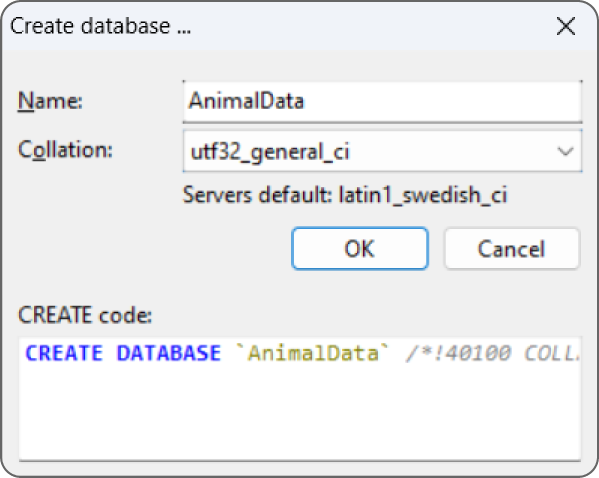
To create a new database, right-click the Unnamed entry in the list on the left, open the Create New menu, and select Database. In the dialog box shown in Figure 16.5, enter the database name. Select a collation order from the ridiculously long list to determine how the database orders sorted text and click OK.
To create a table, right-click the new database, open the Create New menu, and select Table to display the window shown in Figure 16.6.
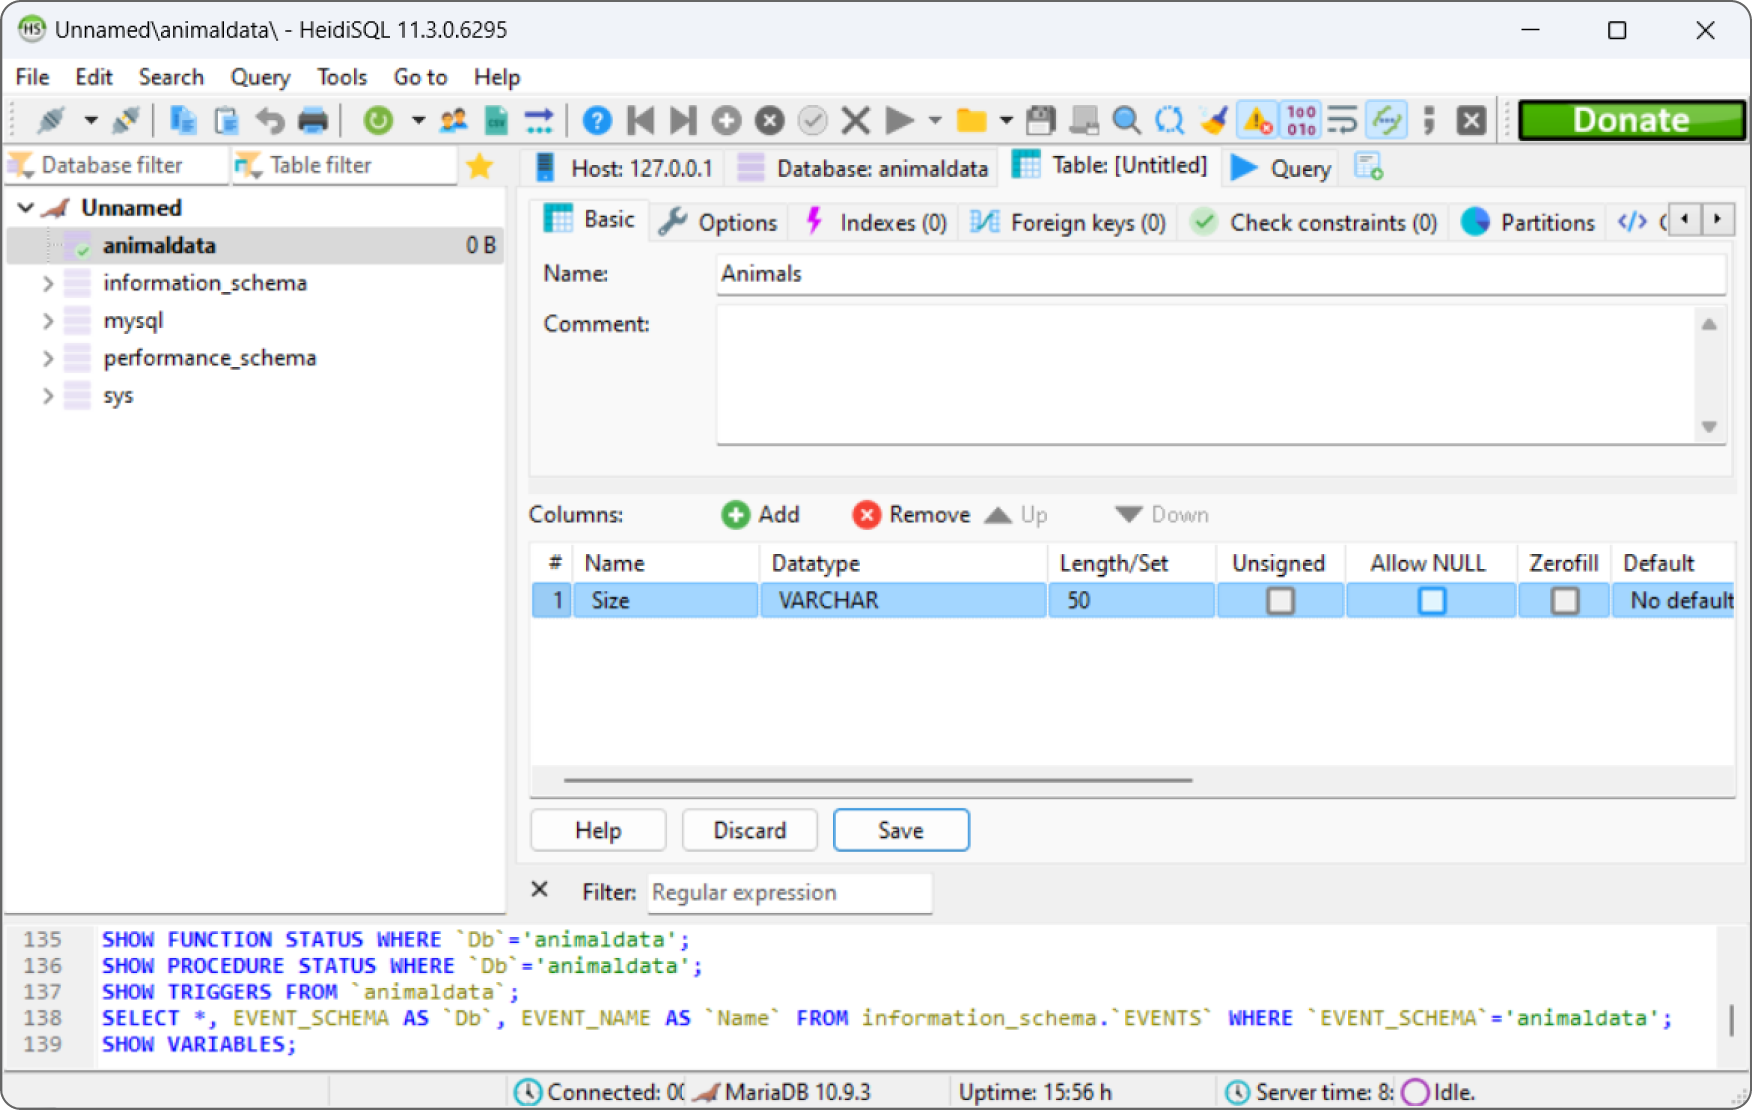
Click the Add button in the middle (below the table's Name and Comment fields) to create a new column. Then use the column list to set the column's properties. For example, click the column's name and type a new name, click its data type to pick a new type from a drop-down list, and deselect the Allow NULL box to make the field required.
You can continue to use HeidiSQL to build the entire database if you like. At this point, I'm going to stop working with HeidiSQL and write a Python program that creates the database shown in Figure 16.1.
CREATE THE PROGRAM
To create a Python program to work with the extraterrestrial animals MariaDB database, create a new Jupyter Notebook and then add the code described in the following sections.
The following sections describe each of the example program's code cells. Each cell connects to the database, performs some actions, and then closes the database connection.
If you like, you can join most of the cells together so you open the connection at the beginning and then close it at the end. You'll notice that the connection is slightly different when you're creating the database and when you're working with it, but I'm sure you can figure that out.
Install pymysql
Either use pip to install pymysql or enter the following code into a new notebook cell and execute it:
!pip3 install pymysqlThe result should be similar to the following, possibly with different version numbers:
Collecting pymysqlDownloading PyMySQL-1.0.2-py3-none-any.whl (43 kB)Installing collected packages: pymysqlSuccessfully installed pymysql-1.0.2
Create the Database
MariaDB has a good online knowledge base, so it's easy to find explanations of the SQL commands that it supports. For example, if you search for MariaDB create user, you can find a page that explains the CREATE USER command. I'm going to be lazy and use the root user for this example, but in general it's better to create a separate database user for each flesh-and-blood user so that they can log in separately and so that you can minimize their privileges. It's generally safer if normal users cannot create and destroy databases, tables, and other users at will.
To create the database, enter the following code in a new notebook cell and execute it:
# Create the AnimalData database.import pymysql# Connect to the database server.conn = pymysql.connect(host="localhost",user="root",password="TheSecretPassword")# Create a cursor.cur = conn.cursor()# Drop the database if it exists.cur.execute("DROP DATABASE IF EXISTS AnimalData")# Create the database.cur.execute("CREATE DATABASE AnimalData")# List the available databases.cur.execute("SHOW DATABASES")databases = cur.fetchall()for database in databases:print(database)# Close the connection.conn.close()
This code first imports the pymysql module. It then creates a connection object attached to the database server. Replace the password shown here with the one you used when you installed MariaDB. Notice that this code does not specify a database because we haven't created one yet.
Next, the code creates a cursor. Databases use cursors to execute commands and return results. This code uses the cursor's execute method to execute the following SQL statement:
DROP DATABASE IF EXISTS AnimalDataSQL is reasonably English-like, so you can probably guess that this drops the database named AnimalData (for example, if you used HeidiSQL to create it). The IF EXISTS clause tells the cursor to not try to drop the database if it doesn't exist. Trying to drop a database that doesn't exist (or more generally, to work with any object that doesn't exist) will make the program throw a temper tantrum.
Next, the code executes the following SQL statement to create the database:
CREATE DATABASE AnimalDataThe code then uses the cursor to execute the SHOW DATABASES query command to list the available databases. It uses the cursor's fetchall method to retrieve the query's results and then loops through the results and prints them.
The code finishes by closing the database connection to release the connection's resources.
The following text shows the output from the previous code:
('animaldata',)('information_schema',)('mysql',)('performance:schema',)('sys',)
Each of these values is a tuple (a sort of unchangeable list) containing a single item that holds the name of a database.
The first returned item is the database that we just created. The others represent system databases and schemas that MariaDB needs to manage its data. If you compare this output to Figure 16.6, you'll see the same list of databases.
Define Tables
Enter the following code into a new notebook cell to create the database's tables:
# Create the tables.import pymysql# Connect to the database server.conn = pymysql.connect(host="localhost",user="root",password="TheSecretPassword",database="AnimalData")# Create a cursor.cur = conn.cursor()# Drop any existing tables.cur.execute("DROP TABLE IF EXISTS AnimalPlanets")cur.execute("DROP TABLE IF EXISTS Animals")cur.execute("DROP TABLE IF EXISTS Planets")# Create the Animals table.cmd = """CREATE TABLE Animals(Size TEXT NOT NULL,Animal TEXT NOT NULL,AnimalId INT PRIMARY KEY)"""cur.execute(cmd)# Create the Planets table.cmd = """CREATE TABLE Planets(PlanetId INT PRIMARY KEY,HomePlanet TEXT NOT NULL,PlanetaryMass FLOAT NOT NULL)"""cur.execute(cmd)# Create the AnimalPlanets table.# Foreign keys:# AnimalPlanets.AnimalId = Animals.AnimalId# AnimalPlanets.PlanetId = Planets.PlanetIdcmd = """CREATE TABLE AnimalPlanets(AnimalId INT,PlanetId INT,CONSTRAINT fk_animalsFOREIGN KEY (AnimalId) REFERENCES Animals (AnimalId)ON DELETE RESTRICTON UPDATE RESTRICT,CONSTRAINT fk_planetsFOREIGN KEY (PlanetId) REFERENCES Planets (PlanetId)ON DELETE RESTRICTON UPDATE RESTRICT,PRIMARY KEY (AnimalId, PlanetId))"""cur.execute(cmd)# Close the connection.conn.close()
The code first creates a database connection much as before. This time, however, it includes the database name AnimalData so it will work with that database.
Next, the code executes three DROP TABLE statements to delete the AnimalPlanets, Animals, and Planets tables if they already exist. Note, you must drop the tables in a valid order. In this database, the AnimalPlanets table has foreign key constraints matching fields in the Animals and Planets tables. If the AnimalPlanets table contains data and you drop either of the other tables first, then the AnimalPlanets records will violate their constraints and the program will crash.
Dropping tables (if they exist) and then re-creating them is a common technique for building test databases. It lets you remove any experimental changes to the tables so that you can start with a known state. (This is the main reason why I didn't use HeidiSQL to build the database. If you build the database with a database management tool and then later decide to modify the table structure, you need to use the tool to rebuild the database's structure. It's often faster and easier to modify a program or script and rerun it to rebuild the database from scratch.)
Next, the code executes three CREATE TABLE statements to build the tables. The CREATE TABLE statement can be pretty complicated, but you can look at the code to get an idea of how it works. The first two statements just list the tables’ fields, giving them their data types and some special properties such as NOT NULL to indicate that a field is required and PRIMARY KEY to indicate that a field is the table's primary key.
The third CREATE TABLE statement is a bit more complicated. It defines the table's fields, and then defines two foreign key constraints. The field name after the FOREIGN KEY keywords indicates the field in this table. The table and field names after the REFERENCES keyword tell what table and field the first field must match. In this example, the fk_animals constraint requires that each AnimalPlanets.AnimalId value must match some Animals.AnimalId value.
Similarly, the fk_planets constraint requires that AnimalPlanets.PlanetId values must match some Planets.PlanetId value.
The ON UPDATE RESTRICT and ON DELETE RESTRICT clauses mean that the database will prevent (restrict) any updates or deletions that violate the constraints. Other choices can make a change cascade to related records or null out related fields.
This CREATE TABLE statement finishes with a PRIMARY KEY statement that makes the pair of fields AnimalId and PlanetId the table's primary key.
Create Data
To add some data to the tables, create a new notebook cell and enter the following code:
# Create some data.import pymysql# Connect to the database server.conn = pymysql.connect(host="localhost",user="root",password="TheSecretPassword",database="AnimalData")# Create a cursor.cur = conn.cursor()# Delete any previous records.cur.execute("DELETE FROM AnimalPlanets")cur.execute("DELETE FROM Animals")cur.execute("DELETE FROM Planets")# Add records to the Animals table.cmd = """INSERT INTO Animals(Size, Animal, AnimalId) VALUES('Medium', 'Hermaflamingo', 1)"""cur.execute(cmd)cmd = """INSERT INTO Animals(Size, Animal, AnimalId) VALUES('Large', 'Skunopotamus', 2)"""cur.execute(cmd)cmd = """INSERT INTO Animals(Size, Animal, AnimalId) VALUES('Medium', 'Mothalope', 3)"""cur.execute(cmd)cmd = """INSERT INTO Animals(Size, Animal, AnimalId) VALUES('Small', 'Platypus', 4)"""cur.execute(cmd)# Add records to the Planets table.cur.executemany("""INSERT INTO Planets (PlanetId, HomePlanet, PlanetaryMass)VALUES (%s, %s, %s)""",[(101, "Virgon 4", 1.21),(102, "Dilbertopia", 0.88),(103, "Xanth", 0.01),(104, "Australia", 1.0)])# Add records to the AnimalPlanets table.cur.executemany("""INSERT INTO AnimalPlanets (AnimalId, PlanetId)VALUES (%s, %s)""",[(1, 101),(2, 101),(2, 102),(3, 103),(4, 104)])# Commit the changes.conn.commit()# Close the connection.conn.close()
This code creates a database connection and defines a cursor as usual. It then deletes all the records from the database's three tables. Emptying a table before adding test records is another common testing technique.
Next, the code creates four INSERT INTO statements and executes them one at a time to add records to the Animals table. That works but is somewhat verbose.
The code then uses a more concise method to add several records at once. It calls the cursor's executemany method, passing it an INSERT statement that contains the value %s as a placeholder for field values. It also passes the method an array of tuples, giving the values for each record. This approach lets the cursor insert many records all at once, which makes the code shorter. It also allows the database to optimize the insertion operation, so it is likely to be faster than inserting the records one at a time, although you won't notice the difference for such a small example.
After it has added the data, the code calls the connection object's commit method. This is important! If you don't commit the changes, then the newly added values are removed and you're left scratching your head while staring at code that you know should work. (Not that I have firsthand experience of that or anything.)
Fetch Data
To verify that the preceding code actually adds data to the database, create a new cell and add the following code:
# Fetch data.import pymysql# Connect to the database server.conn = pymysql.connect(host="localhost",user="root",password="TheSecretPassword",database="AnimalData")# Create a cursor.cur = conn.cursor()# Select each table's records.print("*** Animals ***")cmd = "SELECT * FROM Animals"cur.execute(cmd)rows = cur.fetchall()for row in rows:print(row)print(" *** Planets ***")cmd = "SELECT * FROM Planets"cur.execute(cmd)rows = cur.fetchall()for row in rows:print(row)print(" *** AnimalPlanets ***")cmd = "SELECT * FROM AnimalPlanets"cur.execute(cmd)rows = cur.fetchall()for row in rows:print(row)# Select matching records.cmd = """SELECT Size, Animal, HomePlanet, PlanetaryMassFROM Animals, Planets, AnimalPlanetsWHEREAnimals.AnimalId = AnimalPlanets.AnimalId ANDPlanets.PlanetId = AnimalPlanets.PlanetIdORDER BY Animal"""print(" *** Results ***")cur.execute(cmd)rows = cur.fetchall()for row in results:print(row)# Close the connection.conn.close()
This code connects to the database as usual. It then creates three queries that fetch the data from the tables. It passes the queries into the cursor's fetchall method and loops through the returned tuples of results and displays each row's data.
The final query selects values from the tables using the ID fields to link corresponding records.
The following text shows the results:
*** Animals ***('Medium', 'Hermaflamingo', 1)('Large', 'Skunopotamus', 2)('Medium', 'Mothalope', 3)('Small', 'Platypus', 4)*** Planets ***(101, 'Virgon 4', 1.21)(102, 'Dilbertopia', 0.88)(103, 'Xanth', 0.01)(104, 'Australia', 1.0)*** AnimalPlanets ***(1, 101)(2, 101)(2, 102)(3, 103)(4, 104)*** Results ***('Medium', 'Hermaflamingo', 'Virgon 4', 1.21)('Medium', 'Mothalope', 'Xanth', 0.01)('Small', 'Platypus', 'Australia', 1.0)('Large', 'Skunopotamus', 'Virgon 4', 1.21)('Large', 'Skunopotamus', 'Dilbertopia', 0.88)
SUMMARY
MariaDB is a direct descendant of the extremely popular MySQL database. It is a standard relational database that also provides column-oriented features, making it useful for data warehousing and large-scale data analysis and analytics.
The example described in this chapter creates a new database, defines some tables for it, and adds a little test data to those tables. That sort of application is useful for getting the database up and running, but in a real application you'd probably also need a user interface to let the user query and modify the data.
The next chapter describes a similar example that uses C# to build and manipulate a MariaDB database. Before you move on to Chapter 17, however, use the following exercises to test your understanding of the material covered in this chapter. You can find the solutions to these exercises in Appendix A.