How to use ImageView as a graphic object in the game
Use the ValueAnimator in animating movements of game objects
Use AudioManager, MediaPlayer, and the SoundPool classes to add audio effects and music to your game
Use Java threads to run things in the background
Like in the previous chapter, I’ll show the code snippets necessary to build the game; at times, even full code listings of some classes will be provided. The best way to understand and learn the programming techniques in this chapter is to download the source code for the game and keep it open in Android Studio as you read through the chapter sections. If you want to follow along and build the project yourself, it’s best to keep the source code for the chapter handy, so you can copy and paste particular snippets as necessary.
Game Mechanics
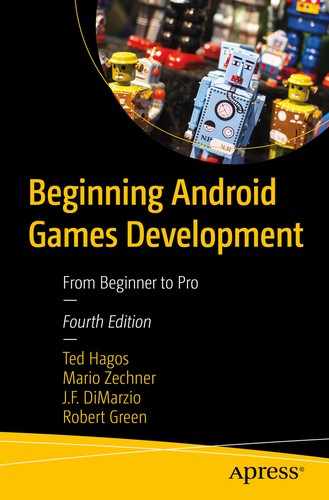
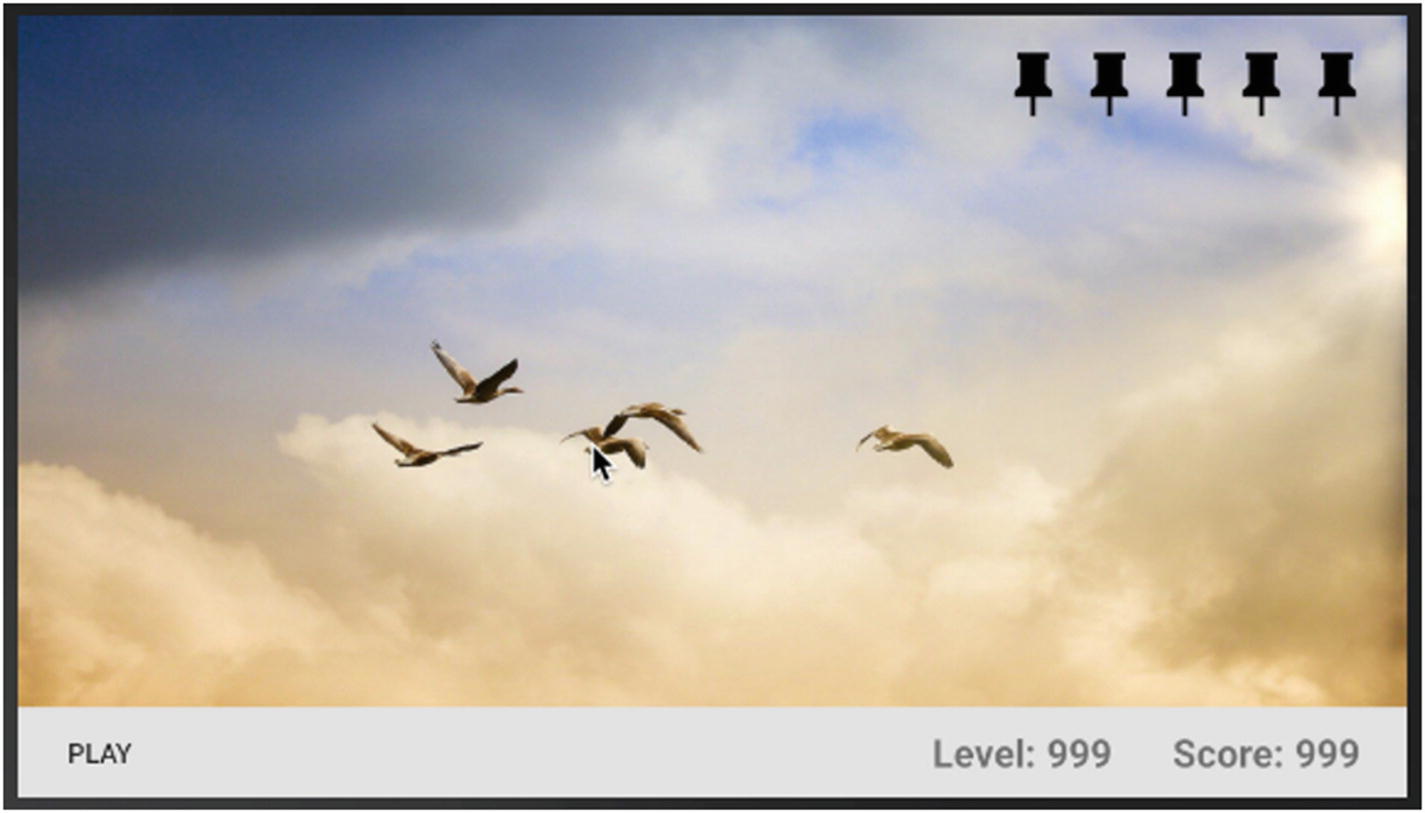
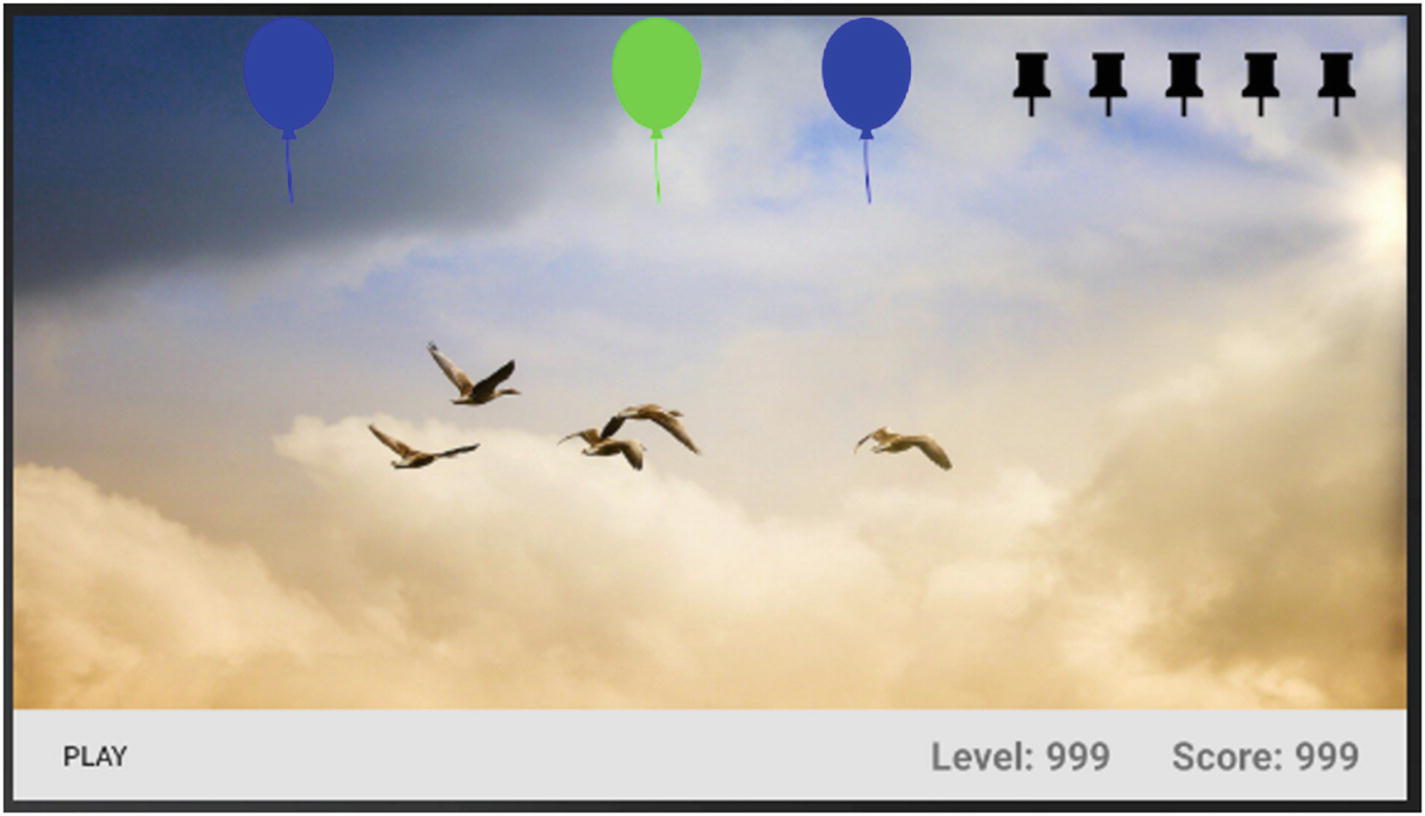
We will make balloons float from the bottom of the screen, rising to the top. The players’ goal is to pop as many balloons as they can before the balloons reach the top of the screen. If a balloon reaches the top without being popped, that will be a point against the user. The player will have five lives (pins, in this case); each time the player misses a balloon, they lose a pin. When the pins run out, it’s game over.
Pop balloons
The balloons will show up on random locations from the bottom of the screen.
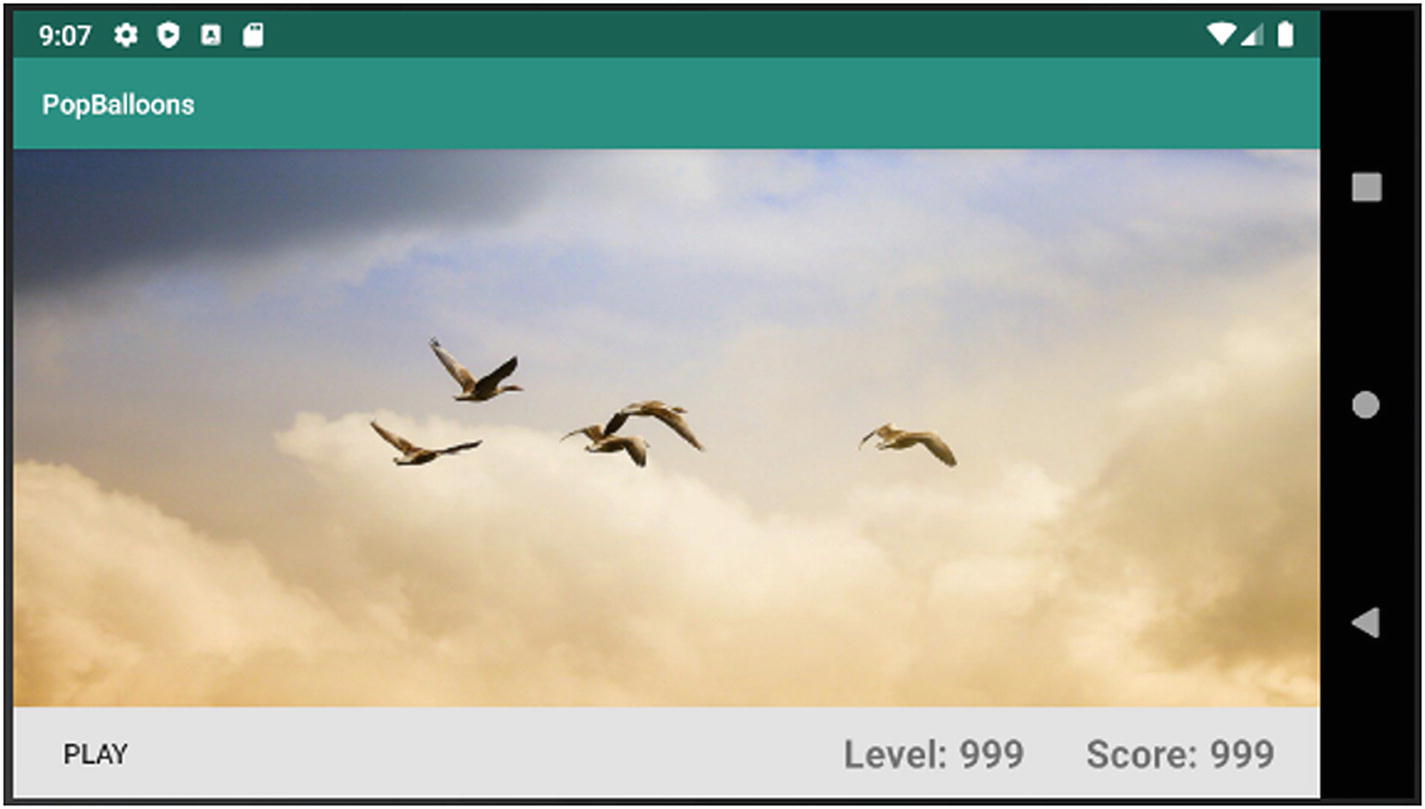
We will devote the lower strip of the screen to game statistics. We will use this to display the score and the level. On the lower left side, we’ll place a Button view which the user can use to start the game and to start a new level.
The game will be played in full screen (like our previous game), and it will be done so exclusively in landscape mode.
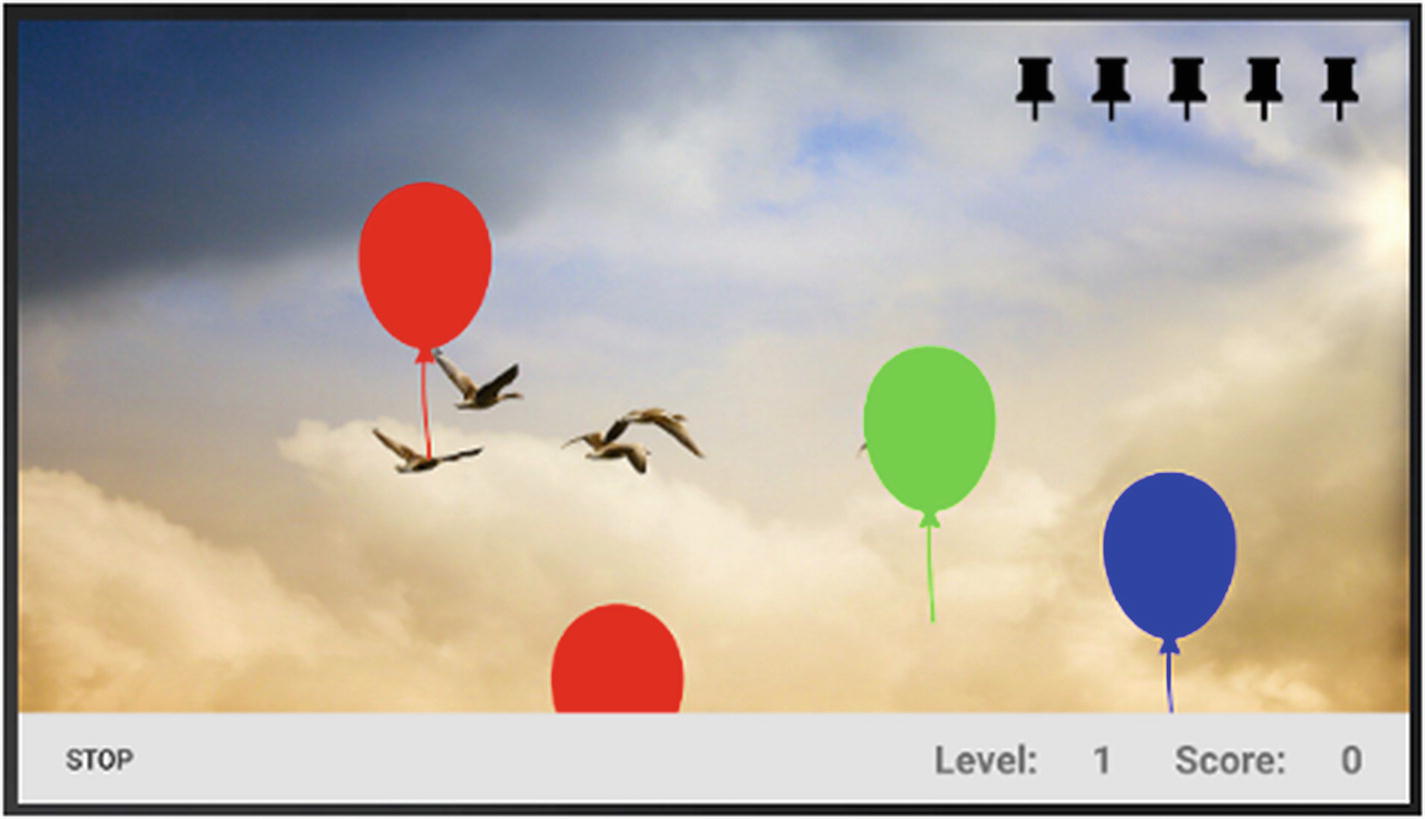
Creating the Project

New project with an empty Activity
Create a new project
Click Finish to create the project.
Drawing the Background
The game has a background image; you can do without one, but it adds to the user experience. Surely, if you’ll release a commercial game, you’ll use an image that has more professional polish. I grabbed this image from one of the public domain sites; feel free to use any image you prefer.
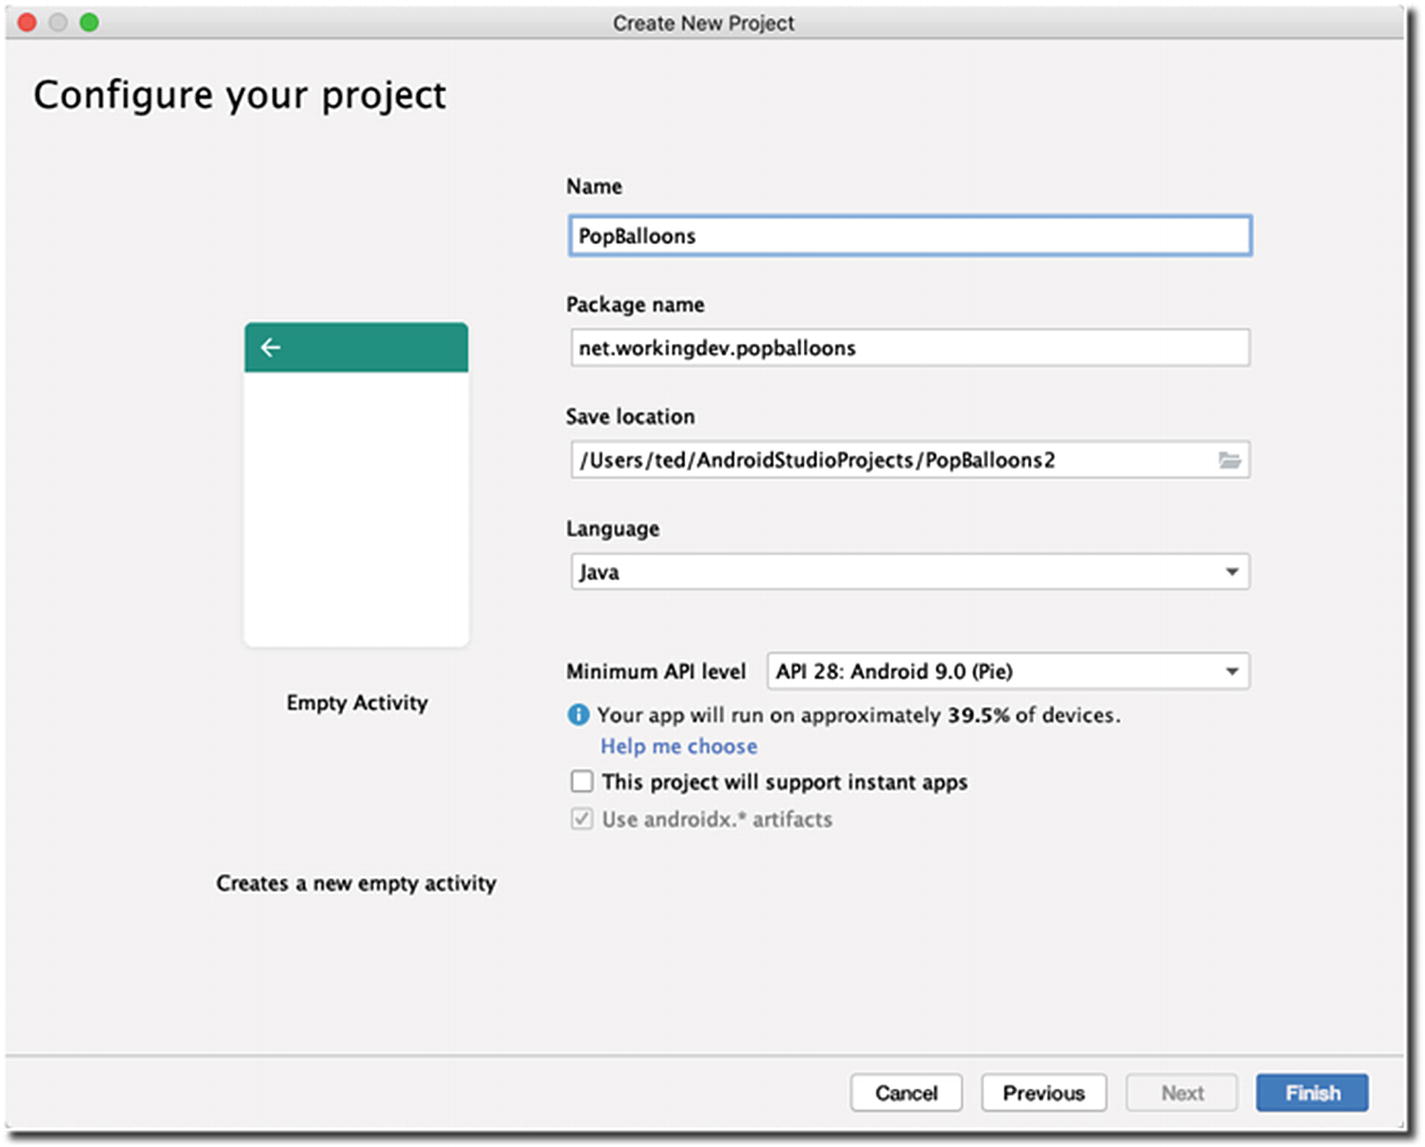
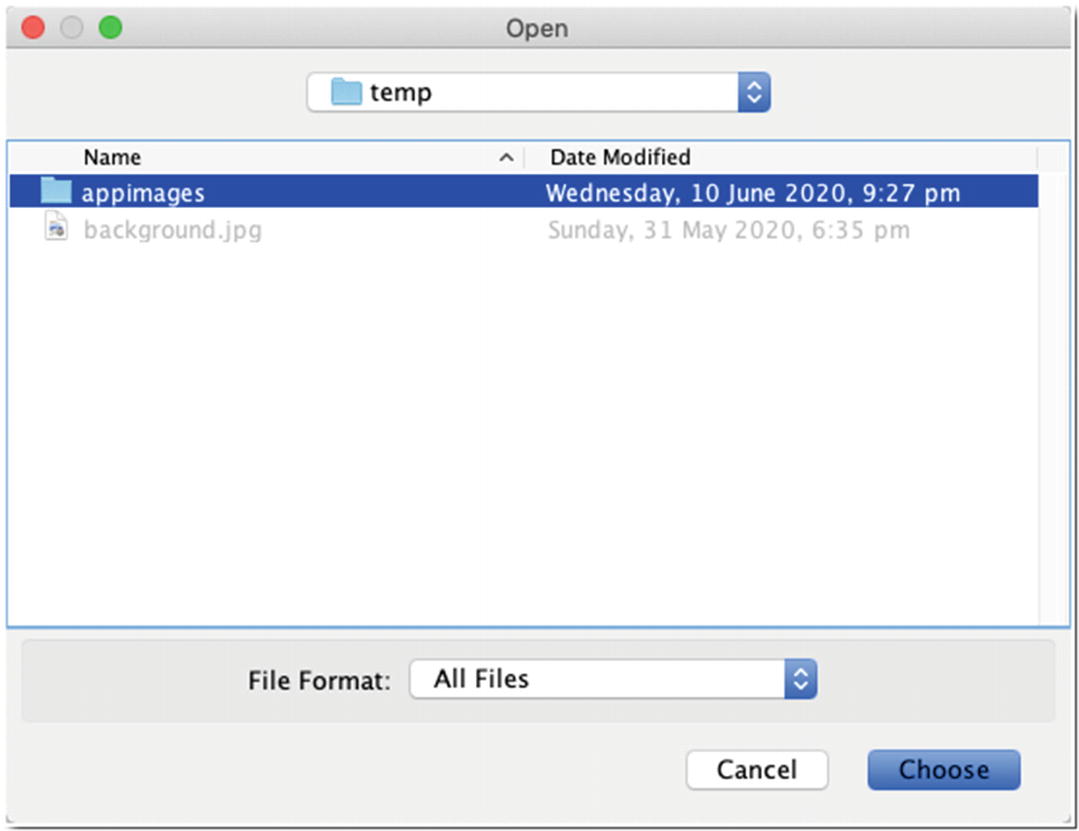
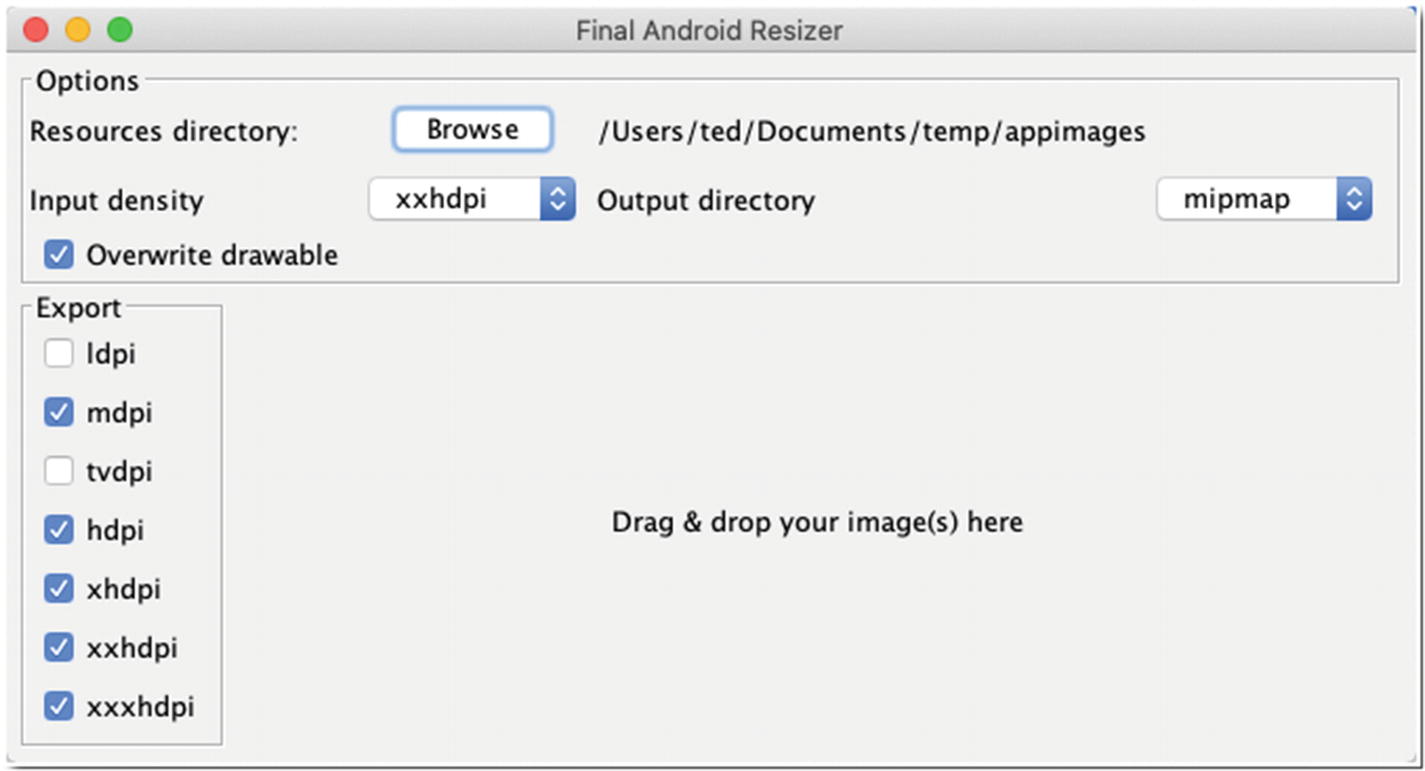
When I got the background image, I downloaded only one file and named it “background.jpg.” I could have used this image and dropped it in the app/res/drawable folder and be done with it. Had I done that, the runtime will use this same image file as background for different display densities, and it will try to make that adjustment while the game is playing, which may result in a jittery game experience. So, it’s very important to provide a background image for different screen densities. If you’re quite handy with Photoshop or GIMP, you can try to generate the images for different screens; or, you can use just one background image and then use an application called Android Resizer (https://github.com/asystat/Final-Android-Resizer) to generate the images for you. You can download the application from its GitHub repo and use it right away. It’s an executable Java archive (JAR) file.

Android Resizer app
Android Resizer
Target folder for generated images
Android Resizer, target directory set
The target directory (resources directory) should now be set. Remember this directory because you will fetch the images from here and transfer them to the Android project. In the window that follows (Figure 7-7),you will set the target directory.

Android Resizer, done with the conversion

Generated images

Grayscale image of the balloon

Generated files

Reveal in Finder
Now, you can simply drag and drop the generated image folders (and files) into the correct folders in app/res/ directory.
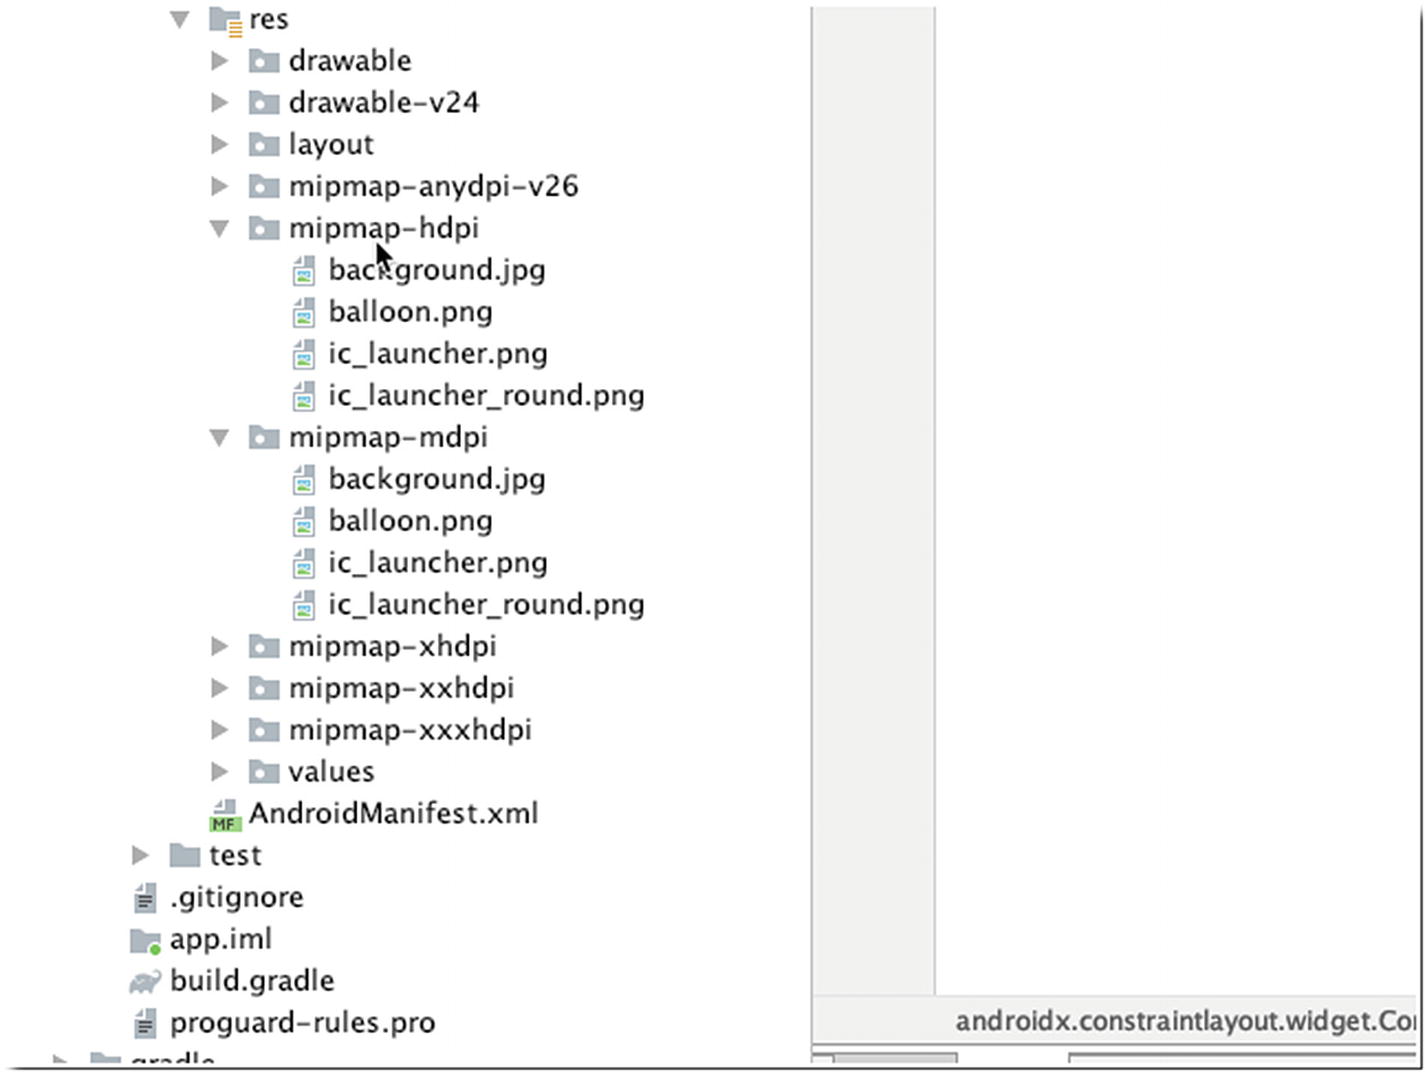
app/res folder with the appropriate image files
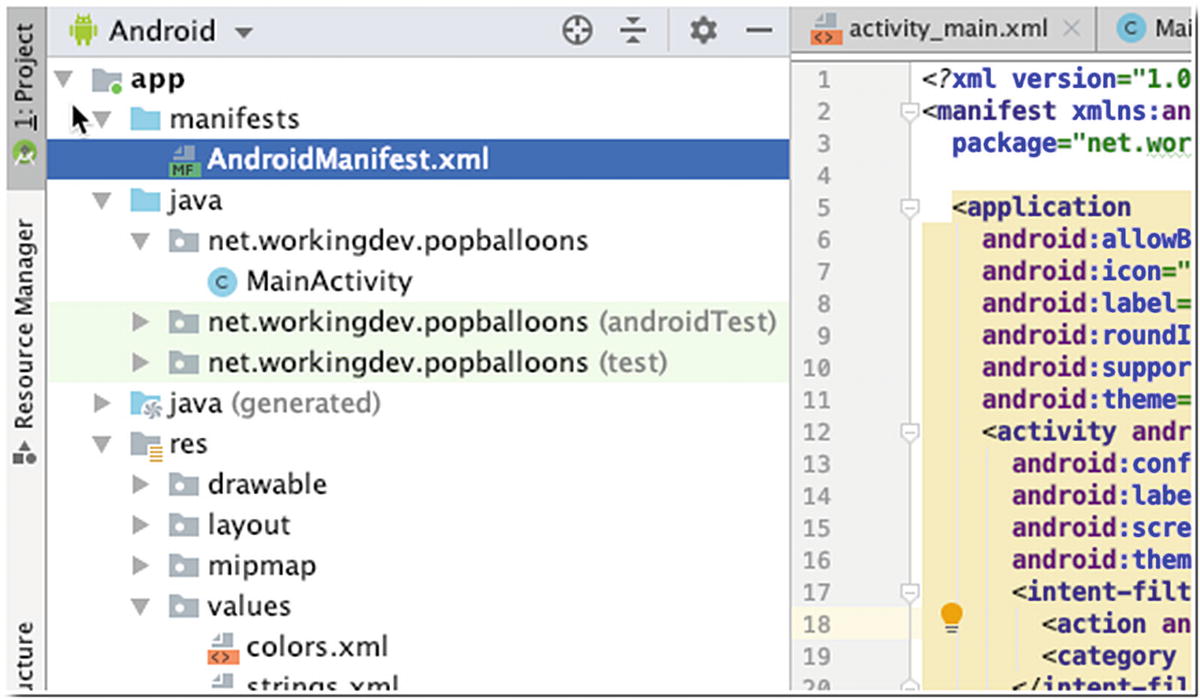
AndroidManifest.xml
AndroidManifest.xml
The entries responsible for fixing the orientation to landscape are found on the attributes of the <activity> node in the manifest file. At this point, the project would have an error because the Android:theme=” style/FullScreenTheme” attribute doesn’t exist as of yet. We’ll fix that shortly.
/app/res/styles.xml
PopBalloons
MainActivity
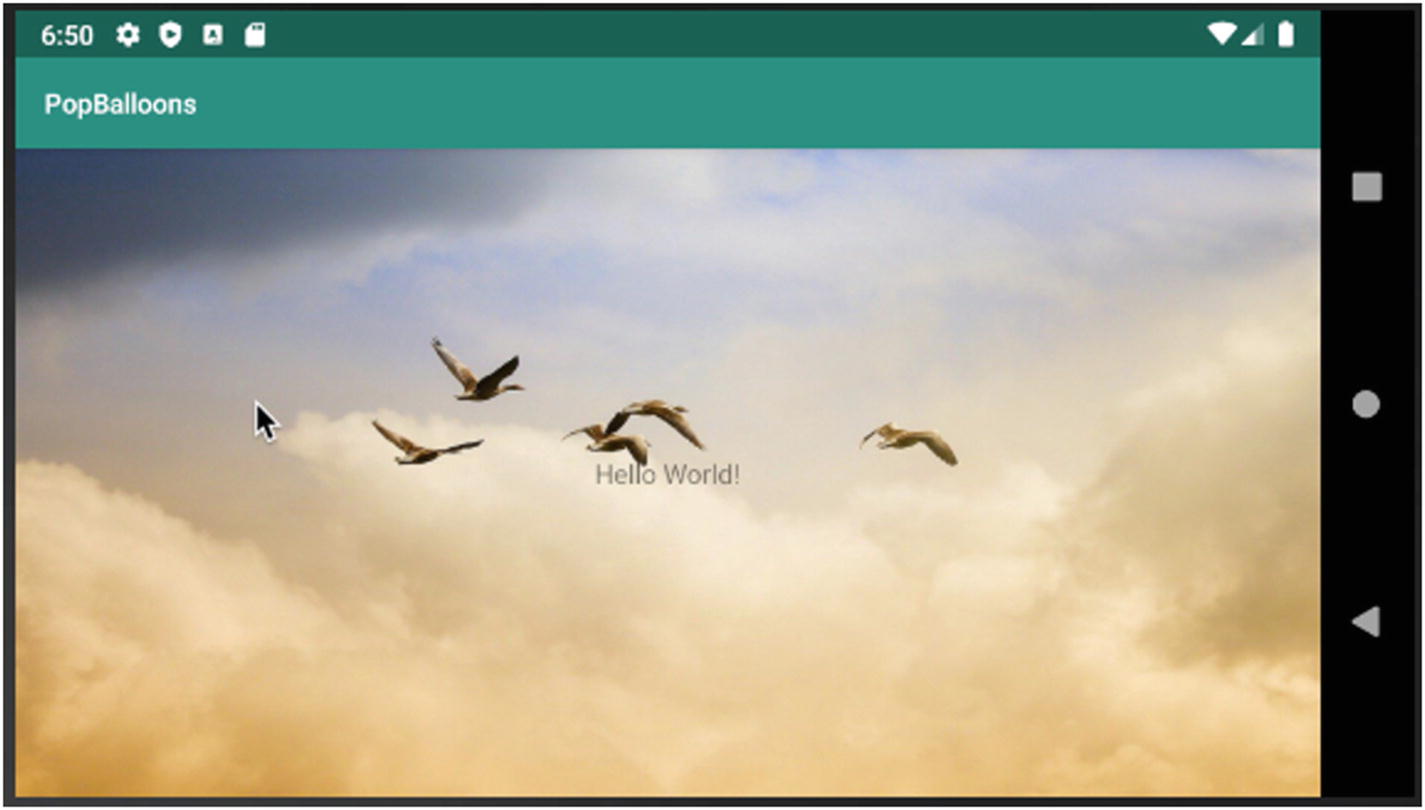
With background image
Game Controls and Pin Icons
We will use the bottom part of the screen to show the score and the level. We’ll also use this portion of the screen to place a button that triggers the start of the game and the start of the level.
activity_main
activity_main.xml
We referenced a couple of string and color resources in activity_main.xml, and we need to add them to strings.xml and colors.xml in the resources folder.
app/res/values/colors.xml
app/res/values/strings.xml
String literals are stored in strings.xml to avoid hardcoding the String literals in our program. This approach of using a resources file for String literals makes it easier to change the Strings later on—say, when you release the game to non-English speaking countries.
Next, let’s draw the pins. You can get the pins from Google’s material icons. These are SVG icons, so we don’t have to create multiple copies for different screen resolutions; they scale just fine. The vector definitions of the pins will be in the drawable folder. We’ll create two vector definitions for the pin; one image represents a whole pin (an unused game life) and the other a broken pin (a used game life).
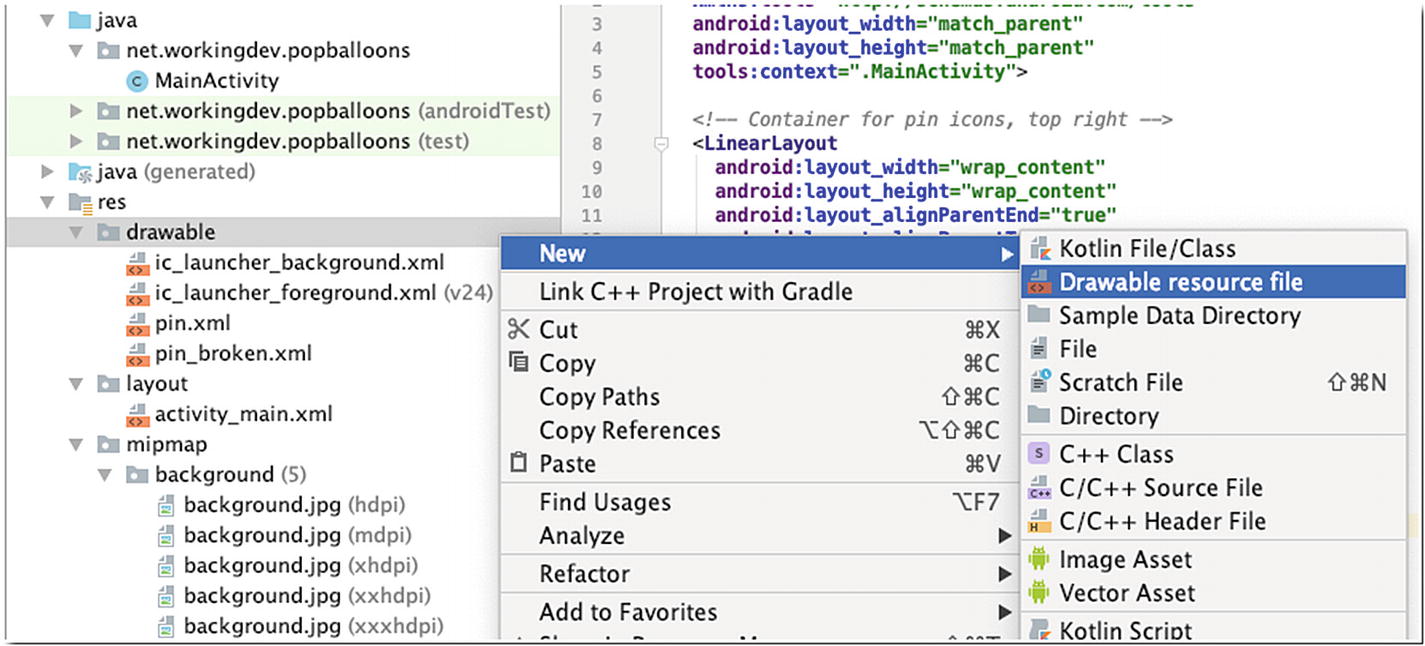
New drawable resource file

New Resource File
Check to see that the Directory name is “drawable,” then click OK. Simply type pin for the file name; no need to put the XML extension, that will be automatically added by Android Studio. Do the same thing to create the file for pin_broken.
app/res/drawable/pin.xml
app/res/drawable.pin_broken.xml
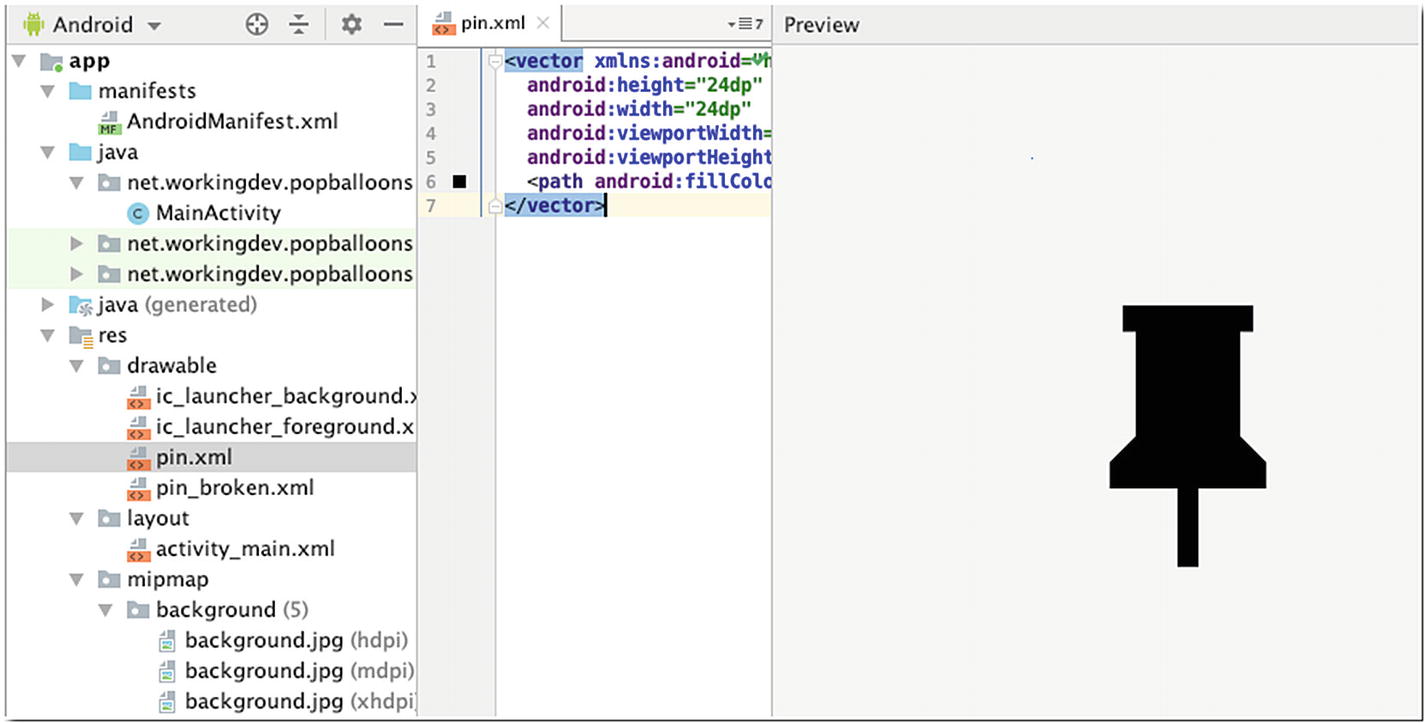
Pin definitions in XML
The android:src attribute points the ImageView to our vector drawing in the drawable folder.
Complete code for activity_main.xml
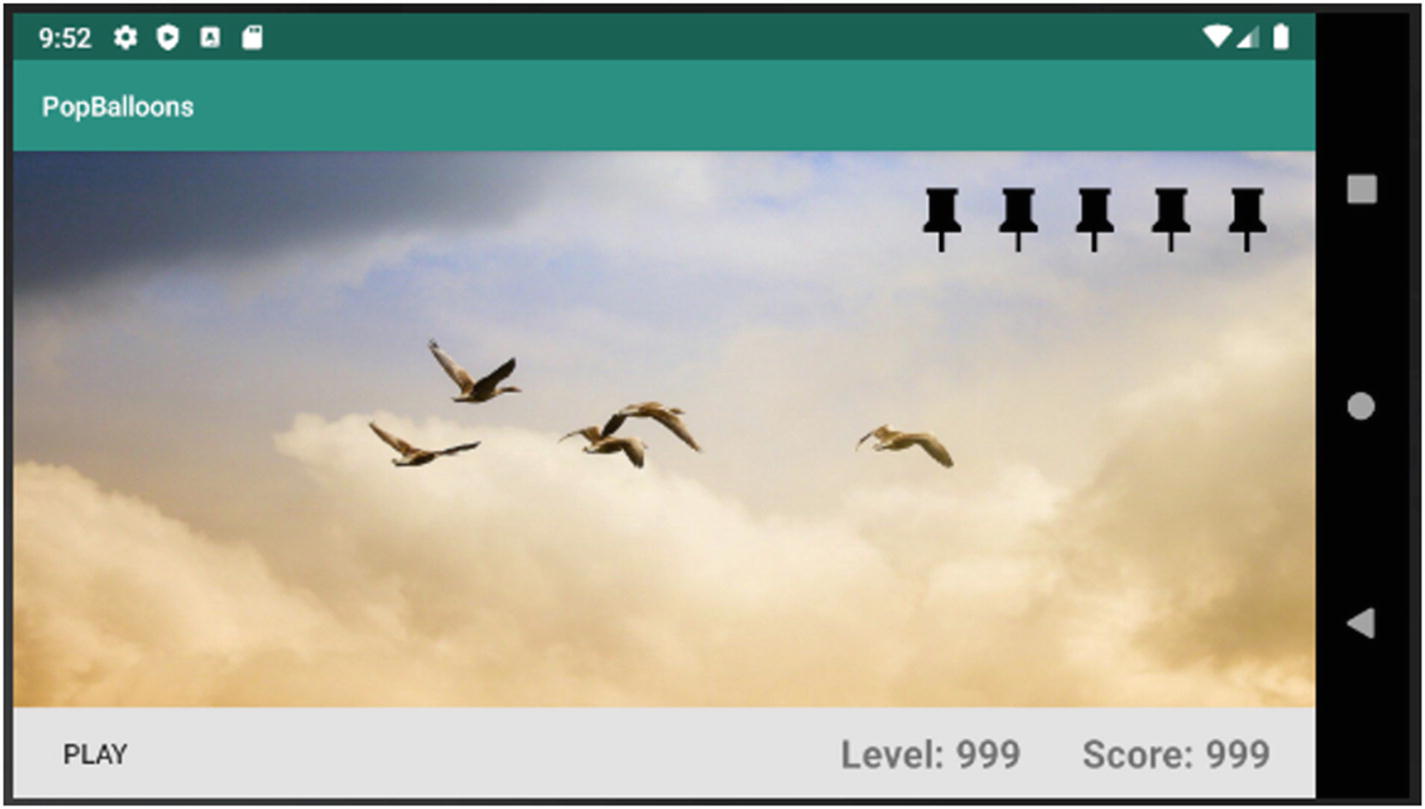
The app with game controls and pins
setToFullScreen()
Enabling fullscreen mode is well documented in the Android Developer website; here’s the link for more information: https://developer.android.com/training/system-ui/immersive.
Annotated MainActivity
❶ | Declare the contentView variable as a member; we’ll use this on a couple of methods, so we need it available class-wide. |
❷ | Get a reference to the FrameLayout container we defined earlier in activity_main. Store the returned value to the containerView variable. |
❸ | The fullscreen setting is temporary. The screen may revert to displaying the toolbar later (e.g., when dialog windows are shown). We’re binding the setOnTouchListener() to the FrameLayout to allow the user to simply tap anywhere on the screen once to restore the full screen. |
❹ | We’re calling the setToFullScreen() here in the onResume() lifecycle method. We want to set the screen to full when all of the View objects are already visible to the user. |
Drawing the Balloons
The idea is to create a lot of balloons that will rise from the bottom to the top of the screen. We need to create the balloons programmatically. We can do this by creating a class that represents the balloon. We’ll write some logic that will create instances of the Balloon class and make them appear at random places at the bottom of the screen, but first things first, let’s create that Balloon class.
New Java class

Create a new class
Balloon class
❶ | This is the default constructor of the AppCompatImageView. We’ll leave this alone |
❷ | We need a new constructor, one that takes in some parameters that we’ll need for the game. Overload the constructor and create one that takes in parameters for the balloon’s color, height and game level |
❸ | Set the source for the image. Point it to the balloon image in the mipmap folders |
❹ | The balloon image is just monochromatic gray. The setColorFilter() tints the image with any color you like. This is the reason why we want to parameterize the color |
❺ | The image file of the balloon is set so that it’s twice as long as its width. To calculate the width of the balloon, we divide the height by 2 |
❻ | We want to calculate the device-independent pixels for the image; so, we created a static method in the Balloon class that does exactly that (see the implementation of pixelsToDp()) |
MainActivity’s onTouchListener
❶ | Create an instance of the Balloon class; pass the context, the color RED, an arbitrary height, and 1 (for the level, this isn’t important right now). |
❷ | Set the Y coordinate where we want the Balloon object to show up. |
❸ | Set the X coordinate. |
❹ | Add the new Balloon object as a child to the View object; this is important because this makes the Balloon visible to us. |
Array of colors (this goes into the MainActivity)
nextColor() method
Assigning a random color

Random colors
Making the Balloons Float
To make the balloons float from the bottom to the top, we will use a built-in class in Android SDK. We won’t micromanage the position of the balloon as it rises to the top of the screen.
The ValueAnimator class (Android .animation.ValueAnimator) is essentially a timing engine for running animations. It calculates animated values and then sets them on the target objects.
release() method in the Balloon class
❶ | The release() method takes two arguments; the first one is the height of the screen (we need this for the animation), and the second one is duration; we need this later for the levels. As the level increases, the faster the balloon will rise. |
❷ | Create the Animator object. |
❸ | This sets the duration of the animation. The higher this value is, the longer the animation. |
❹ | This sets the float values that will be animated between. We want to animate from the bottom of the screen to the top; hence, we pass 0f and the screen height. |
❺ | We set the time interpolator used in calculating the elapsed fraction of this animation. The interpolator determines whether the animation runs with linear or nonlinear motion, such as acceleration and deceleration. In our case, we want a linear acceleration, so we pass an instance of the LinearInterpolator. |
❻ | The target of the animation is the specific instance of a Balloon, hence this. |
❼ | The animation has a life cycle. We can listen to these updates by adding some Listener objects. We will implement these listeners in a little while. |
❽ | Start the animation. |
BalloonListener.java
❶ | We’re interested in the lifecycle methods of the Animation; hence, we implement Animator.AnimatorListener and ValueAnimator.AnimatorUpdateListener. |
❷ | We need a reference to the Balloon object; hence, we take it in as a parameter when this listener object gets created. |
❸ | When the ValueAnimator updates its values, we will set the Y position of the balloon instance to this value. |
Calculate the screen’s height and width
❶ | Get an instance of the ViewTreeObserver. |
❷ | We can only work with this observer when it’s alive; so, we wrap the whole logic inside an if-statement. |
❸ | We want to be notified when the global layout state or the visibility of views within the view tree changes. |
❹ | We want to get notified only once; so, once the onGlobalLayout() method is called, we remove the listener. |
❺ | Now, we can get the screen’s height and width. |
MainActivity
❶ | Create member variables scrHeight and scrWidth. |
❷ | Change the value of Y coordinate for the Balloon instance. Instead of showing the Y position of the Balloon where the click occurred, let’s start the Y position of the Balloon at the bottom of the screen. |
❸ | Call the release() method of the Balloon. We would have calculated the screen height by the time we make this call. The second argument is hardcoded for now (duration), which means the Balloon will take about 4 seconds to rise to the top of the screen. |
❹ | Before we calculate the screen height and width, it’s very important that we already called setToFullScreen(); that way, we’ve got an accurate set of dimensions. |
❺ | Put the code to calculate the screen’s height and width on the callback when all the View objects are already visible to the user; that’s the onResume() method. |
Balloons rising to the top
Launching the Balloons
Now that we can make balloons rise to the top one at a time, we need to figure out how to launch a couple of balloons that resembles a level of a game. Right now, the balloons appear on the screen in response to the user’s click; this isn’t how we want to play the game. We need to make some changes.
What we want is for the player to click a button, then start the gameplay. When the button is first clicked, that automatically gets the user into the first level. The levels of the game aren’t complicated; as the levels rise, we’ll simply increase the speed of the balloons.
- 1.
Make the Button in activity_main.xml respond to click events.
- 2.
Create a new method in MainActivity that will contain all the code needed to start a level.
- 3.
Write a loop that will launch several balloons.
- 4.
Randomize the X position of the Balloons as they are created.
Binding the Button to an onClickListener
startLevel() in MainActivity
launchBalloon()
❶ | The method takes an int parameter. This will be the X position of the Balloon on the screen. |
❷ | Set the horizontal position of the Balloon. |
LevelLoop (implemented as an inner class in MainActivity)
❶ | LevelLoop is an inner class in MainActivity. Implementing it as an inner class lets us access the outer class’ (MainActivity) member variables and methods (which will be handy). |
❷ | The loop will stop when we’ve launched 15 balloons. The number of balloons to launch is hardcoded right now, but we’ll refactor this later. |
❸ | Get a random number to pick an X coordinate for the Balloon. |
❹ | Let’s introduce a delay; if you don’t introduce the delay, all 15 balloons can appear and rise to the top at the same time. Right now, the delay is hardcoded; we’ll refactor this later. We need to vary this according to the level. By the way, Thread.sleep() throws the InterruptedException; that’s why we need to wrap this in a try-catch block. |
❺ | Finally, call the launchBalloon() method of the outer class. We need to wrap this call in a runOnUiThread() method because it’s illegal for a background process to make calls on UI elements; UI elements are rendered on the main thread (otherwise known as the UI thread). If you need to make a call on objects that are on the UI thread while you are running in the background, you’ll need to wrap that call on a runOnUiThread() method like what we did here. |
At this point, every time you click the “Play” button, the game will launch a series of 15 balloons that will rise to the top of the screen; however, the game has no concept of levels yet. No matter how many times you click “Play,” the speed of the rising balloons remains constant. Let’s fix that in the next section.
Handling Game Levels
Preparing the levels
❶ | Declare level as a member variable. |
❷ | Get a reference to the TextView object that displays the current level. |
❸ | While we’re at it, also get a reference to the TextView object that displays the current score. |
❹ | Increment the level variable every time the startLevel() method is called. |
❺ | Let’s pass the level variable to the LevelLoop object (we need to refactor the LevelLoop class, so it becomes aware of the game level). |
❻ | Let’s display the current level. |
LevelLoop
❶ | Let’s introduce the variables longDelay and shortDelay, which hold the integer values for the longest possible delay (in milliseconds) and the shortest possible delay, respectively. |
❷ | Refactor the constructor to accept a level parameter. Assign this parameter to the member variable looplevel. |
❸ | This bit of math calculates the delay (which is now affected by the level). The delay won’t be lower than shortDelay nor will it be higher than longDelay. |
❹ | Use the calculated delay in the Thread.sleep() method. |
Pop the Balloons
To score points, the player has to touch the balloons, thereby popping them before they get to the top of the screen. When a balloon gets to the top of the screen, it also pops, but the player doesn’t score a point; in fact, the player loses a pin when that happens.
- 1.
In MainActivity, we will update the score and the status of how many pins are left.
- 2.
Also in MainActivity, we will remove the Balloon from the ViewGroup, regardless of how it got popped, whether the player popped it or the balloon got away.

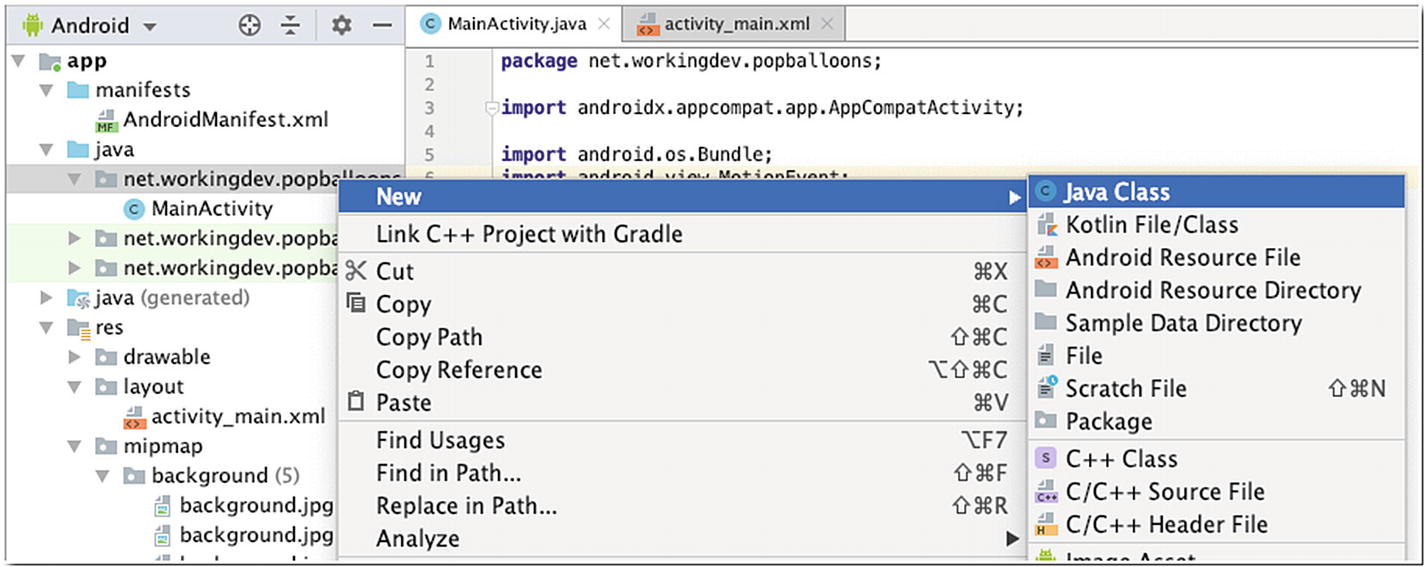
New Java class
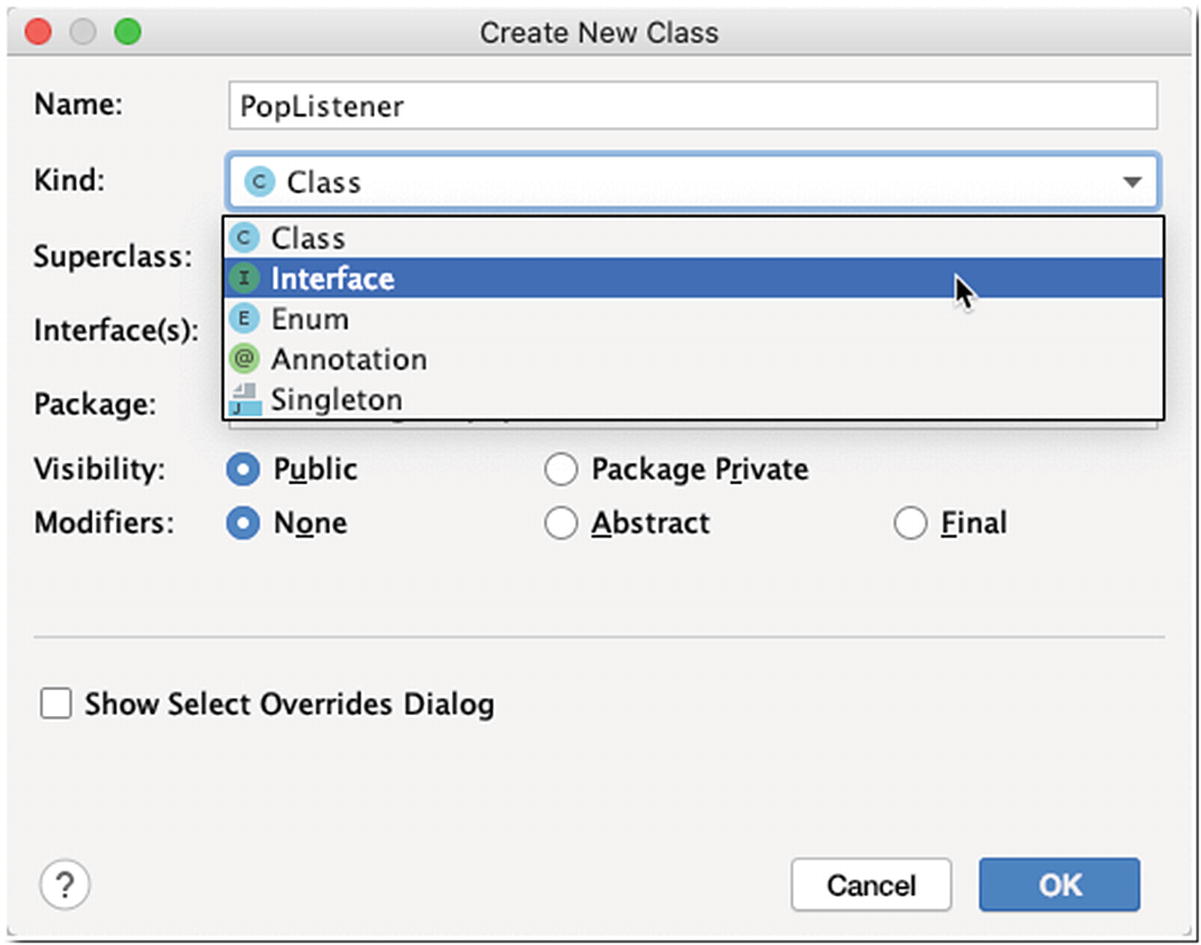
New interface
PopListener interface
The first parameter (bal) refers to a specific instance of a Balloon. We need this reference because this is what we’ll remove from the ViewGroup. Removing it from the ViewGroup makes it disappear from the screen. The second parameter will tell us if the balloon popped because the player got it, in which case this parameter will be true, or if it popped because it went all the way to the top, in which case, the parameter will be false.
MainActivity
❶ | Implement the PopListener interface. |
❷ | Implement the actual popBalloon() method. |
❸ | This code removes a specific instance of a Balloon in the ViewGroup. |
❹ | Now we can increment the player’s score. |
❺ | This will display the score of the player. |
Balloon class
❶ | Implement the View.OnTouchListener on the Balloon class. We’ll make this class the listener for touch events. |
❷ | The isPopped variable holds the state of any particular balloon, whether popped or not. |
❸ | Create a reference to MainActivity (which implements the PopListener interface). |
❹ | In the Balloon’s constructor, cast the Context object to PopListener and assign it to the mainactivity variable. |
❺ | Set the onTouchListener for this Balloon instance. |
❻ | Create a utility function named pop(). We’re making it public because we’ll need to call this method from the BalloonListener class later on. |
❼ | Create a utility function named isPopped(); we will also call this method from the BalloonListener class. |
At this point, you can play the game with limited functionality. When you click “Play,” a set of Balloons floats to the top; clicking a balloon removes it from the ViewGroup. When a balloon reaches the top, it also gets removed from the ViewGroup.
Managing the Pins
When a balloon gets away from the player, we want to update the pushpin images on top of the screen. For every missed balloon, we want to display a broken pushpin image. The code we need to change is in MainActivity; so, let’s implement that change.
numberOfPins = 5;—The number of pins in our layout.
pinsUsed;—Each time a balloon gets away, we increment this variable.
Pushpin images in an ArrayList
popBalloon()
❶ | If isTouched is false, that means the balloon got away from the player. |
❷ | Increment the pinsUsed variable. For every missed balloon, we increment this variable. |
❸ | Let’s check if pinsUsed is less than or equal to the size of the ArrayList which contains the pushpin images (which has five elements); if this expression is true, that means it isn’t game over yet, the player still has some pins to spare, and we can continue the gameplay. |
❹ | This code replaces the image of the pushpin; it sets the image to that of the broken pin. |
❺ | We display a simple Toast message to the player. A Toast message is a small pop-up that appears at the bottom of the screen, then fades away from view. |
❻ | Let’s check if the player has used up all five pins. If they have, we call the gameOver() method, which we still have to implement. |
When the Game is Over
Resetting the pushpin images
gameOver()
We’re simply displaying a Toast to the player, announcing the game over message. We’re also resetting the text of the Button. You might have noticed the isGameStopped variable; that’s another member variable we need to create to help us manage some rudimentary game states.
finishLevel()
❶ | Tell the player that the level is finished. |
❷ | Increment the level variable. |
❸ | We haven’t implemented this method yet, but you could probably guess what it will do. It will simply display the current score and the current level. |
❹ | Change the text of the Button to one that reflects the next level. |
❺ | We’re resetting the balloonsPopped variable to zero. We also need to create this member variable. It will keep track of all the Balloons that got popped. We will use this to determine if the level is already finished. |
updateGameStats()
Now, we need to know when the level is finished. We never bothered with this before because we simply let the LevelLoop thread do its work of launching the balloons, but now we need to manage some game states. There are a couple of places in MainActivity where we can signal the end of the level. We can do it inside the LevelLoop thread. As soon as the while loop ends, that should signal the end of the level; but the game might feel out of sync if we put it there. The Toast messages might appear while some balloons are still being animated. We will call the finishLevel() inside the popBalloon() method instead.
popBalloon()
startLevel()
❶ | Let’s check for some game state. This will be false the very first time a player starts the game. This gets reset in the gameOver() method. If this condition is true, it means we’re starting a new game. |
❷ | Let’s set the value of isGameStopped to false since we have started a new game. |
❸ | Call the startGame() method. We will implement this shortly. |
❹ | Update the game statistics. |
startGame() method
That should take care of some basic housekeeping.
Audio
Most games use music in the background to enhance the player’s experience. These games also use sound effects for a more immersive feel. Our little game will use both. We will play a background music when the game starts, and we’ll also play a sound effect when a Balloon gets popped.
I got the background music and the popping sound effect from YouTube Audio Library; feel free to source your preferred background music.
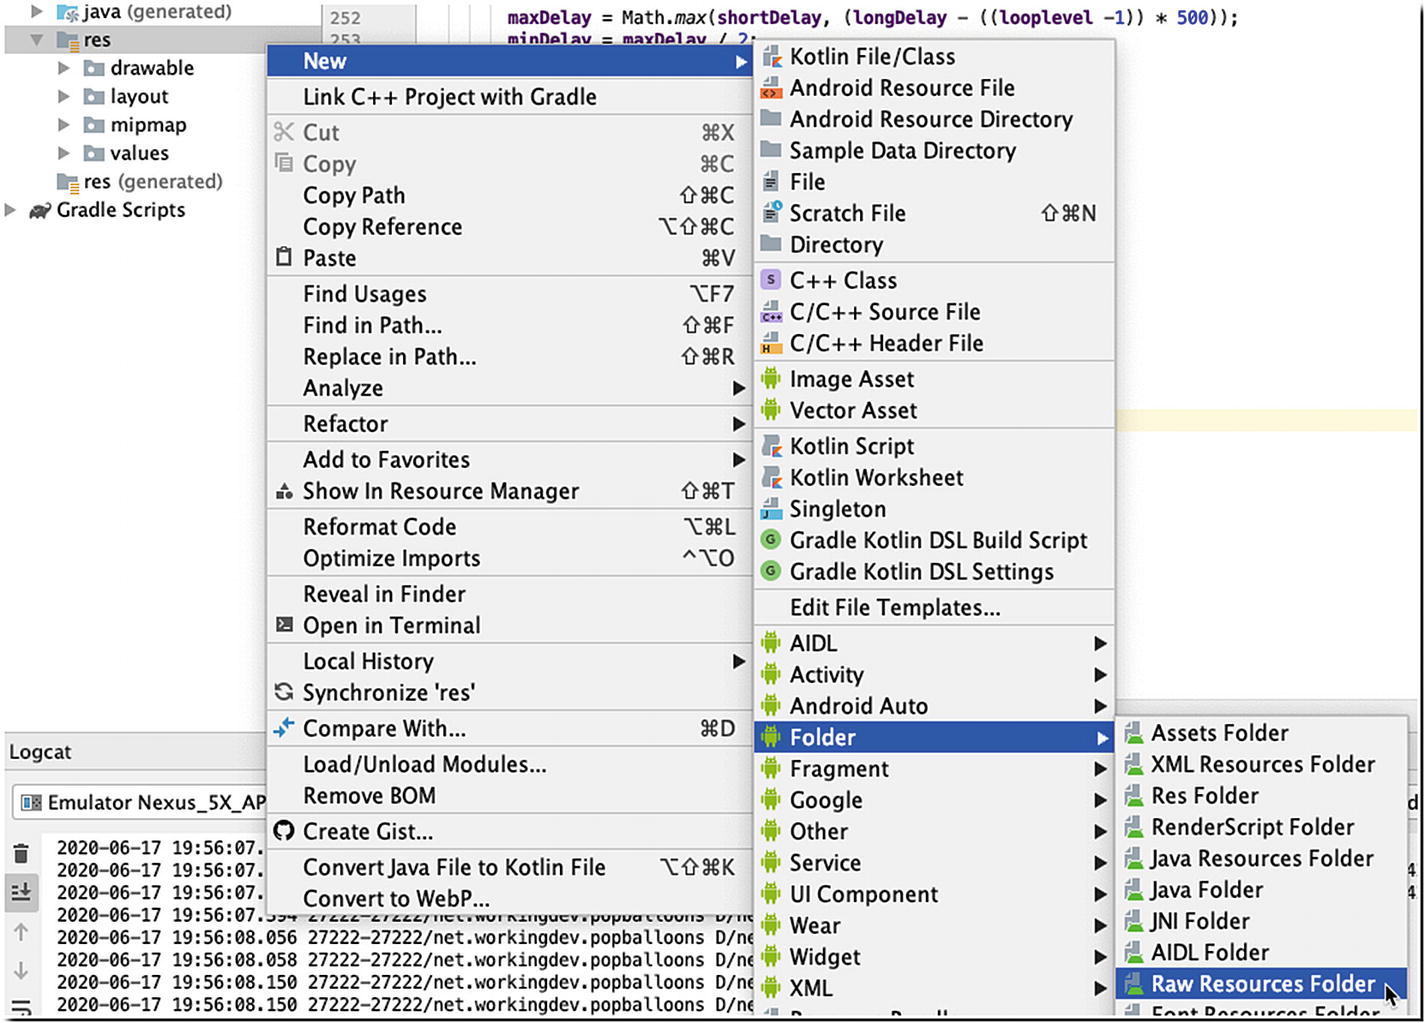
New Resources Folder

New Android Component
Next, right-click the raw folder. Depending on what OS you’re using, choose either Reveal in Finder or Show in Explorer.
You can now drag and drop the audio files in the raw folder.
Key method calls on the MediaPlayer object
❶ | This statement creates an instance of MediaPlayer. It takes two arguments; the first one is a Context object, and the second argument is the name of the resource file in the raw folder (ngoni.mp3). We are specifying a resource file here, so there is no need to add the .mp3 extension. |
❷ | The setVolume() method takes two arguments. The first one is a float value to specify the left channel volume, and the second one is for the volume of the right channel. The range of these values is from 0.0 to 1.0. As you can see, I specified a 70% volume. In an actual game, you might want to store these values in a preferences file and let the user control it. |
❸ | I’d like the music to keep on playing. I’m setting it on auto-repeat here. |
❹ | This will start playing the music. |
❺ | This will pause the music. |
To play the popping sound for the Balloon, we’ll use the SoundPool object. The popping sound is provided as a very short audio file that will be used over and over (every time we pop a balloon). These kinds of sounds are best managed using the SoundPool object.
SoundPool
❶ | Setting up the SoundPool and the AudioManager is usually done on the constructor. We need to pass an Activity instance (which will be MainActivity), so we can get a reference to the audio service. |
❷ | We will use the getStreamVolume() and getStreamMaxVolume() to determine how loud we want our sound effect to be. |
❸ | This binds the volume control to MainActivity. |
❹ | We need to set some attributes to build the sound pool. This method of building the sound pool is for Android versions 5.0 and up (Lollipop). |
❺ | The sound is loaded asynchronously. We need to set up a listener, so we get notified when it’s loaded. |
❻ | Now we get to load the sound file from our raw folder. |
❼ | This line plays the sound. This is what we will call in the popBalloon() method. |
Audio class
Final Touches
- 1.
Keep track of all the balloons being released per level. We can do this using an ArrayList. Every time we launch a balloon, we add it to the list.
- 2.
As soon as a Balloon is popped, we take it out of the list.
- 3.
If we reach game over, we go through all the remaining Balloon objects in the ArrayList and set their status to popped.
- 4.
Lastly, remove all the remaining Balloon objects from the ViewGroup.
gameOver() method
setPopped() method in the Balloon class
MainActivity