
Adopting the Action Bar
The previous chapter introduced the traditional notion of menus, giving you some common understanding across all Android versions of how a traditional menu would work. Starting with traditional menus has also set you up to take the next logical step into Android’s (relatively) new and more advanced approach to menu-like interaction with users: The Action Bar.
The Action Bar works to incorporate the most intuitive menu options that users might wish to use at a given point in time, together with a standard set of navigation and option elements to bring consistency across Android devices of all sizes and types. Your users will not need to worry about screen size, layout, or where to find the most obvious actions to take. The Action Bar solves all! (Well, almost all).
We will take a look at the Action Bar appearance and behavior, and how to develop applications to use and take advantage of the Action Bar.
Recognizing the Action Bar
Depending on how you have tested the examples introduced earlier in the book, and on which AVD or real device, you might have already seen the Action Bar reveal itself. But to be absolutely sure, and for those who know they haven’t seen it, Figure 9-1 shows a typical Android screen for contacts management that is running on an emulation of moderately-sized tablet in landscape mode. The Action Bar is at the top.

Figure 9-1. The Action Bar displayed at the top of a Contact detail screen
Some of the key features of Figure 9-1’s Action Bar to note are the incorporation of the DONE button that would otherwise be a menu option, and the < symbol representing the back button (which may or may not display depending on context and other factors). Items like the back button are added by Android as part of the Action Bar framework, meaning no coding is required by you. Android will implicitly return to the previous activity. Or if there is no prior activity (e.g., when first starting the application and working with the launch activity) then the user is returned to the launcher.
Managing Android Versions for Action Bar
Support for the Action Bar was introduced in Android 3.0, otherwise known as Honeycomb. The support was implemented as a new feature in the Android SDK, meaning inevitable questions about version requirements arise.
Specifying SDK level for Native Action Bar Support
Honeycomb was released along with version 11 of the SDK for Android. To ensure your application can work with the Action Bar natively, you should do one of two things. The most common is to set the android:minSdkVersion to 11 in your android manifest file, in the <uses-sdk> element, like this:
<uses-sdk
    android:minSdkVersion="11" />
Alternatively, you can specify a lower android:minSdkVersion setting, and use an android:targetSdkVersion of 11 or higher to indicate you desire SDK level 11 functionality such as the Action Bar, but will settle for something lower if that’s all the device has available. The two settings would look like this:
<uses-sdk
    android:minSdkVersion="8"
    android:targetSdkVersion="11" />
Utilizing the Support Library for Older Android Versions
One option for older versions of Android is to make use of the support library, which we discussed in Chapter 2. Through the support library and the classes it offers (notably, android.support.v7.app.ActionBarActivity) you can bring Action Bar behavior to devices with SDK support as far back as version 8. We will explore some examples that use this option later in this chapter.
Creating Action Bar Applications
You have seen examples of stock Android applicatoins using the Action Bar in Figure 9-1. Now it is time to create your own. We will start by defining menu items to “migrate” to the Action Bar, and then move on to more advanced topics of custom views and dealing with menu-based input.
Enabling the Action Bar for your Application
As introduced earlier in the chapter, you will need to ensure the your manifest specifies at least SDK level 11, if not higher, as the target SDK version in order to make the Action Bar available to your application. Listing 9-1 shows the manifest for our example menu application from Chapter 8 converted to using the Action Bar.
With the Action Bar enabled implicitly, things like options menus will appear under the control of a vertical ellipsis icon in the top-right of the Action Bar, revealing themselves when the icon is pressed. You can see this in action in Figure 9-2, and compare the behavior to earlier examples in the book that had no Action Bar at all

Figure 9-2. The Action Bar example in action
Having your options menu migrate automatically to the Action Bar is great, but that migration doesn’t deal with any other custom menus you have created. Rather than leave the user with a “split” experience, the next step is to move all of your key menu-like options to the Action Bar.
Moving Menu Functionality to the Action Bar
The key to enabling a menu item to appear in the Action Bar is to include the attribute android:showAsAction in your menu item’s <item> element. This is a simple stackable attribute that takes a mandatory value of always,never, ifRoom, and a few others to control whether the menu item is displayed. As the values suggest, an attribute of always indicates the menu item should always be displayed in the Action Bar, never means it is never promoted to the Action Bar, and lastly ifRoom indicates that you would like the menu item shown if there is room, and your application’s functionality will not be compromised if the Android system decides there is no space to display it.
One stackable optional attribute you can include is the withText option, which instructs Android to include the menu text adjacent to the icon on the Action Bar. The withText option can be used with either always or ifRoom, but obviously increases your chances of not having room and therefore not being displayed with the ifRoom|showText combination.
Listing 9-2 shows our custom menu XML configuration to show variety of Action Bar behavior in action.
From here, there are no Java code changes necessary (assuming you are not also looking to alter your menu item functionality). Action Bar use and preferences are expressed entirely in the XML layout for your menu, which makes adoption even easier. You can see the new-look Action Bar for our ActionBarExample application in Figure 9-3.

Figure 9-3. A customized Action Bar from the example code
Using Java to Manage Action Bars
As with almost all aspects of Android, programmatic creation and control of the Action Bar is provided in situations where you want to go beyond the augmented menu XML definition, or you want to allow for some kind of run-time dynamic changes to your Action Bar and its menus.
Android provides the ActionBar object to easily define and manipulate your activity’s Action Bar at run-time. There is even a subclassed version of Activity, known as ActionBarActivity, for those circumstances where your activity is solely focused on the Action Bar and you are not interested in other widgets.
Working with a Standard Action Bar in Java
While you can manipulate Action Bar state anywhere in your code, you most often will want to do this as part of activity creation in onCreate() or shortly thereafter. Listing 9-3 introduces a little manipulation of the stock Action Bar through use of several of the methods for ActionBar objects. The code for this can be found in the ch09/ActionBarExample2 folder.
Let’s examine how each piece of the Java code affects the Action Bar for our example activity. First, after normal activity setup in onCreate(), we instantiate and ActionBar object named bar using the getActionBar() method to ask the activity to hand us the reference for its Action Bar. Thankfully, there are no tricky ID numbers or similar abstractions to track; an activity has only one Action Bar.
With our ActionBar object in place, we use several of its methods to set our preferences. The setTitle() method is quite self-explanatory, changing the ActionBar’s title to the phrase we have chosen. Be careful how wordy you are when you do this, because you can run into problems due to screen width, especially on narrow devices.
Lastly, we use the setNavigationMode() method to set our prefered behavior for the Action Bar. In this instance we have chosen NAVIGATION_MENU_STANDARD, which is the vanilla version of an Action Bar that attempts nothing more than to elevate your otherwise-normal menus to be placed within the rendered Action Bar. We’ll explore some other options shortly.
As already mentioned, Android provides a variety of child classes of Activity tailored to specific views. When it comes to the Action Bar, there is an ActionBarActivity child class that can be used in much the same way, and is useful if that’s where most of you logic for your activity will reside. Listing 9-4 shows a reworked version of Listing 9-3 changed to use ActionBarActivity.
When we run the ActionBarExample2 to generate menus programmatically, we see the results depicted in Figure 9-4.

Figure 9-4. The Action Bar controlled from Java code
Choosing a Tab Layout for the Action Bar
If you have used any of the contemporary stock applications that come with an Android phone, you might have encountered a different layout for Action Bars that includes multiple tabs of menus or other custom views. For example, Figure 9-5 displays an application showing a tabbed Action Bar.
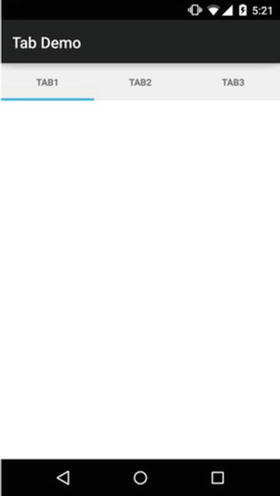
Figure 9-5. An example application with tabbed Action Bar
Using a tabbed Action Bar allows you to offer many more UI options in a small space, by allowing the tabs to house a subset of views and widgets, and display them only when that particular tab of the Action Bar is selected.
We can flag our desire to have a tabbed Action Bar by altering the parameter to the setNavigationMode() method to NAVIGATION_MODE_TABS. This forewarns Android that we’ll be constructing tabs and adding the necessary logic to make them work.
To implement a tabbed Action Bar, we need three things:
- First, the layouts you want each tab to inflate, such as menus, images, etc.
- Then the code that defines each Tab object, and its key parameters.
- Lastly, a custom listener that implements the TabListener interface, and provides our logic for what to do when one of our tabs is selected.
You already know how to define a menu layout or other set of Views, so we’re left with the Tab definition logic and behavior logic as new things to learn about.
Defining Action Bar Tab Objects
In order to define the tabs that will consitute a tabbed Action Bar, we need to obtain the activity’s Action Bar object, and then use the newTab() method to instantiate the Tab object which represents a tab. You will need to issue newTab() calls for as many tabs as you wish to have in your Action Bar. Listing 9-5 shows the changes to a regular activity’s onCreate() method that enable such tab creation.
We’ve created three tabs: tab1, tab2, and tab3. These will be added to our Action Bar when each Tab object is passed to an addTab() method call on the Action Bar’s object, which we’ve called tabbed. You will note I also perform two other set up steps for the tabs. The setText() call provides a caption for each tab when presented on the Action Bar, and is fairly self-explanatory. The other method invoked is the setTabListener() method, which refers to the mysterious CustomTabListener object.
Coding the TabListener Behavior
When we configure the Action Bar to function in tabbed mode by using the setNavigationMode() method option NAVIGATION_MODE_TABS, we also implicitly flag that we’ll implement the necessary listener to detect and respond to user interaction with the tabs and their content. The listener we need to implement is the ActionBar.TabListener interface. For those of you using Android Studio or Eclipse with ADT, you will get a useful code-time warning that you need to implement this interface. Text editor die-hards can refer to developer.android.com for the details, but the essentials are as shown in Listing 9-6.
We can call our TabListener implementation anything we like. In my case, I’ve chosen the name CustomTabListener to make it obvious. We need to cover the implementation of the three methods defined in the interface, though for some of the methods you may not need specific logic. If you d o not need specific logic, then simply leave an empty method.
- onTabSelected() This method is the workhorse of the TabListener, typcially implementing the logic to determine which tab was selected. That’s done via the Tab parameter. Then further code detects which menu item is selected and what subsequent action to take. The process is identical to normal menu management which I introduced in Chapter 8. In essence, onTabSelected follows a common coding pattern of a switch statement for Tab identification, and further switch logic for menu item detection and follow-up action
- onTabUnselected() There are times when you need to perform cleanup work or change UI behavior when a tab is no longer the focus. For example, one common design flourish is to bold the text caption of the Tab when it is selected, and unbold it when it is no longer selected (i.e. when another tab is selected and its caption is bolded).
- onTabReselected() If you maintain any state for menu items, or even the Tab object itself, and you maintain that state through Java logic changes at run time that alter the initial menu layout for a given tab, then you might need to reinstate those changes when a tab is reselected. This callback is rarely used, but is presented here for completeness.
The FragmentTransaction parameter enables the use of fragments for the UI design and behavior for your tabs. The parameter is optional, and at this point in the book will make little sense. However, we will move on to cover fragments in-depth in Chapter11, at which point the capabilities will make perfect sense.
Future Changes For Action Bar Tabs
With the announcement of Android “M”, the yet-to-be-released version 5.x of Android, Google has flagged that it will deprecate traditional tabbed Action Bar implementation in favour of a new set of APIs called TabLayout. You might think this deprecation makes all of the above discussion of tabbed Action Bars obsolete. Let me put your mind at ease. The traditional Action Bar and tab construction will still be present in future SDK levels (deprecated doesn’t mean removed, after all), and the vast bulk of devices in circulation will be using pre-Android-M for many years. You can continue to build using the current approach to tabs for some time.
Using Other Layouts for the Action Bar
There are a range of other more advanced layout options available for Action Bars. Two that you will see from time are a list-based Action Bar, and an embedded custom view in the Action Bar.
Adopting a list-based Action Bar is done through setting the setNavigationMode() method option to NAVIGATION_MODE_LIST. With the Action Bar object configured to expect a list, the developer (that is, you) implement the ActionBar.OnNavigationListener interface and provide list adapter (such as those introduced in Chapter 7) to populate your Action Bar.
Note You are familiar now with lists, adapters, and the concept of a listener for an Action Bar. Rather than showing another example, I will point you to the excellent references online at developer.android.com/guide/topics/ui/actionbar.html for more details.
The Action Bar URL is also a good starting point for exploring adding custom views to your Action Bars (and tabs!)
Summary
With all of the options offered by the ActionBar now added to your Android know-how, you can start adding increasingly ambitious functionality to your application design and behavior. I incorporate the ActionBar in many more examples later in the book to show you some further possibilities.